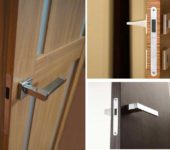
Self-installation and adjustment of the door closer
To prevent the doors from staying open, they used to use a banal spring, today they put a door closer. Its design is also based on a spring, but it is more powerful, hidden in a metal case and filled with oil - for "braking" when closing. Installing a door closer is an easy task. Self-installation will take 20-30 minutes. Hardly more. So we take a drill and set it up with our own hands.
Most popular model
The content of the article
Classification
According to the world standards EN 1154, door closers are classified according to the closing force they can generate. They are divided into 7 classes, which are designated EN1-EN7. When choosing a class, attention is paid to the inertia of the door, that is, to the width of its leaf and its mass at the same time. If different parameters of the door correspond to different classes, they put a device of a higher class.
| Door closer class | Door leaf width, mm | Door leaf weight, kg |
|---|---|---|
| EN1 | up to 750 mm | up to 20 kg |
| EN2 | up to 850 mm | up to 40 kg |
| EN3 | up to 950 mm | up to 60 kg |
| EN4 | up to 1100 mm | up to 80 kg |
| EN5 | up to 1250 mm | up to 100 kg |
| EN6 | up to 1400 mm | up to 120 kg |
| EN7 | up to 1600 mm | up to 160 kg |
For example, the width of the door is EN2 and the weight is EN4. They put the 4th grade, since a weaker effort cannot cope with the load.
There are door closers belonging to the same class. The characteristics then indicate the class with one digit - EN5. They have a small range of effort adjustment - within the same class. There are devices, the closing force of which is regulated within several groups. In this case, a range is put in the marking with a hyphen - EN2-3, for example. The latter are more convenient to use - you can adjust the closing speed depending on the weather. But the cost of such models is higher.
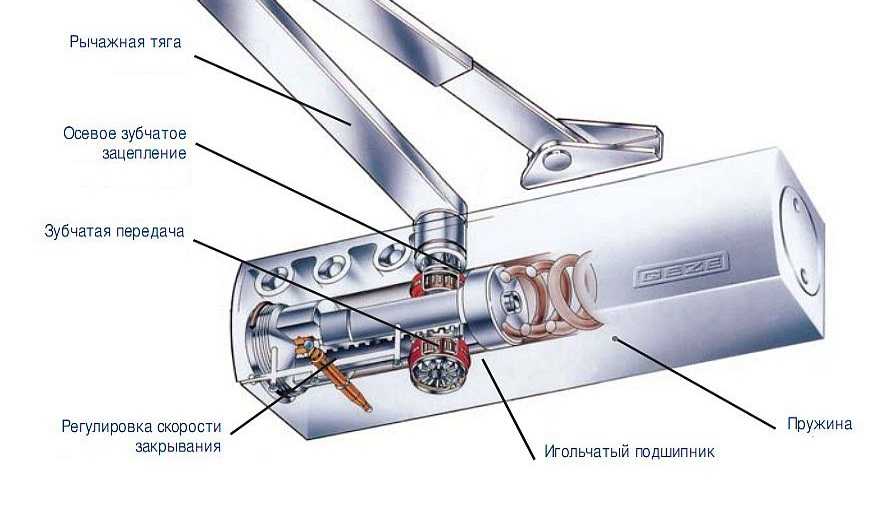
Structures and traction device
The main structural element of a door closer is a spring that pushes the lever. According to the method of transferring force from the spring to the lever, there are two types of devices:
- With link arm. Such models have a characteristic appearance - levers stick out perpendicular to the surface of the door leaf. The same closers are also called with knee or articulated traction. The design works reliably, but protruding levers are unattractive and can be easily broken if desired. There is another disadvantage: as the door is opened, more effort is required. For children and the elderly, this can be a problem.

Link arm
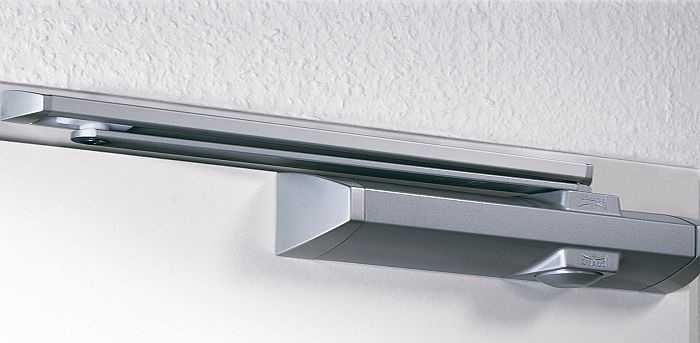
- With sliding channel. In these models, the lever is parallel to the door leaf for a more attractive appearance. Another plus: when the door is opened at 30 °, the force for further opening becomes much lower. Doors equipped with such door closers can be easily opened by both children and the elderly.

With sliding channel
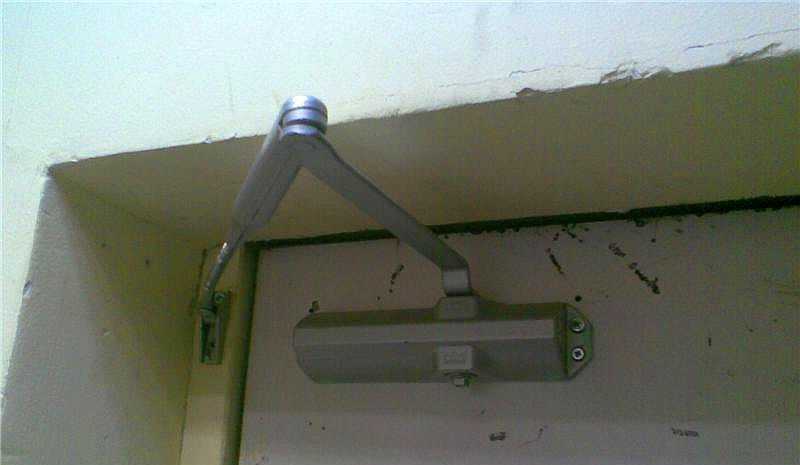
Both of these types consist of two parts: a body in which a spring is hidden and a force transmitting mechanism and a lever. They are mounted at the top of the door: one part on the canvas, the second on the frame. Which one, where, depends on the direction of opening. If the doors open "towards themselves", a body with a mechanism is installed on the door leaf; when opening "away from you", a lever is attached. The photo shows a lever-type closer, but the installation rules are similar for models with a sliding channel.
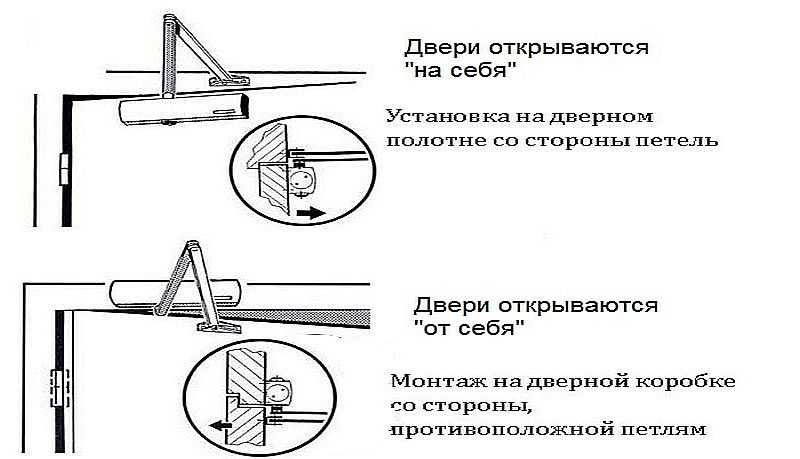
Installation of a door closer depending on the direction of opening
As you understand, they are not suitable for all types of doors - it is problematic to put them on glass. For them there is another design - floor. The housing with the mechanism is mounted in the floor, only the holder plate protrudes from above. A similar holder is installed at the top, but the mechanism is not always there, only for heavy door leaves.

Floor spring for glass doors
There are, by the way, floor models for wooden and metal doors. They also have a linkage or sliding channel. They are less striking, but with this arrangement they are more likely to be damaged.
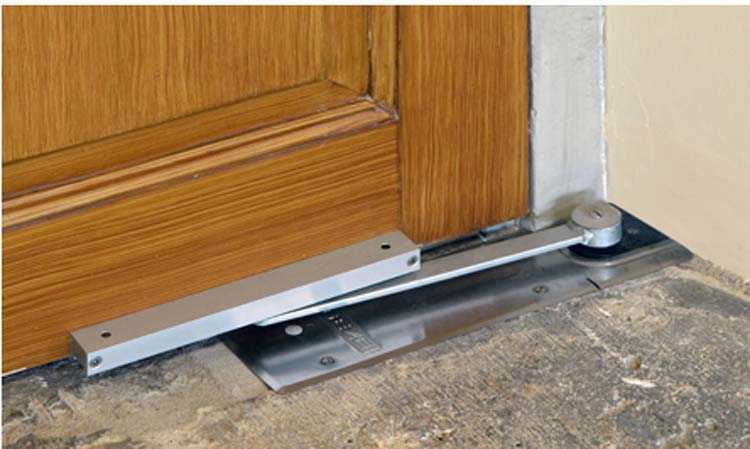
Floor spring for glass doors
Do-it-yourself installation of interior doors is described here.
Where to put
Generally, closers are installed on external or entrance doors, they can be installed on a gate or a wicket. In the case of doors, they are positioned so that the body is in the room. Although there are frost-resistant models designed for use in cold weather, it is better that the case is protected from weather conditions. Also, this arrangement guarantees greater safety.
Installing a door closer: instructions with a photo
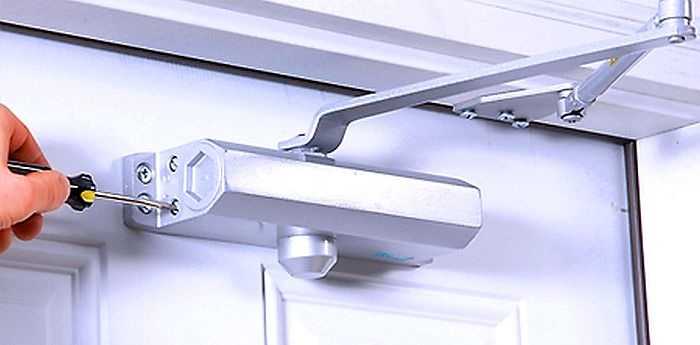
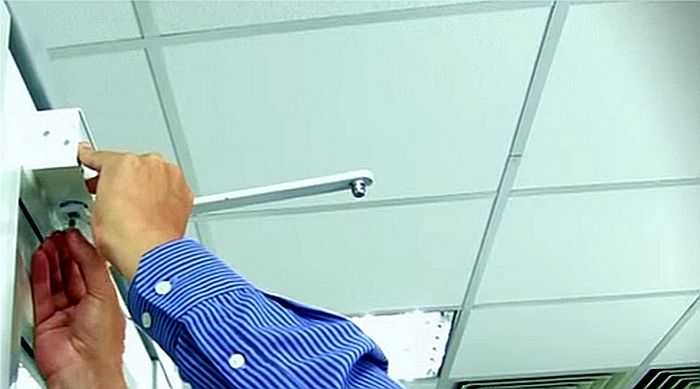
To mount the door closer, you only need a drill, ruler, pencil and screwdriver. The drill usually requires a "3" (three), but you need to look at the diameter of the fasteners, which usually come with the kit.
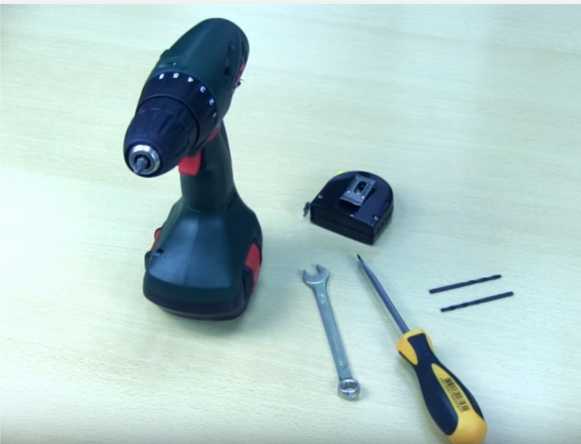
What is needed to install a door closer
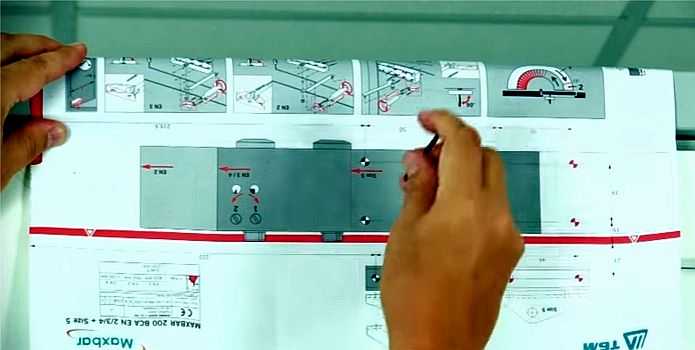
Most of the manufacturers, to facilitate self-installation of the door closer on the door, complete the products with installation templates. These templates show the full size parts of the door closer. They also have mounting holes for each element. In models that can create an opening force of a different class, the holes are drawn in different colors, they are additionally signed - a closer class is placed next to it.
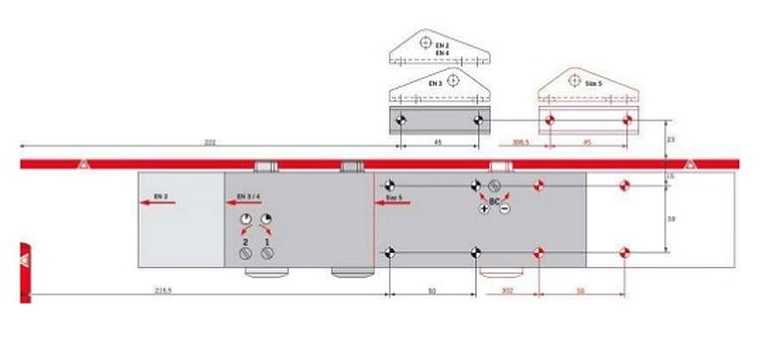
Example of a template for installing a door closer
The template is printed on both sides of the sheet. On one side - for opening doors "towards yourself" - from the hinge side (pictured above), on the other - "away from you".
Installing a template
The template has two perpendicular red stripes. We combine the horizontal one with the upper edge of the door leaf, the vertical one with the line of the hinge axis.
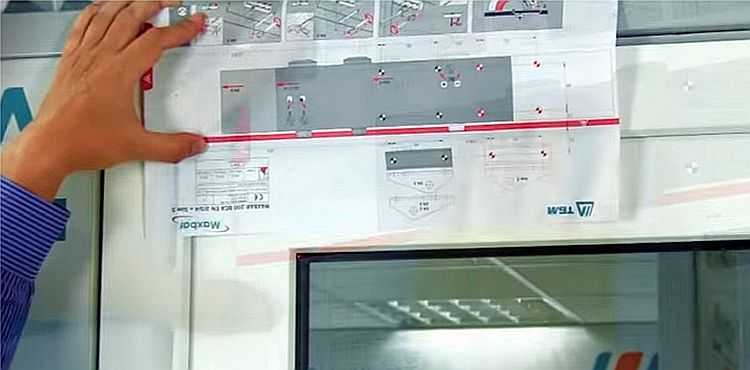
Installing a template
Everything is clear with the upper edge of the door leaf, but in order not to make mistakes during installation, the line of the axis of the hinges must be drawn. If a closer is installed on the hinge side, there is no problem - using a long ruler and a pencil, move the line of the middle of the hinges up. If the installation will be carried out on the other side, measure the distance from the edge of the web to the middle of the loop. Mark this distance on the other side and draw a line.
Door closer
On the template, we find the marks for the holes according to the selected class. Using a drill or an awl, we transfer them to the door leaf and to the frame.
We transfer the marks under the holes to the canvas and frame
Usually, the kit includes two types of fasteners: for metal (metal-plastic) and wood. We select a drill of a suitable size and drill holes in the indicated places with a drill.
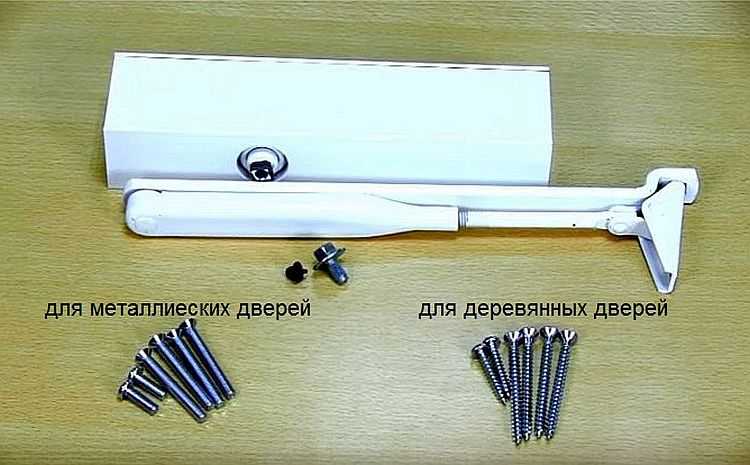
Door closers are equipped with two types of fasteners - for metal and wooden doors

Drill holes according to the marks
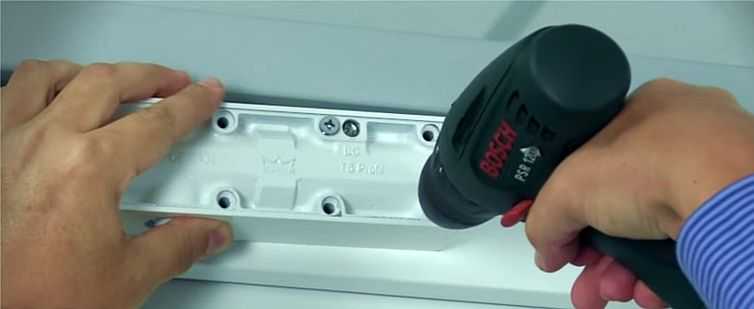
Further, the actual installation of the door closer begins. Please note that mounting requires the body and levers to be disconnected. If they are assembled, they are separated (the washer is unscrewed, the screw connecting the levers and the body is removed).
Mounting
We attach the parts to the holes made, install the fasteners. In the diagram, we find the class of opening force that we need (in this case, EN2) and install the parts as shown in the figure.
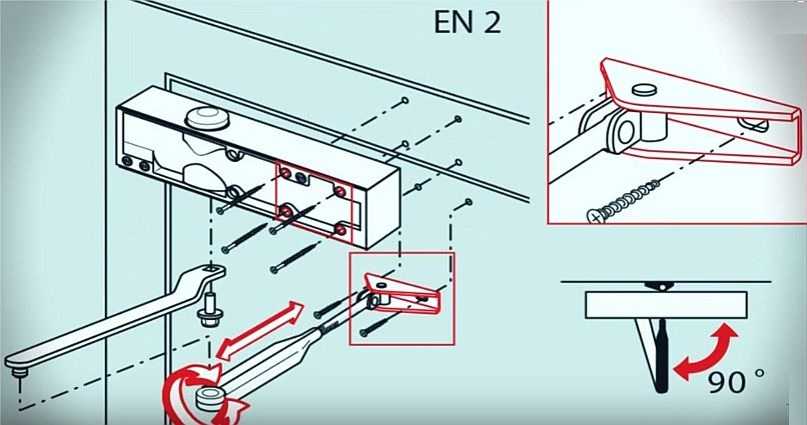
Door closer installation diagram
To open "towards yourself" we put the body on the door leaf, install the pull rod on the frame.
Installing the case

We fasten the traction
Now you need to connect the traction lever to the body. There is a special protrusion at the bottom of the case. We put a lever on it, tighten it with a screw.
Installing the traction lever
Now it remains to connect the lever to the rod. There are two options.
FROMThe independent installation of the front door is described here.
Connect the lever to the rod
The very connection of the lever with the traction is very simple: two parts are combined, they are slightly pressed down with fingers. They snap into place with a light click. The trick is how to position them relative to the door. The rate of movement of the door leaf at the final stage of closing depends on this. The position can be changed due to the fact that the rod is in two parts and can be adjusted in length - one of the rod parts is a long threaded pin. By rotating the pin and shorten or lengthen it.
If you just need a smooth finishing, the traction is placed so that it is perpendicular to the door leaf. To do this, slightly reduce its size (in the photo on the left).
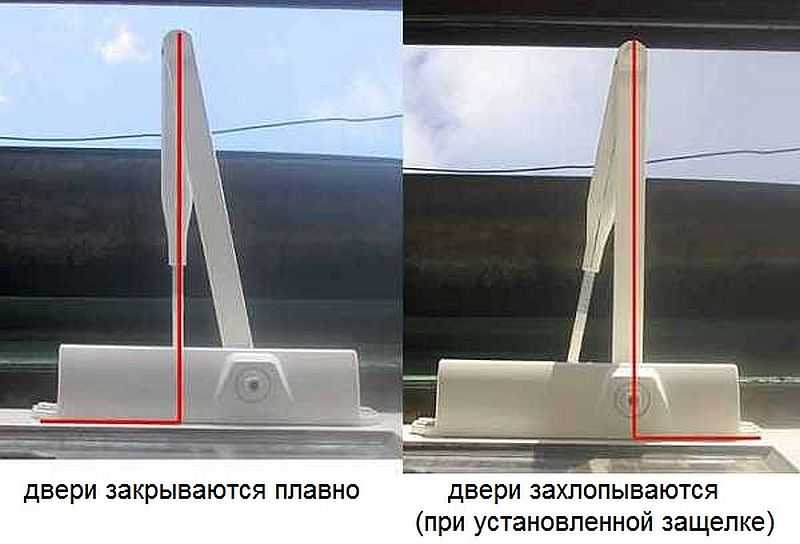
Arrangement of the lever and rod for setting the finishing effort
If a latch is installed in the door, a solid effort is required to overcome its resistance. For this option, a shoulder is placed perpendicular to the door (the traction is untwisted, making it longer).
After placing the parts in the appropriate way, they are combined and connected. Actually everything, the installation of the door closer is completed. And you can handle it with your own hands, and without much difficulty. The final stage remains - setting the closing speed. To do this, you need to understand the adjustments of door closers.
How to put on a gate
Frost-resistant models that can be used outside are suitable for installation on the wicket. But not all wickets have a top bar. But everyone has side racks. In this case, the pull rod is attached to the side post by expanding the mounting plate along the post.
Installing a door closer on a wicket door without an upper crossbar
But hydraulic devices (they were discussed in this article) do not feel very well in the cold. Oil, which is poured into the body and serves to "brake" the door leaf, becomes more viscous, the wicket closes more slowly. From this point of view, it is better to choose a pneumatic model for the wicket (about the selection and installationread here).
How to install on a metal door
Installation of the closer on metal doors differs only in the type of fasteners used and the size of the drill. Since the canvas is usually heavier, powerful models of at least class 5 are selected (you need to look at the table). Accordingly, the mounting template will need markup for another class.
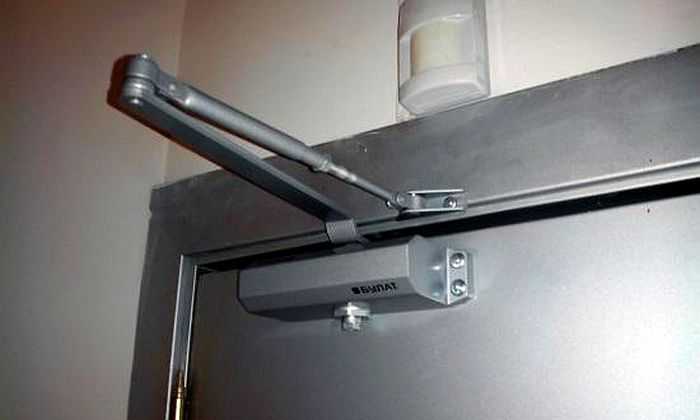
The closer on the entrance metal door is placed in the same way
You may also need a more powerful drill, but these are all details. For the rest, it is necessary to put the closer on metal doors in the same way as wooden or metal-plastic ones.
Door closer adjustment
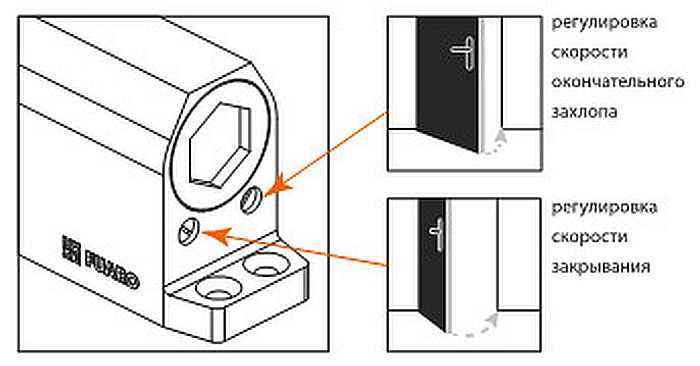
The door closers that are installed on the doors have different designs and the adjusting screws are located in different places. Everything is exactly indicated in the passport or installation instructions. But, in general, the technique is the same:
- turning the screw clockwise increases the speed / force;
- turning counterclockwise - we slow down / decrease the force.
When adjusting the door closer, do not turn the screws several turns at once. Often, just a quarter of a turn is enough, maybe a little more. Having knocked down the balance by tightening or unscrewing the screws too much, it is very difficult to adjust everything again. You can even break the device or cause oil to flow from the inside.
The door opening and slamming speed controls are located on the body. Most often they are either on the front part under the protective cover or on its side surface.
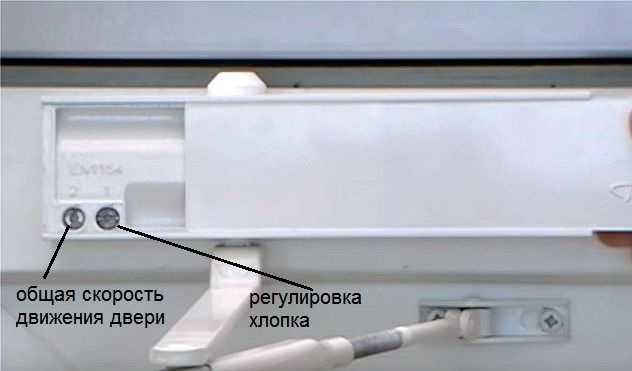
Move aside the cover, find the screws
In rounded or polyhedral housings, the adjustments are located on the side of the housing
-
 How to open a door without a key if the door has slammed or the key is lost
-
 Dimensions of standard doorways: interior and exterior
-
 Magnetic locks and latches for interior doors - modern and practical!
-
 Door handles for interior doors: types, choice
-
 How to choose a video peephole (door peephole with a video camera)


