Installing a lock in an interior door with your own hands
Putting a latch on a door or cutting a lock is not that difficult. If you have a tool (nothing extra expensive or unusual is not needed), you can do it in 30-40 minutes. And this is without experience. We will talk further about how to embed a lock into an interior door and how to install a latch.
The content of the article
Tools for tapping locks and latches
Sitting a lock into an interior door is not so difficult, but you will need tools to work:
- Drill with a 25 mm bit and / or a 22-23 mm pen drill (there are also smaller locking elements, so a 20 mm pen / bit may be required). This tool is used to cut holes for the lock in the door leaf.
- 16 mm drill bit - to make a notch in the edge of the door and a counterpart in the frame.

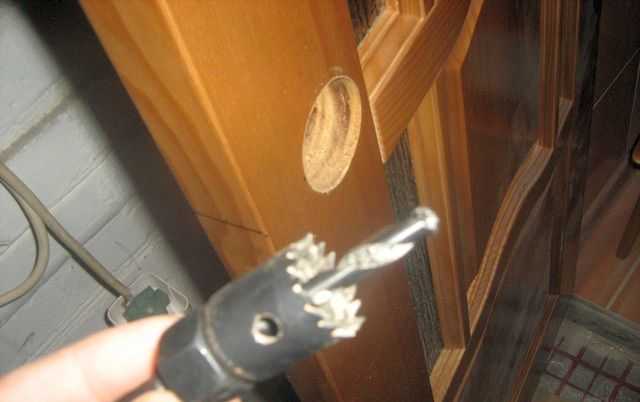
It is better to work with a crown with a wooden door
- Mallet and chisel (better - inch). With their help, the latch plate and the plate are “deepened” onto the mating hole.
- Drill with a diameter of 1 mm - drill holes for the installation of self-tapping screws that secure the lock itself and the lining.
- Screwdriver - tighten the screws.
- You will also need a tape measure or a long ruler (more than a meter long), a pencil, a triangle (preferably a carpenter's, but a regular school one will do).
Not such an expensive and rare instrument. If you do not have a drill and crown, you can buy at any building supermarket or market. Since we will not drill a stone, it is not necessary to buy too expensive - ordinary crowns or drills for wood.

Ready-made set for inserting locks into interior doors (for wood): feather drill, holder, crown
A few words about which is better - a crown or a feather drill. Cutting a hole in the door for the lock is easier and faster with a crown, while there are fewer chips. But working with a crown is far from so convenient at the end, and the hole is larger than necessary. Drilling with a pen a little longer and more chips, but it is easier to control the process. In general, there is not much difference, but most often, a hole in the canvas is made with a crown, and in the end - with a feather. But you can use the pen anywhere.

You can't do without a chisel
Another point: a standard crown has a diameter of 25 mm, and a hole of 22-23 mm is required for the lock. The extra 2 mm are easily covered with decorative overlays, but with a very narrow door, these extra millimeters can become critical.
How to insert a lock into an interior door: step by step photos
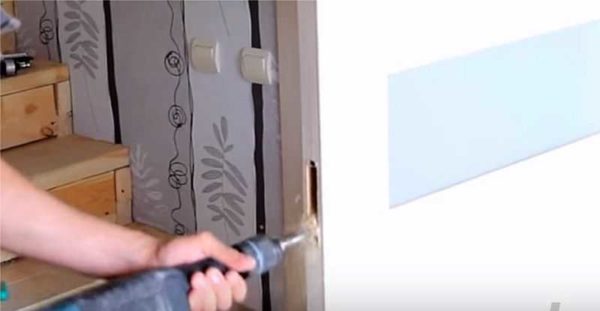
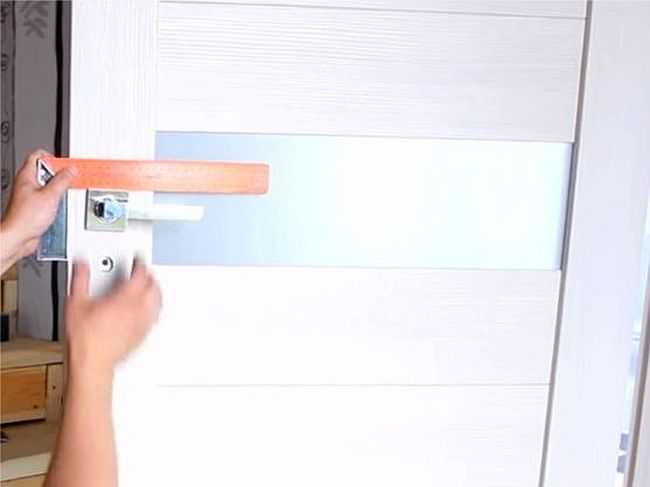
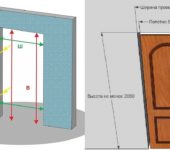
Before installing a lock or latch, you need to decide on the height at which the handles will be located. The recommended height is 90-110 cm. In this gap, they usually put a lock or latch. But when inserting a lock in an MDF door, you should not put the lock above a meter. The fact is that in budget models, the wooden plank, into which the lock is installed, has a height of 1 meter. Above there will be only emptiness and you will have to re-drill the hole and figure out how to close the resulting hole. Once we have decided on the height, we can start the installation.
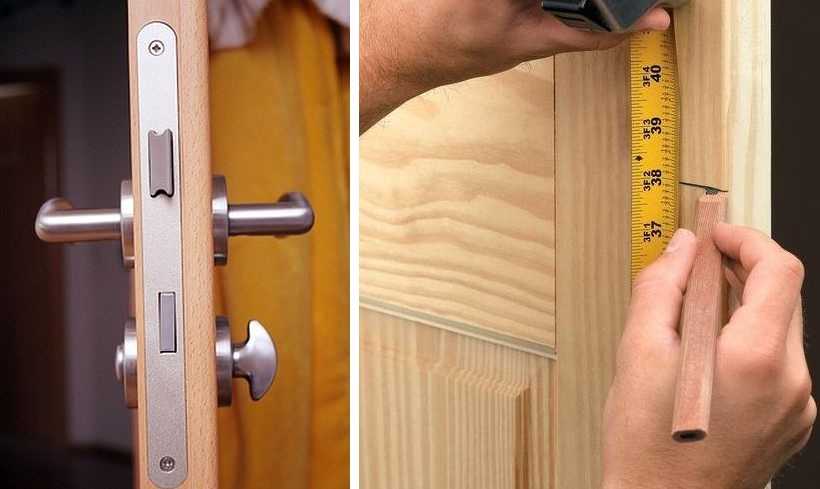
Interior doors are usually equipped with locks that can be locked without a key.
Recess for the lock part
Before cutting the lock into the interior door, mark the selected height on the door. It is more convenient to do this with a tape measure. We put a mark on the end, transfer it with a square or a building level to both sides of the door leaf.
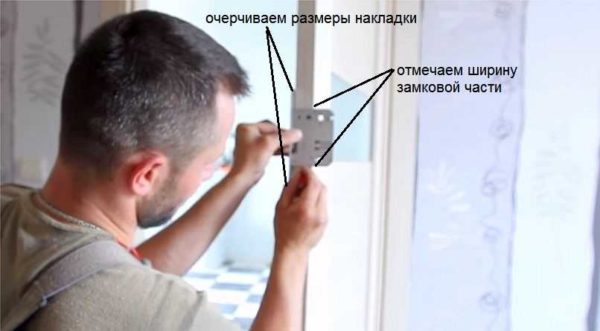
- We take the lock / latch, apply it to the end of the door so that the middle of the lock falls on the drawn line. We mark the width of the metal lock and the level at which the pad ends.
- We take a 16 mm feather drill, apply it to the part of the lock that will be inserted into the door leaf. Using a marker or masking tape, a piece of electrical tape, make a mark on the drill. This mark should be slightly farther than the lock. We will be guided by it to what depth to make holes. This is especially important if the lock is installed against glass. Otherwise, you can drill too deep and damage the glass.
We put a mark on the pen drill - this way we will control the drilling depth
- Having installed the pen drill, we make several holes one below the other, forming a notch for the lock. The number of holes depends on the size of the lock. In some models 4-6 are enough, in others 8-10 are needed.
- The edges of the holes are uneven, and the wood has risen in places. We take a chisel and remove the protruding wood fibers from the edges, slightly moonlighting in depth (but do not get too carried away).
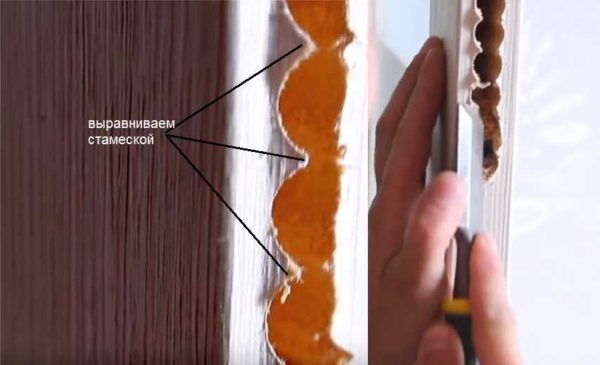
The edges are uneven, remove the protruding fibers with a chisel
- We take a regular 16 mm drill, put it in the drill. Use it to align the edges of the hole made. To do this, we drive it up and down, pressing it slightly to one or the other side of the recess. This operation is needed to speed up the process, but the drill must be tightly controlled. If you're unsure, it's best to line up the notch with a chisel and mallet.
Drill to level faster
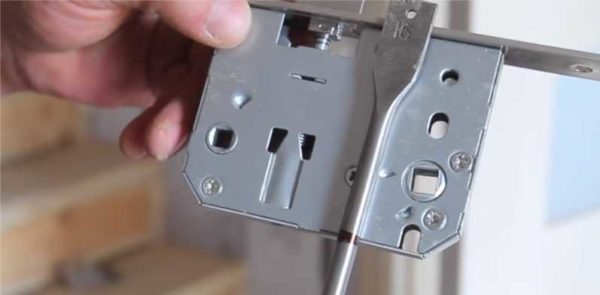
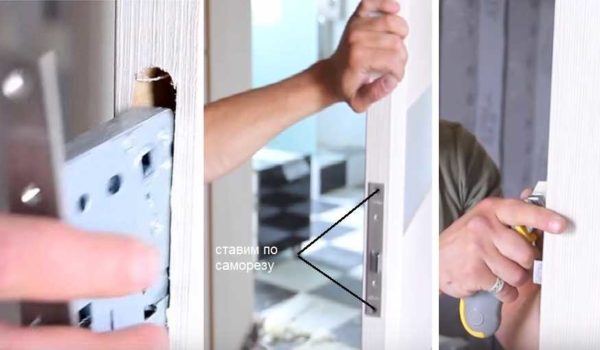
- We insert the lock into the resulting hole. It is usually slightly larger, so no problem arises. If necessary, using a chisel or drill, it can be increased to the desired size.
- We put the lock in the desired position, fasten it with two self-tapping screws (one at the top, the other at the bottom) to the door leaf.
How to embed a lock into an interior door: finalizing a recess
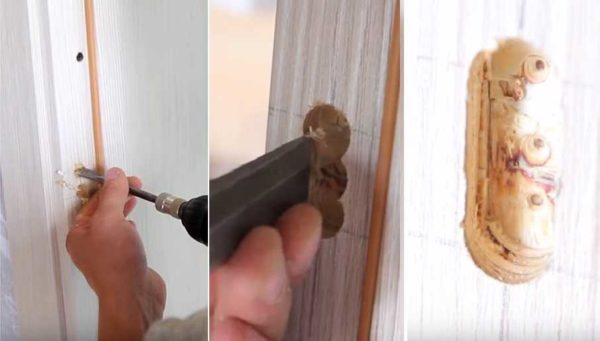
- With the help of a pencil or a clerical knife, we circle the padlock around the perimeter. We remove the lock, take a chisel and remove 1-2 mm of wood, MDF or veneer inside the made markings.


The depth of the recess for the locking part depends on the thickness of the decorative strip. Usually they try to make sure that the strip is flush with the end of the door, but it may protrude a little. Shoot a little while you work - it's easier to modify than trying to restore what was shot.
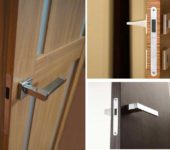
We put the pens
To finish installing the lock in the interior door, you need to make holes for installing the handles. The work is much less than what has already been done, but precision is needed. Mistakes are not too critical, although it is better to try to avoid them.
The handles are supplied with self-tapping screws for wooden doors and tie bolts for installation in a metal door. It is better to replace the self-tapping screws from the kit - they are usually made of soft metal. Unless you bought a branded foreign constipation, in which the self-tapping screws are hardened. And so, buy some good self-tapping screws with a diameter of 1.5-2 mm and a length of about 1 cm.
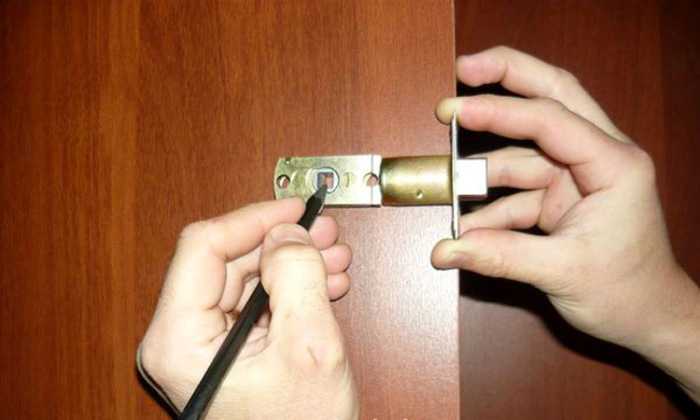
- We take the lock and apply it to the side surface of the door, matching in height.
- With a pencil, marker or awl, we put marks through the slots for installing the pens.
Making marks on both sides of the door
- We repeat the operation on the other side of the door leaf.
- We install a crown or a feather drill of a suitable diameter on the drill. Set the center of the drill / crown into the marks, make holes. An important point: we do not drill through and through, but from both sides, towards each other. That is, as soon as the drill falls into the made recess under the lock, we stop the work and start from the other side.
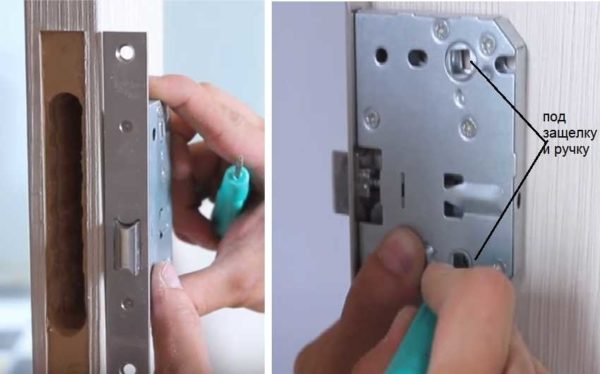
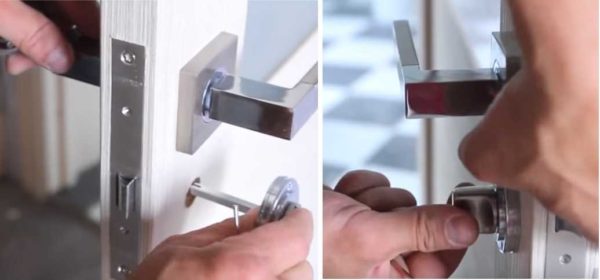
- We remove the chips from the recess under the lock, put the lock plate in place, fix it with self-tapping screws.
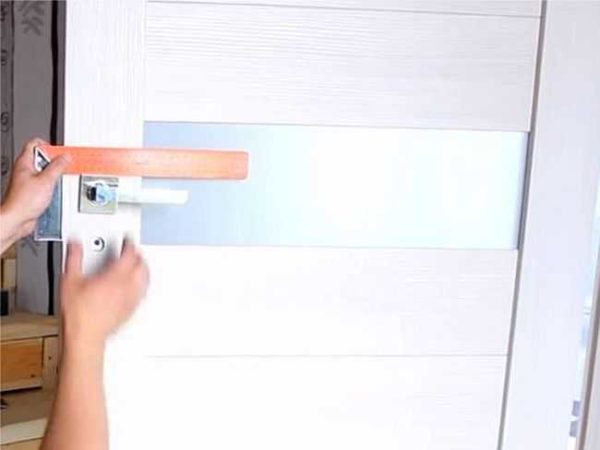
- We loosen the clamping screws on the handles - the central rod should "walk" freely, set it in place.
We put and fix the handles
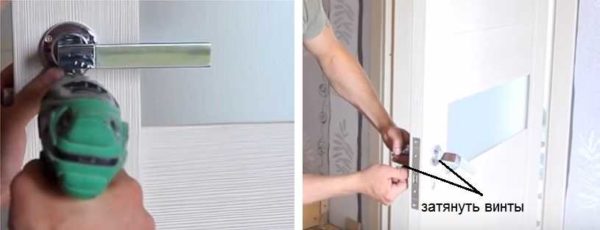
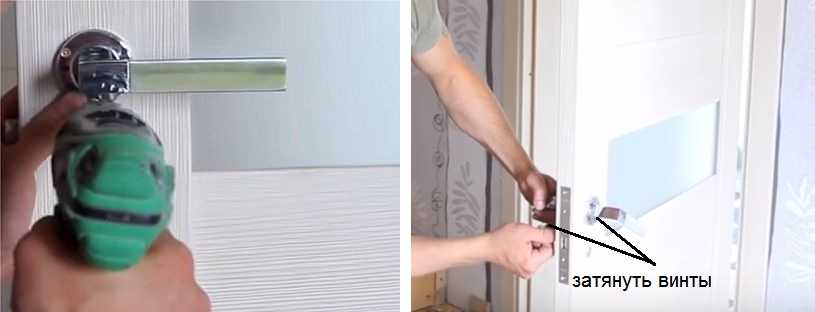
- We align, fasten with self-tapping screws. It is better to pre-drill holes in veneered doors.
- You only need to tighten the fastening screw that connects the two handles and the lock cylinder. They are usually found on the underside of the handle.Take a screwdriver and tighten the screws on both handles.
Install decorative overlays

Some models have decorative overlays. We align them with a square.
Installing the lock latch
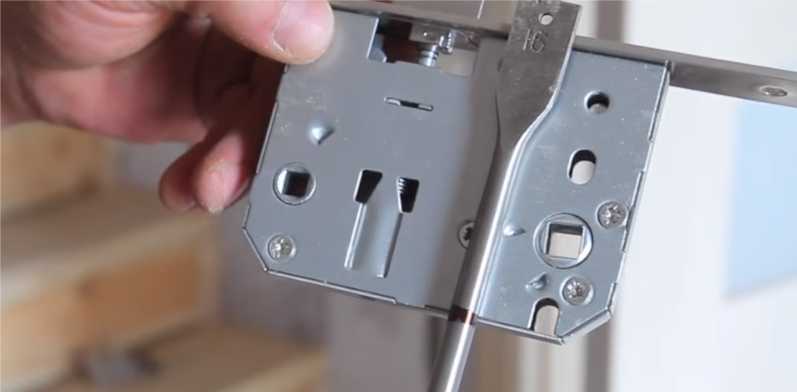
Locks for interior doors usually have a rotary latch (wrap) on one side, which locks the lock, on the other side there is only a plate with a slot. That is, you cannot just open the door from the outside - you need a special key. Installation of this part of the castle takes just a couple of minutes, but there are nuances.
- We take the central part, which is inserted into the lock. The side where there is no slot, we insert it into the cover without a handle, we insert this structure into the lower hole from the outside.
How to embed a lock into an interior door: installing a lock striker
- From the side of the room, we put a cover with a wrap on the pin.
- We tighten the clamping screw (before fixing with self-tapping screws).
- We fix it with self-tapping screws, if it is provided for by the design, we put decorative overlays.

Everything, the insert of the lock into the interior door is almost finished, it remains to check the work.
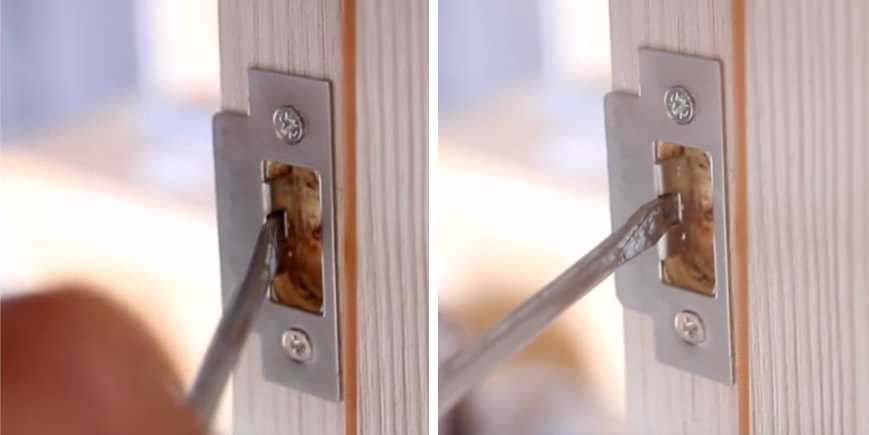
Mating insert
The counter part must be installed clearly so that the doors do not play and there are no problems with closing. Therefore, we try to mark as accurately as possible and take a sharpened pencil.
- We close the doors so that the latch tongue rested against the jamb. We mark the position of the latch with a pencil (top and bottom).
- Draw horizontal lines along the marks using a triangle.
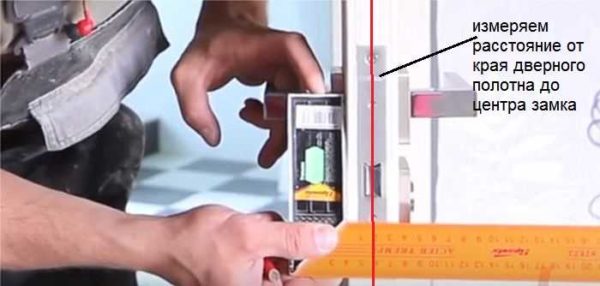
- We measure exactly the distance from the edge of the door leaf to the middle of the lock. The middle of the lock is the middle of the tongue or the center of the mounting hole.
It's easy to find the middle of the castle
- On the lines marking the position of the tongue, we postpone the measured distance (we measure it from the bar against which the door leaf rests). Draw a straight line through these two points. This is the markup for installing the counterpart of the lock.
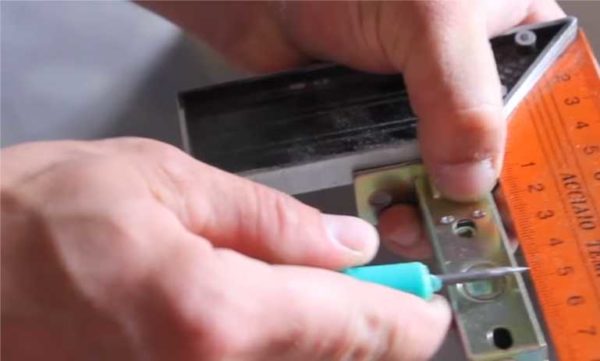
- We take a drill or a 14 mm pen, drill a hole in the jamb according to the specified marks. The depth of the hole is slightly more than the length of the tongue.
- Using a chisel, align the hole.
We will check the holes according to the marks, modify it with a chisel
- We close the doors, checking if the tongue comes in normally. If you pull the closed door towards you, there should be a slight backlash - a couple of millimeters - for the installation of the adjustment tab on the lining. Correct the hole if necessary.
- We put the striker in place, fasten it.
- We close the doors and check for backlash. If there is one, we remove this backlash using the adjusting tongue. There is a screwdriver slot near this tab. We put a screwdriver into this hole and squeeze it a little. We close the doors, check. We repeat until the backlash disappears.

We remove the backlash of a closed door


You know how to put a lock into an interior door. The description takes up a lot of space, the process itself takes 25-30 minutes if you do it for the first time. It will take more time if you level the holes with a chisel rather than a drill. But the total duration will still not be more than an hour.
Features of installing the latch
A full-fledged lock in interior doors is not so often put. More often you have to put a latch - a handle with a tongue. It is smaller and much faster and easier to cut.
- We mark the installation height of the latch at the end of the door, transfer the marks to both sides of the door leaf.
- Using a square, we measure the distance from the beginning of the bar to the center of the hole for installing the central pin (square section). Using a square, we transfer this distance to the marks. There is also a second way - to attach the latch body to the door so that the center of the hole and the drawn line coincide, put a mark through the hole with a pencil.
We measure the distance from the beginning of the plate to the center of the hole
- Using a 23 mm pen or a 25 mm crown, we make holes in the end of the door, setting the peak of the drill to the center of the mark (so that it does not move, you can outline with an awl). The hole depth is equal to the latch body length + 2-4 mm.

The second way to make a mark for the pen shaft
- We change the drill by 20 mm, make holes on both sides in the door leaf, setting the peak at the designated points.

At the end of the door we drill a hole for the latch cylinder with a feather drill
- We put the latch larva in place, fasten it.
- Install the handles and overlays as in the previous version.

Putting a latch in an interior door is even faster and easier than a lock. There is very little work. You can do it in 20 minutes. And this is completely without experience.
-
 How to open a door without a key if the door has slammed or the key is lost
-
 Dimensions of standard doorways: interior and exterior
-
 Magnetic locks and latches for interior doors - modern and practical!
-
 Door handles for interior doors: types, choice
-
 How to choose a video peephole (door peephole with a video camera)


