What should be the slope of the sewer
In most cases, the drain is made by gravity. This means that all the drains leave on their own, under the influence of gravitational forces. But in order for them to move, the pipes must not be laid evenly, but with an inclination, and with a certain one. What should be the slope of the sewer pipes and we will talk further.
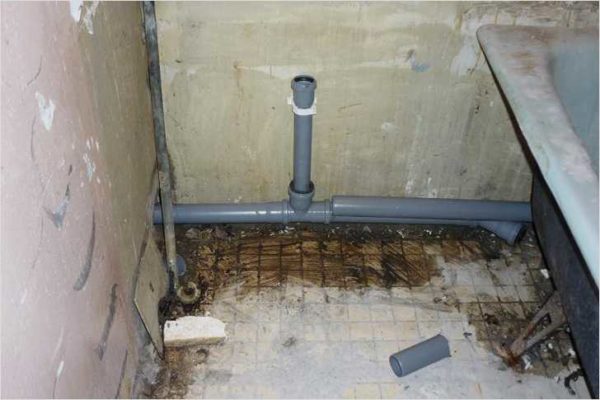
Sewer pipes must not be laid exactly
The content of the article
What is the slope of the sewer pipe for?
Everyone has probably heard that sewage pipes must be laid with a slope, and even with that certain building codes - SNiP. Why is it so? Because it is necessary that the speed of movement of sewage through the pipes was such that water and solid particles move together.
When self-laying or repairing an existing sewage system, I often make two mistakes:
- Make the slope less than recommended. In this case, the water leaves very slowly, the pipeline section is often clogged. Even if it is a bathroom, sediment accumulates in the pipes, which causes blockages. If the pipe from the toilet is laid with a small slope, then, firstly, problems with flushing may arise, and secondly, the smell of decomposing waste will be added.
The sewer pipe must be laid with a certain slope
- The slope of the sewer pipe is made too great. This case is no better. Water leaves quickly, and solid inclusions remain in the pipe. They rot, spread aromas, and even cause clogging. In this state of affairs, the sewage system has to be cleaned almost every month.
The norms specified in SNiP are advisory in nature, but they are written based on many years of experience, so it makes sense to listen.
What should be the slope
How to understand what is the slope of the pipe? In SNiP it is spelled out in fractions - in the form of decimal add-ons. It will look like this: 0.03 or 0.008. The numbers are deciphered as follows: this is the difference in heights of the two ends of a meter-long piece of a laid sewer pipe. The number 0.03 means that one end of a meter-long pipe is raised by 3 cm. Accordingly, the figure 0.008 indicates that one edge is raised by 0.8 cm or 8 mm.
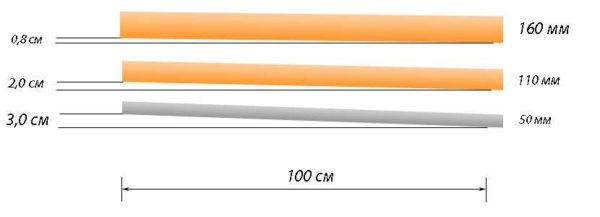
Recommended slope of sewer pipes of different diameters (50 mm, 100 mm, 150 mm)
The pipeline is usually much longer than one meter. You can calculate how much one end of it should be higher than the other by multiplying the selected slope by the length of the pipeline. For example, we will lay a sewer with a slope of 3 cm / m, its length is 25 m.This means that its far end will be lowered by 3 cm * 25 m = 75 cm.
Dependence on pipe diameter
Sewer systems are divided into internal - mounted in an apartment or house, and external - which are laid outside. In both cases, it is necessary to maintain the required slope of the sewer pipe. When they say so, they mean the indicator recommended by sanitary standards. It depends on the diameter of the pipes used: the smaller the section, the greater the slope must be given.
| Sewer pipe diameter | Normal slope | The smallest acceptable |
|---|---|---|
| 50 mm | 0.035 (3.5 cm) | 0.025 (2.5 cm) |
| 100 mm | 0.02 (2cm) | 0.012 (1.2 cm) |
| 150 mm | 0.01 (1cm) | 0.07 (7mm) |
| 200 mm | 0.008 (0.8 cm) | 0.005 (0.5 cm) |
The table shows the slope of the sewer pipe, which will ensure the normal operation of the system. If for some reason it is not possible to make the required slope angle (it happens in areas with difficult terrain), you can reduce the slope angle to the specified boundary norm. The chance of getting into trouble increases, but not much.
What to do if the slope is more than required
Sometimes it is not possible to make the required slope - conditions are different. In this case, there are two options:
- Lay the pipe as it turns out (but the difference per meter should not be more than 15 cm per meter) and hope that everything will work. With a steep slope, it is recommended to install tees with upward branches on the track after a while - so that it is possible to clean the blockages. The probability of their formation with large slopes of the sewer pipe is high.
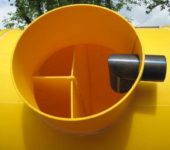
- Lay the pipe with the recommended slope in such a section where it is possible, then put a drop well, and again bring the pipe out of it at the desired slope. Several such wells may be needed.

The method of organizing sewerage in areas with a high slope - drop wells
The first option is cheaper in the device, but it involves frequent blockages in the pipes. Of course, with intensive use of the sewage system (a large amount of water), there may not be any problems, everything can work without problems. But this is rather an exception. By the way, when using plastic pipes, the likelihood of blockages becomes lower - they have smooth walls, on which precipitation is rarely formed. The second option is more costly and laborious, but it guarantees the performance of the system.
How to maintain the required slope
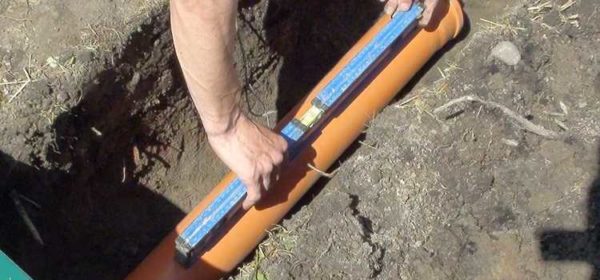
Determining the slope of the sewer is not enough. It must be maintained during laying. The most convenient option is a special level with a protractor. If there is no professional equipment, you have to be cunning.

Construction level with goniometer
There are ways to control the angle of the sewer pipe using a regular level:
- Having drawn a line on the wall with the desired slope, apply a building level to it, make a mark on the plastic in the place where the edge of the bubble is. When placing the pipes, position them so that the bubble is in the desired position.
- If you take a meter level, you can attach a lining of the required width on one side. In some areas, this method does not work, but it is convenient to set up a long pipeline.
Internal sewerage
When laying the pipeline, it is necessary to maintain the specified slope, to prevent deflections and sagging. By the way, when laying branch pipes from different plumbing fixtures, it is required to withstand different slopes (see photo below).

The slope of branch pipes from different plumbing fixtures
When laying an internal pipeline, you can draw the required slopes on the wall, and place pipes along them. You should not be guided by the floor level, it is better to beat off the horizontal line. It's easier to do this if you have a level, if you don't have one, you can use a bubble level. After that, having calculated the required drop (described above), “lift up” the far end. Once again, check the accuracy of the calculations and the drawn lines. Then you can proceed with the installation.
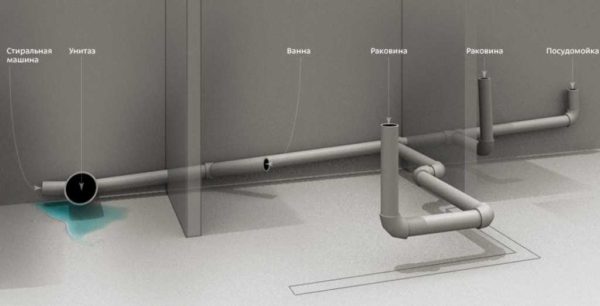
An example of an internal sewerage wiring
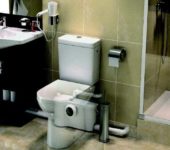
In bathrooms and toilets, the required level is usually laid out using a thick sand-cement mortar. Anyway, then the pipe is finished - a drywall box is placed, on which the tiles are then glued. A more modern option - to lay pipes in a groove is not available to everyone - in panel houses there is no such wall thickness. When laying sewer pipes from the kitchen, they often use stands and wedges. After that, the pipeline laid with the required slope is fixed to the walls using special holders. They are installed in increments of no more than 40 cm.
Advice! When installing, turn the sewer sockets against the flow. This is less likely to get leaking joints.
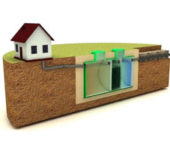
Outdoor sewerage
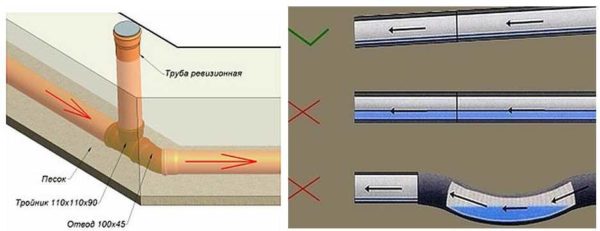
Sewerage on the site is laid in trenches. When laying the route, try to make it as straight as possible. Any turns are a potential blockage point.If you cannot do without turns, install a tee next to it, bring the pipe just above the ground level and plug it with a sealed cover. This will be the right decision - you can quickly and easily clean the plugs.
When laying external sewerage, they dig a trench with a flat bottom. The depth of the trench - 20 cm more than required - is a place for a sand cushion. With a short length and small drop, the bottom can be left flat. If the difference is large, you will have to form a slope. At this stage, there is no need to maintain the slope too much - do it approximately. Then the bottom is leveled, all stones and roots are removed, the holes are compared, and compacted. There should be a flat, solid base.
Key points to remember
Sand is poured onto the leveled bottom. It must be poured in layers of 5 cm, leveled, compacted (spilled with plenty of water). Laying 4 layers in layers, we get a pillow of 20 cm. Pipes are laid in the sand, forming a given slope. The slope can be checked with a long building level (1.5-2 meters or more). If this is not the case, you can tape a bubble level in the middle with tape to a long, even rail (bar). This way you can achieve a minimum error.
After the pipe is laid and its slope is checked, it is covered with sand. He should cover it almost halfway. The sand is carefully leveled and spilled. After that, the pipe is 1/3 filled with dense sand (you can make the level higher). Then you can fill it with soil.