How to cover the lining inside the premises
One of the most popular types of wood finishing materials is clapboard. It has a different profile, due to which the surface has a different appearance - from a smooth wall with small grooves to waves of different sizes. It's just that wooden walls do not fit into all interiors, therefore it often becomes necessary to paint the lining inside the room - at home or in the country.
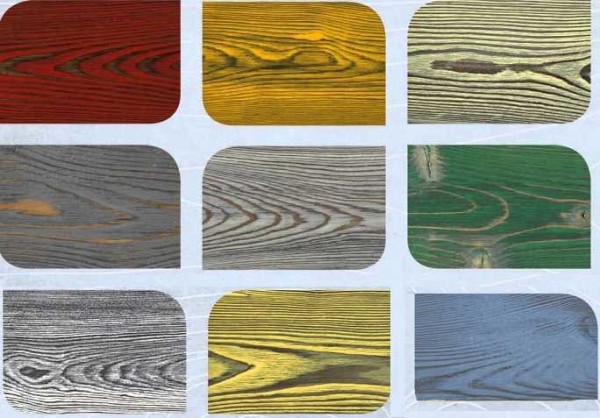
You can paint the lining in different colors
The content of the article
How to process the lining inside the house
In general, many believe that it is better not to process the lining inside the premises with anything. Maybe so, but not in every climate and room, it will retain its original appearance for a long time. If the level of ventilation is insufficient, the wood can turn blue, if it is exposed to the sun - it becomes dark gray.
Blue discoloration can only be fought with biological agents - chlorine or active oxygen, and then - unambiguously impregnated with protective compounds, and maybe even painted. With gray wood it is a little easier: removing the top layer by sanding you will again get a beautiful color, but without UV protection it will not last long either. Therefore, they decide to paint the lining inside the house or cottage.
Another point: not everyone likes wood in the interior. It's just that sometimes people get tired of looking at her. I just want a flat colored surface. This also happens, and often. In this case, look for an opaque paint. Choose characteristic effects as desired.
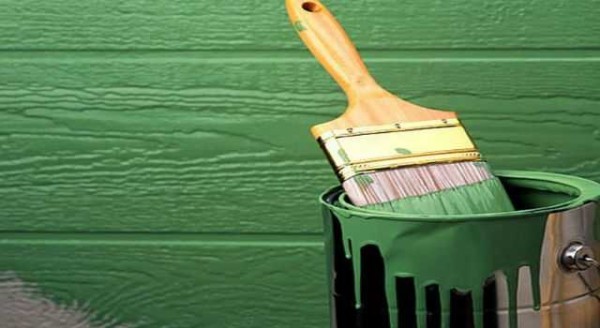
Opaque paints give an opaque film
They paint the lining inside with opaque paints because wood in its natural color is not compatible with all styles. But sometimes you want have an interior in a wooden house hi-tech, for example. In this case, paint with metal particles or mother-of-pearl (for example, Lignovit Platin) is suitable.
All compositions for protecting wood can be rather conditionally divided into six main groups:
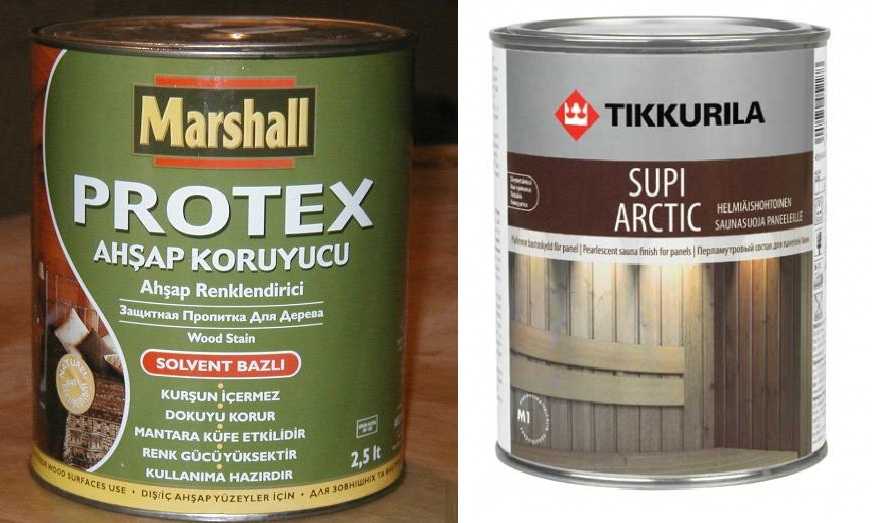
- Protective compounds... There are for outdoor and indoor use. Formulations for outdoor use additionally include UV protection, which prevents or slows down the process of photoaging of wood - the color change to gray. So if impregnation is needed for the lining on the balcony, and it faces south or east, you need a composition for outdoor work. Only Please note, some of them paint the surface pink or green - this is the result of a chemical reaction. Read the description carefully, because the resulting color can only be painted over with opaque paints or very dark toning.
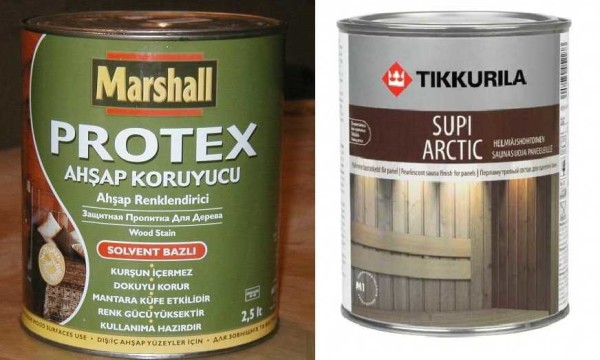
Protective impregnations
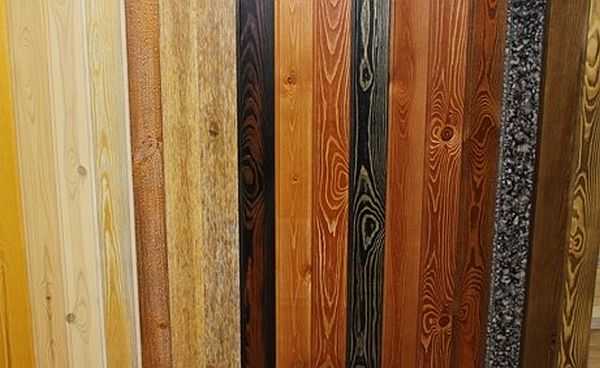
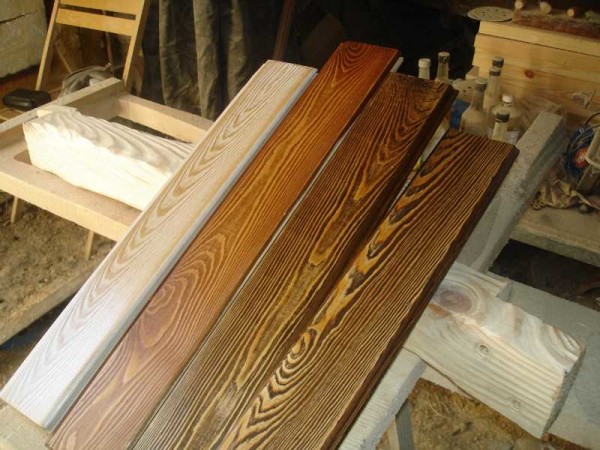
- Tinting compounds or stains. They do not paint over the texture of the wood, but give some kind of shade. At the same time, a film is not created on the surface, the wood does not lose its properties - it remains vapor-permeable. Tint formulations contain pigment and can be lightly or highly pigmented. If you want a surface with a pronounced wood structure, take a slightly pigmented composition. You may need a lot of layers, but you will be able to control the degree of "shading" of the wood.

The result of the work of stains of different colors
- Lucky. Today, water-based varnishes or aqualacs are more popular for lining on walls or ceilings. They can be matte, semi-matte or glossy. Many have the ability to add color - simultaneously change the color. Unlike traditional varnishes, water-based varnishes do not close pores - the film on the surface remains vapor-permeable, but protects from the absorption of dirt. Many manufacturers add UV filters and germicidal components. Such paintwork materials are good for balconies or in unheated rooms with periodic visits - at dachas and in baths.
The varnish can be glossy, matte or semi-matte, and it can give a color - pigmented
- Paints. This group includes compounds that create a dense film on the surface through which the wood structure is not visible. The group is extensive, with different properties and price ranges - from traditional oil enamels to latex and acrylate enamels.
- Wood oils. There are transparent, there are pigments. Unlike varnishes, they do not create a dense film on the surface, but are absorbed into the fibers. Good formulations act in a similar way to varnish, protecting against abrasion and dirt absorption. Only the oils do not have a bright glossy sheen - a matte or slightly shiny, like silk surface. This is a great way to preserve wood. By using a specific application technique with pigmented wood oils, the texture can be accentuated (see below).
Brushing with wood oils
- Wax-based formulations. There are three types of wax: solid, liquid, and water. Before use, hard wax is heated to a liquid state, liquid and water (wax glaze) are already ready for use. Wax protection is traditional and very effective, and new technologies make the process much easier. Lack of wax - it is quite difficult to apply it evenly, but it fits well on the previously primed surface.
This division is arbitrary: there are many mixed compositions that can be attributed to at least two groups. So there are impregnations that can be tinted, and there are paints with protective properties. The difference is in the effectiveness of protection. Impregnations primarily protect the wood, while the color application is a secondary task. The opposite is true for paints. Their main task is to create a beautiful coating, and protection is a side effect. If you need both good protection and high-quality coating right away, take the impregnation without tinting, and apply paint after drying.
Another example of a mixed composition is oils with wax. These formulations combine the properties of both oils and wax, thanks to which the wood retains its appearance for a longer time.
The question of which of the groups to give preference, everyone decides for himself. Different tools solve different problems and it is important to choose the right properties that you need in the first place.
How to paint the lining inside: technology
Any type of paint can be used to paint the lining in "dry" rooms inside the house. Here you simply decide on the requirements for the decorative appearance of the surface. If the lining is dry, you can not impregnate it with protective compounds, or choose paint / varnish / wax with appropriate additives. it can only be painted on one side, leaving the back unprocessed.
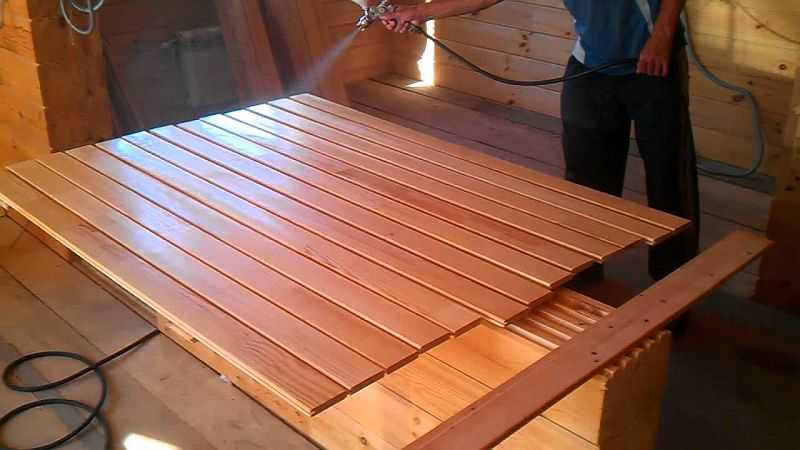
Paint each lining board separately
If the lining will be used in damp or unheated rooms, on the balcony, you must first soak it well with protective compounds from all sides, you can do it twice. Only after the impregnation has dried can it be painted, varnished, in general, given decorative properties. Another point: when installing the lining on a wall or ceiling, it has to be cut into pieces. Places of cuts in damp rooms must also be coated with the composition. It is not necessary to wait until it dries, but it is necessary to process it.
There is one very important nuance that many amateur decorators overlook. If you want to get a professional-level lining color, you need to process each board separately: sand, paint, dry, and only then collect the surface from the already painted lining.That is, on the wall or on the ceiling, mount already fully processed boards. Only with this approach from any point the surface of the lining will have the same color.
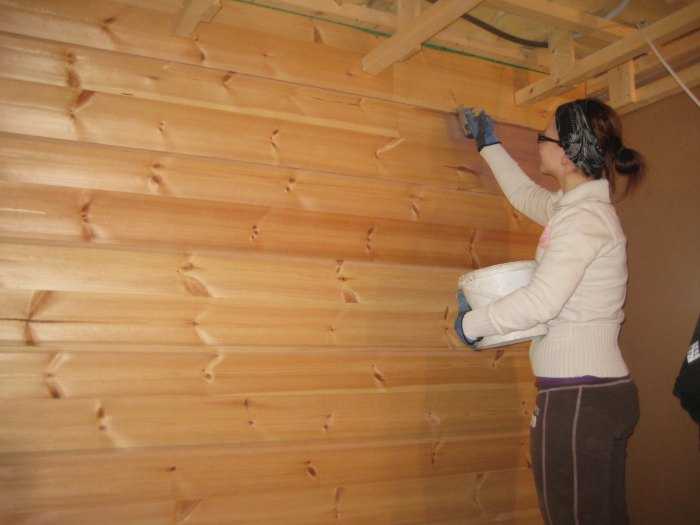
It is difficult to paint well the entire surface of a wall covered with clapboard
If you paint an already assembled surface, unpainted places remain in the grooves and recesses, it is difficult to grind large areas. You can't get a perfectly flat surface. The quality of the finish in this version is not above average. It is permissible to paint the finished surface if you are updating the painting. This must be done at different intervals - it depends on the operating conditions and properties of paintwork materials.
Correctly, the painting technology is as follows.
- The lining is checked and sorted. All crumpled, bent or cracked boards are rejected. On them you can test the color, select the color, the number of layers, work out the technique and the sequence of painting.
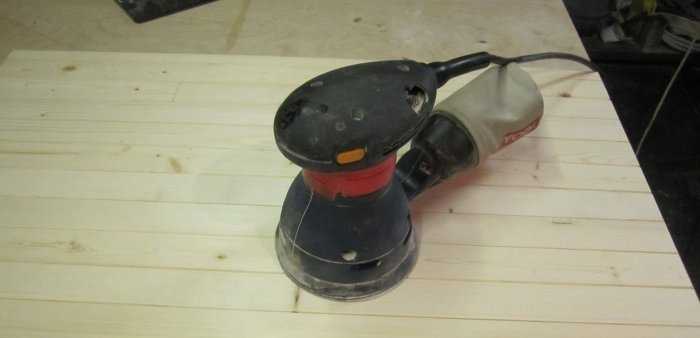
- Sorted boards are sanded to full smoothness. It is most effective to work with a grinder, but you can also use a bar with sandpaper fixed to the surface. Sandpaper grain - 250-280. When grinding in a circular motion, the face surface, spike and groove pass. The back of the lining can be left untreated.

It is more convenient to work with a grinder
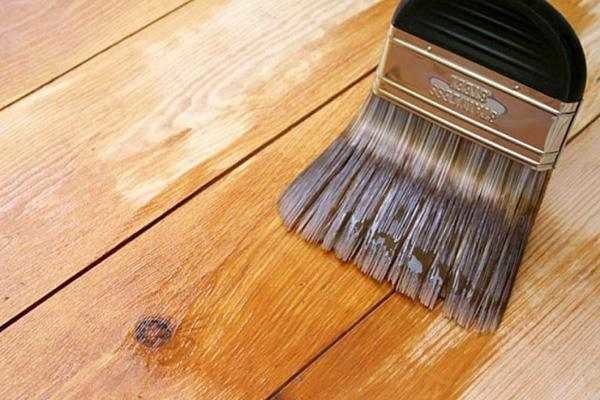
- Apply the composition with a roller or brush. Each type of coverage has its own points and features - they are spelled out on the bank or in the accompanying instructions. In general, the rules are simple: they take a little paint, apply in single strokes along the lining along the entire length. Then thoroughly grind, shade until a uniform color is obtained.
- Having achieved a uniform color, they are left to dry.
- After drying, grind again if necessary. This step is often necessary when working with opaque paints and varnishes. The first layer of paintwork material raises the pile of the wood, which makes it rough in places. This nap is removed by repeated grinding.
- The second layer of paintwork is applied. Dries.
There can be many layers: it depends on the hiding power of the paint and on what effect you want to get. But in any case, the rule remains one: there should be little composition on the brush. The exception is impregnation or primer. They are applied with a well-moistened brush, but only those without pigment. When applying pigmented protective compounds, the rules for paints apply - the minimum required amount of the composition is well shaded.
Sometimes, even with careful rubbing of the paint, stains are clearly visible. This is not a bad paint, but the properties of wood: somewhere the pores absorb better, somewhere worse. In order to achieve an even color in this case, the surface is first primed. You can use any primers for wood or colorless matte varnish (water-based). After drying, the surface is sanded (aha, again) and then the required number of layers of paint is applied. Only in this case, after the first layer of paintwork materials, grinding is rarely required, and if necessary, then in some places, more often - on a thorn or groove.
How to evenly apply glaze, oil or wax, see the video.
If you need furniture quality painting, there are even more layers: first, a stain is applied, then two layers of primer. After drying, it is sanded until the surface is completely dull, first with grain 280, then 320, after removing the dust, a finishing layer is applied - varnish. An example of such work in the video.
Painting wood with preserving texture
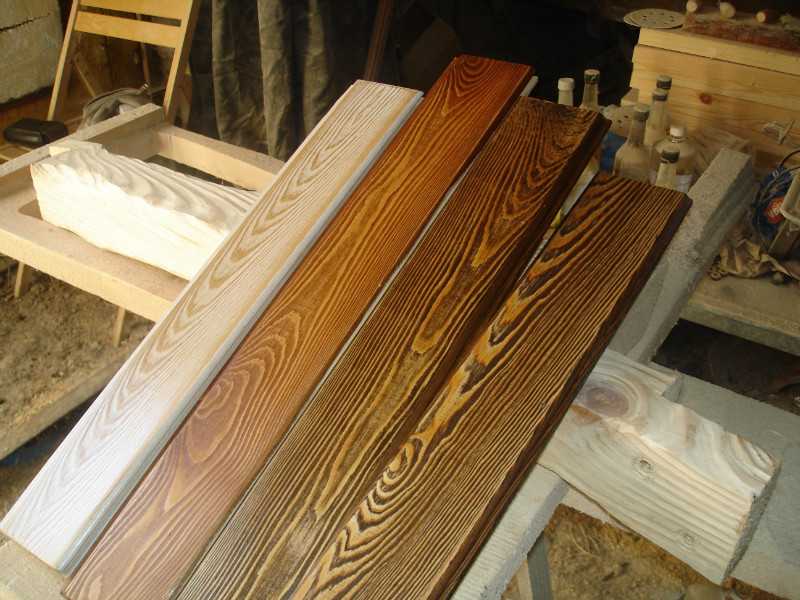
You can achieve a pronounced woody pattern using azure, pigmented oil or wax. These compounds fit quite tightly, almost painting over the structure of wood fibers. Any of the formulations described above can be applied with a brush or roller.
When applying paintwork materials, they take very little, first applying in fragments along the entire length of the lining. Then with a brush or roller, the applied strokes are shaded over the entire surface.Leaving them to soak in for 5-10 minutes, take a soft, lint-free cloth to reveal the texture and remove most of the oil. As a result, the pattern appears much brighter than in the original state: a greater amount of pigmented agent is retained in the grooves, and almost none of it remains on the protruding parts. The result is a pronounced texture. This technique is also called brushing or texturing the lining. In interiors, wood treated in this way looks very decorative: both on the walls and on the ceiling.
The process can be seen in the video. Three samples were stained: two with the same oil with a pigment, and one colorless. 5 minutes after painting, one of the pigmented blanks is wiped off to develop the pattern. To preserve the wood after the pigment has dried (read the package for 24 hours or more), the lining is covered with two layers of colorless oil (azure, wax). In places of intensive use, it can also be covered with matt varnish.
How to paint a lining under a bleached oak
It is often required to paint the tree white, but so that the veins are visible. They also say - to create the effect of bleached oak. There are several ways:
- Use tinting with the appropriate name, which are also called stains. Different manufacturers have these. They usually have the names "frost", "bleached oak" or something like that. Application feature: you cannot pour a lot of composition. If overflowed, the surface will eventually peel off. Several very thin layers are applied to achieve the desired degree of color. After each, give time to dry well.
Whitewashed lining looks great both on the walls and on the ceiling
- Waxed oil of the same name. The application technique depends on your desire: one or two coats for an almost opaque finish, or one coat followed by a rag for a pronounced texture.
- Pigmented polyurethane primer named "white" or "bleached". To obtain a translucent coating, the composition is diluted with a large amount of thinner. Its amount can be 80-100% of the volume (determined by samples). The disadvantage, like all polyurethane paints and varnishes, is that it turns yellow over time.
- Pigmented acrylic primer, also diluted 80-100%. The color remains white for a long time, but such a primer costs more than polyurethane.

It is difficult to say which of the compositions to choose - you need to try It is advisable to paint the lining with several compositions and compare the result. The effect when using different products is slightly different, but still highly dependent on the wood. Reviews are also very different - someone bleached it with tints, someone with oil. Soils for these purposes are rarely used, but mainly due to the fact that not everyone knows their properties.
Secrets of decorative wood staining: techniques and tricks
City dwellers want to preserve the natural color of wood to the maximum. Those for whom wood in the house is a boring daily routine - paint the lining inside the premises in some unusual color. Modern paintwork materials allow you to achieve different effects. For example, textured or brushed lining, but in two colors. This technique is often used in loft style interiors.
Brushed lining in two colors is an excellent choice for decorating walls
The trick is to apply two layers of different colors. The first layer is some kind of dark color, the second - a light or brighter one. Having played with colors and the order of their application, you can create your own version. Watch the video - how to get a lining brushed in two colors.
Coloring in two colors may not be the same. You can make grooves of a darker color, and the face (front part) only slightly tinted or do everything exactly the opposite. You will get a striped wall of lining - the effect of a rack wall.
How to paint lining inside the house: ideas
Painting techniques and methods are great, but how fit the lining into a modern interior? Simply. There are many interesting options. The latest finds of designers - a wall of lining in a room with smooth walls. It looks creative and interesting. And most often such a wall is made using the brushing technique.
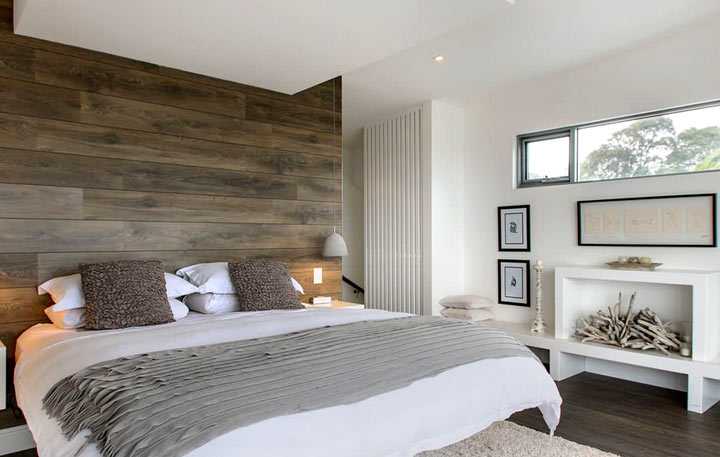
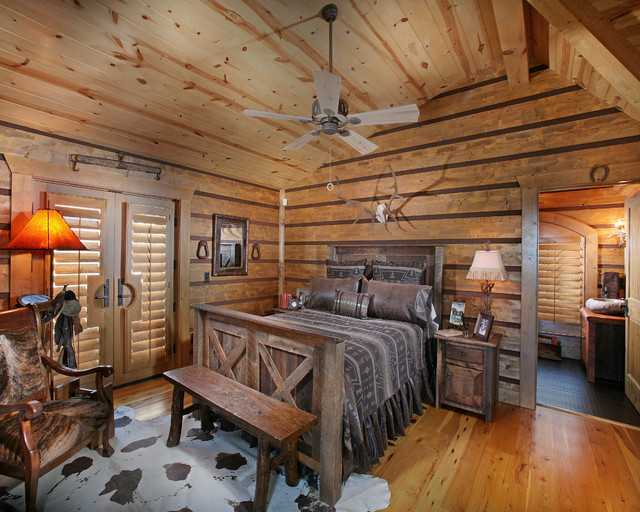
One of the options for using lining in the bedroom interior
An interesting effect is provided by combining fittings of different thicknesses - in the photo, thin boards are inserted between wide boards. Moreover, they are painted in different shades of the same color. The combination is interesting and fresh.
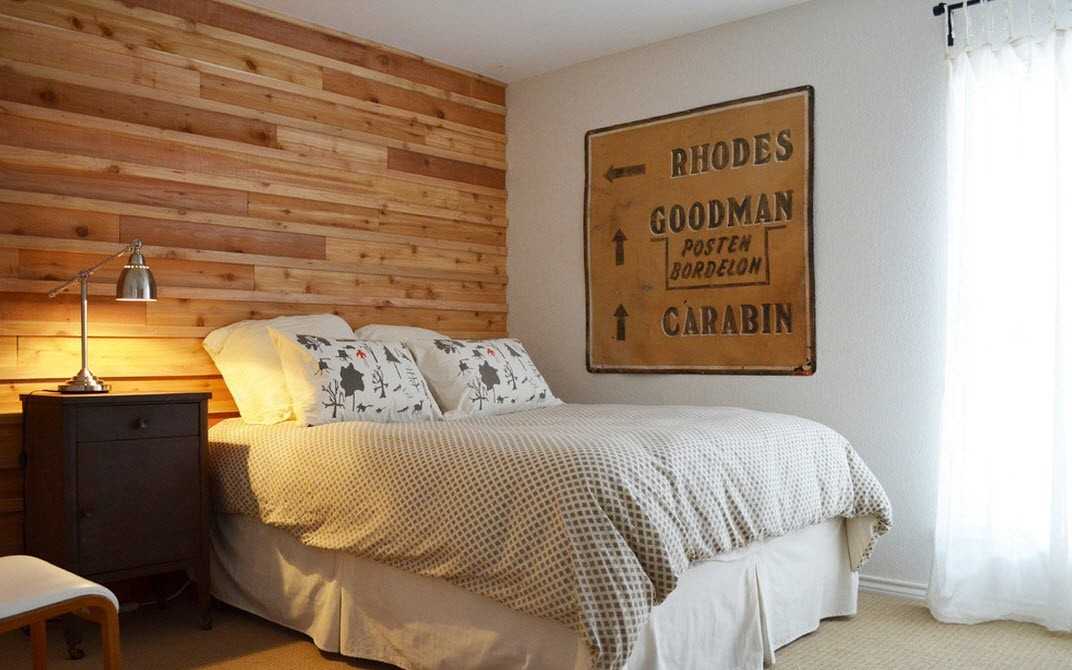
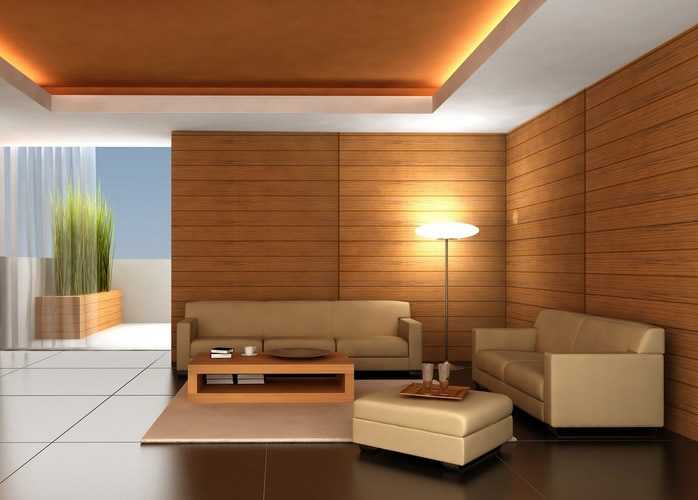
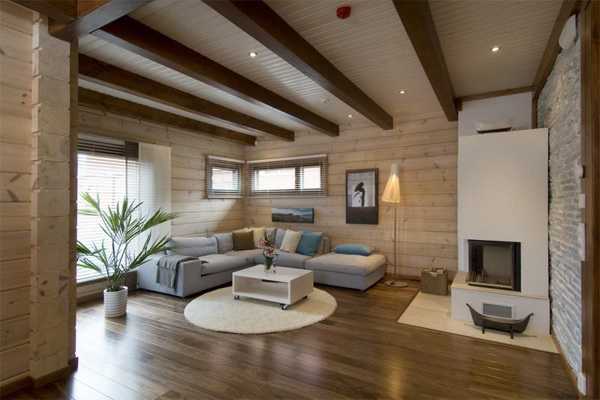
Lining is also used when creating interiors in a modern style.
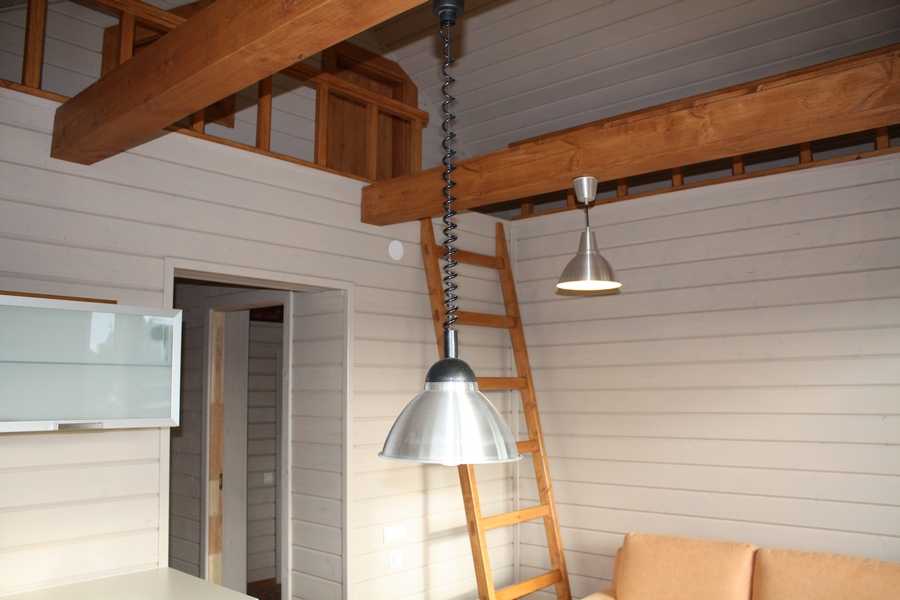
Lining is not necessarily just a flat board with small grooves on one side, which is also called eurolining. There are different profiles, including those with waves and troughs. Of these, you can assemble interesting walls, the relief of which is emphasized by coloring.
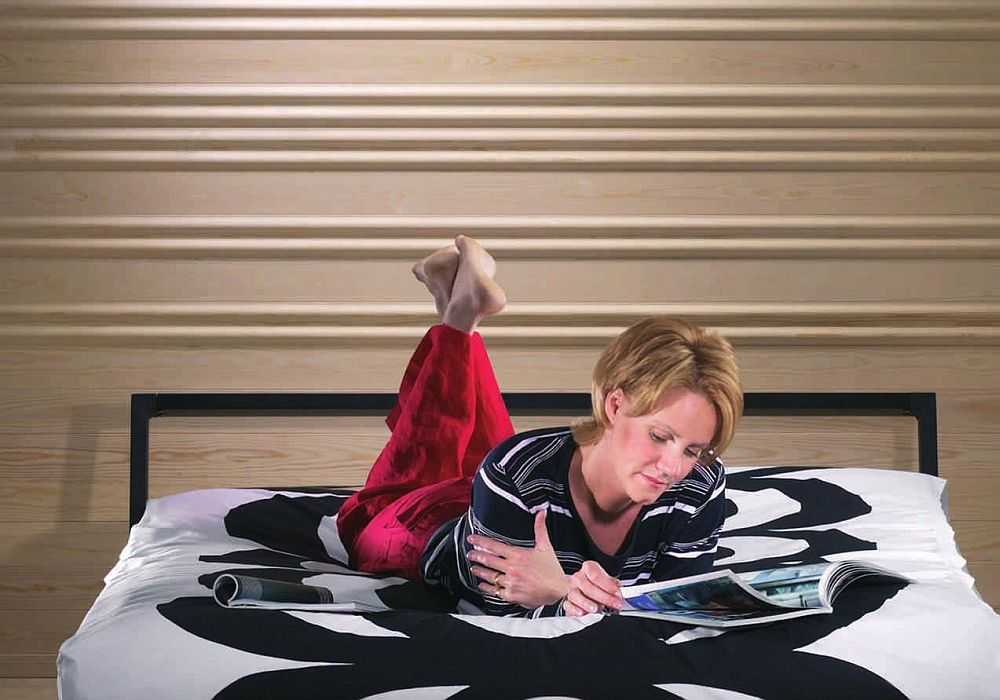
Interesting reliefs can be assembled from lining of different profiles. To make it look more interesting - emphasize reliefs or whiten
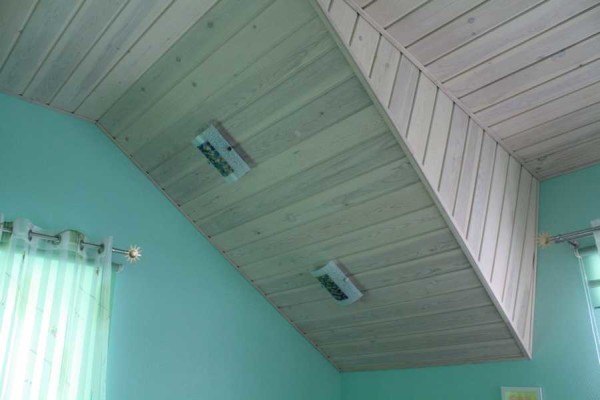
As usual in the interior, a lot depends on the light. Several non-standard lamps - long translucent strips, behind which are hidden lamps installed in the middle of the ceiling - and the interior is completely transformed. In this design, you can arrange rooms for youth, creative living rooms etc.
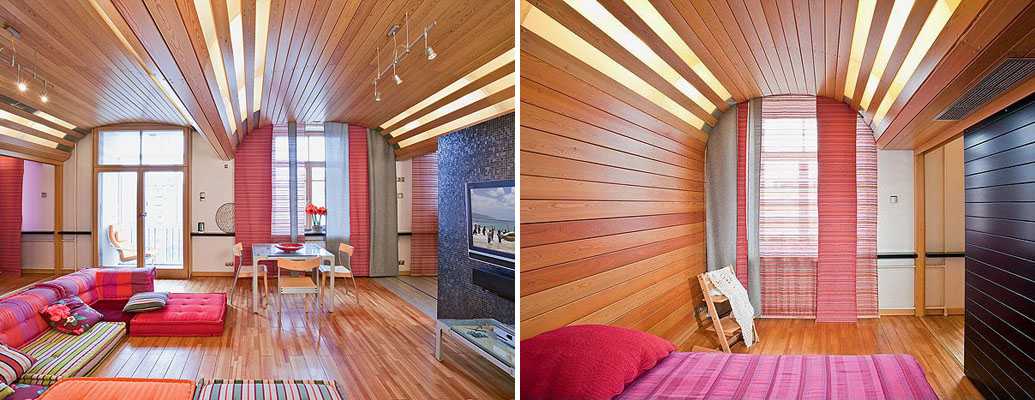
Very interesting backlit solution
You can play not only with light, but also with color: in the lighting area, paint the lining in a lighter color, thus highlighting this area.
The play of light and color reflected in the mirror
If you have good drawing skills, you can paint the lining. Just do not forget to cover the whole picture later with colorless oil or varnish - so that it will last longer. This technique can be used when decoration of a children's room.
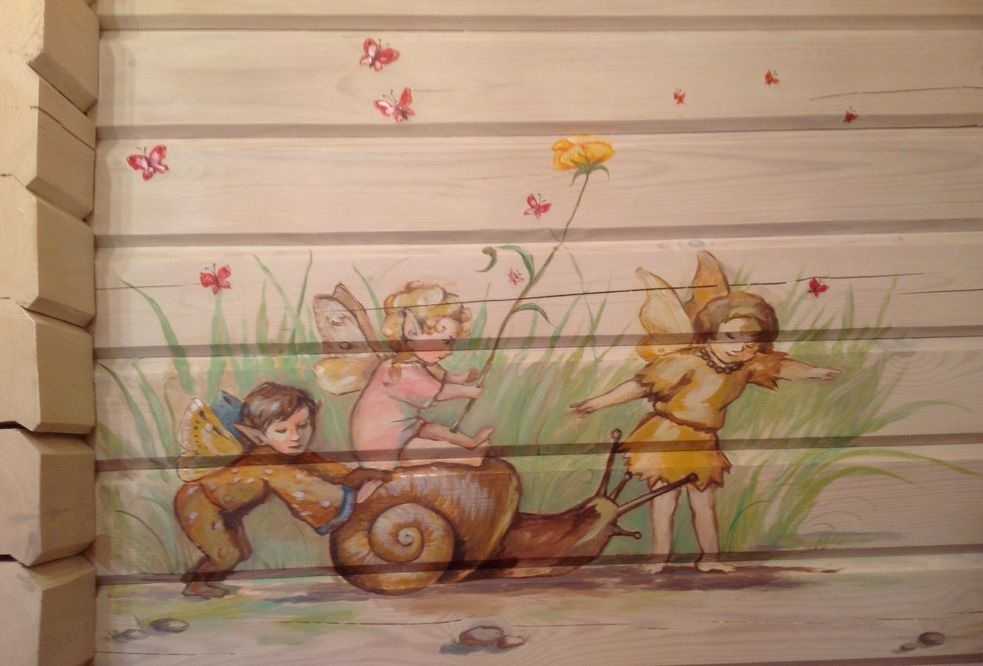
Painting on the lining
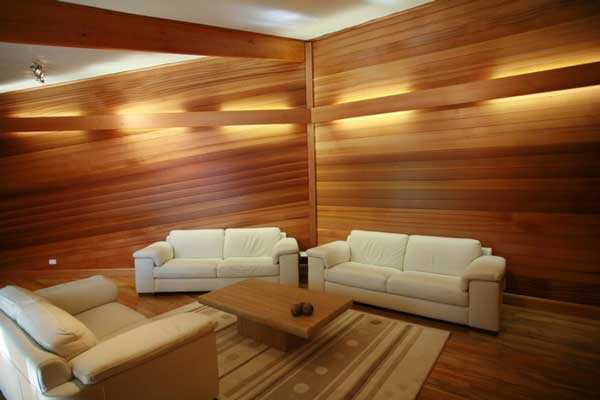
In the interior of the office, living room, hallway, rigidly outlined panels from the lining look great. In the same vein, you can decorate the wall in the dining area in the kitchen. Only its quality and color should be perfect.
The honey tint of the lining is repeated on the ceiling
Processing for a rustic interior can be deliberately imperfect. A sort of room with a masculine character.
Men will like the rustic style. In this case, painting the lining using the brushing technique is the norm. And the colors are chosen dark
As a counterbalance - light walls. The lining is whitewashed and the beams are painted dark. Despite the traditional materials used for centuries, the look of such a room is modern and stylish.
A great combination - light walls with a bleached oak effect and dark massive beams. It's almost a win-win.
Variation on the same theme
Lining is also used in the decoration of bathrooms. Impregnation must be given maximum attention here, but if ventilation in the bathroom done on a level, impregnation - with protection from moisture, then there should be no problems. And the interior, you see, is very interesting - the warm tones of wood combined with bright marble are a great move.
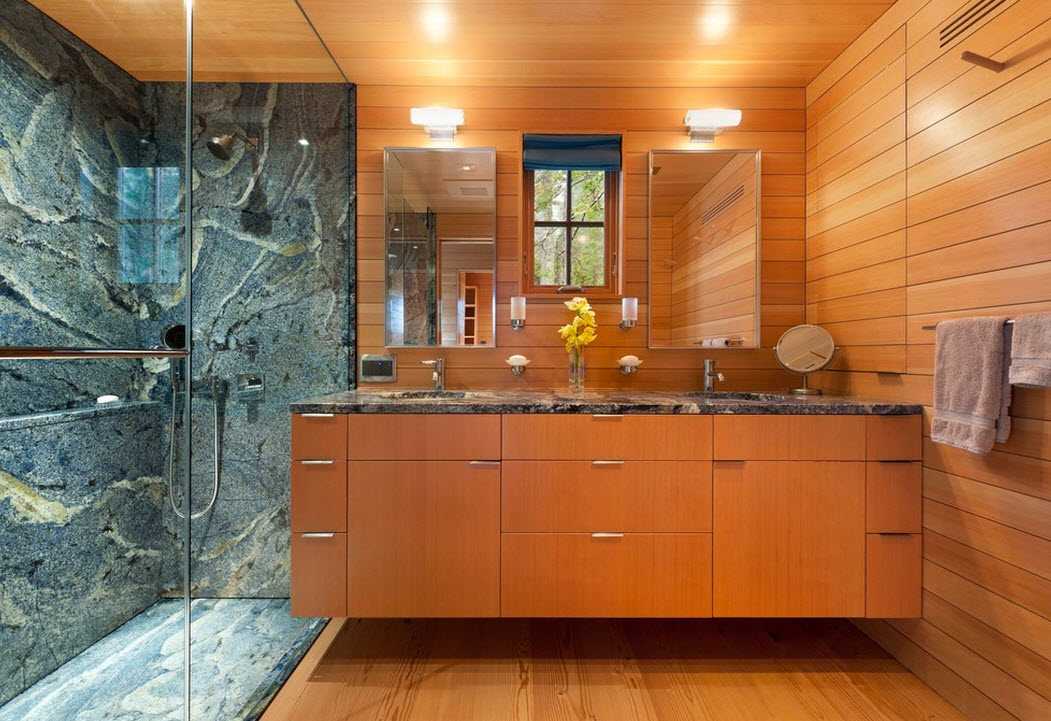
Lining in the bathroom
Lining is used and whenfinishing balconies... It is only necessary to fill it horizontally - this way you can expand a small space. And light colors look better on such a small area, maybe with a dark edging.
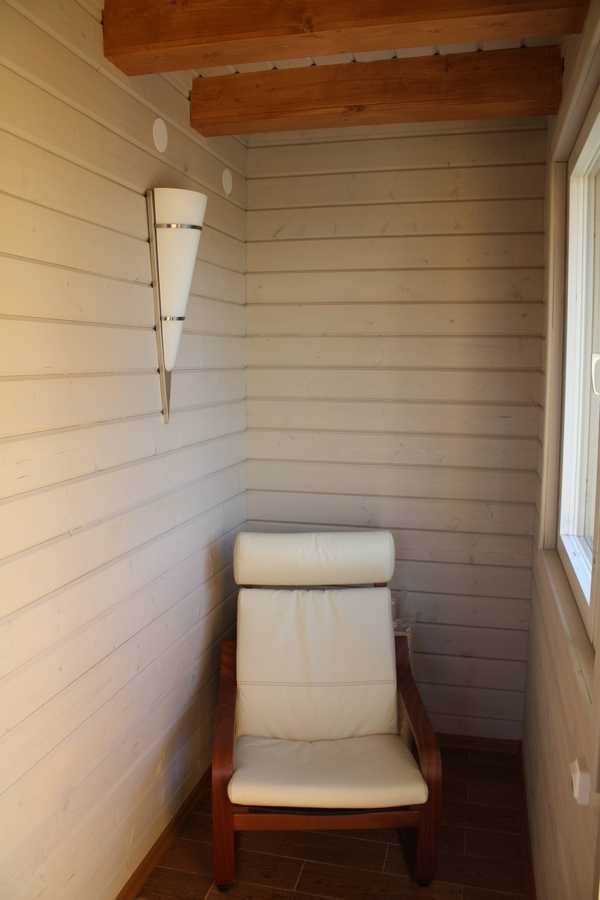
Whitewashed lining on the balcony
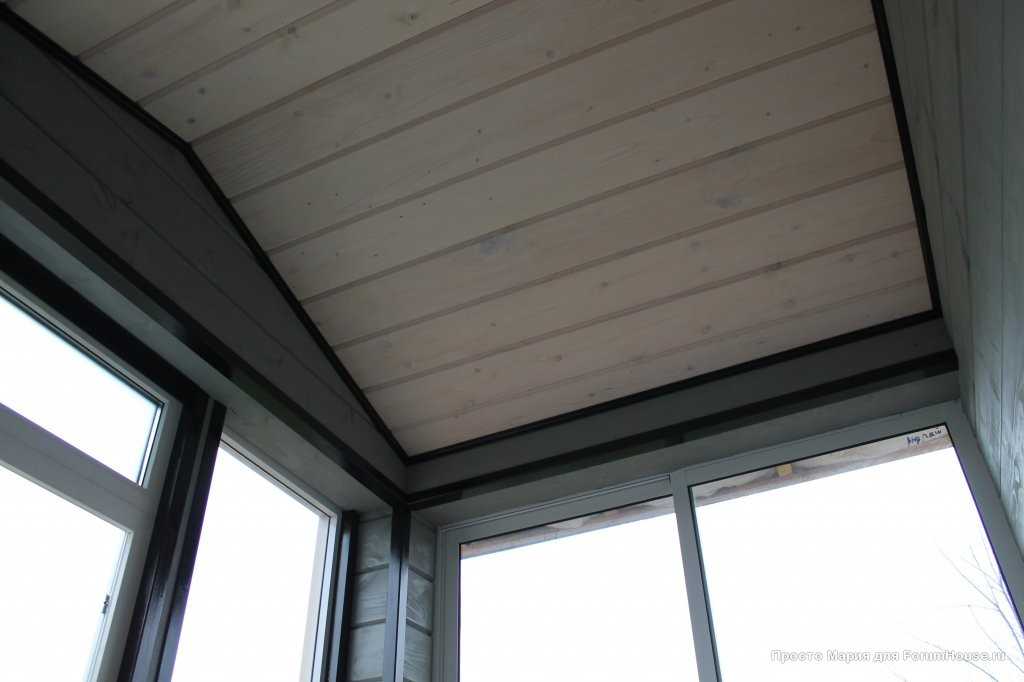
Ceiling - lining, painted with light stain