How to glue wallpaper
One of the most popular types of interior decoration is wallpapering. But for the result to please, you need to know how to glue the wallpaper correctly. There are a sufficient number of nuances that affect the quality of the finish.
The content of the article
Preparatory stage
First, everything that can be removed is removed in the room, including door trims and baseboards, if possible. They also remove sockets and switches, closing boxes with wires with plugs - plastic or wooden.
You also need to know how to glue the wallpaper
Disconnect electrical outlets
When working with an electrician, we de-energize the room and do not turn it on until we finish. It is advisable to carry out all work, including gluing wallpaper, with the power off. The work is "wet" and water or glue can get on the wires and short-circuit. If the wiring is done according to all the rules and there are circuit breakers, this is not a big deal. They just cut off the power and that's it.
If the wiring is still the old way, it can be dangerous. Worst of all, in this case, there is often no way to turn off the power in a separate room. Only in the entire apartment or, at best, in its half. Then the way out is to remove the power wires from the sockets and switches (with the power off, of course) and carefully insulate the ends, then hiding them under the plugs. Then you have to unwind and put them in place, but it will be safe.
Lighting during work is done temporarily - they pull extension cords from other rooms and turn on portable lamps. After you figured out the electricity, you can move on.
If the walls are only aligned and putty, you do not need to do anything except a primer. But if they have an old coating - wallpaper or paint - you will have to work. First, remove the previous finish.
Cleaning off old wallpaper
If wallpaper is pasted on the walls, in an arbitrary place they are pryed with the corner of a spatula, then pulled by the bent corner, tearing off. If you're lucky, whole strips come off, sometimes several meters in a single canvas. But more often it turns out in small fragments. First, they shoot everything that comes out "dry." If it is very difficult and in small parts, they take a basin of water and a roller, wet the walls in this way. To make them lag easier, you can add dish detergent to the water.
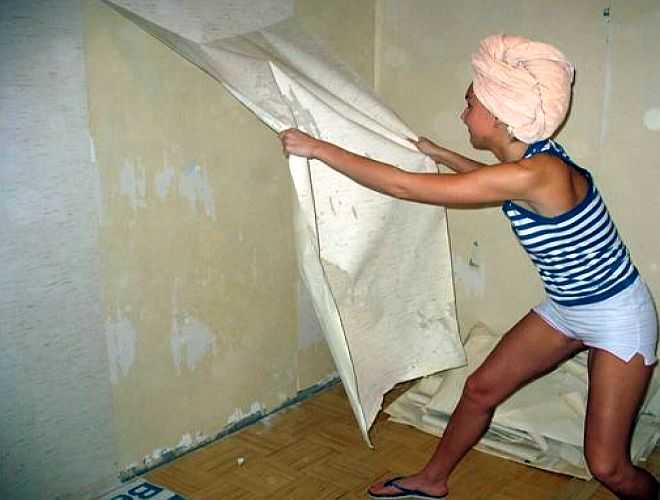
Things don't always go so well
If wallpaper paper water is applied simply to the surface. If they are vinyl or with some other durable film, they break through the film first. This can be done with a spiked roller, or with a metal bristle brush. The main thing is to break through the film so that water can be absorbed into the base - paper or non-woven - and soak the glue. Sometimes it is necessary to wet the wallpaper several times to make it easier to come off.
Further, the actions are the same as with paper ones: we pry with a spatula and tear off. Sometimes this technique - tearing off pieces - is ineffective. It works faster if you scrape off the soaked finish with a spatula. Then we scrape at a sharp angle with a blade along the wall. In general, it doesn't matter how, but the old wallpaper must be completely removed.
Removing paint and whitewash
You also have to work with a spatula, cleaning off centimeter by centimeter. The work is monotonous and rather boring, and also dirty. There are several ways to speed things up.
Oil paint on concrete
There are, in fact, two options: chemical and mechanical. Chemical is a special paint remover.The composition most often looks like a gel. They are applied to the surface and, after some time, (indicated on the package) rises in bubbles or begins to shrink. The paint has softened and can be removed with any spatula.
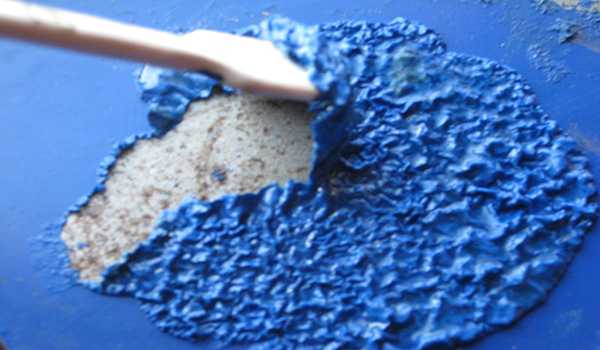
This is how the paint looks after the "work" of the remover
Everything is quite simple, but there are two "buts". First, the price of the wash is rather big. Second, the fumes are clearly not useful. It is necessary to work in a ventilated area, but do not dry the wash, otherwise there will be no effect. And all the same, even when airing the head sometimes hurts. So a respirator will not hurt, and gloves are also required.
The mechanical method is not just a spatula. It will take a very long time to scrub. Use a grinder or hammer drill. The grinder has metal wire brushes. You can try to shoot like this. The method works, but not always, or it turns out too slowly. Then you can take a punch and a chisel, and holding the chisel perpendicular to the surface, drive it along the wall without deepening. The paint bounces briskly. After such a "shock" treatment, it remains to clean the remnants with a spatula.
Water-based emulsion, whitewash or paint on gypsum plaster
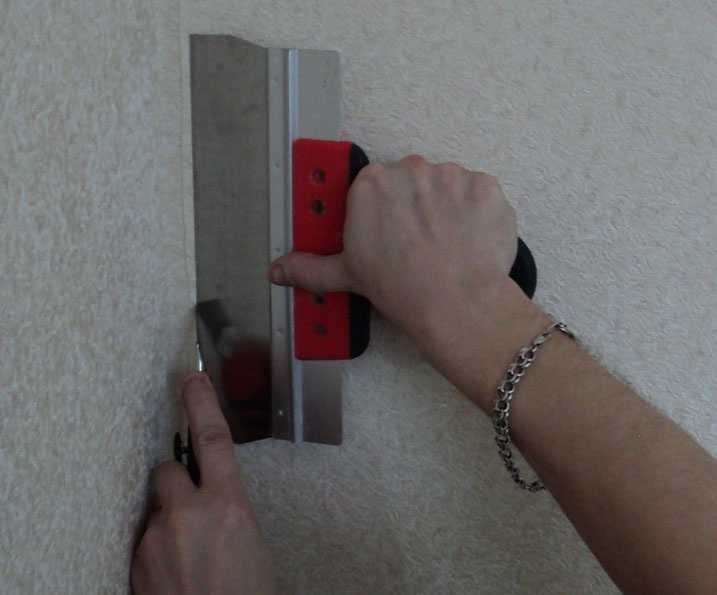
Removing this type of paint on walls is no easier. It turns out to scrape, only very, very slowly. The solution is very simple: water again and a special paint scraper. You can buy it at a hardware store. Take a few spare blades right away: for the kitchen, for example, it takes three or four pieces.
The wall is well coated with water. With a brush or roller, several times. Then leave to soak. And then you start cleaning with a scraper. The paint bounces straight. It is only important that the wall is well wet.
How to choose wallpaper for the corridor and hallway, read here.
Sealing irregularities
Here you will first have to assess the condition of the walls. First you need to pull out all the nails, screws, remove the chips and open the cracks. Then examine the results. If the walls are more or less even, there are only small defects, occasional alignment can be dispensed with. Only cracks, dents, chips are covered. They can be covered with finishing putty. Just before leveling the wall, completely clean it of dust and pieces of wallpaper, and then cover it with a primer (roller the walls and a brush in the corners).
If the wall is after "processing" with a perforator, you cannot do without a full putty of the entire wall. Basically, gypsum putty is used today. First, apply a layer of primary or starting. It has a coarser grain and the layer can be up to 3-5 mm. With this composition, the main irregularities are leveled, trying to achieve a flat surface. After drying, they pass through a special mesh, removing irregularities and sagging that may be.
After that, a finishing putty is used. It is very flexible and is applied in a thin layer - up to 1-2 mm. After that, the wall becomes smooth (after the irregularities were smoothed out with a mesh, only with a smaller cell).
Wall priming
The second layer of primer is applied after filling. It forms a film on the surface, which reduces the absorbency of the glue and also improves adhesion. For the case of wallpapering, a more liquid wallpaper glue can be used as a primer. Each pack has a table that indicates the amount of water for pasting and priming. We dilute the glue in the right proportion, wait for it to be ready (also on the package) and cover the walls with the composition. The primer technique is the same: first go through the corners with a brush, then with a roller on even surfaces.
For some reason, in the video, the use of primary putty is called plaster, but otherwise the sequence of actions is correct.
The rules and methods for combining wallpapers are described in this article.
Sticking rules
When wallpapering, there are several rules that must be followed. The technique varies depending on the type of wallpaper, as does the glue that is required for a quality result. the main difference is when and where to apply the adhesive. You don't have to guess.Everything is on the liner, which is found on each roll of wallpaper. There, in a graphic form, it is shown, and in some it is written, which part should be smeared with glue: only the wall or only wallpaper, or maybe both at once.

Such designations are on the insert
But some things remain the same. For example, drawing a start strip.
Where to start
In reality, the starting point is not that important. It is important that the first strip is glued strictly vertically. Therefore, the choice is yours.
If the room has a perfectly drawn angle: even and exactly vertical, you can start from it. You can start from a door with a perfectly exposed jamb. If there is nothing like that, draw yourself a landmark yourself. Take a building level, mark a point on the wall and draw an exact vertical line through it. Inexpensive building levels of the household class, which we usually use for repairs, sometimes give a solid error. And since it is important for us to stick the first strip strictly vertically, check the accuracy of the line using a plumb line. Here he never lies, pointing straight down. If everything is fine, you will align the edge of the strip along this line.
If you still have not decided where to start gluing wallpaper and this is your first experience in this area, start with the wall that is less visible than others. For example, the one along which there is a closet. A couple of first pages will be difficult for you, and then you will better understand what's what and there will be fewer flaws.
How to glue wallpaper on the wall
If glue is applied to the cut piece, as requested by the manufacturers, the smeared strip is folded so that the coated side is inside. To do this, fold the edges to the middle, then fold them several more times. The folds are not pressed. Keep it rounded. This is necessary so that all layers are soaked and the canvas fits well on the wall, and also adheres without bubbles.
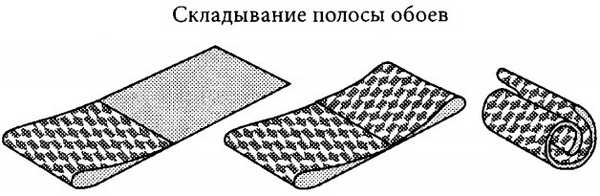
How to fold glue-coated paper wallpaper
If you need to apply glue to the wall, coat an area slightly larger than the width of the wallpaper. The area under the ceiling, in the corner and near the floor is smeared with a brush. Then the rules are general.
Take the cut off strip, go up the ladder. Bring the upper edge a few centimeters to the ceiling, then align one of the edges along the drawn "start" line. Since the wallpaper is glued end-to-end today, it does not matter which edge.
Strictly attaching the side edge to the line, with movements from this line to the other edge, glue the wallpaper around the ceiling. Then, gradually moving down, you go down a little lower.
The extra centimeters on the ceiling are cut off. It is more convenient to do this with a paper knife and a large spatula. Press the paper well against the corner by swiping your hand. Then apply a spatula. Draw along its edge with a knife blade.

Trimming under the ceiling and near the baseboard
When gluing the canvases, movements are made from the center of the strip to the side and slightly downward, expelling the trapped air to the edges. Previously, this was done with a rag, but it is better and faster to do it with a roller with an elastic attachment (it is usually yellow). There are practically no bubbles when working with it. But if the wallpaper is structural, with an embossed pattern, you can crush it with a roller. Then take a wallpaper brush. It is wide and flat, with a stiff pile.
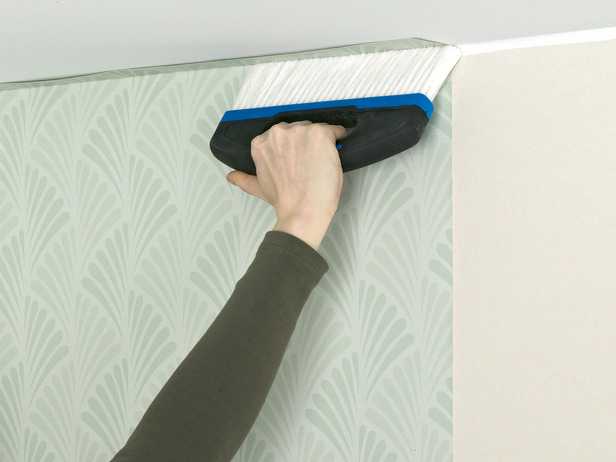
Wallpaper brush for quick stickers
When you get to the place where the strip is not yet glued, unfold the rest is dense and proceed in the same way. First, expose the edge, then use a roller or rag to expel the air, achieving a flat surface.
The second strip is glued in exactly the same way, with the only difference that the canvas already on the wall will serve as a guide for gluing the edge. That is why it is important to glue it exactly, otherwise everyone else will also mow.
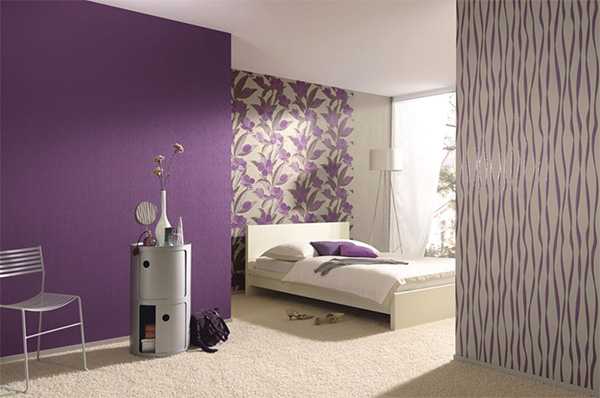
Features of the choice of wallpaper for the bedroom are considered here.
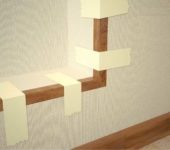
Secrets of pasting corners
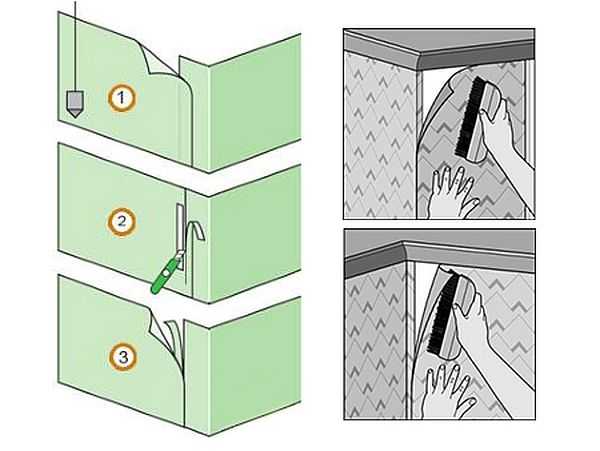
The most difficult thing is to properly glue the wallpaper in the corners. But that's only as long as you don't know the secret. At first, you can try to make it simple.Wrap one of the parts on the adjacent wall by 1-2 cm, and cut the second at the corner.

One way of pasting the inner corner
It is not difficult to do, this method looks good. But on some wallpapers, this strip is very visible. There is another way for such a case. Glue the canvases on both sides of the corner so that they wrap at least a little on the other side (2-3 cm is enough). Press well so that they fit exactly. to the walls and corner.
Cut the wallpaper in the corner
Then take a special cutter or a large spatula. Press it in the corner, cut the wallpaper with a sharp knife along its edge. It is necessary to cut both canvases at the same time, so that considerable effort may be required. To make a continuous cut, do not tear off the knife. Having stopped, move the spatula, which you rest against the blade and then continue the cut.
Cutting off everything, remove both cut strips, and join the remaining canvases in the corner. If the wallpaper was well pressed before trimming, the match is perfect, without any discrepancies.
How to glue wallpaper in the corners correctly
How to glue the wallpaper on the outer corners? In much the same way. In the first case, one of the stripes is wrapped around the corner by one or two centimeters (for thicker wallpapers, 2 cm is better, for thin ones - 1 cm is enough). The second strip is glued strictly along the corner. If this overlap is visible (usually on non-woven wallpaper), it will be necessary to cut along the entire strip. In this case, wrap it up more and cut it vertically using the same spatula and knife. We remove the cut off, glue the joint.
Meter wallpaper in the corners is glued in the same way as narrower ones. It so happens that a narrow strip is needed in the corner, and the rest is cut off. If the wallpaper is without a pattern, it can be used somewhere, at least in another corner. With patterned canvases, they also sometimes turn out to be attached somewhere, but this is more difficult. Therefore, they take patterned ones with a decent margin: just for such cases.
How to glue paper-backed vinyl wallpaper, how to expel imperfect corners in this video.
What wallpaper is better in the kitchen read here.
How to glue wallpaper near doors and windows
If the door or window is flush with the plane of the wall, problems usually do not arise. Wallpaper is cut along the door frame or along the edge of the trim. The blade is cut at an angle of about 45 ° to the corner of the casing or frame. The cut parts are wrapped along the opening, folded and then cut with scissors or a knife. Smoother and faster with a knife and spatula.
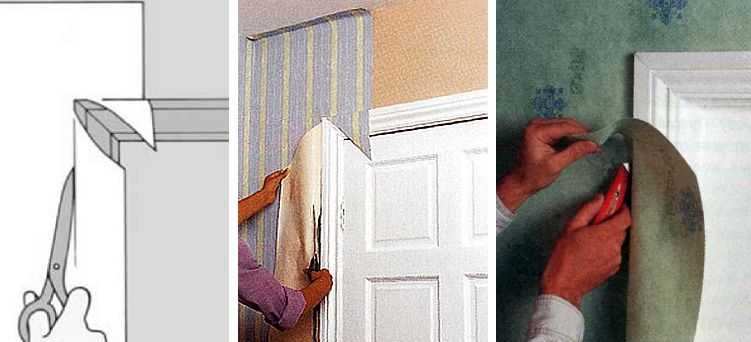
How to glue near the door
More difficulties are caused by the option when it is necessary to paste over the slope of the door or window. When using paper wallpaper, the principle is again simple: we glue the strip onto the slope, leading it 1 cm onto the wall. On top we glue a piece exactly along the cut of the window opening.
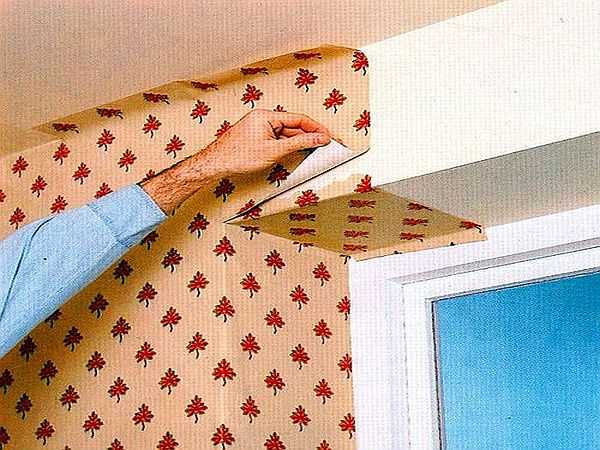
One of the ways of pasting the slope of a door or window
But with wallpaper on a non-woven fabric, this method will not work: "overlaps" are too visible. In this case, the strip is cut along the window opening with a small margin. From above with an overlap, another fragment is glued, cutting them exactly along the cut of the window opening. The glued piece is wrapped inward, onto the slope. Then they join as before.
It is difficult to explain in words. It is more accessible in the video. In it, by the way, there is a plot about the design of the wallpaper of arched openings.
How to make joints invisible
Care must be taken to ensure that the joints of the canvases are invisible during gluing. You need to connect the canvases so that there is no gap between them, but also so that they do not overlap one another even by a millimeter. A perfect match must be achieved.
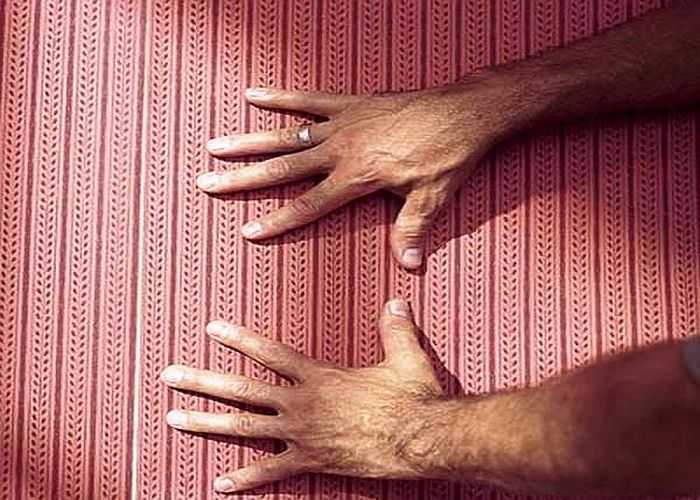
Move the lane to the right side
Since ideally flat walls we meet, alas, infrequently, it turns out that the seam either creeps a little, then diverges. Your task is to move the canvases so that it becomes perfect and invisible. You can move the canvases with your hands - they can stretch and shrink slightly. This is how you achieve the desired match.If the resulting deficiency is too large and it is not possible to achieve anything with shifts, the strip is peeled off to this place and, having corrected as necessary, glued again. Sometimes, if the seam sticks out a little, rolling with a special tapered roller can help.
With this technique, it turns out that first the edge is glued, which joins, and then, from it, they begin to smooth the rest of the surface of the canvas. If you examined the seam and were satisfied with the result, take a clean rag and wipe it off any excess glue that might have come out during all these actions.
To learn how to glue meter-long vinyl wallpaper on a non-woven base and how to make the joint invisible, see the video.
Eliminate disadvantages
With a lack of experience, it may happen that after or during drying, bubbles appear on the walls. You can remove them with simple actions. Take a large syringe, fill it with glue, pierce the bubble and inject some glue into it. Vinyl wallpaper, acrylic, paper - the upper part is unimportant. Actions vary depending on the basis. If the wallpaper is paper-based, wait five to seven minutes, if the wallpaper is non-woven, act immediately.
Then you need to expel the air from the bubble using a roller, spatula or rag. First, push the glue inside, then from the edges to the puncture, squeeze out the air along with the excess glue. Wipe them down with a clean cloth.
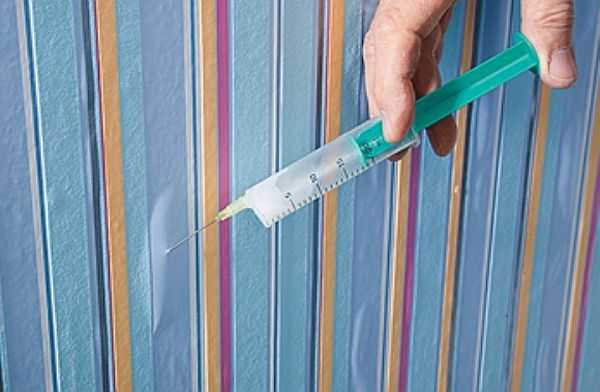
How to remove bubbles from wallpaper
The seams often come apart. Wallpaper may lag along a stream or baseboard. There are two ways to glue them. Use a brush and glue residues or buy a special one for seams. It comes in a tube and is applied pointwise. And again, the procedure depends on the base. After wetting the paper, we wait for a while, then glue it, making sure that the edges coincide.
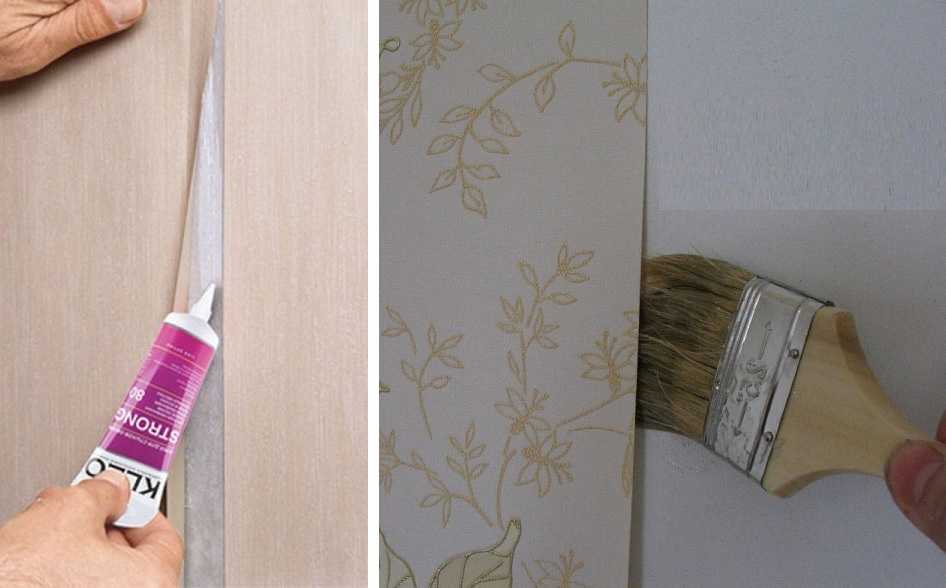
What to do if the seams on the wallpaper are open


I paid people money for gluing wallpaper in the dressing room, in the hope that, as it were, a pro and they would do everything well. It was not there - a couple of days ago I saw that there were folds on one wall on the wallpaper. Possibly badly smeared with glue. Today I had to tear off and glue myself. The glue remained Kleo - he poured it into the water and stirred it. The whole thing turned out with lumps. But I thought that these are trifles and will be smoothed out. Alas, due to lumps, the wallpaper could not be smoothed. I had to tear off and remove the lumps again with a rag. Something like glued more or less evenly. For myself, I once again concluded that you need to read the instructions. Would act according to the instructions there would be no lumps and excess hemorrhoids.