Installation of beacons for plaster, screed
By leveling the walls with a layer of plaster, a good result can be achieved if there are support strips - beacons. The same planks are needed when you pour the screed. Then the floor turns out to be flat, without drops. How to put beacons on the walls, under the screed, and we will consider further.
The content of the article
Materials
- Screws or dowels (dowels - in a concrete and brick wall) of different lengths - from 40 mm to 80 mm. The set of screw lengths depends on the degree of curvature of the wall. Any color of metal, but always with a flat head.
- Phillips or regular screwdriver - depends on the set of screws.
Installation of beacons on walls or under a screed does not require complex tools
- Painting cord - for beating straight lines.
- Strong fine thread / cord / line.
- Roulette.
- Level.

Everything will be easier if there is a plane builder, but if not, you can get by with the usual building level. Only its length is at least 1.5 meters, and preferably more. And it is advisable to check it so that there are no deviations in the readings at all, or, at least, that they are minimal.
How to put beacons on the wall
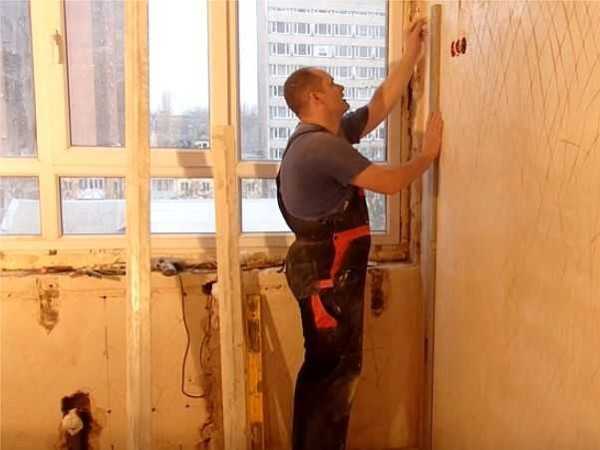
It all starts with an assessment of the wall drops. First you need to find the most protruding point. If there's laser level or plane builder, you can use it. Align the beam parallel to the wall. And with respect to this ray, look for the highest point on the wall.
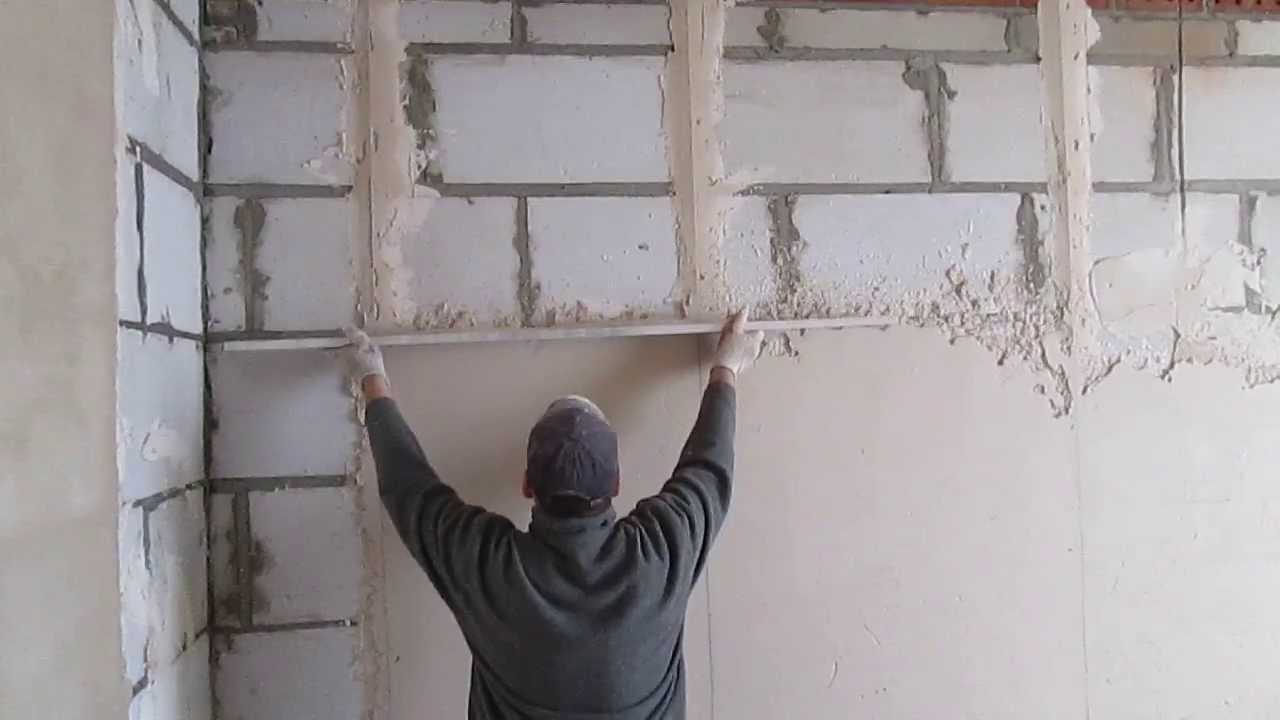
If there is no laser device, we take a long rule or just a flat long bar (about 2 m long). We attach the building level to them with adhesive tape and with the help of such a device we determine where this protruding part of the wall is located. This is how the verticality of the walls is assessed.
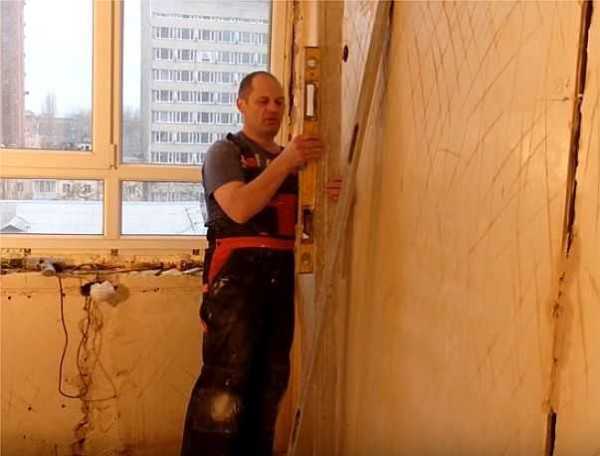
Find the most prominent point on the wall
But there are also humps and depressions in the longitudinal plane. They can be "identified" with a fishing line stretched at some distance from the wall. It can be tied to nails driven into the wall or screws. They are tied to them at one level and see where and how much the level deviates. They pass the entire plane, determining the most protruding point. At the same time, you evaluate the most "drowned" one.
What is it for? The most protruding point is found in order to use the minimum layer of plaster: here it will be minimal. Which layer will be next depends on the curvature of the walls. The "deepest" point is found in order to choose the right plaster. There are two important positions in the technical data of any composition: the minimum layer and the maximum. You will need to choose so that your drop fits within these frames. For example, the well-known and popular Knauf Rotband plaster has a minimum layer of 5 mm and a maximum layer of 50 mm. If that suits you, you can use it (it is plaster).
Determining the number of beacon lines
The distance between the beacons depends on the tool with which you will "pull" the solution - the rule. The most convenient is 1.5 meters. This tool should rest on two beacons, but 15-20 cm on each side should still remain to the edges.Therefore, when working with a rule of 1.5 m, beacons are placed at a distance of 110-120 cm.
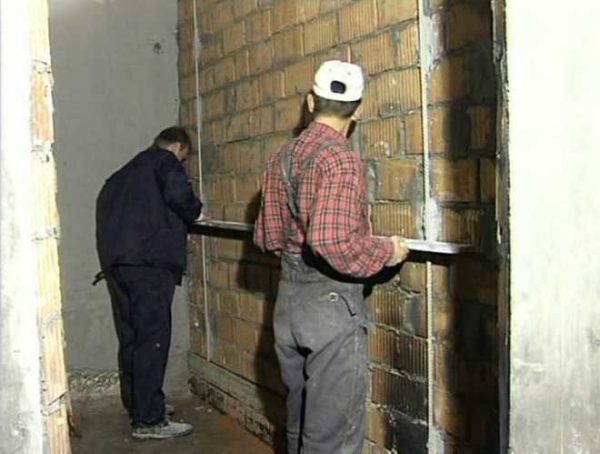
This is how the walls are plastered along the lighthouses and it is more convenient when they (the lighthouses) are exposed so that the edges of the rule are 20-30 cm free
The markings start from one of the corners. 10-30 cm retreat from it - who is how, and who is comfortable. At this level, mark with a pencil or marker. And then they mark out the lines with the selected step. The distance between the beacons does not have to be the same.On walls with door or window openings, it is mandatory to install plaster beacons on both sides, retreating all the same 10-30 cm. If the last gap remaining during dividing is larger than the size of the rule, it is divided in half.
We draw the lines along which we will attach the beacons
Draw vertical lines according to the marked marks - we will use them to screw in screws. If there is a laser level, you can use it to set along the marks without drawing lines. If there is no level, the easiest way is to draw lines using a level - vertically up and down from the marked marks.
How to expose beacons on self-tapping screws
The preparatory stage is over, the actual installation and placement of beacons under the plaster of the walls begins. There are several methods, but the most popular is with screws or flat head screws.
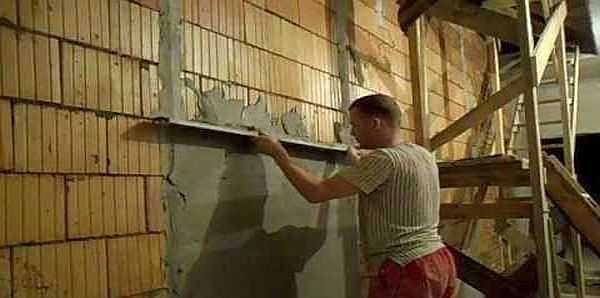
To make plastering easy, you need to correctly expose the beacons
Exposing self-tapping screws
Having stepped back from the floor and ceiling 5-10 cm with a painting cord (lace in blue), we beat off two horizontal lines on the wall. At the intersection of the contour lines and extreme verticals (along which we will mount the beacons), we screw in self-tapping screws. It turns out there are only 4 of them: two at the top and two at the bottom. While their height is arbitrary.
Further, the height of the screwed-in screws must be set in the same plane. The consumption of material for plaster and how smooth the walls will be as a result depends on how accurately and correctly this will be done. Therefore, we try to do everything as accurately as possible. The procedure is as follows:
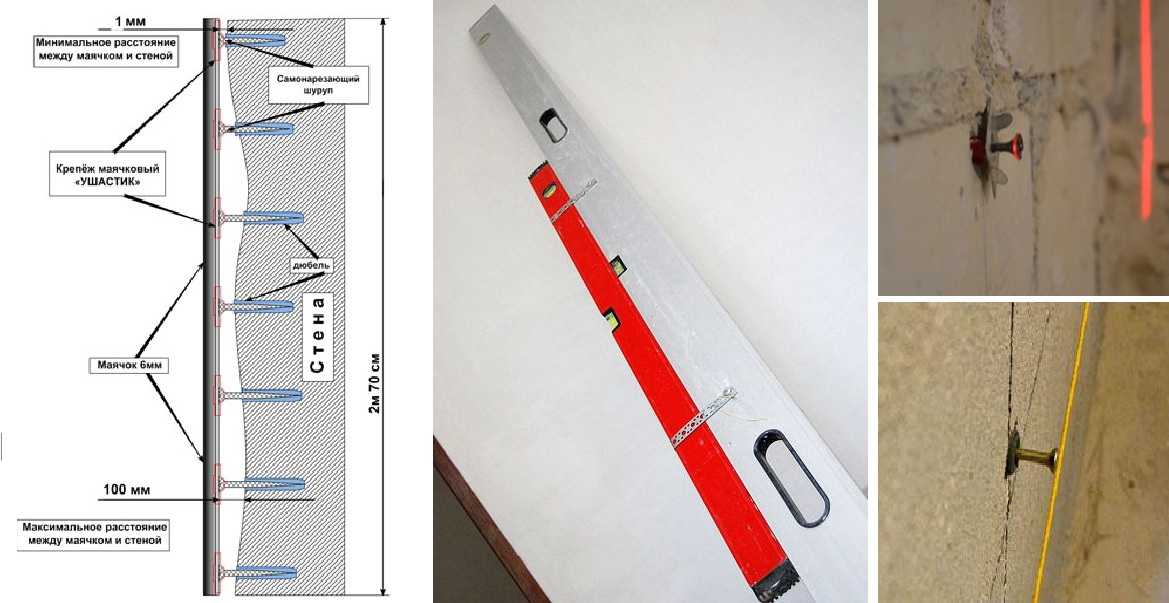
- Based on your previously estimated wall curvature, unscrew or tighten one of the screws to the desired distance. Then, using a long level or a rule / plank with a level attached to them, expose the second screw so that they are in the same plane. You can also use a laser level: it generates a plane parallel to the wall, take a screwdriver and mark on it the distance from the head of the first screw already exposed to the generated plane (it is visible on the screwdriver as a luminous point). Set the other screw at the same distance relative to the mark.

Principle of setting screws under beacons
- Similarly, we expose another pair of screws - top and bottom.
- At the intersections of horizontal and vertical lines on the wall (above and below), we also screw in self-tapping screws.
- Next, you need to put all the screwed intermediate screws in one plane. If there is a plane builder, we do it with its help, if not, a cord will be needed. We pull the cord between the extreme exposed self-tapping screws, along it we expose the caps of the remaining stops. We carry out this operation at the top and bottom.
- Now, using the same technique, we set the screws on each vertical line: between the upper and lower we pull the cord, set the caps along the thread on one line, then repeat the same operation on the second. The distance between the screws on the vertical is 40-50 cm. Repeat with each vertical.
After all the screws are set, for the sake of fidelity, check how correctly you did everything using a rule or an even bar.
If the work was carried out without a plane builder, it may be that the stretched cord lies on a bulge on the wall. Then you will have to reconfigure all the screws, starting with the first four. Very unpleasant, but it doesn't take too long.
Installation of beacons
We dilute the composition that we will use for plastering, a little thicker than indicated on the package. Near the screws (you can also between them), stepping back slightly to the side, apply small cakes of mortar with a trowel. We take the lighthouse bar, press it into the solution to the right or left of the screws. The beacon protrusion should be flush with the head of the screws.
We take the rule / bar, with its help we set the beacon so that it is perfectly flat. The metal on the lighthouse is often not very thick and can be easily bent. Therefore, this check is required.
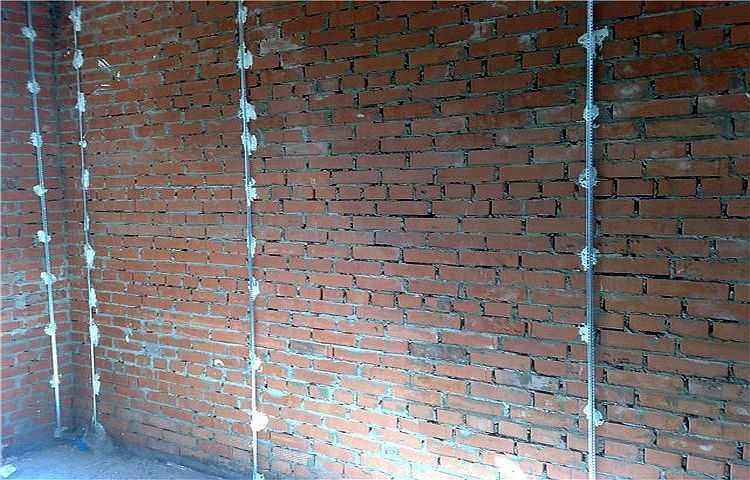
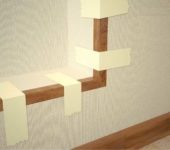
It looks like a wall with already installed beacons, ready for plastering
In a similar way, we expose all the beacons, after which we check that they are all in the same plane. Again we take a flat bar, but this time we compare the installed lighthouse bars with each other. Correct if necessary. After everything is set evenly, we leave everything until the solution dries out (the exact time depends on the solution). When it's dry, you can start level the walls with plaster... Now you know how to put beacons under plaster on self-tapping screws.
There are special mounts for beacons that allow you to do the same job faster. In any case, the authors of the idea and the manufacturers of this fastener say so.
Self-tapping beacons for screed
Basically, the process is different at the preparation stage - you need to determine the level of the screed and beat it off on the walls. When determining the thickness, it is worth remembering that the minimum layer of mortar on the floor should be at least 3 cm.Otherwise, there is a high probability that the concrete will begin to crack.
After you have decided on the level of the screed, put a mark on one of the walls. Then, using an electronic level (set in the horizontal plane mode) or a water level, transfer the mark to all walls, connect them with lines. Further, self-tapping screws are installed on these marks, twines are tied to them and they begin to install and level the screws on the floor.
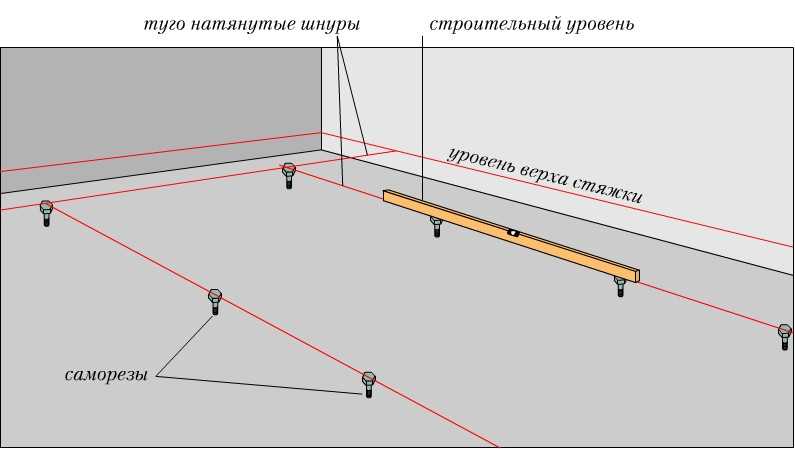
How to expose beacons on self-tapping screws for screed
The number of beacons for floor screed is determined in the same way: based on the length of the rule: its length is minus 20-30 cm. The lighthouse strips are placed perpendicular to the wall in which the entrance doors are located.
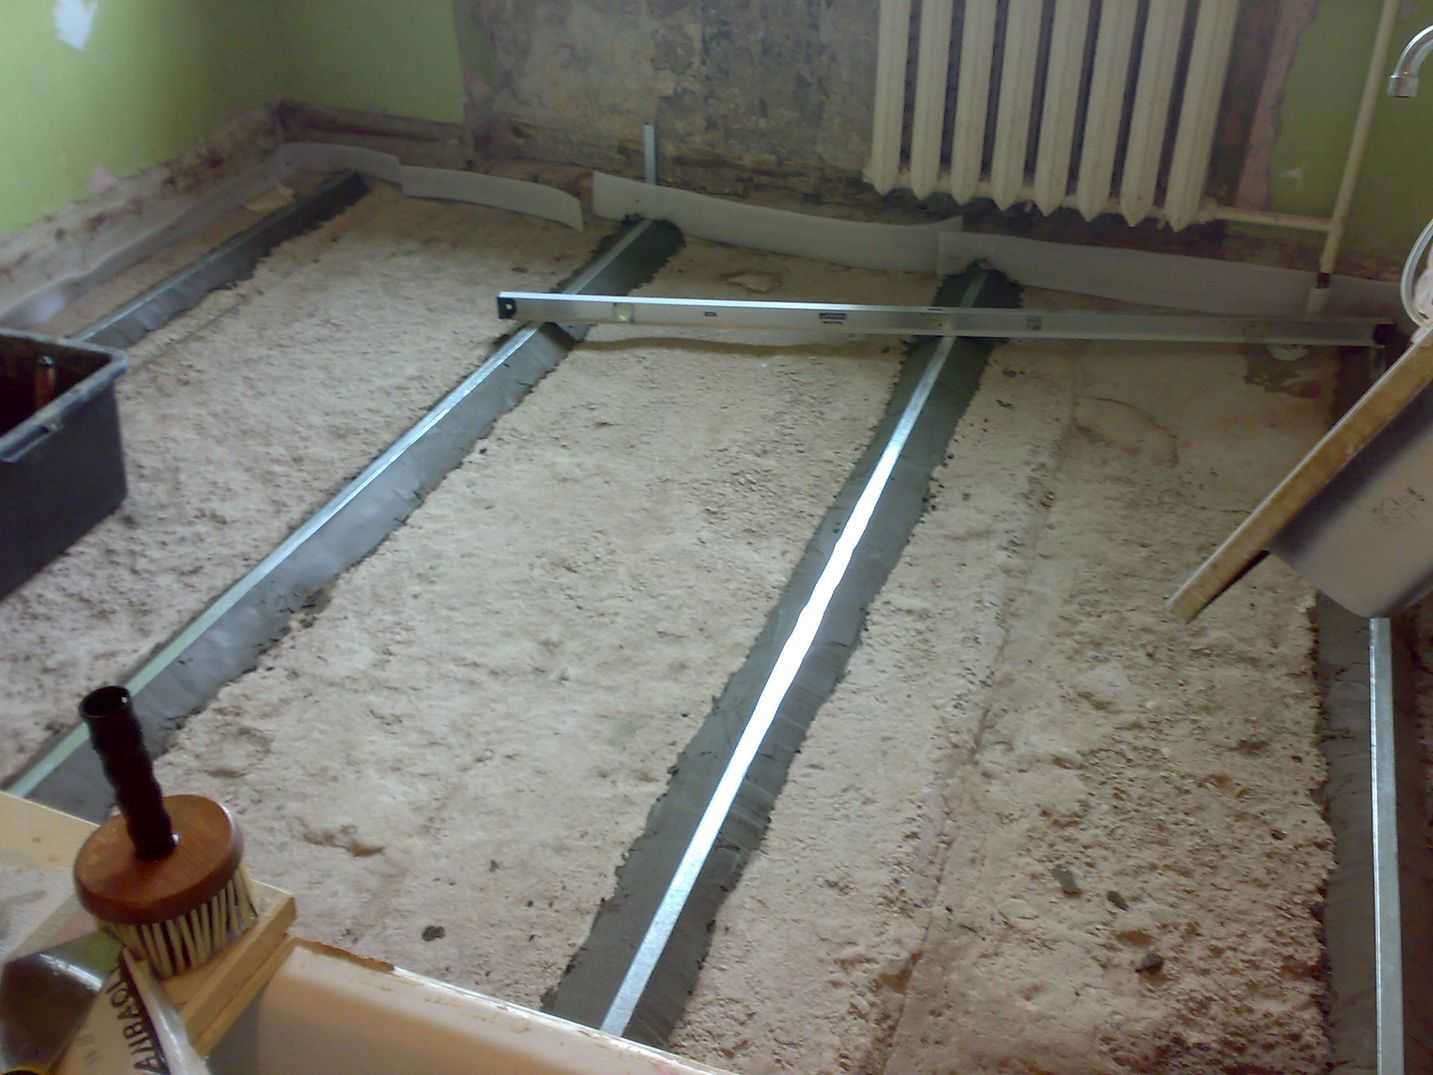
After all the screws are installed and exposed in a single plane, heaps of mortar are also applied next to them. But not the one that will be used for the screed, but the one that sets faster - you can also use the plaster based on alabaster. Next, you need to set the beacons in the same way as for the walls: press down to the caps, check the level.
A faster way to install screed beacons
To implement this method, it is necessary to have a level (electronic plane builder) and gypsum plaster (you can take Rotband or any other). Determination of the screed thickness is similar. Only since there is a builder, there is no need to paint something on the walls. We put only one mark.
Installation of beacons is possible without self-tapping screws - only for solution
We lay out the lighthouse strips on the floor at the selected distance. Along the planks at a distance of about 20 cm from each other on the prepared floor we lay small cakes from the plaster mixture. Put a beacon on top of them. Turn on the plane builder and unfold the horizontal plane approximately at the level of your belt (it is convenient to work). We take a flat bar, go to the place where there is a level mark for the screed, align the lower end of the bar with this mark. Above we see a glowing trail from the plane created by the level, we make a mark on it. With this bar it will be possible to set beacons at this level. We put the bar on the lighthouse, press it down until the level beam is aligned with the mark. Let's move on. So we go along the entire lighthouse bar. We set up the rest of the beacons using the same technology.
It turns out really faster, but there are two points. The first is that a level is needed, and the normal ones are pretty decent. Second - there is no hard stop, which makes it easy to push the beacon lower than it should. You have to tear off, level the piles, start again. Until you gain experience, it will also take a lot of time. But the way is quite your own, if you know how to work carefully.