How to make a wardrobe for a balcony or loggia
According to the old tradition, things are kept on the balcony and loggia that did not have a place in the apartment. And so that these small spaces do not turn into a landfill, a good storage system is needed. The most practical option is a built-in wardrobe on the balcony or loggia. Often all that is required is to make construction sites on which shelves will be held and doors to be installed. You can easily cope with such a task with your own hands, even with a minimum of skills.
The content of the article
Materials and constructions
The built-in closet design can be divided into two parts: a frame and doors. Sometimes, if a side rack is needed, there is also a sheathing.
What is the frame made of
Cabinet racks are most often made of timber. The section is approximately 40 * 40 mm or 50 * 50 mm. Not a bad option, but the unheated balcony can be humid. And wood is a material that changes size depending on humidity. There is one more point: timber is not cheap in all regions.

For the frame, mainly two materials are used: a wooden beam and a metal profile
There is another option - to assemble a frame on a drywall profile. Any sheet material such as Chipboard, plywood etc. If you take galvanized, then no moisture problems are terrible.
What to make shelves from
The easiest way is to cut the shelves to size from sheet material. It's all the same chipboard - plain or laminated, thick plywood, sometimes you can use OSB, but shelves for weights should be desired on a wooden frame.
They can be attached to places prepared on the frame - installed bars or self-tapping screws.There is an option - with corners directly to the wall. But it is good if the walls can be drilled with self-tapping screws at once, otherwise it will take too long to plant each shelf on the dowels. Then it is easier to assemble the frame and attach it to it.
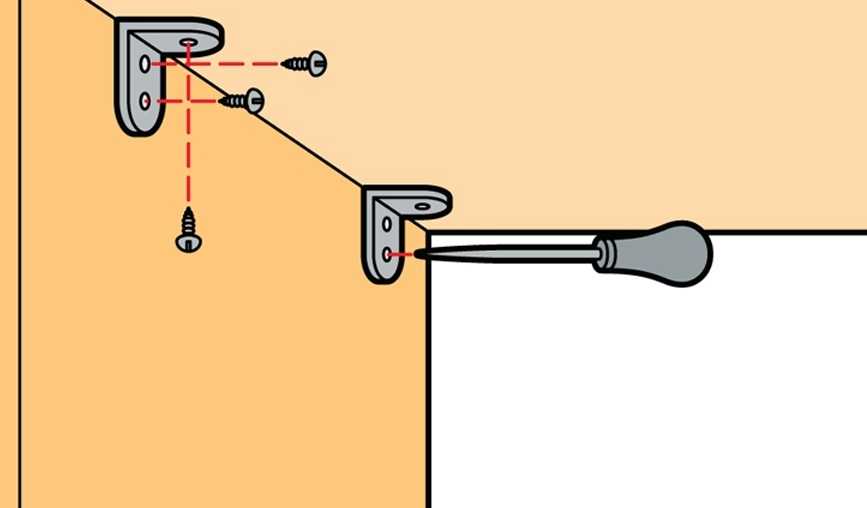
Fastening shelves to corners
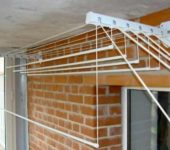
There is an even easier way to make shelves on a balcony or loggia: use metal guides and brackets for them. These systems are used in stores, but for this case they are more than convenient: the height changes easily with a fairly small step. The brackets are simply outweighed by other holes.

Convenient system for balcony shelves
With such an organization of everything, what is needed is to put the doors. So the wardrobe is ready on the loggia or balcony.
By the way, you can make something similar from wooden blocks: recesses for the shelves with a certain step. You can make cuts with a saw and then remove with a chisel.

Example of height-adjustable shelves for a balcony cabinet
Often, shelves are made from cut pieces of boards. Since the width of the balcony is usually small, all sorts of trimming are used. Only so that they do not lose their appearance for a long time and are easily wiped off, they need to be covered with something. And although the glazed balcony and loggia are more related to the interior, take paints and varnishes for outdoor work, as well as protective impregnations. They contain substances that protect against ultraviolet radiation. Without them, in a couple of years, the wood will look miserable.

Shelves made of boards on the balcony are most often made
So that when working in the apartment it does not smell too much, you can take a water-based varnish. It does not create a film, but dirt is not absorbed into the surface.
What are the doors
There are three types of doors in the closet on the loggia or balcony:
- ordinary swing;
- sliding - like a wardrobe;
- roller shutters.
All these doors can be for the entire height of the cabinet, but it is more convenient to divide it into two or three parts, and hang their own doors on each.
Doors can be hinged
The most inexpensive are swing doors.Doors and hinges themselves are needed, and it is easy to "put" them in place by yourself. Sliding systems are more expensive. You need guides - top, bottom and side, as well as a roller system that is installed on the door leaf. But this option is attractive because it saves space.
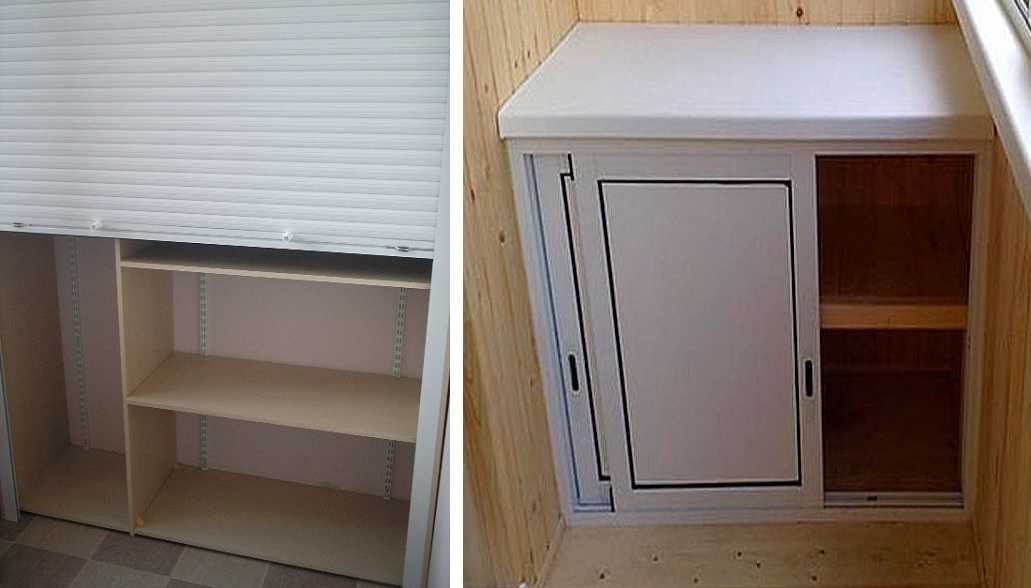
Sliding doors and shutters
The most expensive are roller shutters. But they are attractive in that they come as a ready-made kit, and the installation is basically “attached” to the purchase.
See the video on how to assemble sliding doors for a balcony cabinet. Much will become clear.
How to make a balcony cabinet on a wooden frame
First, cut 4 racks to the required cabinet height. If you plan to make it all the way to the ceiling, measure each one separately, and do not cut the same ones. The heights are often decently different. The cut racks are attached. The distance between them determines the depth of the cabinet, but most often depends on the available space. They use as much as there is.
If there are three blank walls, no problem. The bars are attached to the dowels. They put the bar to the wall, check its verticality, drill holes through and through for fasteners in the right places. The bar is removed, plastic plugs from the dowels are inserted into the holes in the wall. After installing the bar in place, screw it to the wall with screws.

Examples of fastening racks
If you make a cabinet on the balcony, one side is attached to the wall, and the other - to the frame elements or only above and below - to the ceiling and floor (we use reinforced metal corners).
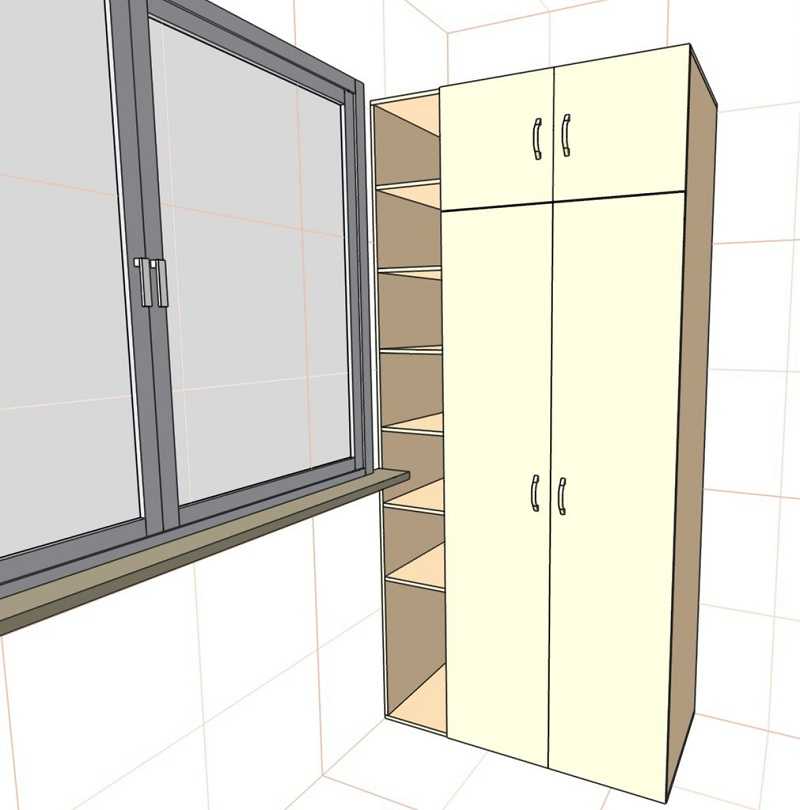
Another option for a similar case - if you need to close the window glass with something - put a wall near the window (for example, made of chipboard), fix it at the bottom and top with corners to the floor and ceiling, and then attach it to the wall (and to the stream and the floor) frame bars.

Put a side panel made of chipboard near the glass, and attach the shelves to it
Then transverse bars are nailed to the racks. They give the entire system a high degree of rigidity and the shelves will rest on them.
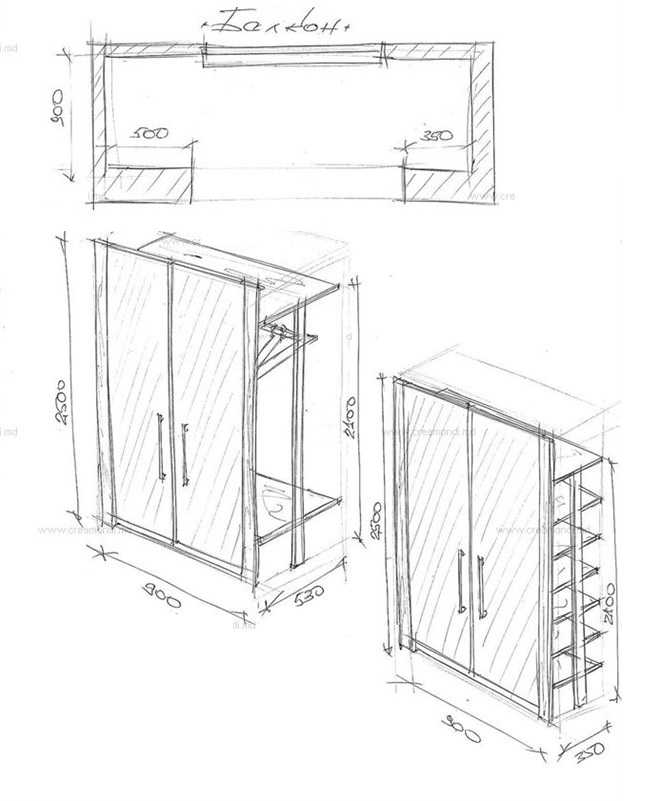
Option with the removal of shelves up to the glass
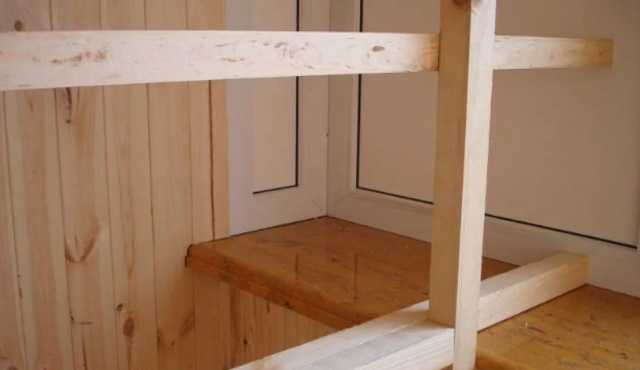
Larger node
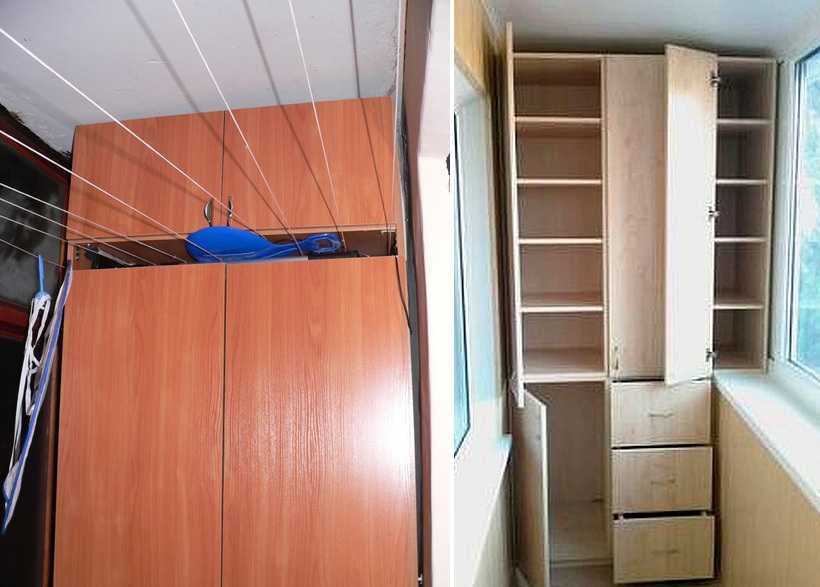
So that the place near the glass does not "walk", this part is also occupied by shelves. Since the width of the furniture is different, two separate small cabinets are often made: for the lower and for the upper half. Often they also differ in depth: the lower one can be made wider and heavier and larger things can be hidden there. In this case, the upper cabinet can be made less deep. In this case, the top of the lower cabinet can be used as a worktop.
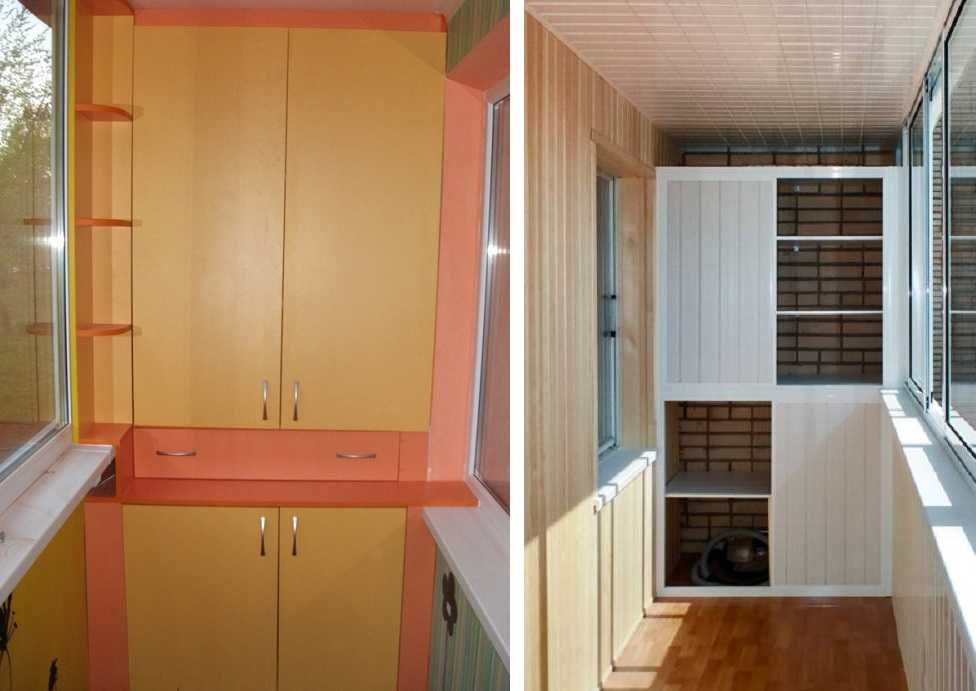
Can be made of two parts of different widths, and maybe depths

Another version of the cabinet on the loggia of two parts and an example of its use
Further, it is only a matter of what and how to make the doors. The best option is to make sliding ones. Their diagram is shown in the figure. There are a lot of spare parts, but you can figure it out.
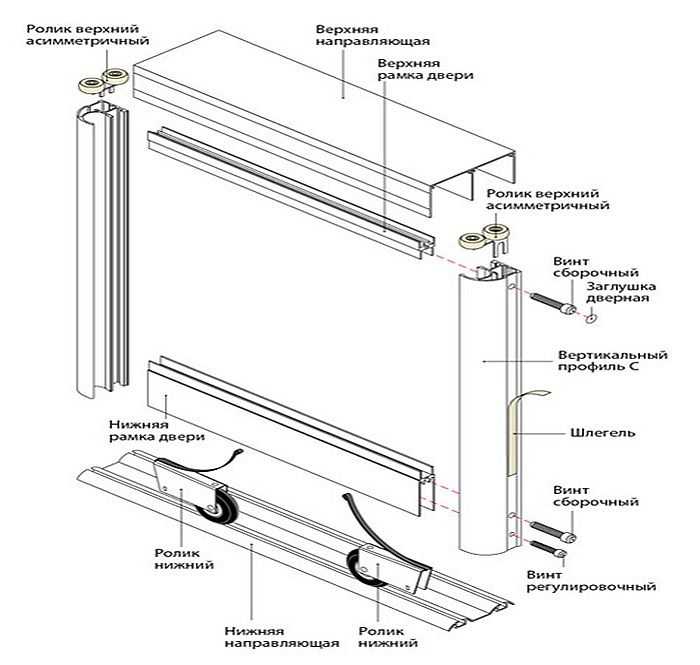
Complete set of compartment doors
Corner wardrobe on the loggia: photo report
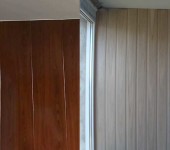
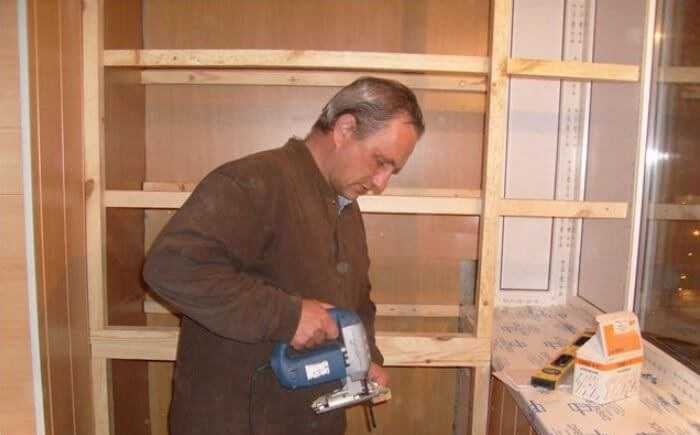
First, the loggia was lined with clapboard. Immediately after that, a wardrobe was made from the same lining. It was decided to want a corner, so as not to close the window too much. On the opposite side, the wardrobe takes up almost the entire width, slightly short of the balcony door.
The racks were not fixed. They nailed the bars on the ceiling and to the floor, the walls to them. They turned out to be short - three planks. Planks were nailed to the wall paneling, on which the same paneling was laid, cut out according to the resulting cabinet shape.
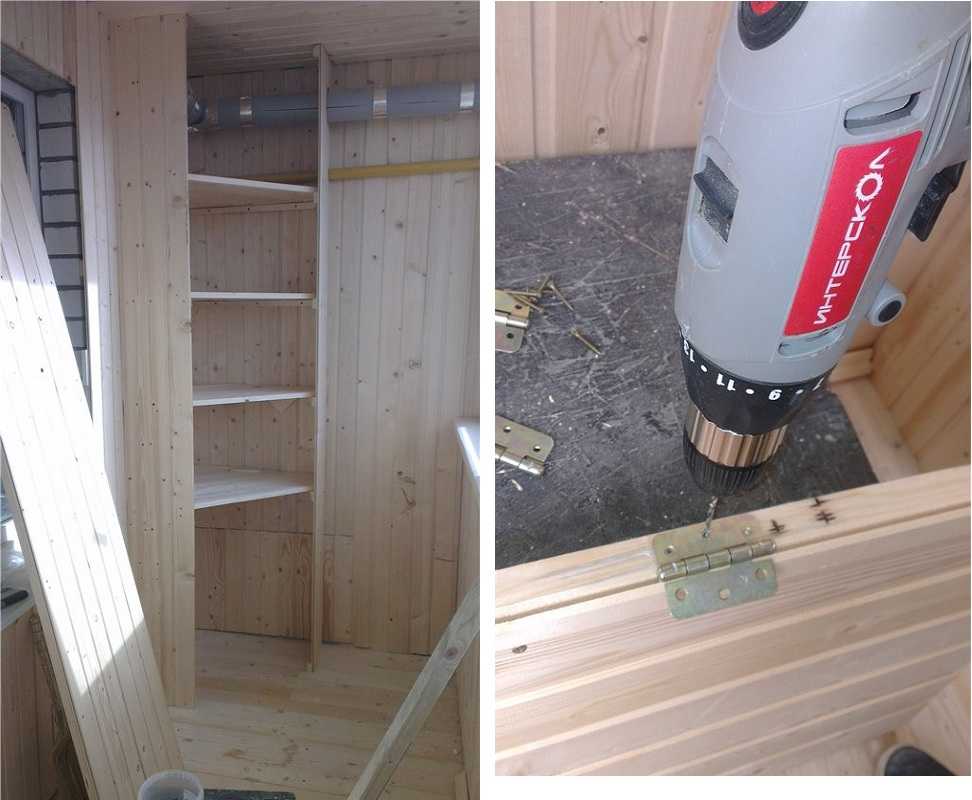
Stages of construction of a corner cabinet from lining
Above and below the doorway, a lining was stuffed across the opening. We measured the remaining distance, subtracted 1.5 centimeters for inaccuracies and cut the lining on the door of this length. It took six of them. They knocked them down with the help of four cross bars and knocked them into the doors. They were hung using regular hinges.
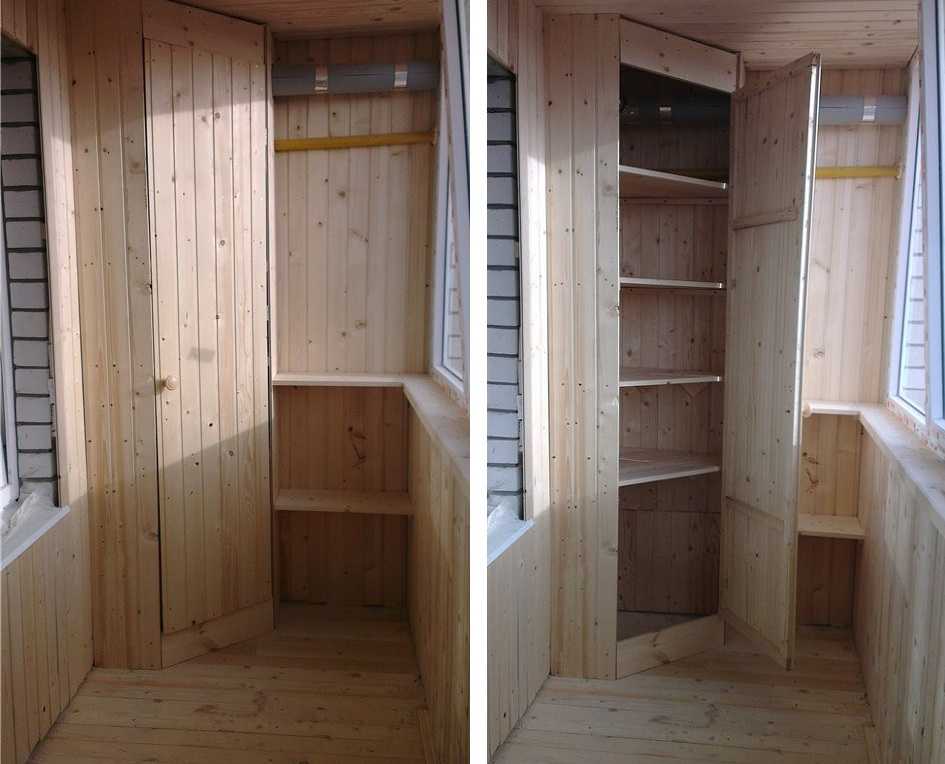
They hung the doors, made the shelves below
Two shelves are nailed in the free space between the cabinet wall and the balcony trim. A little later added a little higher with rounded edges. The last step was to nailed the plinth under the ceiling and on the floor (close the cracks), then sanded the lining with sandpaper and painted it with stain.

The result of work and after three years of operation
Drawings and diagrams
It is impossible to talk about any standards regarding cabinets for balconies. And the size and configuration, and the glazing is different for everyone. Therefore, even the size of the shelves has to be determined "in place". But we will give a few examples that you can change as you need.
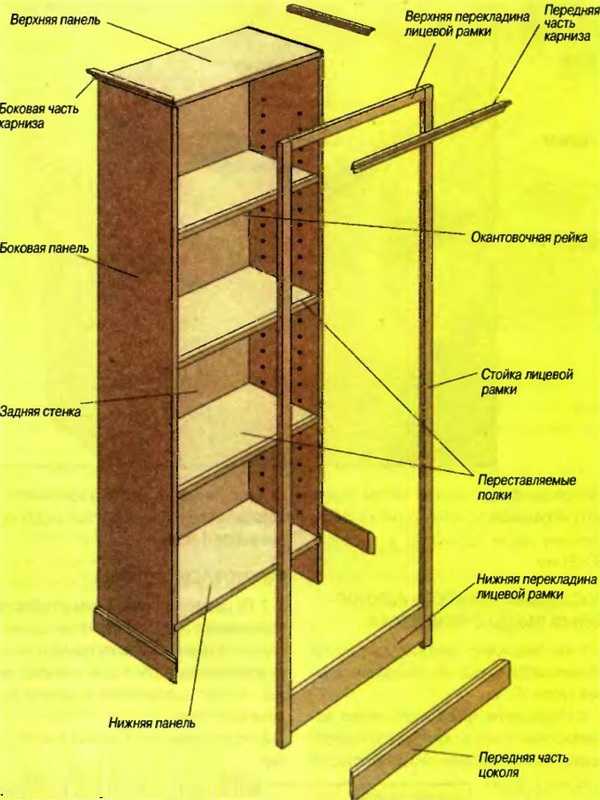
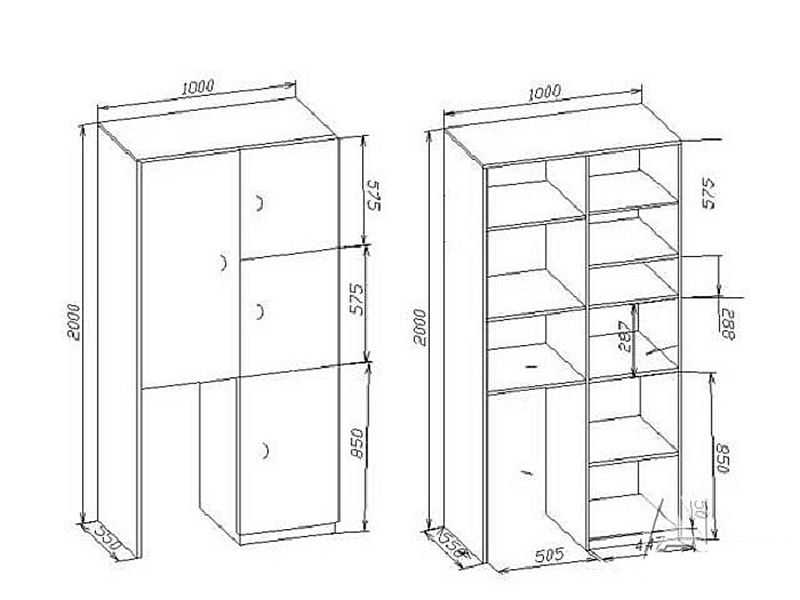
A cabinet made of sheet material (OSB, plywood, chipboard or just chipboard)
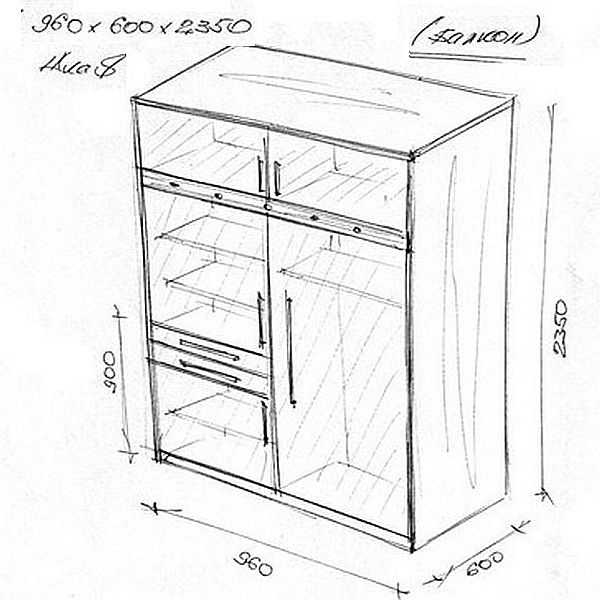
With a department for bulky items
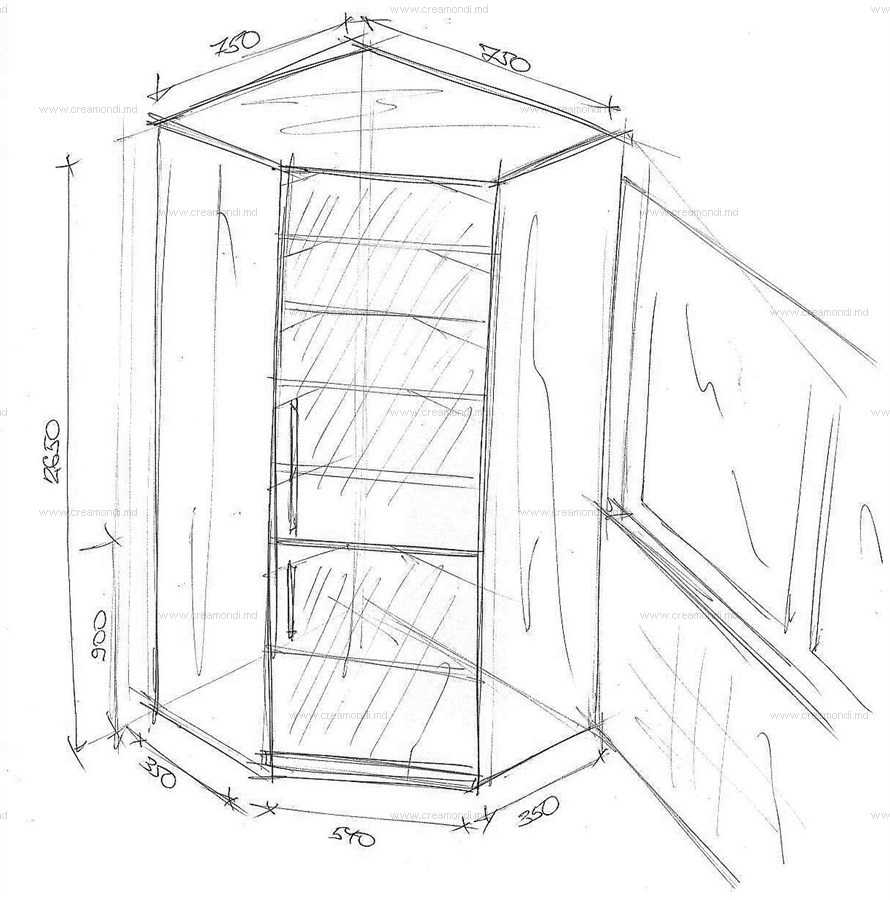
Angular
Different depths and with different filling (on both sides of the balcony)
Many shelves
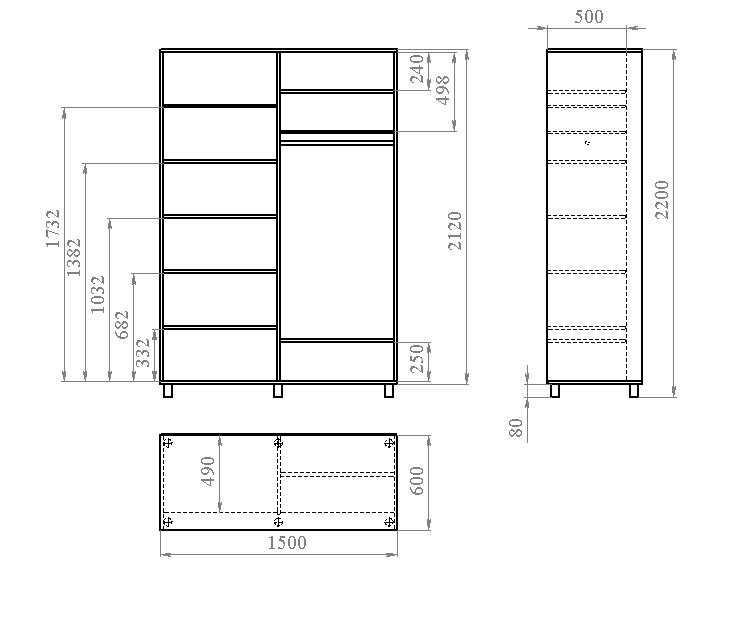
Another variant of the layout for sliding doors (the depth of the shelves is less by the width of the lower rail)
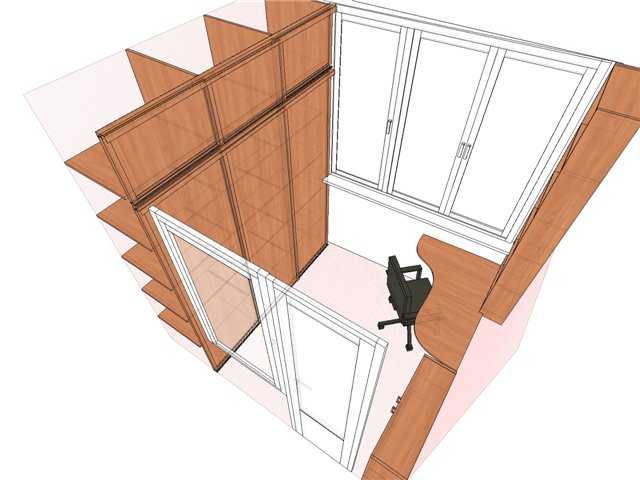
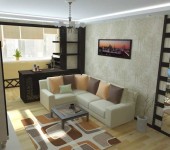
Habitable balcony
Another option with open shelves and two rows of swing doors

The design of a folding table, maybe someone will need it)))
Photos of finished cabinets on the loggia and balcony

It remains to hang the door

Wooden cabinet on the balcony

With full glazing of the balcony, you can make a wardrobe up to the windowsill
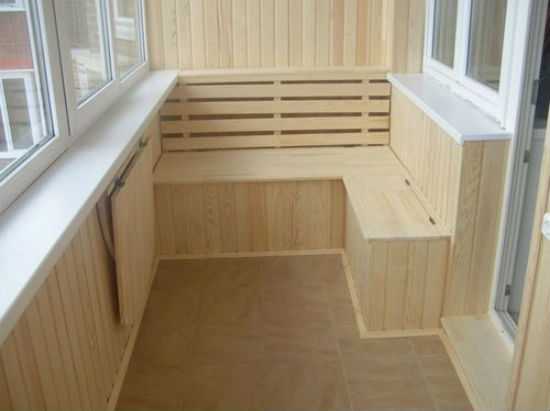
Not quite a closet - a seat with a drawer underneath
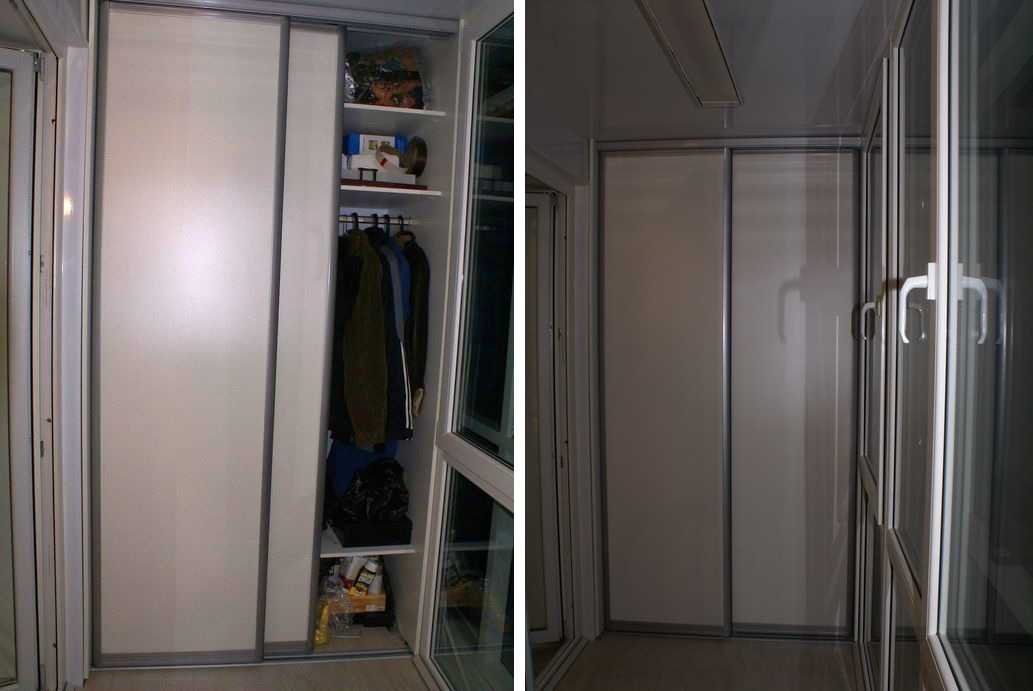
Sliding wardrobe on the balcony for storing things
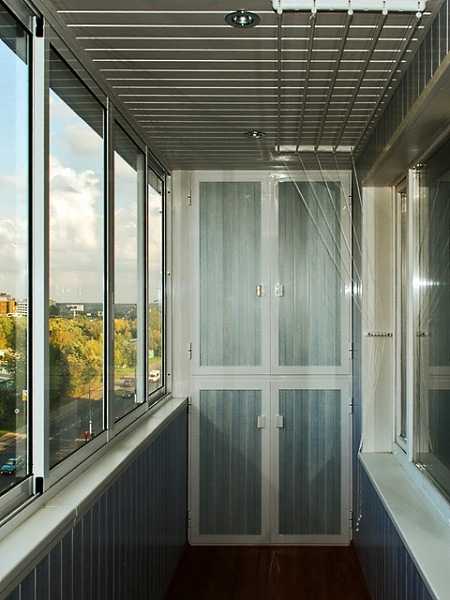
Plastic wardrobe on a loggia

Height to the windowsill, so as not to spoil the view