How to make a bar counter in the kitchen with your own hands
Once upon a time, bar counters were used only for their intended purpose: in a drinking establishment to sit down and have a drink. Somehow they migrated to the kitchen and settled down there. The detail turned out to be very convenient, especially since it has undergone noticeable changes and the modern bar counter for the kitchen has a varied design. Its variants can differ greatly in design and style, and their functional purpose can also be different.
The content of the article
Purpose and types
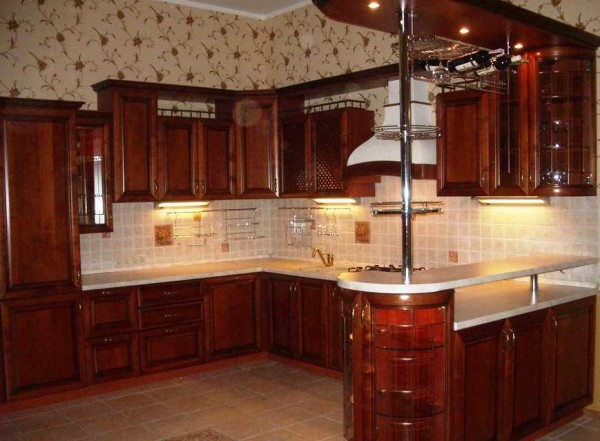
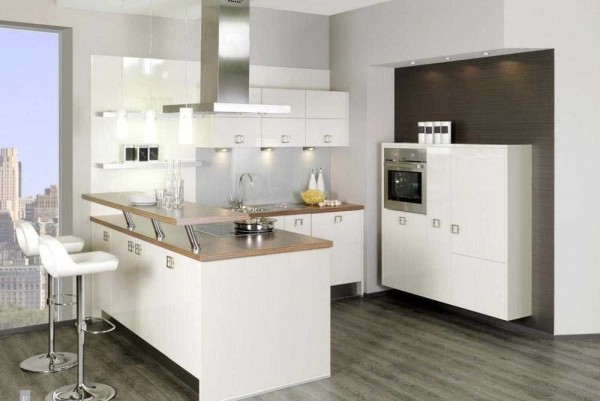
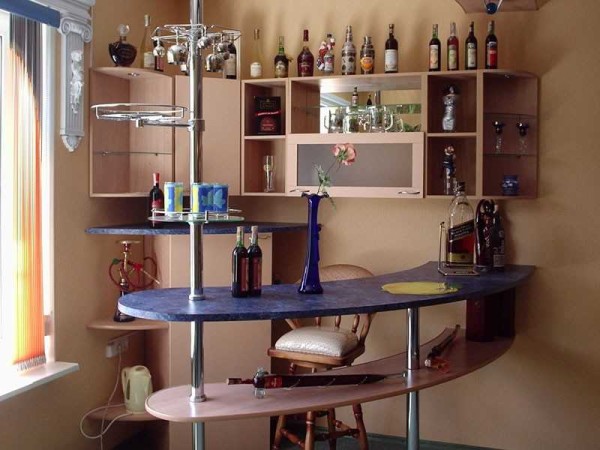
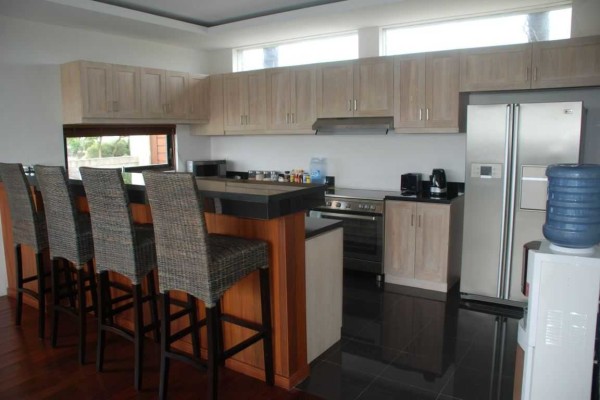
If the area of the kitchen allows, the bar counter in the kitchen is set for its intended purpose: to sit down for a cup of coffee or something stronger, to have something to eat. Then her “equipment” is appropriate: holders for glasses, wine glasses, wine glasses, next to the shelf / holders of juices, bottles, etc. They put it with one edge on a wall or edge kitchen set, sometimes arranged in the form of a skeleton - in the middle of a free zone.
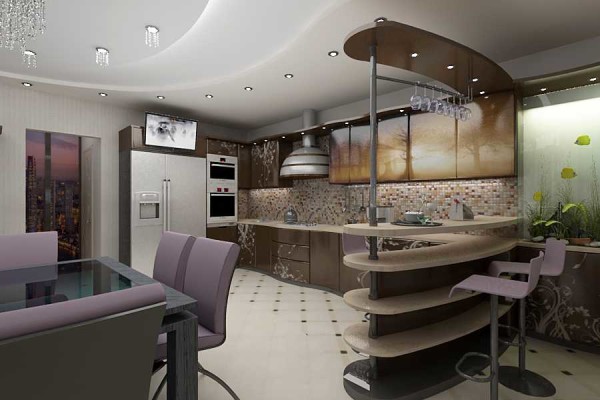
Barn counter in a large kitchen
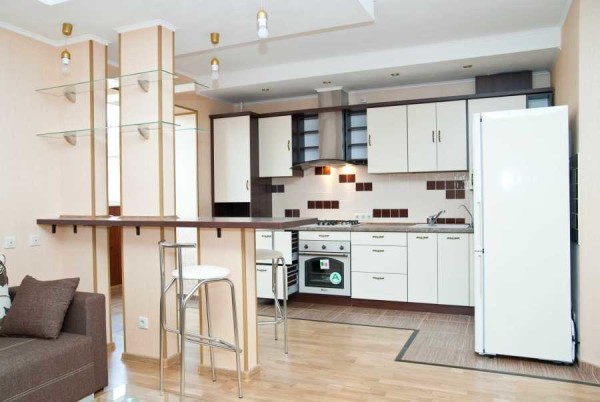
In small kitchens, it is often multifunctional. It can also be used as a divider into zones - a dining room and a kitchen; in very small areas it is often used as a dining table. Moreover, it can be located non-standard - against the wall.
Bar counter along the wall
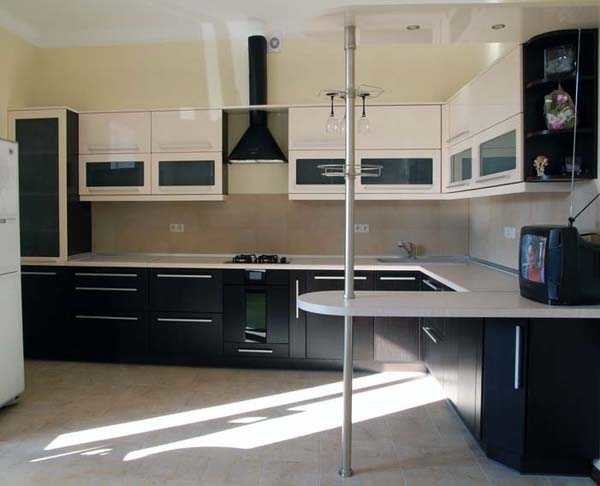
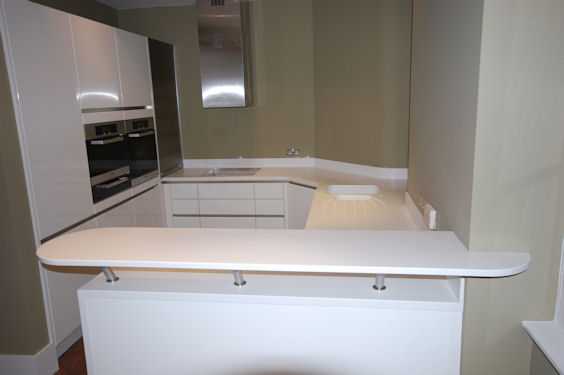
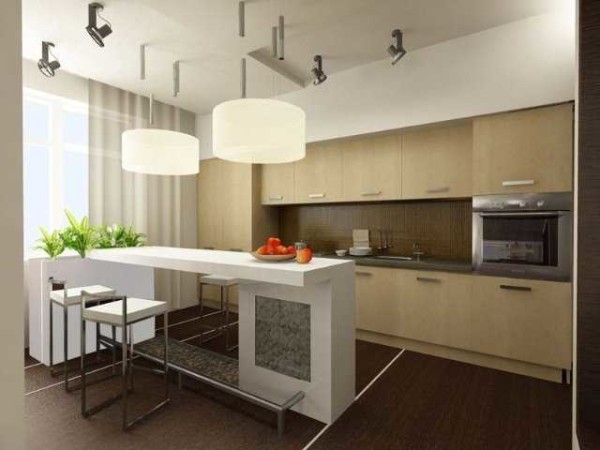
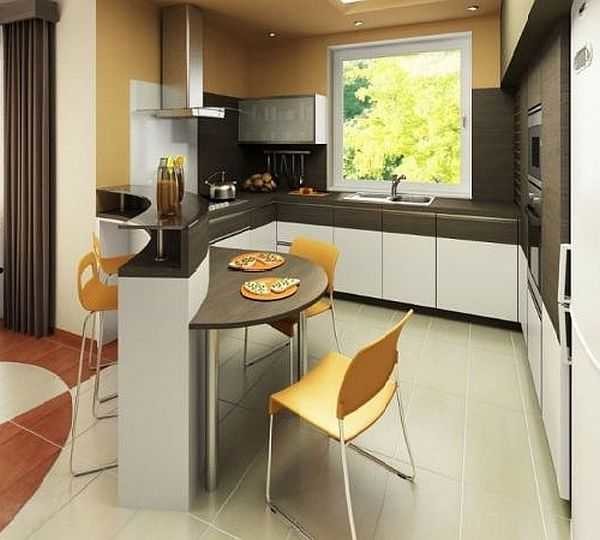
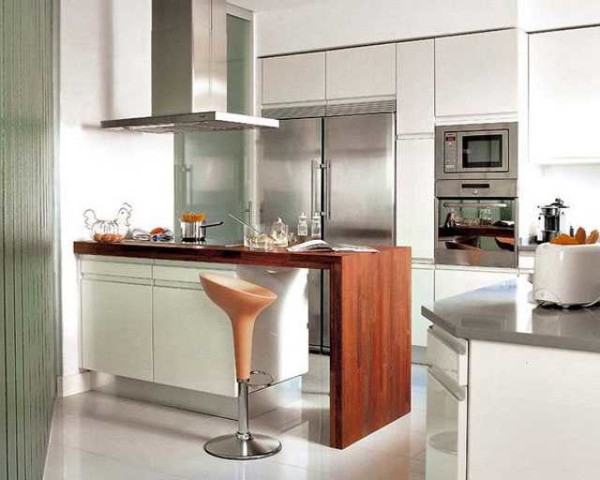
In medium-sized kitchens - 10-12 meters - it is often performed in the form of a peninsula - a small ledge on the side. In order to more efficiently use the space, the space under the countertop is taken under the shelves or cabinet. This design is very simple - the countertop of a bar counter often rests on several pieces of straight or inclined pipes fixed to the cabinet table.
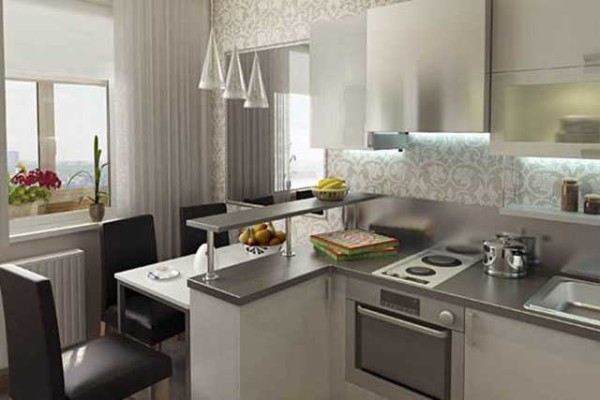
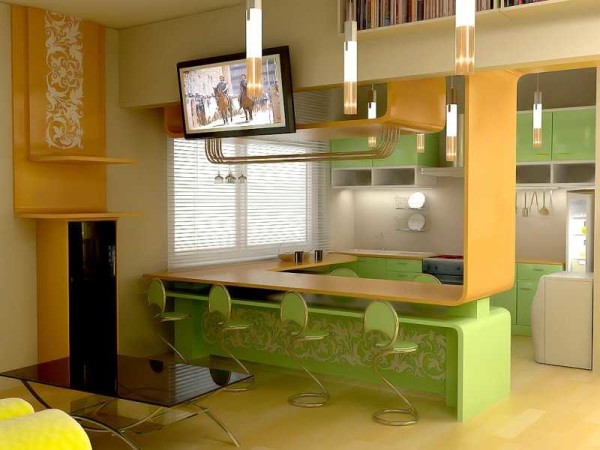
Bar counter in the kitchen - peninsula
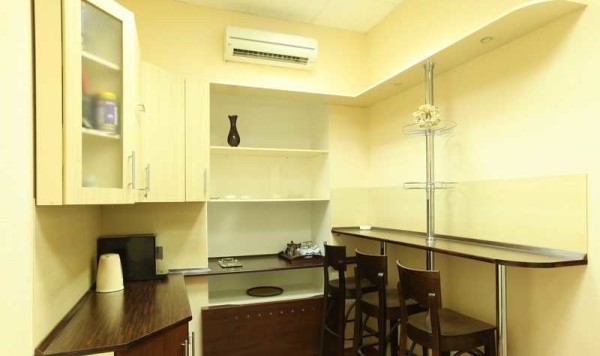
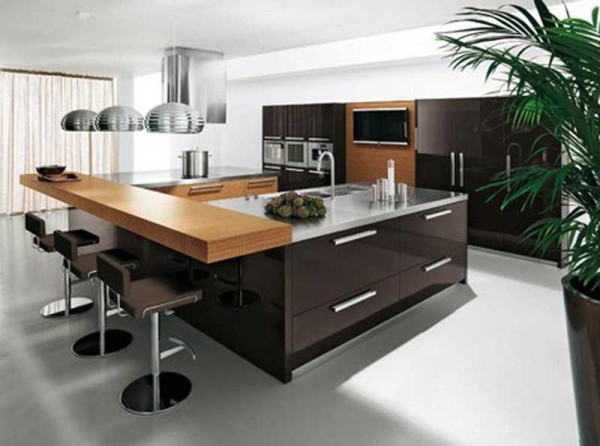
Such multi-stage kitchens have recently become popular: it is more convenient to perform different operations in the kitchen on surfaces with different heights.
Two surfaces one above the other
The surface of the stand is slightly shifted relative to the table
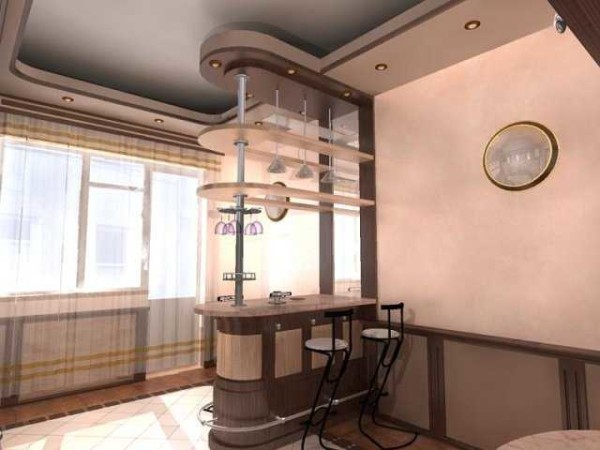
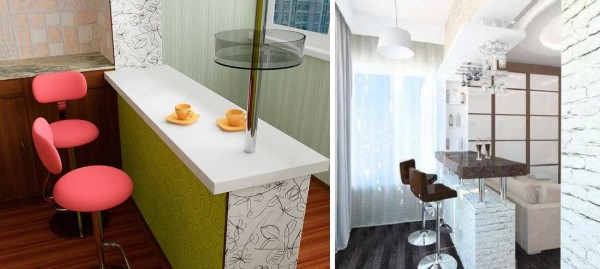
But, nevertheless, more often a bar counter for the kitchen is present in studio apartments to distinguish between two zones: kitchens from the living room or from the hallway - who has what is combined. Moreover, it is often a continuation of the desktop-island or peninsula.
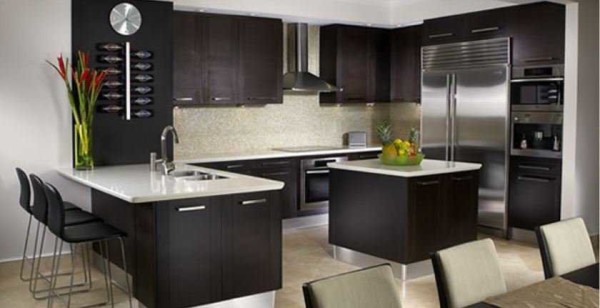
Bar counter for the kitchen as an extension of the island table
They also do it in the form of a partition. In this case, the base is most often made of plasterboard, and the surface is "attached" to it - on top or on the side.
Plasterboard bar-partition

This option is not difficult to do.
In general, there are many options, variations and different types. You adapt the idea that you liked under your conditions, and you can start implementing it.
Dimensions and dimensions
There are no strict rules on this score. There are some recommendations that are violated in about half of the cases. The recommendations only apply to the height and width of the tabletop:
- It is customary to make the bar counter 1.1-1.2 meters in height. Then special high chairs are placed next to it.
- In width - at least 30 cm, optimally 50-60 cm. Do not make less than 30 cm: even a small plate on such a tabletop will be in danger. And it’s just uncomfortable: neither put your elbows, nor really lean on your elbows.
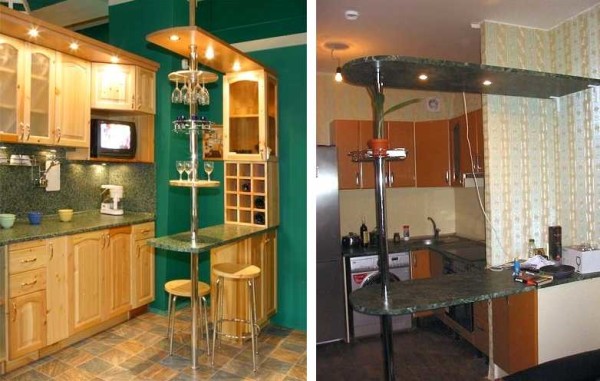
The length, shape, number and shape of the legs are all at your discretion. By the way, about the legs. The traditional racks that were in drinking establishments are a tabletop on a pedestal. But for the kitchen, for some reason, the countertop on one pipe from floor to ceiling is considered "classic".
Something like such a rack is considered a classic in kitchen sets.
By the way, it is practically not used in this form. More functional counterparts with wardrobes and cabinets prevail.
Bar counter for the kitchen: stages, manufacturing methods, photo reports
The easiest option in execution is precisely the classic one: a tabletop, attached with one edge to the wall or furniture, and with the other resting on a pipe. With a countertop, there are options:
- Make from a wide board, preferably not coniferous - their wood is too soft.
- Order in the same company that made the kitchen set. If you bought a ready-made one, you will have to look for similar material from the photo or carry a small spare part with you around the workshops to demonstrate what you need.
- Make it out of thick plywood, then decorate it with something - stick plastic, tiles, mosaics.
Everything else is better to choose in a store that sells furniture accessories. The choice is very wide, and the range of prices is generally amazing. For example, a pipe of the same diameter can cost three times more. But this difference is not without reason. With cheap Chinese pipes / nets / baskets, chrome plating begins to crumble after a while. German accessories have a very high price tag, but a lifetime warranty, the Poles are in the middle both in price and quality. The choice is yours.
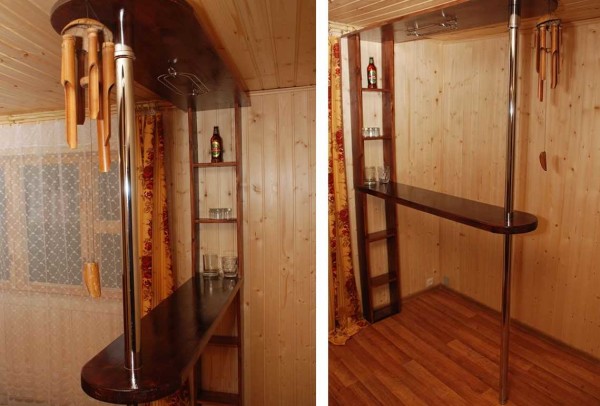
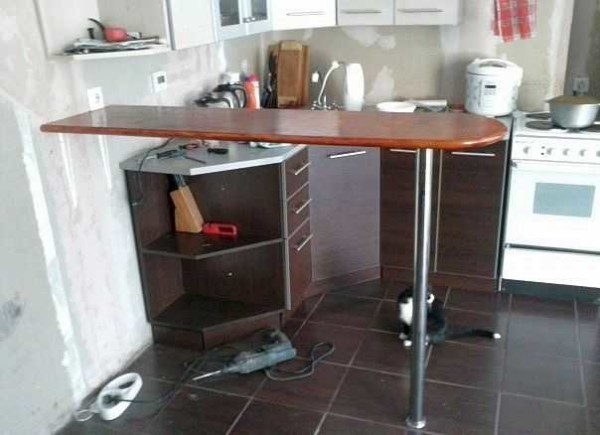
Homemade bar counter for the kitchen from the board
The photo above is a homemade bar counter made from a thick board. It rests on one side on a shelf attached to the wall (also made of inch boards). The second leg is a traditional pipe. A hole of suitable diameter is drilled under the pipe in the body of the countertop. A nozzle-stop "fastening ring" is installed on the pipe under the table-top, the hole is closed from above with a decorative ring. There is also a "thrust bearing" or universal pipe fastening to the floor and ceiling, as well as various holders and shelves for it.
If the tabletop is attached directly to the wall, corners are usually used for these purposes. You can take reinforced, and choose the color based on the finish. But this type of fastener is installed so that it is not visible - stepping back from the edge a few centimeters. You can put several small corners, or one solid one.
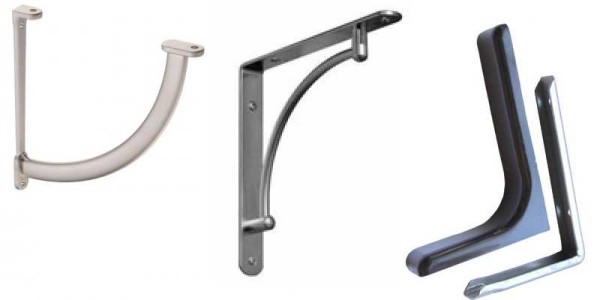
Shelf holders can be placed under the worktop
If you decide to make a bar counter in the kitchen along the wall, you can use decorative brackets for the shelves. Their bearing capacity should be enough for the countertop, especially since you can put several pieces. An example of assembling a bar counter of a simple design with a pipe in the photo below.
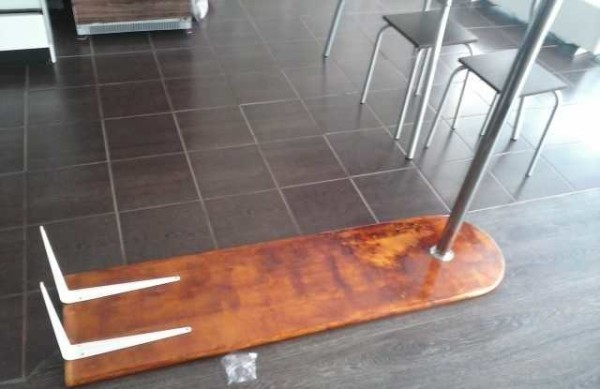
Photo report number 1: a homemade stand from a table top and a pipe
The table top was cut out of the window sill (array), the edge was rounded, sanded, toned and varnished. Spare parts - bar leg, brackets and a fixer to the floor - were purchased from the furniture fittings department.

This is the original data
We fasten the stop to the tabletop, and the corners to the edge. Everything sits on self-tapping screws with a flat head. Work takes 7 minutes.
The main part is assembled
Having attached the assembled stand to the wall, mark the places on the wall where you need to install the dowels. On the floor, we circle the pipe with a marker: we will put the thrust bearing on this mark. We mount the stop for the rack using the marks, put the dowels into the wall.
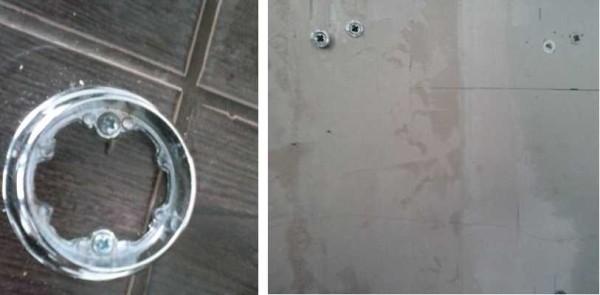
Preparatory part
We put the stand in place, fasten it with screws. All. Done.
Simple bar counter assembled by hand
Bar counters with shelves
If you don't like the construction with a pipe, you can do without it, but you will have to remove the upper part, which is located under the ceiling. Instead of a leg, for example, you can make the same shelf as near the wall. The view will immediately become more dynamic and modern.
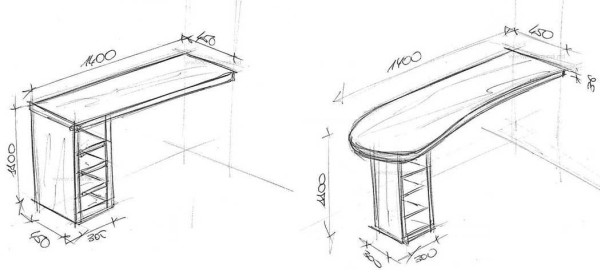
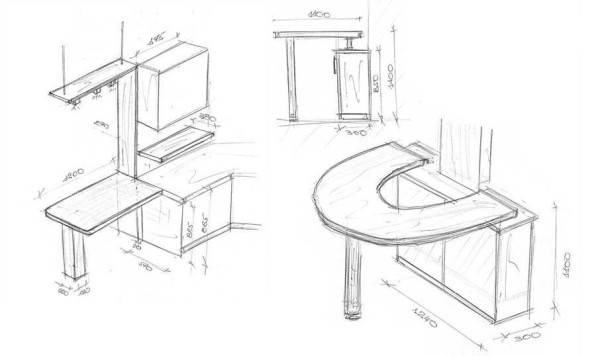
Sketches of easy-to-manufacture bar counters
And in general, the entire structure can be assembled from wide boards, joining them at right angles. By looking at the photo below, you will understand what it is about.
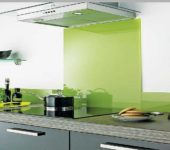
Bar counter for the kitchen in a modern style (for minimalism and high-tech too)
Broken lines generally fit better in modern interiors.If the kitchen is in the style of minimalism or high-tech, then the classics are hard to fit there, but something consisting of broken lines will look very good (a few sketches in the picture below).
Bar counters for the modern kitchen
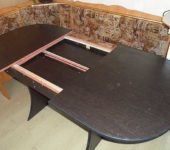
A slightly more traditional version is shown in the photo. This made him no less interesting. A non-standard approach, even in small doses, significantly changes perception.

Bar stock option - table
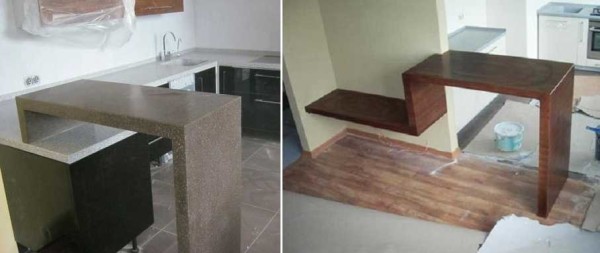
Bar counter on the base
All this we considered options without reason. But the tabletop can be attached to some kind of cabinet. If the table top is exactly above the table surface, take a pipe and standard fasteners to horizontal surfaces. If, as in this case, the surface of the bar is shifted, there is a special inclined fastener.
Attaching the worktop to the cabinet is easy and simple
The curbstone can be made by yourself. Actually, the main thing is to assemble the frame. It can be sheathed with furniture plywood or some other finishing material - it depends on the style of your kitchen. The frame can be made of wooden (dry) slats, or you can weld a metal corner.
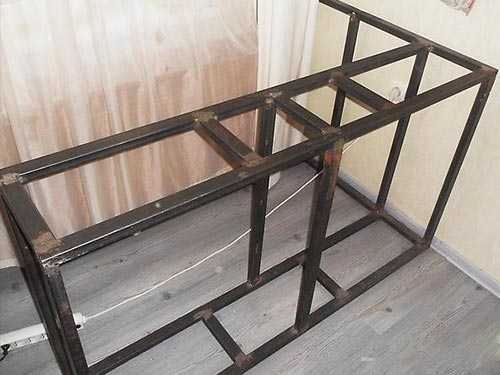
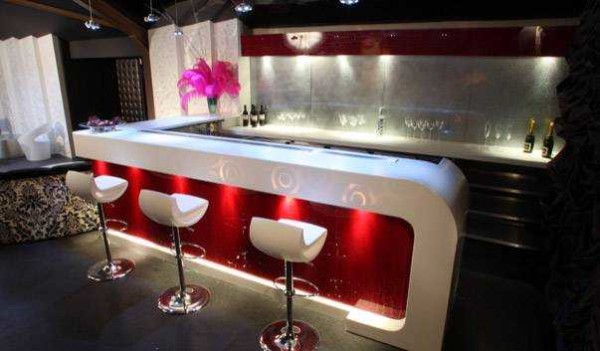
You can dance on such a rack
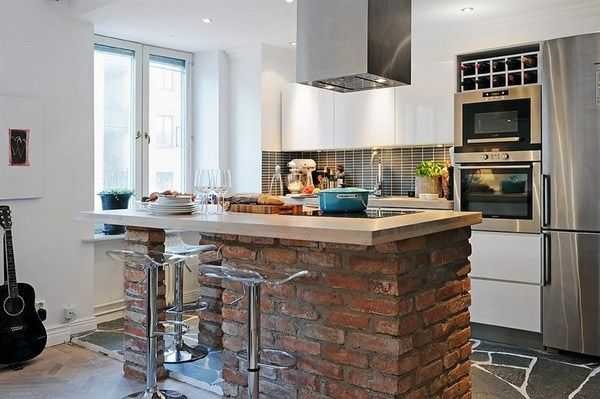
As an option - to collect from profiles for drywall, sheathe them or GVL. Another option is to fold the brick base. But this, if the bearing capacity of the floor allows.
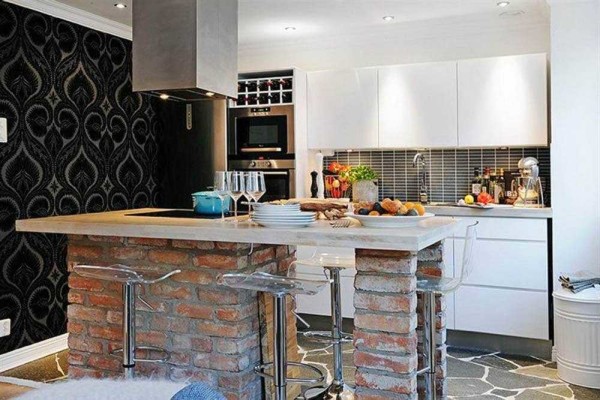
Loft style
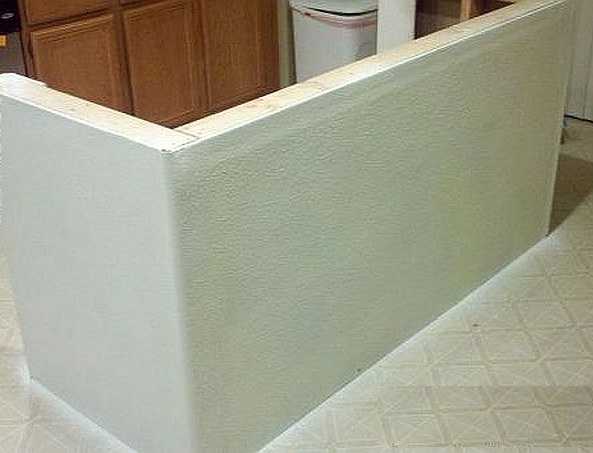
With a plasterboard base: photo report No. 2
Plasterboard base device is often chosen. The material is inexpensive, the technology has been tested, the mechanics are familiar, the result is at least good. No news in the order of work: we assemble the frame. In this case, wooden blocks are used, but it is also possible with the use of profiles.
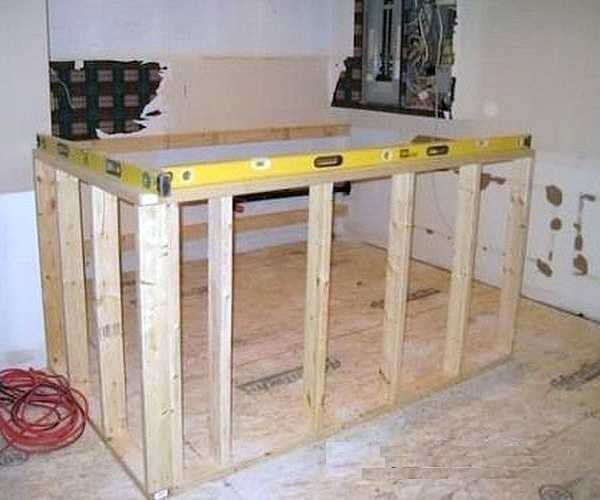
Assembled frame
The main thing is to observe the verticality and horizontalness of the planes, to put the racks exactly at 90 °. Everything is checked by a good building level, it is better to track verticality with a plumb line: it has no error. When the frame is assembled, it is sheathed on both sides with gypsum cardboard or gypsum board.

Drywall sheets mounted
Traces of screws, corners and joints are putty. Further, it depends on the type of finish chosen: some require putty (painting with water-based emulsion), others not. In our case, textured paint was chosen, it is applied in a thick layer, and you can - directly on drywall.
Coated with textured paint
It remains to install a countertop on the bar counter. Choose which matches the rest of the furniture in your kitchen.
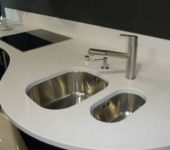
Photo report No. 3: Bar counter with sink
This was the first experience in creating furniture (and generally something worthwhile) with his own hands, as a result, some design flaws were made. The design turned out to be not the most successful, although there is no dispute about tastes.
Source materials:
- inexpensive countertops bought on sale;
- the remains of the cabinet from laminated chipboard;
- bars;
- a couple of purchased doors;
- plumbing stuffing: sink, siphon, mixer and the required pipes-hoses-fittings.
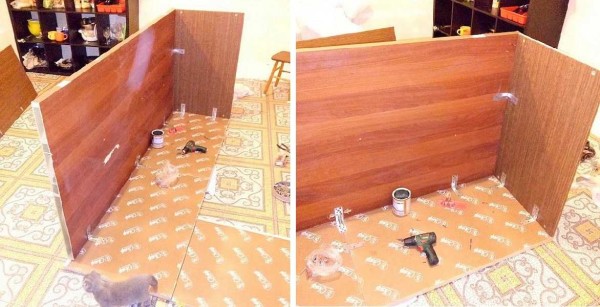
The tabletops are folded with the letter "G", connected by steel plates, sidewalls are attached
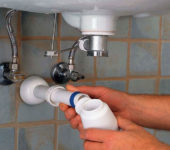
The installation and replacement of a faucet in the kitchen is described here.
The countertops are laid out face down on the floor. They are connected in the form of the letter "G" with the help of glue, with which the ends are smeared, and a steel strip with perforation, into which self-tapping screws are screwed. The strip, of course, is fixed at the bottom.
The sides were supposed to be refined (presumably with a laminate), so the remains of the household were used - an old door and a piece of a cabinet. They are screwed in with corners, aligned with the edge of the countertops. And this is the first mistake. And visually such a curbstone looks heavy, and it is uncomfortable to sit. The sides must be moved from the edge by at least 10 cm.
After the sidewalls were installed, the curbstone was turned over, put in a permanent place. All other work was carried out on site. A hole for the sink was cut out, the plumbing part was installed and connected.
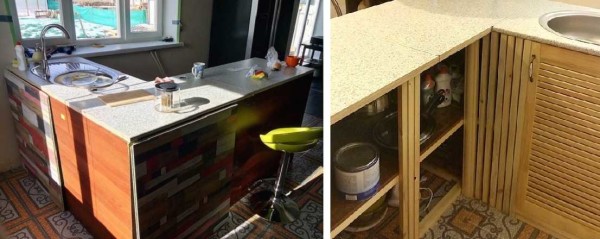
Front and back views
Slats are nailed along the floor - along the walls and slightly stepping back from the outer edge (an indent of 5 cm is made, 10 is more convenient), shelves are made. The cabinet on the sink side is closed with a door, the shelves on the left are left open. The space is partly finished with wooden planks.
At first, they thought to put several different "bells and whistles" on the pipe, but semicircular edges remained from the tabletops. It was decided to use them on the pipe. Panels for decorating balconies (purchased from Leroy) were used as an exterior finish for the curbstone. They almost came in size, and the remaining slots were closed with a twisted cord. As a result, a homemade bar counter with a sink cabinet looks like, see the photo below.
Bar counter for the kitchen with a do-it-yourself sink
There are also some remarks on finishing. First, the cord will soon be saturated with various liquids, will have a pale appearance and a strong "aroma". To postpone the appearance of the smell, it can be covered with something, even with the same PVA glue. Second, the countertops are simply docked. Water will get into the gap, various small debris will be packed. Even at the stage of "joining" the edges must be coated with a sealant (transparent, silicone, not acrylic). You can and should also process the edges of the cutout for the sink. Then the table top will not swell. The joints of the countertops can be finished with furniture overlays, they can be used instead of a cord. Another budget option is plastic corners and the same T-shaped strips.
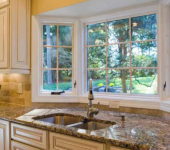
Bar counter for kitchen on the remains of the wall
If the kitchen is combined with a balcony, a piece of the wall remains. Place where the window used to be. If there is no desire to destroy it, you can make a bar counter.
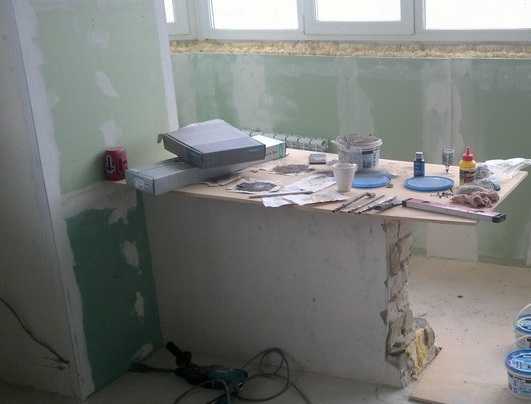
The rest of the wall, when combining the kitchen and the balcony, can be turned into a bar counter
There are two options:
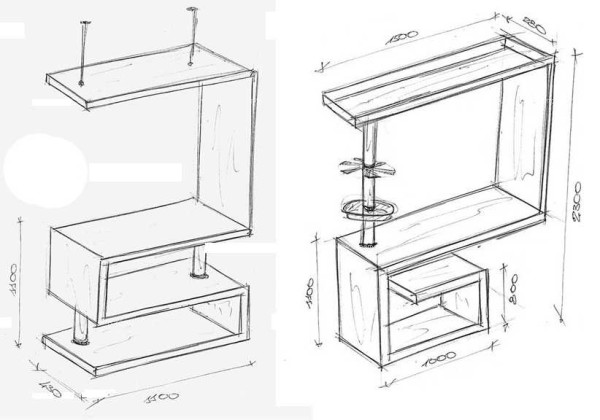
- Put the countertop at the same height. This will be another work surface or shelf. Above it, on pipes at a height of about 1.1-1.2 m, fix another plane, which will actually be a bar counter.
- Build / extend the wall to the desired height and place the countertop.
How can you arrange a rack on the remainder of the wall
Both options are good, but the one on the right is more practical: two surfaces in the kitchen are always better than one. Please note that the dimensions of the table top are larger than the width of the "leg". This is no coincidence: this way you can sit more or less comfortably without turning sideways.
And if you are not too lazy to remove this wall, you can do something more convenient - so that you can put your legs. An example is in the photo.
This will make it more comfortable to sit.
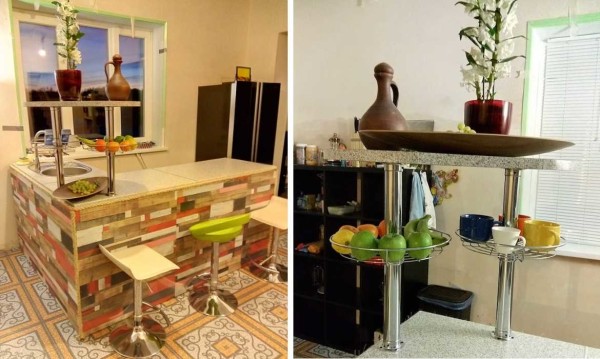
Photo design ideas
Separate corner
Desktop - as a base
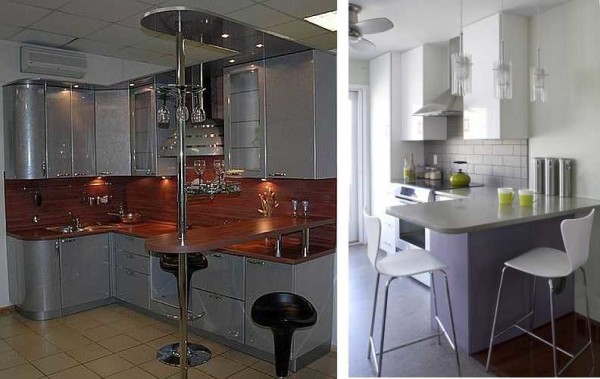
Photo of a bar counter in a small kitchen
Zoning option
Interesting lighting

As a base for a coffee table
In the spacious kitchen))
Bar counter made of brick or stone - stylish
Non-standard appearance and color
Bar counter in studio apartment
You can and dine
Two sketches for implementation
Bar counter for a small kitchen
Related Videos
If you want to put the bar counter on an open summer kitchen, the idea can be borrowed from this video. The guy made an interesting rack out of the snags and a thick board found in the forest.
Most often, questions arise about how to make a countertop for a bar counter. You can decorate it with mosaics. And how - see the video. In general, the technology of laying the mosaic is simple: on a special white glue, followed by grouting the joints between the tiles. It can be difficult to create a rough edge. Here's how to do it - watch the video.
Worktop glued from bars


Hello, we wanted to order a white bar counter, a picture with the inscription "It will be more comfortable to sit this way."
What is the cost and what is the production time?
Hello! Unfortunately, we do not trade in anything. The site is informational. You can print this photo and refer to the furniture that makes the furniture.
Now I know how to arrange a countertop. Thank you
Everything is sooo informative and useful !!! Thank you for the article !!!
Tell me, please, is it better to "fence" a rack better than GKL up to the floors, before the tiles and laminate, or after?
It is better to do a drywall bar counter before finishing work. At the same stage when you level the walls (if there is such a stage). This is about installing a frame, plating gypsum board, putty. And finishing can be done either simultaneously with the walls or immediately after. But before the laminate or other flooring is laid.
Thank you, there is such a stage. So we will do it.
Is the rigidity of the pipe sufficient, consisting of two halves of 1.5 m, connected by a standard coupling for a bar counter, or is it necessary to install a 3-meter pipe. a pipe in the space of the floor-ceiling for installing the table-top cantilever? Thank you.
Better put it by surprise. The worktop can be used without restrictions.