How to build a summer kitchen (40 photos)
Take a steam bath in the house in the summer, if you can spend time outdoors? Not a good idea. And cooking or spinning is even worse. It is much more pleasant and useful to spend time under a canopy or in a light, ventilated building, which many call a "summer kitchen". A summer kitchen with your own hands is easy to build, especially open options.
The content of the article
Open summer kitchen: views and photos
An open one is rather an open gazebo or veranda. A very good option for the warm season. Not in all regions, even in summer, you can spend a long time outdoors. Then they make closed summer kitchens - this is already a small house that can be built using any technology that seems most attractive to you.
Summer kitchen - extension
Let's start with open areas. If it is supposed to move the main activity to fresh air for the summer, it will be more convenient to attach the summer kitchen to the existing house. In this case, do veranda... Most often, they make it open first. The easiest way is to make a wooden extension. In a very open version, these can be simply pillars supporting the roof.
The simplest option is a few pillars supporting a light roof - a do-it-yourself summer kitchen is ready
This option is very good for the southern regions, where you can spend most of the year outside for as long as you like. For more northern regions or if this is a permanent residence, it is usually decided to make the extension more closed. First, they make railings, and then they often think about how to close the spans with something else: I want to extend the "period of use". As a result, the open summer kitchen becomes closed.

Open summer kitchen from a bar, attached to the house
The most common material for this kind of extension is wood. She is flexible, forgives many mistakes, which can later be corrected without analysis of the structure, therefore it is easy to work even without skills. It is also light, because the foundation for a summer kitchen made of wood can be made lightweight - columnar or pile, you can - with a grillage.
The second most popular material is brick or decorative stone. In the presence of "straight" hands and adherence to technology, and with this material, amateur developers can work. You should not undertake the construction of a house without experience, but you can try to fold the pillars and partitions under the summer kitchen.
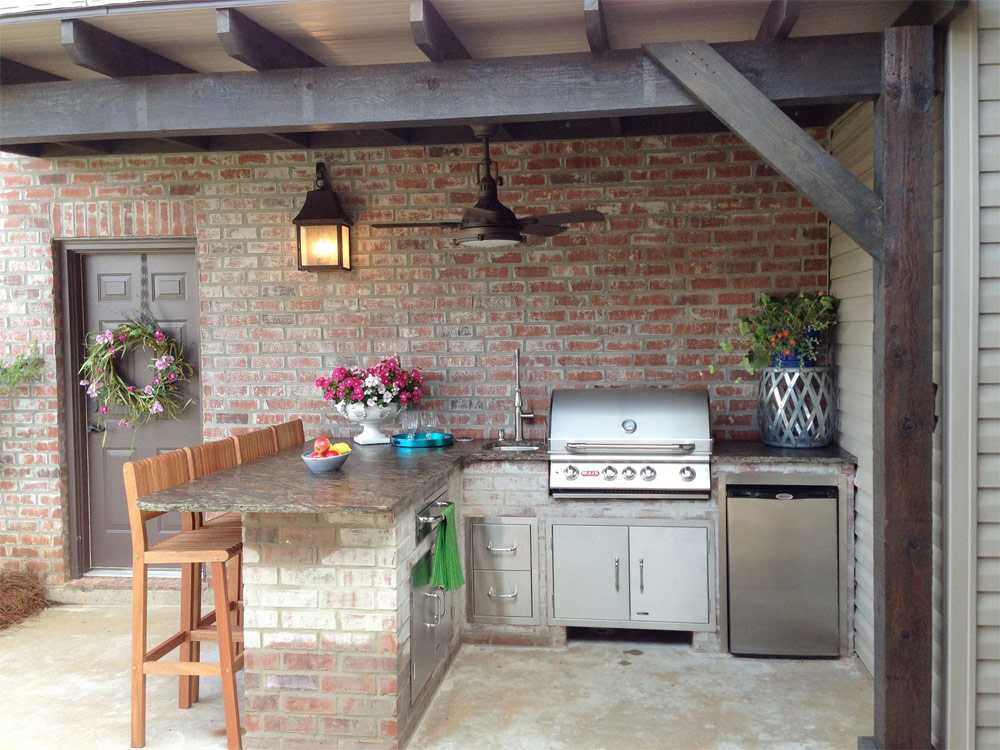
An example of an extension to a house with brick pillars
But since even a pillar made of brick or stone weighs more than a hundred kilograms or more, a more solid base is required for it. If you consider that it will still take the load from the roof, then you will have to make pillars or piles with good bearing capacity.
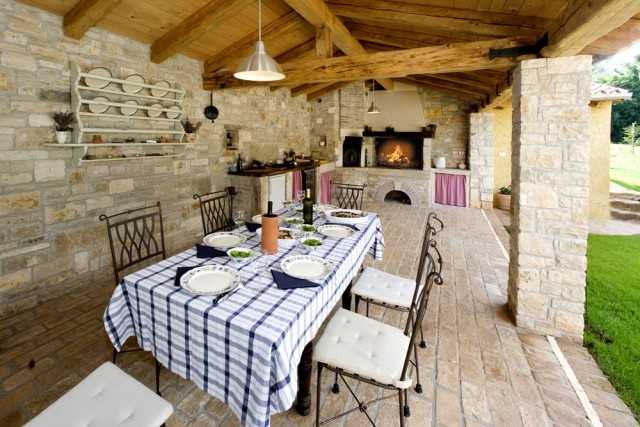
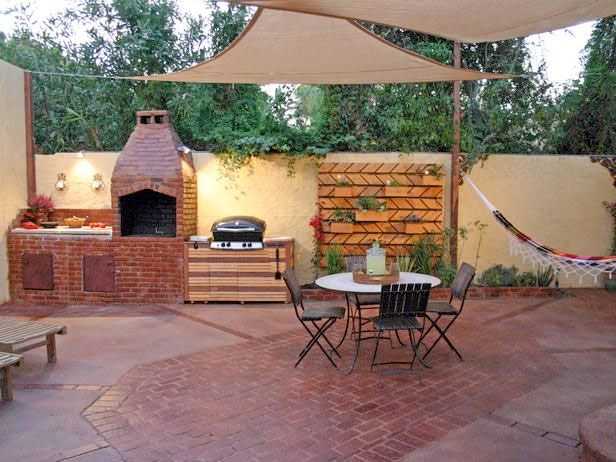
Carrying out to the side of the house - an open terrace with an oven and barbecue
If you are thinking about putting brick walls later, it is better to immediately fill in the pile-strip foundation, and deepen the tape below the freezing depth. If this option is not suitable - the freezing depth is large or the soils do not allow, you will either have to make a monolithic slab, or abandon brick walls, making them using a different technology, even if they are of the same tree or frame-panel technology. A summer kitchen built by your own hands is good because, knowing all the design features to the smallest detail, you can subsequently upgrade the building.
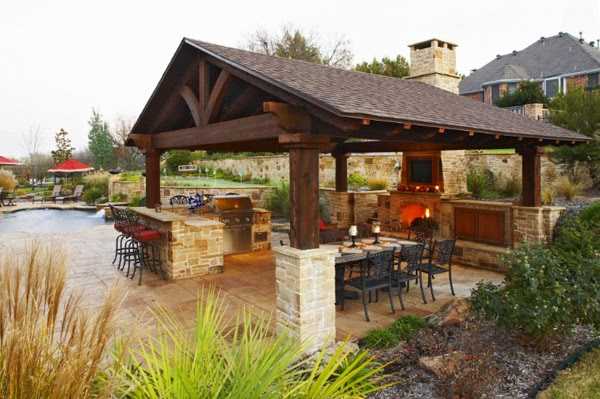
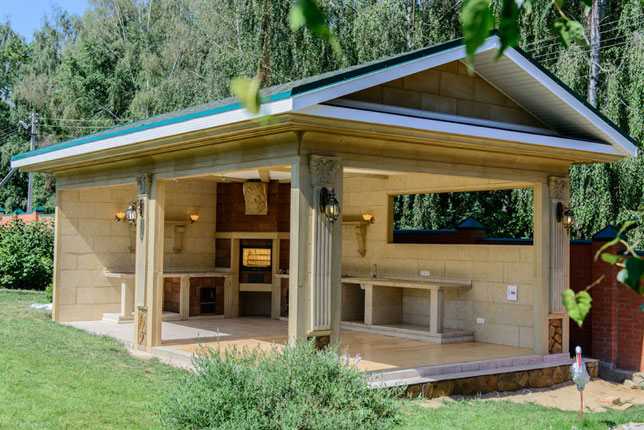
Detached building
Some people don't really like the kitchen smells that can enter the house from the extension. Then a small building is erected at some distance from the house. The presence of summer kitchens is almost an obligatory attribute of private houses in the southern regions.Before the era of air conditioners, cooking in the heat in the room was a real torture: the high temperature "overboard", heated walls, and even the heat from the stove - conditions are hellish, while the rest of the rooms are also heated. Therefore, they made at least small detached houses-gazebos, in which they put a gas stove and a cylinder with liquefied gas in cities, in the villages they put a small stove. Some even cooked on "kirogas" or kerosene stove.
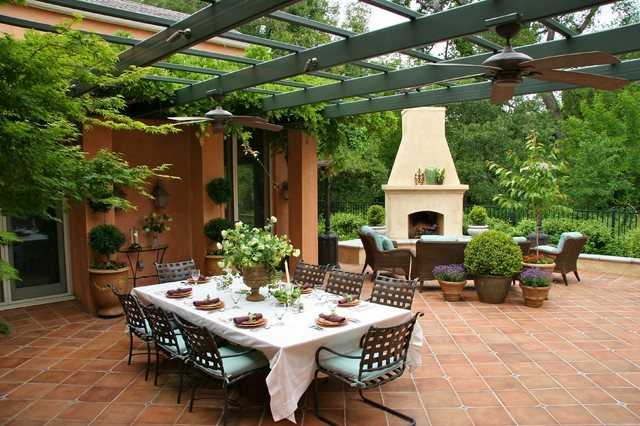
Combined open-closed type
Modern climatic technology makes it possible to negate all these inconveniences, but detached summer kitchens are still being built. They are often still used as a guest house - by making them with attic floor.
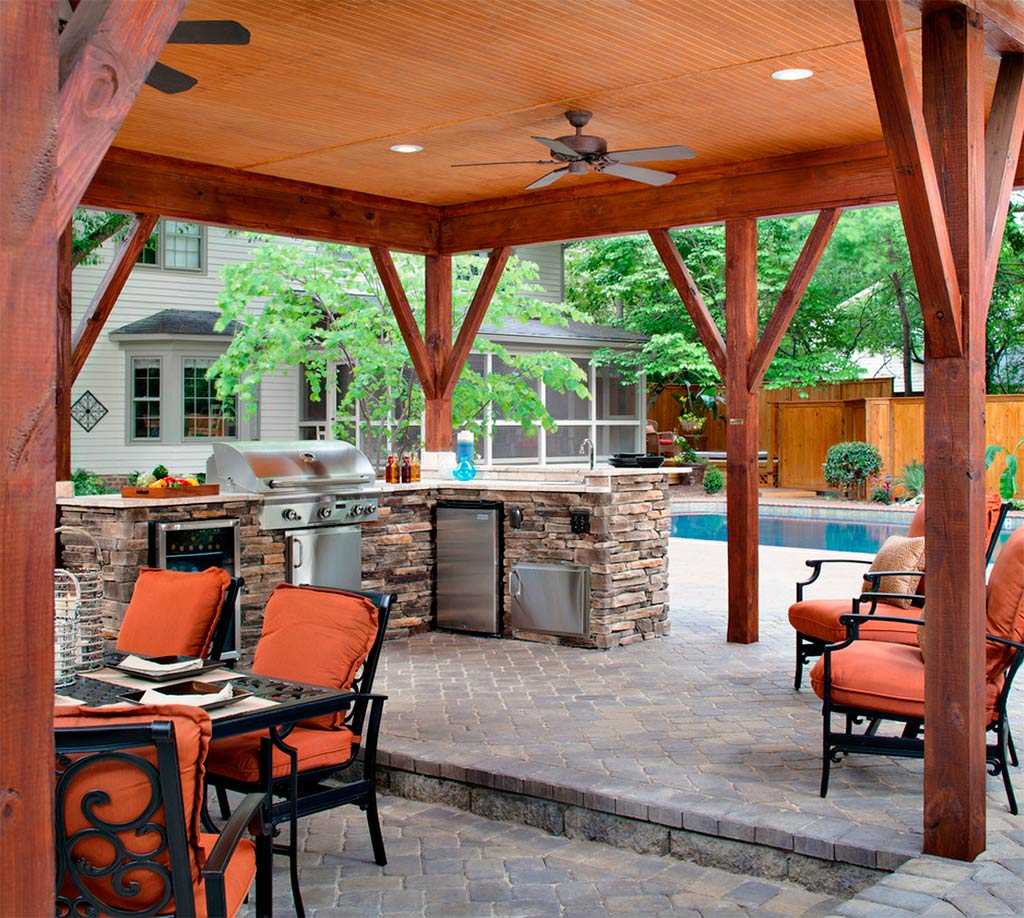
The cheapest option is roof support pillars. They can be wooden, brick or combined - consisting of a base of stone, and the top of a bar. This is the best option from the point of view of operation: the wood is protected from the effects of most of the precipitation, and at the same time the weight is not very large.
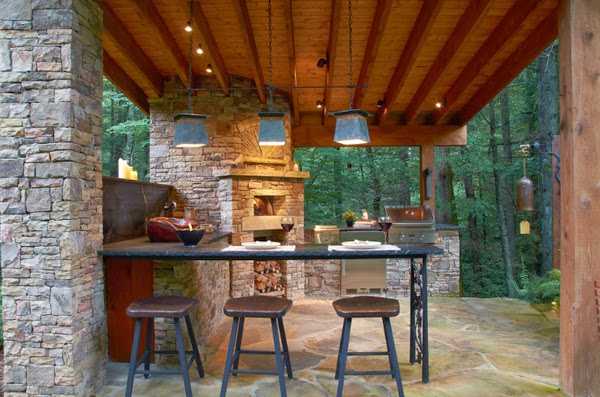
The optimal view of pillars for an open summer kitchen
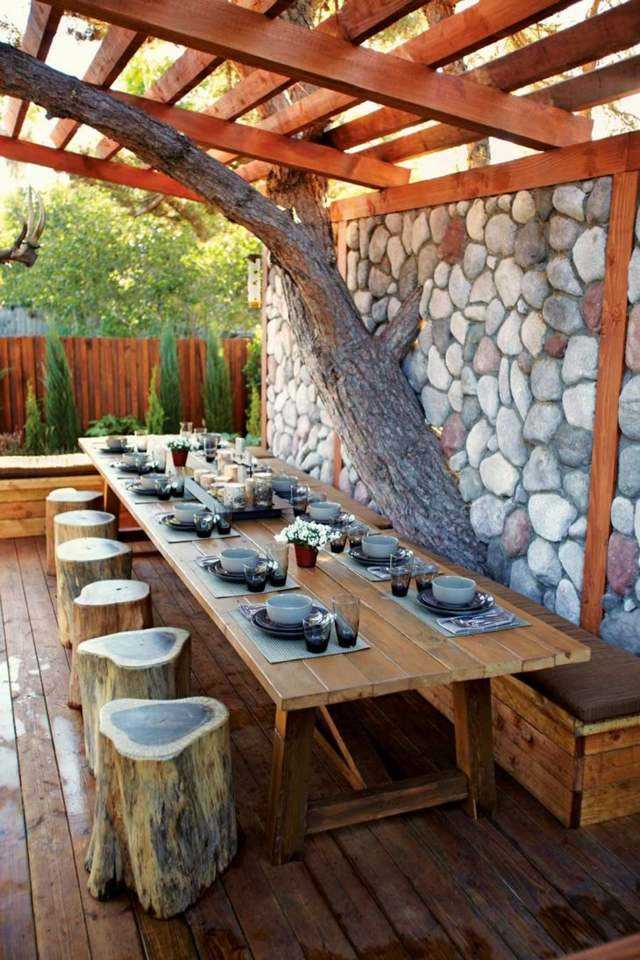
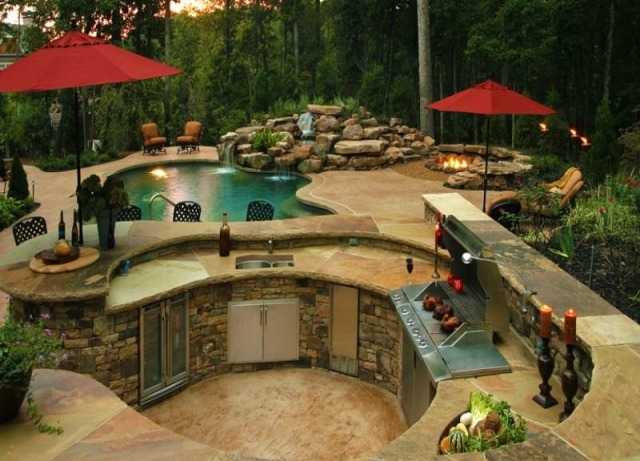
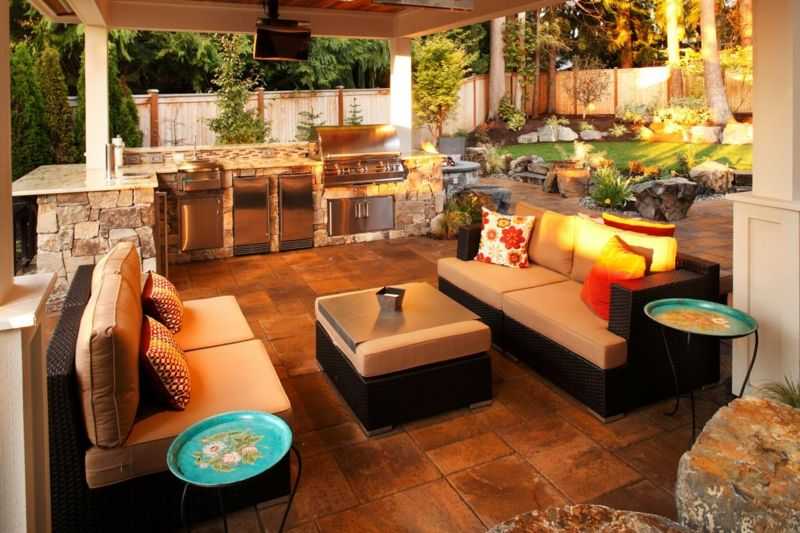
There are a lot of options for free-standing open summer kitchens. They are built according to the same type as the gazebos, only, perhaps, they are large. TThe technology of building an open area made of bricks can be viewed here, process wooden buildings are described here.
Sometimes, they can have barbecues or barbecues. How to make simple brick grill read here, about brick barbecue - here.
One of the easy options
What to make the floor of
The floor in such a kitchen can be planked. It is easier to do it, but many are confused by the fact that the wood will be located practically without protection. There are two ways to solve the problem. The first is to use effective protective impregnations, such as oils or wood wax for outdoor use. They do not create a shiny surface, but they protect well from moisture and dirt. Using varnishes for summer kitchens is not the best idea. They begin to burst and crack, in order to renew the old coating, the old must be removed completely, while oils and wax require only a thorough preliminary cleaning, after drying, a fresh layer can be applied.
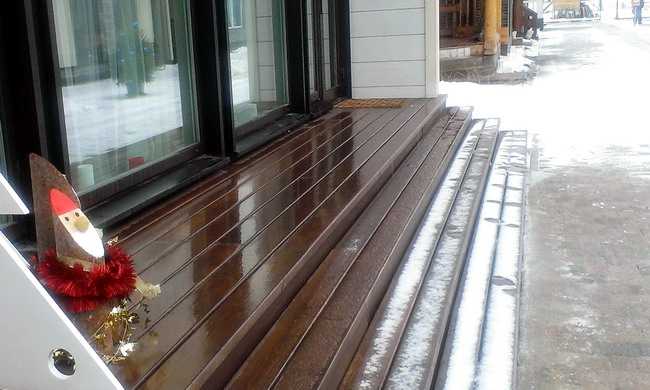
This terrace is treated with Pinotex Terrace Oil
The second way is to use not wood, but wood-polymer composite (WPC). These are boards that consist of a mixture of wood fibers and polymers. They look and feel very much like wood. With the only difference that they almost do not change size depending on humidity, however, thermal expansion is present. Such boards are called "decking" or "planken" depending on the profile of the board. There is also "garden parquet". This is a covering made of the same material, only assembled into boards, like parquet. They can be simply laid on the ground without any preparation.
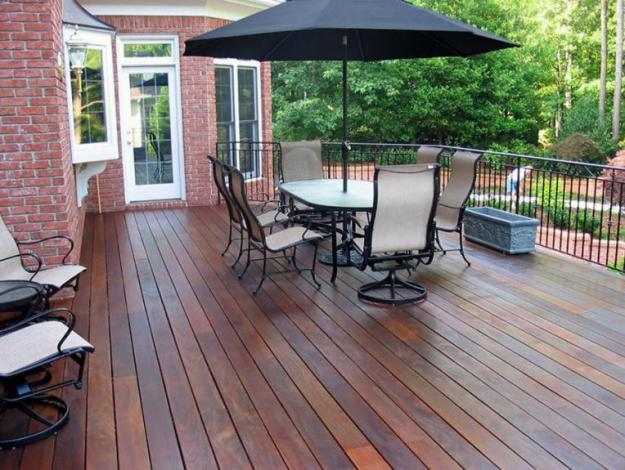
The terrace and the floor in the summer kitchen are made of WPC - wood-polymer composite
The advantages of WPC include a long period of operation without changing the original properties. It is calculated for tens of years, but varies greatly depending on the manufacturer. The downside is not the most affordable price. Perhaps this is due to the fact that the technology is relatively new, not yet fully mastered, although there are also Russian manufacturers of such products.
Stone or specialized tiles withstands the effects of weather better, but the installation of such a floor is not easy. If you just put it on a gravel-sand bed, locking it in the fall, in frost the tiles can crack or bounce. We have to make an insulated monolithic slab, observing all the technology: with a sand and gravel layer, insulation, reinforcement, concrete pouring. The dimensions of this slab are 50-60 cm larger along the perimeter than the planned building. In general, the costs and work are serious, although the operation is convenient.

One flooring option is large concrete slabs of high grade concrete
After a time when the concrete gains strength (at least 2 weeks should pass, and this is at an average temperature of + 20 ° C), the coating can be laid. You can use flagstone - stone sawn into layers, you can use porcelain stoneware, or frost-resistant tiles.
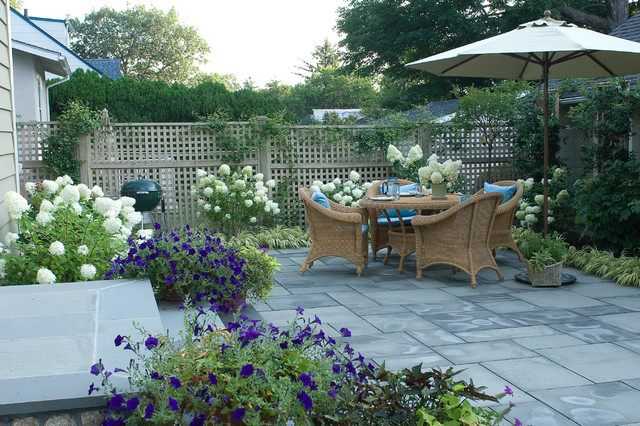
A simpler option is to lay out the site with paving slabs. But this is an exclusively summer option. But - without fiddling with the foundation.
The area for the summer kitchen can be laid out with paving slabs
If a summer kitchen is being built with your own hands in the country, this is perhaps the best option. It turns out inexpensive and practical.
Closed summer kitchen
Those who want to have an all-season summer area for gatherings or cooking, erect more capital buildings. Most often, these are buildings using frame technology - quickly and relatively inexpensively, more expensive, but more thoroughly - from a log or bar.

Option "frame" - timber racks sheathed with clapboard
In the case of a frame construction, everything is very simple: with a small step, racks from a bar are placed (you can even spliced boards), then they are sheathed on both sides with some kind of finishing material. What - of your choice, even clapboard - wooden or plastic, blockhouse, any other material. Inside, to save money, they are often sheathed with plywood, fiberboard, gypsum fiber board, OSB or something similar. If desired, it can be insulated. The frame is sheathed on one side, insulation is laid (usually mineral wool), the sheathing is mounted on the other side. You can insulate not only immediately, but after some time, you only have to remove the sheathing on one side.
What does the "skeleton" of a summer kitchen look like using frame technology
The frame construction is also convenient in that it can be given any shape, and the foundation can be relatively light - depending on the soil - pile or tape. Such foundations are also needed for wooden buildings - from a log or a bar. All the rules are the same here. It is important to find or order a project, but assembling is a matter of technology.
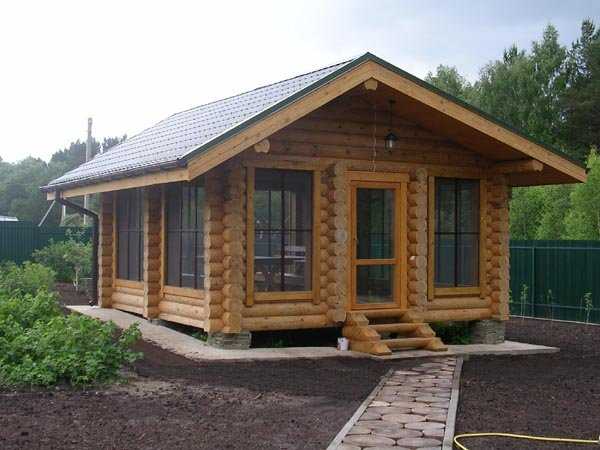
Summer kitchen made of logs
Naturally, you can build from any other materials - from foam blocks - to bricks or even rubble. It's all about the amount that you plan or can spend on this building. The construction of foam concrete, aerated concrete, some building blocks, adobe will also cost inexpensively. Cinder block, like adobe, can be made independently, so the choice of material is only yours, and then everything is built according to all the rules. With only one deviation: insulation for a summer kitchen is either not done at all, or made to a minimum. Another point - heating, as a rule, is absent, and this must also be taken into account when choosing materials for construction and decoration.
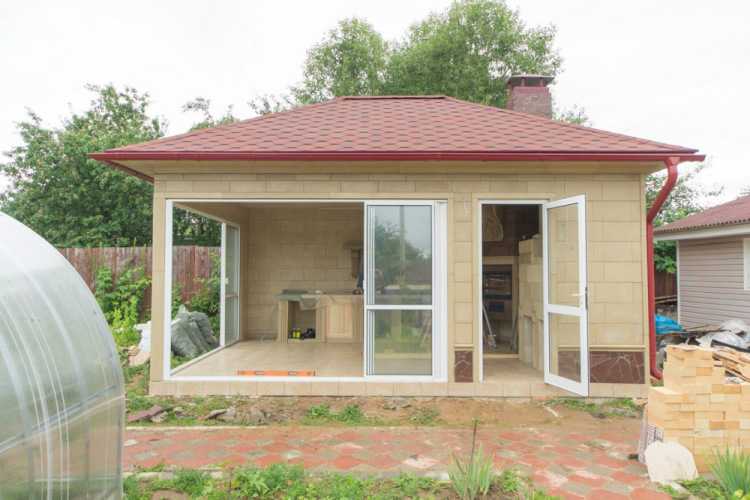
Photo report of the construction of a summer kitchen with an open veranda
A summer kitchen was being built with the opportunity to “sit in the air”. Therefore, the option with an open veranda was chosen. The base of the house is assembled from a bar 200 * 200 mm, internal walls - from 150 * 100 mm. Outwardly, I like the carriage, but it is ungodly expensive, because the timber was suspended to create a similar relief.
The foundation is columnar. Since the construction is light, the soils are normal, the posts were buried only 60 cm.
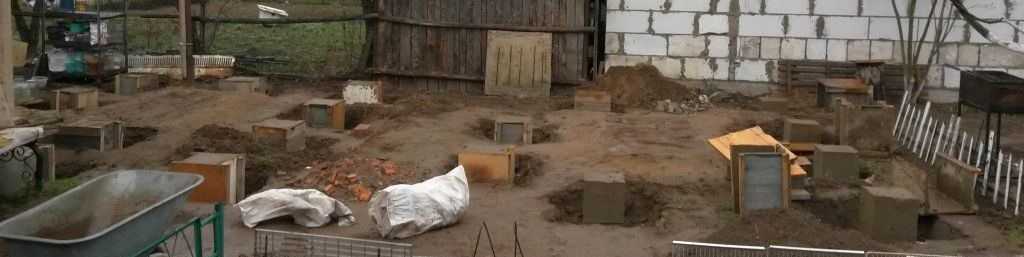
Ready foundation
The harness was assembled from a bar 200 * 200 mm. It was pre-soaked with an antiseptic. The corners were connected as usual - they made cuts. The crossbars were placed on metal U-shaped plates. The timber was not rigidly fastened, since there will be heaving anyway, so that the building has the opportunity to "walk".
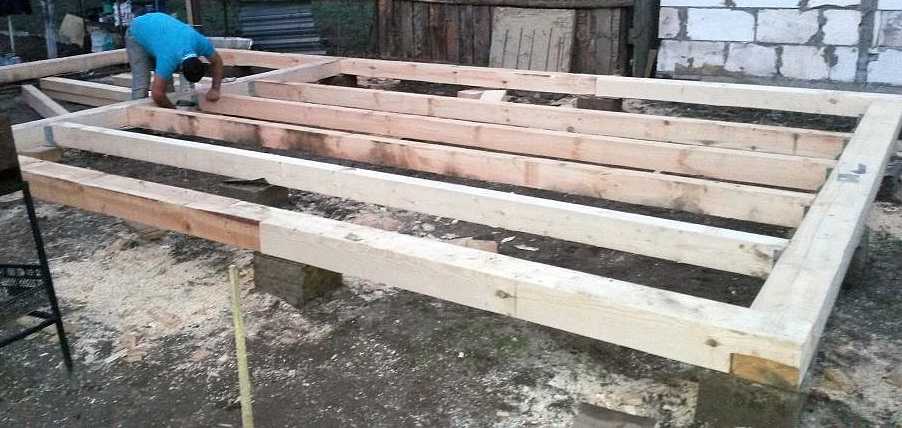
Assembling the harness
The racks were made from a bar of 200 * 200 mm, the inner filling was from 150 * 100 mm.

Putting up the walls
The walls were assembled pretty quickly and without any problems: there was no cut, just pieces of timber of the required length were nailed to the racks. The roof is made of a gable, with a slight slope angle. On the one hand, the extension of the rafter legs is greater - in order to make a canopy from the side of the veranda, which will cover it from slanting rain.
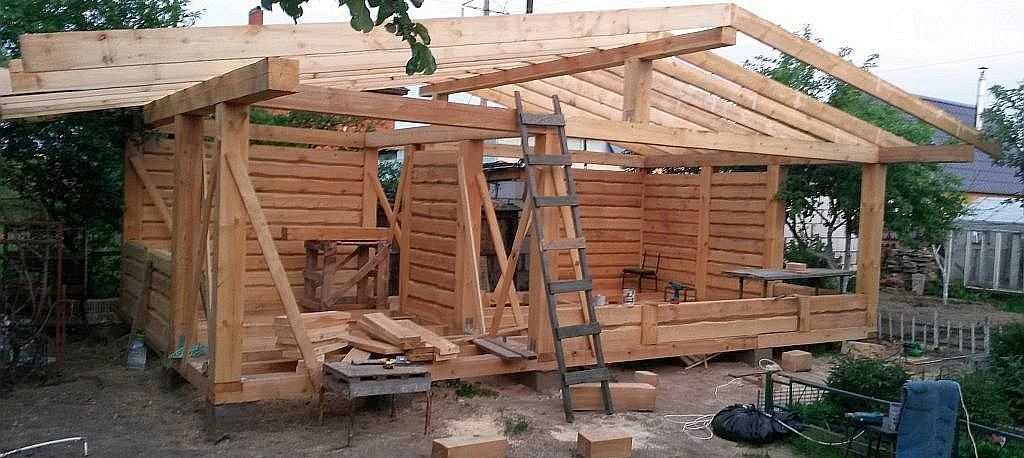
After the walls were assembled, the rafter system was taken up
The ceiling lining is made of unedged boards, which were then brought to mind on our machine.
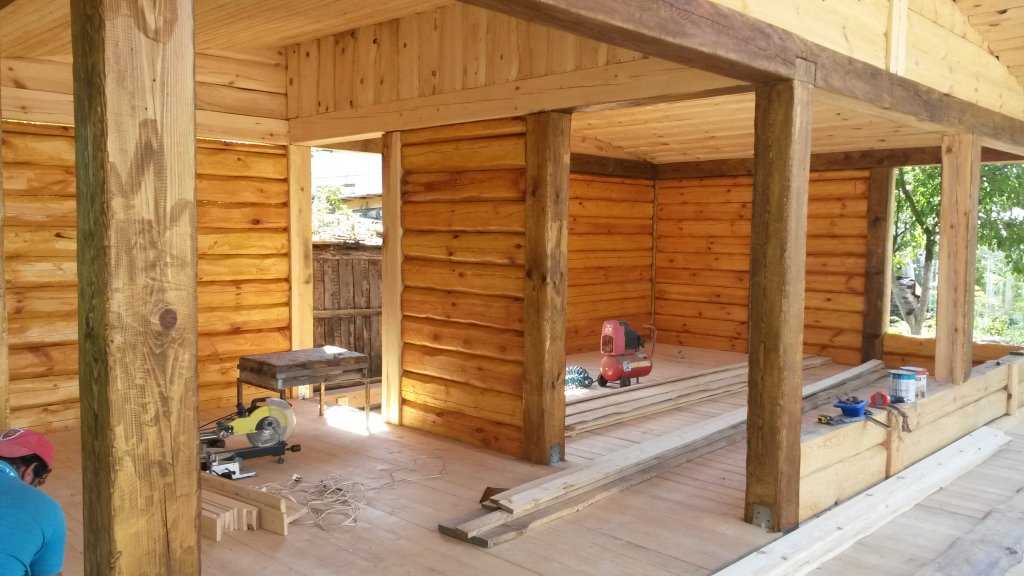
Ceiling lining - board
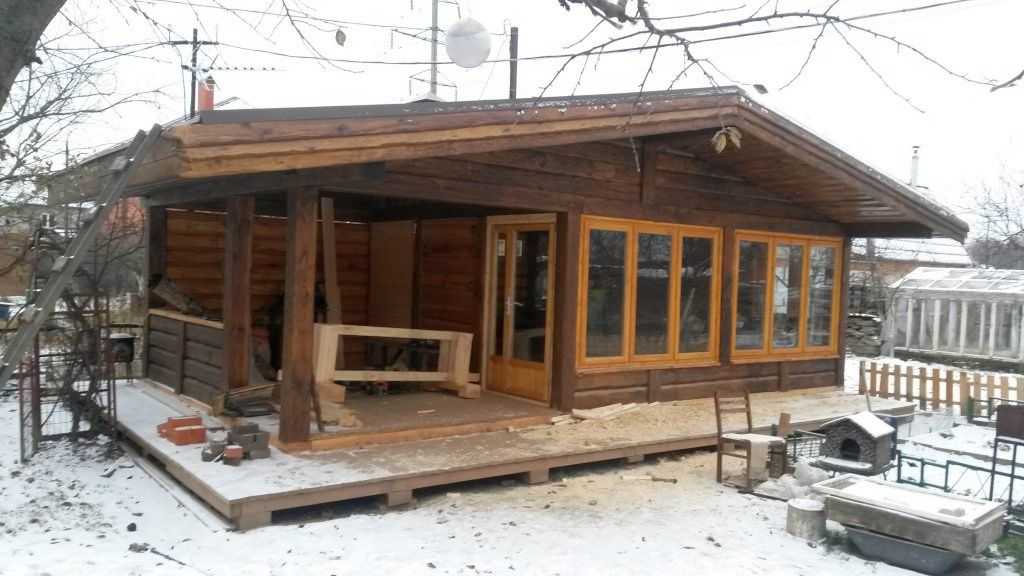
This is after we painted and installed the frames.
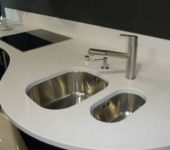
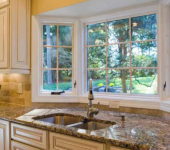
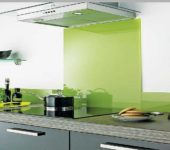
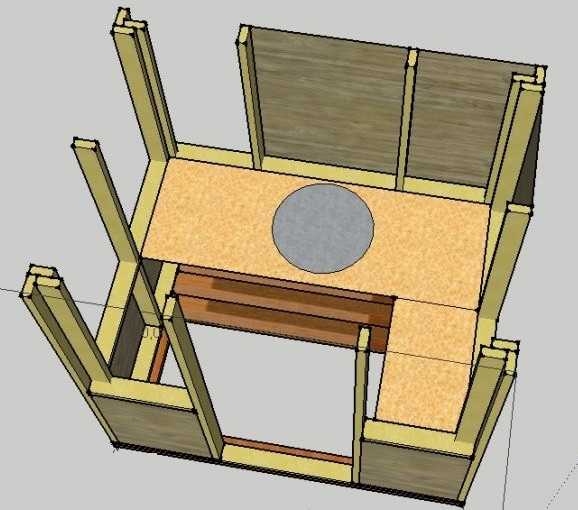
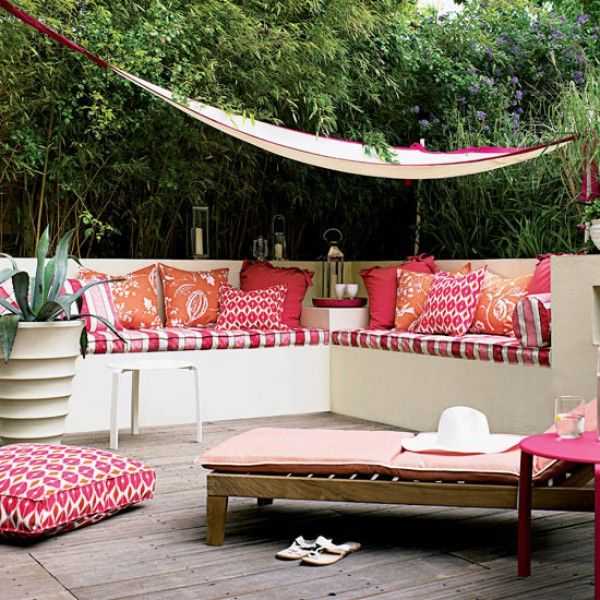
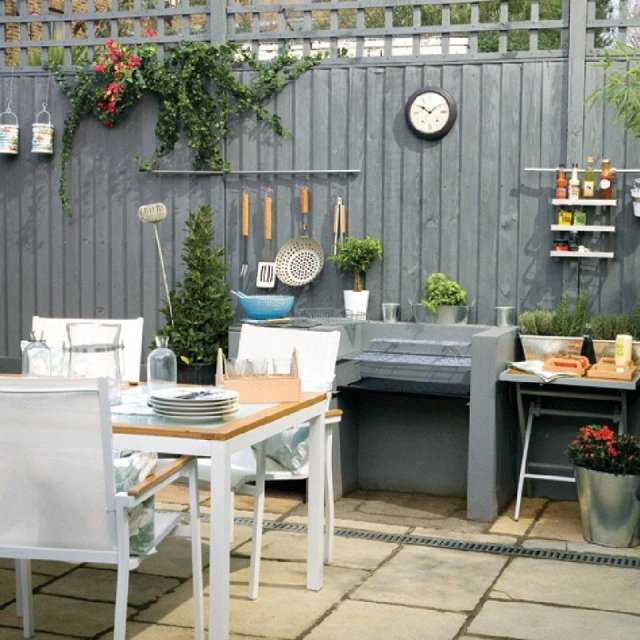
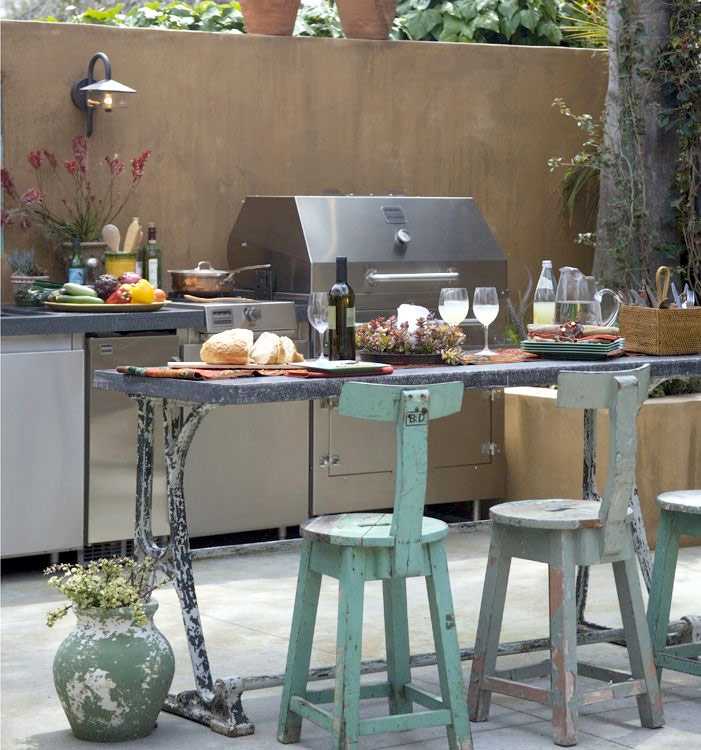
Summer kitchen design: photo
After the construction of the summer kitchen, another problem arises: it is necessary to arrange it. The arrangement includes not only the choice of a table and chairs, it is also necessary to somehow organize a working area, somewhere to store food for the stove, which is often placed here.


And some more ideas in video format