How to make figurines, sculptures for the garden and plot
Decorating a garden, backyard, suburban area is an endless process. All the time, something is changing, removed, added. One way to decorate is to make garden figures. If you place them correctly, they transform the look of the site.
The content of the article
Figures made of cement: what are good and how to make
You can make garden figures from cement - this is one of the most used and affordable materials. It is inexpensive, allows you to create a variety of figurines - from simple and small, to full-length sculptures. There are several ways how to make garden figures from cement mortar: with a frame, without it, from a semi-dry mortar. More about everything further.
Very often, mushrooms are made of concrete, but they are not always the same ...
What to add to the solution
There are many additives to cement that improve / modify its properties. There are a lot of them, but they are sold in rather solid volumes, which may be needed only for the manufacture of garden sculptures on an industrial scale. But there are common substances that also change the properties of the concrete solution.
- PVA glue - increases the frost resistance of the finished product and the plasticity of the liquid solution. It fills out the form better, but “grabs” faster. Dried cement with the addition of PVA can be processed much worse than usual. So don't miss the time while it can be molded.
- Liquid glass - reduce water permeability, the solution sets faster. But it should be added no more than 1% of the total mass of the solution.
Not a very common technique: the drawing is copied onto a semi-dry block of concrete, then scraped out with chisels or spoons. The main thing is to have time before the concrete becomes unyielding for processing.
- Plasticizer is an additive that increases the plasticity of a semi-dry (with a small amount of water) concrete solution. You need to add quite a bit, literally a teaspoon per bucket of solution.
- Adding HYPERTUF will help to make concrete easier.
- Washing powder or dishwashing liquid - works as a plasticizer and speeds up the hardening. Add 0.5-1 teaspoon to a bucket of solution.
- To make the surface of the figure smoother, it can be covered with putty. But the putty is not needed for the walls, but for the wooden floor. After drying, it becomes very hard, and adheres tightly to concrete.

These are the main additives that are needed when making concrete garden figurines. It's easier to work with them. But don't add much. Maximum one teaspoon per bucket, otherwise you will only make it worse.
How to paint and some technological nuances
After the concrete figure has dried, it must be sanded to smoothness, dust removed and you can paint. In order for the paint to lay down smoother and less wasted, you first need to cover the product with a layer of primer. The primer is selected depending on the type of paint. The painting process itself is no different - usually you need brushes of different sizes. But it is worth knowing some features.
- Acrylic paints become brighter after varnishing.
- Can be painted with floor paint (enamel PF 115).
- Spray paints in cans are good - from automobile to interior. But the best option is for outdoor work. They last longer.

Regular floor paint holds well
- Can be painted with facade paint.They are just designed to withstand weather conditions. One problem - they are sold in large packaging.
- To make homemade garden figurines better tolerate precipitation, after the paint has dried, they must be covered with two or three coats of varnish. The best option is yacht varnish, but it is expensive and incompatible with acrylic paints (they have a different base). For acrylic paints you need a water-based varnish, just be sure to take it for outdoor use. And see the degree of gloss. There are glossy, matte, semi-matte.
- If molds are used to make garden figures, before filling them, they must be lubricated with oil (any, even sunflower, even technical) - so that they can easily come out.
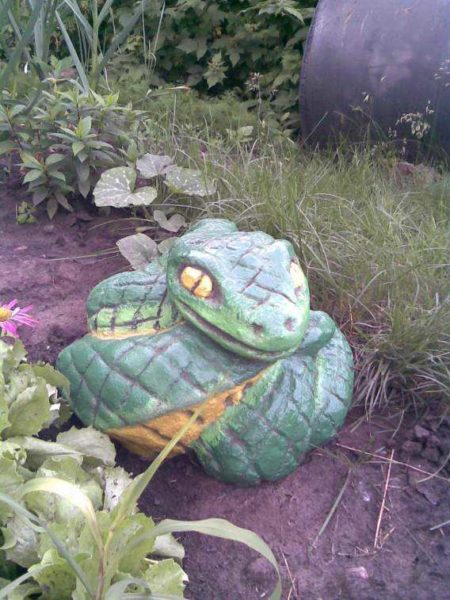
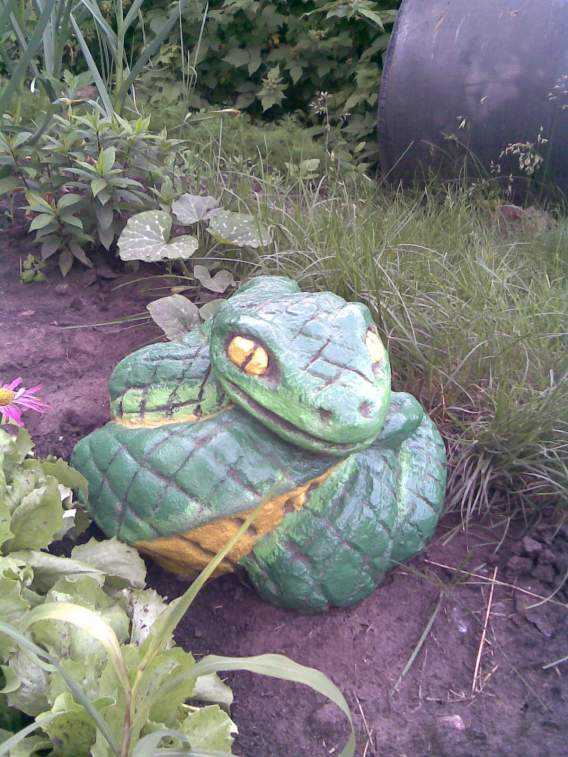
This snake was "scraped" from a concrete monolith
- Before painting, sand the concrete with fine-grain sandpaper. In the process, not too well-adhered sand is scraped off, the surface becomes smoother.
- Wool on animals can be made from an old faux fur coat soaked in liquid concrete.
- Feathers or short hair can be imitated by adding long (or not so) chips to the solution.
There are still a lot of different technological nuances, but these are the main ones. The rest you will master or come up with in the process.
How to make garden figures: cutting from a semi-dry mortar
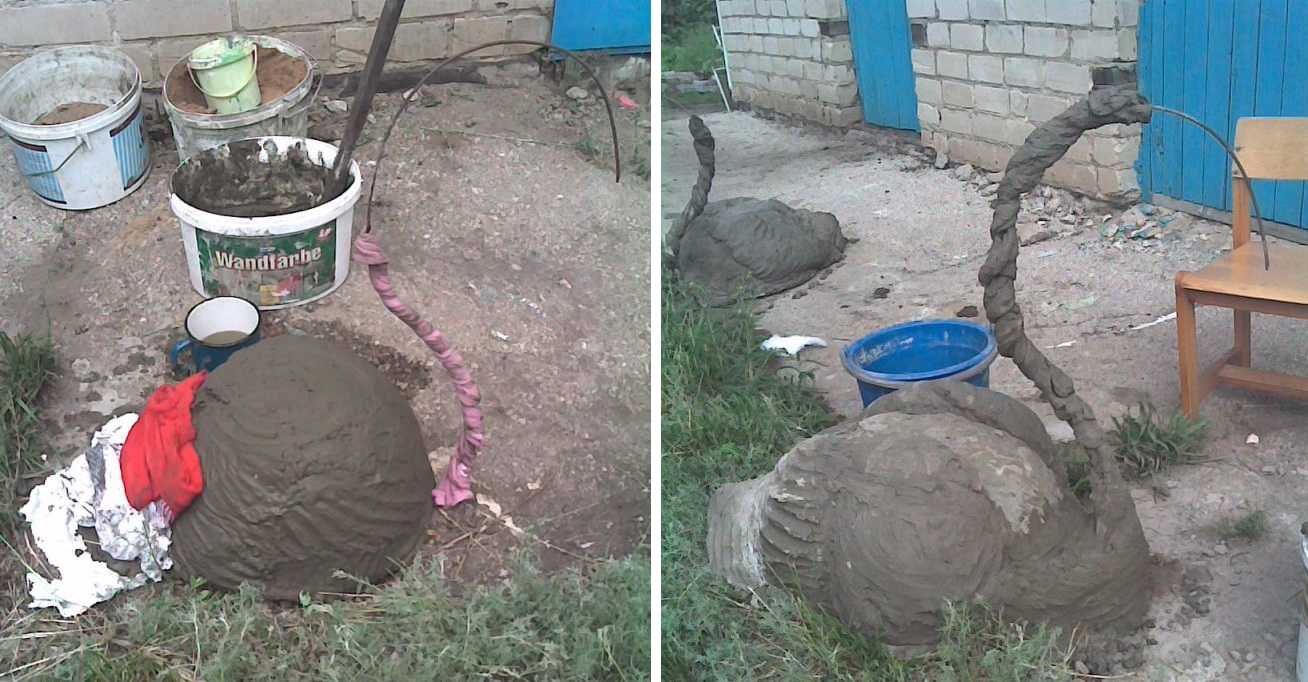
It will not work to make garden figures from fresh cement-sand mortar - it is too liquid. Even if you mix it with a minimum of water, you will not be able to blind anything intelligible. But you can wait until the solution begins to harden, but it will still be quite soft - it will crumble under pressure. In this state, you can make grooves in it with a metal object, cut off the excess.
Monolith blank for figure
From a thick mixture, you can form the approximate shape of the intended character - put it in a piece of film, tie it, give the desired shape. If there is a liquid solution, find a more or less suitable container or use all the same film. The solution is left in the mold for 8-12 hours. The time depends on how liquid the cement was initially and the temperature at which you withstand the product. The optimum temperature is about + 20 ° C, at a lower time for hardening increases, and at a higher one, there is a possibility that the cement will dry out and not "set".
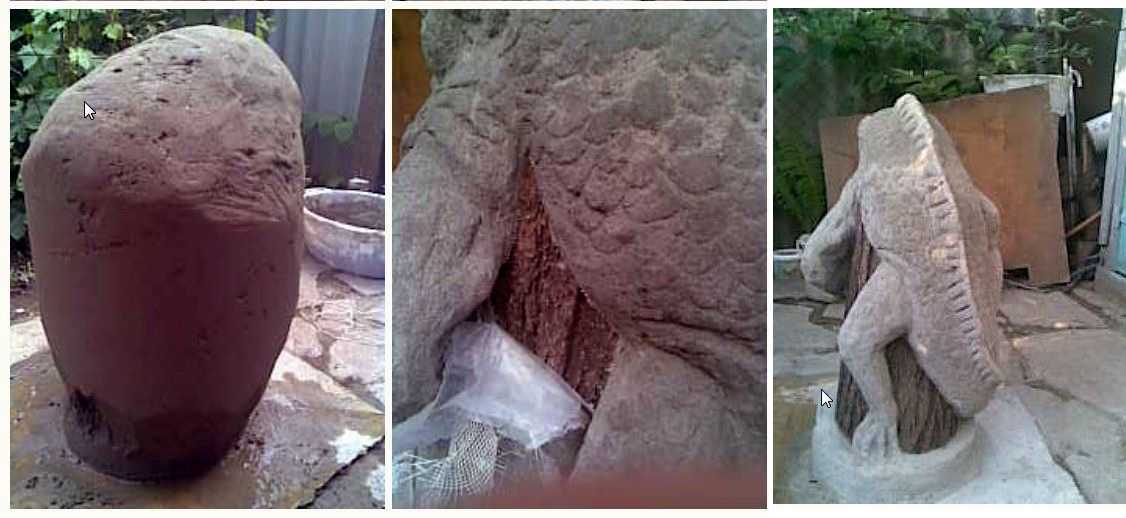
Gradually a figure emerges from the block
Periodically check the condition of the workpiece: there should be a solid mass under your fingers, and when you apply more force, the cement is slightly squeezed. In this state, you can already begin to shape the sculpture. You have 7-8 hours to work. For small figures, this is more than enough, for big ones right next to it - you have to hurry. To delay drying of parts that have not yet been processed, they can be wrapped with a wet rag.
-
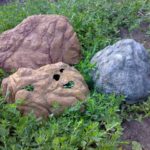
- You can start with these decorative stones

-
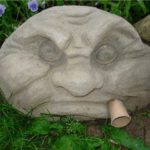
- Cute faces
-
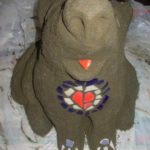
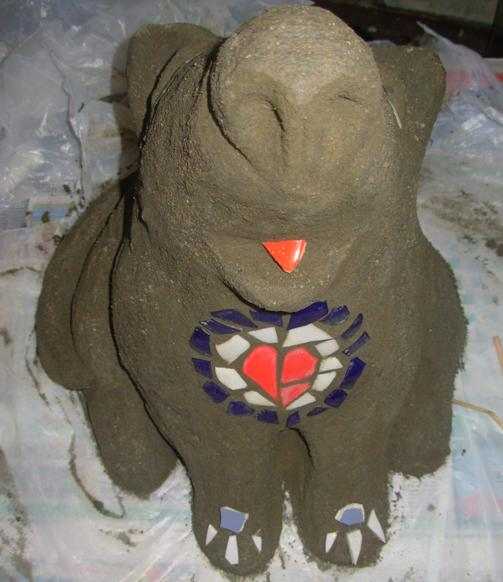
- It is not necessary to paint ... You can cover with colored fragments of glass or dishes
-

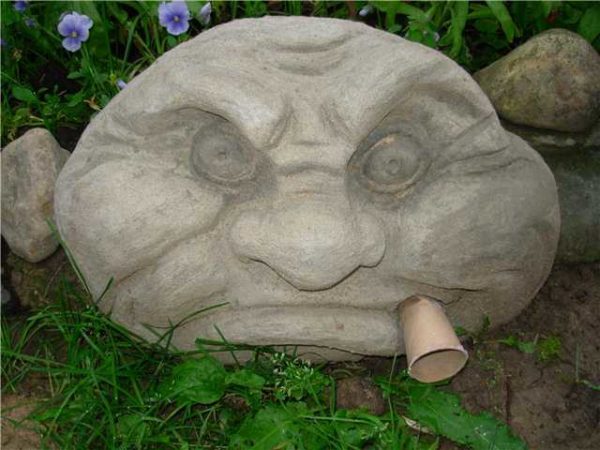
- Another cute homemade garden figurine

-
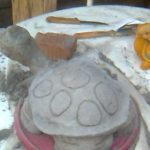
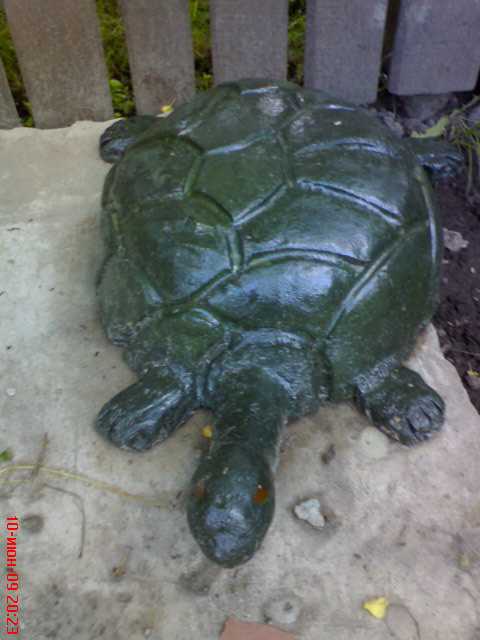
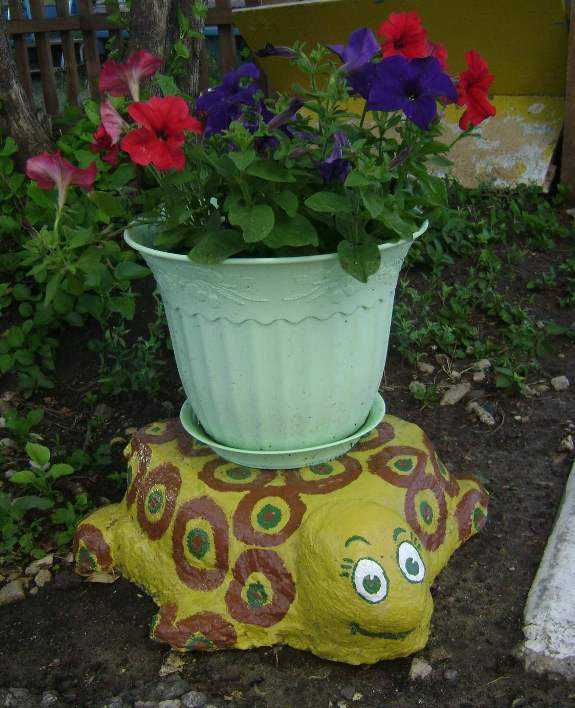
- This is how you can turn a small toy turtle into a garden figurine.
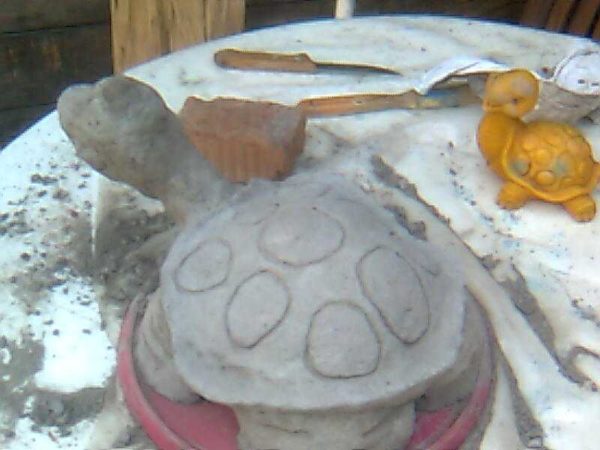
Take a knife, wire, spatulas, start to cut off the excess little by little. They do not need to be afraid, if you remove something superfluous, you can later add a little solution, touch up when it dries up. In general, the technology is not too complicated, but if there is no artistic ability, it is difficult to come up with something intelligible on your own. For such cases, there is one trick: find a small figure from any material, looking at it, sculpt your own.
Making cement figurines with a base or frame
The technology for making garden figurines from concrete on the base consists in layer-by-layer application of the solution to the frame. But this technique is required when making large figures - about 150 cm and more. Then the bearing capacity of the concrete itself may not be enough. In this case, a rigid base is needed.In other cases, a frame or base is needed only to minimize concrete consumption and reduce the total weight of the product.
The frame for complex products is made (weaved or boiled) from wire, for simpler ones, improvised materials are used. On the finished frame, a layer of solution (thick) 1-2 cm is applied, laid with a fiberglass mesh-serpyanka, the solution is applied again, again the mesh. The process alternates until your piece takes on the desired shape.

Example: wire turtle frame
Where and how to find the foundation
The main task is to find a dish, bottle, box, which is in shape suitable for the intended product. If the shape is complex, it can be grown or completely created from pieces of foam. It is lightweight, well cut. But such figures - with a foam base - do not withstand the load. If you suspect that someone can sit on your products or otherwise mechanically act, instead of foam, it is better to use wooden blocks or foam concrete blocks. Foam concrete is perfectly cut with a saw on wood, it can be planed with a plane, a large knife, grooved with a sharp object. We all know the principles of working with wood.
A frame may be needed if you want to recreate an exact copy of an animal or plant.
The found form is covered with a solution, wrapped with rags, tow, ropes, and then also coated with cement. If the layer of the solution is more than 2 cm, it is reinforced with a fiberglass mesh (serpyanka mesh is used for plastering walls). If plastic is used as a base, it is very difficult to apply a solution to it - it flows down. Such products are wrapped with rags soaked in solution. After drying, the next layer is very well applied to them.
In the dried solution, grooves are made, which indicate feathers, wool. In general, there are many tricks. Let's give a few examples to make it clearer how to make garden figures out of concrete. Another option is to coat it with a solution into which the pebbles are pressed. It creates uneven relief.
Swans
For example, we want to make figures of swans. The basis for the body is a small rounded basin. Neck - S-shaped wire. We attach the "neck" to the body in any way possible.
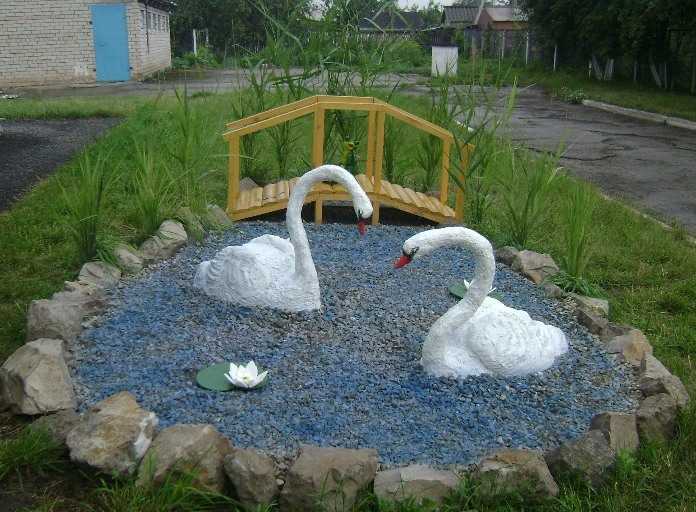
Concrete swans
We put a thick solution on the basin, forming the desired bend, add foam, pieces of rags, etc. We leave to dry. On the wire (it is better to find a thicker one, you can rebar) we wind rags soaked in the solution. We fix and leave everything for a day. During this time, the concrete will set, and on the "body" you can use scraping to form wings, make grooves, draw feathers, etc.
Manufacturing process
We are closely engaged in the neck and head. Apply a solution to the resulting base with our hands (do not forget to wear rubber gloves), forming a neck of the desired shape and thickness. You won't be able to "build up" a lot at once - only in thin layers. When the neck becomes more like a real one, you can begin to form feathers, outline the beak, eyes, etc. Leave the finished birds to dry for a week or more. Further - grinding, priming painting.
Frog princess
In this example, we will demonstrate how you can make garden figurines from cement mortar and stones. The foam block is taken as a basis, cut and hewn where necessary. Smeared on top with a thick solution in several layers.
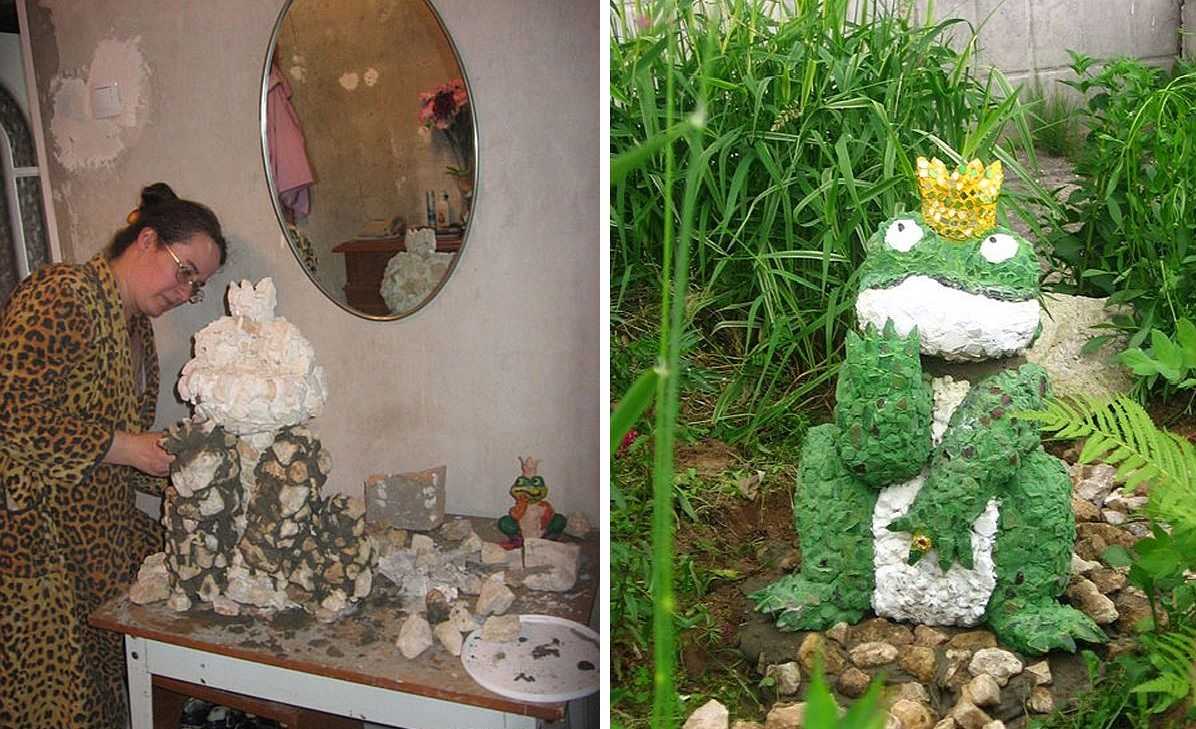
How to make garden figures: a frog from concrete and stones
In the upper layer, still soft, pebbles are fixed - small flat pebbles; glass fragments are used on the crown. After drying, the figurine is painted with acrylic paints and twice varnished.
Frameless technology: concrete drinker
If the product is small or thin, a large load is not planned on it, you can make it without a frame. This is how all kinds of bowls, plates, small sculptures are made. For example, a leaf-shaped bird drinker.It can also be a stand for flowerpots and flower pots, other figures that are undesirable for contact with the ground.
We find a large leaf - burdock, rhubarb, etc. We put the sheet in water, form a gentle hill from sand on a flat surface (table), cover it with a film.
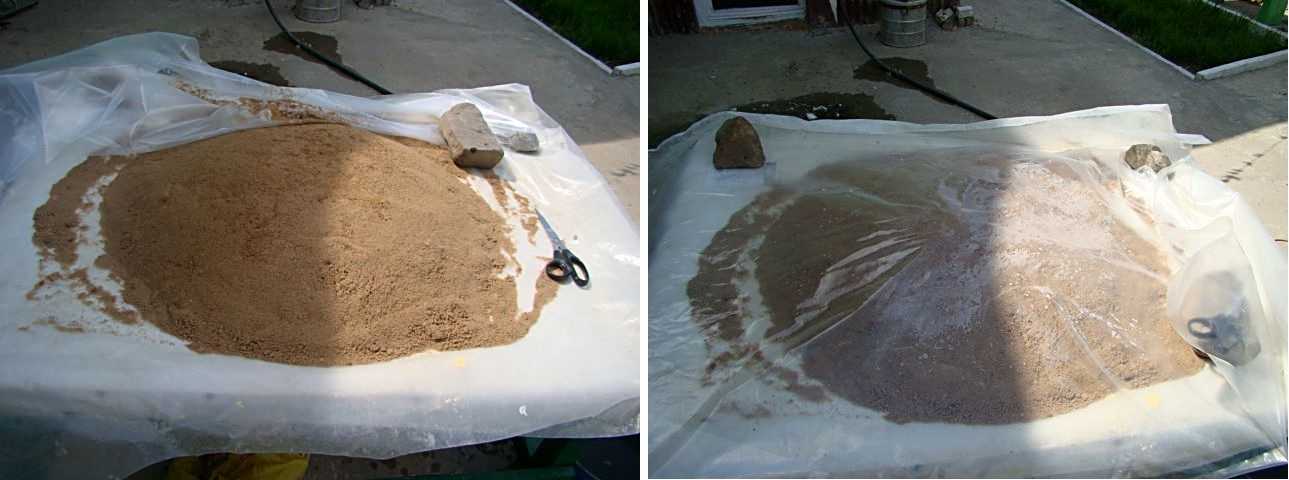
We shape the bowl in reverse
We spread the sheet on a slide, pressing it into the sand. We knead the thick solution - it should not drain. The composition of the mortar for sculptures is 1 part cement, 3 parts fine sand, you can add a plasticizer. We spread the solution on top of the sheet, pressing it tightly. In the middle, the layer thickness is about 2 cm, towards the edges it becomes thinner - up to 1 cm. Shape the edges neatly. They can be adjusted, but this is not so easy.
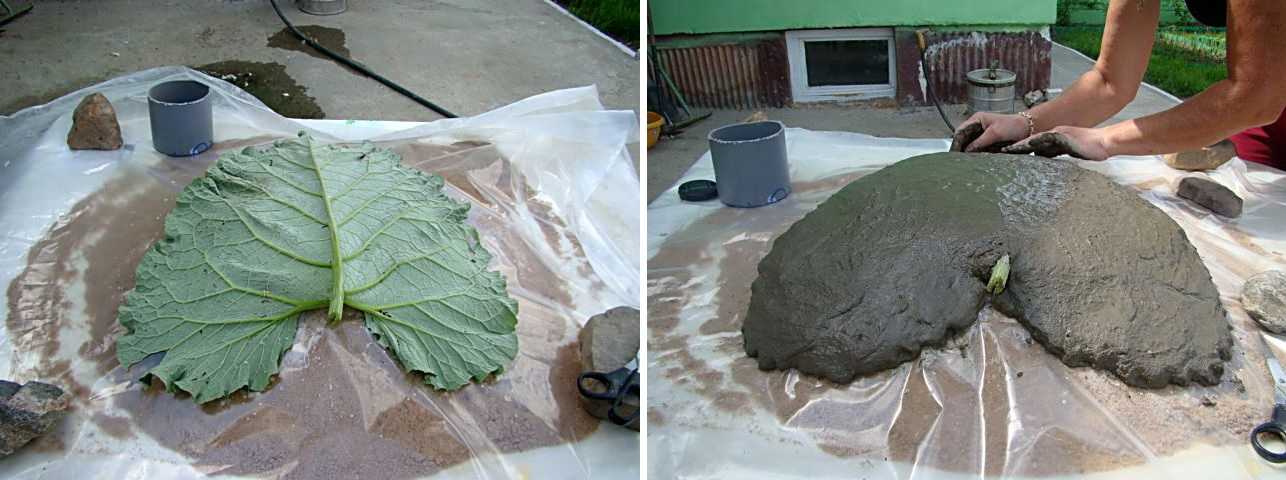
Cover the sheet with a solution
In the middle we insert a piece of plastic pipe with a diameter of about 10 cm and a length of 10-15 cm. We coat the joint with a solution, fill the pipe. Cover with plastic wrap. It protects against overheating, rain, dirt. We press the edges with stones or something heavy, but it is not necessary to achieve tightness - excess moisture must evaporate.
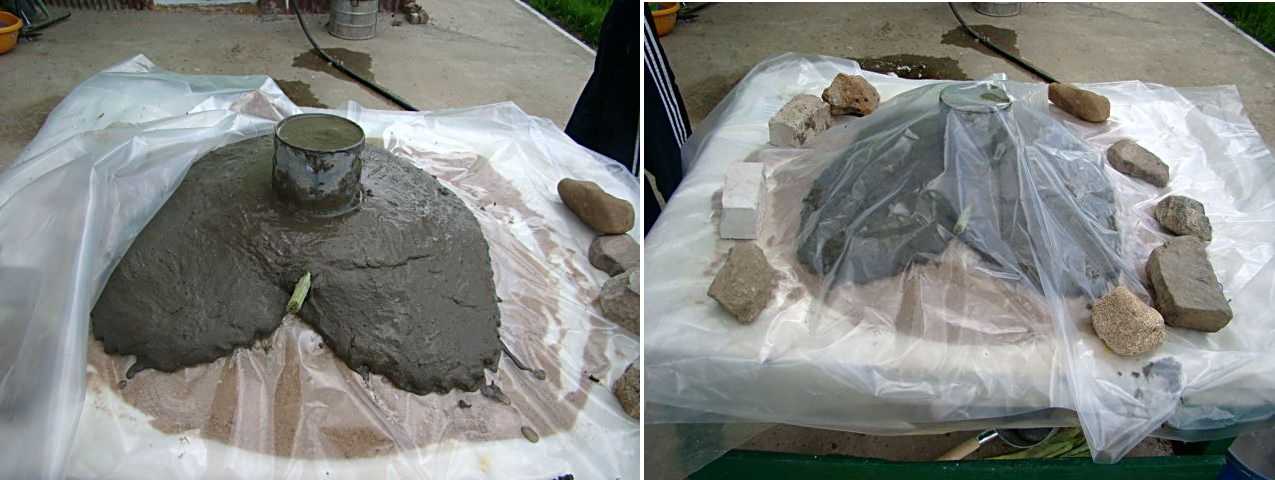
Almost done, it remains to wait
Withstand the garden sculpture without turning it over for at least 2 days. Then remove the outer film, gently turn over, remove the sheet. If it does not come off, moisten and wait a couple of minutes. Remove residues and debris with a brush. Wait a few more days before painting - preferably two weeks.

Here's what happened ... the original bird drinker
Before painting, sand with sandpaper, remove dust. Can be primed if desired. Its type is matched to the type of paint. The primer is needed so that the paint lies smoother and so that it is less wasted. When the paint dries, the product is covered with two layers of varnish. Choose varnish for outdoor use. Better - matte or semi-matte.
Decorative figures from polyurethane foam
Very quickly and easily you can make garden figures from polyurethane foam. Just keep in mind, they are very light, so you need some kind of weighting. Suitable as a base are plastic bottles, metal containers, cardboard boxes, etc. For thin parts - arms, legs, necks - any materials of the desired shape and size are suitable: branches, wire, wire frame, plastic pipes, metal corner, etc. etc.
This is an alpine goby made of polyurethane foam. There is no need to make wool on purpose: the foam itself forms the desired relief
The base for thin or strongly protruding parts of the figures can be stuck in later - after the "body" is ready. Wire, corner, stick, you can just stick it into the dried foam. If soft materials are used, they can be nailed or screwed on with self-tapping screws, grabbed with staples from a stapler, and glued. In general, use whatever method is available.
It is better not to save on the quality of foam - choose an expensive one. It does not flow like a rising yeast dough, but grows in size, maintaining the shape set during application. But even with expensive polyurethane foam, you should not rush. The main secret is this: apply a thin layer at a time. Then wait until it ceases to increase in volume, hardens (25-40 minutes) and apply the next thin layer. Such a consistent increase in volumes is the key to success.
Refined technology and tips
If in steps, then you need to make garden figures from foam like this:
- We take the base, apply the first layer of foam.
- We are waiting until it stops increasing in volume and hardens.
- Apply the next layer.
- And another layer.

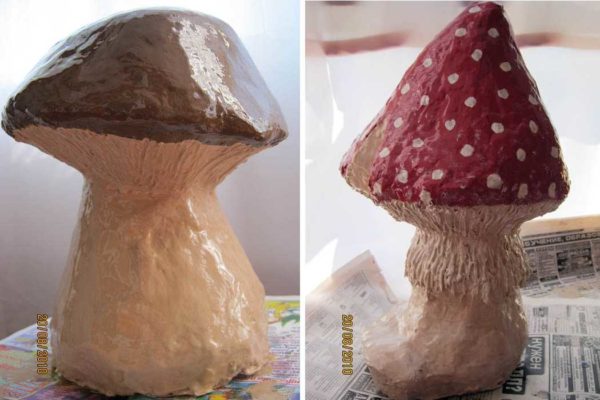
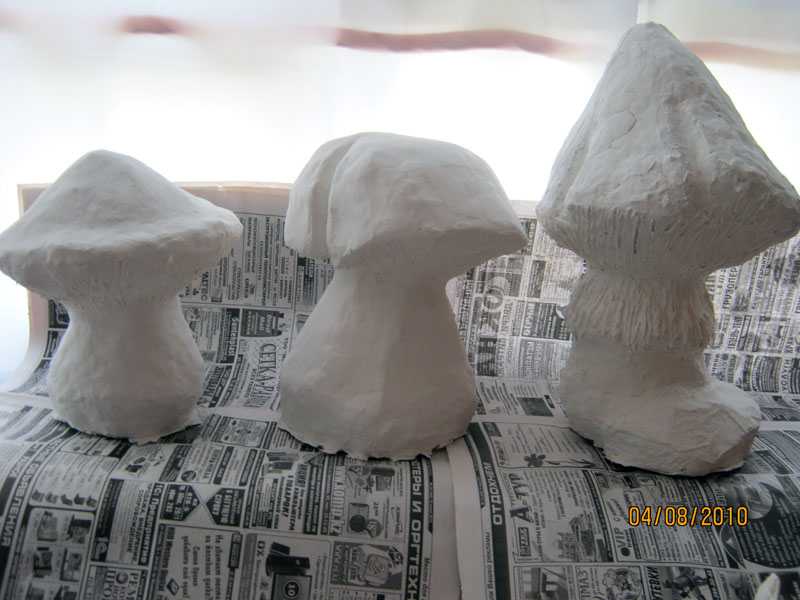
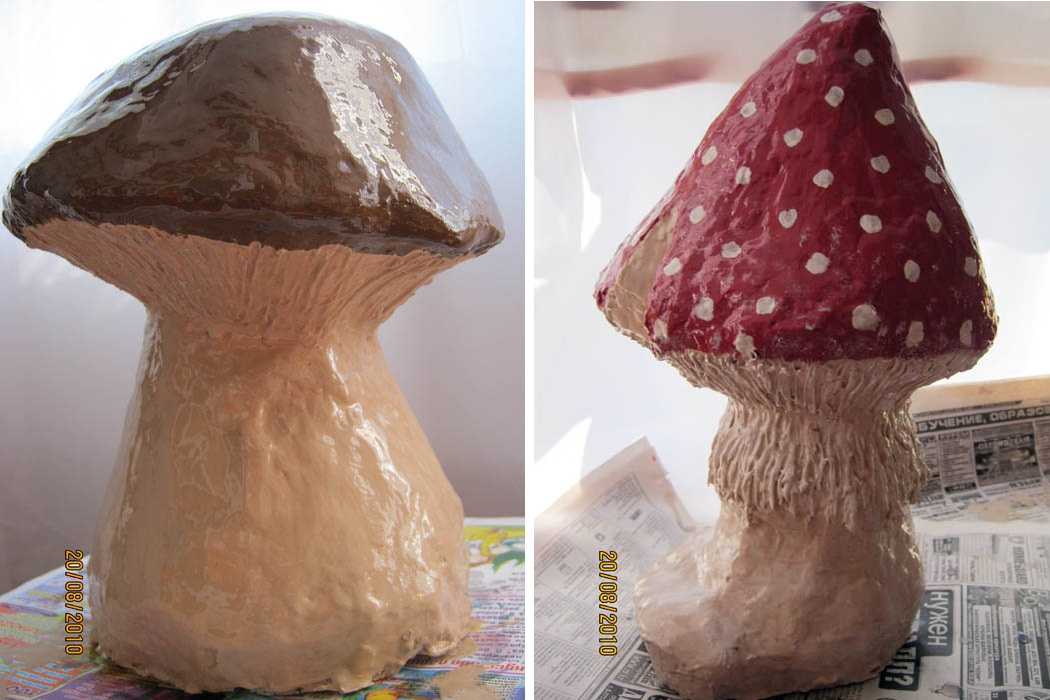
Mushrooms are made from foam. These are rough blanks
- So until the desired volume and shape appears.
- We leave to dry for two days.
- We take a sharp knife, cut off the excess, giving the desired shape.
- We putty the finished product (acrylic supermastic, composition for wall putty is suitable), dry.
- Level the surface (if necessary) with fine-grain sandpaper.
- We clean, prime and paint.
This is the result of labor
In general, the technology is simple and now you know how to make garden figures from polyurethane foam. But there are nuances. First. If you bought cheap foam and it began to spread, you need to wait until it begins to harden, moisten your hands with water and form what you need out of it. It is important to catch the moment when the foam is no longer very sticky, but has not yet completely frozen.
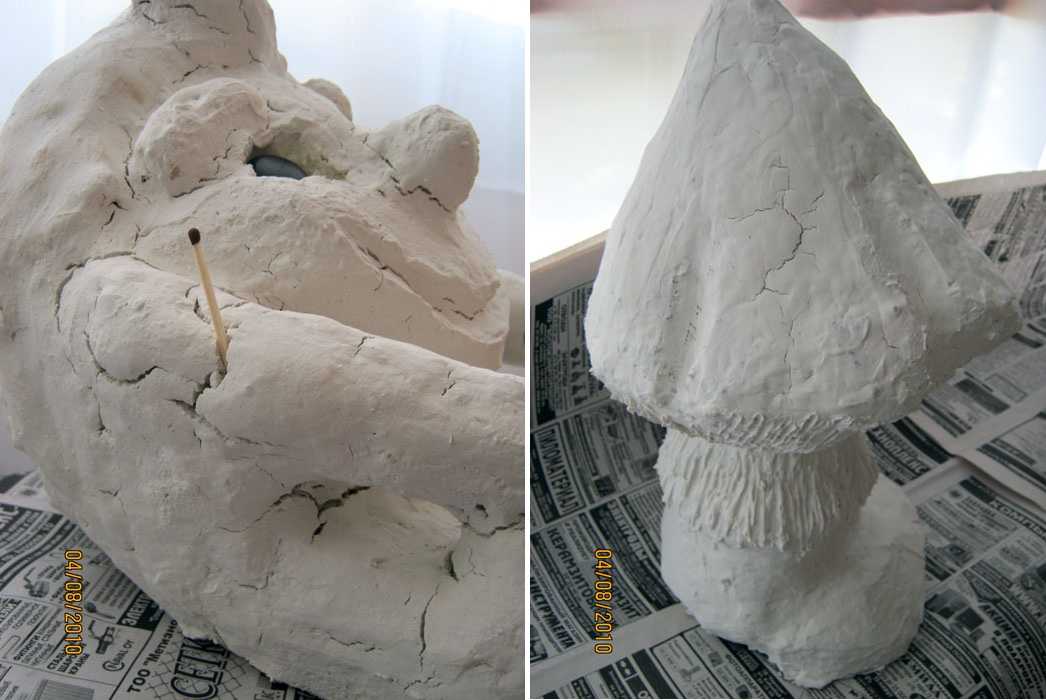
These are the cracks after the putty dries.
Second. If part of the figure fell off in the process, it can be fixed by dropping foam onto the joint, sticking a piece of wire - for greater strength - to connect the parts. Cover the seam with mastic, putty.

And this is the elimination of defects
Third. When the putty dries, cracks form on the surface of the figure. Covering them with putty again brings almost no result. Cracks appear again. To avoid them, we take a bandage, wrap the figure smeared with putty, apply another layer on top, level it.
This is after smoothing with your hands, but still wet
Fourth. If with the help of a spatula it was not possible to get a perfectly flat surface, but you need it, then when the putty dries, you can smooth it out with your hands. If necessary, moisten hands with water.
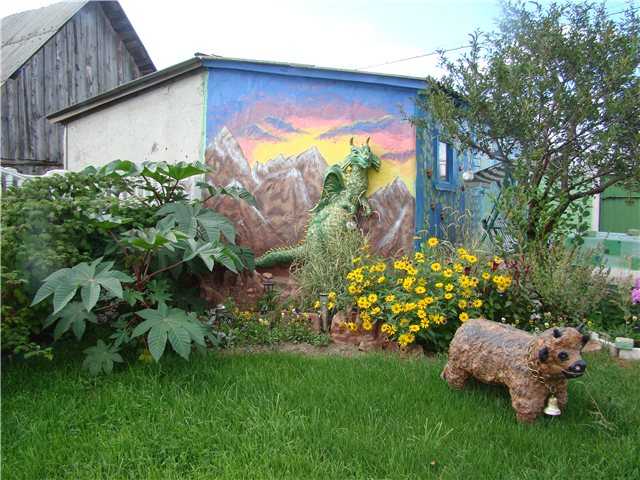
Photos of homemade garden figures and sculptures

These are concrete stones, but they are hollow inside. The base can be molded from clay, coated with several layers of concrete. When everything is dry, crumble the clay

To make the plumage of an owl look like a real one, sawdust was added to the solution

The most interesting thing about these garden figurines made of concrete is that the clothes are real, just soaked in concrete, and after drying they are painted
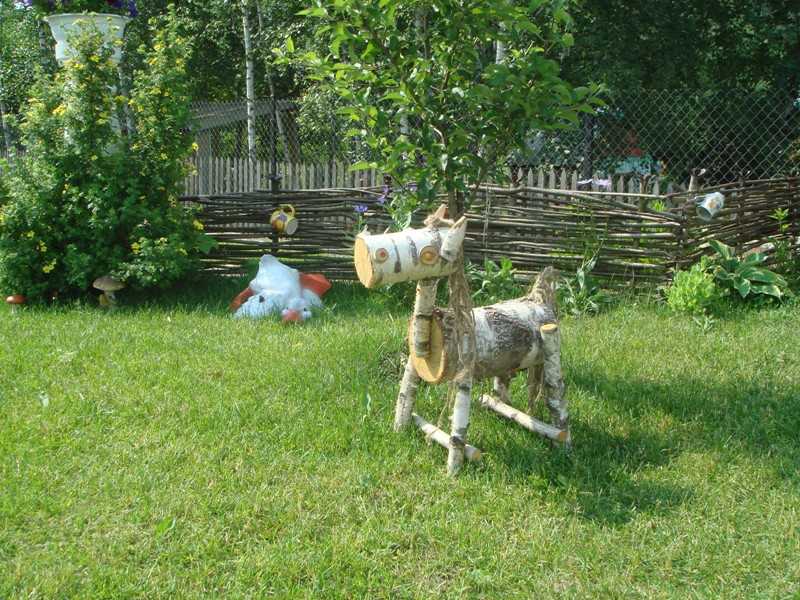
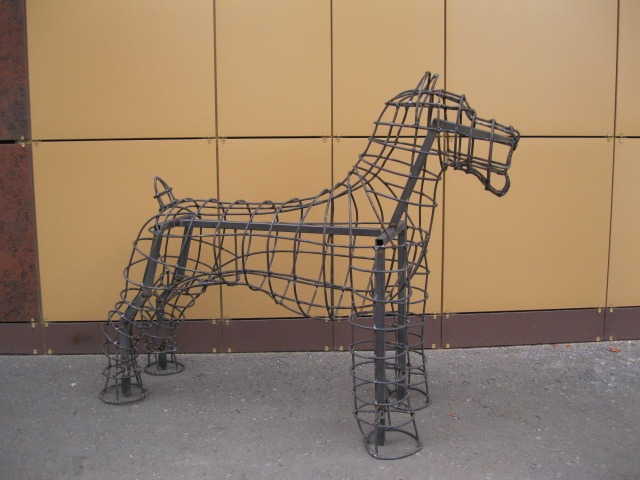
Garden figurines made of wood are not necessarily carved. There may be such - from blocks of wood. A wonderful horse!
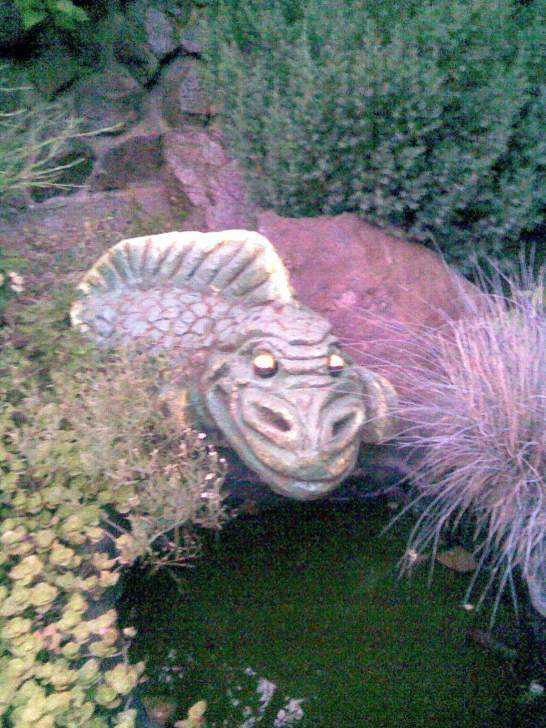
It is made from a concrete monolith with a knife.
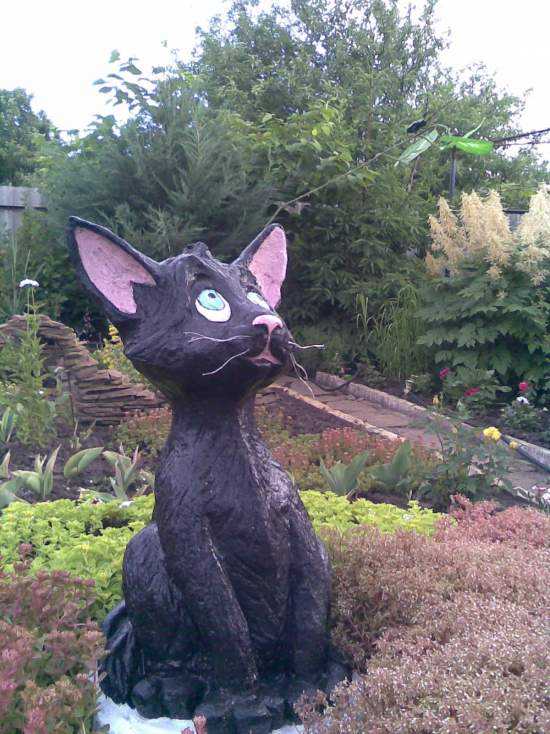
The cat is tall - more than 160 cm at the base of the pin. The head was made separately, then connected to the "body"
Turtles and mushrooms from concrete - they are most often made by novice sculptors

Such sculptures need a form ...
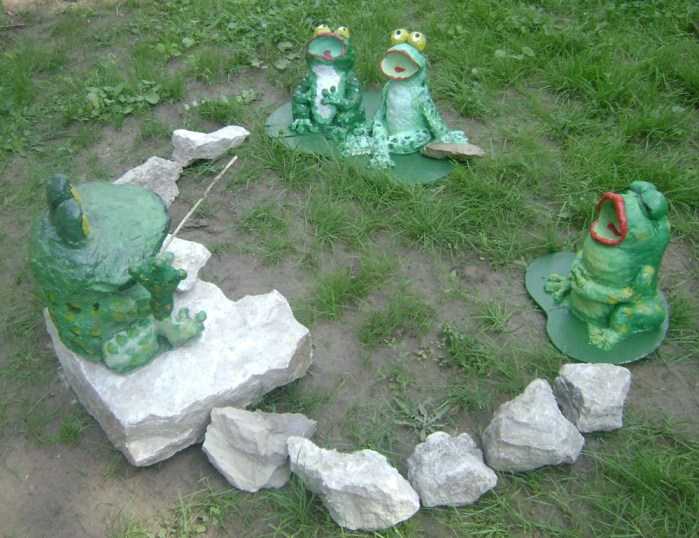
Frog family
From the remnants of concrete ...

These are plaster figures for the garden, but they cannot be left for the winter.
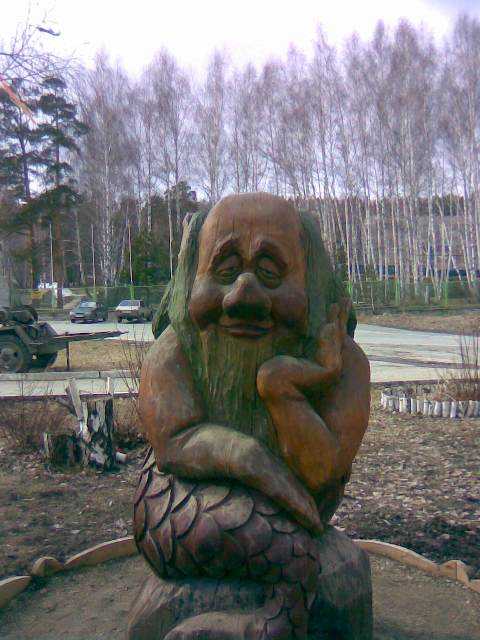
Wooden sculpture for a garden and a personal plot - a talent ...

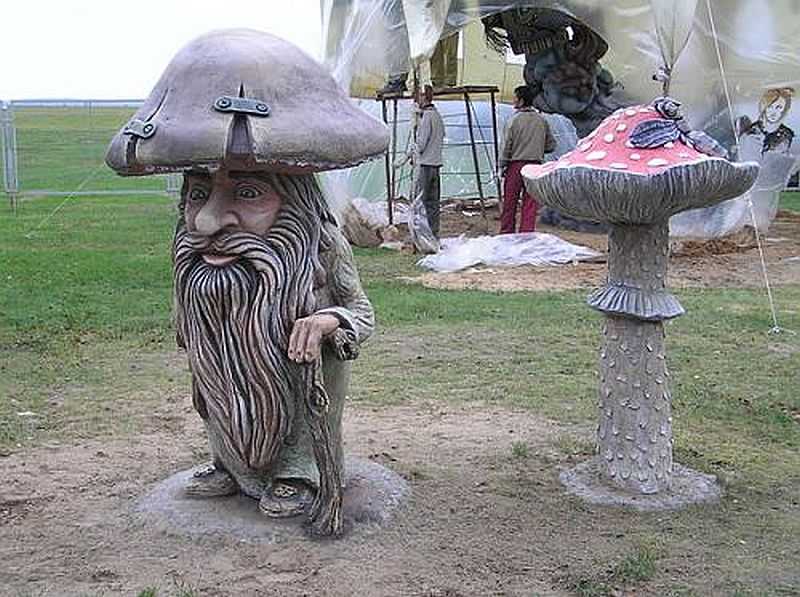
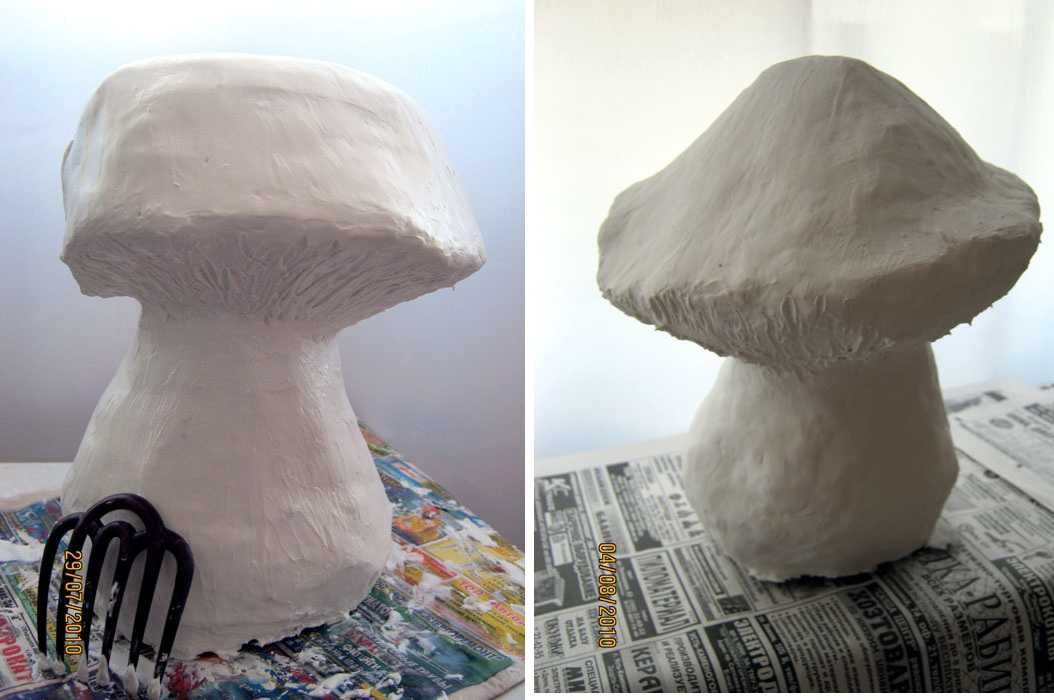
Mushrooms made of concrete - a plastic stem cup and a bowl for a hat. In the future hat, until the solution has hardened, dig out a cylindrical hole - so that the leg can enter there. So the fungus will be very similar to the real one.
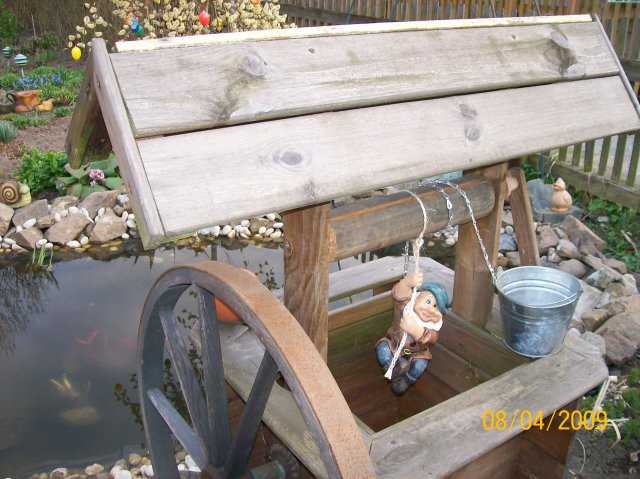
Cute gnome as decoration of the well
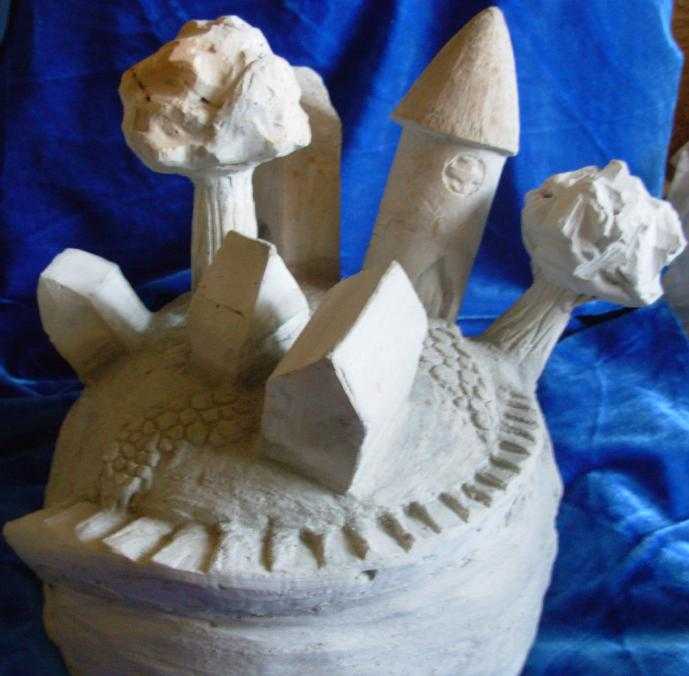
Fairy town made of plaster
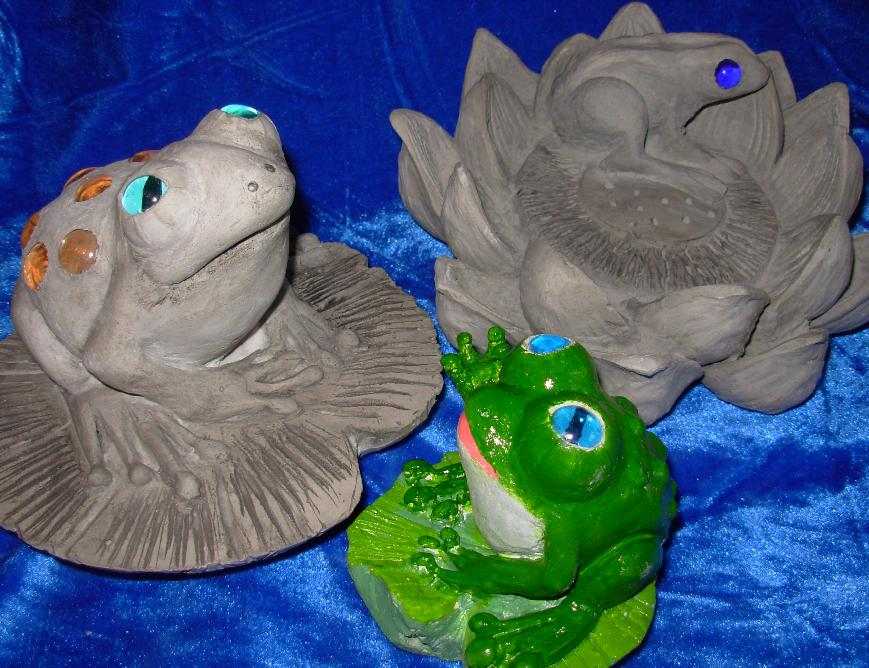
Frogs are ready to paint
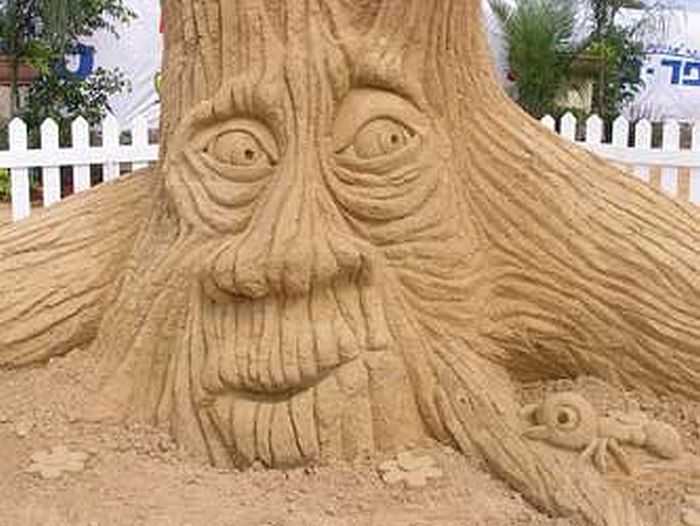
Some kind of a forester made of a withered tree