DIY installation and connection of heating radiators
The device or reconstruction of the heating system implies the installation or replacement of heating devices. The good news is that if you wish, you can do it yourself without involving specialists. How the installation of heating radiators should take place, where and how to place them, what is needed to carry out the work - all this is in the article.
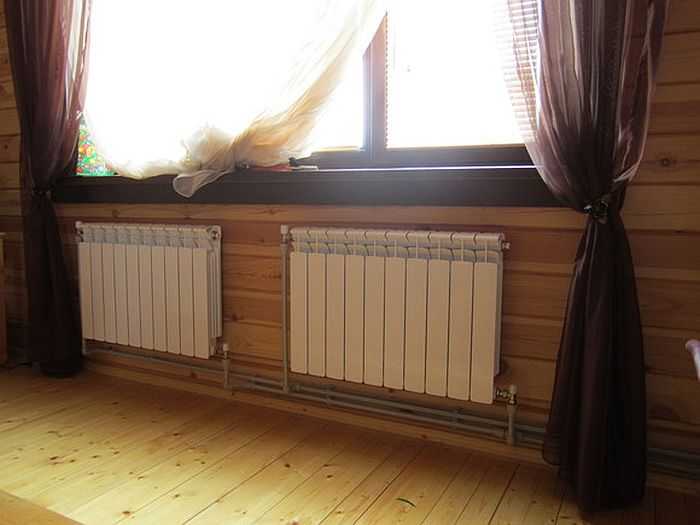
Do-it-yourself installation of heating radiators is possible
The content of the article
What is needed for installation
Installation of heating radiators of any type requires devices and consumables. The set of necessary materials is almost the same, but for cast-iron batteries, for example, the plugs are large, and the Mayevsky valve is not installed, but, somewhere at the highest point of the system, an automatic air vent is installed. But the installation of aluminum and bimetallic heating radiators is absolutely the same.
Steel panel ones also have some differences, but only in terms of hanging - they come with brackets, and on the back panel there are special bows cast from metal, with which the heater clings to the hooks of the brackets.
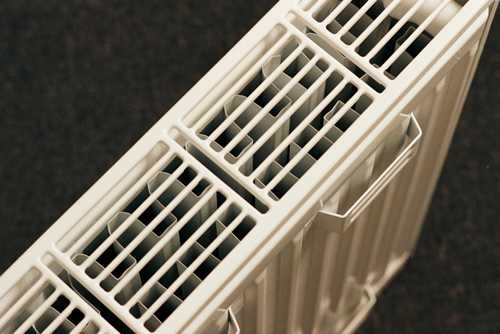
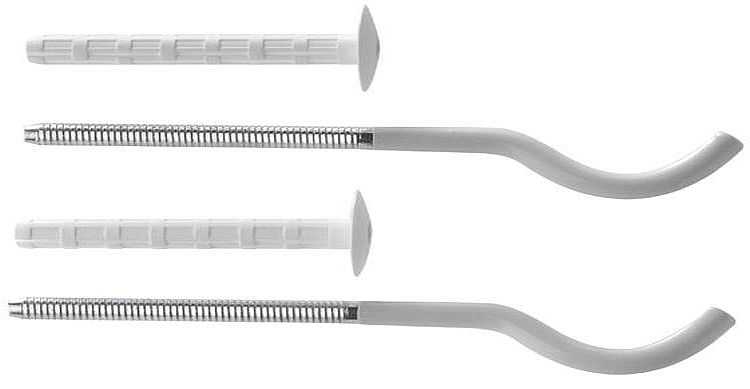
These are the hooks
Mayevsky crane or automatic air vent
This is a small venting device for air that can collect in the radiator. Placed on a free top outlet (collector). Must be on every heating device when installing aluminum and bimetallic radiators. The size of this device is much smaller than the diameter of the collector, so an adapter is also required, but Mayevsky taps usually come complete with adapters, you just need to know the diameter of the collector (connecting dimensions).

Mayevsky crane and method of its installation
In addition to the Mayevsky crane, there are also automatic air vents. They can also be placed on radiators, but they are slightly larger and for some reason are only available in a brass or nickel-plated case. Not in white enamel. In general, the picture turns out to be unattractive and, although they deflate automatically, they are rarely placed.

It looks like a compact automatic air vent (there are more bulky models)
Plug
The radiator has four outputs with side connection. Two of them are occupied by the supply and return pipelines, on the third, a Mayevsky crane is installed. The fourth entrance is closed with a plug. She, like most modern batteries, is most often painted with white enamel and does not spoil the appearance at all.
Where to put the plug and the Mayevsky tap with different connection methods
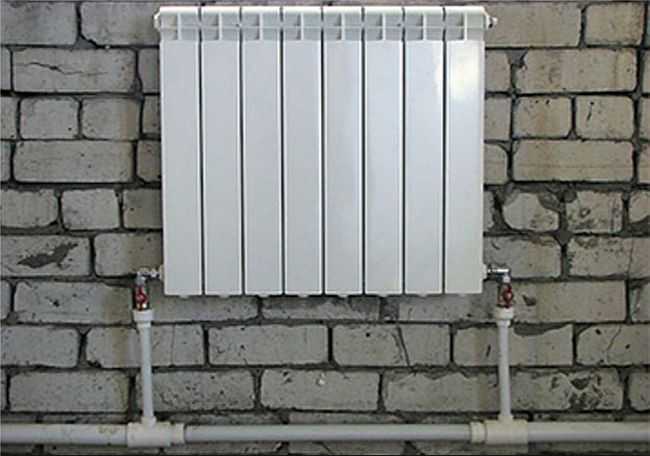
Shut-off valves
You will need two more ball valves or shut-off valves with the ability to adjust. They are placed on each input and output battery. If these are ordinary ball valves, they are needed so that, if necessary, you can turn off the radiator and remove it (emergency repair, replacement during the heating season). In this case, even if something happened to the radiator, you will cut it off, and the rest of the system will work. The plus of this solution is the low price of ball valves, minus the impossibility of adjusting the heat transfer.
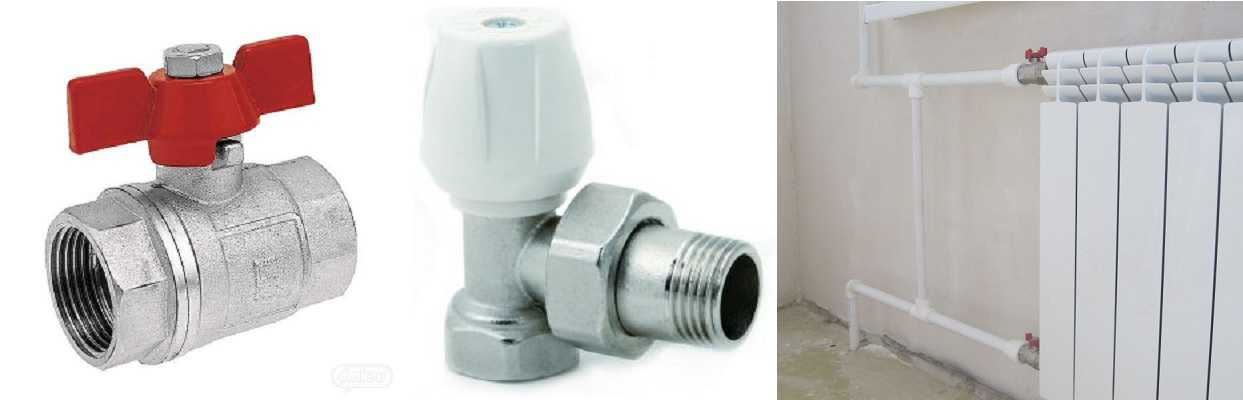
Heating radiator faucets
Almost the same tasks, but with the ability to change the intensity of the coolant flow, are performed by shut-off control valves.They are more expensive, but they also allow you to adjust the heat transfer (make it less), and they look better outwardly, they are available in a straight and angular design, so the strapping itself is more accurate.
If desired, you can put a thermostat on the coolant supply after the ball valve. This is a relatively small device that allows you to change the heat transfer of the heater. If the radiator heats up poorly, they cannot be installed - it will be even worse, since they can only make less flow. There are different thermostats for batteries - automatic electronic, but more often they use the simplest - mechanical.
Related materials and tools
You will also need hooks or brackets for hanging on walls. Their number depends on the size of the batteries:
- if the sections are no more than 8 or the length of the radiator is no more than 1.2 m, two attachment points at the top and one at the bottom are sufficient;
- for every next 50 cm or 5-6 sections add one fastener at the top and bottom.
So you need fum tape or linen roll, plumbing paste to seal the joints. You will also need a drill with drills, a level (a level is better, but a regular bubble level is also suitable), a certain number of dowels. You will also need equipment for connecting pipes and fittings, but it depends on the type of pipes. That's all.
Where and how to place
Traditionally, heating radiators are installed under the window. This is necessary in order for the rising warm air to cut off the cold from the window. To prevent the glass from sweating, the width of the heater must be at least 70-75% of the window width. It must be installed:
- in the middle of the window opening, the permissible deviation is 2 cm;
- the distance from the radiator to the floor is 8-12 cm;
- to the windowsill - 10-12 cm;
- from the back wall to the wall - 2-5 cm.
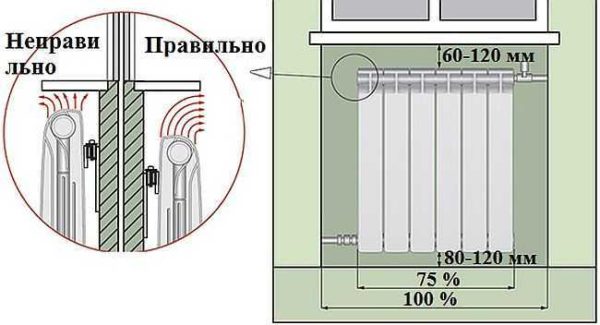
Distances from the heating radiator to the window
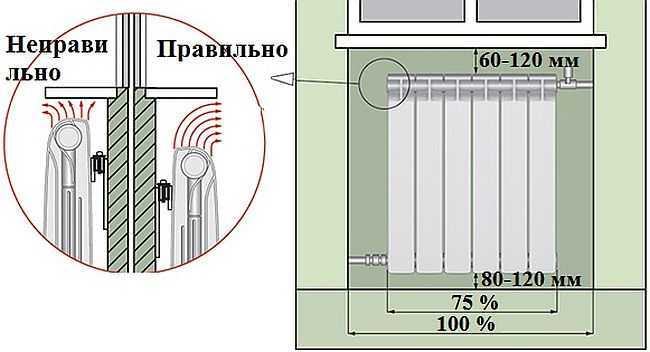
These are all recommendations, the observance of which ensures the normal circulation of warm air in the room and its effective heating.
How to choose polypropylene pipes read here.
How to install correctly
Now about how to hang a radiator. It is highly desirable that the wall behind the radiator is level - it is easier to work this way. The middle of the opening is marked on the wall, a horizontal line is drawn 10-12 cm below the window sill line. This is the line along which the upper edge of the heater is aligned. The brackets must be installed so that the top edge coincides with the drawn line, that is, it is horizontal. This arrangement is suitable for forced circulation heating systems (with a pump) or for apartments. For systems with natural circulation, a slight slope is made - 1-1.5% - along the flow of the coolant. You can't do more - there will be stagnation.
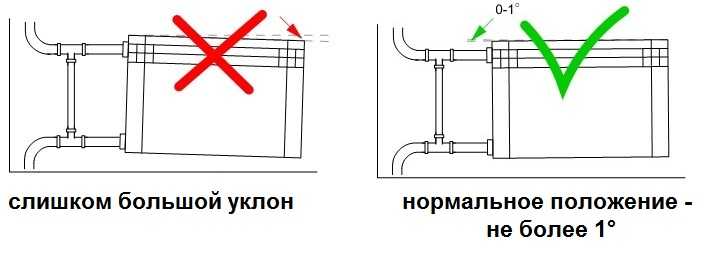
Correct installation of heating radiators
Wall mount
This must be taken into account when installing hooks or brackets for heating radiators. Hooks are installed like dowels - a hole of a suitable diameter is drilled in the wall, a plastic dowel is installed in it, and the hook is screwed into it. The distance from the wall to the heater can be easily adjusted by twisting and unscrewing the hook body.
The hooks for cast iron batteries are thicker. This is a fastener for aluminum and bimetallic
When installing hooks under heating radiators, keep in mind that the main load falls on the upper fasteners. The lower one serves only for fixing in a given position relative to the wall and is installed 1-1.5 cm lower than the lower collector. Otherwise, you simply cannot hang the radiator.
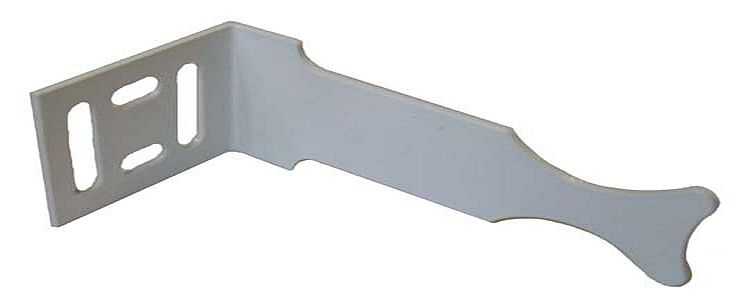
One of the types of brackets
When installing the brackets, they are applied to the wall in the place where they will be mounted. To do this, first attach the battery to the installation site, look where the bracket will "fit", mark the place on the wall. With the battery down, you can attach the bracket to the wall and mark the location of the fasteners on it. In these places, holes are drilled, dowels are inserted, the bracket is screwed onto the screws.Having installed all the fasteners, the heater is hung on them.
Fixing to the floor
Not all walls can support even lightweight aluminum batteries. If the walls are made of lightweight concrete or plasterboard, floor installation required. Some types of cast iron and steel radiators come immediately on legs, but they do not suit everyone in appearance or characteristics.
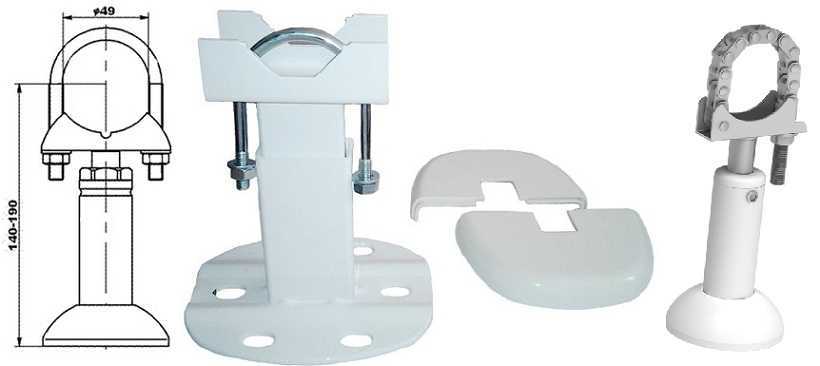
Legs for installing aluminum and bimetallic radiators on the floor
Possibility of floor installation of aluminum and bimetallic radiators. There are special brackets for them. They are fixed to the floor, then the heating device is installed, the lower collector is fixed with an arc on the installed legs. There are similar legs with adjustable height, there are fixed ones. The method of fastening to the floor is standard - on nails or dowels, depending on the material.
Options for piping heating radiators
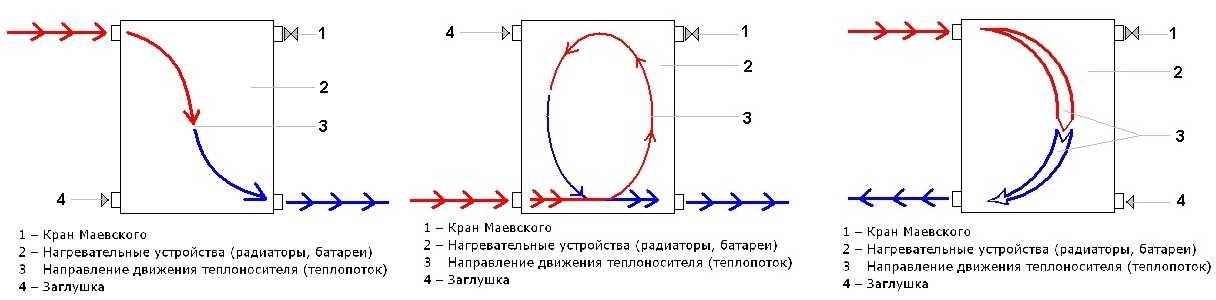
Installation of heating radiators implies their connection to pipelines. There are three main ways to connect:
- saddle;
- unilateral;
- diagonal.
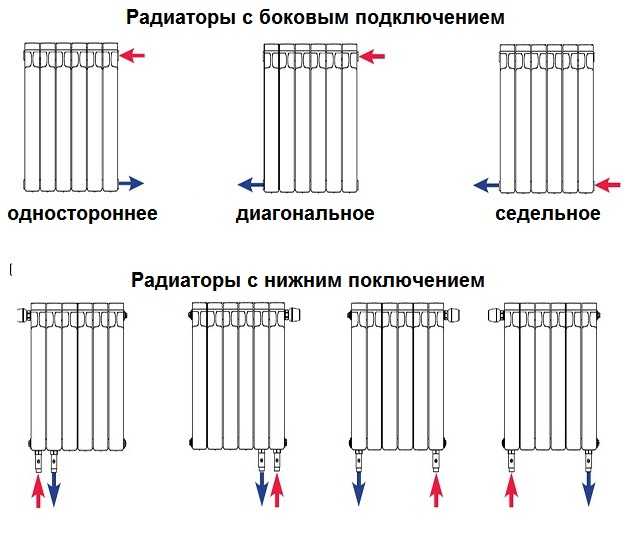
Connection options
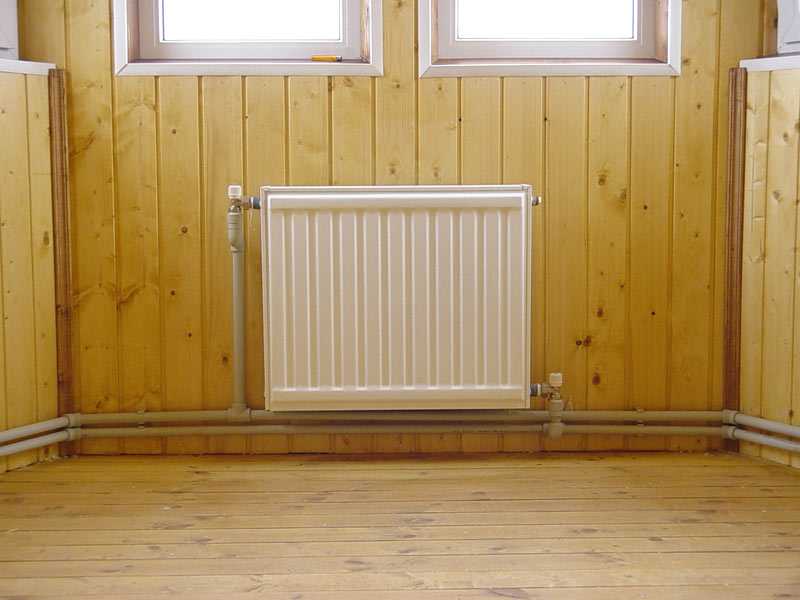
If you install radiators with the bottom connection, you have no choice. Each manufacturer rigidly binds the supply and return, and its recommendations must be strictly followed, otherwise you simply will not get heat. With side connection more options (read more about them here).
Strapping with one-way connection
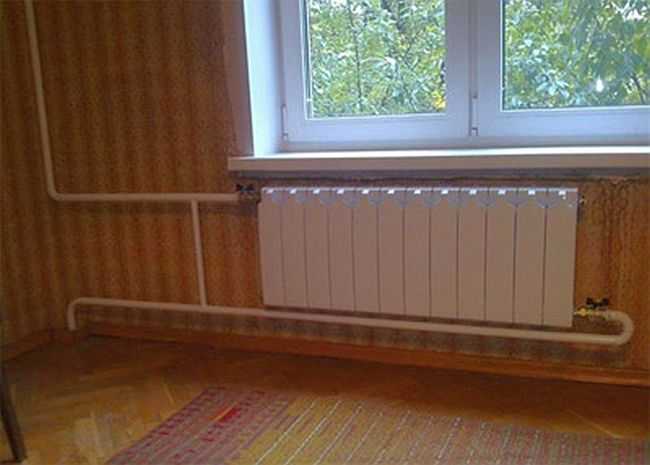
One-way connection is most often used in apartments. It can be two-pipe or one-pipe (the most common option). In apartments, metal pipes are still used, therefore, we will consider the option of tying the radiator with steel pipes on squeegees. In addition to pipes of a suitable diameter, two ball valves, two tees and two squeegees are needed - parts with external threads at both ends.
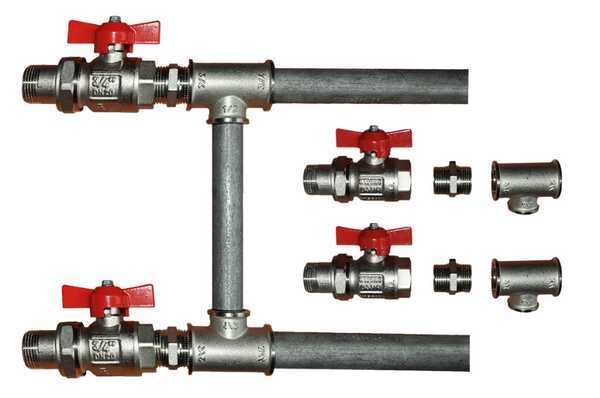
Lateral connection with bypass (one pipe system)
All this connects as shown in the photo. With a one-pipe system, a bypass is mandatory - it allows you to turn off the radiator without stopping or lowering the system. You cannot put a crane on the bypass - you will block the movement of the coolant along the riser with it, which is unlikely to please your neighbors and, most likely, will be fined.
All threaded connections are sealed with fum-tape or linen tape, on top of which packing paste is applied.When screwing the tap into the radiator manifold, a lot of winding is not required. Too much of it can lead to the appearance of microcracks and subsequent destruction. This is true for almost all types of heating devices, except for cast iron. When installing all the others, please, no fanaticism.
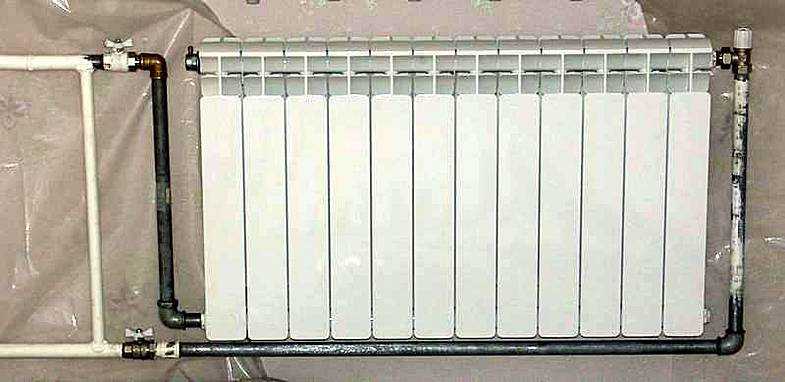
Welded option
If you have the skills / ability to use welding, you can weld the bypass. This is how the piping of radiators in apartments usually looks.
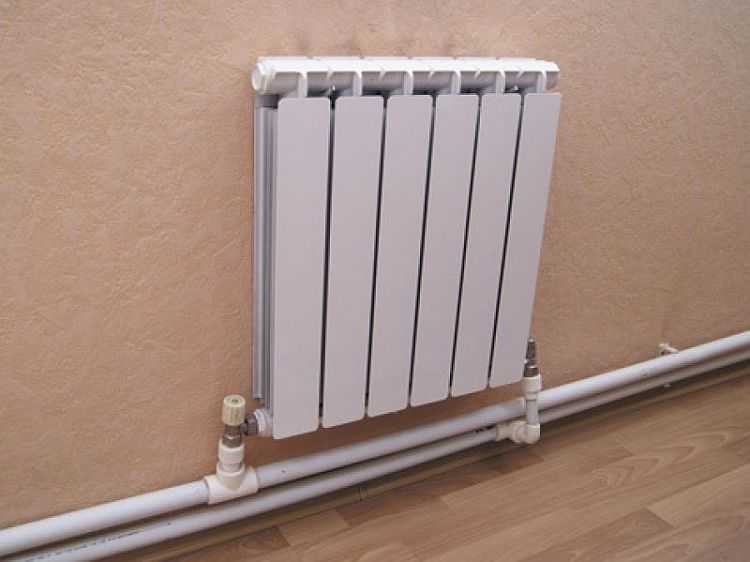
With a two-pipe system, a bypass is not required. The supply is connected to the upper input, the return is connected to the lower one, taps, of course, are needed.
One-sided piping with two-pipe system
With lower wiring (pipes are laid on the floor), this type of connection is done very rarely - it turns out inconvenient and ugly, it is much better in this case to use a diagonal connection.
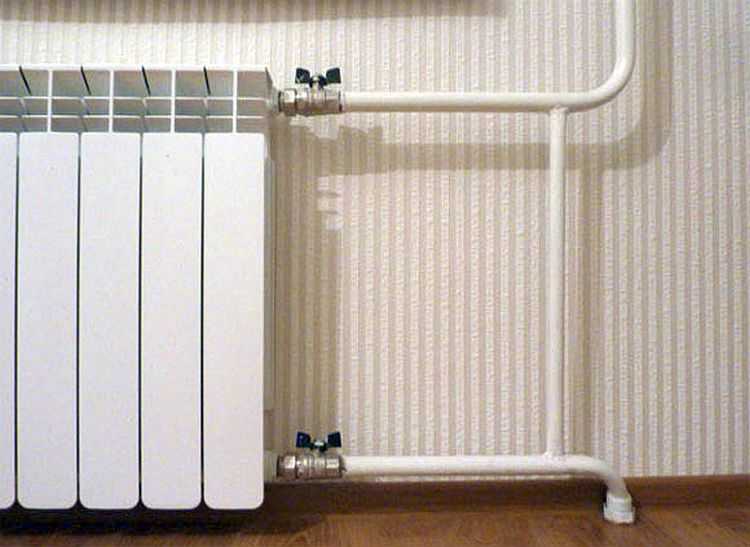
Strapping for diagonal connection
Installation of heating radiators with diagonal connection is the best option in terms of heat transfer. She is the highest in this case. With lower wiring, this type of connection is easy to implement (example in the photo) - supply from this side at the top, return flow from the other at the bottom.
A single pipe system with vertical risers (in apartments) doesn't look so good, but people put up with the higher efficiency.
Coolant supply from above
Note that with a one-pipe system, a bypass is again required.
Coolant supply from below
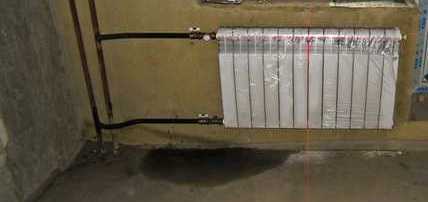
Saddle piping
With lower wiring or hidden piping, installing heating radiators in this way is the most convenient and most inconspicuous.
With saddle connection and bottom one-pipe wiring, there are two options - with and without bypass. Without a bypass, the taps are still installed, if necessary, you can remove the radiator, and install a temporary jumper between the taps - a squeeze (a piece of pipe of the required length with threads at the ends).
Saddle connection for one pipe system
With vertical wiring (risers in high-rise buildings), this type of connection can be seen infrequently - too high heat losses (12-15%).
Video tutorials on installing heating radiators