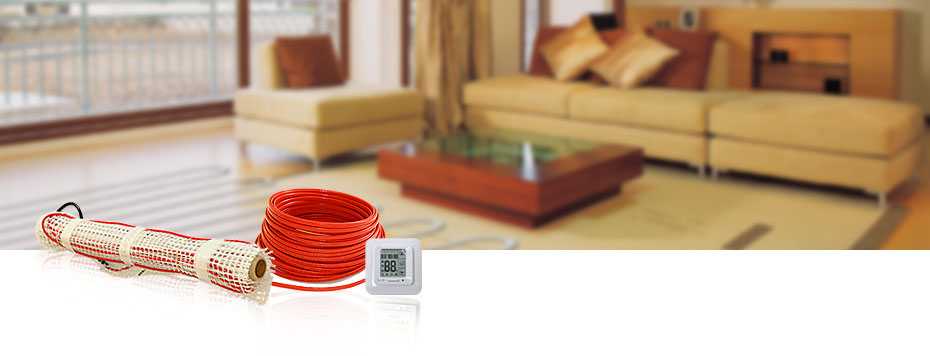
Laying electric underfloor heating under laminate and tiles
To increase the comfort of living in the cold season, you can use floor heating. One of the options is an electric underfloor heating. It is mounted faster and easier than water, you can do it yourself without the involvement of specialists. Self-laying of an electric floor under tiles, linoleum and laminate will be discussed.
The content of the article
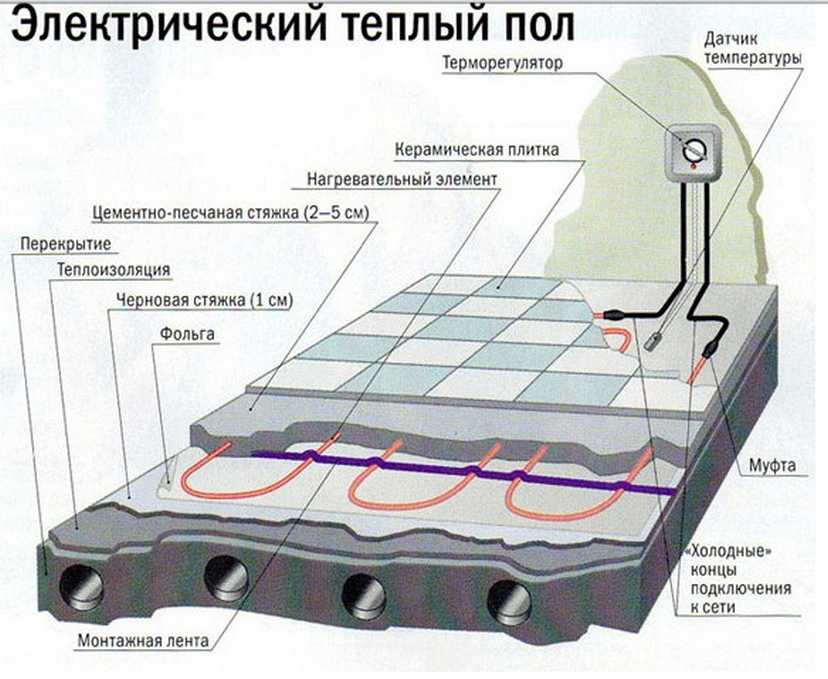
Electric floor heating device
Generally speaking, an electric floor heating consists of the following parts:
- heating element;
- floor temperature sensor;
- thermostat (thermostat).
In this case, it is worth knowing that the heating element will work without a sensor and thermostat, but the work will be ineffective and short-lived. Inefficient, because you will have to turn it on / off manually, and this leads to excessive consumption of electricity. And it is short-lived, because overheating often occurs during manual control, which negatively affects the service lines of the heating element.
Components of an electric floor heating
Types of heating elements
On the market you can be offered several different heaters:
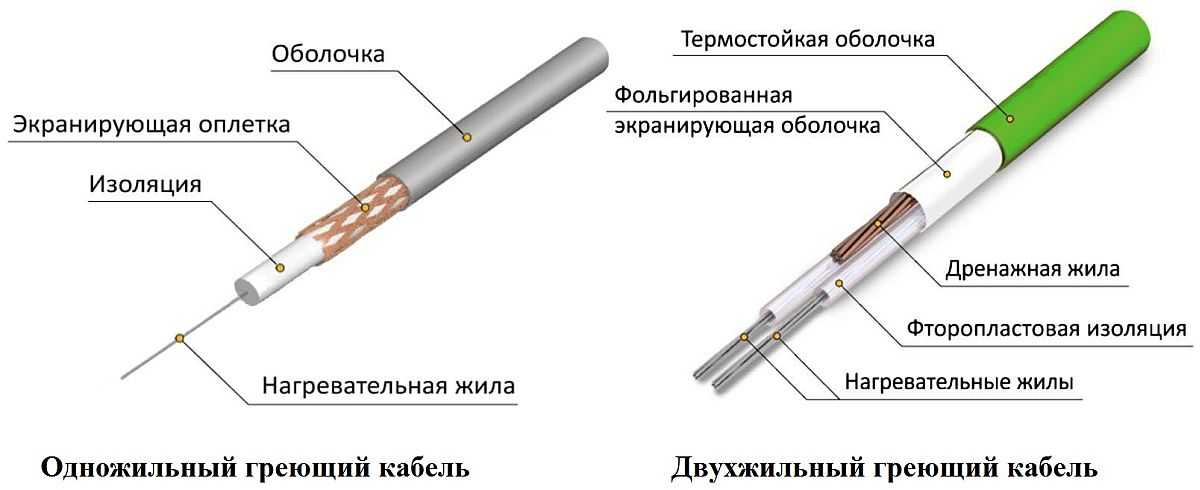
- Resistive heating cables. They have the lowest price, they are single-core and two-core, which is why their connection diagram changes. Their main disadvantage is the possibility of local overheating and failure (you cannot put objects on a working resistive cable floor heating). Therefore, during installation, the cables are not laid out under the places where furniture and household appliances will stand. Another disadvantage is the lengthy installation process during installation.

Resistive heating cables
- Self-regulating heating cable. It has a higher price, but it can regulate its own temperature in a separate area in automatic mode, which avoids local overheating and prolongs its service life.

Self-regulating heating cable
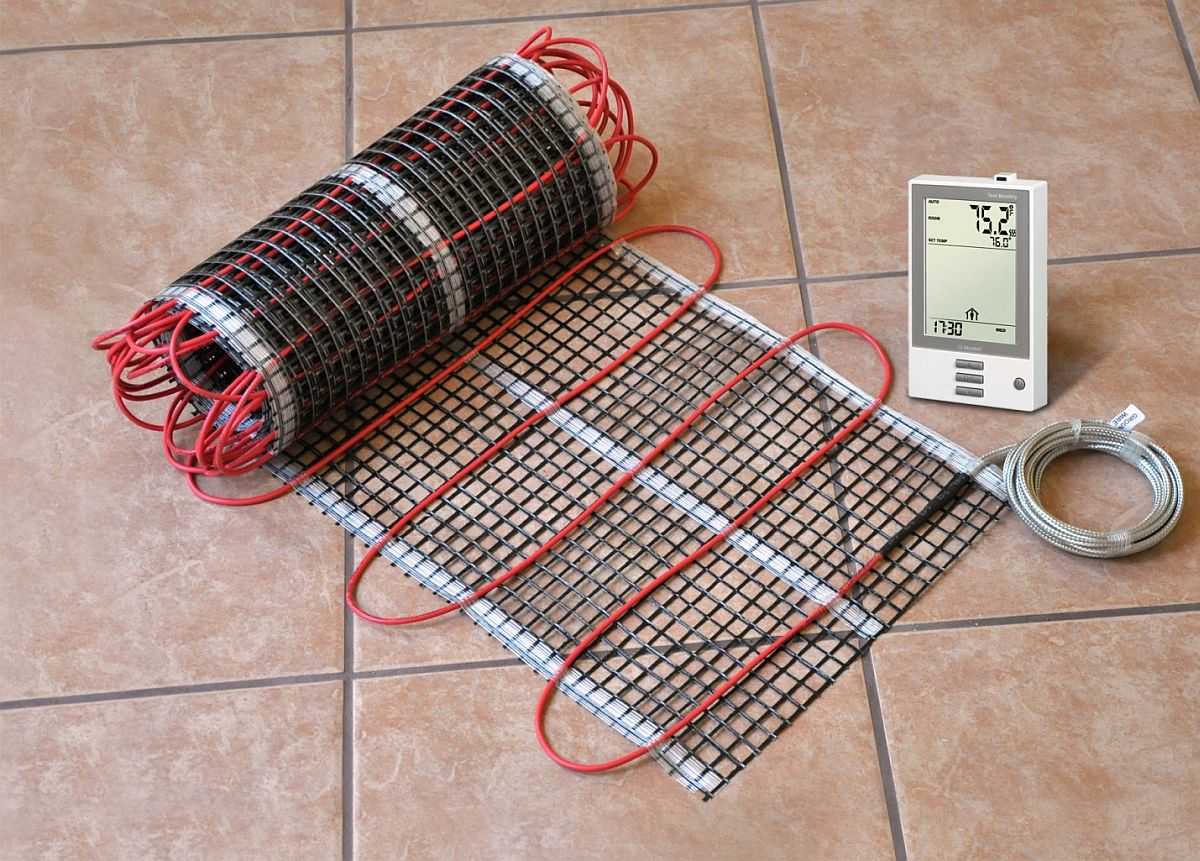
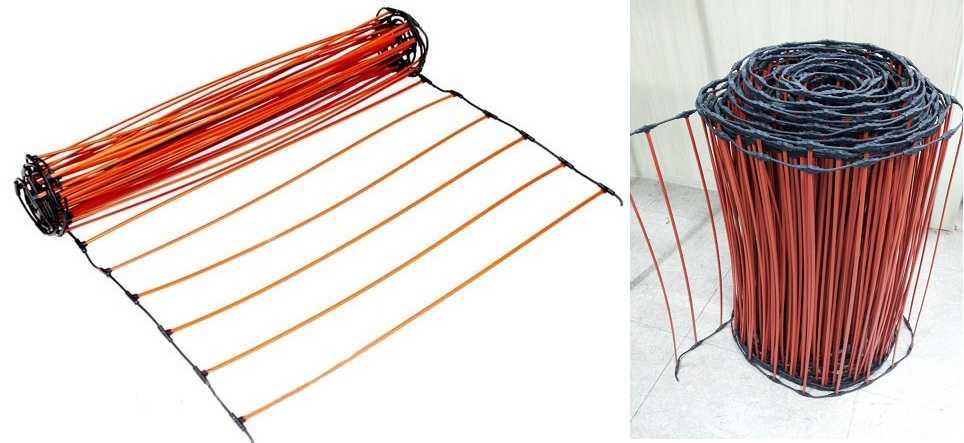
- Electric cable mats for underfloor heating. These are the same cables, only fixed in the form of a snake on a polymer mesh. They can also be made from resistive or self-regulating cable. Laying such an electric floor requires a lot less time.

Electric cable mat
- Infrared carbon films. A carbon paste is sealed between two layers of polymer, which, when an electric current passes through it, releases heat in the infrared range. It is attractive by the release of infrared heat, with proper quality it is durable - if some of the carbon strips are damaged, only they are excluded from work, the rest work. Quick installation is also a plus, but the electrical connection is more complicated than that of cables. The price is not very happy and this is the main drawback.
Carbon film - infrared floor heating
- Carbon infrared mats. These are rods with carbon fiber internals, interconnected by electrical wires. The most expensive type of heating elements for electric underfloor heating, but, according to reviews, the most unreliable. They appeared not very long ago and the production technology is poorly worked out, therefore the main problem is failure due to contact failure at the junction of the carbon rod and the conductor.

Carbon fiber mats for infrared floor heating

Which of these types of electric floor is better, it is impossible to say for sure.Each has pros and cons, installation features. Based on them, they choose the best option for a particular floor covering - it is better to put cables or mats under the tiles, and a film heater under the laminate or linoleum.
Types of thermostats
There are three types of thermostats for electric underfloor heating:
- Mechanical. In appearance and principle of operation, they resemble a thermostat on an iron. There is a scale by which you set the required temperature. As soon as it drops 1 ° C below the set value, the heating turns on, becomes one degree higher - turns off.
- Electro-mechanical. In terms of functionality, they are no different, only a small LCD screen and up / down buttons are eaten. The screen displays the current floor temperature, and with the buttons it is adjusted in the desired direction.
- Electronic programmable. The most expensive, but also the most functional. In them, you can set the operating mode (temperature) by the hour, and in some models, by the days of the week. For example, if everyone left in the morning, you can set a low temperature - about 5-7 ° C, and an hour and a half before arrival, program it to rise to standard. There are some models with internet control capability.
Some models of thermostats for underfloor heating have built-in air temperature sensors and the ability to turn on / off heating according to these indicators, and not depending on the floor temperature. So there really is a choice.
Electric underfloor heating for tiles - cable and cable mat
Cable mats are best suited for tiles. In this case, such an electric warm floor with your own hands is the easiest to do, especially if you already have it insulated and leveled. Insulation is necessary so that heating costs are not too high, and an even base is necessary in order to ensure uniform heating and avoid the appearance of voids under the cable. If there is air under the cable, it will overheat and burn out. Therefore, first they make insulation and rough leveling of the floor, and then they put a heating cable or mat.
It is more difficult to work with heating cables - they have to be laid out for a long time, tied to a grid or fixed in clamps. But otherwise, it's also a good option.
Electric underfloor heating under tiles
Installation procedure for the cable mat
Let's assume that the floor is insulated and leveled. Situations are too different and it is possible to say exactly what the screed cake should be only in relation to each case.
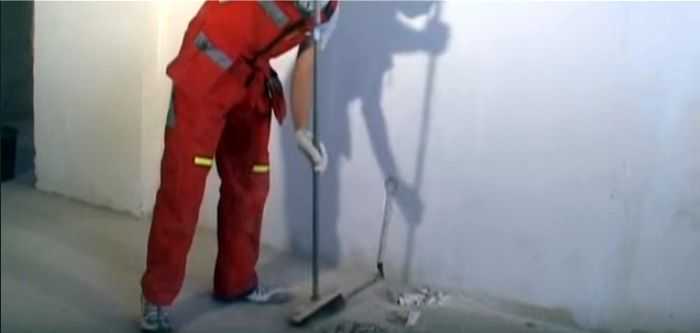
When installing electric floor heating of any type, installation begins with the installation of a thermostat. It is placed on the wall at a comfortable height, but not lower than 30 cm from the floor. It is installed in a standard mounting box (like a socket). A hole is drilled under the box in the wall. To do this, use a drill with an appropriate attachment - a crown.
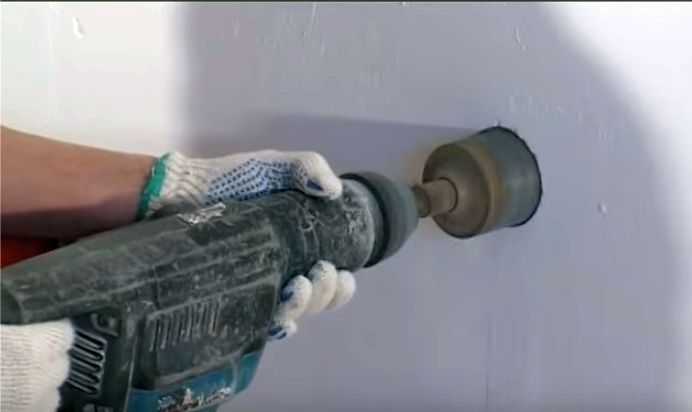
We drill a hole for the mounting box
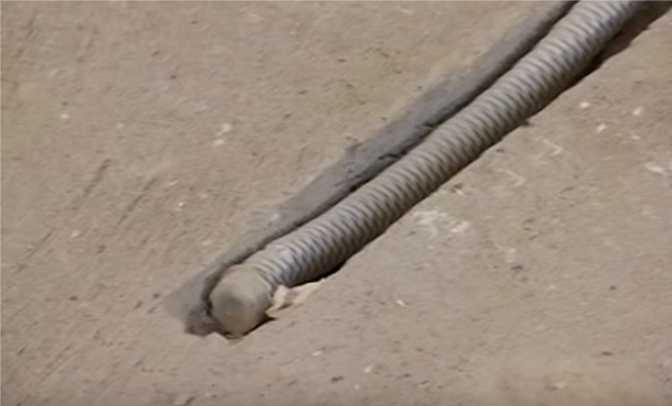
Two strobes are laid down from the box. One will contain electric cables from the heating elements, the other - a sensor in a corrugated hose. The groove for the floor sensor also continues on the floor. It should be at least 50 cm away from the wall.
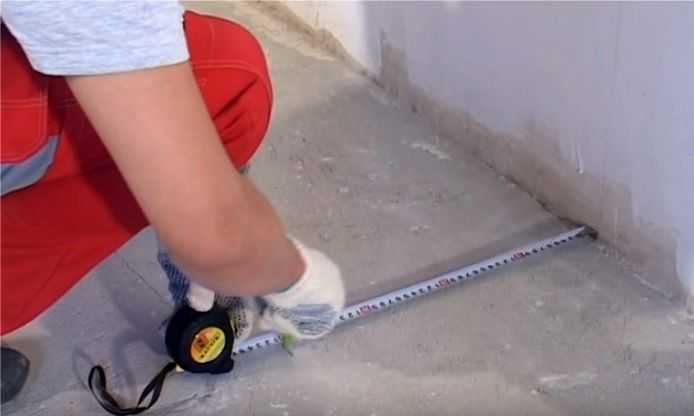
The strobe under the temperature sensor must extend to the floor at least 50 cm
To provide a warm floor with electricity, 220 V must be supplied to the thermostat. The cross-section of the wires is selected depending on the current consumed. The data are shown in the table.
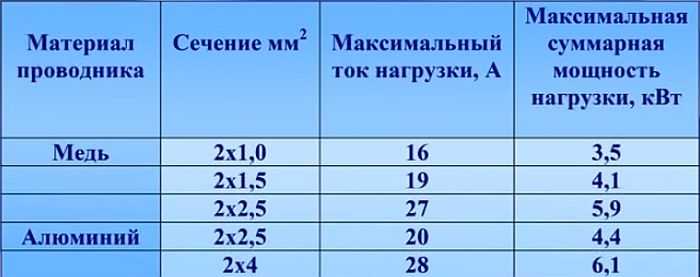
Selection of the cross-section of wires for connecting power to the thermostat of the electric underfloor heating
After the strobes are made, you can start laying the electric floor heating with your own hands. To do this, remove all debris from the floor surface (sweep carefully).
The floor surface must be absolutely clean
To improve the adhesion of the screed and tile adhesive, it is primed.
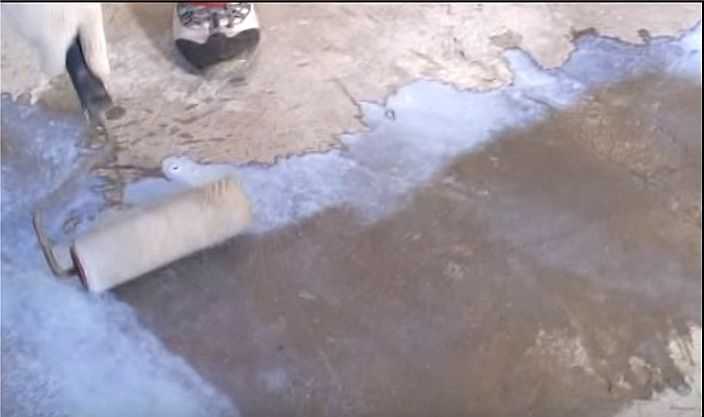
Primer for better adhesion to the adhesive
After the primer has dried, the temperature sensor can be placed in the prepared groove.It is dipped into a corrugated hose (often included). The sensor itself is at the end of a long wire. It is brought up to the edge of the pipe, closed with a plug. The plug is necessary to prevent glue or solution from damaging the sensor. After the tester, they check whether the sensor was damaged during operation. If everything is ok, you can install it.
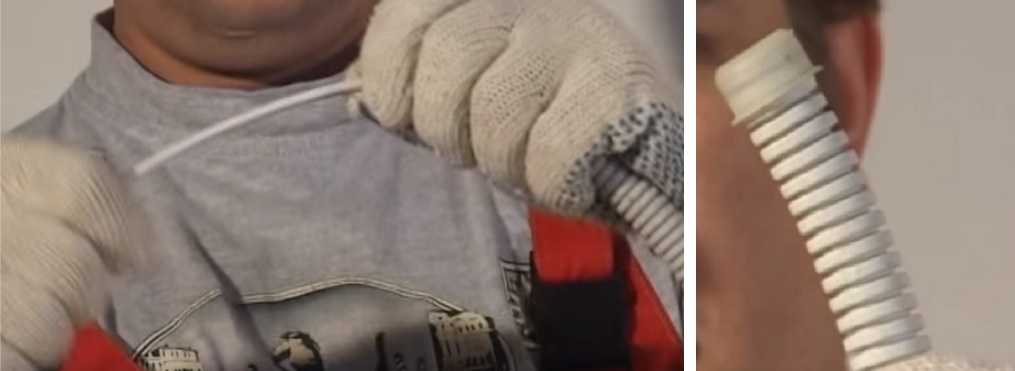
We put the sensor into the corrugated hose
We put the corrugation in a pre-prepared strobe, we put the wire into a mounting box prepared for a thermostat.
We put the sensor in the groove
We put the wires into the mounting box of the thermostat.
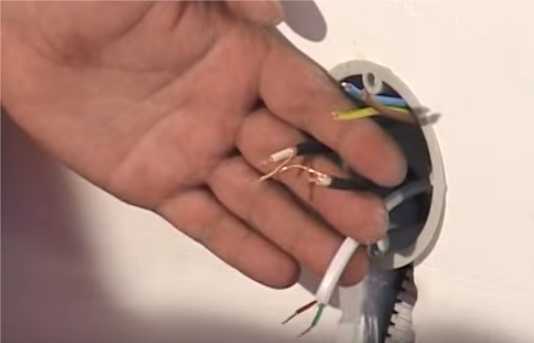
We put the cable from the sensor into the junction box
The groove with the sensor is sealed with tile glue, making sure that there are no drops.
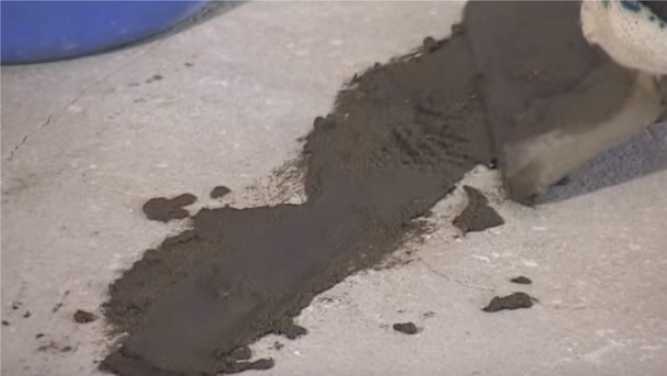
Cover the groove with tile glue
Further, to reduce heating costs, you can spread a thin layer of insulation with a laminated surface on the floor.
To minimize heat loss, you can spread a layer of laminated thermal insulation
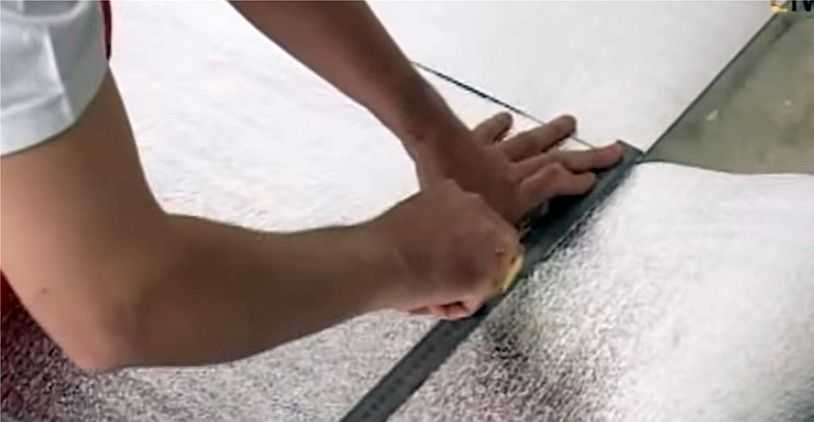
The sheets of thermal insulation are stacked close to each other, gluing the joints with tape.
Tape the joints
With this layer - metallized thermal insulation - not everything is so simple. If you lay it down, the screed or tile will be floating, since it will not have a connection with the base. Some manufacturers recommend cutting out “windows” in the substrate to provide bonding through which the concrete and adhesive (or screed) will bond together. This connection does not seem to be reliable.
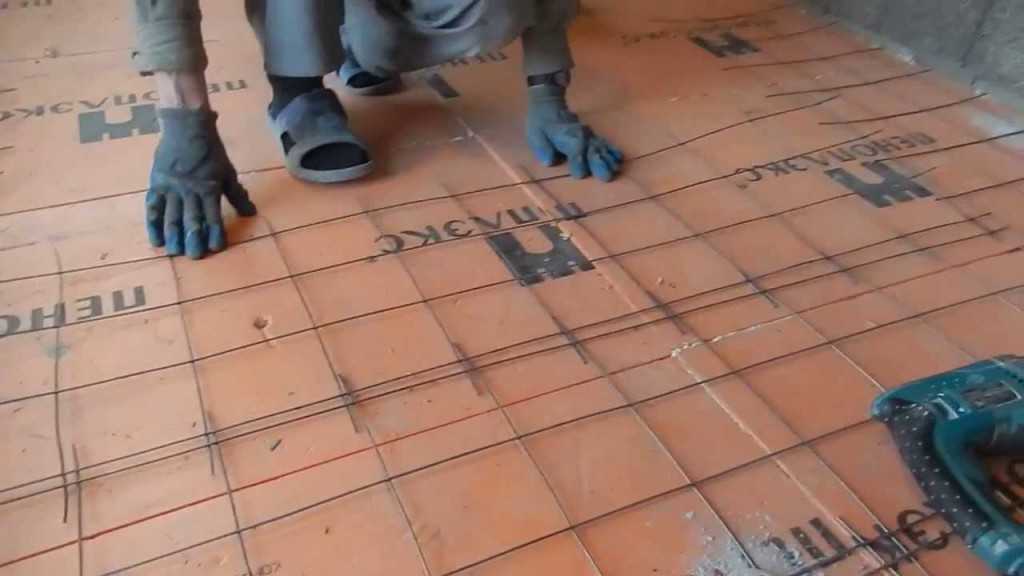
Next, we mark the area that will be heated. We exclude places where furniture and large household appliances will be located. We also retreat from walls and other heating devices (risers, radiators, etc.) by 10 cm. The rest of the area should be covered with cable mats. They are spread over the required space. In the place where the mat needs to be unrolled, cut the mesh without touching the heating cable.
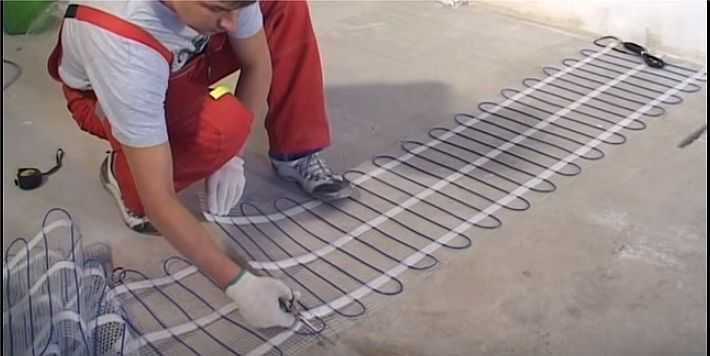
The mesh is cut, the cable is not touched
The mat is unrolled (the cable serves as a link) and laid in the opposite direction (or at 90 ° if necessary).

Checkmate unfold
Please note that the mats must not overlap and the heating cables must not touch. There must be a distance of at least 3 cm between the two wires. Also, when laying out the electric underfloor heating, calculate so that the underfloor heating sensor is between the two sheets.

The floor sensor must be located between the cable turns
Also run the electrical cables from the heating mats into the junction box. After installation, you need to ring them by checking the resistance. It should differ from the passport one (found in the instructions for each kit) by no more than 15%.
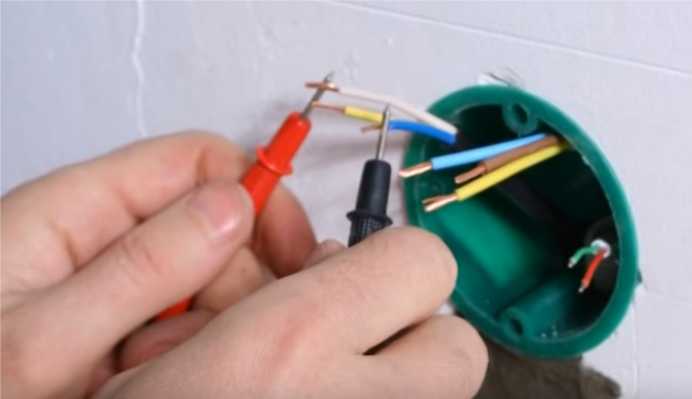
Checking the resistance
After that, you can connect the thermostat. The connection diagram is on the back wall (it is graphically indicated what and where to connect).
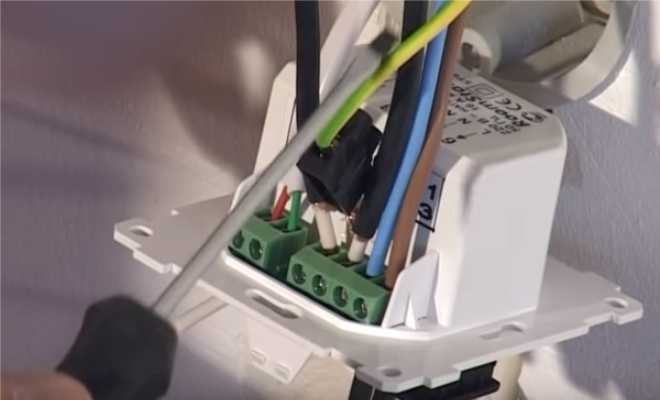
We connect to the corresponding terminals
For better contact, it is better to tin the wires (warm it up with a soldering iron in rosin or soldering flux). The installation of the conductors is simple: they are inserted into the socket, and then tighten the clamping screw with a screwdriver.
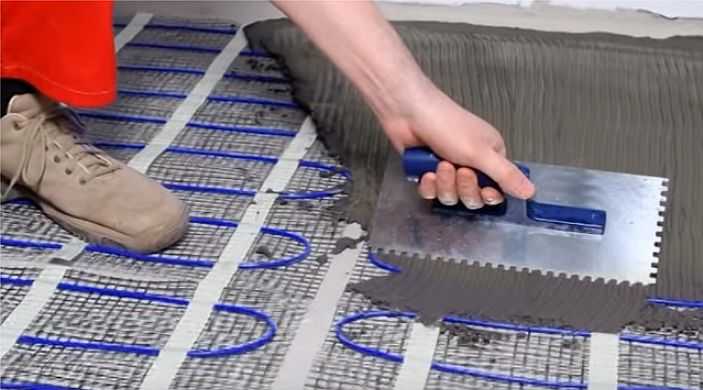
Then we apply voltage for a short time - for about 1-2 minutes. Check if the mats are warming up and if all sections are warmer. If so, you can move on. We close the tile adhesive (special for underfloor heating) and apply in small areas to the cable mat. Layer thickness 8-10 mm.
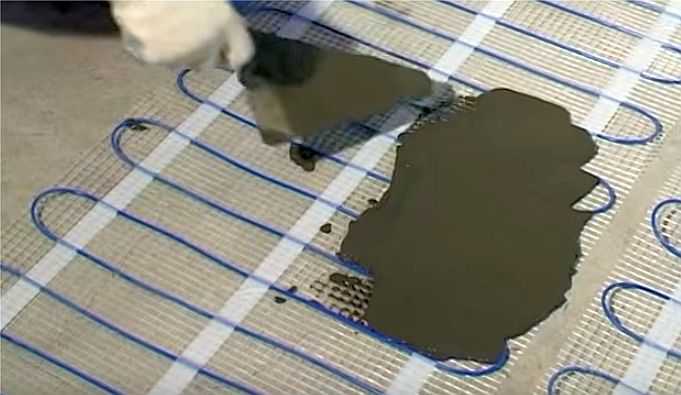
Apply glue in small areas
When applied, the glue is well pressed. There should be no voids or air bubbles. The leveled layer is passed by a notched trowel, forming grooves.
We form grooves
Now we lay the tiles.
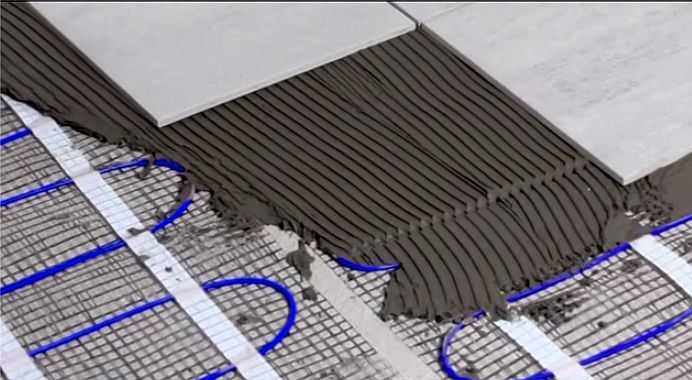
We put tiles on the glue
You must work carefully, otherwise the cable may be damaged. Also, be careful not to move the mats with your feet or break the cable. Electric cable underfloor heating is ready for use after complete drying (indicated on the package).
This method is not the best one. It is easy to damage the heating elements during work.To ensure this is avoided, the laid cable mats can be poured with a thin layer of leveler - a compound for rough floor leveling. It has an increased fluidity, so that bubbles and voids will definitely not remain. It is already possible to lay tiles on the dried leveling material without any problems.
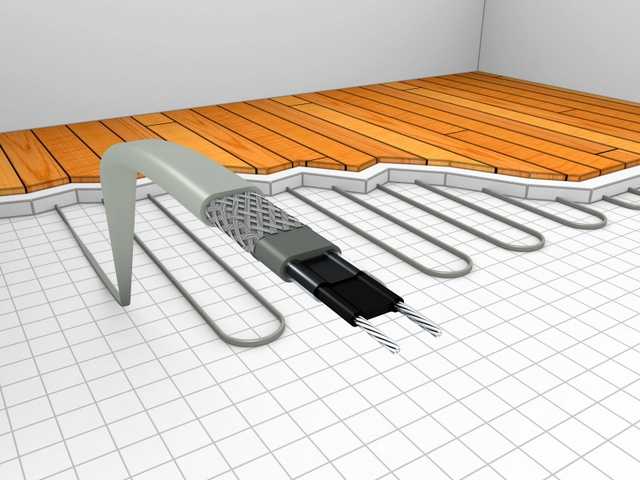
Features of laying an electric floor from heating cables
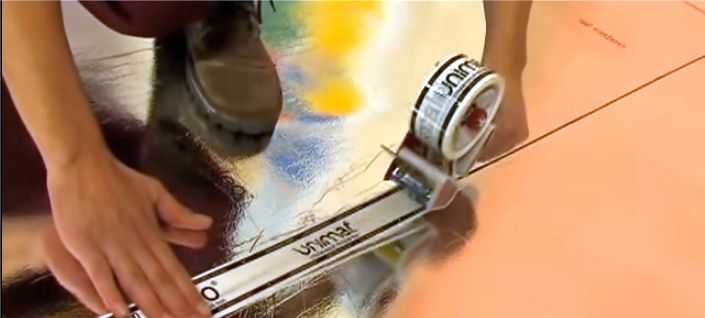
The main differences when laying an electric underfloor heating from a heating cable are that the cable itself must be laid out according to one of the schemes (a snake or a snail and their modifications) and also the fact that such an underneath must be poured with a screed with a thickness of at least 3 cm.Only after being set with concrete design strength (after 28 days at a temperature of + 20 ° C), tiles can be laid. So this option of underfloor heating under tiles requires much more time, but it is also suitable for any other types of flooring - under parquet, laminate, parquet board, linoleum and even carpet.
Now the process itself. Mounting tapes or metal mesh are attached to the finished rough screed over the insulation. Just like when laying mats, you can lay a layer of laminated thermal insulation (with a shiny surface) under them, but you can do without it.
The mounting tape for the warm floor is laid out along one of the walls with a pitch of 50-100 cm. It is attached to the base with dowels or self-tapping screws. The tape has bendable tabs that fix the cable turns.
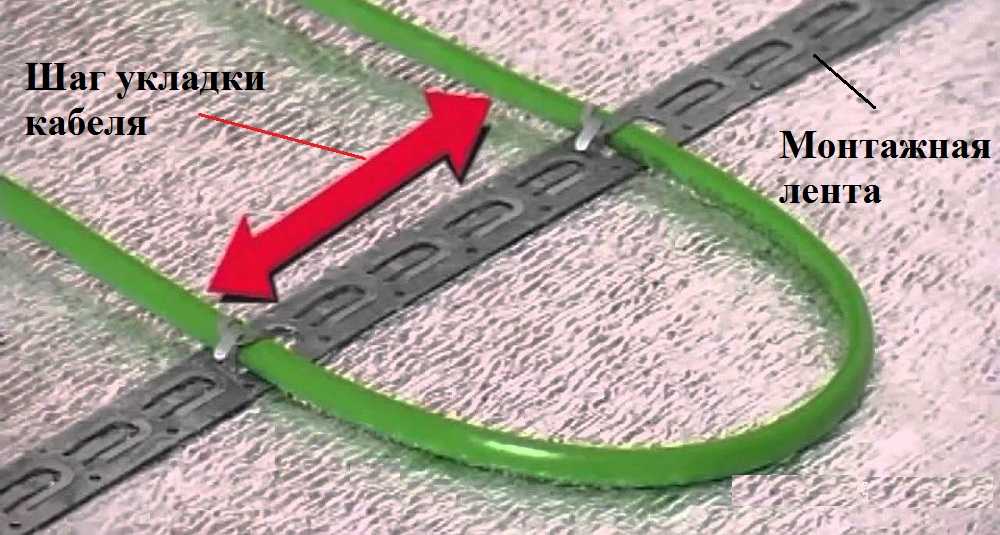
The principle of attaching the cable to the mounting tape
The second method of attachment is to the cells of the reinforcing mesh. This option is good when the warm floor cake is made with insulation. The mesh then still reinforces the screed and evenly redistributes the load on the insulation.
Laying the mesh for the installation of the heating cable
The mesh should be made of wire at least 2 mm thick, mesh size - 50 * 50 mm. This is the most convenient option for laying - you can lay the cable with the required pitch. The mesh sections are connected to each other with wire or plastic clamps, in the same way the cable turns are fixed to the cells.
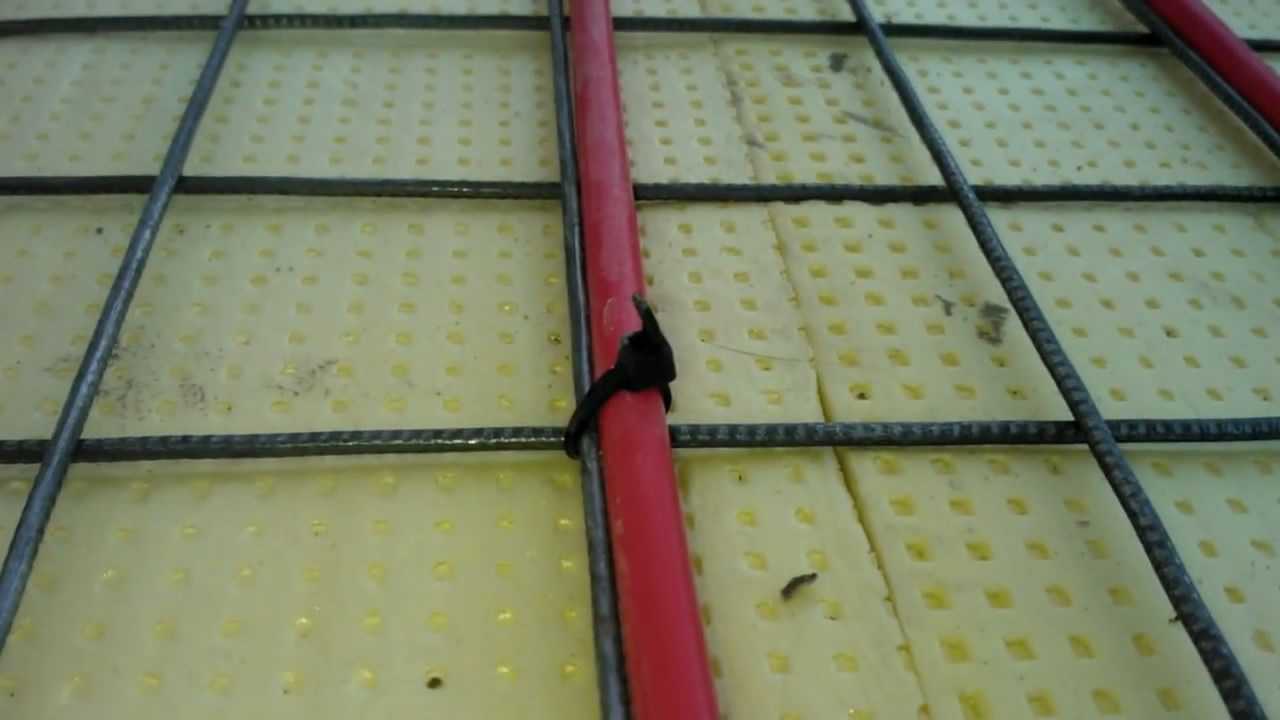
The cable is pulled with a plastic clamp
Why else choose a cable over a cable mat under the tiles? The cable can be laid with different pitches, taking into account the characteristics of the room. For example, lay it more often along the outer walls, and take a step less often indoors. With mats, there is another way out - to use more powerful fragments in cold areas.

Standard cable layouts

Layout schemes with enhanced heating of cold zones
After laying the heating cable, the supply wires are inserted into the junction box of the thermostat, their resistance is also measured, then the thermostat itself is connected and the system is tested. If all the cable fragments are heating normally, you can fill the electric floor heating with concrete mortar. After complete drying, you can install any floor covering, including tiles.
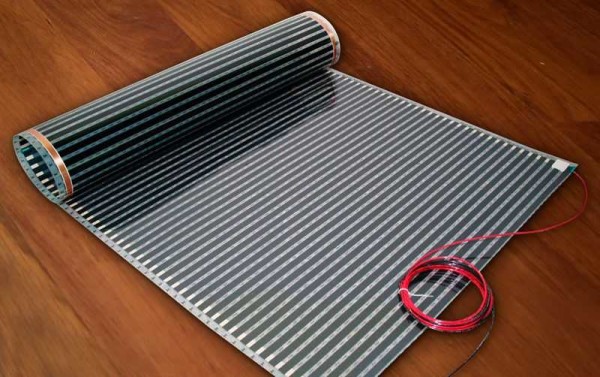
Do-it-yourself electric warm floor under laminate and linoleum
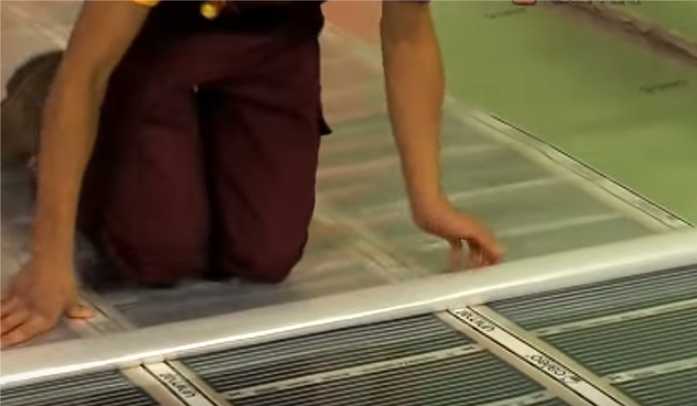
For this type of coating, the use of a film warm floor will be optimal. With an even base (a prerequisite for normal operation, if the floor is curved, a preliminary leveling screed is required), installation takes a little time, does not require screed or other wet works.
Photo editing process
Installation also begins with the marking of the heated area (do not lay under furniture, appliances and low-hanging objects) and the installation of a thermostat and a floor temperature sensor. Next, a heat-insulating foil substrate is rolled out. Since there is no screed, it can be used without any fear.
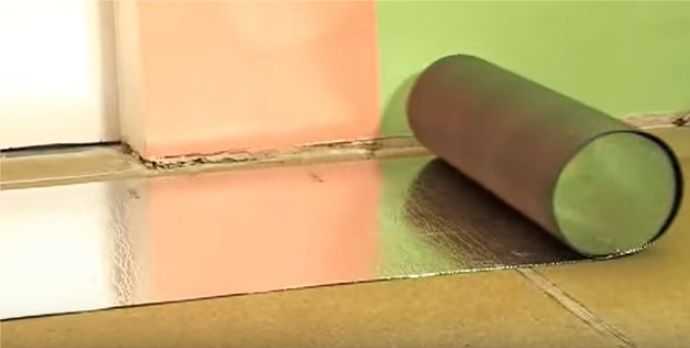
Roll out the heat-reflecting foil backing
The strips of material are rolled out close to each other. It can be fixed on the floor using double-sided tape or shot from above with staples from a construction stapler.
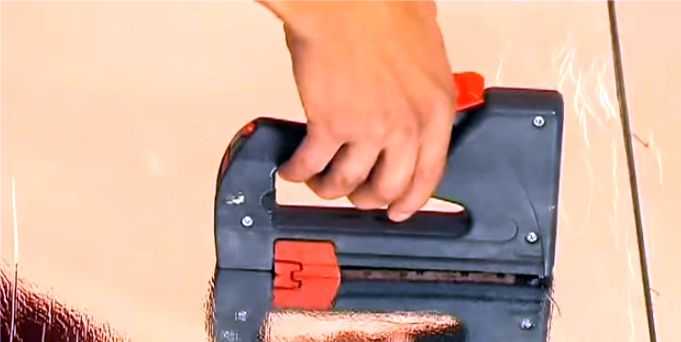
Fix faster with a stapler
The joints of the strips are glued with adhesive tape.Moreover, it is advisable to also take foil-clad - to minimize heat loss.
We glue the joints with tape
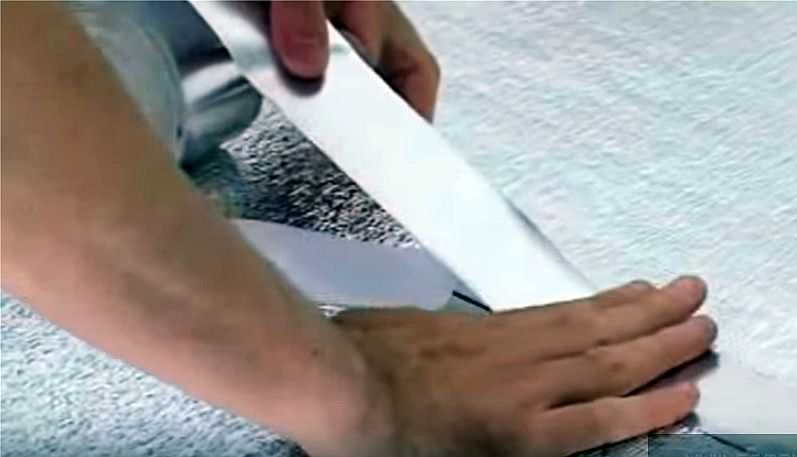
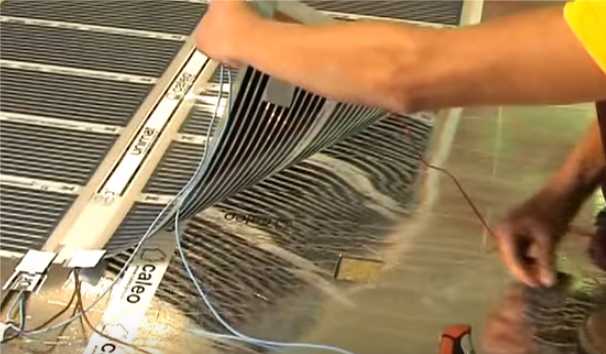
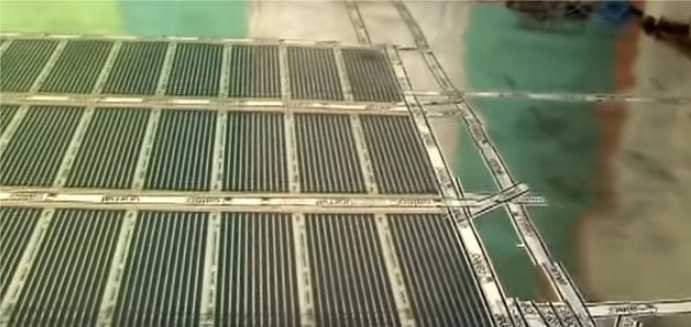
Next, roll out the heating foil. It is cut along the lines marked on it into pieces of the desired length.
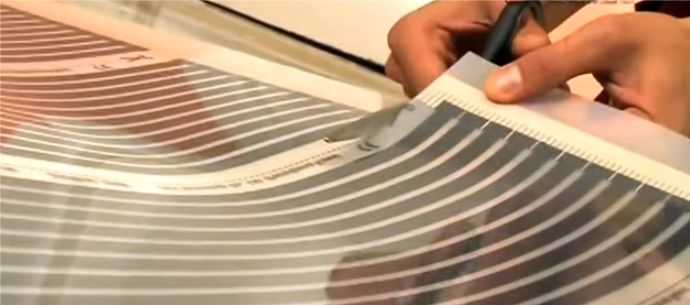
There are special cut points on the film
The strips of film are laid close to each other or with a small gap, but not overlapping. Copper busbars should not overlap under any circumstances.
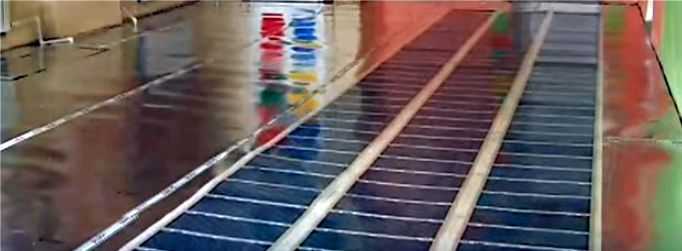
The strips are rolled out next to each other
They are fixed to one another with adhesive tape.

The joints are glued with tape
Next, you can proceed with the electrical connection. The connection diagram is shown in the photo.
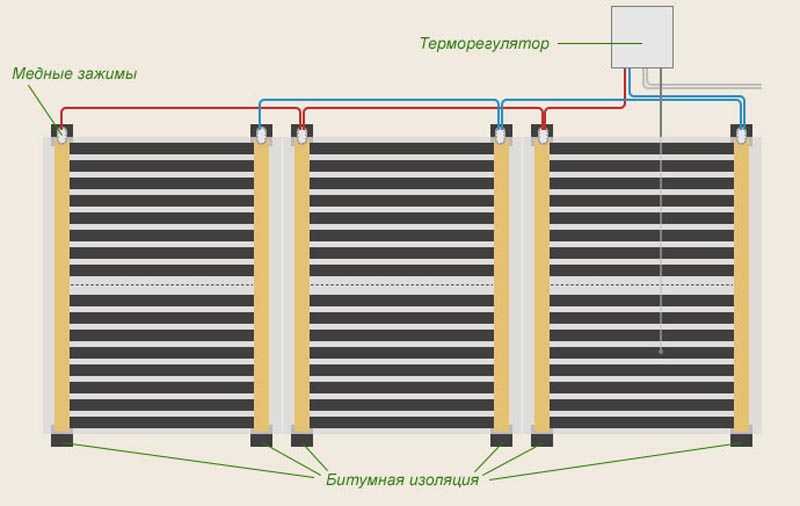
Wiring diagram for connecting film floor heating
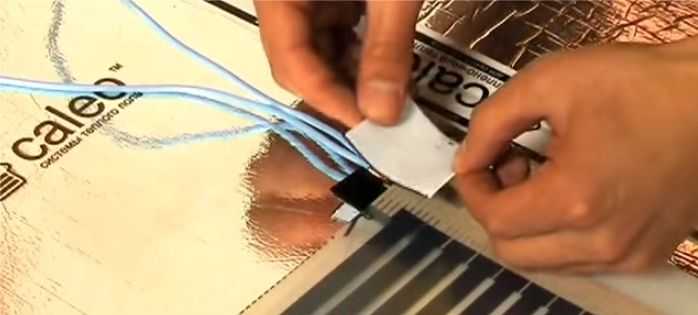
First, the tires are covered with bitumen insulation (included in the kit or purchased separately) at the cuts. Take a piece of insulation, remove the protective coating on one side, apply it so that the entire surface of the bus is completely covered, including the contacts. Half fold over to the other side and press carefully.
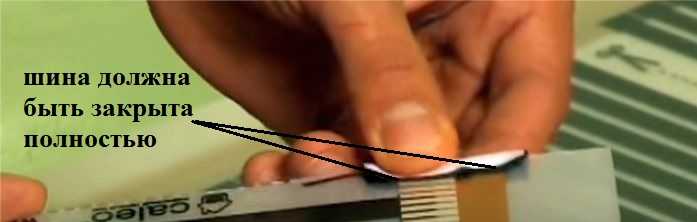
We insulate the tire cut
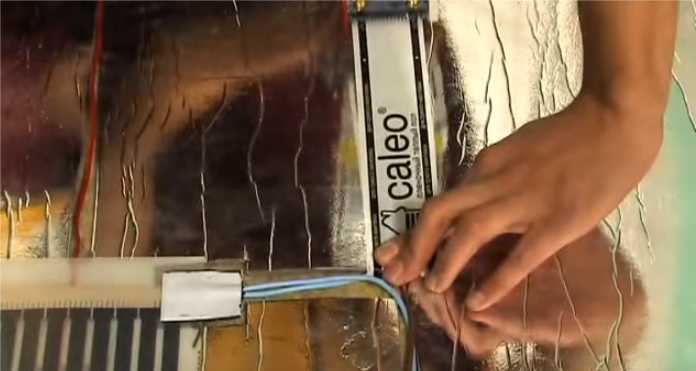
On the side close to the thermostat, contact clamps are installed (included in the kit, but you can buy separately or solder a wire to the copper bus). The contact consists of two plates. One is put on the tire, the second under the film.
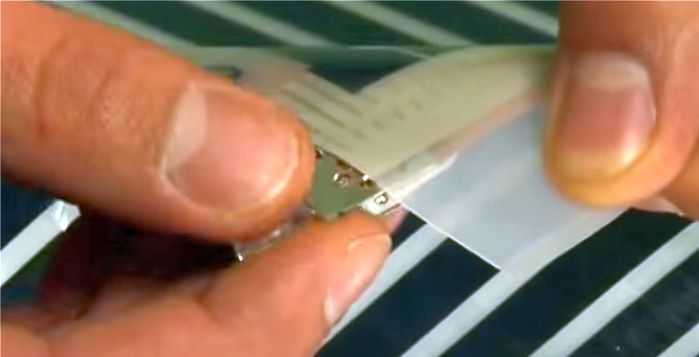
Installing contact plates
The installed plate is crimped with pliers. Check the strength of the installation by slightly twitching the contact.
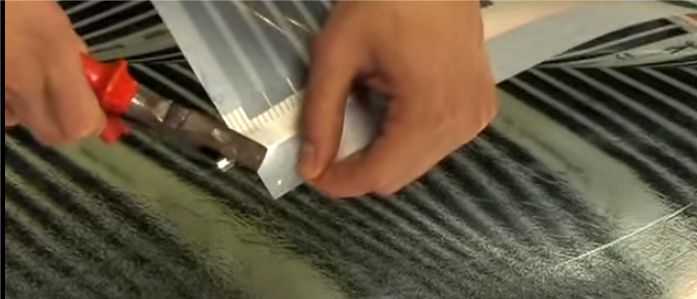
Compress the contact with pliers
We take electrical wires with copper conductors, according to the diagram above, we insert one or two conductors into the clamp at the contact plate and also crimp with pliers. If you have skills in soldering, it is better to solder the connection.
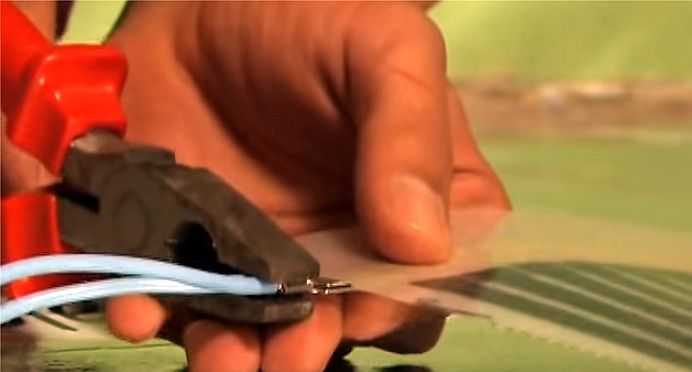
Crimping the inserted wires
The next step in the installation of an electric film floor is the insulation of the conductor joints. There are 2 bitumen insulation plates for each connection. One is laid from below, the second - from above. Also make sure that the busbars and contacts are completely covered.
Insulation of joints of strips
The installation of the floor temperature sensor is also different. It is simply glued to the black (carbon) strip with a piece of tape.
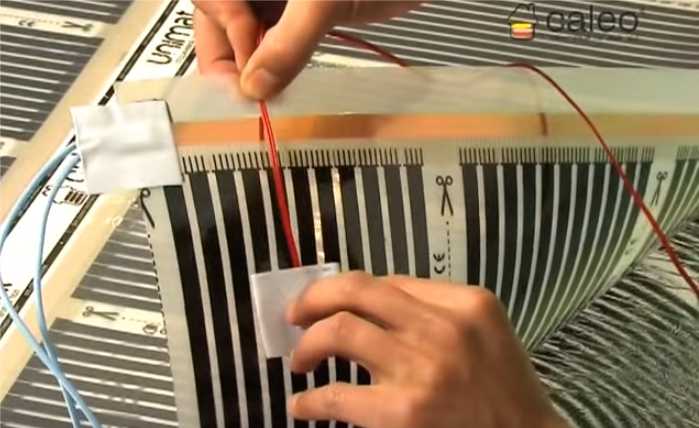
Attaching the floor sensor to the carbon strip
To prevent the sensor from sticking out, a window is cut out in the substrate.
Cut out a window for it in the substrate
The same windows are cut out for insulated contact plates and wires. This is necessary so that the laminate or linoleum lay flat, without bumps.
Cut out windows for contact plates and wires
We glue the laid wires with adhesive tape.
We lay the wires, glue the top with scotch tape
Laid wires
We connect the conductors to the installed thermostat (installation is no different from that described above), we test the system, setting the heating to no more than 30 ° C. After checking whether all the strips are heating up, whether there is a spark or a characteristic smell of melting insulation, turn off the warm underneath.
The following procedure depends on the type of flooring used. If it is a laminate, you can immediately spread the substrate and start laying it. Only the substrate should be special, designed for a warm floor, like the laminate itself.
If linoleum is to be laid, a dense plastic wrap is rolled onto a film electric heated floor.
Lay the film
A rigid base is laid on top - plywood, gypsum fiber sheets. They are fixed on screws to the floor, only in this case you need to be careful not to get into the tires. And on top you can already put carpet or linoleum.
Installation video tutorials