How to install a tongue-and-groove floorboard
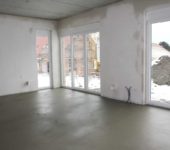
Flooring is a long-awaited stage in the transition from the state of "when will this construction end" to the state of "it seems that it will end soon." The premises acquire a more or less normal appearance, it is easier to assess the area and volume. On open tracks, verandas, in utility blocks, a plank floor is laid from edged boards. But there are cracks in it, which, in this case, is permissible. In residential premises, a special grooved board is usually used. Its installation has its own characteristics, which we will talk about in this article. So, laying a floor from a grooved board - details and techniques.
The content of the article
What is a grooved board and how is it better
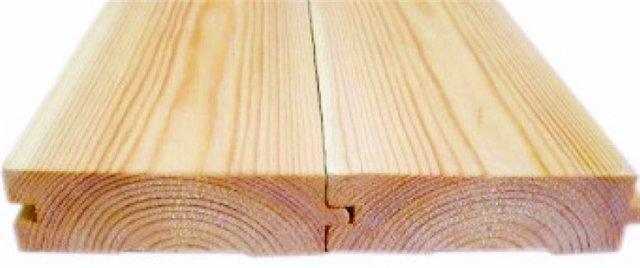
A grooved board is a board, along one side of which a groove is cut, along the other - a spike. During installation, the spike goes into the groove, creating a stronger connection, eliminating "blowing". And this is a plus in comparison with edged or deck boards.
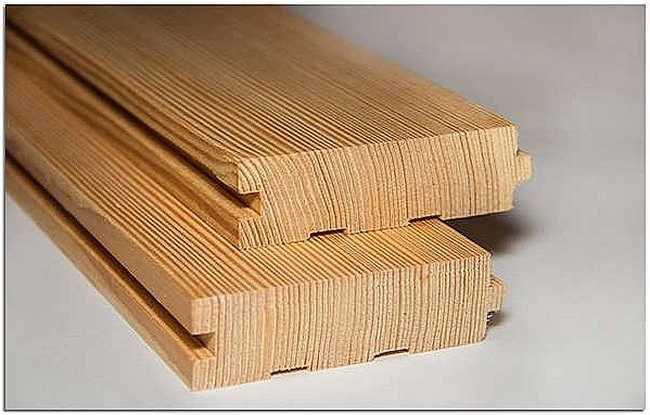
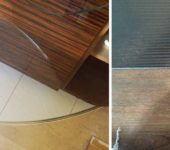
This is what a grooved floorboard looks like
Another plus is connected with the technological process: the grooved board is "adjusted" according to the geometry, cutting the sidewalls, polishing the front side, and cutting longitudinal grooves on the back side for better ventilation. Then a spike and a groove are formed on the processed sidewalls with a mill. After that, the grooved board is ready. With such processing, there is certainly a difference (especially in a low-grade product), but not so great and grinding is needed, but not to the same extent as when using edged lumber.
A little about why it is much more expensive. There is a lot of work, it is for this reason that this material is much more expensive, but the floor is stronger, more reliable.
How to choose quality material
Laying a tongue-and-groove floor begins with the choice of material. Let's talk about sizing first. The width of the floorboard ranges from 70 mm to 200 mm. To take too narrow - it will take a lot of time to lay, too wide - there is a very high probability that when the edges of the boards dry up, the floor will turn out to be ribbed. The problem is solved by grinding, but this is an additional cost in time and money. Therefore, most often they take a grooved board of average width - 130-150 cm.
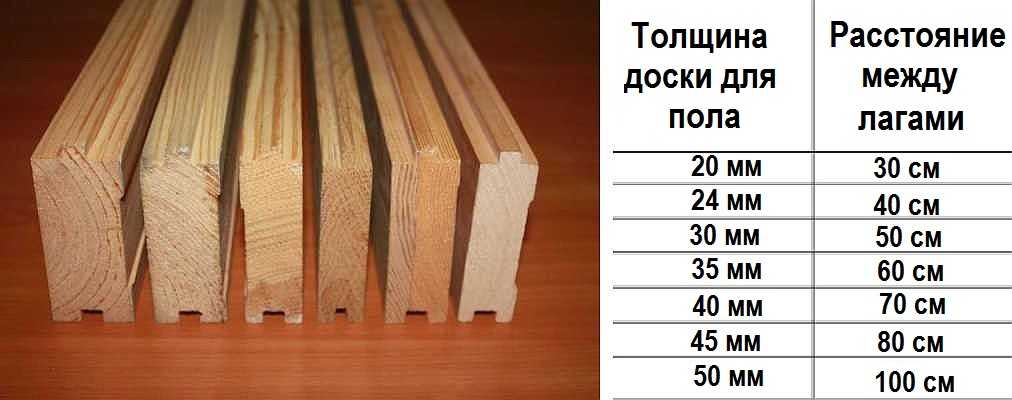
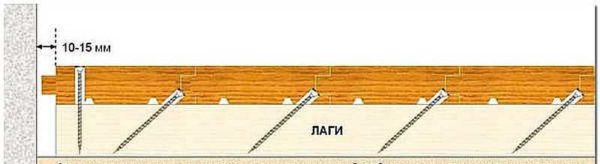
The choice of floorboard thickness depends on the distance between the logs
The thickness of the grooved board is from 18 mm to 45 mm. Laying thin is unprofitable - so that it does not bend when laying on the logs, they (the logs) must be placed frequently. Therefore, for the floor, lumber with a thickness of 28 mm, 36 mm, 45 mm is more often used.
The grooved board is sold in different lengths. Standard - 3 m and 6 m, but they produce 4 m and 5 m. Here the choice is simple: the length of the material should be slightly longer than the length of the room in which it will be laid. Splicing in length is not very beautiful, therefore it is often done that way.
Choice of wood species
The floorboard is made from pine and spruce, larch, oak or ash. Pine and spruce are not expensive, but their wood is soft. Traces remain from heels, fallen objects, and are pressed through by furniture. In places of active movement, "paths" are formed over time. The situation can be saved by coating with wear-resistant varnish in several layers. If this option suits you, the choice is good.
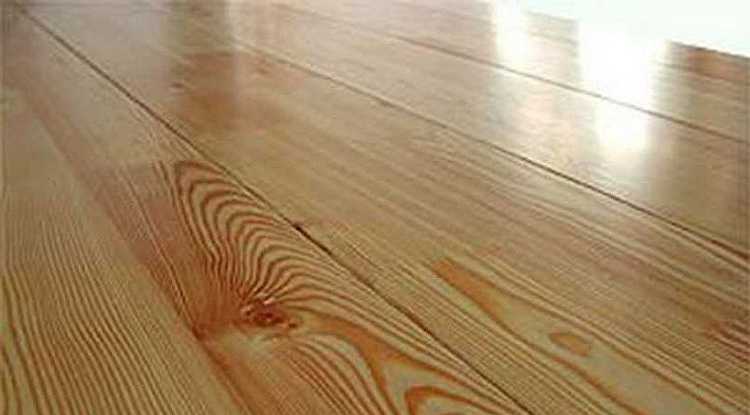
Pine or spruce grooved board under varnish lasts a long time
Larch grooved board is a more expensive material, but also more wear-resistant. The wood has a pronounced pattern and pleasant color. Can be used uncoated or overcoated with oil based formulations without creating a hard film on the surface.
Oak and ash are very beautiful hardwoods with dense, durable wood. But the price for them is completely inhumane. As in the previous version, the floor made of these types of wood can be used without coating or with more gentle compounds.
Variety of grooved board and its characteristics
All lumber is divided into four grades:
- Extra class. Made from the highest quality material. There should be no brown or black knots, irregularities, cracks and other defects.
- Class A. Single spots are acceptable, otherwise no defects either.
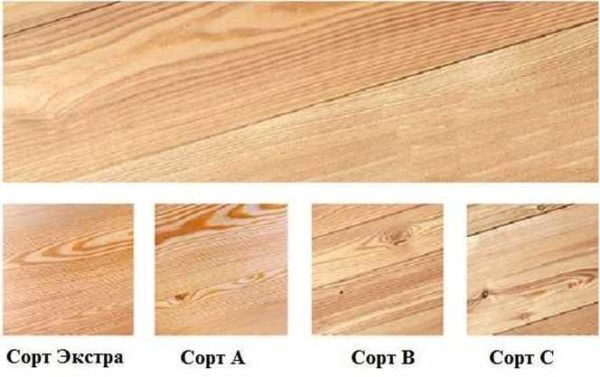
Difference between different grades of grooved flooring
- Class B (or AB). There may be brown knots, irregularities and spots.
- Class C. Irregularities, spots, black and brown knots, a certain amount of through knot spots are acceptable.

Grade C is used for sub-flooring. There are too many defects in it for finishing. The rest of the classes are suitable for finishing, but which grade you choose depends on your financial capabilities - the difference between the classes is decent.
Humidity
Choose kiln-dried wood for comfortable installation of a tongue-and-groove floor. In this case, the raw material after sawing is kept in drying chambers, in which it is brought to a moisture content of 8-14%. Such material is unlikely to dry out after laying - this is almost impossible, but the cost is about 50% higher in comparison with natural drying material. This is due to the cost of equipment (drying chambers) and drying fuel.
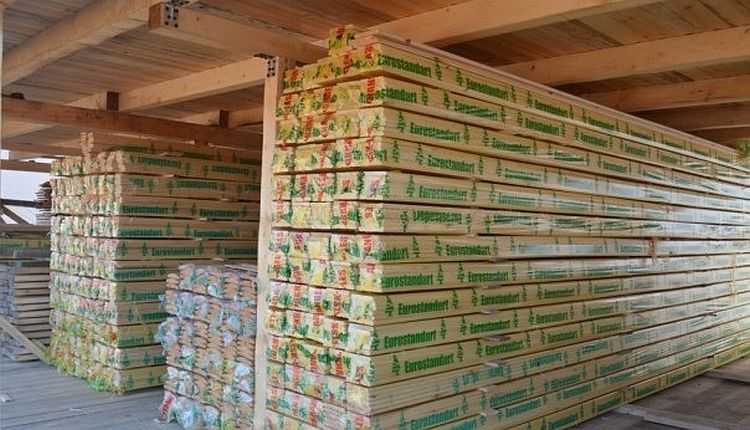
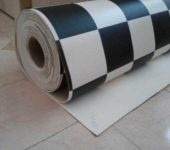
Drying grooved board packed in polyethylene
Humidity is measured with a special device that professionals have, and even then not everyone has. You can also try to determine by appearance. Most often, chamber drying lumber is packed in polyethylene so that it does not absorb moisture from the air. Naturally, the packaging must be intact and free of moisture (condensation on the inside). If you knock on dry wood, it emits a clear, clear sound; wet sounds dull.
What happens if the floor is made of high-moisture grooved board? The first thing you will have to face is the formation of cracks as it dries. After six months or a year, the floor will have to be repaired, removing the resulting cracks. Second, when drying, cracks often appear, the wood is twisted in different directions. Sometimes these distortions can be compensated for by pressing the board harder, sometimes not. So you have to keep a couple of boards "in reserve": to add during the bulkhead from shrinkage and to replace heavily crumpled fragments.
Geometry
When choosing, be sure to pay attention not to geometry. In addition to the fact that the thickness and width of the board should match, there should be no significant curvatures, attention should be paid to the correct formation of the tongue and groove:
- The groove in depth should be slightly larger than the tongue. In this case, laying the floor from the grooved board will be simple and you do not have to manually modify the lumber.
- Observe the distance from the top plane to the tongue and groove. It must be the same, and on all boards of the game. Then, immediately after laying, you will get an even coating that does not require additional sanding.

Two tongue-and-groove boards should dock without gaps
In normal production, this is all monitored, but in reality there is a very large spread - 5 mm is not the limit. It is clear that such a floor will have to be sanded. But, the smaller the discrepancy, the less work will be. Therefore, try to find a manufacturer whose difference will be minimal.
Installation of a tongue-and-groove floor
Due to the possible shrinkage of the wood, the installation of a tongue-and-groove floor is carried out in two stages. For the first time, only every 4-5 plank is attached, after 6-18 months the coating is sorted out, eliminating the resulting cracks. The second time they attach each board, to each lag.
If the premises are residential, the wood is rubbed over and loses its attractive appearance during the year, while it dries. To prevent this from happening, for the first time the grooved board is fastened with the back side up. When re-laying, turn it face up. We have a clean surface.
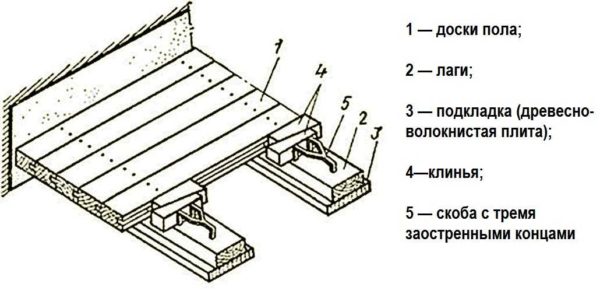
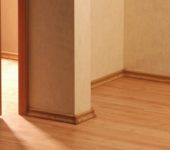
Laying a floor from a grooved board on logs is the most acceptable option
When purchasing material, do not forget to leave a few strips so that you can add after tightening. Depending on the initial moisture content and the width of the boards, one or two (or even more) additional boards may be required. They are also left to dry out. Preferably in the same room, but possible in the attic. On the street - this is already a problem, since the appearance will be "not the same".
Mounting method and fasteners
Tongue flooring can be done using nails or self-tapping screws. The nails are made of flexible steel and can carry significant loads. When the board is "twisted", they bend, but do not break. Only there is another problem: it is very difficult to remove them without damaging the wood, and sometimes even impossible. And it is necessary to remove fasteners when replacing too curved boards or when bulkheading the floor after wood has dried. Therefore, self-tapping screws are often used, and not black, but yellow. Black ones are made of brittle hardened steel. Under lateral loads that occur during the "twisting" of the boards, the caps simply fly off. So, for laying a floor from a grooved board, it is better to use yellow self-tapping screws.
There are three ways to fix the floorboard, two of which are secret:
- Into the bed. The most reliable way, but it does not suit from an aesthetic point of view - the fasteners are hammered into the front part.
When fastening to the face, the fasteners are installed in the front of the board - two at a time, stepping back from the edge 5-7 mm
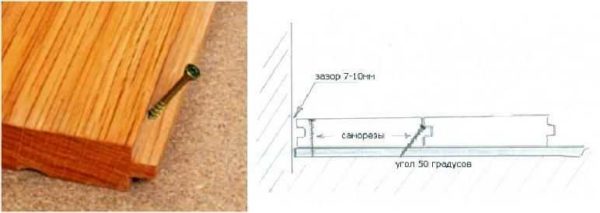
- Into the groove. When fastening the grooved board into the groove, the self-tapping screw is screwed into the bottom of the groove at an angle of 45-50 °. At the same time, the hat should fit well into the material so as not to interfere with the installation of the next one. This method is simple, but the board is attached only to the bottom part, which is about 1/3 of the total thickness of the board. If during drying they are "twisted", there is a high probability of splitting.
Fastening into a groove - a self-tapping screw or a nail is driven into the groove of the groove
- Into the tongue. With this method, the fasteners are installed in the base of the tongue (tongue). It goes through about 2/3 of the board's thickness, which is clearly more. But with this method, there are some inconveniences when laying - when adjusting the boards, you must take care not to damage the spike.
Installation of a self-tapping screw into a thorn - a large thickness is captured


With a secret fastening, the self-tapping screw must be installed so that it does not interfere with the installation of the next board. To do this, a hole is pre-drilled (the drill is equal in diameter to the diameter of the cap), and then self-tapping screws are installed. The dimensions of the fasteners depend on the thickness of the board, but most often they are used with a length of 70-75 mm and a diameter of 4-4.5 mm. Such a long length is needed due to the fact that the screw enters at an angle with a secret fastening, it turns out - to a not very great depth.
If, nevertheless, you decide to make a reliable fastening in the face, it can be made less noticeable. This is achieved by burying the head into the wood (you can pre-drill a hole). The resulting recess is sealed with wood putty and sanded. The second option is to cut the chopik, install it in the groove and grind it too. But all this requires a significant amount of time and skills, therefore, when installing a grooved board, they prefer to use hidden fastening methods.
General rules for flooring
The first row is laid with a gap of 5-7 mm from the wall and fastened, stepping back from the edge about 1 cm, into the front surface - into the face. This place will be covered with a plinth, so you can. If the method of installation is "in a tenon", the groove is turned to the wall, and vice versa.

Do-it-yourself wooden flooring: you will need a hammer, screwdriver, drill
The last board is also laid so that there is some gap to the wall.It can be provided with spacers and wedges that are hammered between the wall and the last board. It is also fixed "in the face", stepping back about 1 cm from the edge.
How to pull off floor boards
If you take a grade AB or B grooved board, there will be a lot of curved board. The longer the board, the more pronounced the curvature will be. The first few pieces from the wall are trying to choose the most even ones. They are laid, fixed. This will be the basis on which to navigate. Next, they try to select the boards so that the curved places alternate. They are pressed or they are also said to be "pulled together", trying to make sure that there are no cracks.
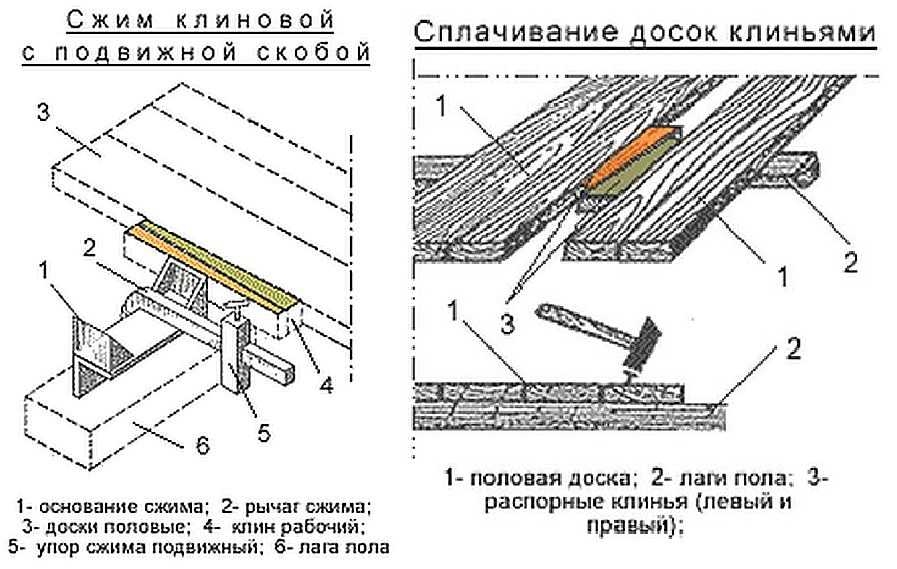
On the right, the traditional way of screed crooked floorboards
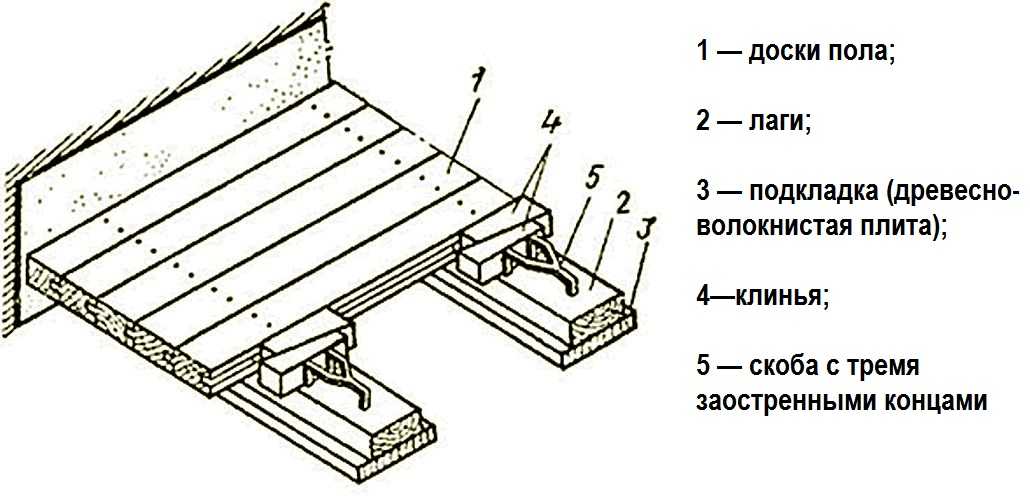
For screed floorboards, different devices are used. For example - a support bar nailed at some distance and several wedges. This method is good for everyone, except that you have to screw the support every time. With rough laying, when only 4-5 boards are attached, this is still normal - you can pull together several pieces at a time. But if you need to attach each, it takes a lot of time. Therefore, clamps, special brackets, and other devices are used. The clamps are simply fixed to the lags, the staples are hammered into them, after which ordinary wooden wedges are used, which rally the coating, eliminating the gaps. Both options take less time.
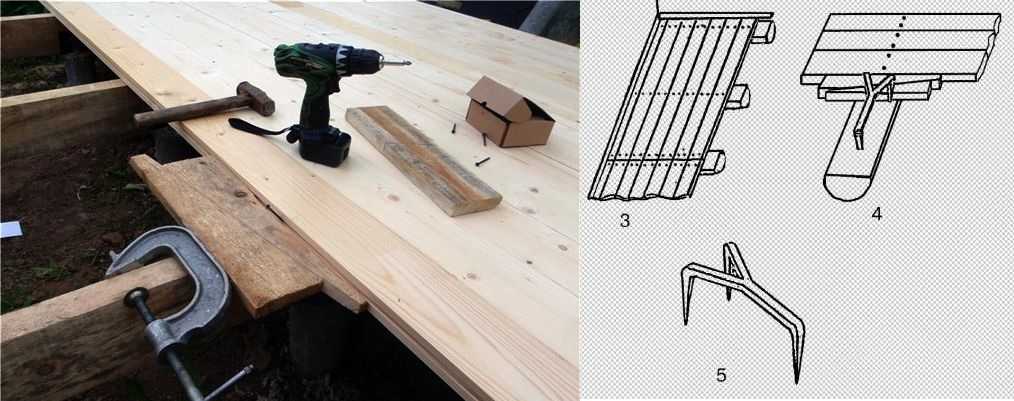
Clamps and special bracket are installed faster
There are also factory options (pictured below). The main thing here is a clever mechanism for attaching to the lags on the clamp. The mechanism for holding the boards in the desired position is also interesting.
Factory version of the device for screed plank floor
When working, make sure that the flooring does not "go away" from the grooved board. This can be seen if you look at the laid floor from the side: the flooring can bend along the edges to one side. To prevent this, periodically measure the distance from the laid board to the walls in several places, adjust its position to acceptable values.
The video shows in more detail how to work with such devices. The first is the traditional way with a thrust board and wedges.
The second - unusual homemade clamps from a hairpin and a corner for ceiling beams. An interesting option - you can adjust the length of the clamp, that is, you can rearrange it every other time.
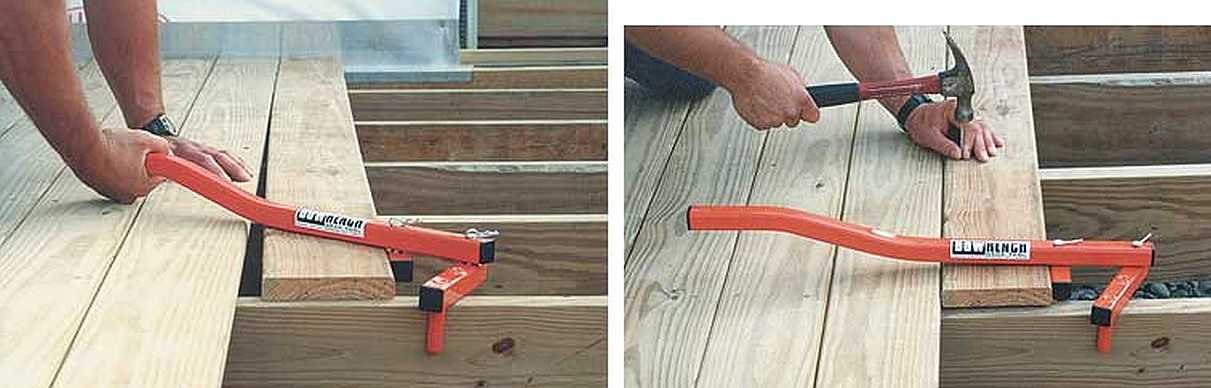
A very interesting way for quick installation. But in this case, laying the floor from the grooved board is done together: one presses, the second installs the fasteners. You just have to pre-drill the holes for the desired width of the lumber.
Can a tongue-and-groove floor be installed without this step? Maybe if you buy material of the "extra" class or lay meter (or even) pieces. On a one-meter segment, if there is a gap, then they are small and easily corrected without devices.


Fortunately, I ordered a turnkey house. I didn't have to bother with laying the floor myself.