Diy brick barbecue oven: drawings and ordering
A metal brazier is definitely good. But, in addition to functionality, I also want beauty, especially on the site: in the country or near the house. An attractive appearance without reducing functionality is given by a brick barbecue. There are very simple models that can be folded, even without skill, in a day or two, there are more complex ones - whole complexes. We do not recommend folding these without experience, but try a simple barbecue oven or just a brick brazier. Master the masonry, the basic techniques, and then you can take on more serious projects.
The content of the article
Barbecue grill - what's the difference
There is no exact separation between barbecues and barbecues. The main difference is that they cook on skewers on the grill, and make berbekyu on the wire rack. But both of these cooking methods can be used even over a fire, so - for us in any case - that the grill, that the barbecue maker is one design.

A simple barbecue or barbecue made of bricks in the country or on the site can be built without experience
It can also be classified by the presence of a roof. A brazier is always an open device, without a chimney. In barbecues, especially made of bricks, chimneys are often made, although there are also simple open models.
Simple brick grill
This design is very simple, easily changed to suit any needs and desires. It consists of brick walls in which protrusions are arranged (the brick is placed on the edge). Heat-resistant sheets (metal, etc.), grates, skewers are placed on these projections. Convenient, especially if there is some kind of roof over your head in case of precipitation, but it is built separately and at will.
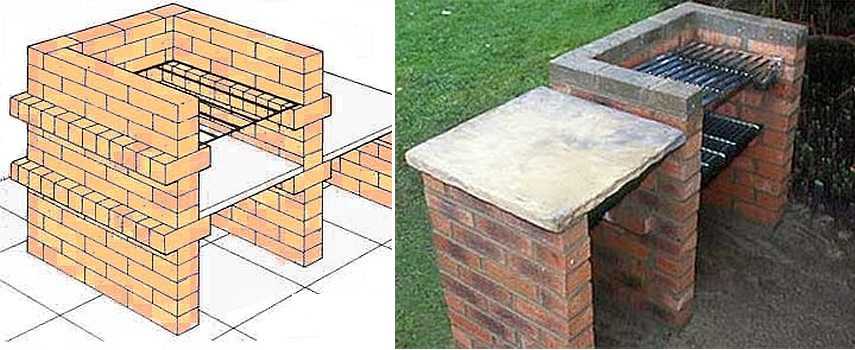
Project and photo of the finished barbecue / barbecue made of bricks
Any brick building requires a foundation, or at least a prepared foundation. Not even this small brick brazier. Since there are not many bricks - the wall is half a brick, then a rammed platform lined with some kind of hard coating is suitable for this structure.
Foundation preparation
Remove the fertile layer, if necessary, deepen the pit. The depth should be about 20-25 cm. The dimensions of the foundation or platform are 50 cm larger than the dimensions of the furnace in all directions. The bottom is leveled, crushed stone of the middle fraction is poured onto it. The thickness of the crushed stone layer is 15 cm. It is well rammed. Desirable - a vibrating plate, if not, a metal or wooden rammer.
Further steps depend on the chosen base. If this is one of the coatings - paving stones, paving slabs and similar materials, then a layer of fine-grained sand is poured into which the coating is laid according to the level.
If a slab foundation is chosen as the base, it is reinforced with a rod of 10 mm in diameter. It is laid along and across the foundation with a step of 20 cm, tied at the intersection. If you don't know how to knit with special wire, you can pull it off with plastic clamps. Reinforcement with ready-made thick wire mesh is allowed for this model. The formwork is exposed at the edges and everything is poured concrete grade M250. Work can be started in a week if the average daily temperature was not lower than + 20 ° C, and after two, if it was + 17 ° C.
Ordering (masonry drawings) and recommendations for masonry
For this brick barbecue, a solid ceramic brick M200 is used. You can take a stove, but it is more expensive, you should not put fireclay: the temperatures are not the same and it loves moisture too much to feel normal in an open grill.
The masonry is carried out on a clay-sand mixture, to which a little cement is added for greater strength. For beginners, it is better to take a ready-made mixture for stoves, just not heat-resistant, without chamotte.Knead according to the instructions, the seam thickness is 3-5 mm, keep strictly. Constantly monitor the verticality of the walls and the horizontalness of the masonry. This is essential for the normal operation of the oven.
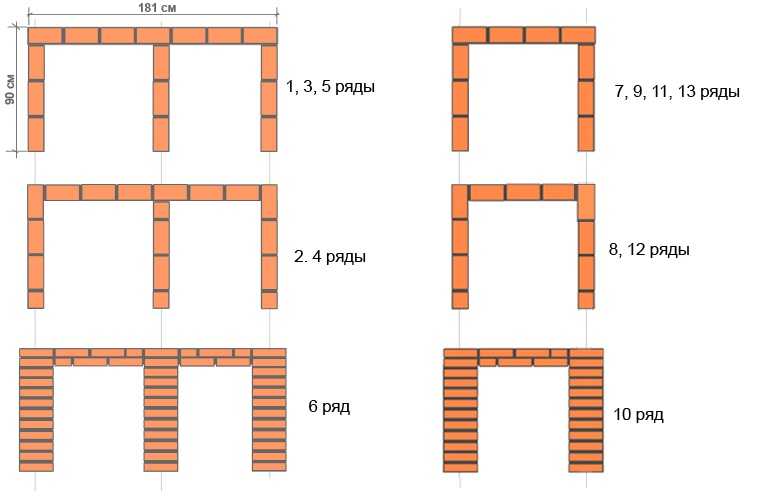
Ordering a brick barbecue (masonry drawings)
As you can see, everything is really very simple. Each odd row starts with a whole brick, an odd row starts with a half. In the 6th and 10th rows, bricks are placed on a spoon - sideways, and unfolded across the main masonry. If you are making a barbecue - under the grate - in the same rows, the back wall is made of bricks, also placed on spoons, and to maintain the thickness of the masonry, they are placed in two rows, as well as the others - with dressing - offset seams. If you are going to use ka brazier - for skewers - on the back wall, put a brick on the spoons too, making a ledge in this area as well. In front, as a support for skewers, a profile metal pipe of small cross-section, cut to size, is used. You can make recesses in it for skewers.
Starting from the 7th row, the masonry is carried out only in half - right or left - as you like, but this layout is given under the frying chamber on the left - it is wider, and there is a table on the left. If the opposite is more convenient for you, do a mirror image of this order.
Brick is a hygroscopic material, in order to reduce the amount of moisture that it will "pull" from the base and extend its life, waterproofing is needed under the first row. You can lay rolled material in two layers (such as roofing felt or waterproofing), walk along the perimeter with a hydrophobic impregnation. A layer of waterproofing between the first and second row will not interfere.

This is what one of the variations of a brick barbecue looks like without a table (if you don't need it, just ignore this part)
After the brick brazier is folded, it is left to dry in warm weather for 1-2 days, in cooler weather - 3-5 days. Then you can conduct a test run. Approximate "equipment" is shown in the photo of the finished barbecue. In this version, three rows of protrusions are made: the upper one is for products, the middle one is for coals, the lower one is for collecting burnt coals and ash.
In order for the folded brazier to serve more or less for a long time, it is desirable to cover it with a composition that reduces hygroscopicity. For this case, the KO-85 varnish is best suited. And it would also be nice to provide some kind of cover: to close it in case of rain and for the winter.
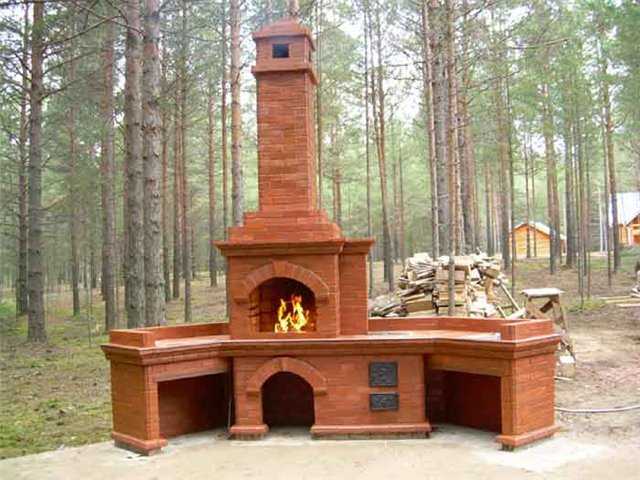
Brick BBQ with chimney: ordering
This barbecue option is a little more difficult, but also not the most difficult. The most important thing is that the combustion chamber here has a straight vault, and it is much easier to make it vaulted. The brick frying chamber is raised to a height of 90 cm, the total height - to the beginning of the pipe - 217.5 cm.
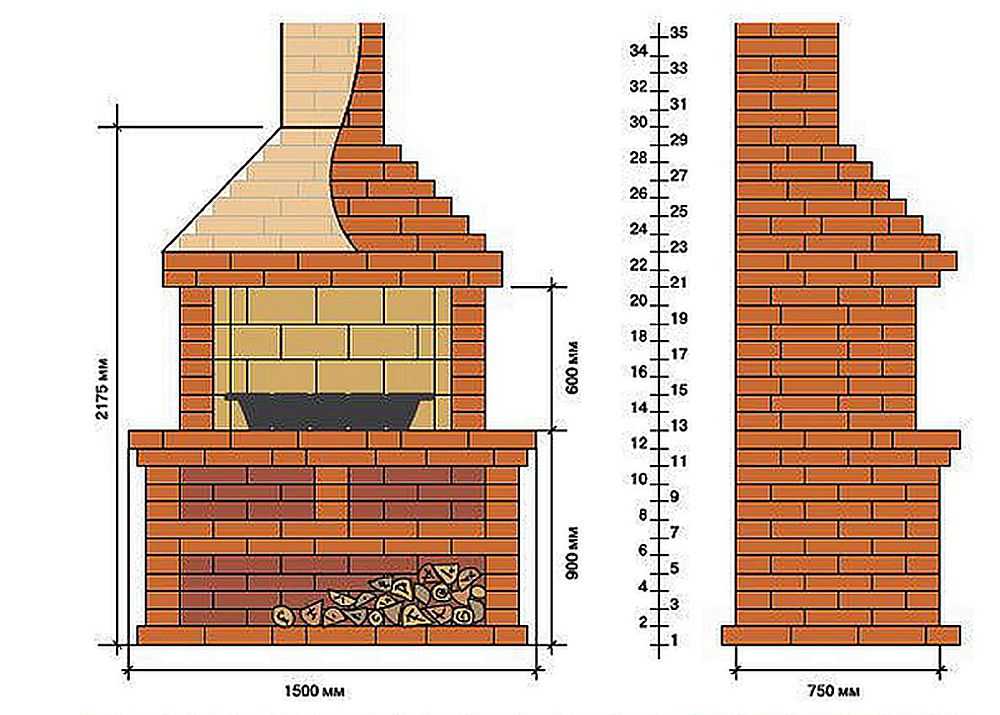
Brick BBQ masonry scheme
It all starts with preparing the foundation. For this barbecue oven, only a monolithic reinforced base (reinforcement pitch 15 cm) on a base compacted with rubble is suitable. On the dried foundation, waterproofing is spread in two layers, then laying begins. If barbecuing is done in a gazebo, the first row of masonry should start at floor level. If the foundation turned out lower, lay out an additional row (or two) bricks, and then begin laying according to the given scheme.
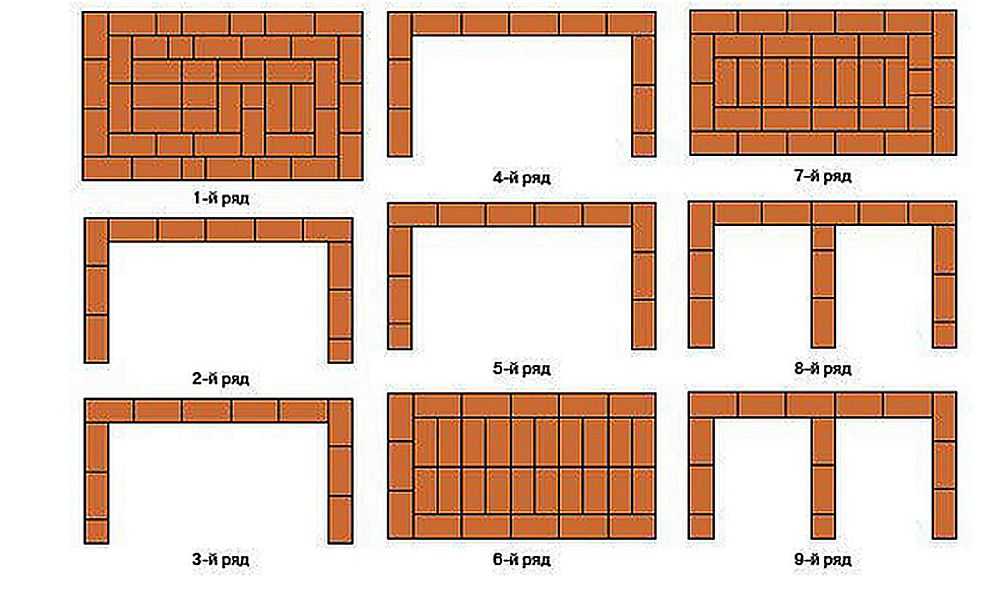
Brick BBQ Drawings
The first 9 rows do not require any special explanation. They are laid exactly according to the scheme, observing the order, using halves and cut bricks, if indicated on the plan. It is imperative to check the verticality of the resulting walls, as well as control the thickness of the mortar - 8-10 mm and the horizontal laying of each brick.
To control the thickness of the seam, you can use a reinforcement bar of the appropriate diameter. It is placed on the edge, the surface of the row is filled with a solution, the excess just above the bar is cut with a trowel. After laying and tapping the bricks, an even seam is obtained - the bar does not allow the brick to go lower than necessary. The bar is then removed and shifted higher.
To be able to lay the 6th row (solid), after laying the 5th, put a strip of metal 4-5 mm thick, 40 mm wide.Length - slightly less than the furnace span - 1450 mm. Stripes are needed 3 - one on the edge, two approximately in the middle of each row of bricks, or as indicated below (11th row).
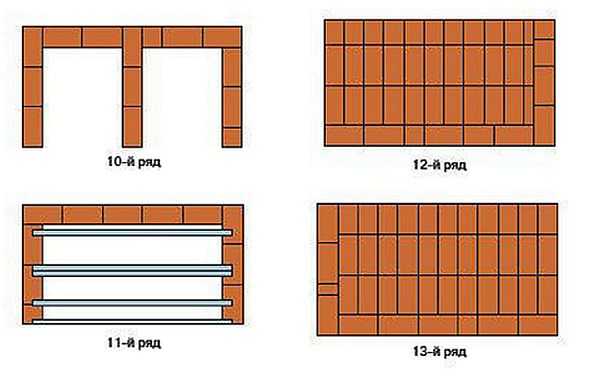
Formation of two utility chambers
The layout of the next rows of barbecue is clear. Only in the 12th row, pay attention - you need bricks sawn along. It should also be said that the 12th and 13th rows are larger than the lower ones - forming a decorative "belt".
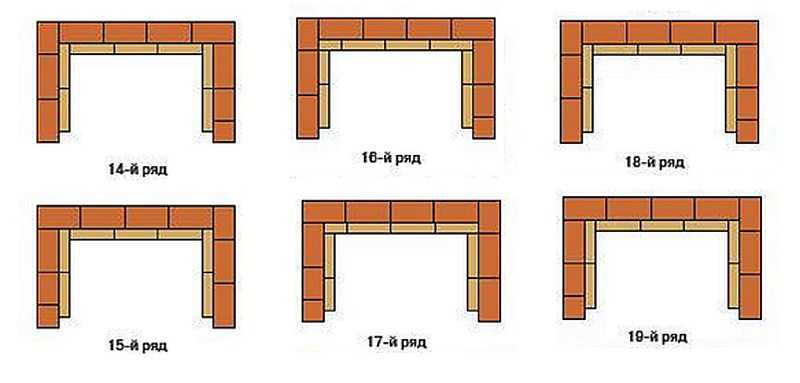
The formation of the combustion chamber begins
Fireclay bricks (ША-8) are marked in light color in these rows. They put it on the same composition of clay and sand (it is possible to add a small proportion of cement). It is better not to use mixtures based on chamotte: they need very high temperatures for sintering, which are unattainable in street barbecues. As a result, this solution may later simply crumble.
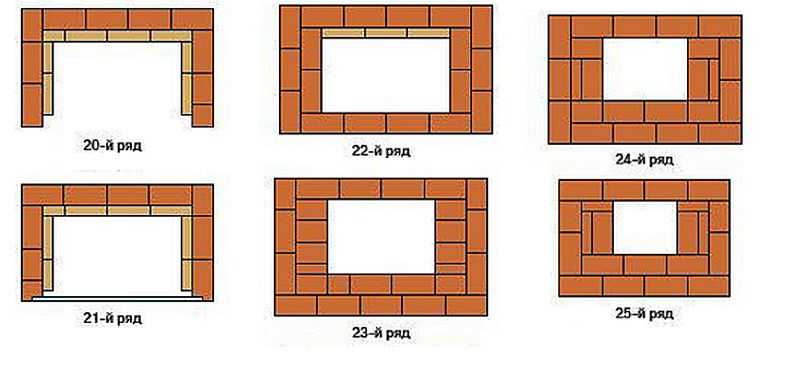
Formation of the roof of the combustion chamber
On this part of the order, everything is also clear: we begin to shape the arch of the firebox. It overlaps on the 22nd row in which it gradually tapers.
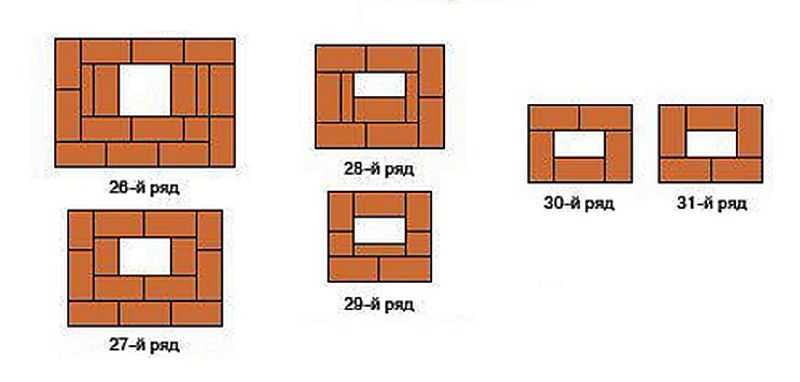
The transition of the arch into the pipe
The formation of the vault continues, which in the 30th row passes into the chimney. Next, the 30th and 31st rows alternate until the required height is reached.
Video
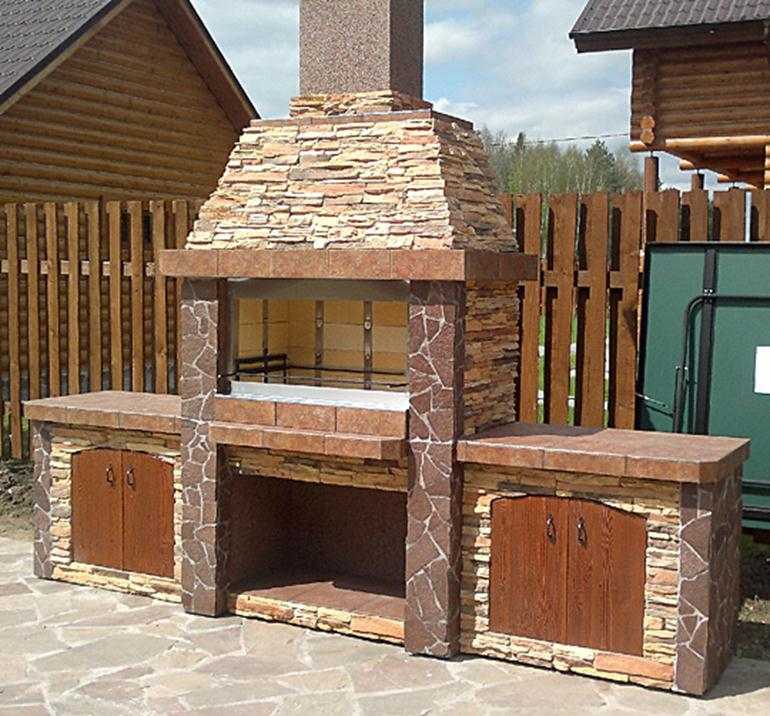
Photo of a brick barbecue
First, a few simpler options. You can make these brick barbecues yourself.
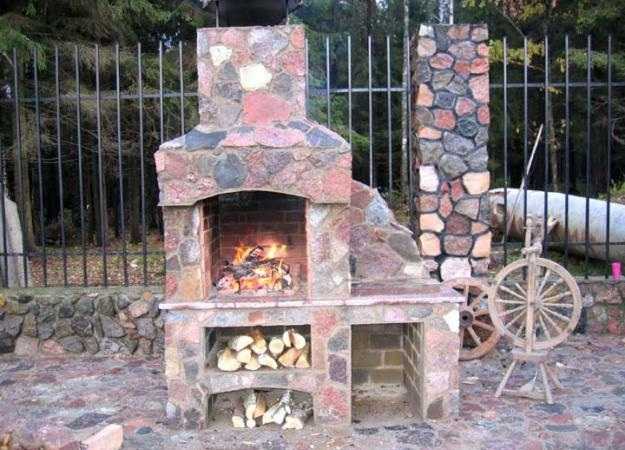
You can build this brazier oven with your own hands.

Simple options for a brick barbecue

A little more difficult, but it's also possible to do it yourself
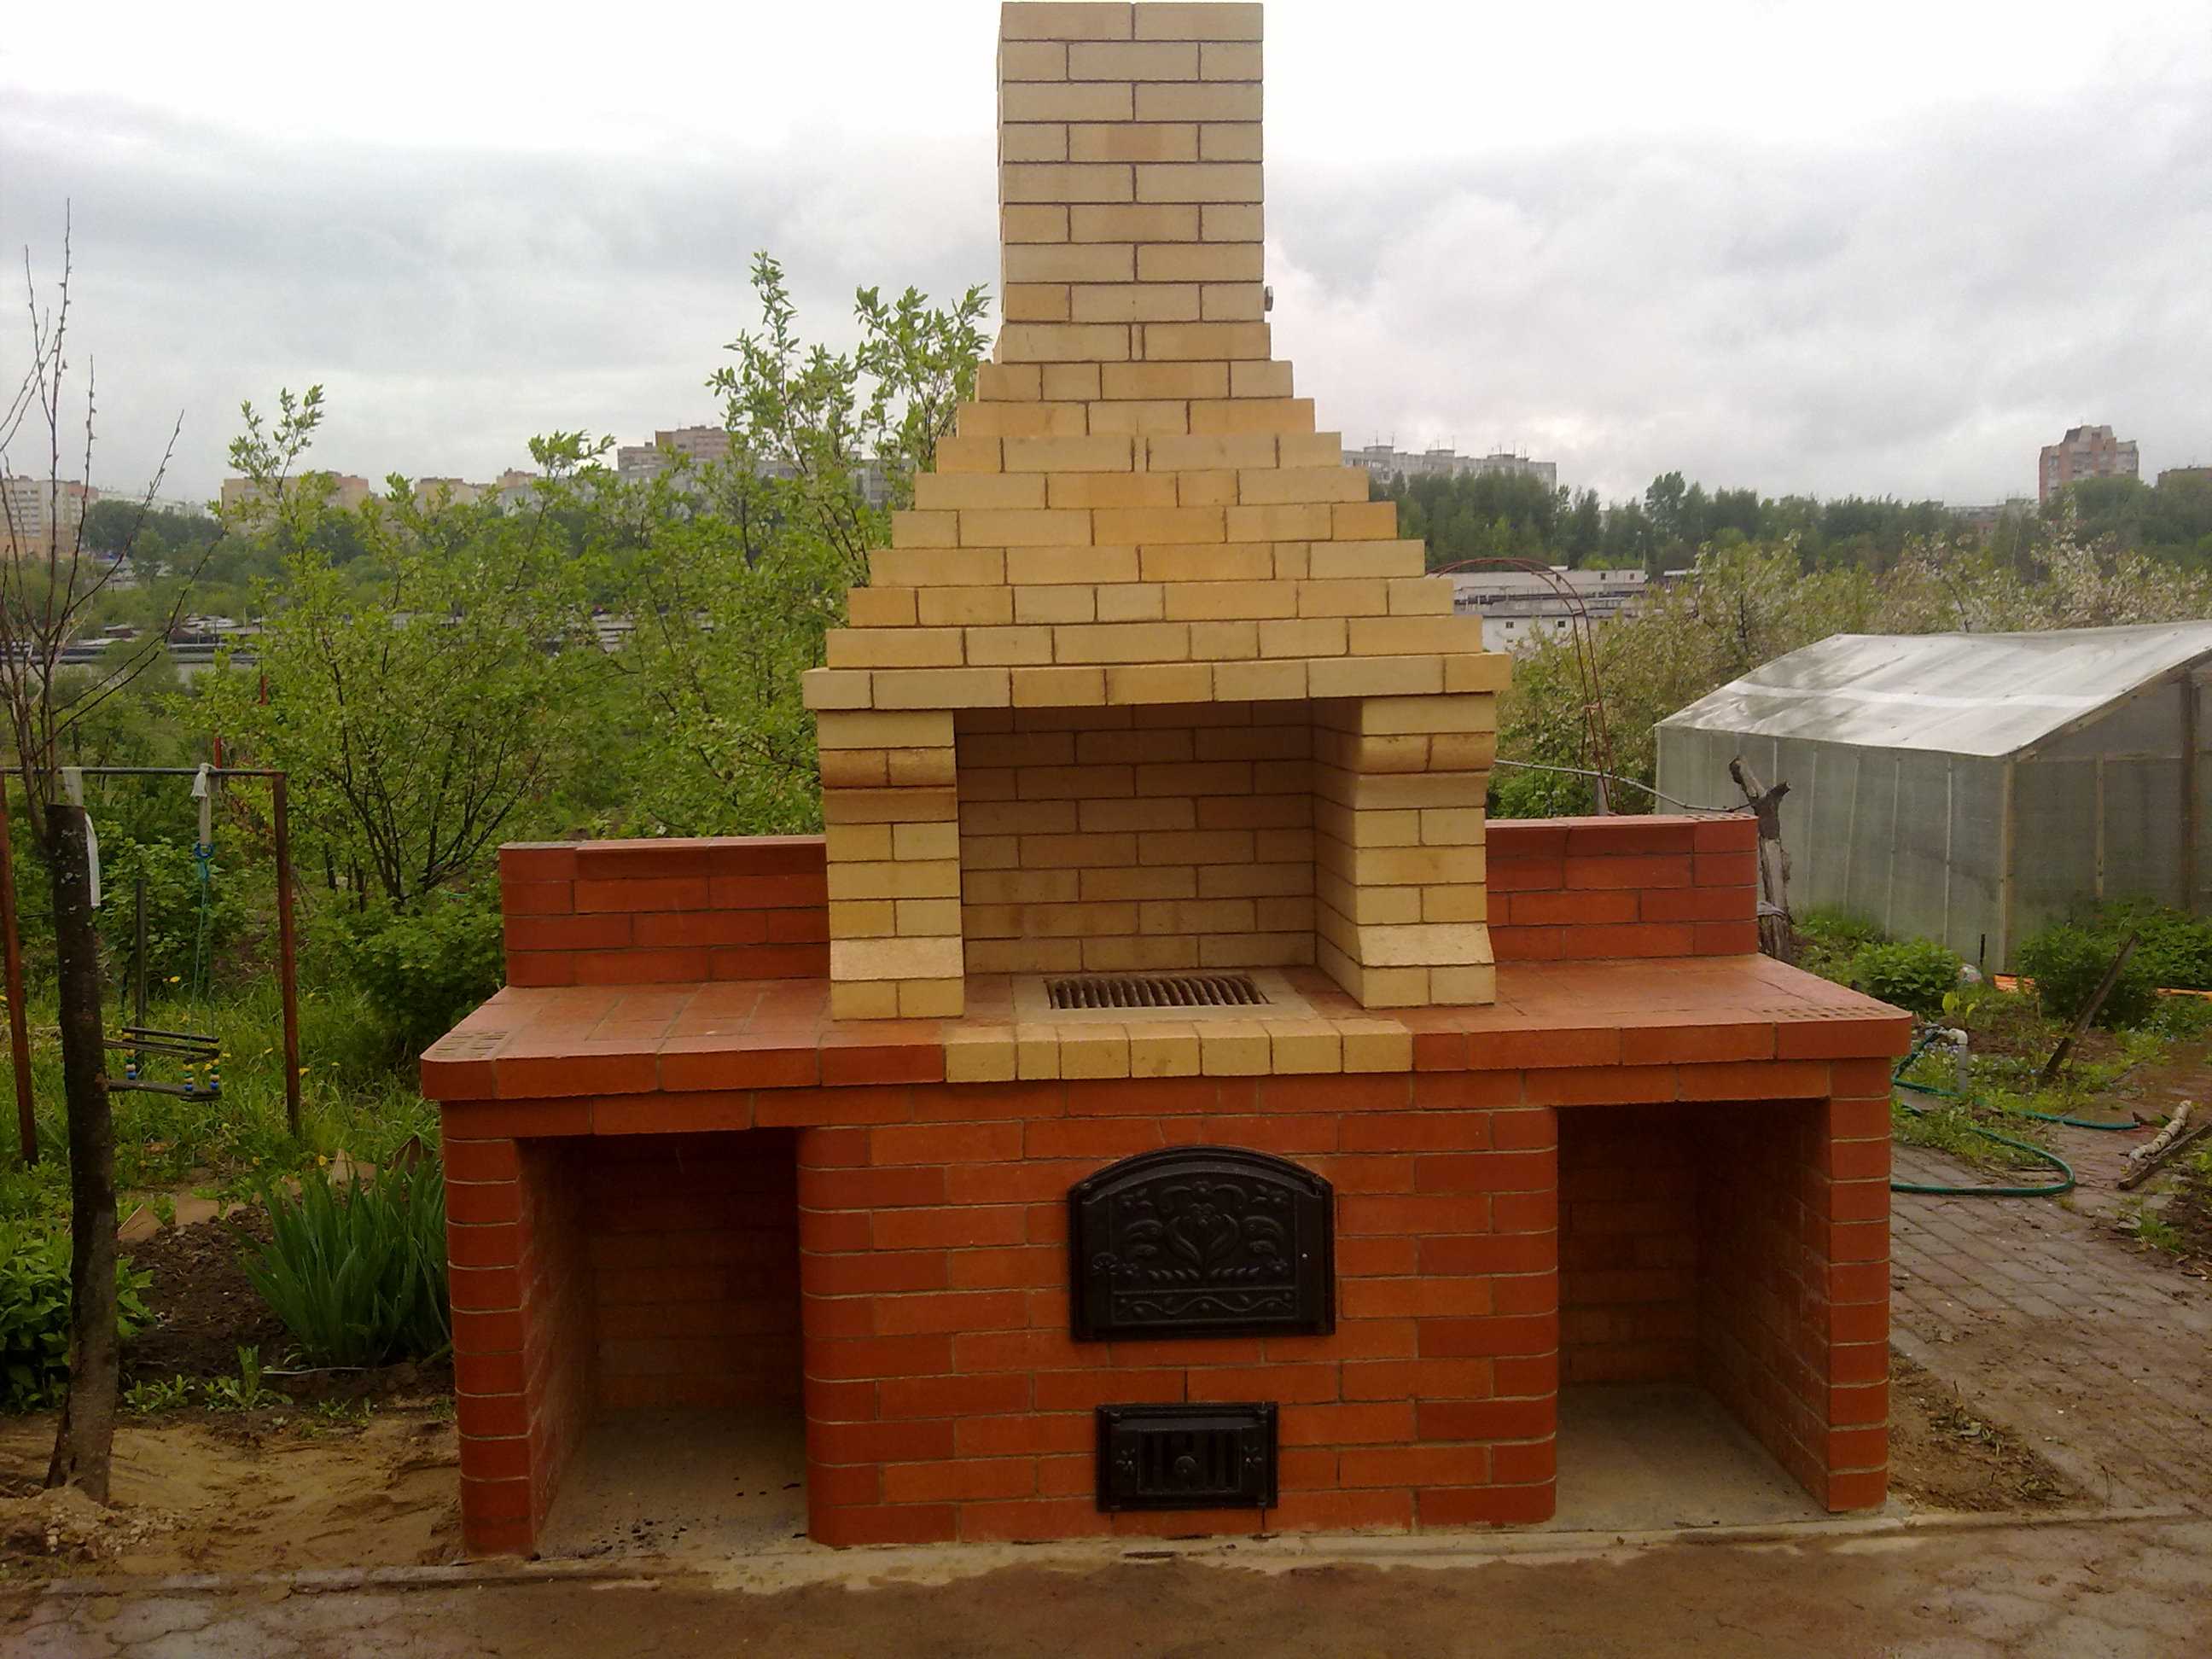
Variations on the same theme - original finish
Several barbecues that can be built with some experience, but it is better to entrust a specialist (if you find it, of course)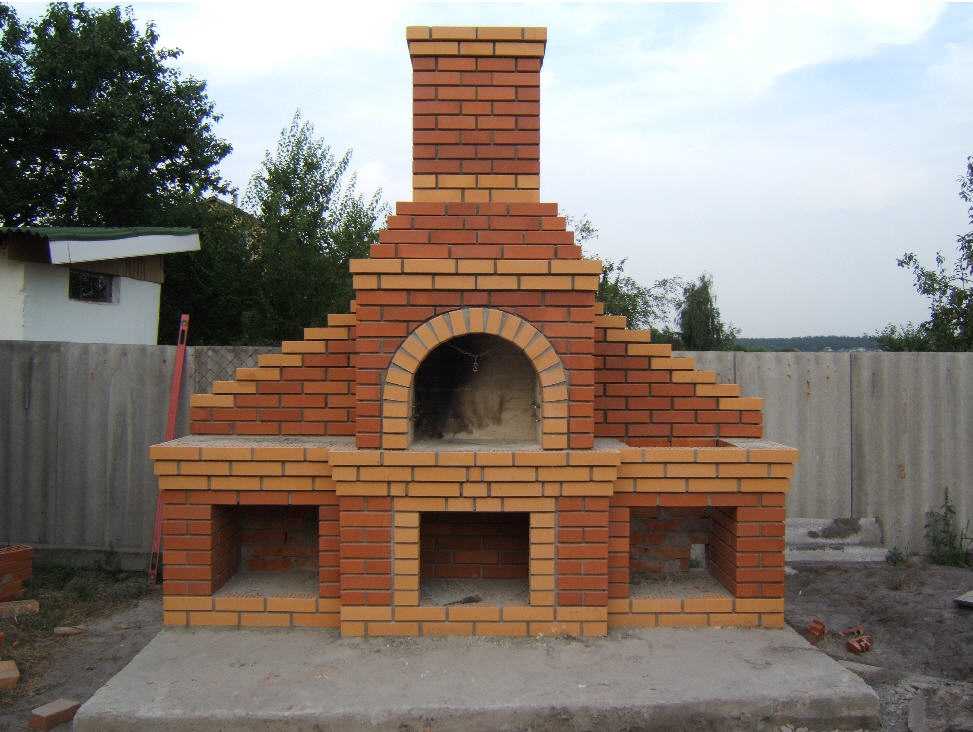

-
 Buying an apartment: what documents are required, their verification
-
 How to deal with cockroaches in an apartment, the best remedy for cockroaches
-
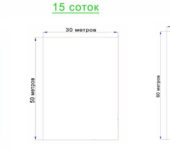 How many square meters in a hundred square meters of land: measurement, calculation
-
 Conversion of inches to cm and mm, centimeters to inches, tables, applications, formulas
-
 Floor stands for flowers


