DIY decoupage technique
You can transform old or ordinary objects into unique ones using various techniques, but one of the most popular and affordable is decoupage. The work uses available materials and tools. All that is needed "special" is paper or napkins. And how to master decoupage for beginners, we will tell you below. You don't have to buy anything super-expensive. Glue, napkins, varnish, brushes, scissors. That's the whole set of necessary tools.
The content of the article
Decoupage for beginners: collecting everything you need
To begin with, briefly about what and with what you will have to work. In general, decoupage is a fixation based on material or paper with a printed pattern. In order for the drawing to last longer, it is covered with several layers of varnish. Here is a brief description of the decoupage technique.
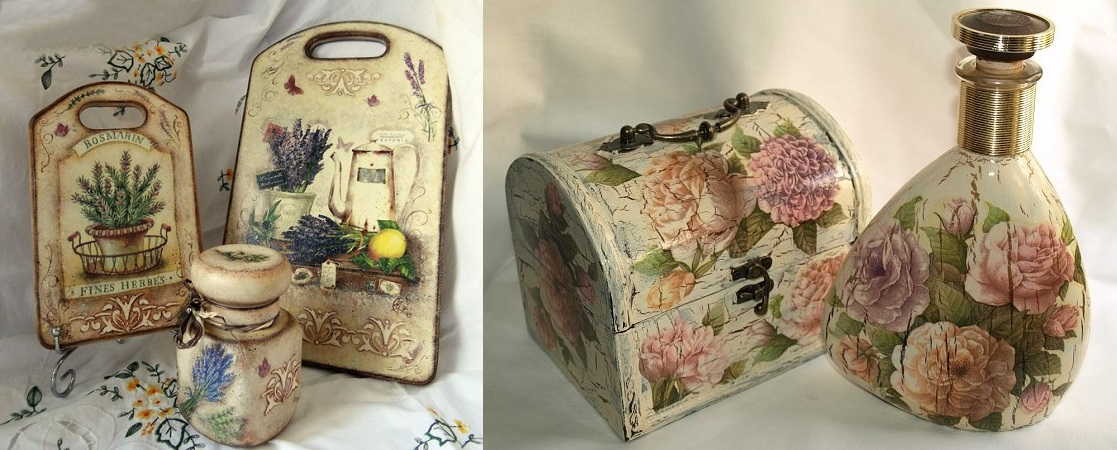
Decoupage is a technique that allows you to make something special from ordinary things
Base
Any weakly absorbent base is suitable as bases for decoupage. Where can this technique be applied? On the following grounds:
- Wood of any degree of processing (without impregnation, impregnated, sanded or not, painted, varnished). It's just that preparation requires a special list of works and the time spent on preparation will be different.
- Plywood, processed or not.

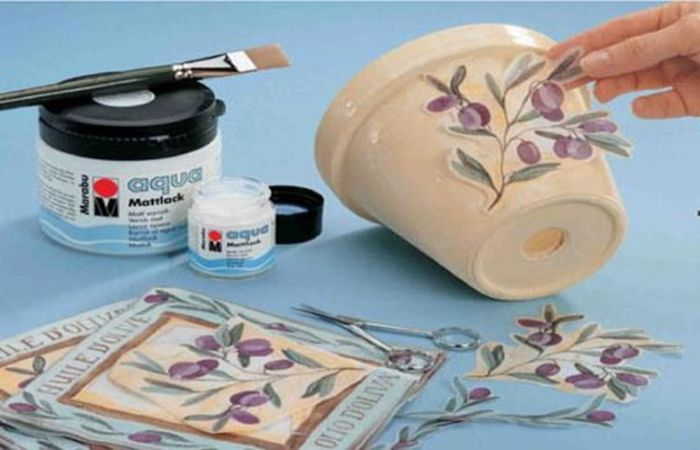
Even an ordinary flower pot can be turned into an art object.
- Plastic - colored, transparent, smooth, rough.
- Glass and glassware.
- Porcelain, faience.
As you can see, the list is solid. Only very porous bases with a lot of irregularities are not suitable for decoupage. And so you can decorate everything: from dishes of any kind to furniture and doors (and you can both the very surface of the doors and glass inserts).
List of tools
You need few tools:
- Small sharp scissors (good manicure or stationery, medical). You can - several pieces with different shapes of blades.
- Brushes and brushes.
- To work with small products for decoupage, flat brushes with a width of 0.8 to 2.5 cm will be needed. The pile is thin artificial. It is convenient to apply glue and varnish with such brushes.
- For applying acrylic paint when you paint over the base, it is more convenient to use a sponge. But it gives a rough foundation. In order for the surface to be smooth, you need a brush - flat or round, but larger (depending on the size of the product).
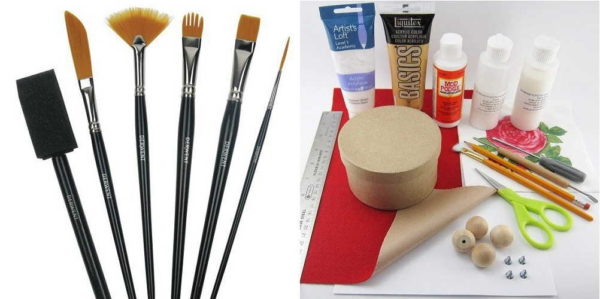
Decoupage for beginners - we start by purchasing the necessary tools
- Fine art brushes are required to draw and underline details.
- Rollers of different sizes. But not the ones with which the walls / ceiling are painted, but smaller ones - a few centimeters wide. They are also convenient for covering the base, applying the first layer of varnish.
- You also need a palette - for mixing paints and getting the desired shade, but this is not necessary. Disposable plates or plastic lids will also work.

All of the tools. Unless you still need stationery - a ruler, a pencil, an eraser.
Consumables
Now we will talk about consumables. We will not talk about napkins and paper here - they are a separate item. In addition to them, to make decoupage with your own hands, you will need:
- Water based acrylic varnish. You can, of course, take another, but this one is the best. Does not smell, does not darken over time. This varnish is different. It can be transparent or with some kind of effect (glitter, antique, etc.).The surface can be matte, semi-gloss, glossy, semi-gloss. Suitable for both ordinary construction and special for decoupage (more expensive).
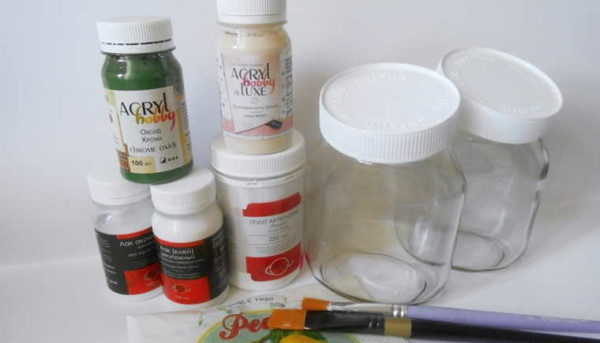
Varnish, paint, glue - all this will be needed if you want to master decoupage
- Acrylic paints. They finish painting, tint the drawing so that the picture assembled from the pieces is a single whole.
- Sandpaper. Take medium and small grain, several grades. Again, it depends on what you are processing. For the initial sanding of wood, you will need paper with a grain of 250-400, for finishing - with a grain of 600-800 (it makes sense to use a smaller one only on grinders). We will also grind the flaws of your work after drying with sandpaper.
- Glue. Handicraft stores have special decoupage glue. But he's expensive. It turns out no worse if you use PVA glue.
Any good scissors will do.
- Priming. Used to reduce the absorbency of wood surfaces.
- Wood putty. It is also a specific material that is used to repair wood defects.

That's all that may be required, so although it requires decoupage for beginners, monetary investments are not very large.
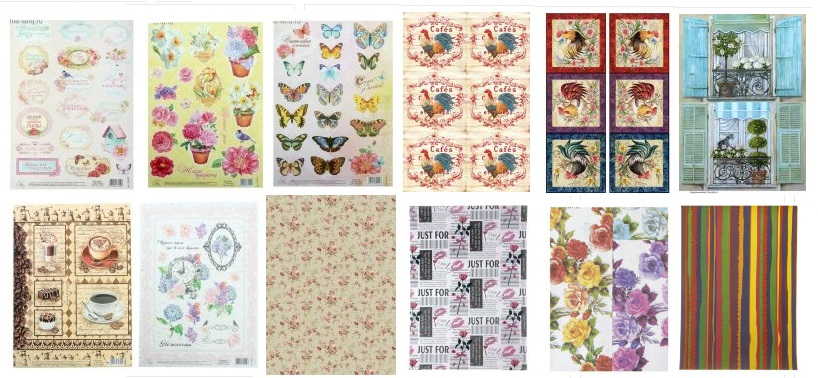
Napkins, paper
For decoupage, napkins and printed paper are used. They are glued to the surface and varnished. There are the following types of materials for this type of decor:
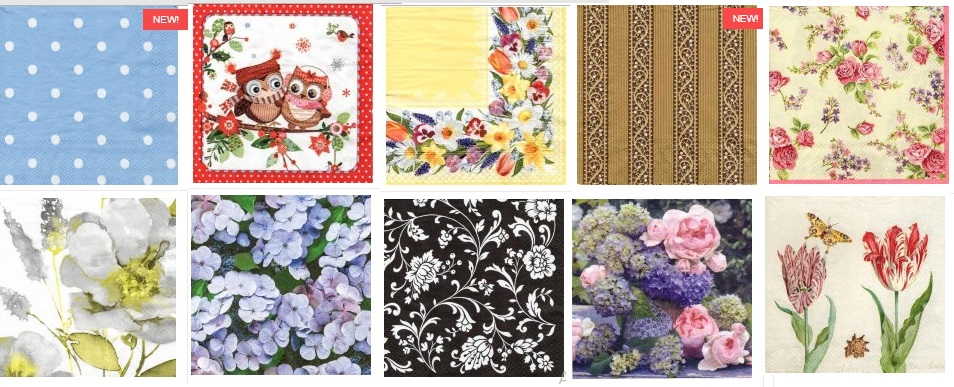
- Napkins. Most often they are three-layer - the bottom two are not used. The drawing is applied to the top layer. It is detached and used during operation. You need to be able to work with napkins, as they are very thin, stretch, bubble, tear. In general, you need a certain skill at work. Napkin decoupage for beginners is not always easy. The average price is 12-18 rubles per pack.

Decoupage napkins are soft and thin and must be handled carefully
- Decoupage card on rice paper. The drawing is applied to a canvas made of rice or mulberry fibers. It is easier to work with it, since it is more elastic, stretches better, does not deform when working with formulations containing water. There are different sizes (up to A4 format and more) and density, the cost of one card is from 70 rubles.
- Decoupage cards on paper. Plain paper is used, on which pictures are applied. Good for gluing on flat surfaces, as they practically do not stretch. It differs not only in size and patterns, but also in density. The cost of paper cards for decoupage is from 35 rubles.
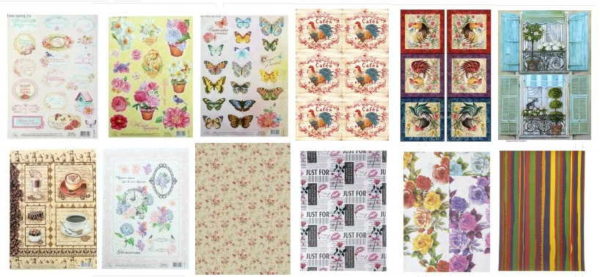
Paper decoupage cards - can be tried on flat surfaces
- Photographic printouts. You can order the printing of any unique image. It will be transferred to thin photographic paper, but in order to work with it, you need to know certain tricks.
In general, they also use special pastes to create volumetric images, ordinary photographs from which the bottom layer of paper and other drawings have been removed. But working with them is not easy, and this is not decoupage for beginners, but for those who are already developing their skills.
Napkin decoupage: techniques
The main idea of decoupage is to decorate the surface with an image or pattern. The process is creative and there are no concepts “right” or “wrong”. Surfaces and patterns are different, so different techniques are used. You just have to choose the method that works best for you.
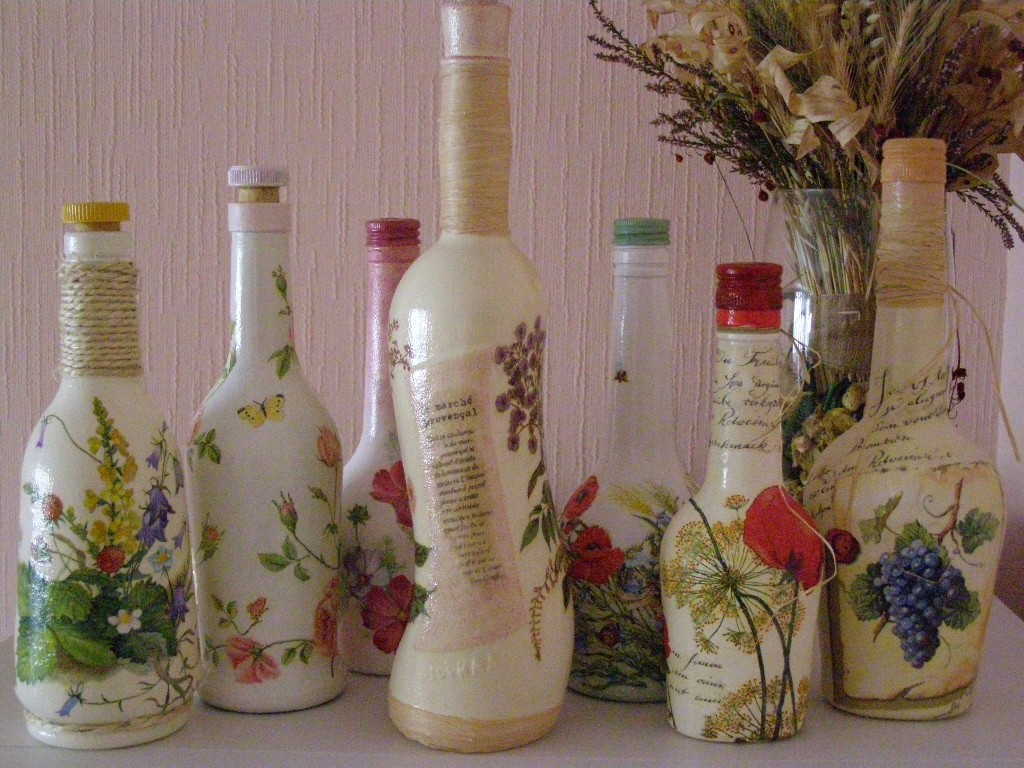
Decoupage bottles are a good start for beginners
The easiest way to start mastering decoupage is by gluing large fragments. When you learn how to glue napkins without folds, you can move on - to master the methods of volumetric decoupage or the use of crackle varnish. Until then, let's figure out how to work with large fragments.
Preparatory work
First of all, you need to remember that napkin decoupage for beginners will have to start with preparing the base. It should be even, smooth, without pits, nicks, humps (except for those that are specially provided).To help - putty and sandpaper. After the surface is leveled, the workpiece is covered with primer (selected by the type of material) and then covered with white paint.
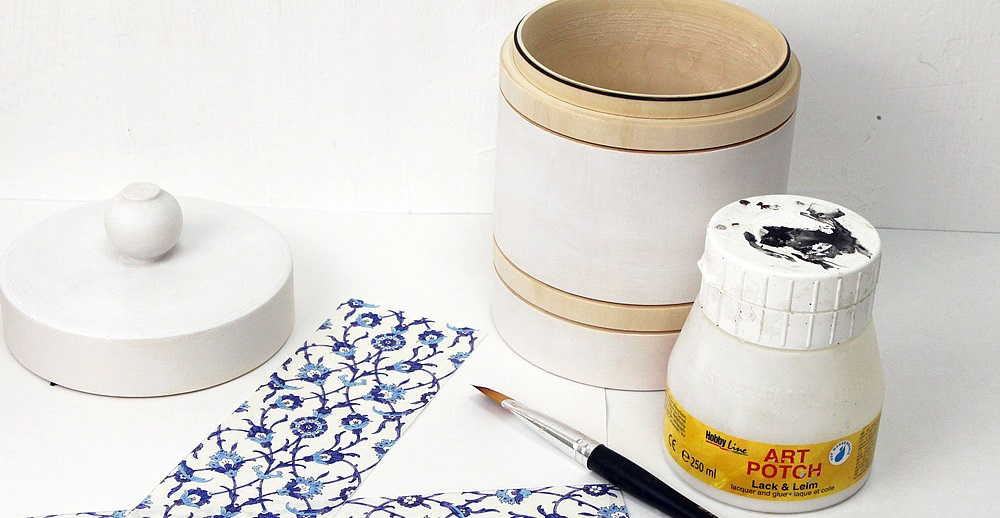
The base is brought to perfect condition, covered with primer (if it is absorbent) and painted with white acrylic paint
The stage of applying white paint is mandatory. The fact is that the napkins are very thin, and when glued, they become translucent. If they are glued to a white surface, the pattern is still bright. If the surface is colored or dark, it fades noticeably, there is no desired effect. Therefore, the paint must be applied even to plastic or ceramics and, possibly, in several layers.
What to do with a napkin
First you need to decide in what form to use the napkin.
- If the surface is flat, it can be glued whole.
- You can't stick a whole on a curved surface. You need to divide it into fragments. They can be:
- to cut;
- to tear.

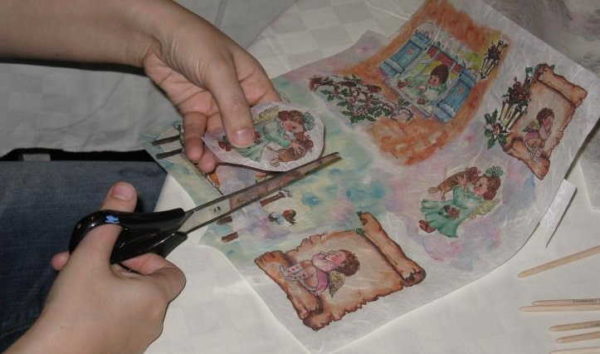
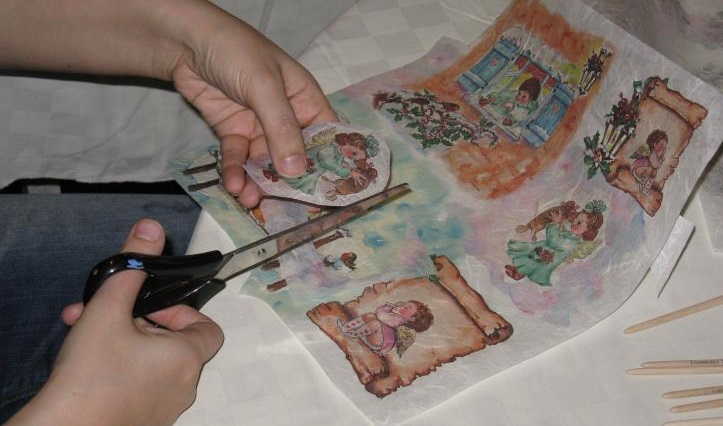
A decoupage napkin is torn if the drawing is small and fragments are cut out if it is large
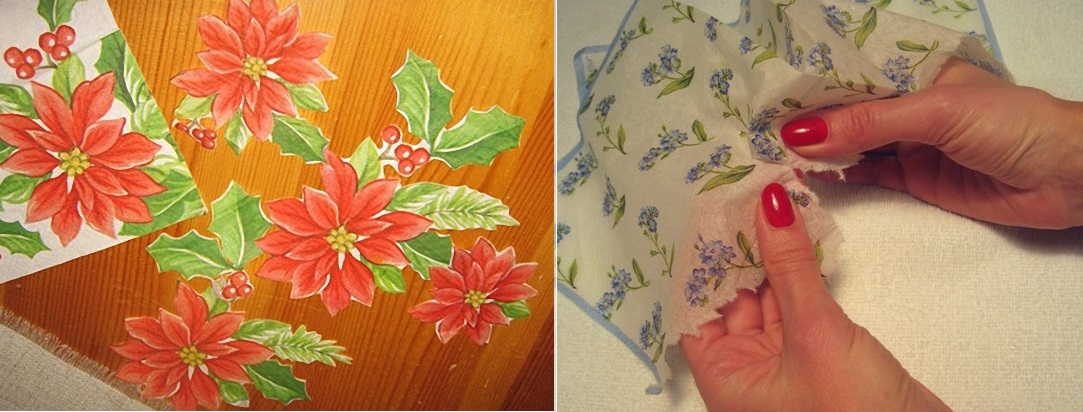
How to decide whether to tear a napkin or cut out elements from it? By the size of the picture. If the fragments are large, have clearly marked boundaries, they are cut out. If the drawing is small, they will stick one next to the other, they will be torn. This will make it easier to match the edges.
Gluing methods
You can choose how to glue decoupage napkins only by experience. First of all, we decide on what exactly we will glue. Can:
- Lacquer.
- Special glue.
- PVA - divorced or not.
- Glue stick.
- Egg white.
To glue on varnish is no worse than on glue. But after drying, you can no longer do anything - the napkins become almost monolithic with the product. If you don't like something, there won't be a chance to change. Therefore, beginners most often use PVA glue - it is cheaper, it is convenient to work with it.
Most often they use diluted PVA glue
If you decide to use PVA, you will have to think (or try) to use it in a diluted or undiluted form. Most often it is diluted with plain water in a 1: 1 ratio. When such an adhesive is used, one must be prepared for the fact that the napkin gets wet from the water, it can stretch in different directions, and tear from careless movements. In general, you need to adapt.
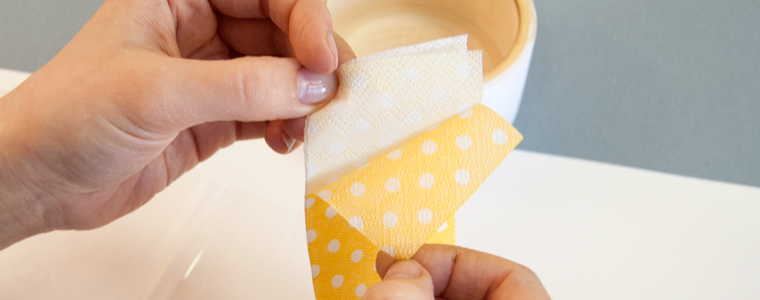
Before work, separate the colored layer. We will glue it
A glue stick is also a good option ... if you can smooth out all the bubbles and wrinkles. This works normally on smooth, slippery surfaces. If the surface is rough, it is much more difficult. It's safe to work with egg white, but it's specific, so try it if you want.
How and where to apply the adhesive
Beginners usually choose their first object for decoupage of a small size. In principle, this is not bad. It is only desirable that the shape be simpler: without a lot of bends.
If the object to be decorated is small, you can use a brush or fingers to apply the glue. Then use the same "tool" to level the napkin. The brush is used flat or true - which is more convenient for anyone. Many people like to work with their fingers - you can feel all the folds.
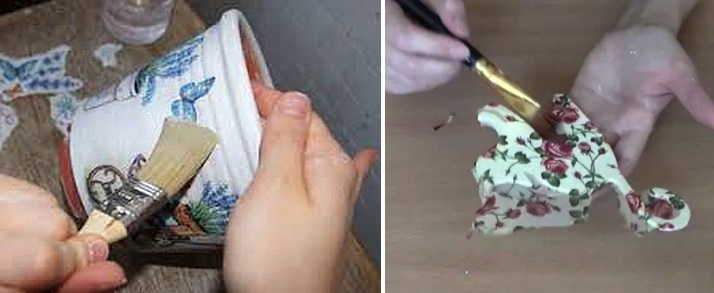
You can work with a brush or fingers
When gluing decoupage napkins, you can apply the glue to the object or to the napkin. They do this and that. When applied to a napkin again, there are two techniques:
- The glue is applied evenly over the entire piece to be glued, applied to the base with the middle. With movements from the middle to the edges, air bubbles are expelled and folds are straightened.
- A certain amount of glue is poured into the middle of the fragment. Further, the actions are the same: we lay on the base, smooth.
The second technique is easier to deal with bubbles and wrinkles - it is easier with more semi-liquid glue.
It doesn't matter what and how you do it. It is important that there are no wrinkles and bubbles.
You can also do if you spread glue on the base: make a small puddle in the place where you are going to glue the fragment, lay it, and, lifting the edges, drive out the bubbles and smooth out the folds.
Decoupage flat surface: glue + iron
When decorating a flat surface, you can do easier than chasing bubbles through the entire napkin. Apply a layer of PVA glue to the primed surface or coat it with glue stick. We smear it well so that no "paths" are formed. Let it dry. To speed up the process, you can take a hairdryer.

Decoupage technique with an iron
Lay and level the napkin on the dried surface, smooth it with our hands. We put a piece of baking paper on it and begin to smooth it with a hot iron from the edge.
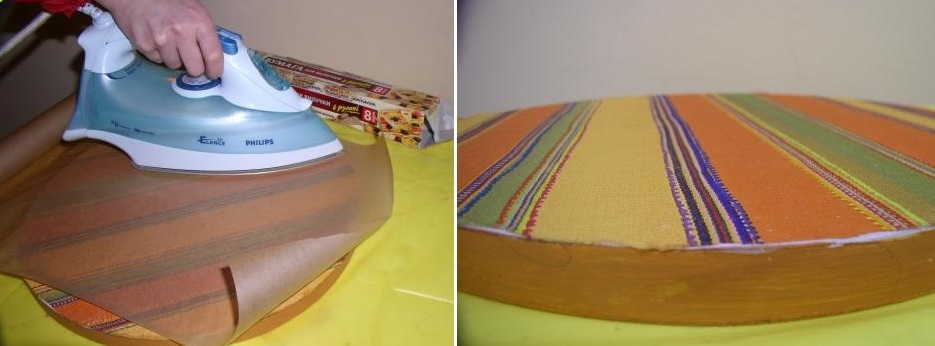
Decoupage for beginners - can you try something like this?
Due to the fact that the glue is heated, it saturates the napkin. Usually it turns out quite smoothly. When everything is glued, coat the top with glue and let it dry. This is perhaps the easiest way to learn decoupage for beginners.
File + water and glue
Decoupage for beginners using a file for documents (choose a thicker film), water and glue. This method is good if you will decorate with large drawings (cut out). Pour some clean water into the middle of the file, into it, face down, place the cut fragment. We carefully straighten it, expelling the bubbles and straightening the folds. It's easy in a puddle of water.
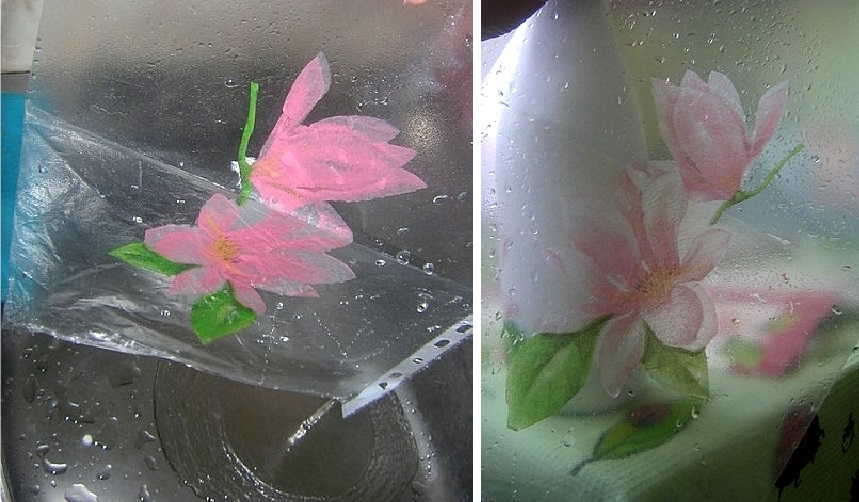
Straighten the fragment in water on the file
When the fragment is flattened, lift the edges of the file and drain the water. The pattern remains adhered to the smooth film. In this state, it is convenient to "try on" and look for the best place for him.
Having found the area where you want to place the decoration, apply the drawing on the film and begin to smooth it. This is a very difficult moment. It is necessary to ensure that at least one edge of the napkin sticks. After one of the edges of the image has been fixed, gradually smoothing and lifting the edge of the film a little, we ensure that the napkin remains on the base. If you act gradually, gradually gluing the picture to the base, bubbles or folds will not appear. This method is suitable as decoupage for beginners.
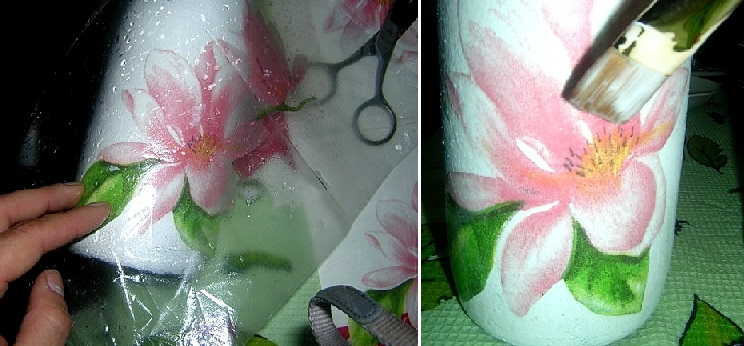
When one edge is stuck, everything is already easy
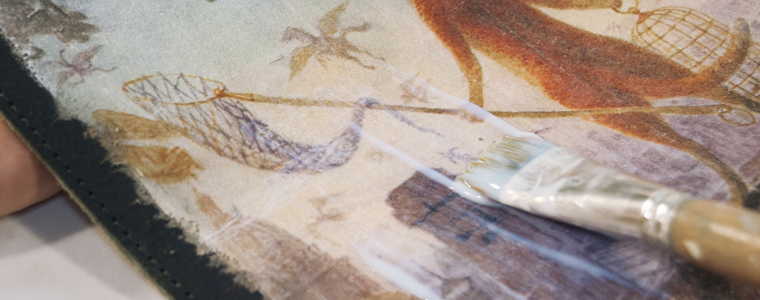
The last stage - coat the adhered napkin with diluted PVA glue. After it dries, we already apply a protective layer of varnish.
A few secrets
These cannot be called ways of gluing decoupage napkins. These are little tricks and tricks that can help you deal with creases faster or better.
- Before work, the cut fragments are moistened with water from a spray bottle. The napkin stretches, when it dries it no longer shrinks. If it has become severely warped, it is ironed. Then use it as usual. Since the paper is already flattened, it hardly stretches anymore. Everything is easier.
- Moisten the fragment with acrylic varnish in the form of an aerosol. In this case, the napkin will become rigid, it does not stretch and does not form folds. But lacquered, it no longer allows glue to pass through, therefore we coat the surface with glue and a processed napkin on it with glue.
- Soak a napkin that is already on the base (dry) and only then coat it with glue. It is difficult to explain here, watch the video.
Eliminate flaws
If the surface is decorated with small torn fragments, from which it is necessary to obtain a single whole, we straighten the edges of the fragments with a brush or fingers. If there is a color irregularity somewhere, we dilute the paint of the desired shade and paint over the translucent base.
When the surface is no longer very wet, but has not yet dried, you can draw details with thin brushes and acrylic paints, add brightness and clarity.
The next step is to decorate the edges of the product. Here the approaches are different. Somewhere you have to cut the edges exactly, painting over the sidewalls, somewhere you can wrap the napkin on the back side and glue it there. In general, this is also a whole science.
Bringing to the finish is an equally creative process
After that, you can already leave the product to dry. To speed up the process, you can use a hair dryer, but you need to keep it at a considerable distance, move it all the time and make sure it dries evenly. If, after drying, you see that there is a crease in the glued napkin, you can still fix it. We take fine-grained sandpaper, sand it. We act gently so as not to damage the drawing around.
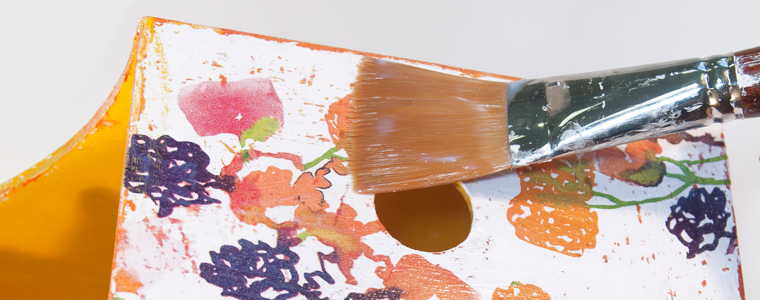
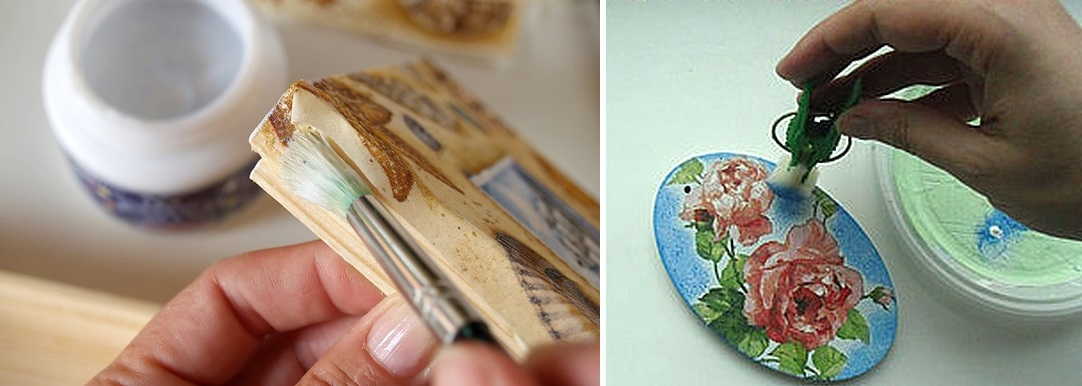
Varnishing
The dried product is coated with water-based acrylic varnish. You can use another, but this one is recognized as the best. First, one layer is applied, after it dries, the second. We can stop at this, but if active operation (caskets, chairs, etc.) is assumed, there may be more layers of varnish - three or four.
Photo of products using decoupage technique
Learning the technique is good, but without knowing the possibilities, it's hard to imagine what can be done and what to expect. A few photos will help you decide what you can or want to do.
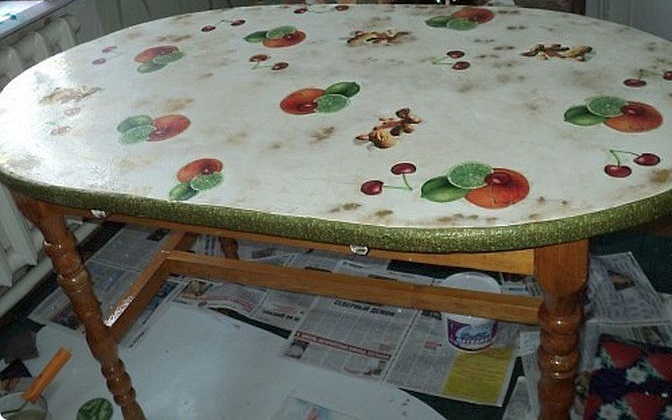
Turning an old table into a new and very unusual one is within the power of decoupage

Decoupage for beginners: standard bathroom furniture is now vintage
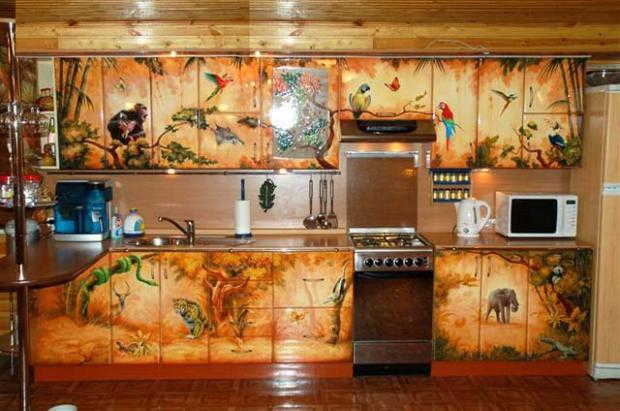
A boring standard kitchen can be made a work of art
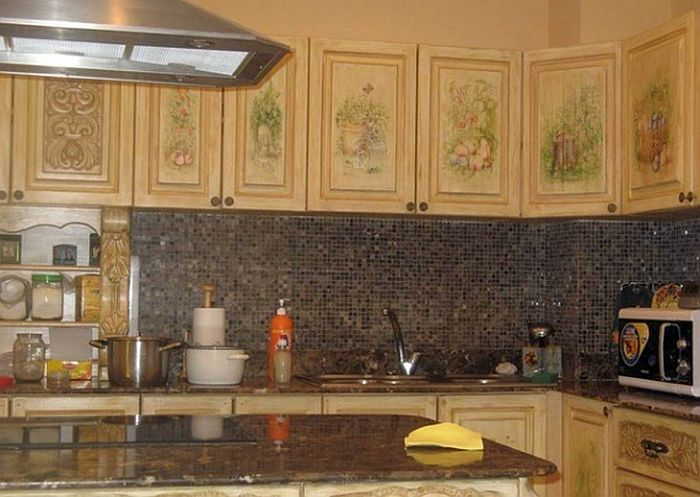
Transformation of old kitchen facades
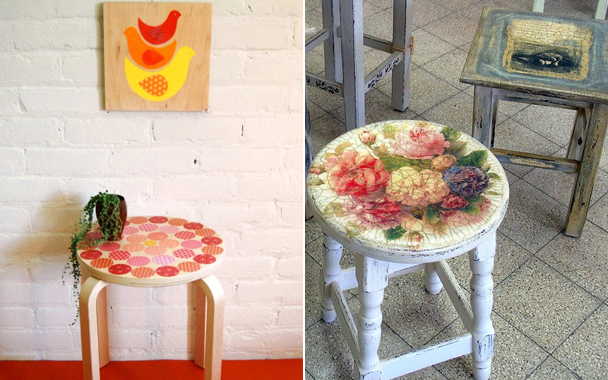
Stools are also an art object
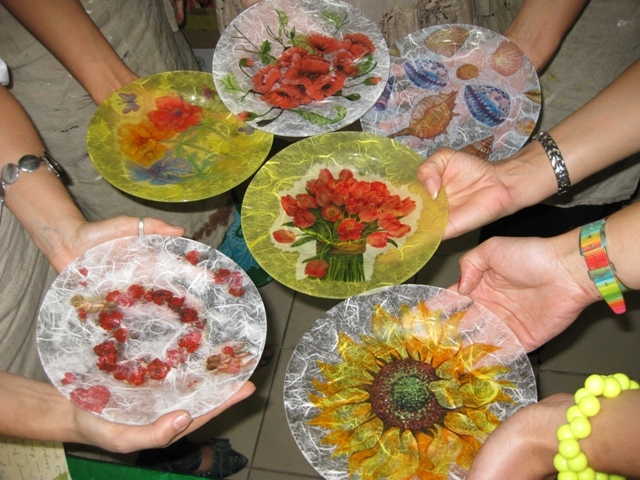
This technique is called reverse decoupage - napkins are glued to the glass with the front side
-
 Buying an apartment: what documents are required, their verification
-
 How to deal with cockroaches in an apartment, the best remedy for cockroaches
-
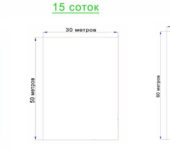 How many square meters in a hundred square meters of land: measurement, calculation
-
 Conversion of inches to cm and mm, centimeters to inches, tables, applications, formulas
-
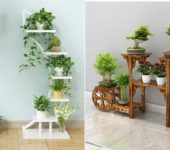 Floor stands for flowers


good lesson
Thank you, everything is clear and understandable.
Thank you so much, everything is laid out on the shelves! You are smart!
Such a detailed description of the decoupage technique will help many beginners to master this type of creativity. The result is a beautiful decor for almost any surface.