Weaving from newspaper tubes - interesting DIY crafts
You can create unique things without spending a lot of money. A striking example of this is weaving from newspaper tubes. Of course, it will take a lot of time. But, in addition to the satisfaction and joy of creativity, you will become the owners of original and beautiful crafts. The problem with gifts will be solved - you can make them with your own hands.
The content of the article
Straw preparation
Before starting weaving, you need to prepare the starting material - wind tubes from newspapers or magazines. You will need the paper itself, PVA glue in a bottle with a dispenser, a long pushing needle, or a piece of stiff wire. The diameter of the spoke / wire is 1.5-2 mm. These are all preparatory tools.
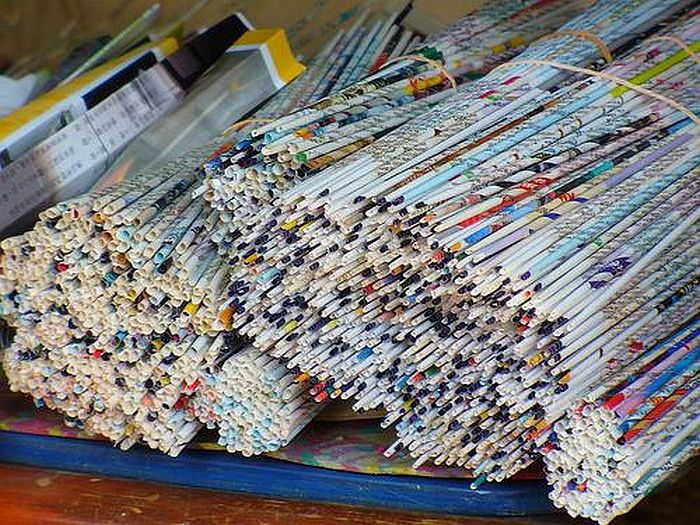
Lots of ideas - lots of stuff!
Twist
To make the straws, you must first cut the paper into pieces of the desired size. We cut newspaper strips or magazine spreads into several parts. The aspect ratio is 1: 3 or 1: 4 (for example, 27 * 9 cm, 35 * 10 cm). The exact dimensions are not important. Divide the page into multiple sections so that they are roughly the aspect ratio shown above.
We take a knitting needle and a paper strip. We twist the corner of the paper around the knitting needle, gradually, layer by layer, roll up the tube. Fix the edge of the strip with a drop of glue. To make the tube of the desired density, lay the paper at 45 ° in relation to the needle. Then it will be tight enough, but at the same time it will bend well.
This is how we make paper tubes for weaving
We take out the knitting needle. The tube is not too long, you will have to splicate them to work. If everything is done correctly, one edge is thin, the other is thick and hollow from the inside. To connect two newspaper tubes, drop a few drops of PVA glue into the thick part, insert the second tube with a thin edge. Now we wait until it dries.
Painting and other processing methods
Sometimes, for easier weaving, the tubes are rolled with a regular rolling pin. They become flatter. In this form, it is easier to work with them - to stretch them between the rows. But this is an optional step. Try rolling, maybe you will like the weaving from newspaper tubes more in this form.
Not everyone likes the "natural look" of newsprint weaving. To improve the appearance, the twisted tubes are dyed. Acrylic paint is best suited for this. It fits snugly, behaves well with any type of paper, does not flow, dries quickly and is odorless. A water-resistant, moisture-resistant stain is also suitable. Paper tubes coated with acrylic varnish, to which a coloring pigment is immediately added, look good. Simultaneously with painting, they become less sensitive to moisture.
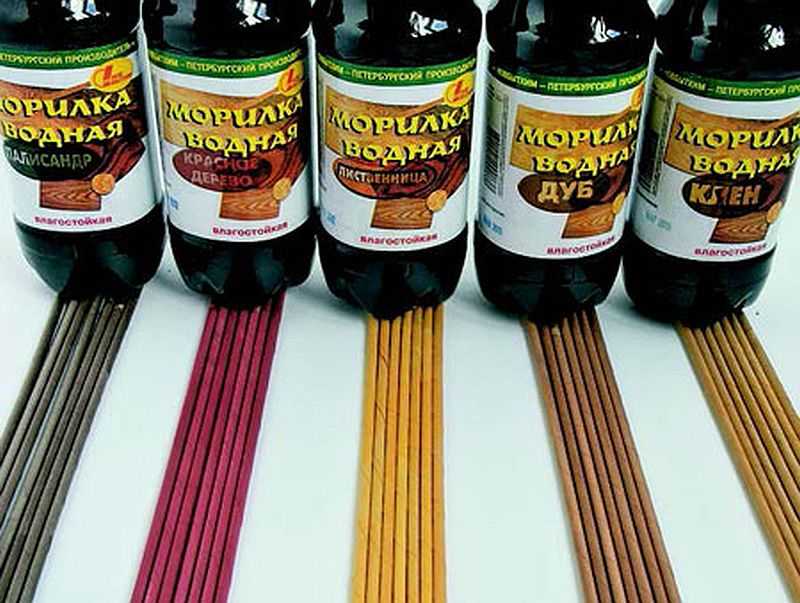
Some colors of water stain for dyeing paper tubes
To paint each tube with a brush is long and dreary, so they are looking for a long tray in which the tubes are stacked. Paint is poured into it, ready-made newspaper tubes are dipped into it. Then they are laid out on a polyethylene layer to dry.
Before weaving, so that the "newspaper vine" bends well, you can moisten it. It is better and easier to do this from a spray bottle, simply by spraying water.
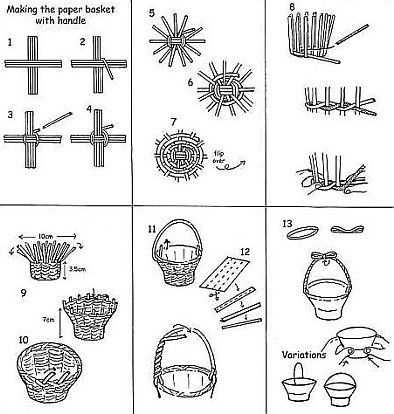
The beginning of weaving - we form the bottom
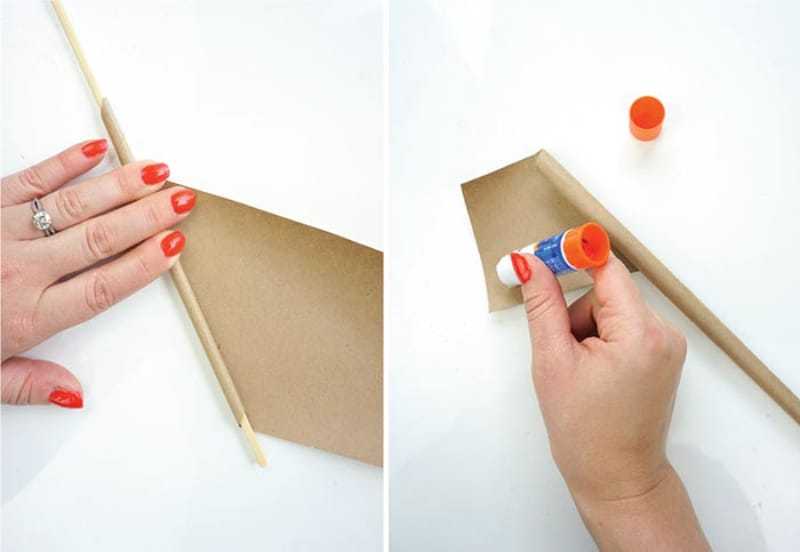
In most products, you first need to form the bottom. There are two options: make it out of cardboard by gluing the racks to the edges.The option is simple and straightforward. Perhaps for beginners, it is better - weaving the walls is a little easier than shaping the bottom. And so that the ends of the glued racks do not "scratch" the eyes, they are covered with a second piece of the same cardboard.
The bottom is made of cardboard for weaving from newspaper tubes
Of the features: in the corners you need to glue a double number of tubes. One will be on one side, the other on the other. In addition to the above option, there is another way - to stick them not on the corner, but on both sides. In this case, the racks are placed from the corner at a distance of no more than half a step (this is the distance at which you placed other racks).
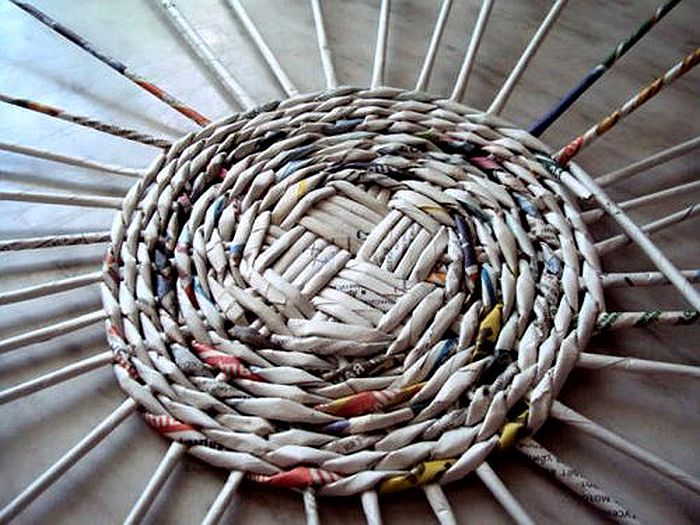
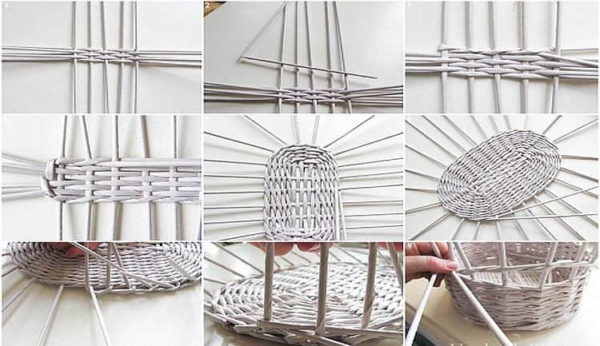
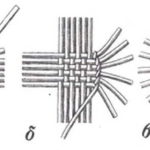
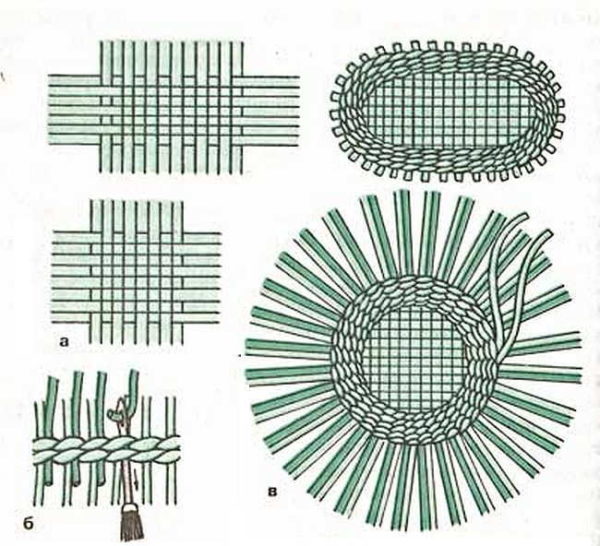
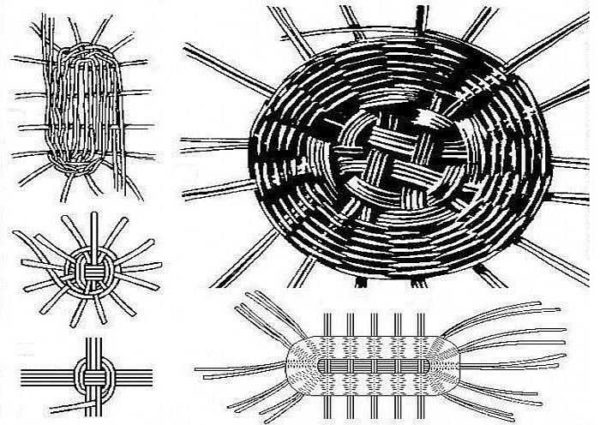
The second option is to weave the bottom out of newspaper tubes. You will need long tubes - spliced from two or three. There are many ways, they are taken mainly from weaving from a vine. The principle is one - the tubes one by one or in groups - are intertwined with each other, forming a center. Then, using some of the lozenges, braid the base, adding dimension or rounded shape as needed.
Round bottom for large items
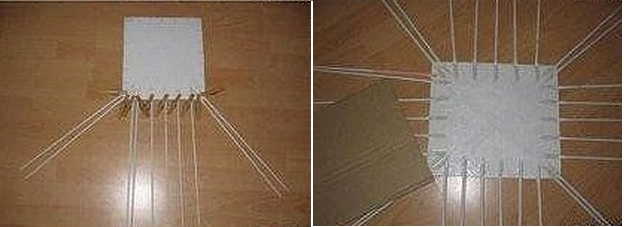
It will be a little easier if you cross several tubes stacked one to the other. In the photo (see below), they took five tubes each, intertwined them relative to each other. To make the bottom less bulky, it must be crushed. The easiest way to do this is with a rolling pin or a bottle - rolling it several times. To make it easier to work further, we coat the intersections with PVA glue.

Bottom weaving for square products
Next, we take a straw and begin to tie the bottom, passing the straw through three tubes (rope method). So - through three tubes - we make two rows. Then - several rows - after two. Several - this is to make the bottom dimensions almost "right" - in shape.
Weave the last two or three rows through one tube. During weaving, it is necessary to part the base tubes at the same distance. So it actually turns out, you just need to make sure that the distance is the same.
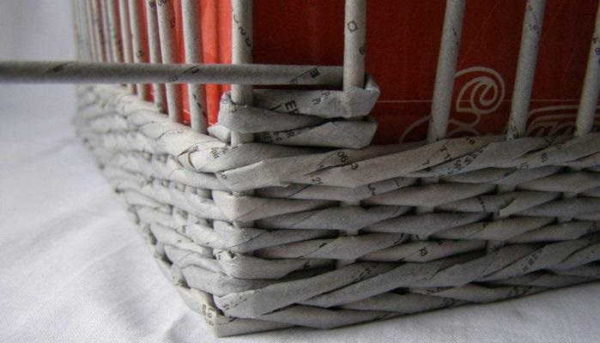
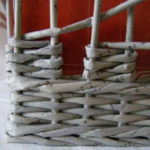
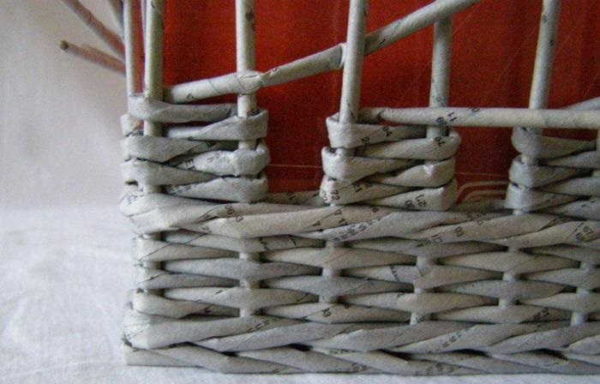
We finish weaving the bottom and go to the walls
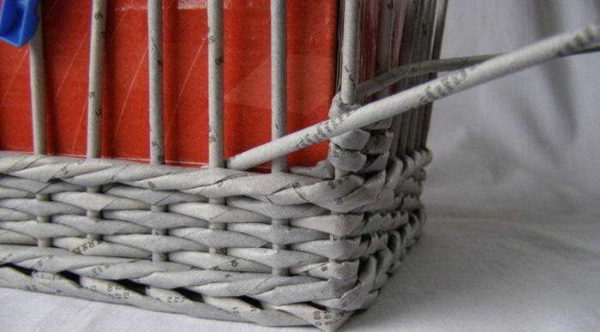
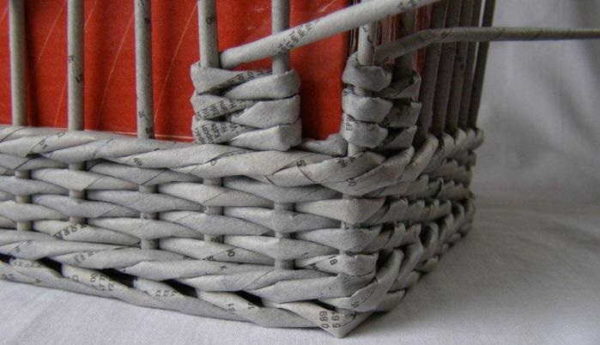
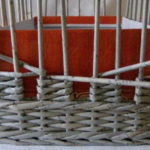
When switching to weaving the walls, we cross the base tubes with one another. This makes the product more stable and the transition more reliable. For weaving the walls, you can use the working tubes that were used when weaving the bottom.
A simple version of the bottom made of newspaper tubes
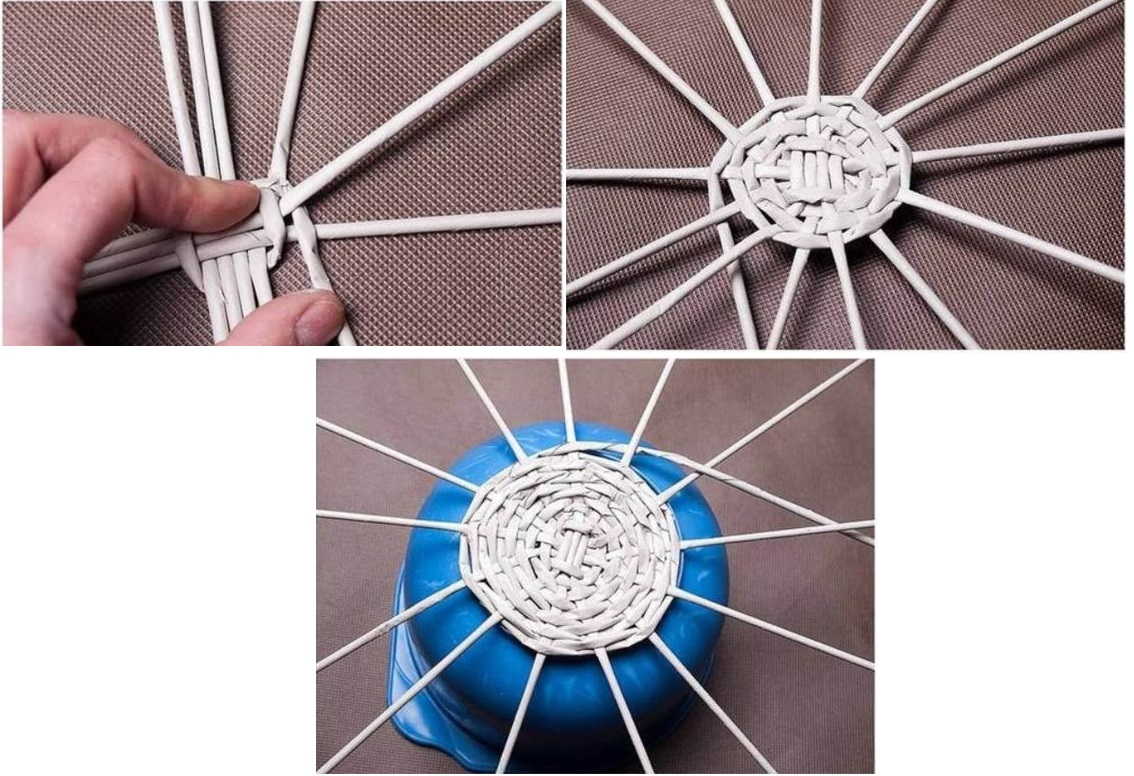
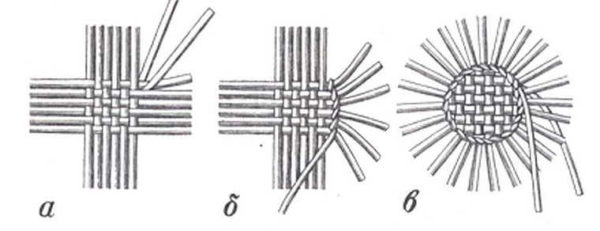
Weaving from round bottom tubes can be started even easier. Such a bottom will not look so elegant, but for beginners, we advise you to try this method.
For a small product, take eight long tubes. We fold "cross to cross" by four. They can also be rolled with a rolling pin and glue the joint - there will be less problems at the start.
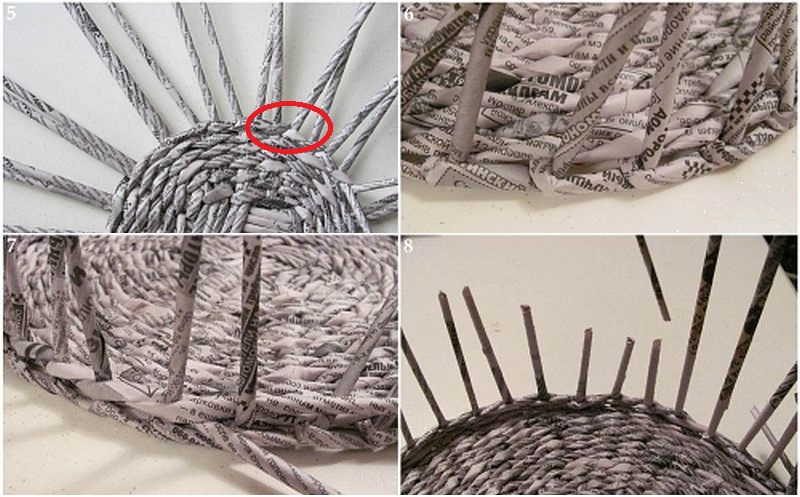
Next, we take the extreme right of the tubes that are below. We bend it, circle it around, the tubes from above, then from below. The second row - we immediately weave with a string through one tube.
How to weave a round bottom from newspaper tubes
Next, we work with this pipe, building up as needed. When you get the bottom of the desired size, go to the walls.
In the described embodiment, 15 racks are obtained (16-1). If you need more, either add as the bottom is weaved, or take a larger number in the source.
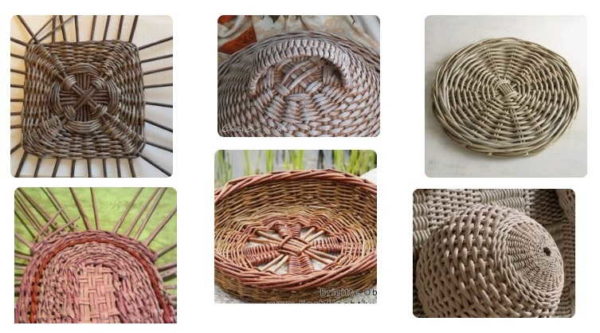
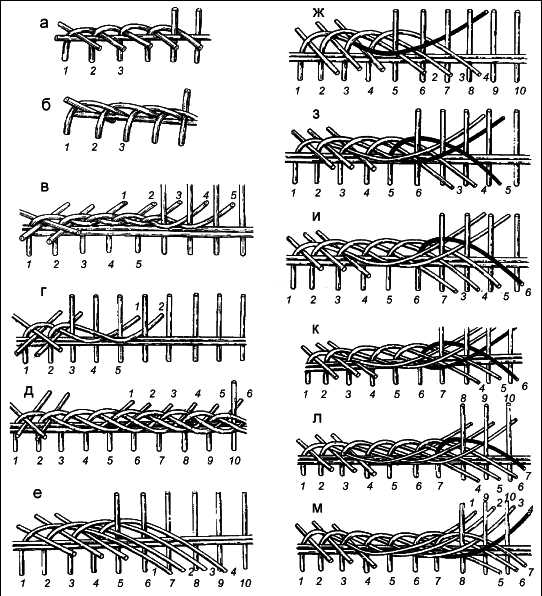
Photos and patterns of weaving the bottom of different shapes
As you gain experience, you will want to make products of other shapes - oval, rectangular, multifaceted. The section contains several diagrams showing how you can make forms more elegant and complex.
-
- For oval baskets
-
- Weave checkerboard
-
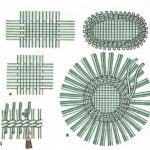
- With an increase in the number of racks and with duplication of racks
-
- Craftsman options
-
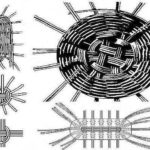
- Different shape, the principle is the same
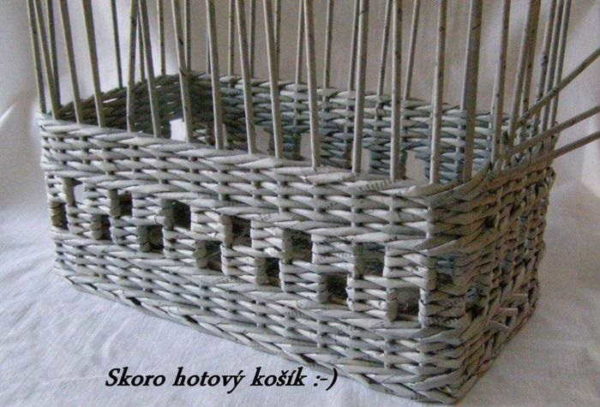
Weaving from newspaper tubes for walls
As soon as you start weaving products, the patterns will become clear to you. With a little experience, you will learn how to restore the weaving method by looking at the photo. For beginners, we recommend starting with the simplest patterns. This is a string, and then a pigtail.It doesn't take long to master them.
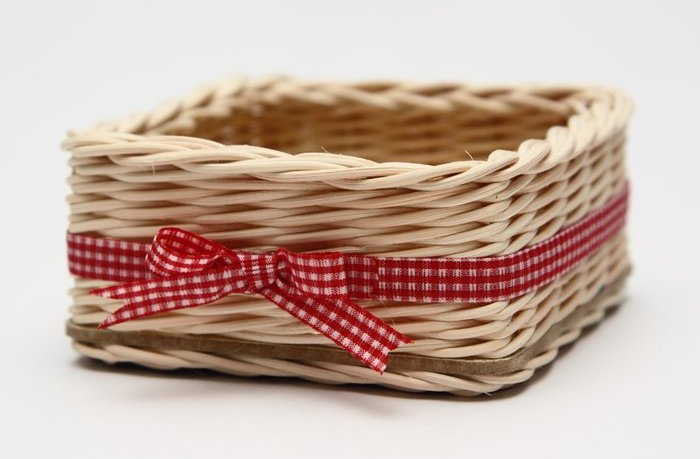
Even a beginner can weave such a basket from newspaper tubes.
Rope
To master the technique of weaving from newspaper tubes, you will need about five to seven racks. To begin with, you can fix several pieces of thick wire on some kind of support (a piece of dense foam, for example).
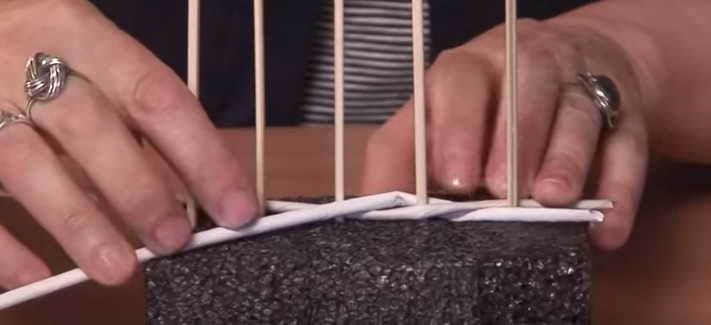
This is how weaving looks live on the "simulator"
Further, the weaving process is as follows:
- We take two tubes, put them between the two extreme racks crosswise. It turns out one tube lies in front of work, the other - behind.
- Holding the tubes at the intersection with one hand, bend with the other, bypassing the next rack. As a result, the tube that was in front turns out to be behind, the one that was behind is in front.
- Bend over again, bypassing the next rack and so on to the end of the row.
That, in fact, is all - this is a method of weaving from newspaper tubes "string". Already using this technique, you can do the simplest things. The product is dense and durable. One important point: for this pattern to look normal, there must be an odd number of racks.
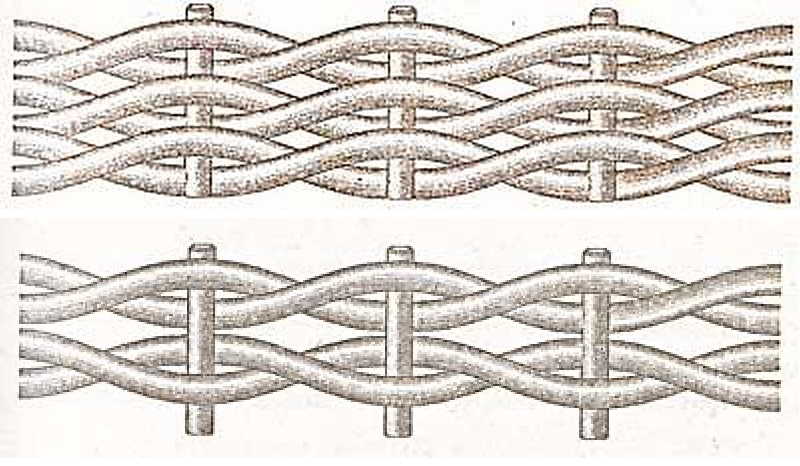
Changing the "starting" location of the tube, we get a different in appearance pattern
If you want to complicate a little, you can take two tubes, go around two racks. But then you need to calculate the number of racks so that the second row is offset - then the pattern will turn out to be interesting. No less interesting are the two strings directed to one another, and not woven in one direction.
Chess
Checkerboard is another easy way to weave. To do this, you need to take two tubes, placing them one above the other.
- We attach the first pair to one of the posts (just hold the edges with your finger).
- We bring them forward, making sure that they remain one above the other.
- We start back.
- Forward again and so on ...
- We take the second pair, attach them to the next rack (move one rack forward), but above the first row.
It's not difficult - take turns bypass the racks in front and behind
- Further actions are similar - forward / backward.
- By the same principle, we weave the following rows.
This way you can weave a basket, tray and many other products. In terms of density, the product is not as strong as with the previous weave.
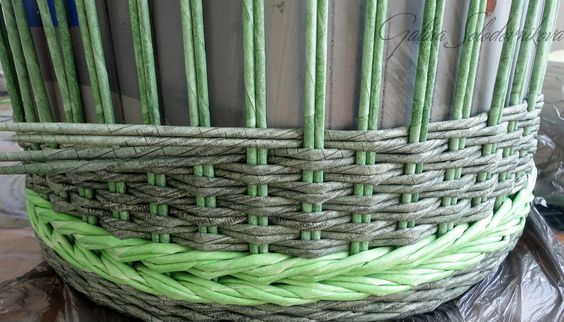
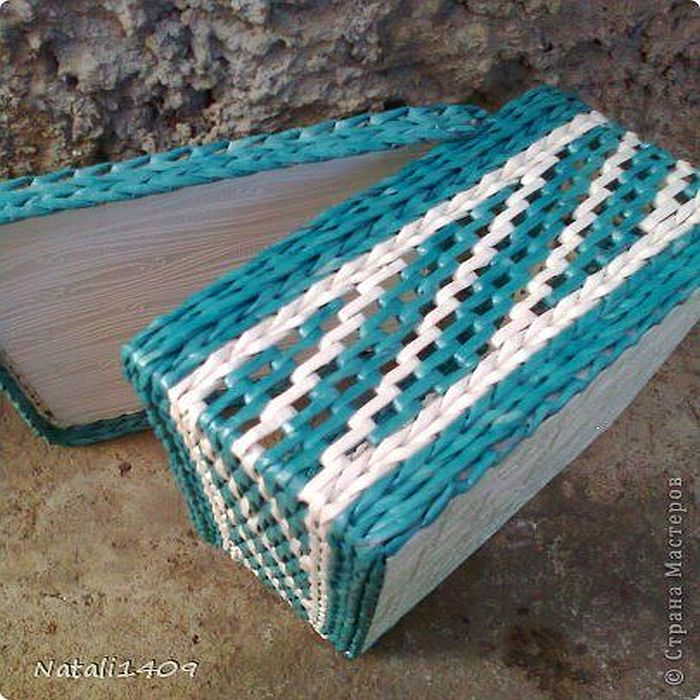
In combination with a well-known rope, we get an interesting product
If you combine the described two methods, you get a rather interesting product. And if the transition is also decorated with a different color, it will be even nicer.
Completion of work
To make the product look neat, it is necessary, firstly, to remove the working tubes, and secondly, to somehow form the edge and do something with the racks.
Some weaving elements are more complex. It is better to master them after making a couple of simple baskets.
We fix the working tubes
First you need to fix the working tubes. Usually they are hidden in weaving - in the closest binding. For this operation you need a knitting needle or a long wooden skewer.
- Having stepped back three or four rows, we push the skewer so that it comes out not far from the working tube.
- We bend the tube, put it on a skewer. We carefully display the entire structure in the place where the skewer was stuck.

We pull out the working tube together with a skewer between the rows
- Cut the tube as close to the weave as possible.
- We repeat from the second.
- We correct the weaving from newspaper tubes so that the scraps are not visible.
This is a simple and reliable way to secure the working tubes. Their ends are hidden in the weaving, while being securely fixed and clamped. For those who are just starting to master paper weaving, this is perhaps the best option.
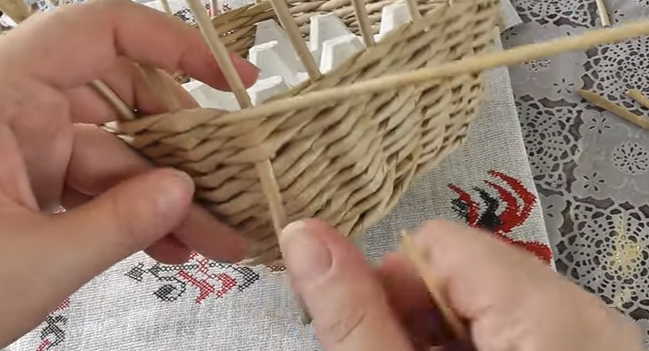
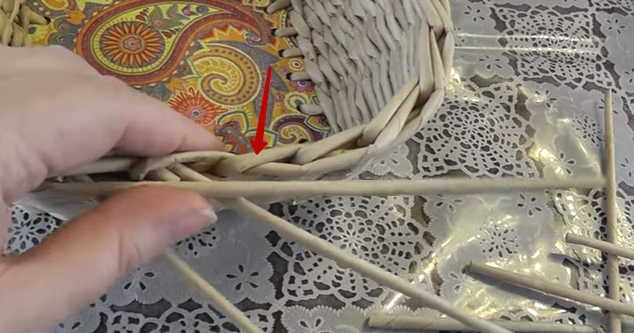
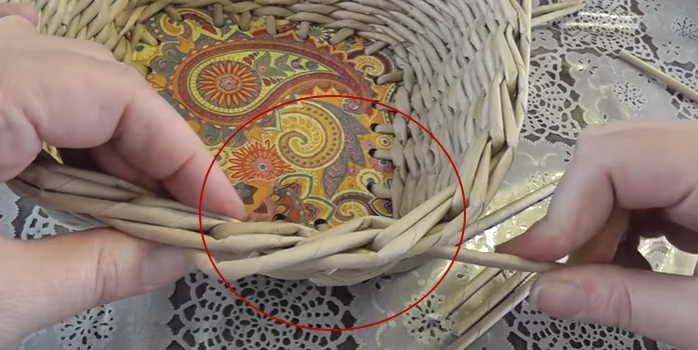
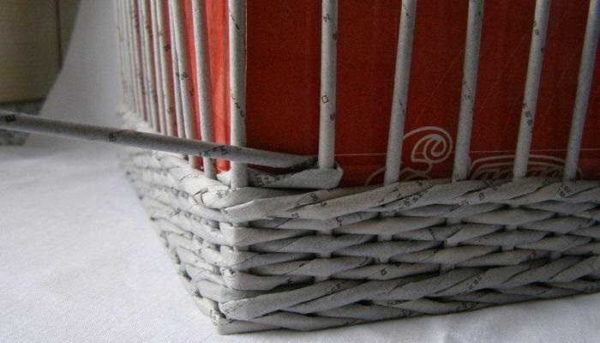
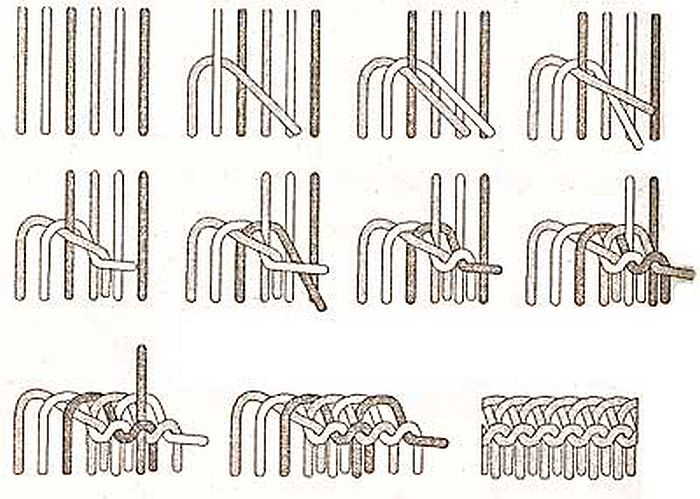
Weaving the edge - the main technique
Then you can start closing the edge. There are many different ways - more or less complicated. The easiest is to do as with workers, but bend them inside the product. But then the edge is not very beautiful. If you want to make it more aesthetic, you can try the "rod" edge.It is not too difficult for beginners to master, but it looks interesting.
To close the edge with a "rod", you need an auxiliary tube or you can take a skewer, knitting needle. With its help, we bend the first rack to the right, start it behind the next rack and bring it forward. Similarly, we bend to the right, start behind the next one and bring two more racks forward. In total, we have three bent.
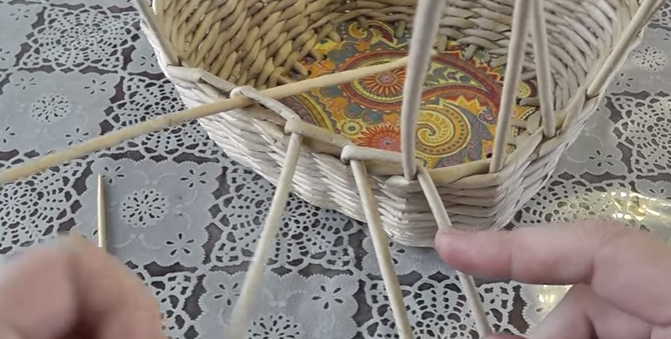
Start - bend three racks
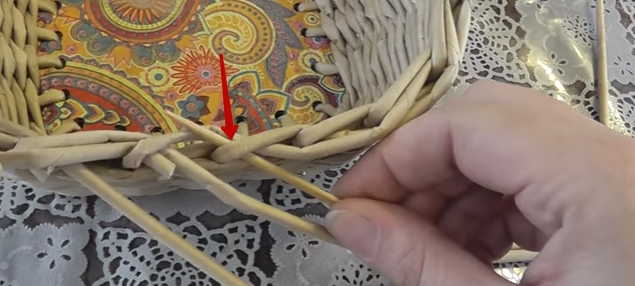
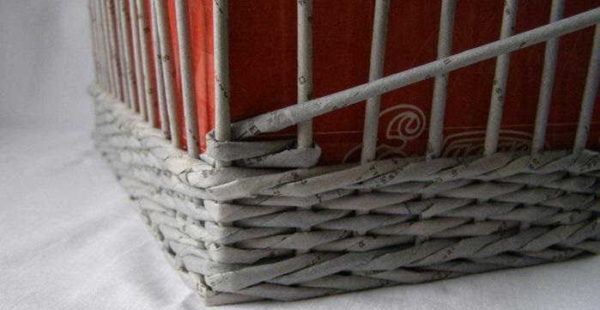
Further, we will always work with the leftmost tube. We take it, take it to the right, go around two racks in front (one bent, one standing), start after the third, bring it forward and bend it.

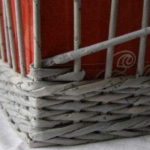
We form the edge of the basket from paper tubes
Cut with nippers so that 8-9 mm of tubules remain behind the rack. To fix this trim, bend the first of the standing racks to the right, pressing the trimmed edge. Again, we have three tubes at work (bent). Again we take the left one and repeat everything again.
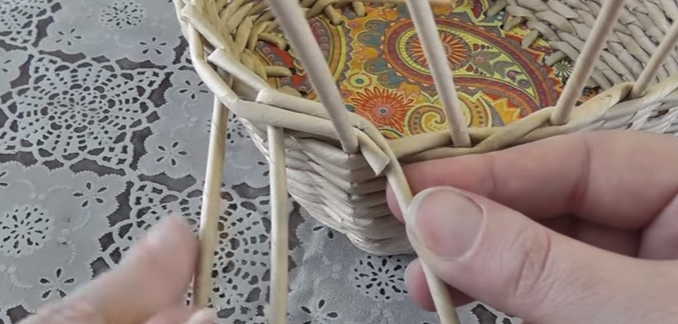
Press the next rack
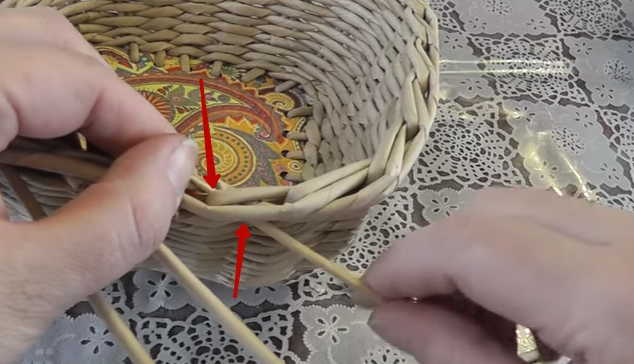
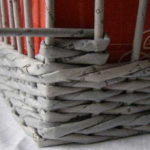
A side is gradually formed, which covers the top of the weave. We repeat all these steps until there are three racks left: two bent and one stands. It is easy to trace this moment, it is important not to miss it. Here you have to be careful. If everything is done correctly, it will be impossible to find the place where the work begins / ends.
Final chords
When three racks remain uncovered, make sure that the newspaper tubes are laid in the same sequence and in the same direction, so that they lay in the same way as before. We take out the auxiliary tube or skewer with which we started to close the edge.
Again we take the leftmost tube, in front we bend around the last standing stand and further, according to the previous weaving algorithm, we need to wind it behind the next stand. This post is already folded and secured. This is the one with which they began to close the edge. We start the tube from behind, slip it under the first bent rack (more conveniently with a skewer) and stretch it forward, laying the tube like the others. We cut it off.
Slip it under the first closed rack
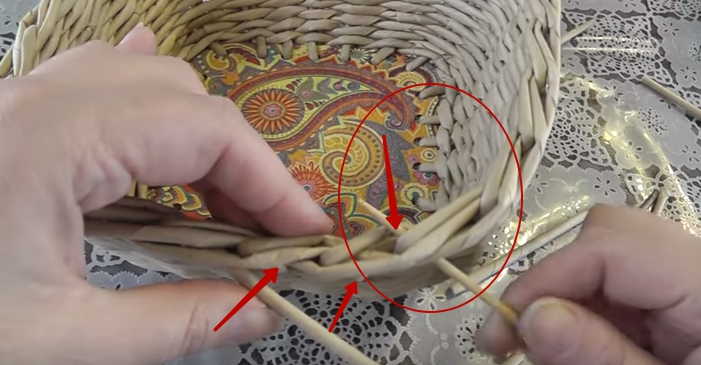
Further according to the algorithm, it must be covered with the previous counter. In this case, this is the last one standing. We bend it, start it behind the weaving and push it behind the cut rack.
We press the last standing rack, pushing it next to the already laid one and fix it
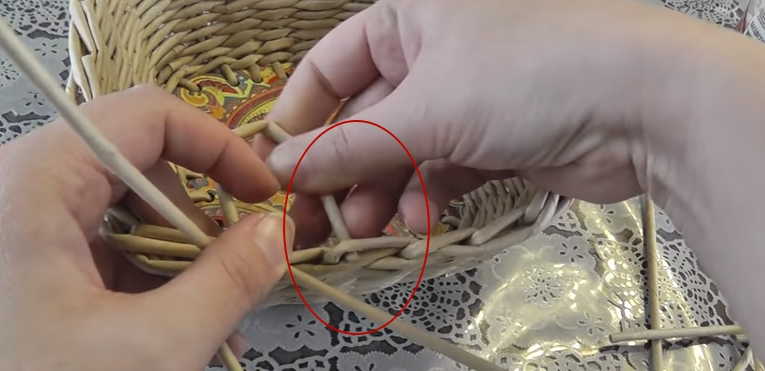
Now there are no standing racks, only three workers remained. They must be laid in the same way as those that are already fixed. We take the far left, it must be stretched under the third rack. Look carefully. This is the first post that does not have a cut tube near it. Stretching, laying, trimming.
We stretch it under the third rack. If you look closely - this is the first one, under which there is no cut tube
We lay the left tube along the top, covering the tubes that have just been laid. We start from behind, stretch it under the counter, in front of the laid tube.
Here we extend ...
We repeat the same operations with the next extreme left. It must be brought behind an "empty" rack, near which there is no cut tube. This counter is located to the right of the one we just worked with. Here you can't do without a skewer - you need to slip a newspaper tube under two already laid ones (look at the photo).
Find the right place
We put the tube on top, hiding the cut above. We start from the back, put it on a skewer and stretch it out. Holding it with your fingers, we stagger from side to side so that there is a place for it and it “lies down”. We cut it off.
It is also necessary to lay it correctly - repeating the same scheme as before
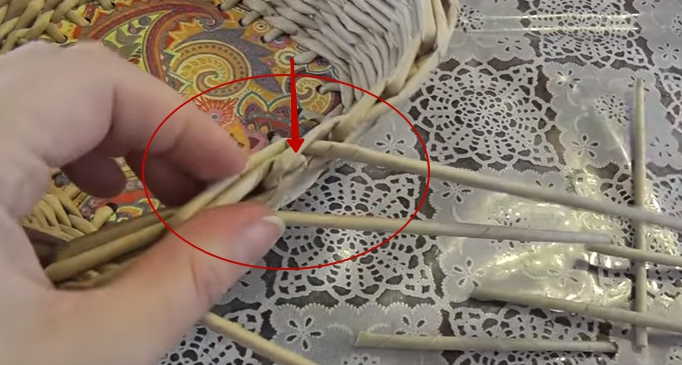
She remained a protruding newspaper tube. We start it at the third rack. It is easy to navigate: under the first two, the trimmings of the newly laid ones are already sticking out. We put the skewer under the laid turns, we bring it out near the bent rack.
It remains only to cut
Using a skewer, we bring the last stand out, spread it so that it lies just like the others. Now you can trim it. The edge of the basket is ready and it is impossible to find where the row begins and where it ends.
Photo ideas for weaving from tubes
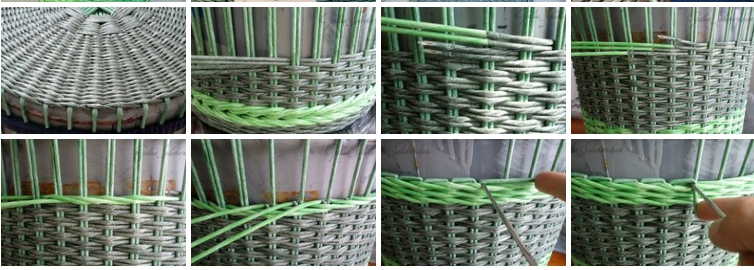
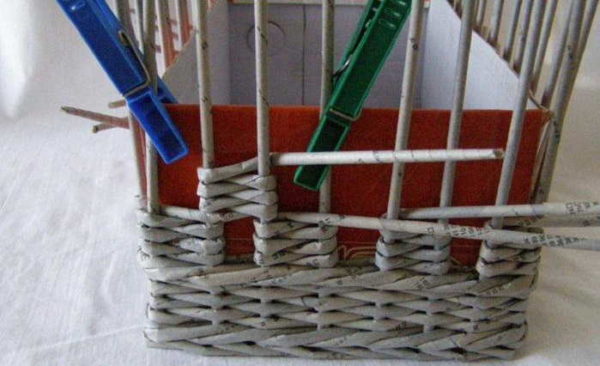
Novice craftsmen master the weaving of newspaper tubes using simple crafts. With the acquisition of experience, I want to diversify products, use more complex patterns. In some cases, weaving that looks interesting in appearance is not necessarily complex. Such an example is in the next photo gallery. It contains step-by-step photos of creating a checkerboard weaving.
-
- Such a basket or wicker tray can be made from newspaper tubes
-
- Start - we braid two racks
-
- We make sure that the racks do not bend or move
-
- The number of turns - at your discretion
-
- It is more convenient if the tube "looks" to the right
-
- We fix the second working tube, make the second column
-

- You can move in the opposite direction
-
- The principle is the same
-
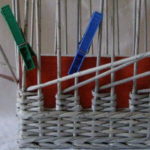
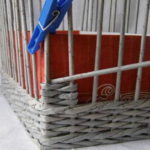
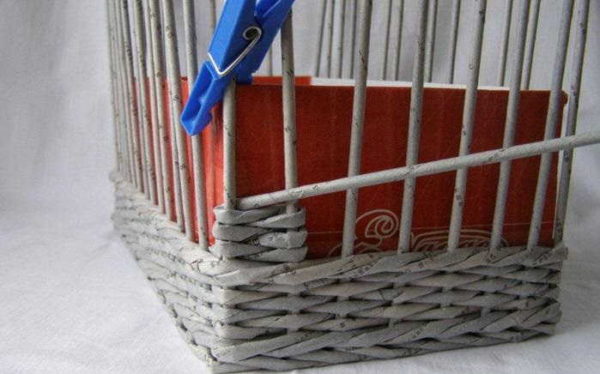
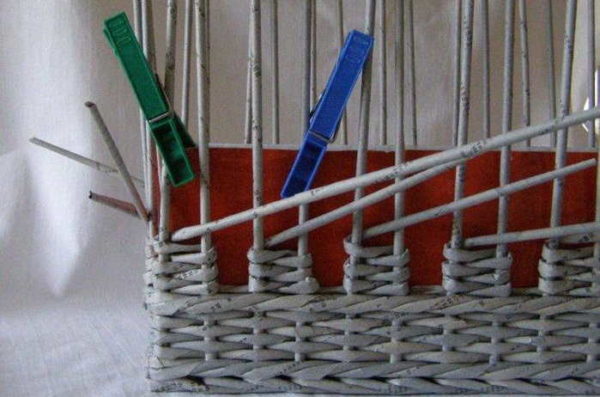
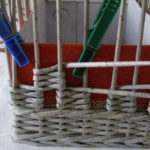
- To prevent the racks from moving, it is better to fasten them with clothespins to the form
-
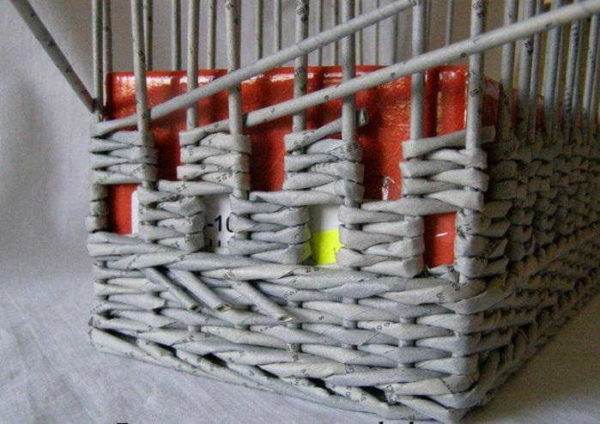
- We start the second row

-
- No different from the first row
-
- We finish the second row of checkerboard weaving, cut off the extra working tubes and fix their ends
-
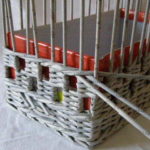
- We leave as many working tubes as needed

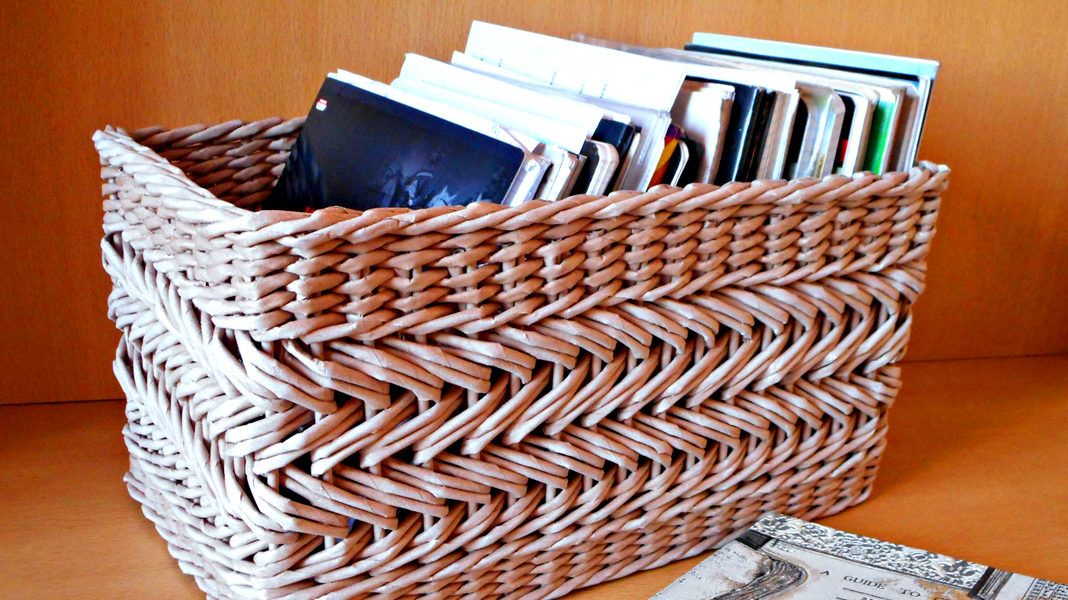
As you can see, weaving is simple, but such a product looks interesting. There are also other techniques. If you look closely at the photographs, chances are that you yourself can repeat or do something similar.
A simple basket. This is a great option to learn weaving from newspaper tubes.
One of the completion options
Several ways to bend the racks
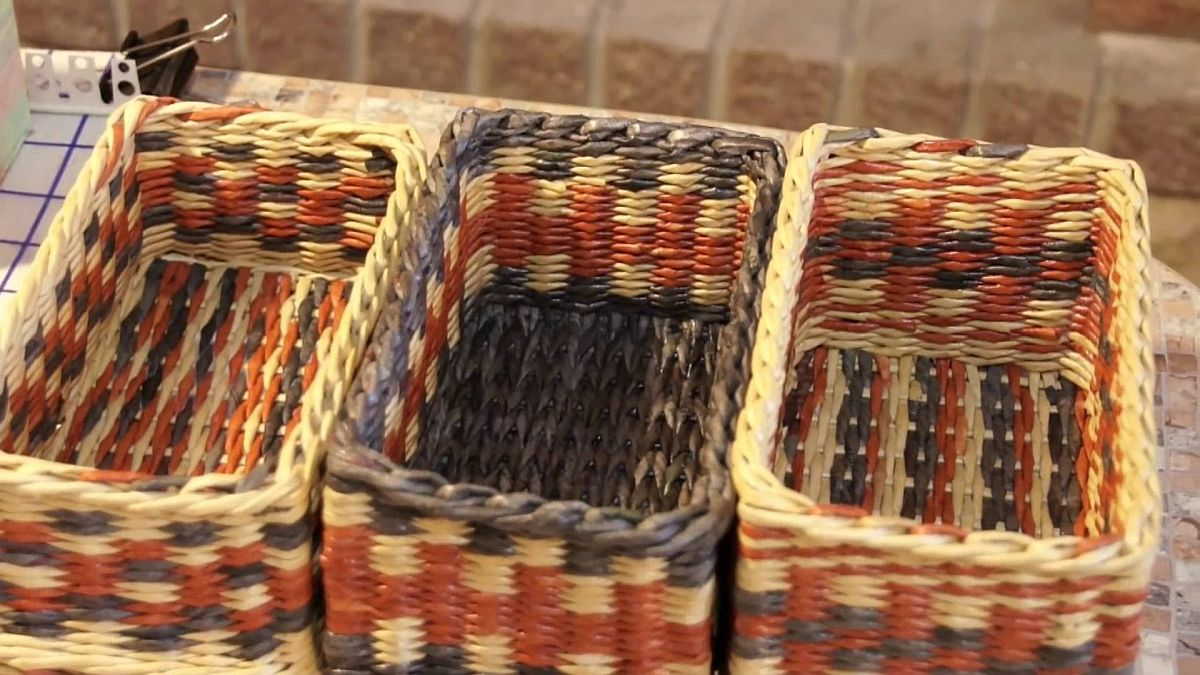
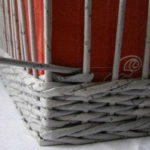
The use of a variety of patterns makes baskets of the same size unrecognizable
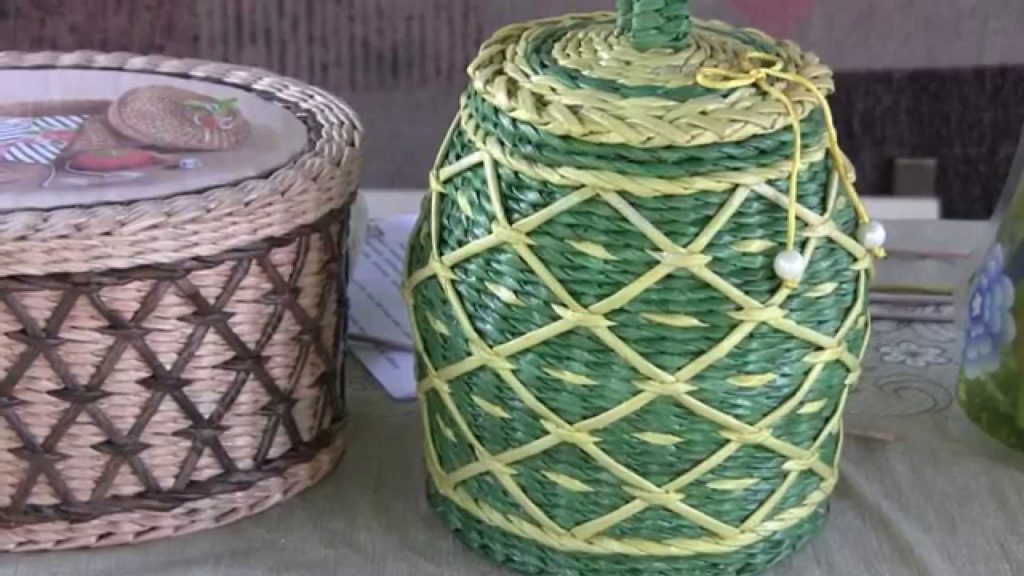
But you can't even say that it is made of paper
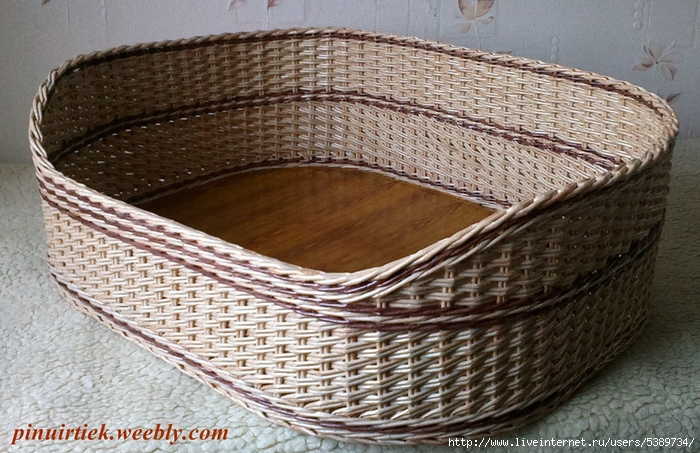
You can make a cat basket from newspapers. In such a couch she will be comfortable
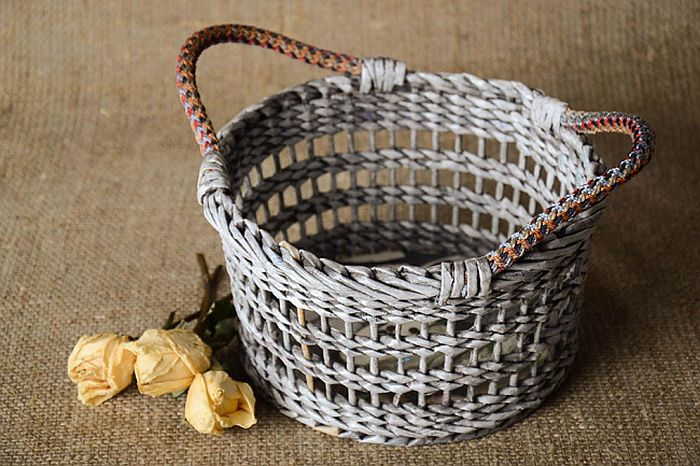
Openwork weaving from tubes - it is important to maintain equal distances

Laundry basket
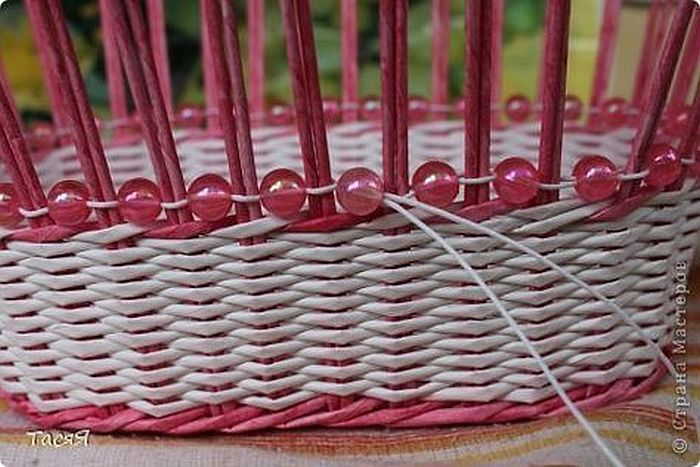
Pebbles / beads can also be used as decoration
Part is woven with ordinary rope, part - using layer-by-layer weaving
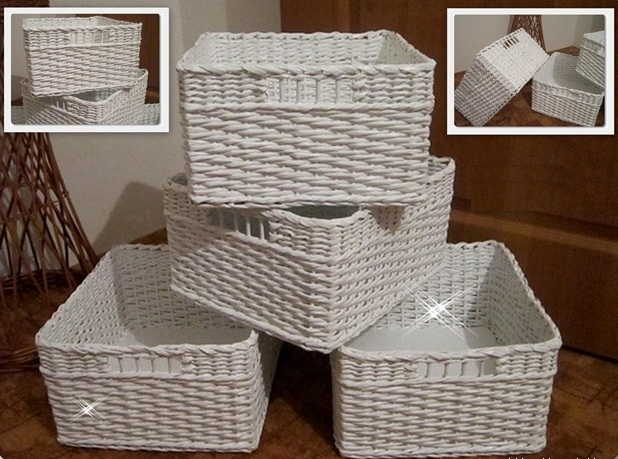
Series of identical paper tube baskets - functional and beautiful
Surprisingly, it is a fact - even furniture can be weaved from newspaper tubes! And not only a dollhouse, but also a real one!
-
 Buying an apartment: what documents are required, their verification
-
 How to deal with cockroaches in an apartment, the best remedy for cockroaches
-
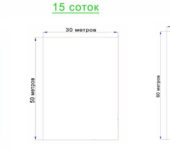 How many square meters in a hundred square meters of land: measurement, calculation
-
 Conversion of inches to cm and mm, centimeters to inches, tables, applications, formulas
-
 Floor stands for flowers


Thank you very useful material, especially for beginners - there are, of course, different techniques available! But a fly in the ointment is on the ointment. There are a lot of speech errors in the video that hurt your ear! We fold the paper, not “fold”, put the knitting needle, not “lay it down”, I don't want to list everything, otherwise it turns out not a laudatory comment, but a negative one! Please follow the speech! And the technique of work, consistency and the products themselves are beyond praise! Thank you!