How to make a housekeeper on the wall
Coziness in the house is "assembled" from little things. It is the small details that give the house originality and coziness, make living much more pleasant and comfortable. One of these small things is the wall key holder. If there is nowhere to put the keys, then you have to look for them for a long time. It spoils the nerves, makes you nervous. A housekeeper is far from a complicated thing, it is easy to do it yourself. By the way, a homemade housekeeper can be a great gift.
The content of the article
A little about boring: types of housekeepers
As you probably understand, there is no strict or official classification. But the whole variety of key holders can be divided into several categories or types. According to the location or method of application, there are wall and pocket key holders.
Pocket covers are made of leather, fabric, or other similar materials. This case has loops (metal or made of a strong cord) to which the keys are hooked. Pocket key holders are needed more for the convenience and safety of pockets or bags: it is easy to tear the thin lining fabric with metal keys. The second function is to keep all the keys in one place. It's easier to look for them even in a women's bag.
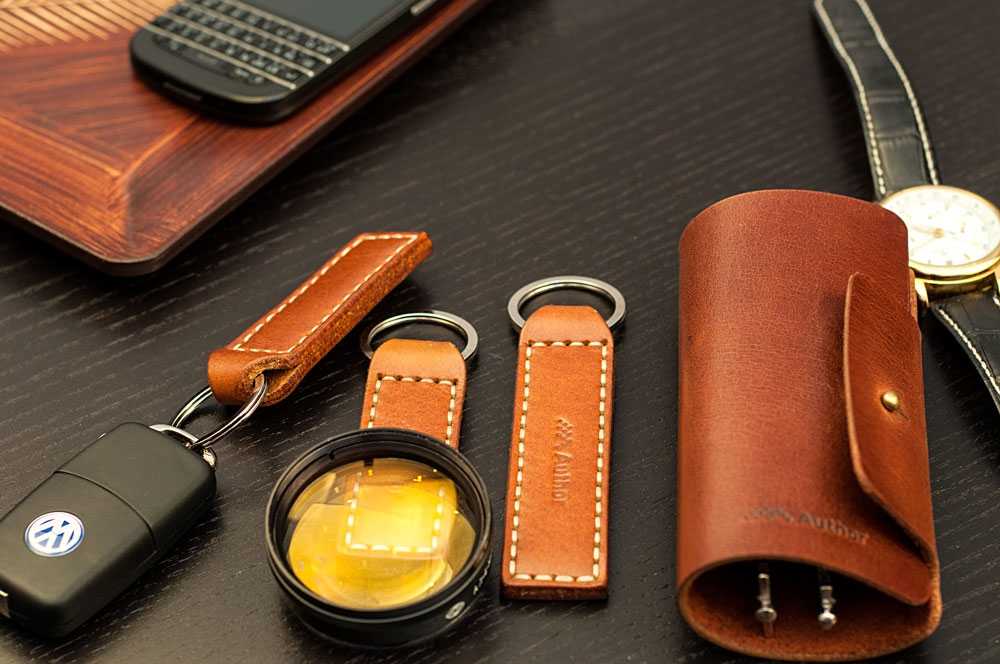
Key holders for pockets and bags are one of the most profitable and necessary gifts
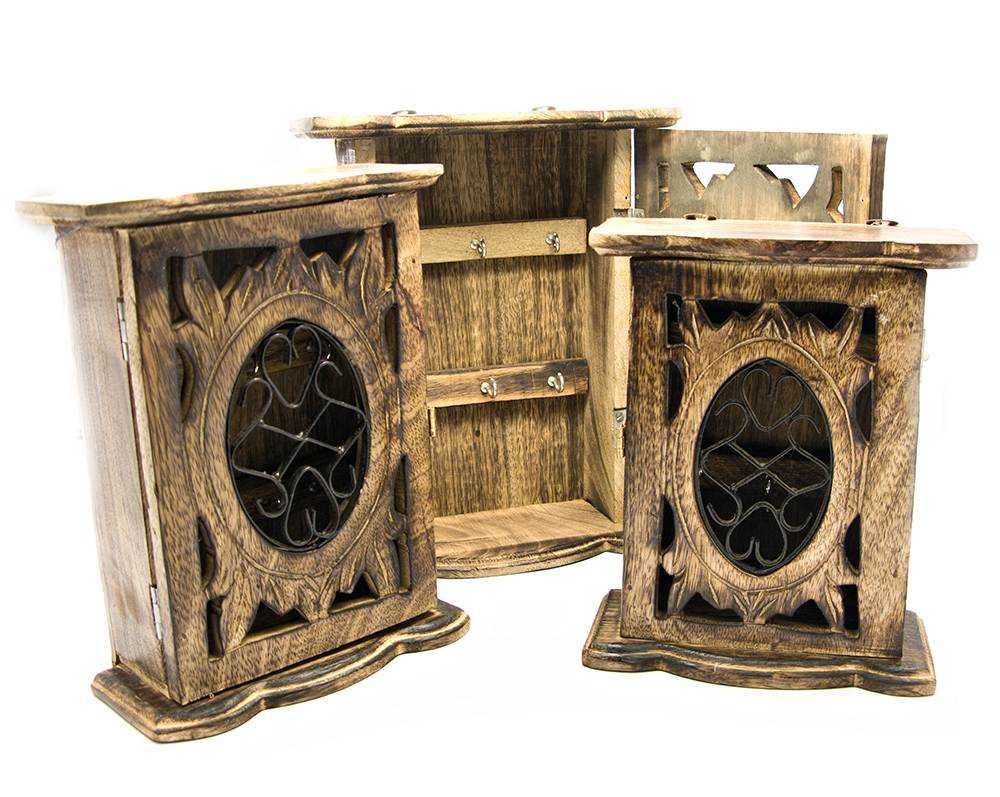
Wall mounted key hangers can be open or closed. Closed - small drawers with a swing door with hooks stuffed inside. Doors can also be hinged or lifting. Private key holders are suitable for those keys that are rarely used. Opening and closing the door constantly is not very convenient.

A closed wall key holder can be of different shapes ... make a round one if you want))
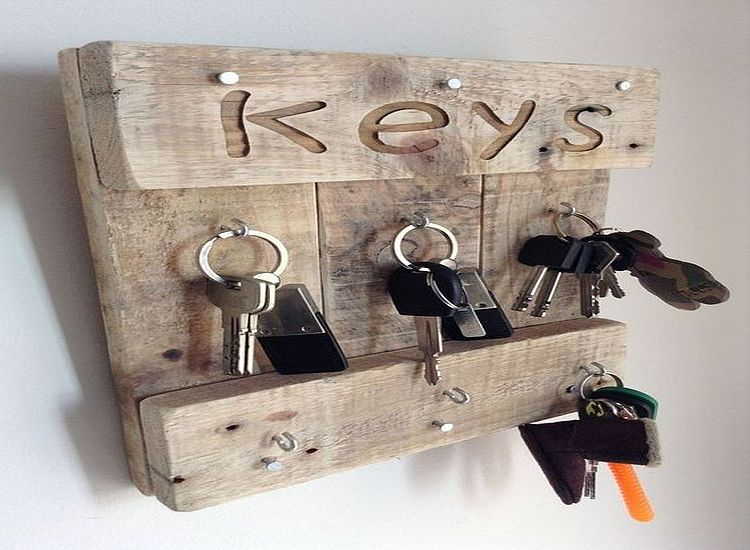
Wall-mounted open key holders are more common and can be very diverse in appearance. The most famous and simple one is a plank with small hooks. Any hooks: furniture, nails or screws, pieces of thick copper wire, wooden knots. You can use old forks, furniture handles, and the same old keys bent into a hook. In general, the imagination is not limited, you can fix everything that the key ring fits on. And you don't have to use everything that is the same. The combination can be very interesting.
Much easier ... but there is a gloss
Wall key holders are also made from various, sometimes unexpected things or materials, but the most common are wooden or sheet material such as plywood, MDF etc. Especially often wood is used for making housekeepers with their own hands. It is easier to work with wood or plywood and the result is more or less guaranteed, even if you are doing something yourself for the first time. Making a wall key holder with your own hands is a good experience for beginners.
Open-type wall key holder: ideas and options
If you decide to make a housekeeper, it is better to start with something not too complicated. First, decide on the place where you plan to hang the product. This will make it easier and faster to choose a model - long and narrow or closer to a square, circle, etc. Then it's a matter of technology. Most of the models are quite simple, even if you are doing something with your own hands for the first time.

If you have patience and are good at a jigsaw, you can make such a masterpiece from plywood.
From wooden planks
As we already said, wall-mounted wooden key holders are one of the most common options for DIYers.Now you will understand why ... Probably, it is not a problem for anyone to find several tablets. Planks of any size and thickness will do. You can use long thin strips - 20-30 mm wide, medium - 40-70 mm or even wide. They can be connected to each other, folding into the shape you need / like. Three samples in the photo below. When you decide on the shape, you can start processing.
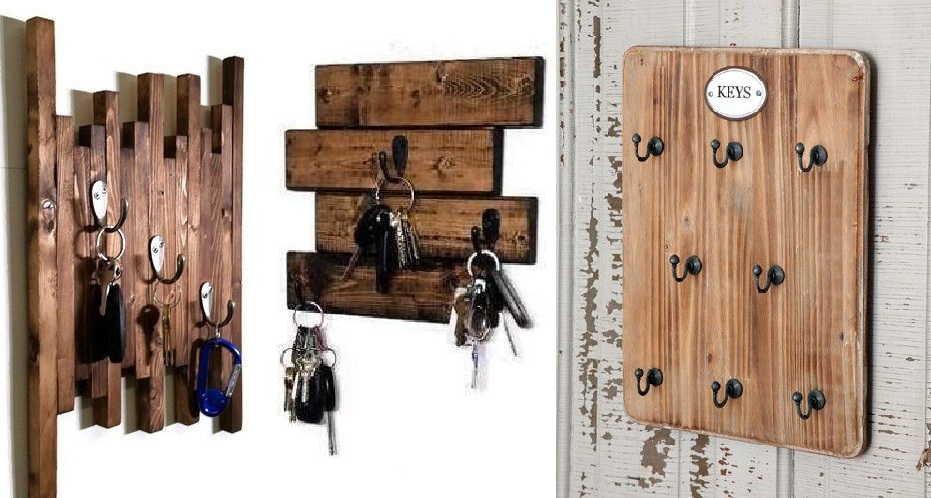
Wall key holder made of wooden boards
Processing wood is also not a problem. You can use different methods. If you want to have something classic and strict, take sandpaper or a sander and sand the surface until smooth. Further - you can cover with paint, oil, stain with varnish or without. All this gives different types of surfaces, respectively, and looks different.
Some more ideas
If you need a more informal look - a loft or something like that, you can take a metal brush (you can use a drill attachment), remove some soft fibers. A clear woody pattern will appear. It is quick and easy to do this with pine. You just need to find a board with an interesting pattern. Further - you can again go through with oil for wood, stain, water-based varnish with a coloring pigment. All of them give a different effect, but the protruding parts are stained worse, the wood shines through. The soft part is darker. As a result, the woody pattern appears more clearly.
Approximately the same effect, but more "harsh", gives the blowtorch treatment. The soft fibers are burned, the structure appears more clearly. But here you have to be careful not to overheat. It won't be possible to restore it ...
Then we fasten the boards, nail the hooks. Read more about the hooks below, as well as about the methods of attaching the key holder to the wall.
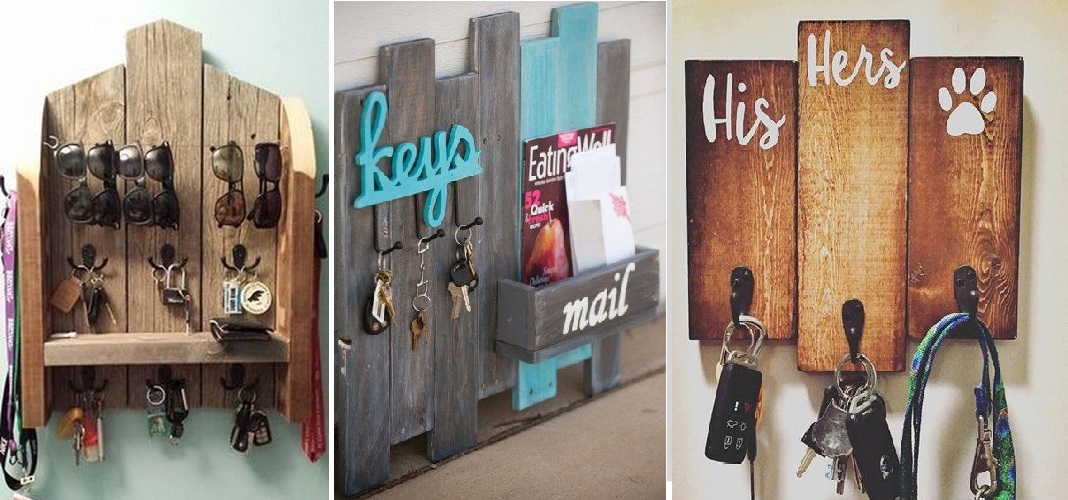
Combined with a shelf
The wall key holder is just for keys - not very practical. We usually don't have so many bundles to fill a dozen hooks with them. Therefore, combined models often appear - with a small shelf for small things, which also have a place not far from the door.
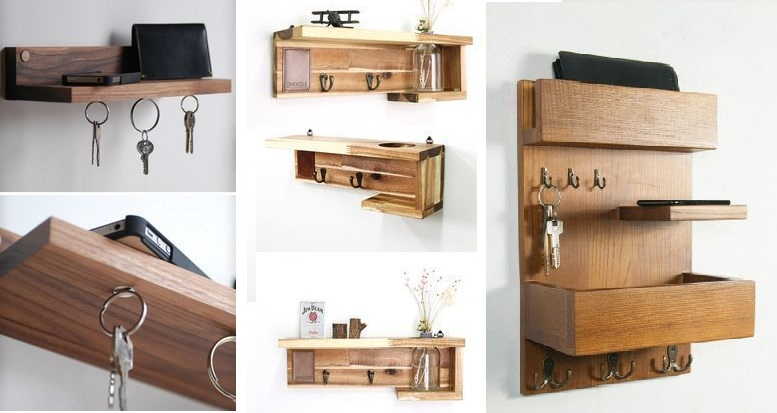
Key holder with shelf
Sizes and formats, as you can see, are different. The difficulty level is the same. Take your pick. You can make an L- or T-shaped structure, attach hooks at the top or bottom.
There is a very interesting idea in the photo - a housekeeper with magnets without hooks (on the left in the photo above). At the bottom of the shelf, small magnets are glued in, which attract keys. It is convenient to use - no need to "aim", everything happens very quickly. Magnets - if they are the same and look "civilized", you can glue them to the front surface, if the sizes are different, it is better to make recesses in shape. The magnet itself should protrude slightly above the surface - by 1-2 mm. This is enough to find it by touch (if necessary).
Plywood
In some ways, plywood is easier to work with than wood. The surface is already processed, all that is needed is to cut it in shape, to walk with an emery cloth along the edge. Then paint, and you can proceed to the final - attach the hooks.
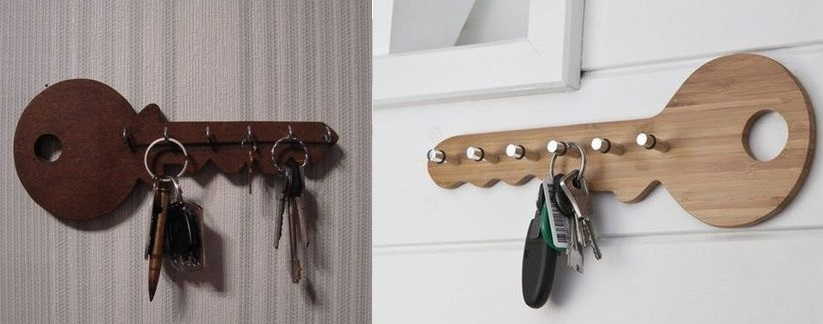
Any shape can be cut from plywood
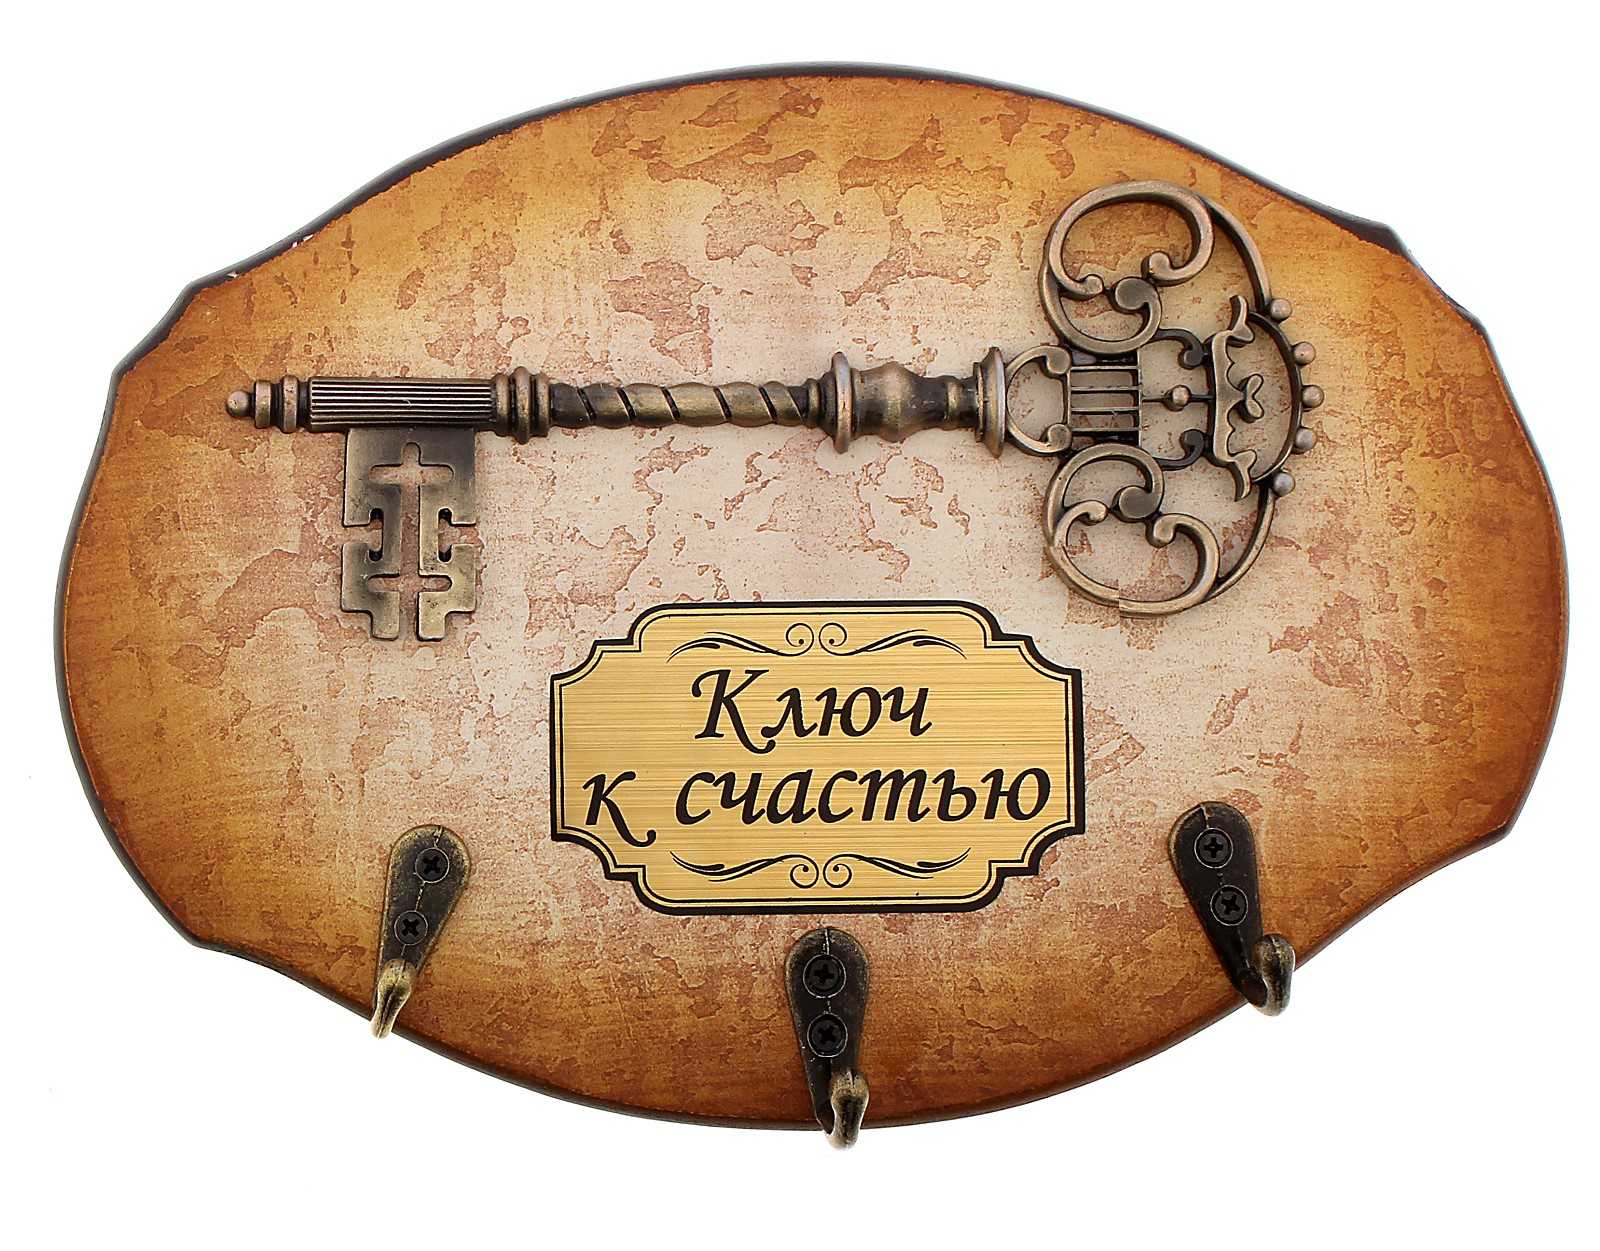
Why plywood key holders are good - you can cut out any shape. Any shape, style. For housekeepers, images of keys are often used, but maybe a dog, a bird, a mouse ... whatever.
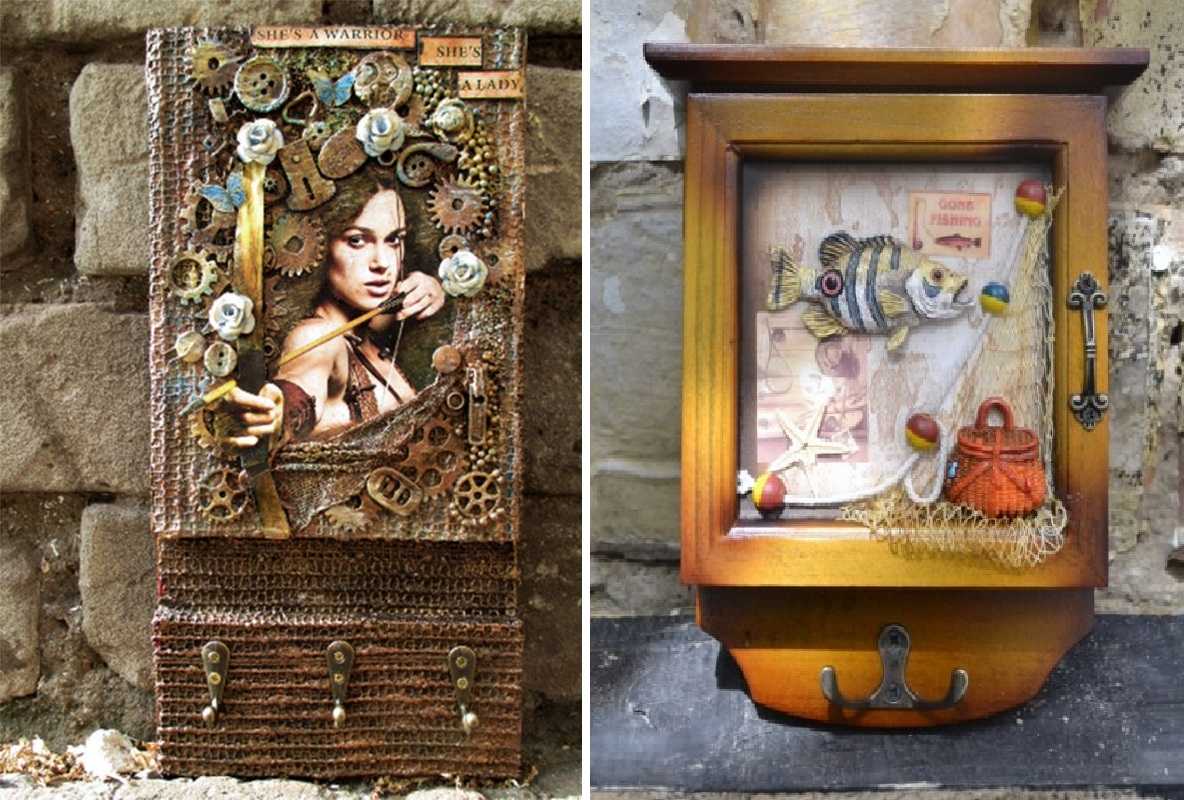
From picture frames
If you have a picture frame or can make one, it will also make a very good wall key holder. On the reverse side, you need to fix some kind of base, for example, a piece of fiberboard or hardboard silt. It is more convenient to fasten with staples from a construction stapler. As a last resort, use an all-purpose adhesive.
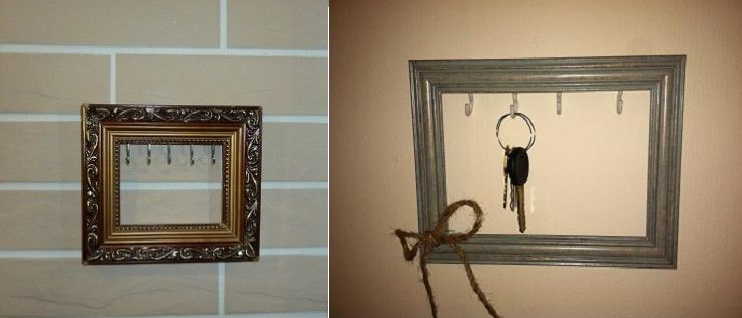
Regular or unusual frame
Inside the frame, the surface can be painted, pasted on a drawing, plain paper, a piece of wallpaper ... Whatever you want or come up with. Hooks can be attached to the frame or to the inside - again, however you wish. The point is their type and the planned load.
Wooden and without hooks
Believe it or not, there is a wall key holder without hooks and magnets.It is usually made from natural wood, since in this material the idea is most easily realized. After all, you can not hang the keys by the ring, but stick them into something. For example, in the gap. It remains only to make such slots, and this is not even difficult at all.

Housekeeper without hooks
Moreover, as you can see, the cuts can be both horizontal and at an angle. You can make them using, for example, a milling machine. This is the most accurate and safest way. You can also use a circular saw. Even a regular saw. It is only important to stop in time and then process the cut well.
Dashboards of various devices - also in business
If there are old non-working appliances in the pantry, which have panels with sockets into which plugs were once inserted, you have a chance to make an exclusive key holder. Carefully cut out this panel, insert the plugs with key rings into the slots. Everything is ready. Can be hung on the wall.
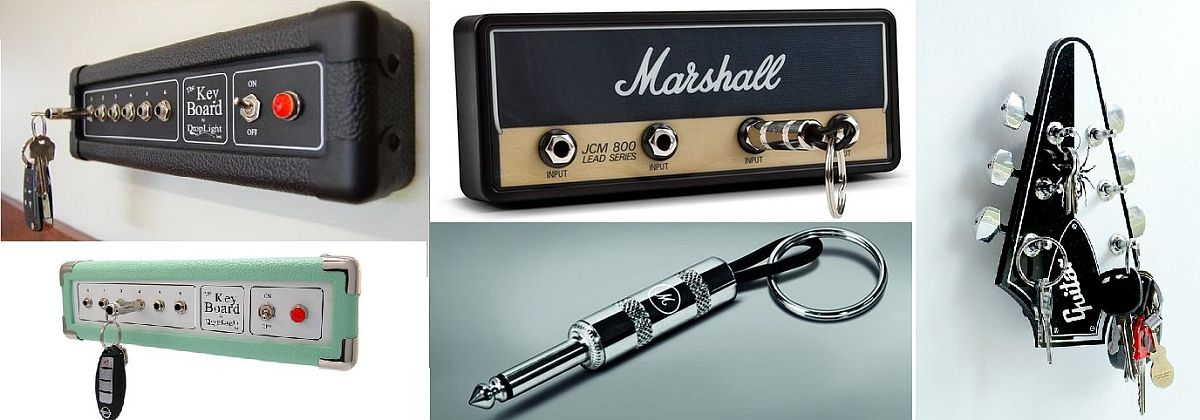
Stylish wall key holders in a youth interior
It works just as well with a guitar / violin / cello headstock or any other stringed instrument. You can use tuners, you can add hooks. By the way, no one bothers to make an imitation, if it's a pity to spoil the instrument. It can turn out even more interesting.
Housekeeper hooks
Hooks can be made from a wide variety of materials. For the classics, you can start by going to a furniture hardware store. There are plenty to choose from. There are hooks for furniture, overhead, which are attached to the surface.
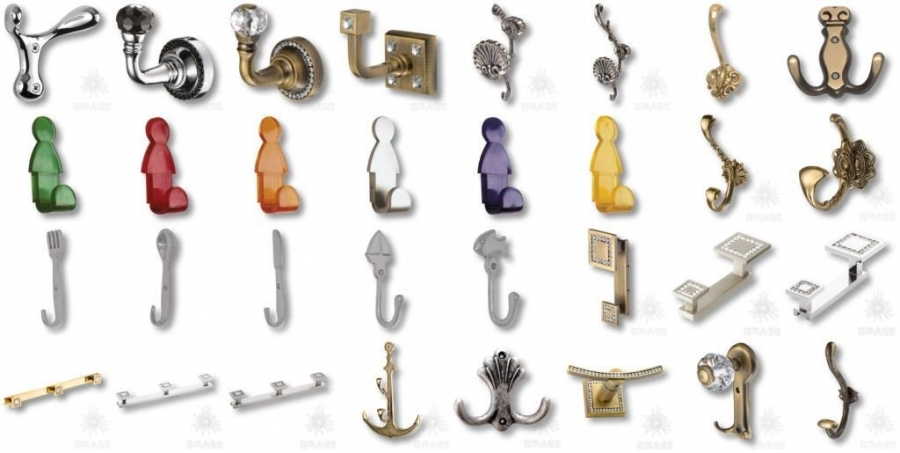
Some types of furniture hooks are made of metal, and there are also plastic
The hooks can also be attached to the plywood, but for this they must be glued. The main thing is to find a suitable adhesive, with good adhesion to wood and plastic or metal, from which the selected hooks are made.
To make it clear what it is about
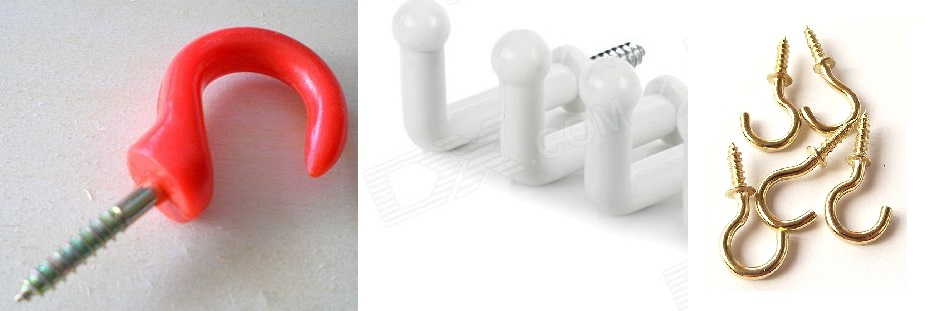
There are different kinds / types of screws / screws with hooks at the ends. They need to be screwed into the board, so this is not an option for plywood.
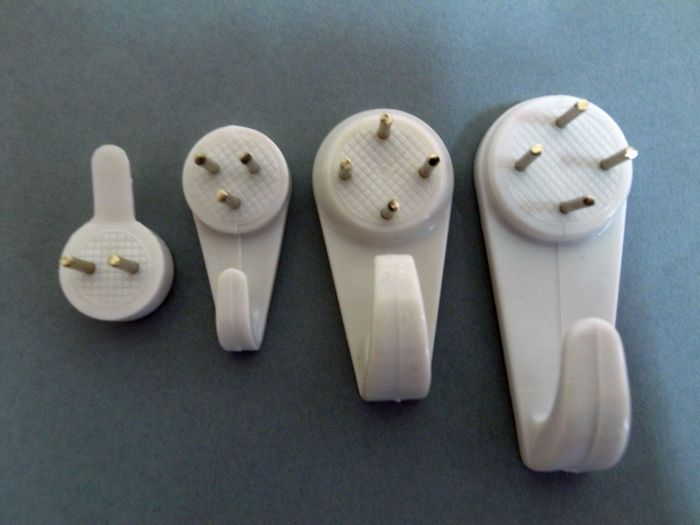
There are also picture hooks (pictured below). They are made of plastic and have several metal pins in the body. These pins can be hammered in and even into concrete without any problems. The only disadvantage of this option is the considerable price. And so, they look good, and hold up well.
Very easy to assemble
These are just standard hook options. In general, it can be made from knots, old keys, forks, wire ... anything that has a small thickness and a suitable shape, or which can be given this shape.
How to make a wall key holder with your own hands: photo report
To make a wall key holder, the following materials were needed:
- Frame for a photo of a suitable format. A door is made of it.
- Wooden bars 20 * 40 mm.
- Fiberboard.
- Hooks, hinges, doorknob.
From the tool - a saw, a jigsaw, a construction stapler with staples, a drill and a screwdriver. Well, and a tape measure with a pencil. This is the first thing we did with our own hands, so there are enough mistakes.
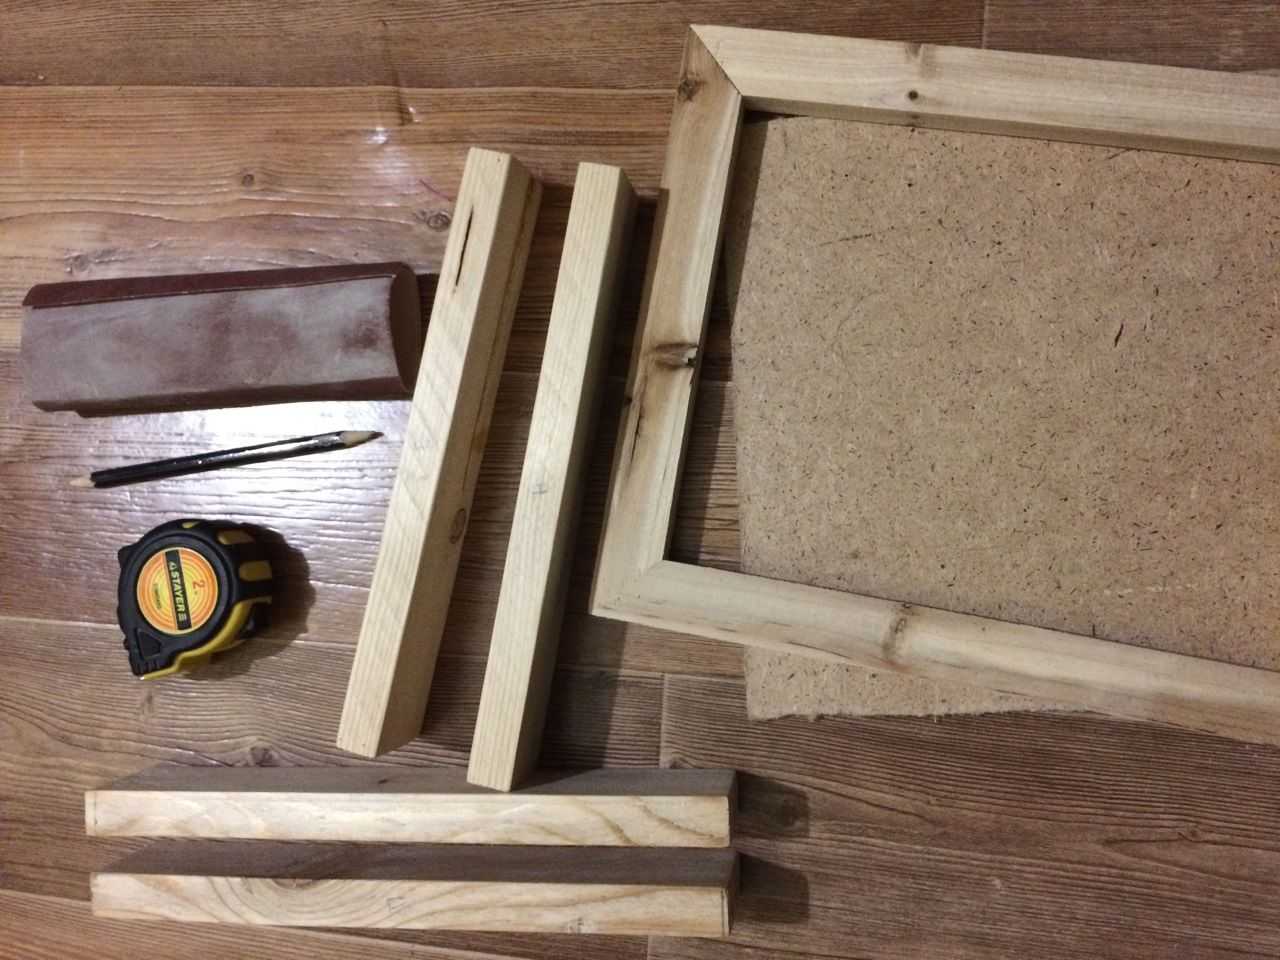
This is all it took to make a do-it-yourself wall key holder
Making a frame
First of all, the bars were sawn to fit the frame. Connected with staples from a stapler. The result is the frame of the part that is hung on the wall. A piece of fiberboard was cut to size and also attached with staples to the frame.
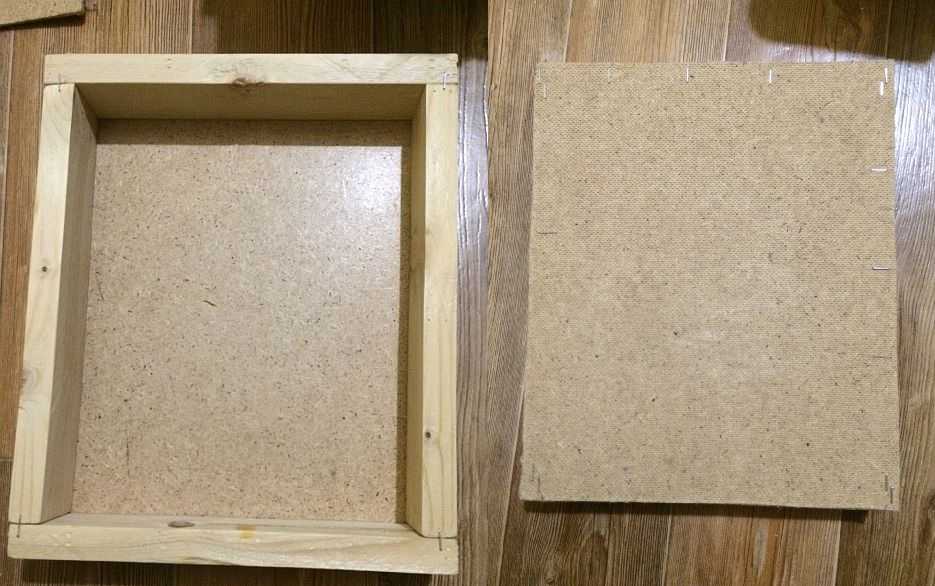
We make the back of the closed key holder
There are two best solutions here. The first is to make the connection of the bars by sawing them at 45 °. It looks much better, albeit harder to execute. If you are not sure what to cut will turn out exactly, you can do it as in the photo. But it is better to fasten the bars with self-tapping screws. And this is unambiguous. Let the housekeeper not have a big load, and the fiberboard gives rigidity to the frame, but it is more reliable to fix the bars with self-tapping screws.
If the connection is as in the photo, self-tapping screws - two pieces for each joint - are screwed from above, perpendicular to the top board. To make the screw go easier, holes are pre-drilled. The drill diameter is 1–2 mm less than the screw diameter.
Installing the crossbars for the hooks
We saw off two segments from the same bars - according to the inner size of the box. We put them in the case, fix them on the back with brackets. We take the furniture hinges, mark their position on the case, mark the holes for the fasteners. We make holes with a drill, fasten the hinges and put a furniture magnet to fix the door in the closed state.
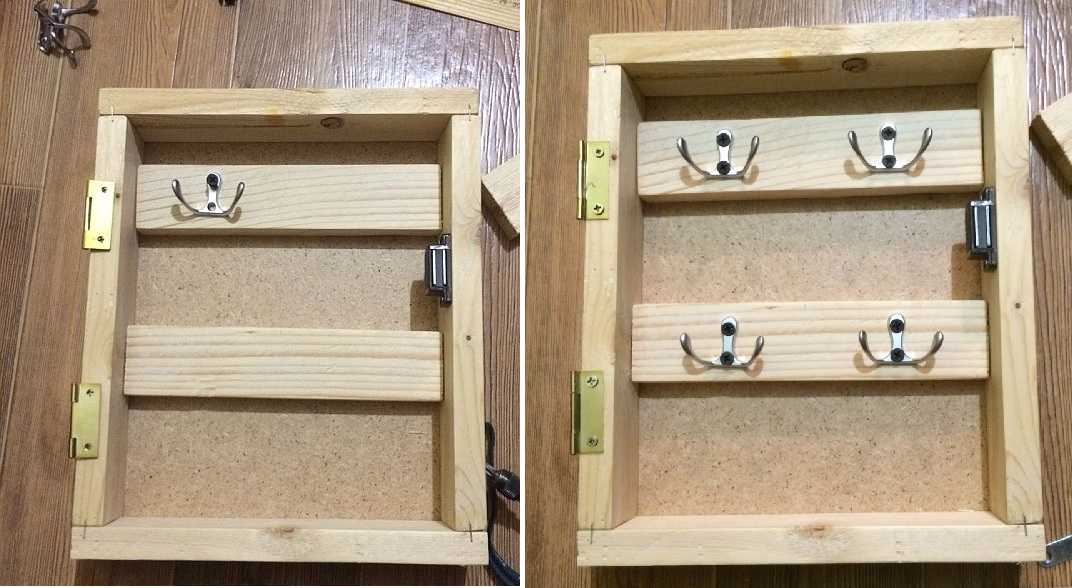
Installing the hooks
Here, too, there is something to do "more correctly". It is better to fix the strips through the walls of the frame with the same screws. So that they do not move, they can just be fixed with brackets, but then it is better to screw in two screws on each side. To prevent the caps from sticking out, pick up a drill that is slightly larger in diameter than the screw cap. Make a hole for a self-tapping screw (the drill is 1 mm smaller than the screw diameter), then small recesses with a large diameter - so that the head is hidden.
We assemble the door and install the hinges
Next, we make out the door. Cut a piece of a suitable size from the same fiberboard and fasten it with staples. We drill a through hole on one side, install the handle. On the other, we mark where the hinges need to be fixed, unscrew them, attaching the counterparts, mark the place for the installation of the fasteners. Having made the holes, we put the hinges in place, connecting the two parts.

Almost all
As usual, a description of the best option. As you can see, there is a decent gap between the door and the body. With such an installation of loops, this is inevitable. To avoid it, the loop is circled around the perimeter with a sharp pencil (it is better to scratch it with a knife blade), then with the help of a chisel they take out a certain amount of wood - to the thickness of the loop plate. Its surface should be flush with the frame. A similar operation is performed with the counterpart. A hinge installed in this way will not give a gap, although more work is required.
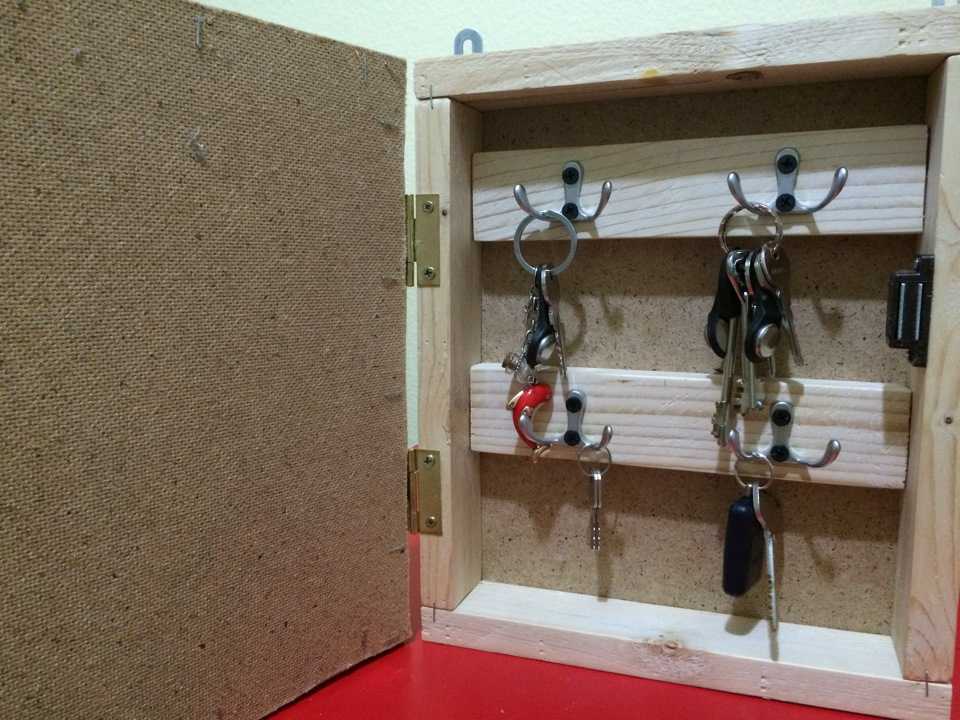
Homemade wall key holder
In general, not bad for a first experience. But in order for the wall key holder to look more presentable, it is desirable to trim it. Finishing is already a matter of taste, but at least you need to polish it. If not grinder, this can be done with sandpaper fixed on the bar. To begin with, take a medium grain, then everything finer.
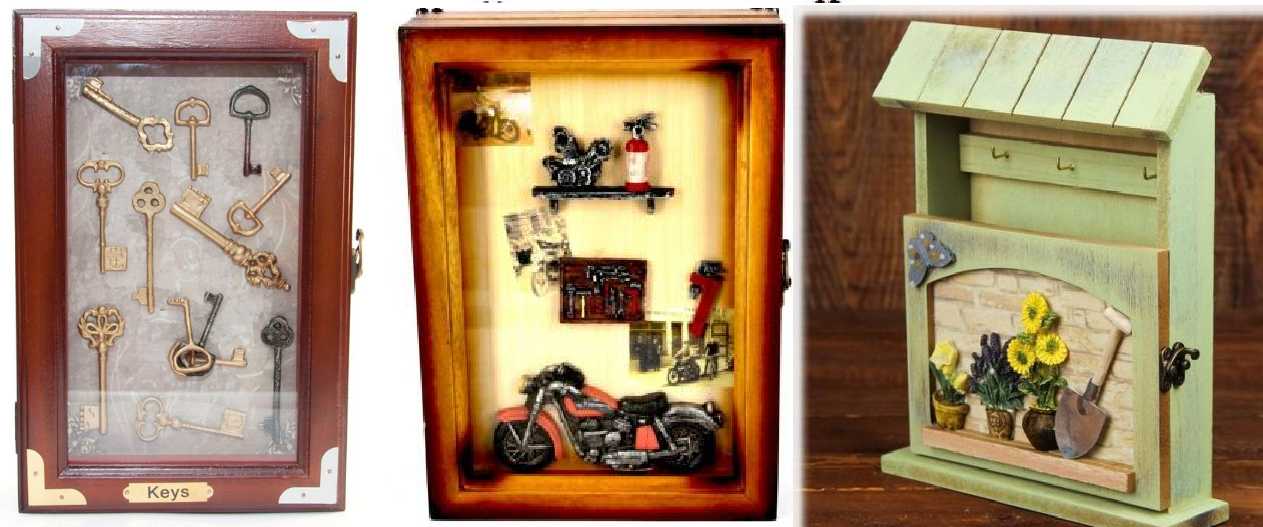
How can you decorate a wall key holder with a door
But how to decorate further is to your taste. Paint, stain or varnish, glue a photo, picture, make decoupage. Sea options. Several in the photo above.
Non-standard homemade key holders on the wall
It is not at all necessary that the manufacture of a wall key holder should be long and persistent. And nobody said that you can't use non-standard materials. As always, everything is possible in needlework, sometimes even what is prohibited. Several ideas that can please you with simplicity and originality.
The first number is the use of connectors and suitable plugs. We make key fobs from the plugs, and fasten the “wasted” connectors near the front door. In total, it will take twenty minutes.
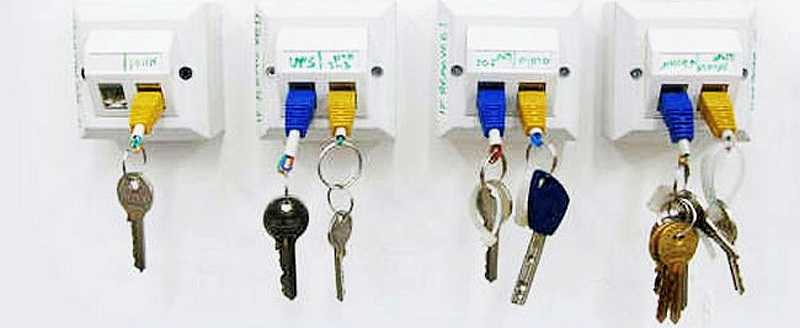
Connectors and plugs - and almost nothing to do
An ordinary stick can also be turned into a housekeeper. Make hooks from aluminum wiring, wrap them around the stick, decorate it with colored twine, paint it with paints. Fixing on the wall is also not a problem - the rope is tied at both ends, clings to a nail or hook.
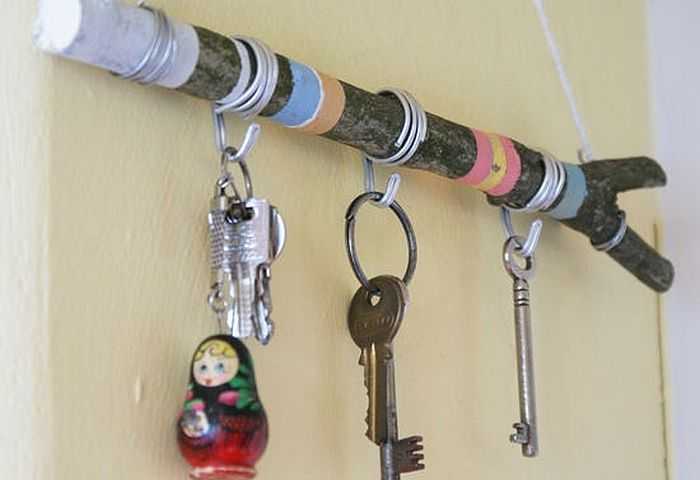
From an ordinary stick
Throwing away wine corks is an unheard of waste. They make a very interesting housekeeper. The plugs are glued together, and then screws with hooks are screwed into them. Stylish and unusual, minimum time and cost.
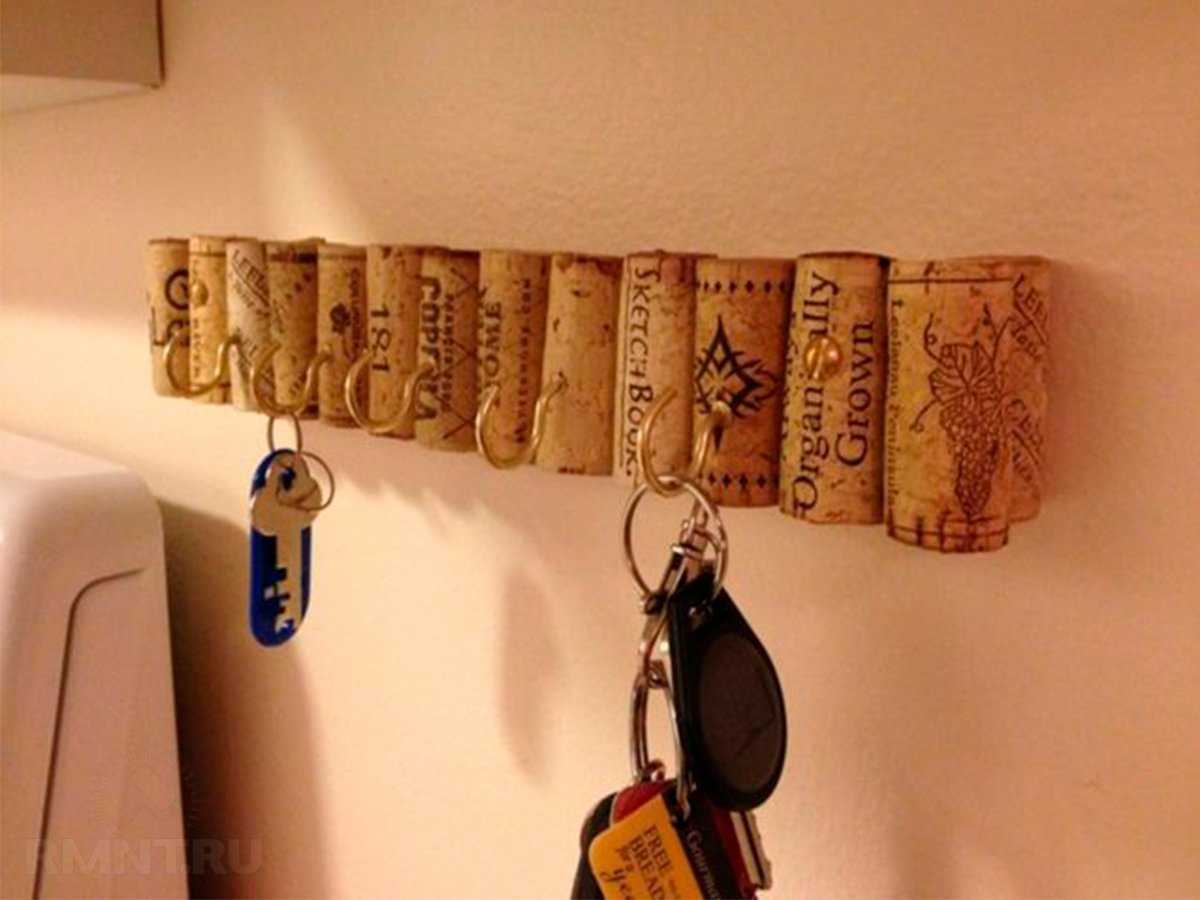
From wine corks
If there is just a piece of good wood, it can be polished, covered in several layers with wood oil with pigments. It already turns out beautifully. It is not a problem to find or make hooks of a small format, and the board itself can be decorated with something.
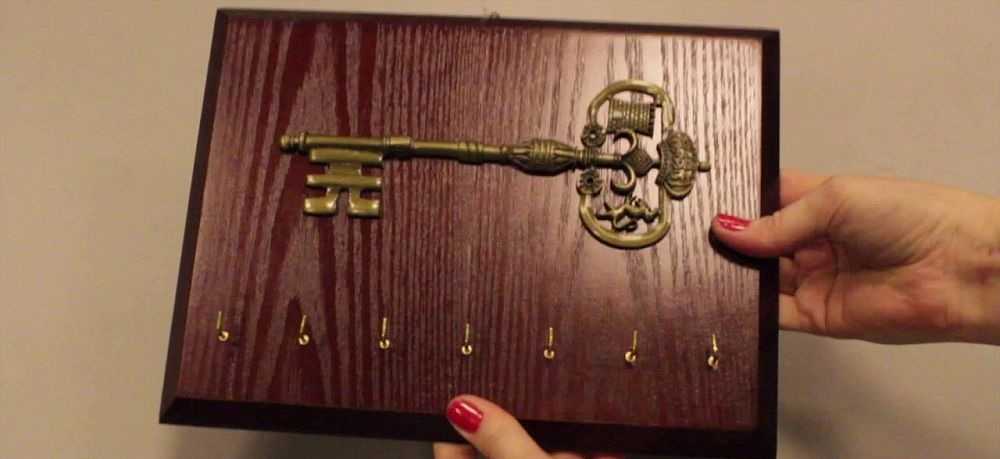
Well-crafted piece of wood with embellishment and hooks
The photo above is a stylized key, but it could be anything.Some interesting piece that echoes the interior or reflects your hobbies. Yes, at least a couple of magnets brought from travels glue. It is already unfashionable to hang them on refrigerators, but here they will be just right.
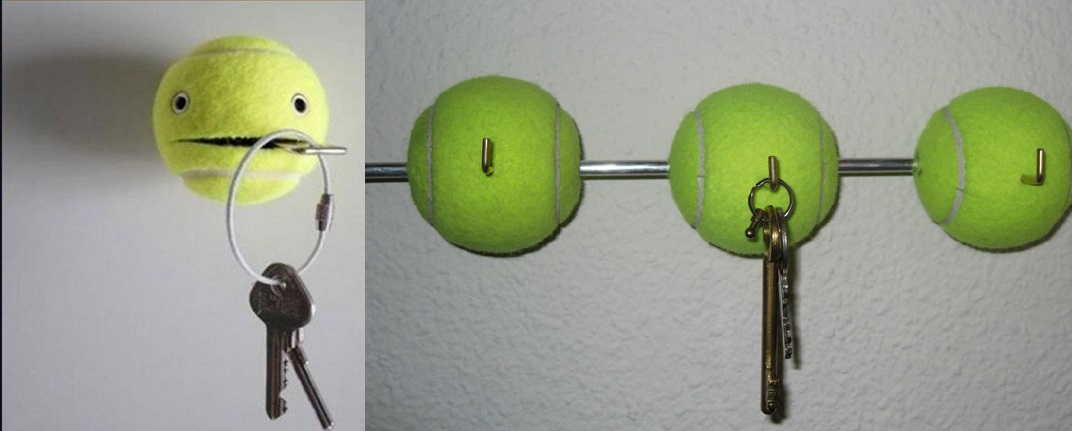
Tennis balls work very well as key holders too
If you cut a tennis ball about halfway it will hold small objects very well. Several of these "holders" can be used to make a housekeeper in a sports house. The second option is in the picture on the right. If you can secure the balls to the rod (with glue, for example), inserting small hooks is not a problem. The problem is they are more likely to spin. And to prevent this from happening, a composition can be poured into the ball, which will become hard after drying / polymerization. The first thing that comes to mind is tile adhesive. But you need to fill it in carefully. If it hits the surface of the ball and hardens, you will not wash it off.
Ideas for inspiration
If there are a lot of keys, you can make a "multipage". This option is suitable for hotels, holiday homes
The wall key holder is decorated with anything you like. If you like stones, you can glue them too. There would be a desire
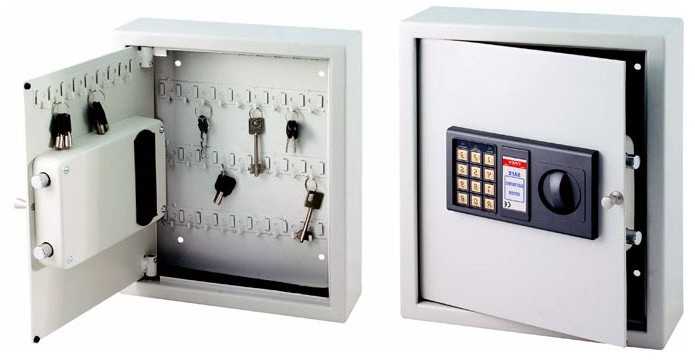
If the keys are more expensive than money ... there are key holders with a combination lock
Can be used as a gift
With patterns and forging elements. For some interiors, it's a godsend
Humorous and very cute
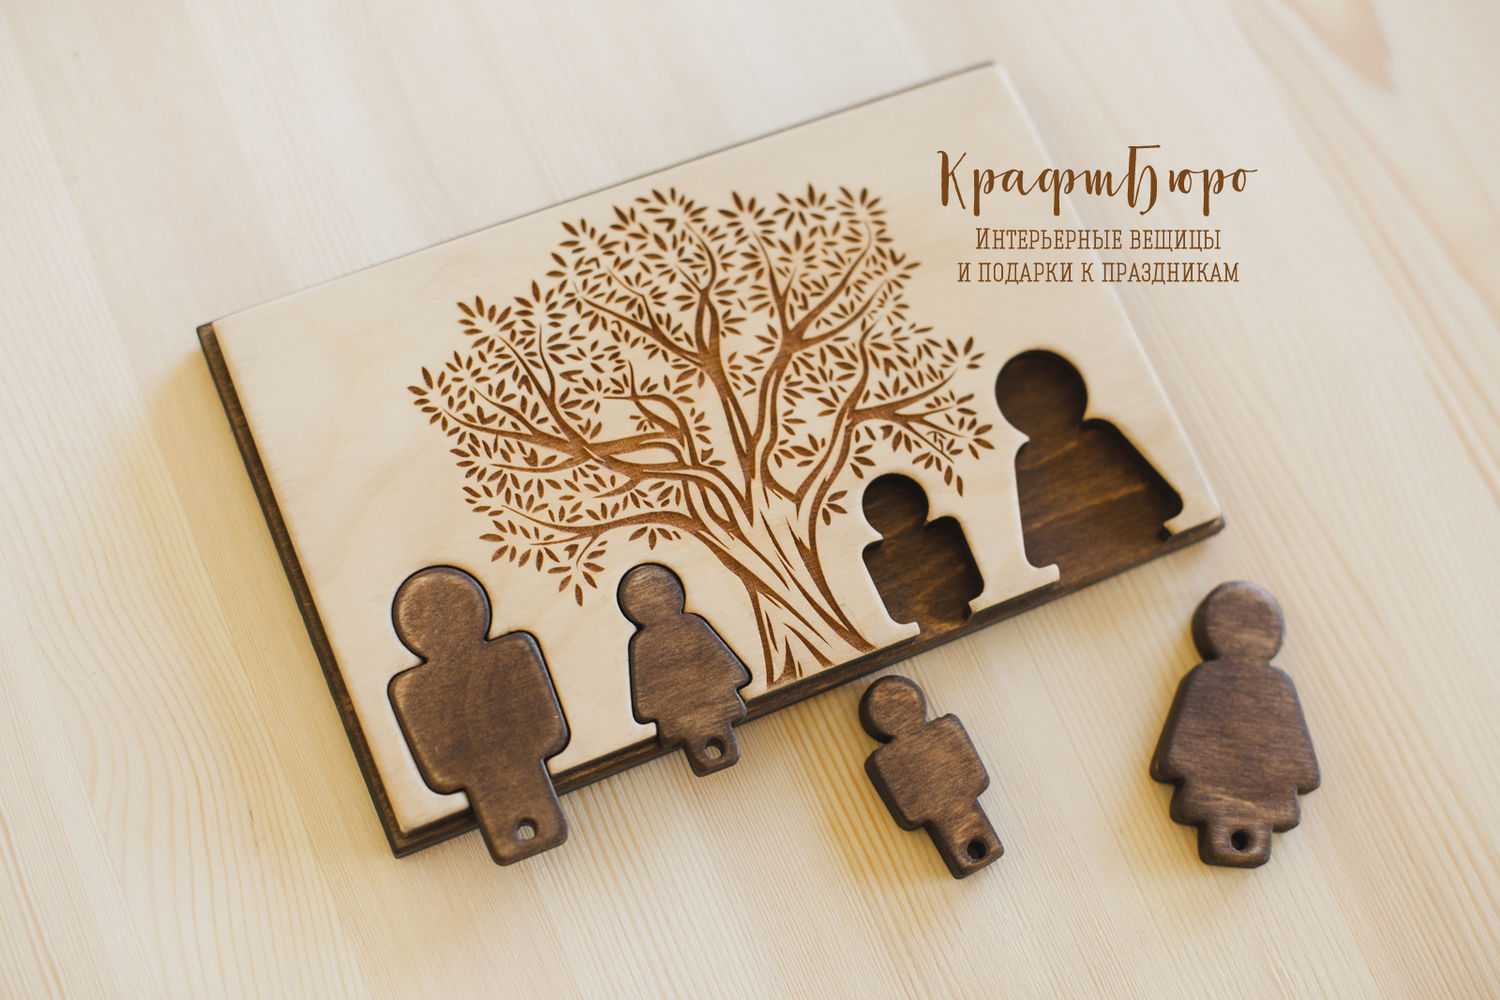
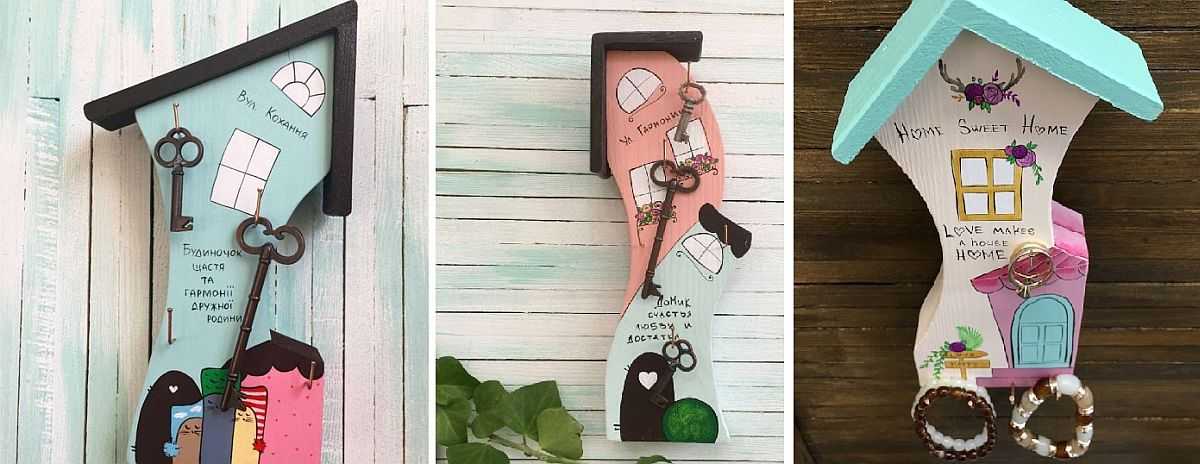
With a separate "built-in" key fob for each family member
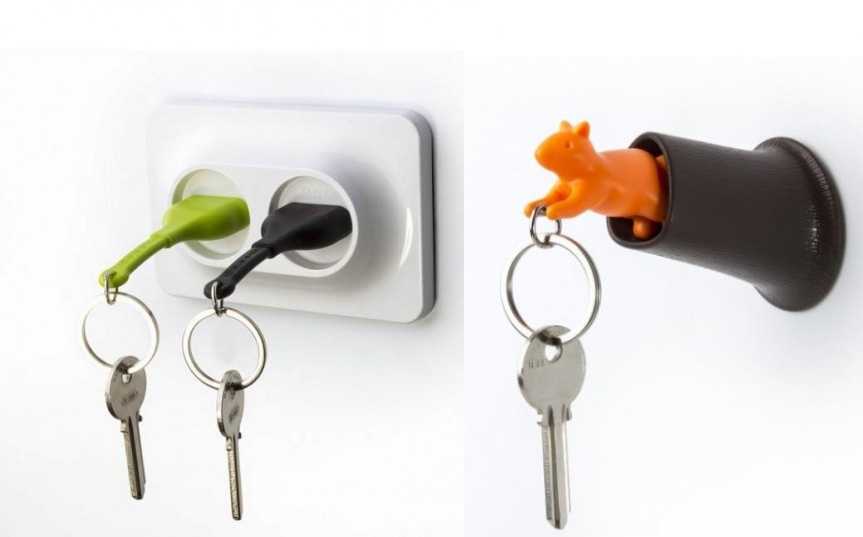
The main thing is not to confuse it with a regular outlet.
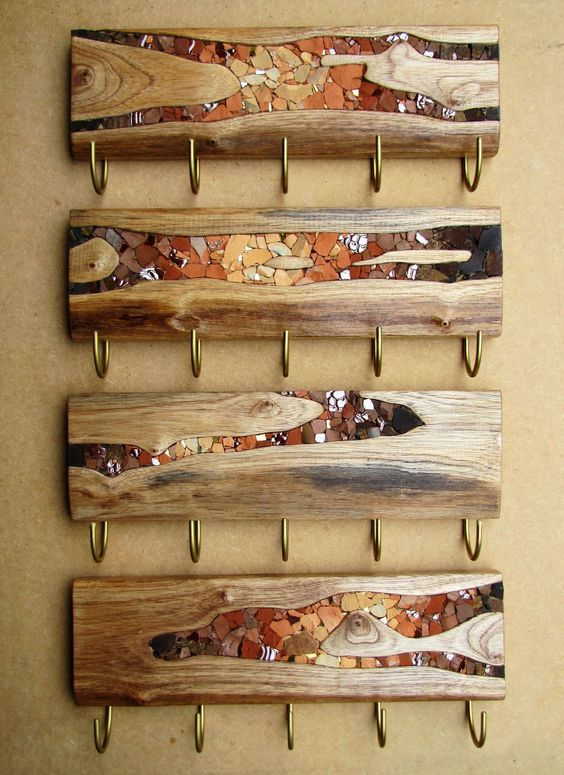
If you know the technique of incrustation, even rot in wood can be turned into advantages. In fact, everything is simple - put stones / pieces of ceramic on the cleaned voids and fill everything with epoxy glue
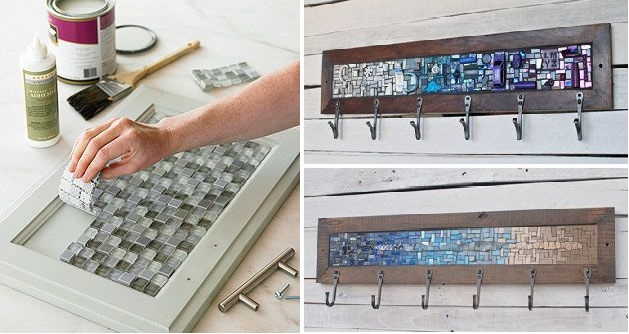
Very fine mosaics can be used
-
 Buying an apartment: what documents are required, their verification
-
 How to deal with cockroaches in an apartment, the best remedy for cockroaches
-
 How many square meters in a hundred square meters of land: measurement, calculation
-
 Conversion of inches to cm and mm, centimeters to inches, tables, applications, formulas
-
 Floor stands for flowers


