What can be made from plastic bottles
The amount of garbage that each person “produces” grows from year to year. The problem is becoming global, as flying plastic bags and plastic bottles scattered everywhere have already made everyone's eyes callous. I am grieving, it turns out, you can help, and even with benefit for yourself. In any case, this applies to plastic bottles. You will be surprised how diverse and, importantly, useful crafts from plastic bottles can be made in literally a matter of minutes. Well, or the clock ... Depends on the scale.
The content of the article
The buildings
PET (polyethylene terephthalate) is the thermoplastic used in bottles. It will be useful to know its physical properties:
- density - 1.38-1.4 g / cm³,
- softening temperature (t melting) - 245 ° C,
- melting point (t pl.) - 260 ° C,
- glass transition temperature (t st.) - 70 ° C,
- decomposition temperature - 350 ° С.
Plastic bottles are very convenient to use, but harmful to the environment, as the polyethylene from which they are made takes more than 200 years to decompose. The same property makes it possible to use practically waste raw materials as a building material. Craftsmen are already building houses from plastic bottles, as well as sheds, summer cottages, hotbeds, greenhouses, and fences. Various technologies have been worked out - the approach is quite serious.
Building material ready
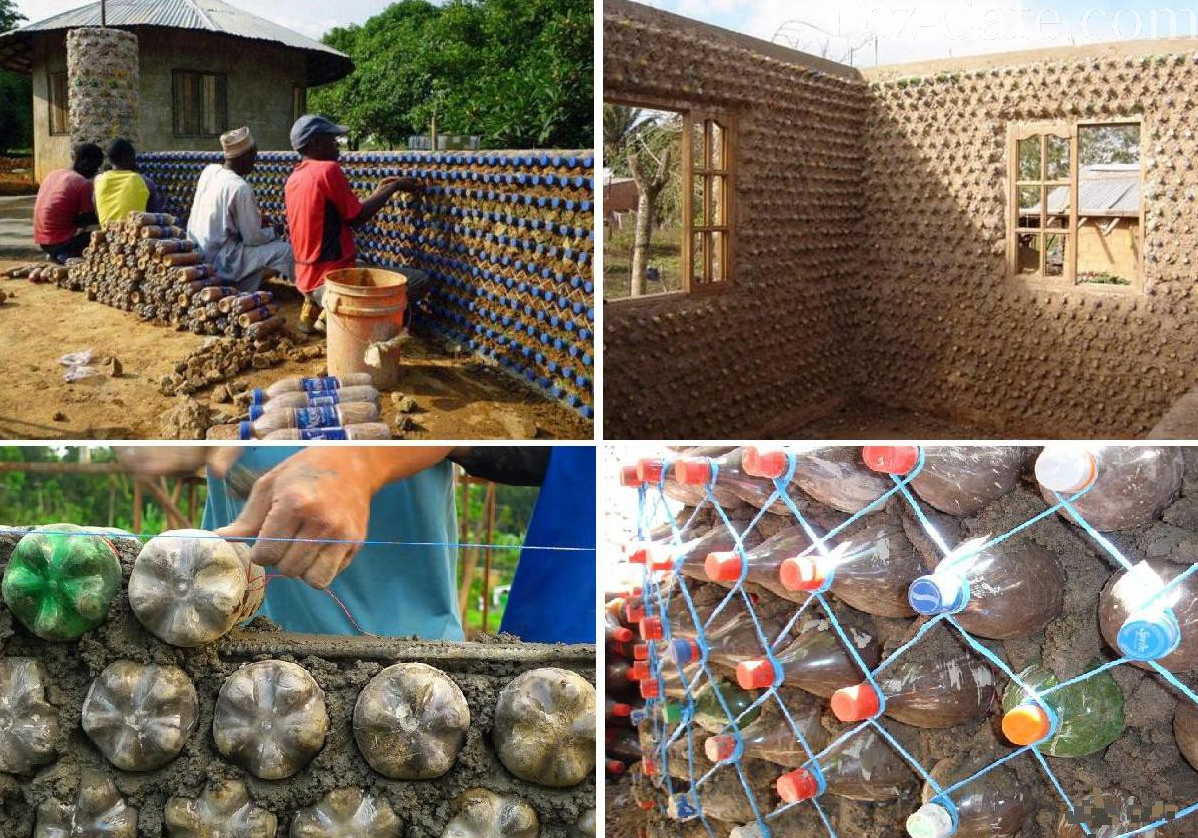
How to build a house from plastic bottles
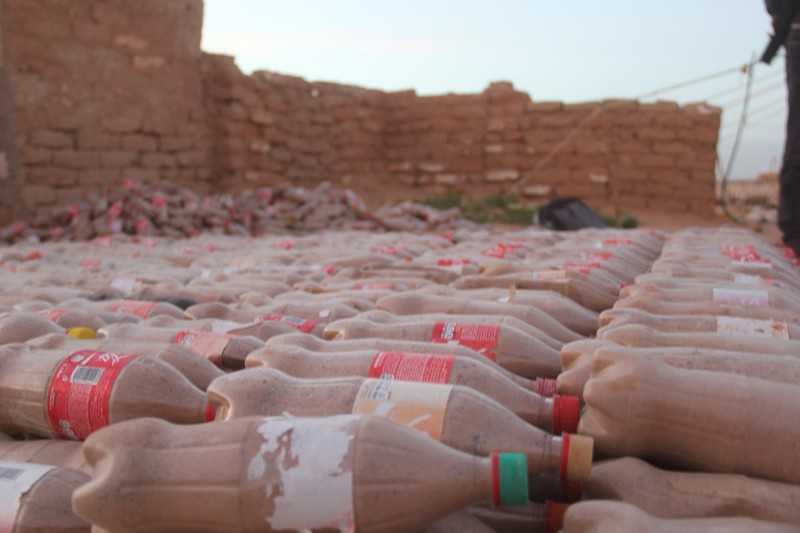
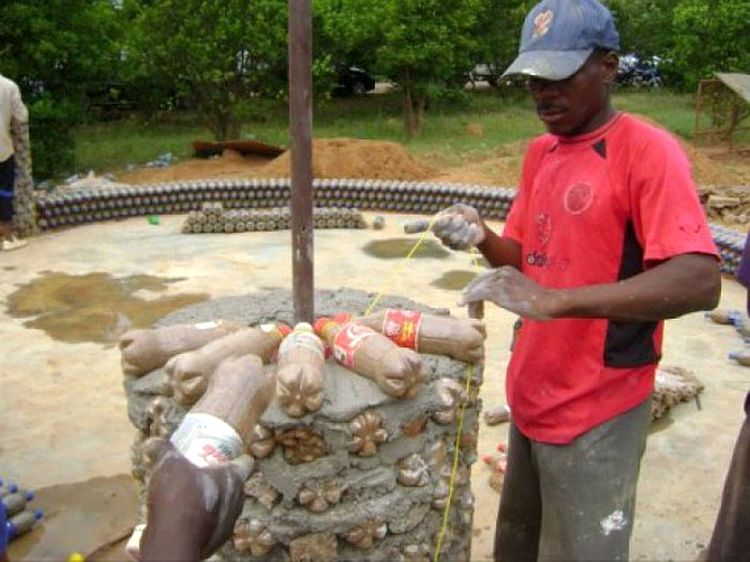
The main idea is to pour bulk material into bottles, screw them with caps and use them as bricks. The bottles are filled with sand and soil. Sand is preferable as there are too many plant debris in the soil that can rot. It must be sieved, dried, filled into bottles, well sealed, filled up to the very top. It turns out a kind of bricks.
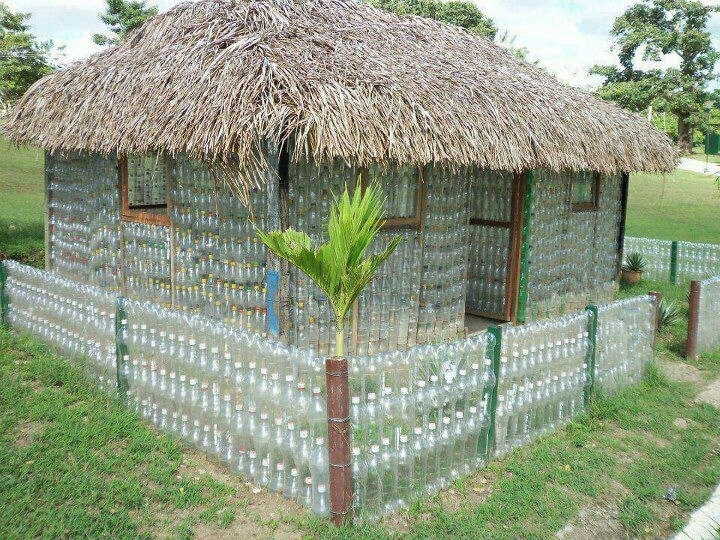
The technology came from warm countries, but you can build a country house or a shed
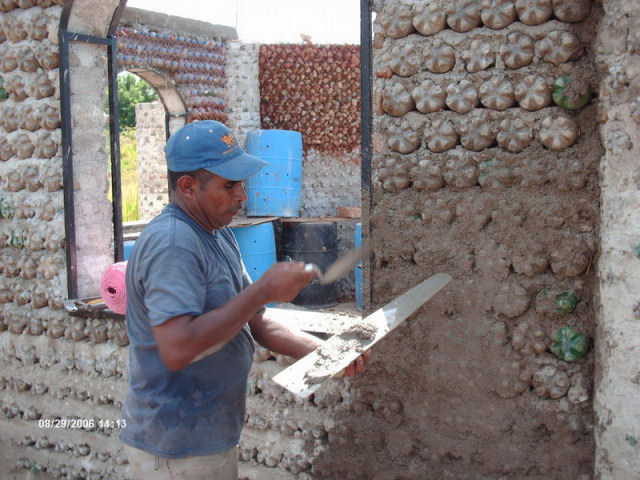
To build a house from plastic bottles, you will need a solution that is used to fill the gaps between the "bricks". There are options here too. It can be an ordinary mortar that is used when laying brick walls, you can make a clay mortar. To keep the "bricks" in the wall until the mortar grasps, they are tied with twines from the side of the lids. Later, these "mesh" will come in handy when you plaster the walls. They turn out to be uneven, so alignment is indispensable.
We make a greenhouse, shed, greenhouse
You can build a greenhouse or greenhouse out of plastic bottles. In this case, only transparent plastic is used, since it is necessary that the light passes in sufficient quantity. For the construction of a barn, on the contrary, it makes sense to choose a darker plastic - it will be less visible what is inside.
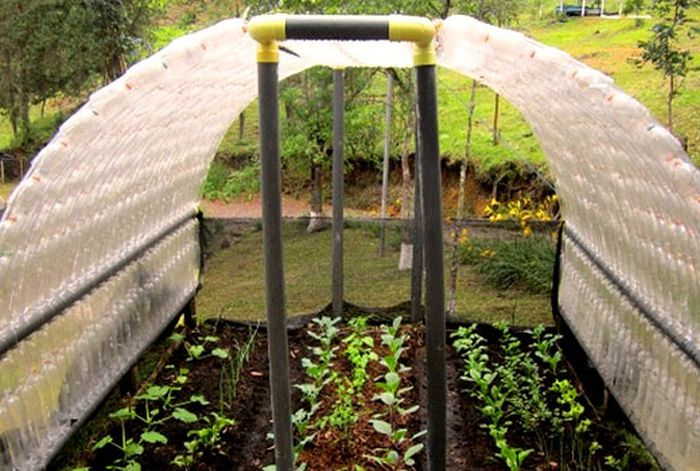
The greenhouse differs in that you cannot work in it while standing
The first technology - one to one
The second requirement for bottles as a building material is an even shape. Such, you know, without notches. Otherwise, to fold the walls so that they retain heat, it will not work - it will "siphon" into the curly cutouts. Remove labels from bottles and dry them. You also need to prepare pins or rods - bottles are strung on them. Their diameter is small so that the neck passes freely. Now you can start building a greenhouse / shed from plastic bottles.
For the construction of a greenhouse or shed, pillars are dug in at the corners. Frames are assembled from the timber according to the size of the walls.These frames will be the base for the bottle walls. We collect them (frames) on the ground and, in a ready-made form, attach to the dug-in pillars. When making frames, don't forget the doorway and windows.
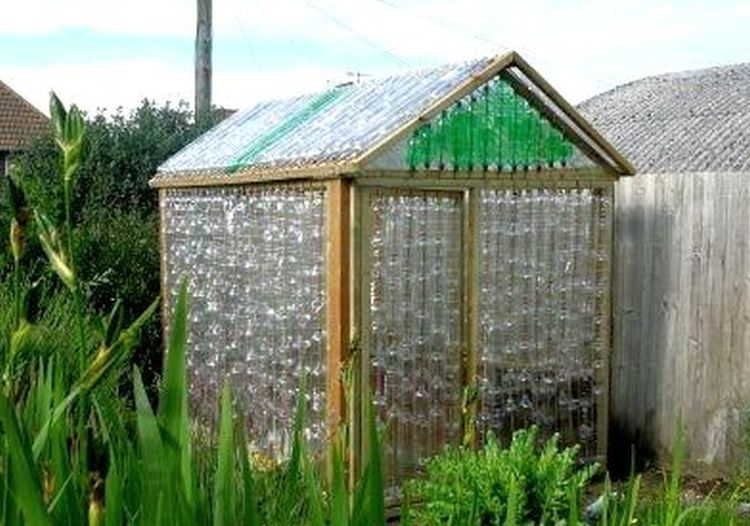
We build a frame, cut off the bottom of the bottles, string them onto a pin. From such "columns" we collect walls, a roof
The construction process begins with cutting the bottom. We string the cut bottles on pins, directing the necks to one side. We insert the bottles with effort so that they become very tight. Having assembled a row of the required height, we attach it to the frame. You can fasten it with clamps, strips cut out of metal, nails ... in any way available to you. We press the second row to the first so that there is a slight deformation. In this position, we fasten. So, row by row, we collect all the walls, then the roof.
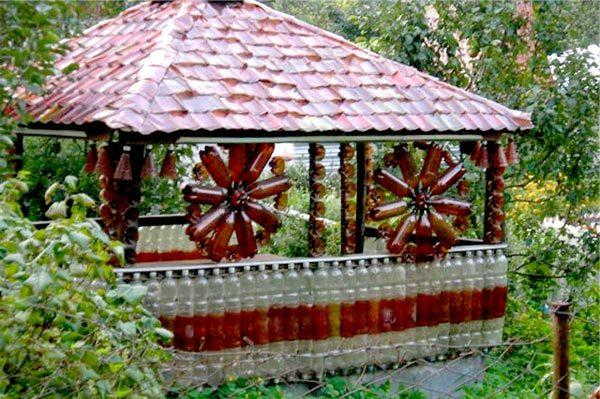
A gazebo made of plastic bottles looks good
Using the same technology, you can make a gazebo. But there is no need for tightness, so you can collect curly and colored containers. It will turn out even more interesting (example - in the photo).
The second technology - we sew plastic
Bottles will also need smooth, transparent or yellow. The central part is cut out of them, getting a square piece of plastic. The pieces are sewn together in long strips. In the strip, the pieces are positioned so that they twist to one side. Then the stripes are sewn into linens. To make the canvas even, the stripes are positioned so that they curl in different directions. As a result, they align each other. Finished canvases are nailed to the frame. This completes the construction of a greenhouse for their plastic bottles.
Such a plan "casing" for greenhouses tolerates winters well, it does not need to be removed. Due to the stitching (many small holes), there is no absolute tightness, which makes it possible to regulate the humidity. You will not be able to heat such a greenhouse, but it will push back the autumn and accelerate the arrival of spring.
It is possible to sew plastic for a greenhouse by hand, but it is not easy. It will be easier for those who have non-capricious sewing machines. Old Podolsk machines cope with this task. Others may have problems.
Fence and enclosure
There are various ways to make a fence out of plastic bottles. If you need a solid monolithic fence, you can use the bottles like bricks. The technology is the same as when building a house. To avoid plaster (after all, there is a great risk that it will collapse) - select the color of the plastic to obtain the required rusink. But in this case, you will have to look for "building material" of the same diameter or lay out patterns from different sizes. In general, the process is creative, no matter how you look.
Both the house and the fence using the same technology
You can also make a filling for a fence out of plastic bottles. Make a frame, say, of wood, and come up with a beautiful filling from figured containers and their parts.
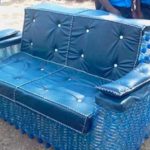
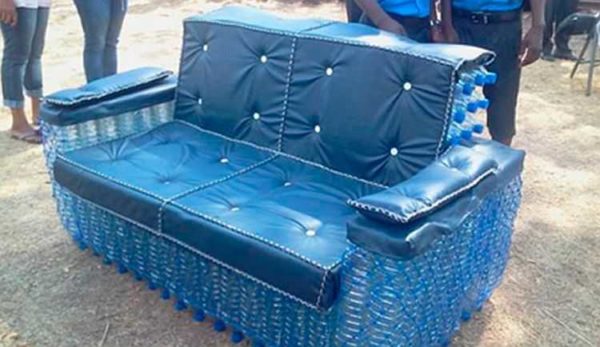
Furniture from scrap materials: recycling plastic bottles
Not only a house and a fence can be made from plastic bottles, they are also used as a basis for upholstered furniture. The idea is to use plastic containers for the frame, not wood. With tightly twisted lids, they have a high bearing capacity, and assembled in blocks, they are quite capable of withstanding loads of up to 100 kg or more.
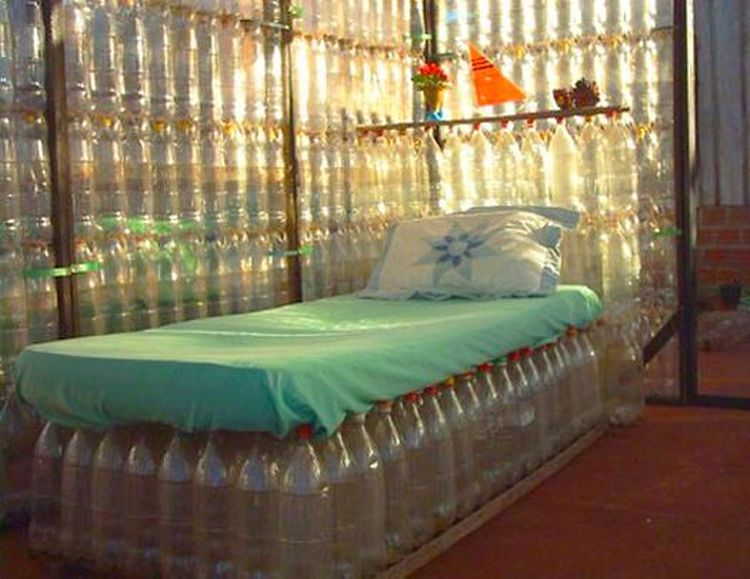
A bed made of plastic bottles ... you need a good mattress and the base is not too difficult to make
Although furniture is made differently, the general algorithm of actions is the same:
- You select the "building material" of the same height, tighten the covers well.
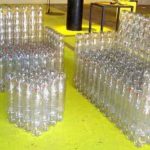
- Collect blocks of the desired size, fastening them with tape.
- Having assembled the base of the required shape, sew the cover. For softness adding furniture foam rubber.
The trick is to make the bottles fit very tightly to one another and not move. The slightest backlash can lead to structural destruction. Therefore, collect the blocks slowly, carefully securing them. You can stack bottles in layers, securing each layer in several places.For the inner layers, it is better to use double-sided tape - the fixation will be more reliable.
Ottomans / benches
The easiest way is to make an ottoman or a bench from plastic bottles. We proceed in the order described above. It is necessary to find bottles of the same height. It is better if they are of the same shape - it is easier to assemble. From plastic containers with tightly screwed lids, we assemble the base in the form of a cylinder. It is desirable that the radius of the base be greater than the height of the bottles - this way the bench will not turn over.
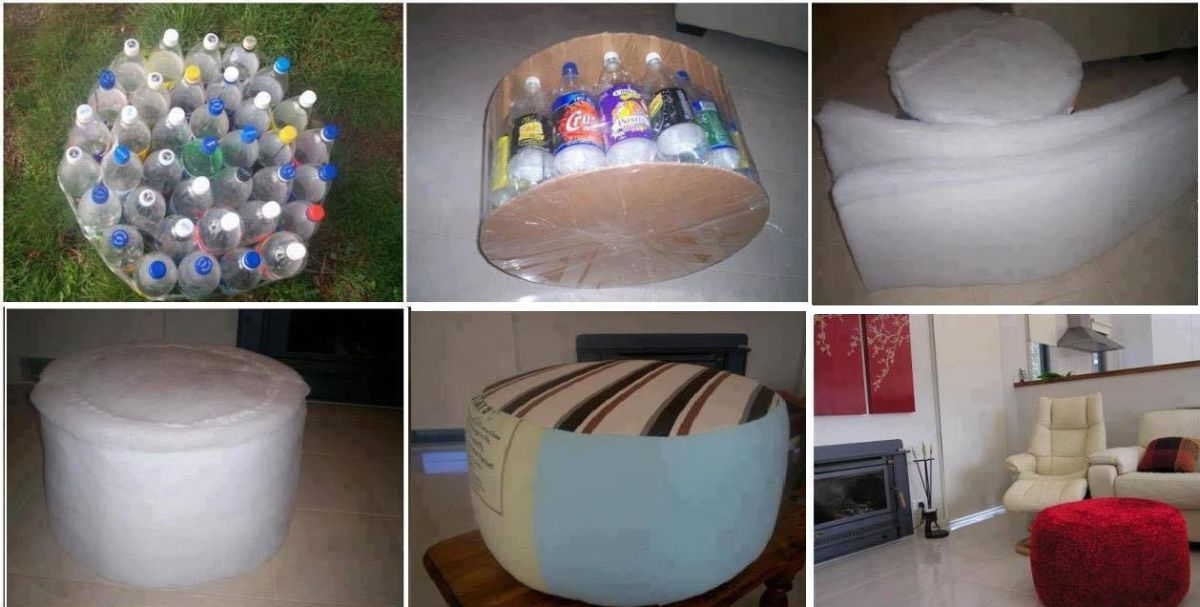
Making an ottoman out of plastic bottles
Next, you need to cut out two circles from fiberboard, which will be slightly larger than the resulting radius of the base - this is the "bottom" and the base of the seat. We fix them with scotch tape. We take furniture foam rubber and, according to the dimensions obtained, cut out the necessary parts. We sew the cover from upholstery fabric, the colors that match the interior.

Plastic bottle bench: round and square
Such a bench can be not only round. It is quite possible to make a square one. And so that this furniture is not too light, it can be made heavier by pouring water. But water is not a very reliable business. Better to add sand. Both harder and more reliable.
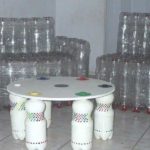
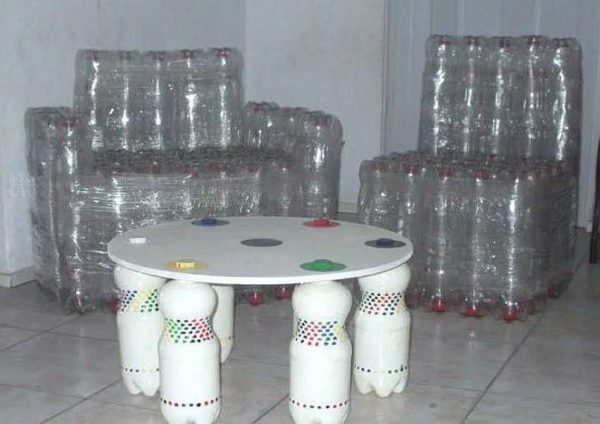
Sofas, chairs, armchairs
If you need furniture higher than one bottle, proceed as when creating walls for a house. Find the "material" of the same shape and height. The first bottle is left intact, the cork is tightened tightly (you can pour sand so as not to turn over). At the other, the bottom is cut off, put one on top of the other. The bottle goes some distance and does not move further, no matter how hard you make it. If the obtained height is enough - great, if not - we put on the next one. In this way, collect the rows of the desired height, then fasten them into blocks.
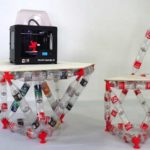
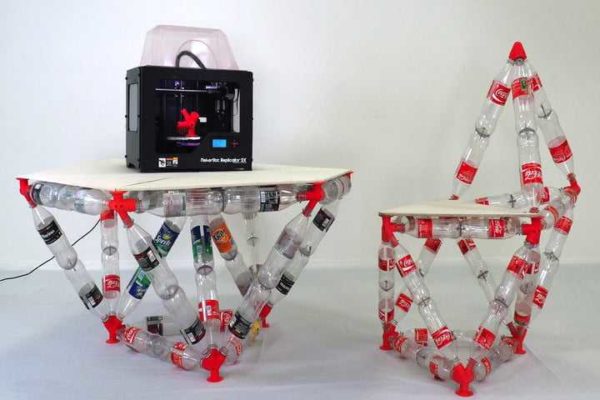
There is another way. It is more reliable in the sense that the bottles are held not by compressed air, but by a mechanical stop. And the walls in them are double, which is also important. The downside is more work, more feed is needed. The whole process is illustrated step by step.
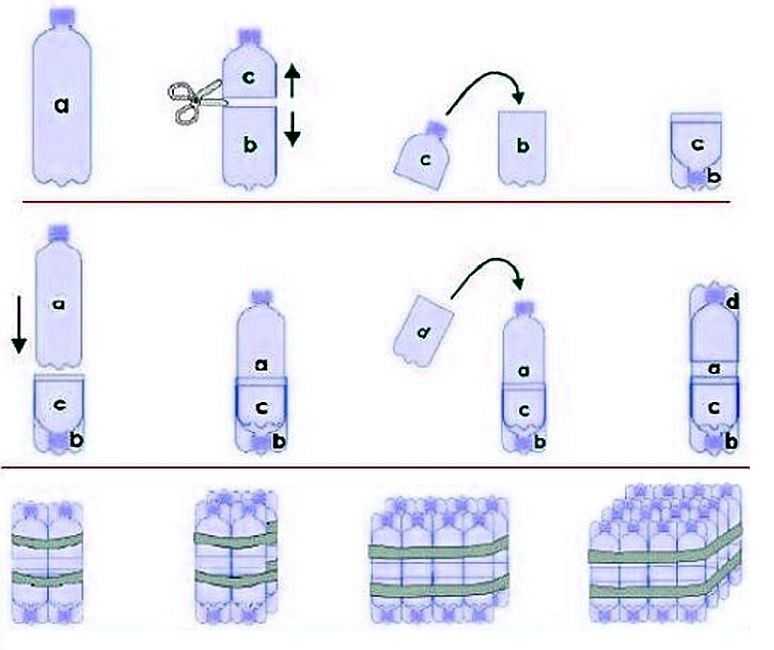
Preparing plastic bottles for furniture making
- We take a bottle, cut it approximately in the middle of the height (the upper part with a smaller neck).
- The upper part with the neck (the lid is screwed on) is inserted all the way into the lower one.
- We take a whole one of the same size and shape, insert it upside down into the prepared structure.
- We cut the third one by about half and put the lower part on the top (with a lid).
From such modules, we assemble blocks of the desired configuration, fastening them with tape. Do not feel sorry for the adhesive tape. You can first fasten two bottles, then collect blocks of large sizes from the double ones.
-
- Crafts from plastic bottles: such furniture for a summer residence is what you need

-
- It's all about the details))
-
- No less reliable design, but requires careful calculation
-
- Another option
As you can imagine, this technology leaves a lot of bottle tops (half of the third bottle). They can be used to make other crafts from plastic bottles: flowers, more practical things for the household.
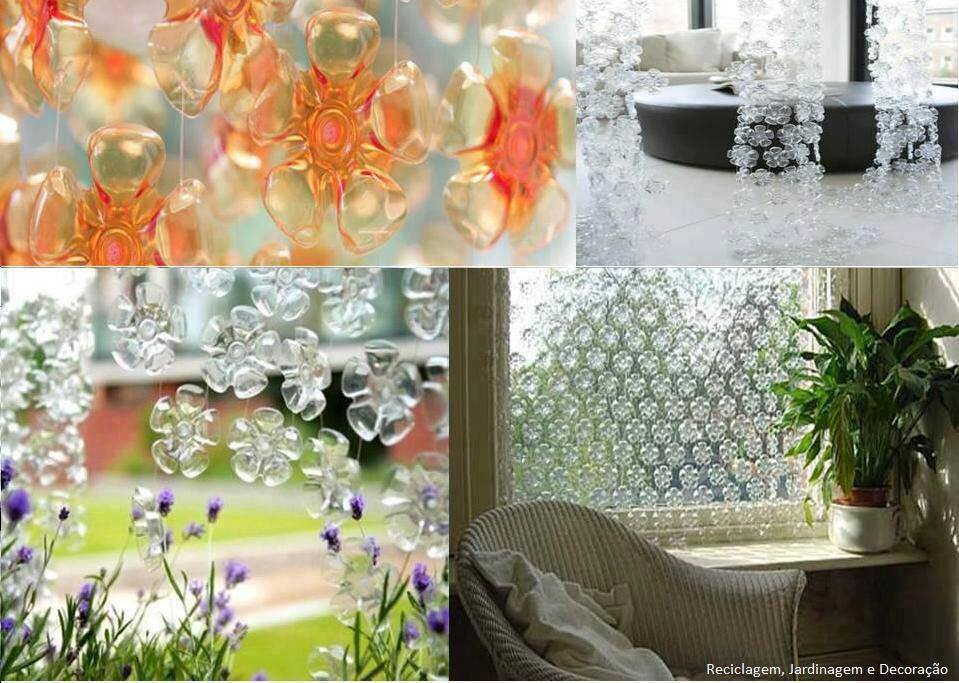
Flowers making methods
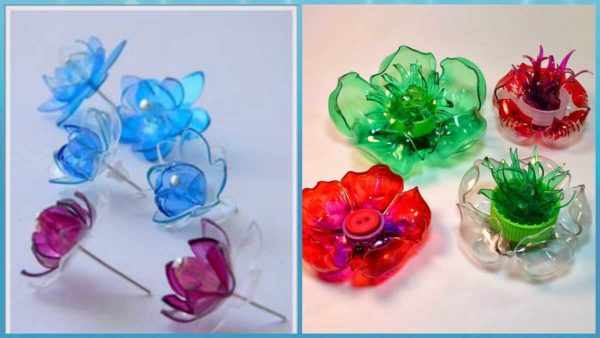
The most common crafts made from plastic bottles are garden figurines and flowers. Read about garden figurines here. There are also other interesting ideas, but many interesting animals and insects have been collected. And we will tell about flowers from plastic bottles below - these are probably those crafts from plastic bottles that give the most pleasure. The process is simple, there are a lot of possibilities, the result is amazing.
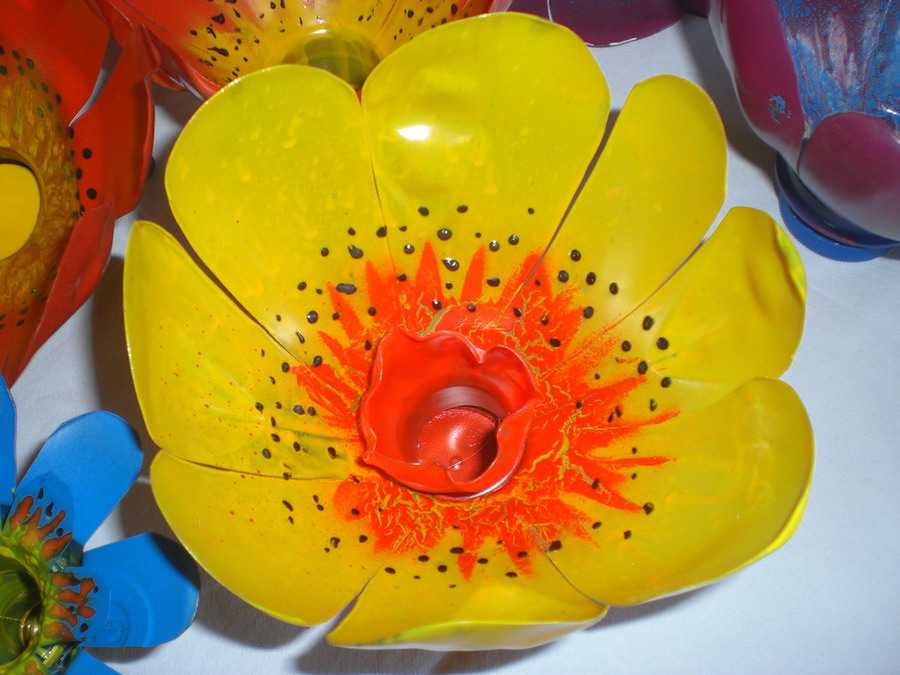
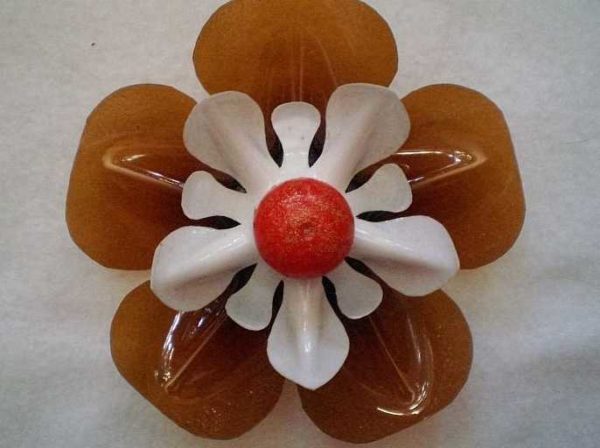
You've probably noticed that the bottom of a PET bottle looks like a flower. All you need to do is find a bottle of a beautiful color, cut off the bottom of it. Now you have already got a pretty flower. In the middle, you can add petals cut from the central part, a core made of a strip of plastic cut into noodles, or glue beads inside, but about everything in a little more detail.
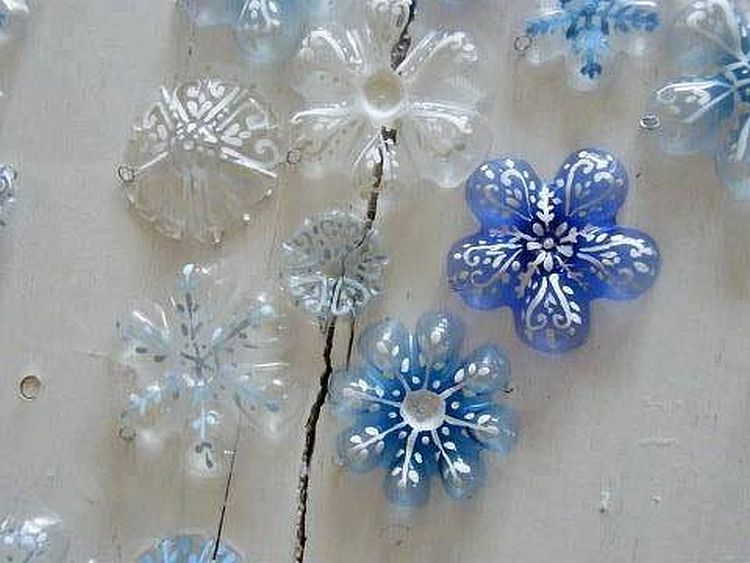
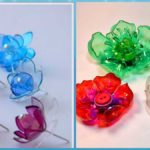
If you paint the cut-off bottoms, you get flowers that are magical in their beauty.
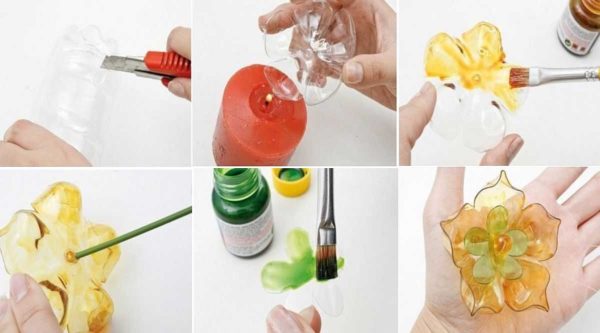
Using the power of fire
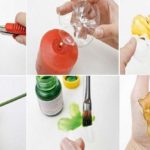
For work, you will need a marker, lighter or candle (it is more convenient with a candle). If available, use a pair of pliers, tweezers or pliers to hold the workpieces while processing. You will also need acrylic paints, you may need glue and beads. The entire manufacturing process boils down to several steps:
- We take a bottle, draw the outline of a flower on it with a marker. You can draw on any part. The petals will simply bend to varying degrees.
- Cut along the contour.
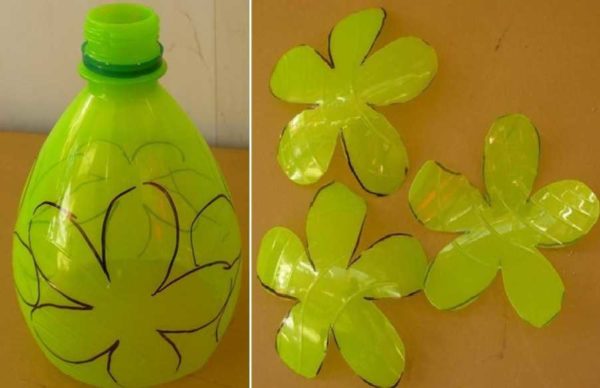
Draw, cut
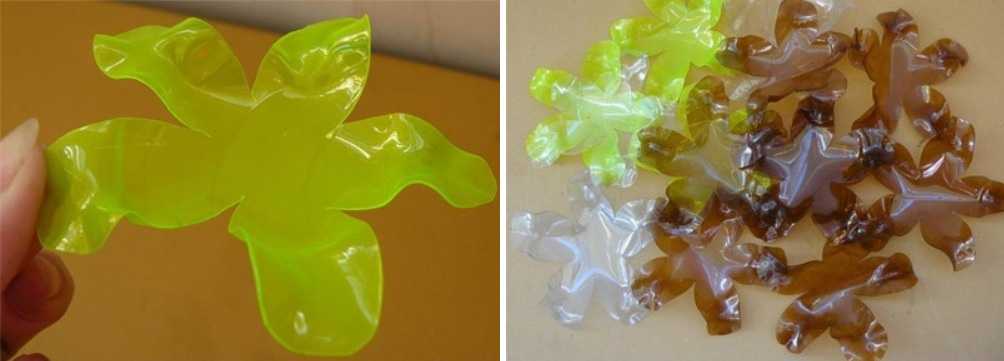
- We light a candle and gently heat the petals. It is important to capture the moment and not melt the plastic. Heat the edges a little more so that they melt a little, forming a more natural edge of the petal.
- With the help of an awl heated over a fire, we make holes in the middle of the resulting petals.
- We paint with acrylic paints. The flowers will be opaque. There are also paints for glass (for stained-glass windows), but they are expensive, although it turns out beautifully.

Warm up on fire, giving interesting shapes
- When the paint is dry, you can collect the flower by aligning the holes in the center, expanding the petals the way you like. You can fasten them with a thread or thin wire with a threaded button or a large bead. A button or bead is the core. You can combine the petals and fasten with a drop of glue, and arrange the core with a strip of the same plastic (or a different color) cut into noodles.
- The stem can be made of green wire, or you can wrap any wire with a strip of green plastic heated over a fire (in a spiral).

There are a lot of options here. Just start doing. Immediately, it may not work out perfectly, but you will understand what and how you can fix it. Look at a few more pictures with step-by-step photos of the process of making flowers from plastic bottles.
-
- From the bottom and one or two tiers of heated petals
-

- It's real to do such a miracle with your own hands

-
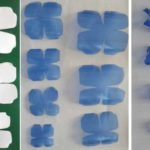
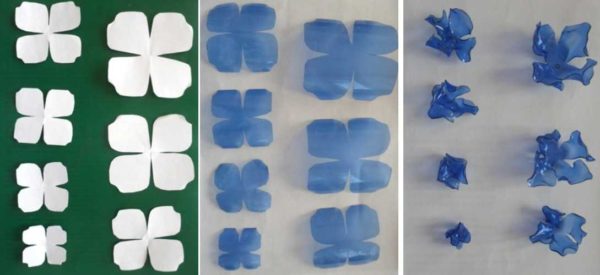
- How a paper pattern turns into a plastic flower
-
- Process with step by step photos
The most simple
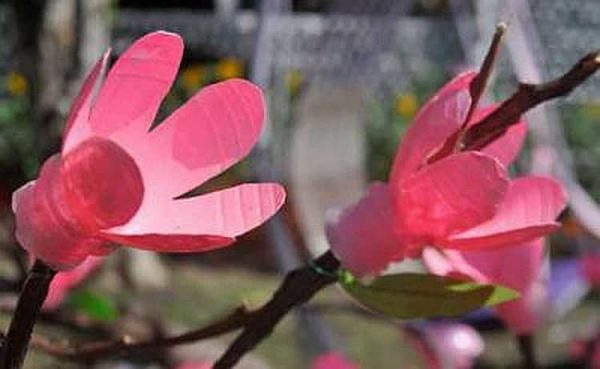
For beginner craftsmen, you can try making flowers from simple shapes of plastic bottles for garden decoration. In this case, milk containers can also be used. To avoid staining the plastic, look for colored ones. And it is not so important whether they will be transparent or not. They can be combined to produce flowers of different shapes.
Cut out the petals from the part near the neck
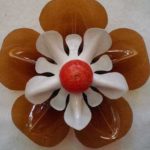
To create such colors, use the part near the neck. It is cut to form petals. Next - warm it up a little, giving the desired bend to the petals, a little paint, a core made of a melted piece with a thread (a bottle of a smaller diameter, a pharmacy will do too). So we got a buttercup.
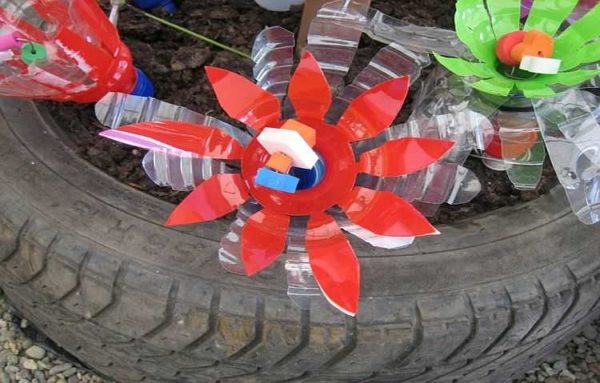
Another option is to cut from the neck into strips of equal width - 1-1.5 cm, bend them (warming up a little at the base). Make the middle whisk from the side of the milk bottle or paint the clear plastic with acrylic paint.
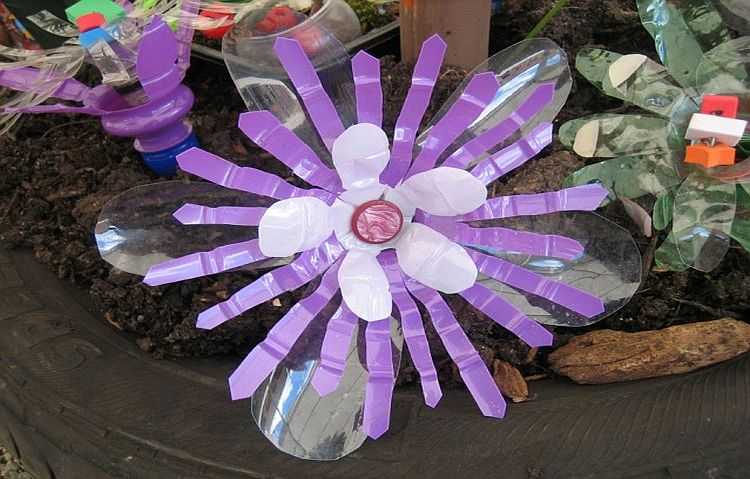
It's even easier - cut into strips for the outer whisk, make the middle out of white plastic milk bottle
The middle is any bright one. Here is a piece of cork, but you can cut it into thin noodles, roll it up and then heat it. You get a shaggy core.
-
- It's all about the form ...
-

- You can make carnations

-

- If there are paint options the sea

-

- Very simple, but very effective
-
- Despite the imperfection, they decorate the site
The topic is actually inexhaustible. Flowers from plastic bottles are made very different. From simple and uncomplicated to very realistic. It's not so much about skill as about different tastes and desires.
Useful home ideas
PET containers turned out to be such a good material that many useful things are made of them. In this section, we have collected useful crafts from plastic bottles that can be used on the farm.
For the kitchen and not only
If you cut off the bottom of a bottle with a capacity of 2-3 liters, you get a bowl or bowl, and so that its edges are even, they can be melted on a heated iron. But so that the sole does not have to be cleaned later, use a special silicone pad. If not, you can do it through a sheet of parchment for baking.
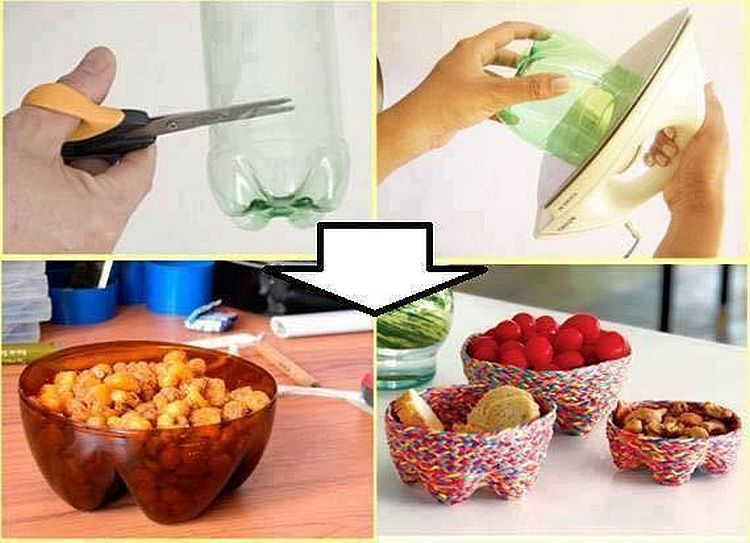
Food container. Plastic is food grade ...
Cut off the threaded part from the same bottle. 1-2 cm of plastic should remain around the thread (the edges are melted using the already known technology). Now it will not be difficult to hermetically close any package: we pass it through the cut neck, wrap it out, twist the lid.
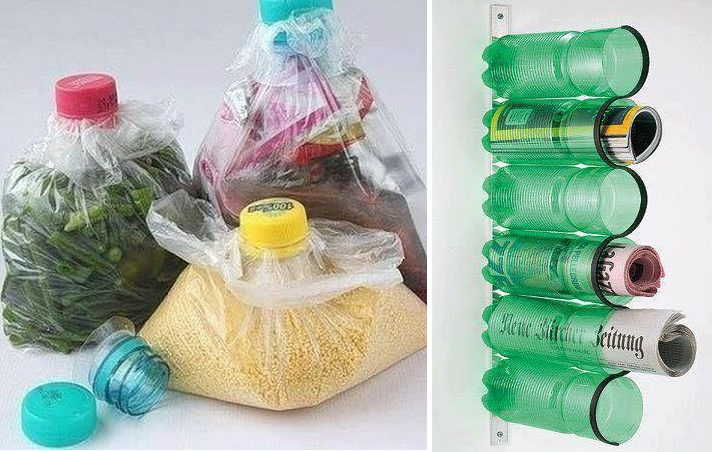
We seal food bags
The bottom of the bottles attached to the bar makes a great newspaper shelf (photo on the right). You can also store umbrellas.
Containers of various shapes can be weaved from plastic cut into strips. Bottles need an even shape, with thick walls. They are cut into strips of a certain thickness. It is necessary to cut in a spiral - as a result, rather long stripes are obtained. If their length is not enough, they are perfectly sewn.
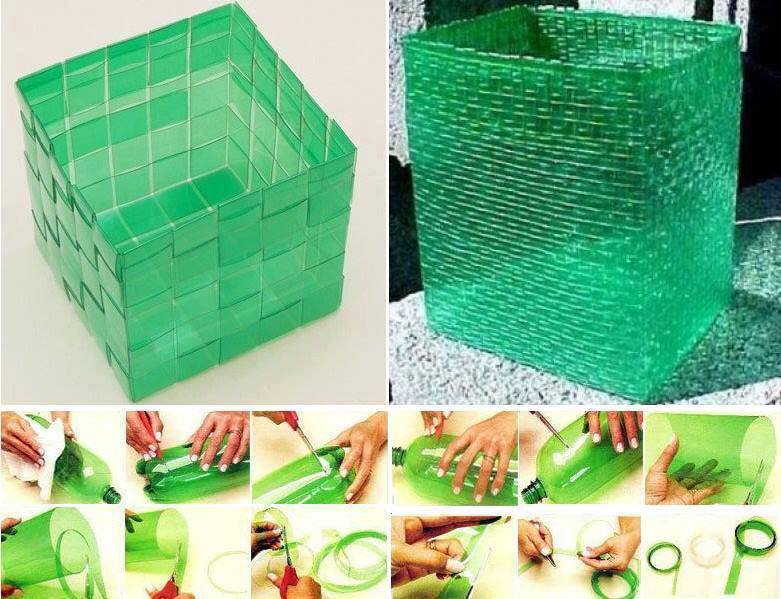
Laundry baskets from strips: weaving from plastic bottles
Lampshades
You can even make a lampshade, but on one condition: you will use similar crafts from plastic bottles in lamps withLED lamps - only they hardly heat up. Plastic is incompatible with other lamps. Let's describe three ways to make a lampshade from a plastic bottle.
First. Need a large bottle. We draw it into strips of the same width. At the beginning and at the end of each strip, we make holes with a heated soldering iron or a nail heated on fire. We insert scissors into this hole, cut. Straight stripes are obtained.

Lampshades from plastic bottles
When the strips are cut, we also make a hole in the bottom, pass a thick fishing line through the neck, take it out through the hole in the bottom, and fasten the decor on the back side. You can - a button, you can - a pebble of a suitable color. Now by pulling the line, we get an interesting shape of the lampshade. You can put a low power light bulb in it.
Another lampshade was made using a similar technology. But then a part of the bottle with a neck was cut into strips, the strips were wrapped and fixed on the neck. To give the desired shape, the fold can be slightly warmed up over a candle or lighter flame. We attach the resulting "flowers" to the base. So we get an unusual design.
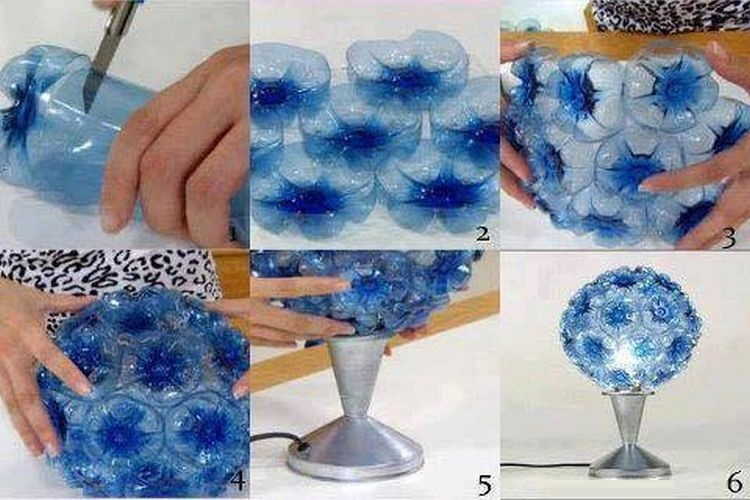
We use the bottoms
They also make lampshades from the bottoms. It is necessary to find a sufficient number of identical bottles, cut off the bottom of them, glue them together using universal glue (choose transparent). The main thing is that it glue the plastic and freeze quickly.
Flower vases
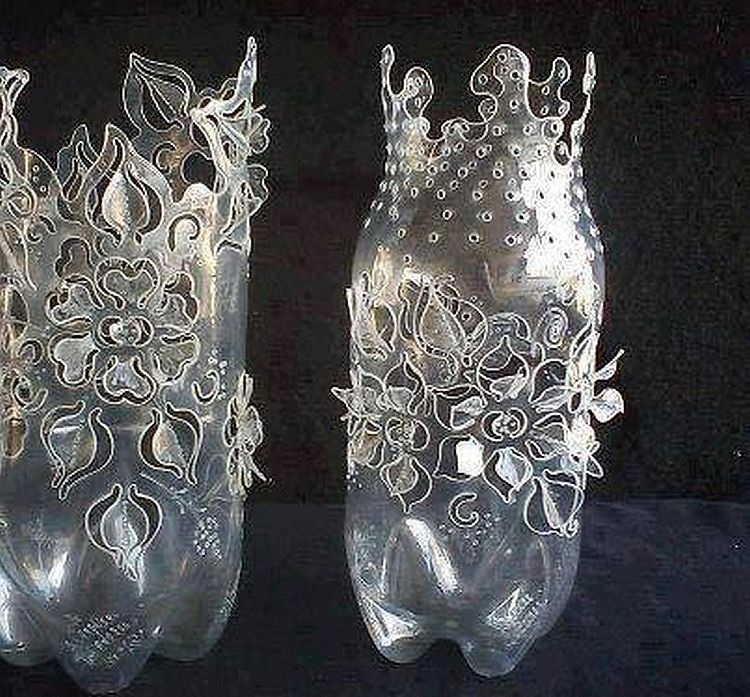
Making a vase from a plastic bottle - what could be easier ... Just cut off the neck and you're done. But there is a technique that allows you to get patterned walls. You will need the thinnest soldering iron. Its power should not be too high. Then everything is simple: with the help of a heated sting, you burn out the patterns.
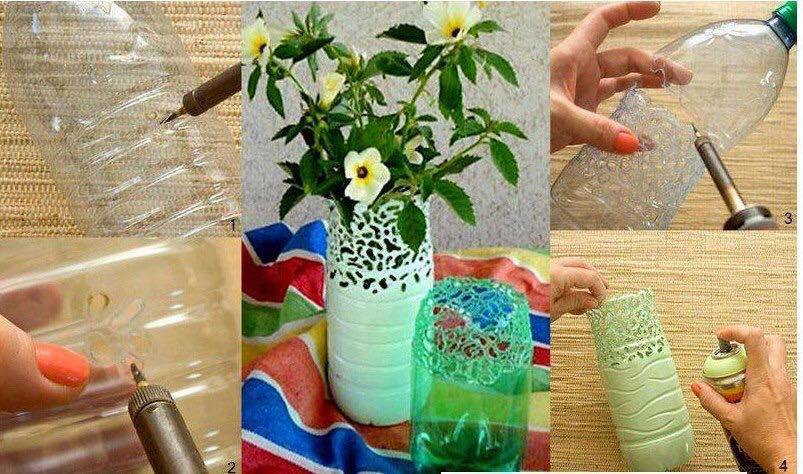
Beautiful vase from a plastic bottle
Magically! To make the drawing appear brighter, we take acrylic paint and paint the resulting beauty. The paint can be in a regular can, but it is faster and more convenient to use a spray can.
These are the options ...
Photo ideas
Crafts from plastic bottles are such an extensive topic that it is impossible to tell about everything. What's nice, knowing a few tricks, you can easily find out how and what to do by looking only at the photos. So here we have collected a few ideas that seemed interesting to us.

Plastic bottle broom
Beautiful curtains
Construction technology
How to make posts or columns for a fence, shed, etc.
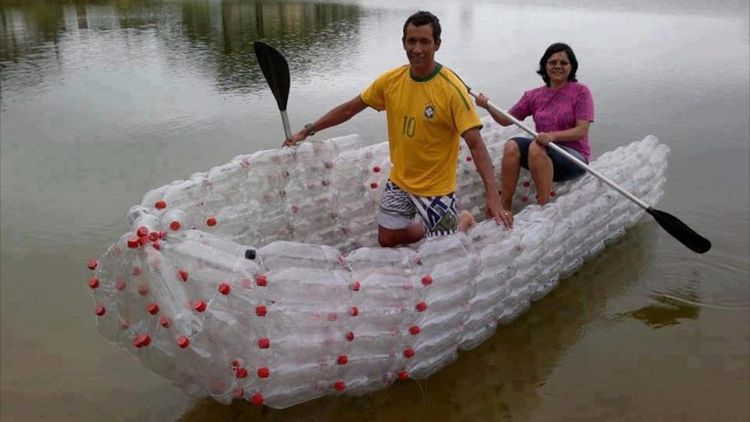
You can even make a boat….
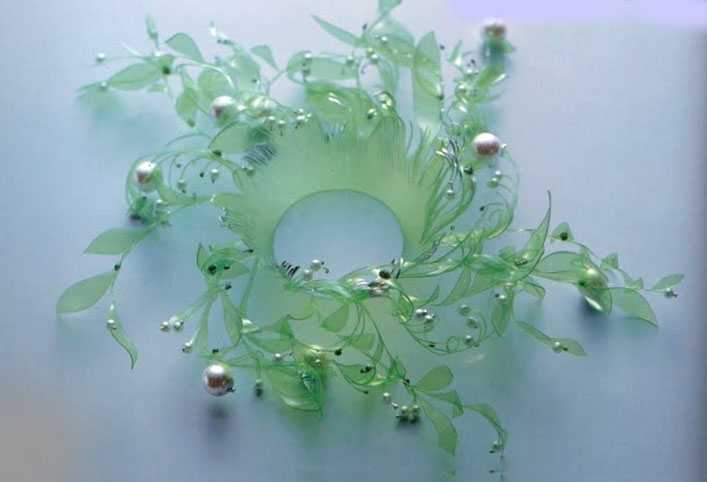
And this is just a decoration….
Plastic bottle broom
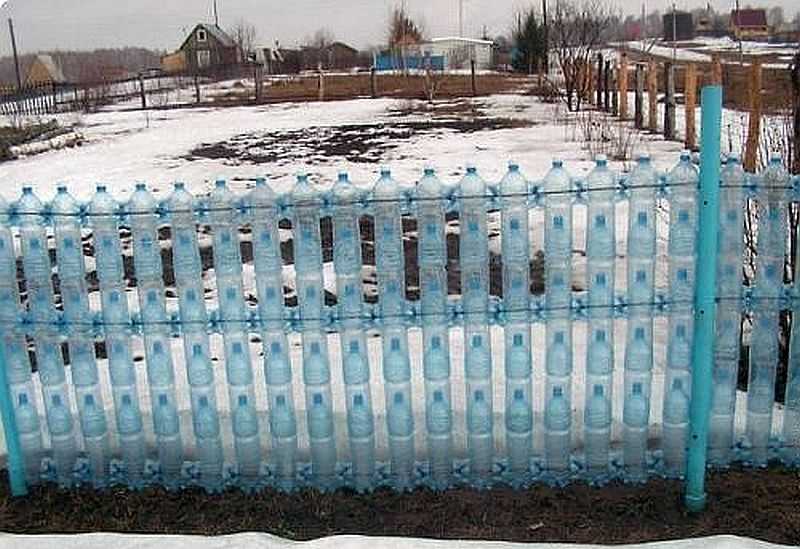
Cute fence
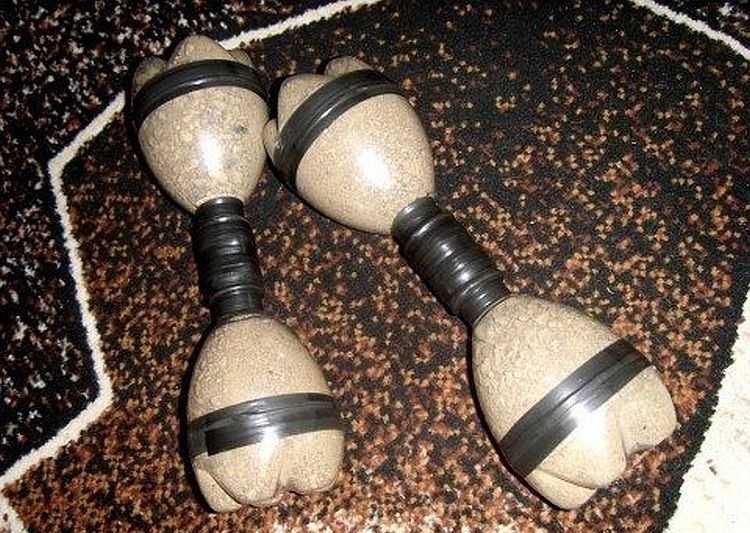
Dumbbells
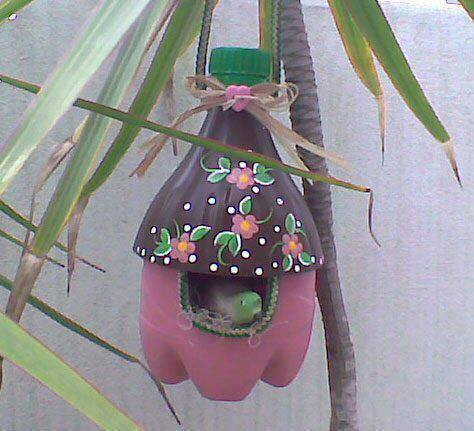
Bird feeder - cheap and beautiful
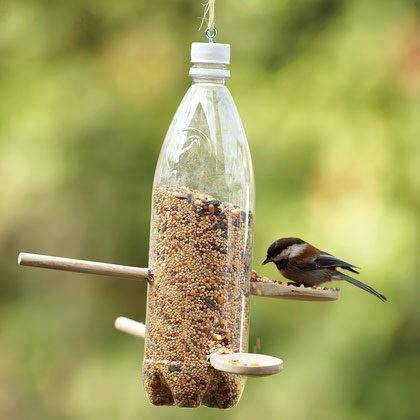
Another option
-
 Buying an apartment: what documents are required, their verification
-
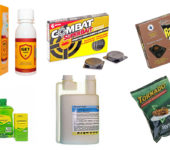 How to deal with cockroaches in an apartment, the best remedy for cockroaches
-
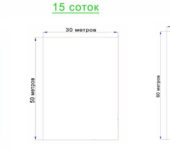 How many square meters in a hundred square meters of land: measurement, calculation
-
 Conversion of inches to cm and mm, centimeters to inches, tables, applications, formulas
-
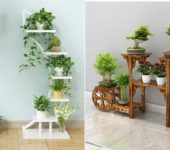 Floor stands for flowers


