How to make a lampshade (plafond) at home
Lighting is the most important component of the interior. The comfort and level of comfort of our home depends on the lighting. The play of light and shadow allows you to play up the winning moments of the interior and divert attention from unfortunate moments. And also - lamps, floor lamps, chandeliers and lamps create the atmosphere that we call "home". Unique lamps and the best way is to make a lampshade with your own hands to make your home only "your", personal, individual. Homemade shades and lampshades are the strong point that will make your home stand out from others.
The content of the article
A few words about safety
In the manufacture of lamps, floor lamps and chandeliers in industrial conditions, a preliminary calculation is made of the minimum distance from the "body" of the lamp to the materials. This distance depends on the power and thermal radiation of the lamp and on the type (combustibility) of the material from which the shade / lampshade is made. At home, hardly anyone will bother with such calculations. And in order not to create a dangerous situation, it is worth adhering to certain rules.
- Use low power bulbs that do not generate much heat. There are two options - "housekeeping" and LED. When selection of LED lamps, you will have to buy expensive ones, since you need lamps with good radiators - metal and ceramic that dissipate heat. These are far from cheap specimens. The consolation is that they emit even light and have a very long service life (in theory, several decades).

Consider safety before making your own lampshade.
- If possible, use ceramic rather than plastic cartridges. They dissipate heat better.
- Do not place flammable materials (paper, cardboard, cotton and synthetic fabric) closer than 5-7 cm to the lamp.
And in general, having made a lampshade and installing it, in the first few days, pay attention to whether the ceiling is warming up. Any rise in temperature above ambient is considered heat. If the shade feels warm, change the bulb to a less powerful one. Check again. So until the homemade lampshade is warm.
Where to get the frame
If you want to remake an old lamp, floor lamp, sconces whose old lampshade has become unusable, you can simply use the existing base, peeling off the old material. Before starting work, inspect the frame well, if there is rust or damaged coating somewhere, maybe it is worth peeling and painting everything again? At the same time, the color can be changed. If there are no old frames, you can buy an inexpensive lamp (at a store or at a flea market) and do the same with it. Quite good lampshades can, by the way, be made from waste baskets. They are wire, there are plastic. The main thing is to find the right one in shape and size. Then in the bottom you make a hole for the cartridge. Further - it is up to the decoration / cladding, and then there are a lot of options.

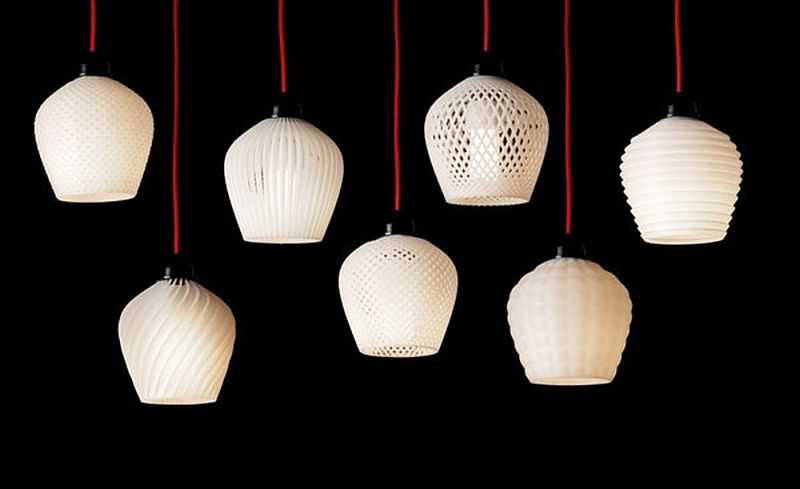
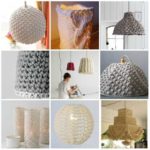
Homemade lampshades amaze with a variety of shapes and materials
If this method is not available either, you can make a lampshade without a frame (there are some) or make a frame yourself. The material for making a frame for a lampshade with your own hands is: wire, wood (wooden or bamboo sticks, specially cut elements), plastic bottles.
How to make a wire frame for a homemade lampshade
The wire for the lamp frame needs aluminum or steel. It is easy to work with aluminum, but it wrinkles easily. This is not very important when the lampshade is already in use, but this fact must be taken into account during work: you can ruin the shape. On the other hand, such plasticity makes it easy and simple to change the shape during operation. So it's not a bad option. Aluminum wire can be obtained from electrical cables. You will have to remove the protective shell and you can use it.
Steel wire is more elastic so that it retains its shape well. You can search for it in the construction market. Working with her is more difficult. It is desirable to have strong male hands nearby.
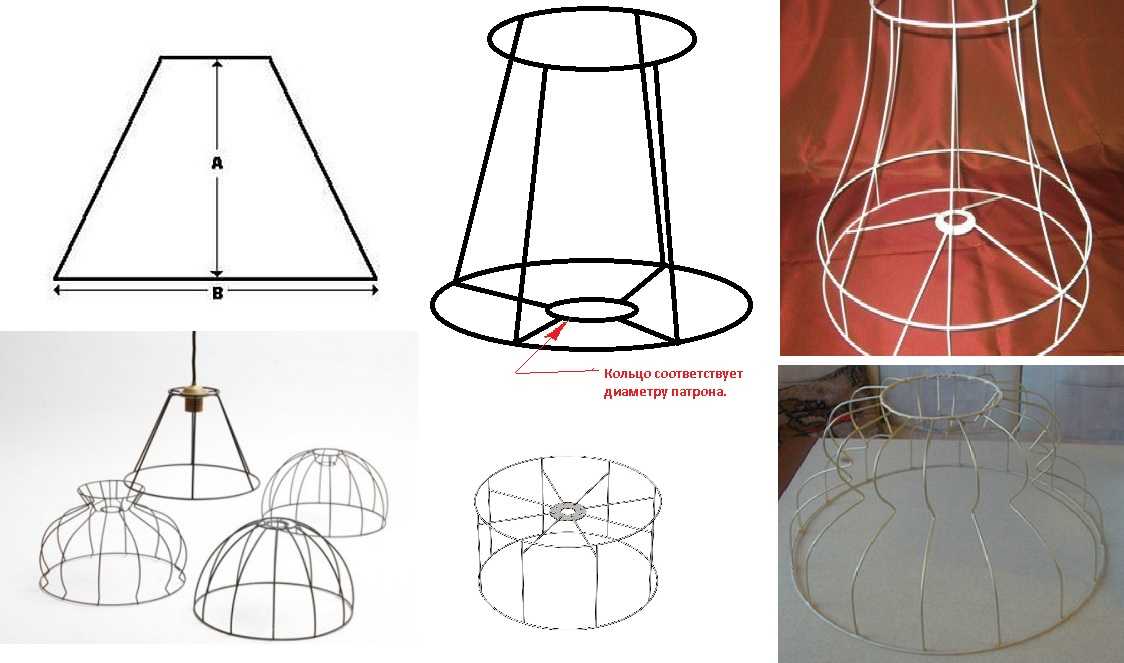
Shades of lampshades that you can make with your own hands from wire
In addition to the wire, you will need powerful pliers and pliers for work. The frame of a lampshade usually consists of two rings and posts connecting them. The shape of the future lampshade depends on the size of the rings and the shape of the racks. Questions may arise about the number of racks and how they are attached. The number of posts depends on the size of the rings and how “round” you want the lampshade. The more racks there are, the smoother the fabric will lie. So it's up to you, but the optimal distance between the posts along the lower circle is about 5-6 cm.
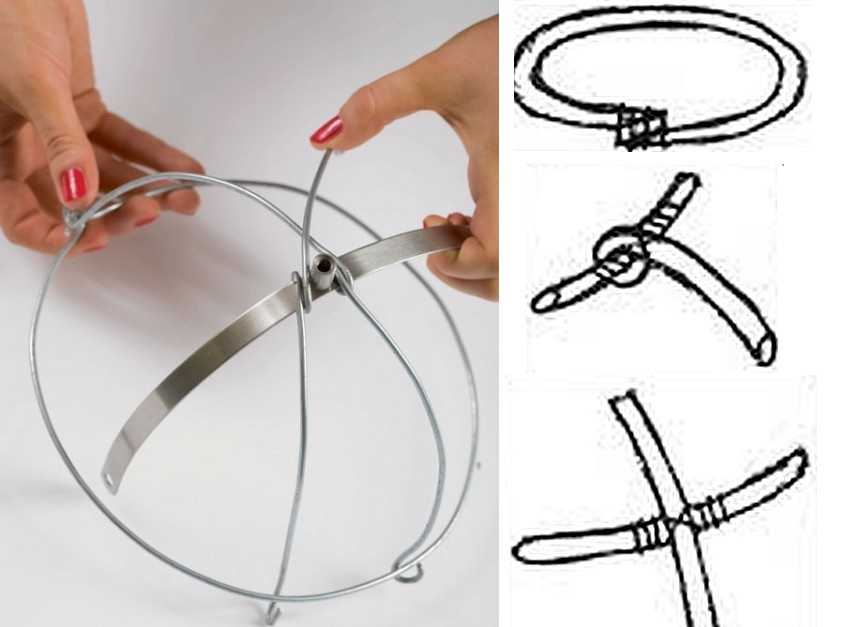
Techniques for creating a wire lampshade frame
How you attach the stack to the rings of your lampshade depends on the thickness and type of wire and the tools you have. The easiest is to make a small hook at the end, then clamp it tightly. And so that the ring does not slide left and right, first sand the wire at the attachment point with coarse-grain sandpaper. This is an option for thick aluminum wires. If the wire is steel, with a diameter of 1.2-2 mm or more, the best way iswelding... The thinner wire can be bent and wrapped around the ring, or you can also make a hook.
If you make hooks, wrap the wire, the appearance is far from being as ideal as that of factory frames. But this imperfection will be covered by the lampshade itself. If she still worries you, find a ribbon of a suitable color (usually matched to the color of the lampshade) and carefully wrap the resulting frame. It will get much better. The tape can be coated with PVA glue and, wet, tightly, turn by turn, wrap the frame.
Wire mesh
If you can find a thin wire mesh, you can quickly make an almost perfect cylindrical shade for a floor lamp, table lamp, night light, candle shade, etc. All you need is to cut off a piece of mesh of the required length and width, roll it into a ring and fasten the wires by wrapping them around the racks.
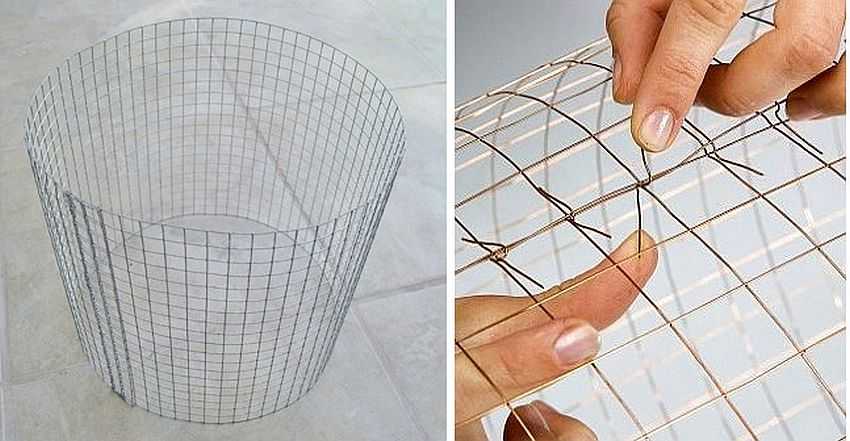
Cylindrical wire mesh lampshade frame
To prevent the mesh from straightening when cutting off a piece, cut so that there are long loose ends on both sides. They will fasten the cylindrical shade. And the imperfection of the upper and lower rings can be masked with a tape of the desired color.
From a five liter plastic bottle
An interesting shape of a lampshade can be obtained from a large-capacity plastic bottle. There are bottles of 5-6 liters and even 10. So you can use them. We cut off the top or bottom from the container - depending on what you like best. In the cut off part, we make a ring for the cartridge. If the top is cut off, the neck can be used for some cartridges. For those with a larger diameter, it will have to be cut.
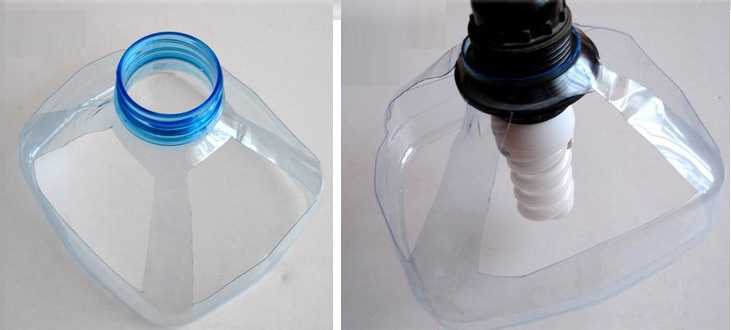
Plafond from plastic bottles
Then we cut out the excess plastic, form the rims and stands of the plafond. In order not to be mistaken, you can first draw all the lines with a marker. It will be easier to cut. Everything is elementary. Then we just decorate. And yes, you must cut out the plastic, otherwise the warm air will have nowhere to go.
We make lampshades on the frame
There are enough options for how you can make a lampshade cover:
- Sew from fabric.
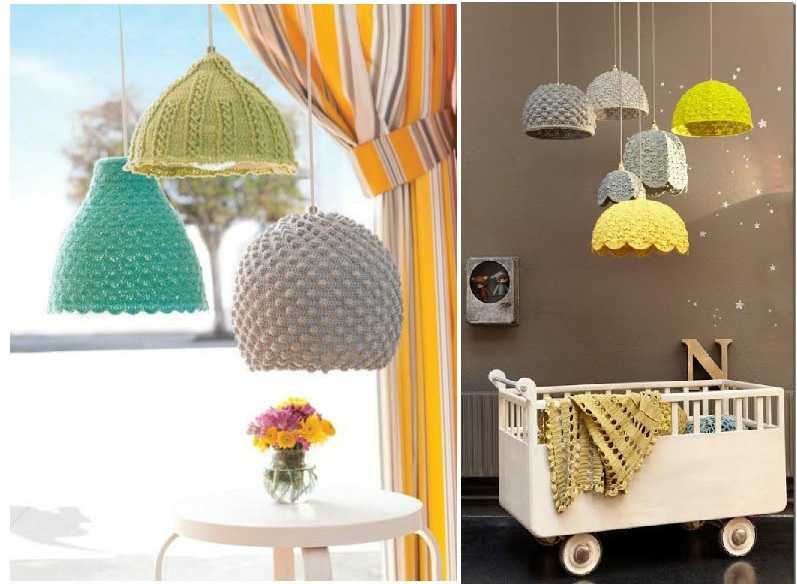
- To tie. Crochet or knitting.

You can knit the cover on the lampshade with knitting needles or crochet
- Braid with threads, twine, ropes.
- Decorate with ribbons.
From ribbons
The easiest and quickest way to convert an old lamp shade to a floor or table lamp is to use ribbons. You need a frame or a lampshade in the form of a cylinder. It can be “naked” or covered in fabric. If you use a bare wire frame, light will filter through the slits, which will create interesting lighting effects, but the lighting will be uneven. It is inconvenient to read in such light - this is an interior solution. If you need even lighting, wrap the fabric over the frame first. It can be the same color as the ribbons, a couple of tones darker or lighter, it can be contrasting. It all depends on your desire. And remember that the darker the fabric, the less light the lampshade lets through.
We take a tape 1-2.5 cm wide. We fix it from the seamy side of the lampshade with PVA glue, additionally fixing it with a pin. If we took a wire frame without fabric, we attach it to the upper or lower rim (you can sew it with your hands, you can use glue). Then we begin to wrap the entire frame, from top to bottom, placing the turns of the tape close to each other, but without overlap.
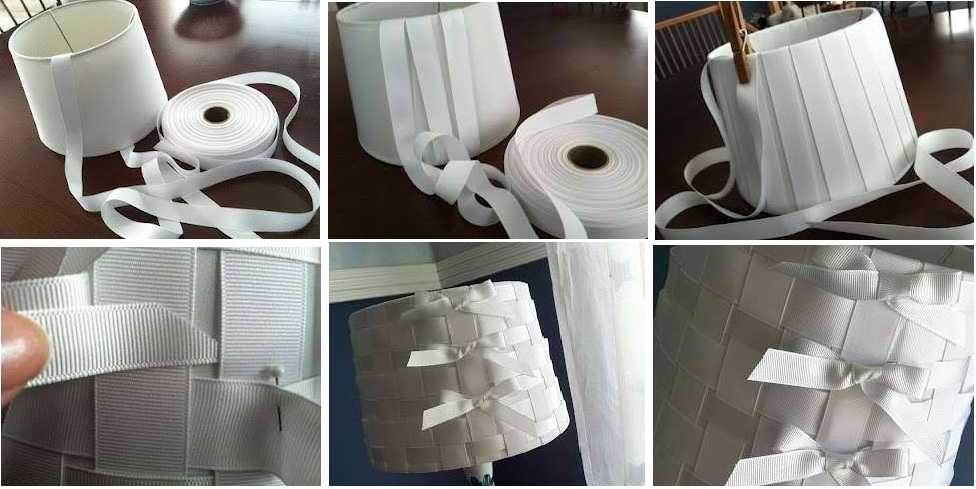
How to make a ribbon shade with your own hands
Having completed the circle, unfold the tape 90 °. We fix it in this position (with a needle and thread or PVA glue, glue from a gun, temporarily fixing it with a pin, pressing it with a clothespin). Then we pass the tape under the first tape, take it out, put it on top of the second one, then pull it down again, pull it up through one tape. So, gradually, we create a weave, filling the entire lampshade.
Alternatively, you can skip two vertical belts. But then you need to make sure that each next row is shifted by one crossbar. Then you get a different type of weave. Such a lampshade is ideal for floor lamps, as it will direct the light downward, and the dispersion through the walls will be small.

This technique is very flexible and produces different results.
In this version, the ribbons can be the same, they can be of the same color, but different textures, they can differ by a couple of tones or be contrasting. The tapes can be run in a continuous circle around the circle, or after a certain distance. If you find a wide tape and overlap it, then horizontal tape is not needed at all. And if you use a braided or twisted cord (in the lower photo on the right), we get a completely different lampshade. So only this lampshade finishing technique gives a lot of options.
Interesting options
Let's briefly present the ideas. There are many options for how you can customize standard lampshade frames. The first method has already been announced: you can knit a lamp shade cover on knitting needles or crochet. Several options in the photo.
-
- Crocheted bedside lamp shade

-
- We knit separately the fragments, which we attach to the frames
-
- Several types of knitted lampshades

Not everyone knows how to knit. It's easier to work with beads, especially if you glue them. You can decorate old fabric with beads, sequins, beads of different shapes and sizes. You can make such a "new-old" lampshade with your own hands in a couple of hours. Pick up jewelry that matches the color, coat the fabric with PVA glue, glue the jewelry. To complete the look, you can assemble pendants from beads and beads that are attached to the lower rim, but this is already painstaking work. The effect is interesting though.
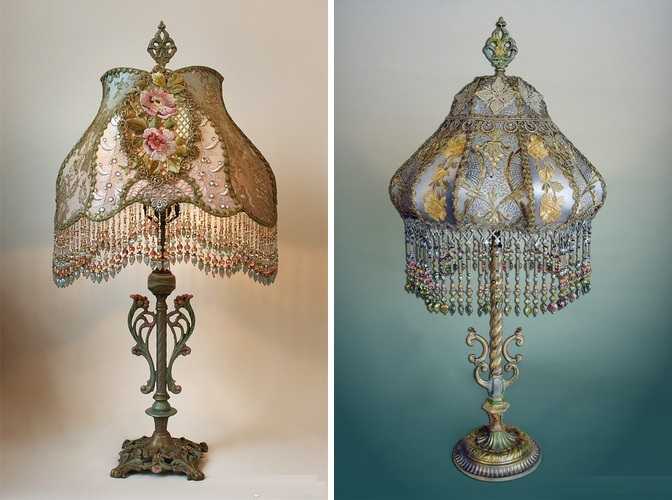
You can update the lampshade with beads, beads, sequins
You can sew a new fabric lampshade. But it is not necessary to make it an updated copy of the old one. Fantasy should be included! If the lamp or floor lamp is in the girls' room, a new lamp shade cover can be made in the form of a skirt. You choose the style of the skirt yourself. They look interesting in the fold. With and without ruffles.
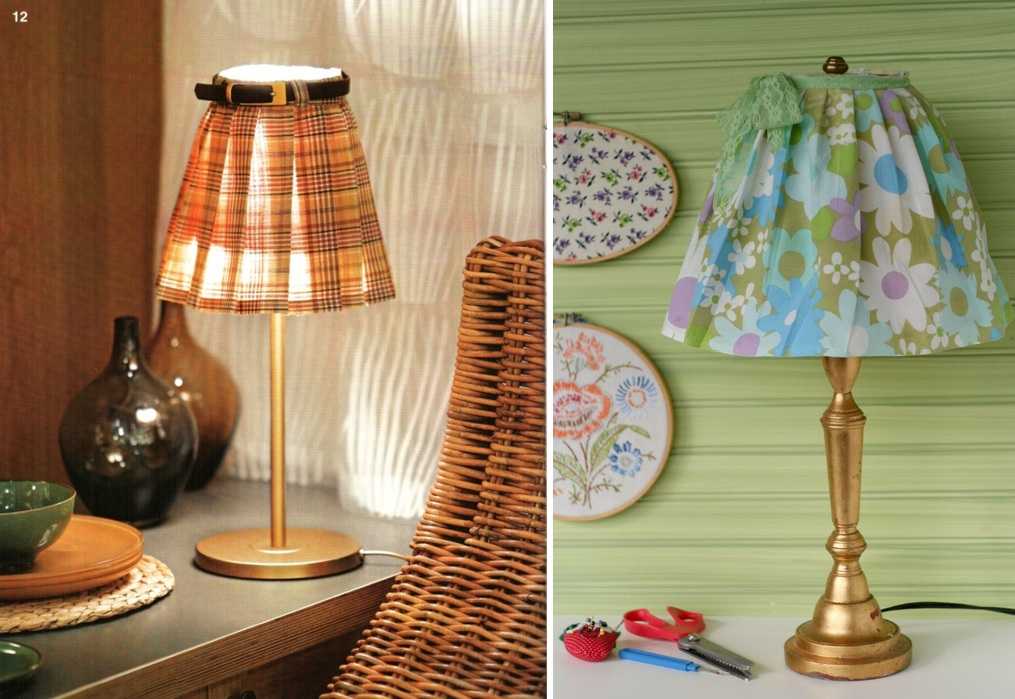
Put a table lamp in a skirt)))
You can use an old geographic map in the boy's room. They are on thick paper.If the paper is not thick enough, you first need to glue the card onto the cardboard, and then glue the lampshade from such a blank.
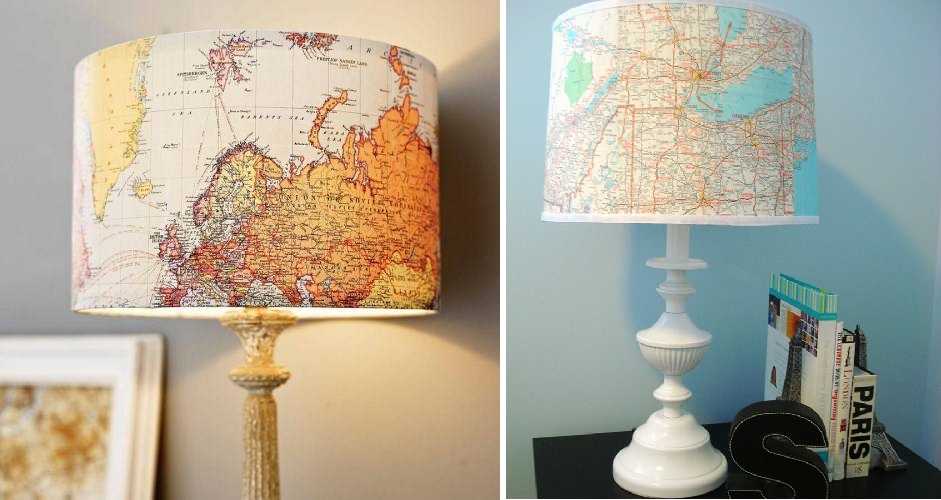
Geographic maps can be used
Original shades are obtained if the finished frame is braided with threads or ropes. The ropes can be natural. In this case, they are gray, brown beige. Thin synthetic colored cords can be found. From them you will get more "fun" in color products. The situation is even simpler with knitting threads. They are thin, thick, textured, with a smoothly changing color. In general, there are a lot of options.
We take the frame and weave it according to a certain pattern. You can start with the racks. Braid each stand with a pigtail (the length of the threads should be 3 times the height of the stand). When this work is over, we begin to stretch the threads / ropes between the posts. They will need to be passed through the pigtails, so with threads it is more convenient to do this with a needle, and the ropes can be inserted like that.
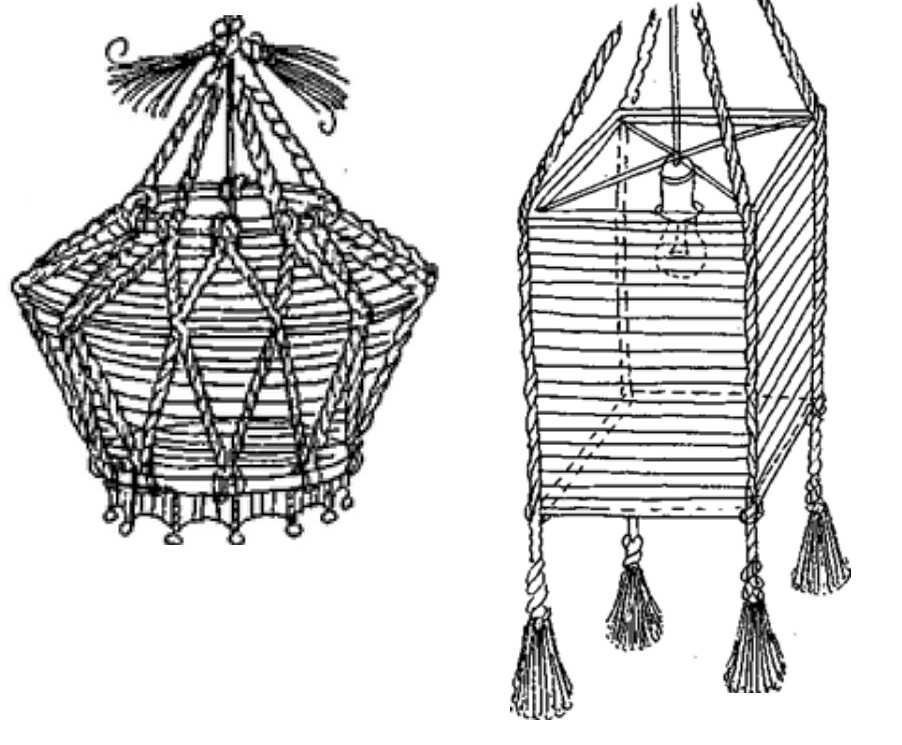
Several ways to braid the frame with threads
The second option is to first entangle the entire frame horizontally, and then braid the racks. The pigtail will no longer work here, you just need to fix the turns on the rack with inclined stitches with a certain inclination. This version is somewhat simpler in execution, but the "pigtails" look more decorative.
Homemade shades without a frame
Many materials are tough enough to keep their shape on their own and, at the same time, they are flexible enough to make something interesting out of them. Well, there are a lot of such homemade lampshades. And almost all of them are worth your attention. We will give here only a part, the other part will go in the section with photos (see below).
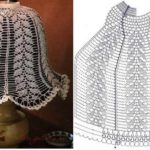
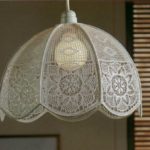
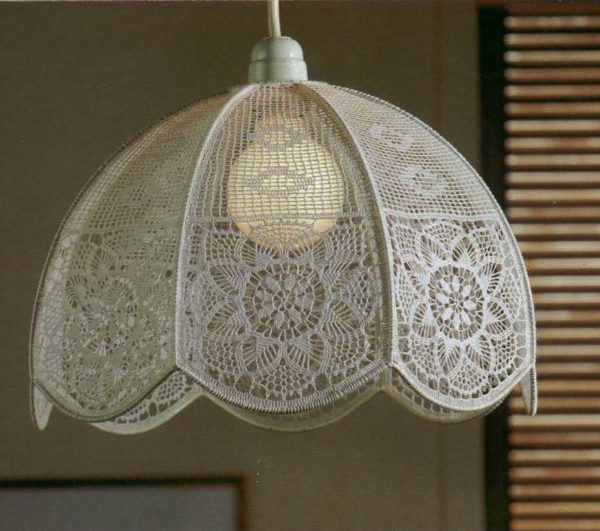
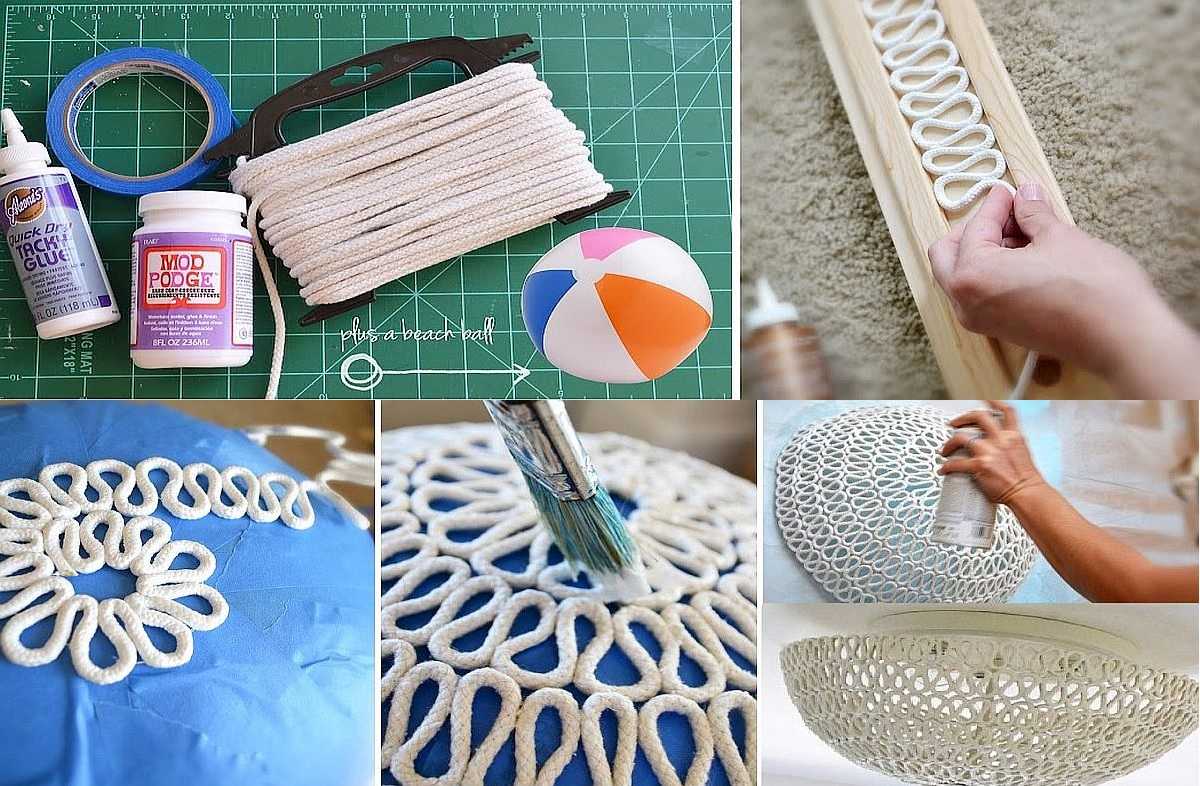
From knitted lace napkins
Many people have crocheted napkins and they lie in the "stash boxes", as it is a pity to throw it away, and do not know how to use it. There is a very interesting idea - to make of them a lampshade for a chandelier on a suspension. In addition to napkins, you will need a large balloon or a bouncy ball, glue for heavy wallpaper (vinyl, silkscreen, etc.), a brush.
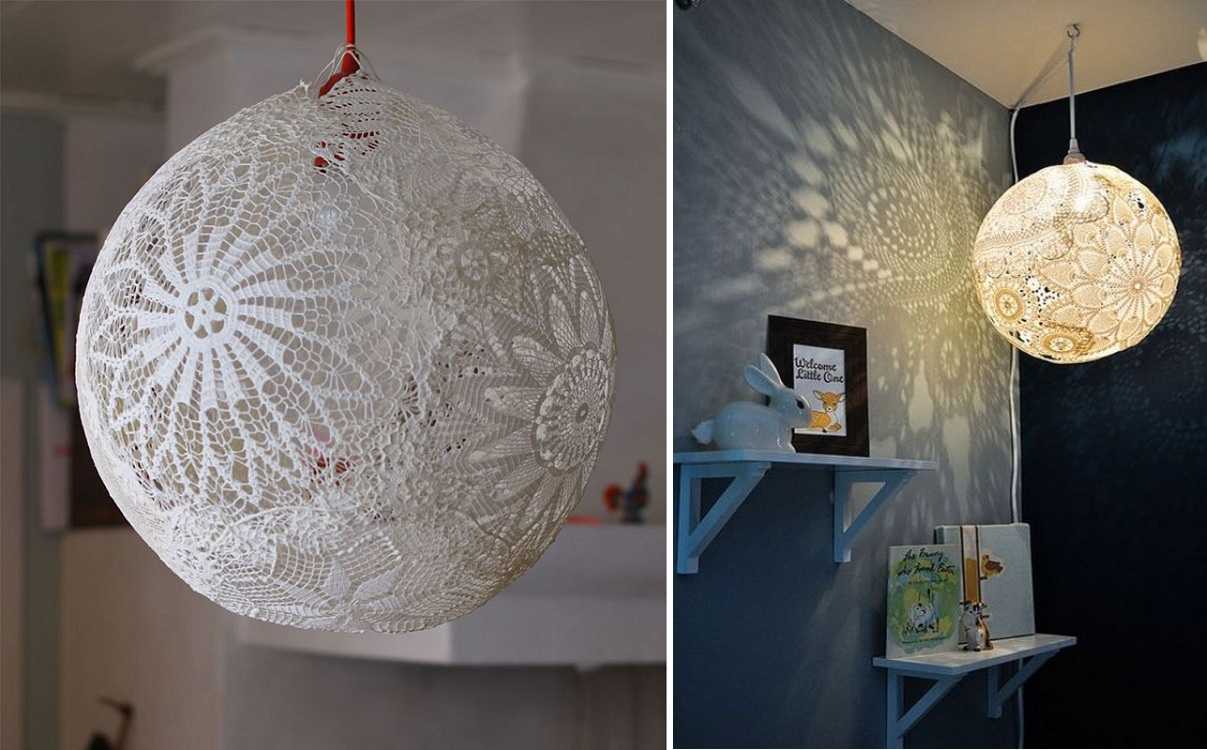
Such a charm can be made from lace napkins
We soak the glue according to the instructions, wait until it swells. We inflate the ball or take the ball, hang it up. When the glue is ready, lay out a napkin on some clean surface, coat it with glue, put it on a ball.
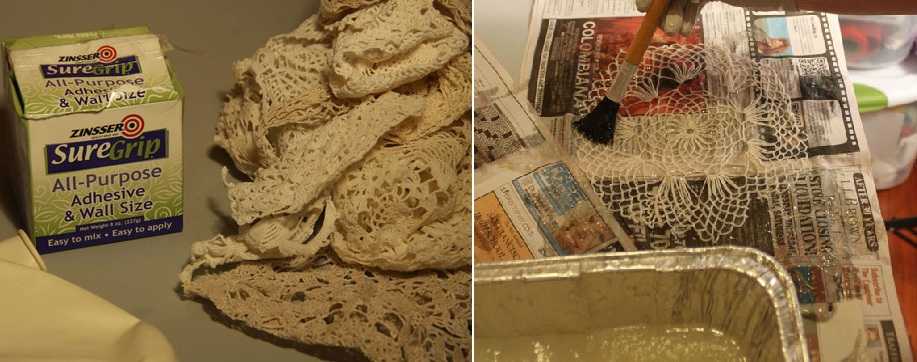
Operating procedure
It is necessary to spread it on such a condition that a hole for the cartridge remains in the center. Glue the napkins one by one. They should be laid out so that the edges overlap slightly. When all the napkins are laid, we coat them with glue again and leave to dry. When the glue is dry, blow off the ball or ball (the ball can be punctured, if not sorry) and take it out through the hole. That's all, the lace lampshade is ready.
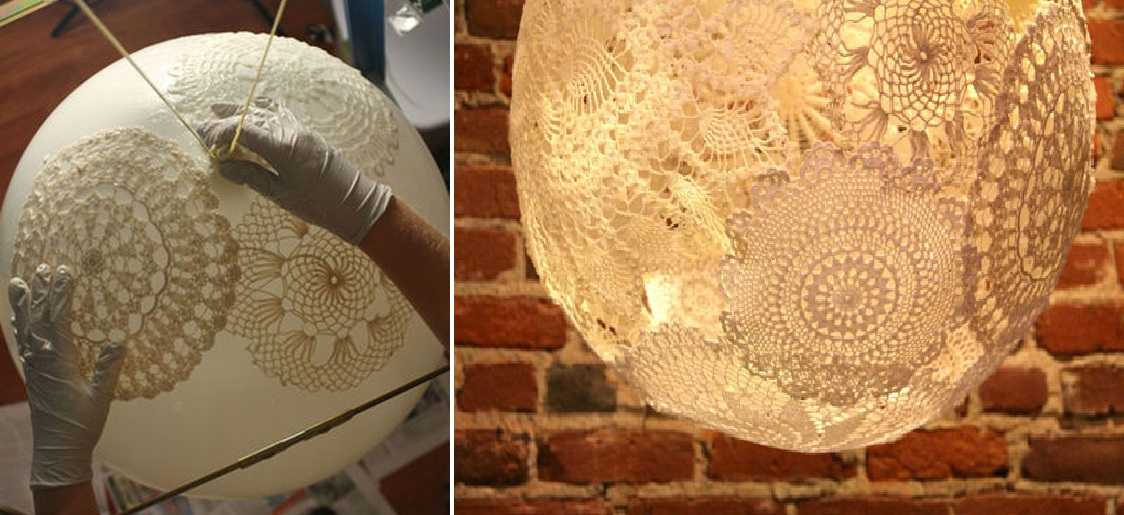
Final stages
In some cases, problems arise with how to hang the finished lampshade on the cartridge. The problem is solved simply - take a transparent plastic bottle, cut off its neck, if necessary, expand the hole to the desired size (so that it fits tightly on the cartridge), then cut off the plastic so that you get a ring 5-7 cm wide.You coat this ring with PVA glue , and from the inside of the ball glue to the lampshade.
Round shades made of threads
Practically using the same technology, you can make round and semicircular stylish shades. Choose a thread of a suitable color. Their composition is absolutely unimportant - the color, thickness and texture are important. They can be shaggy, smooth, twisted, thinner and thicker. The appearance depends on it. It is most convenient to work with medium-thick cotton threads. They absorb glue well and then, after drying, keep their shape perfectly.
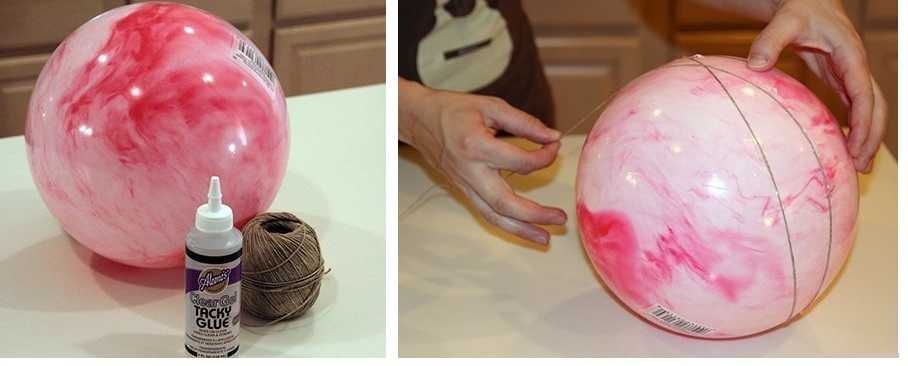
Need a ball, glue and thread
You will also need a ball or a ball. This will be the base of the lampshade that defines the shape. The dimensions of the base are selected at will. The threads will need to be glued, for this you need PVA glue. It is poured into a container, diluted with water in a 1: 1 ratio.
Other glue can be used.It is important that it becomes transparent after drying. These are WB-29 from TYTAN Professional and D2 glue for carpentry work. If you will be using any of these types of glue, read the instructions.
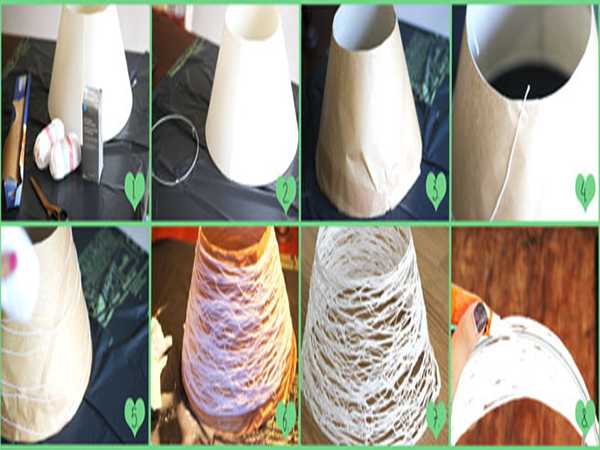
Draw a circle on the ball or ball, which will be slightly smaller than the lamp holder. Draw a larger circle on the opposite side - this will be the lower edge of the plafond. Now everything is ready, we can proceed.
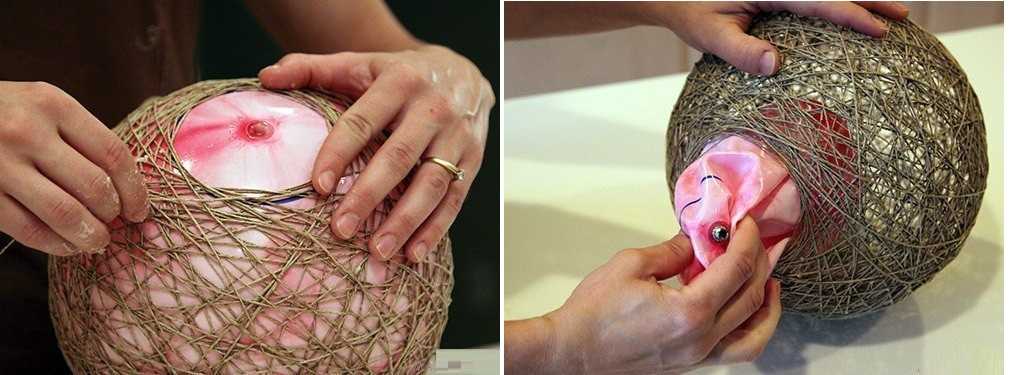
We wind the thread soaked in glue, leaving holes
We coat the threads with glue and wind them around the ball in a chaotic manner. It is more convenient to do this if the glue is poured into a container - you can lower the entire skein there, and just pull the thread slowly. With glue in a tube, everything is not so comfortable: you have to coat areas up to a meter long, wind up, smear again. Time takes much longer. This is if you use non-PVA. But on the other hand, the products turn out to be more rigid and do not sag, do not change shape over time, as can happen with filament lampshades on PVA.
When winding threads on a ball, carefully go around the drawn circles. If you accidentally climbed into the "forbidden territory", we simply move the threads, forming an even (more or less even) edge. When the threads run out or you decide that there is enough density, the process can be stopped. Thread the edge of the thread between others. All. Then we coat the ball with wound threads again with glue (PVA can be poured) and leave it to dry (at least 2 days). To prevent the ball from rolling, we find a bowl or saucepan and use it as a stand.
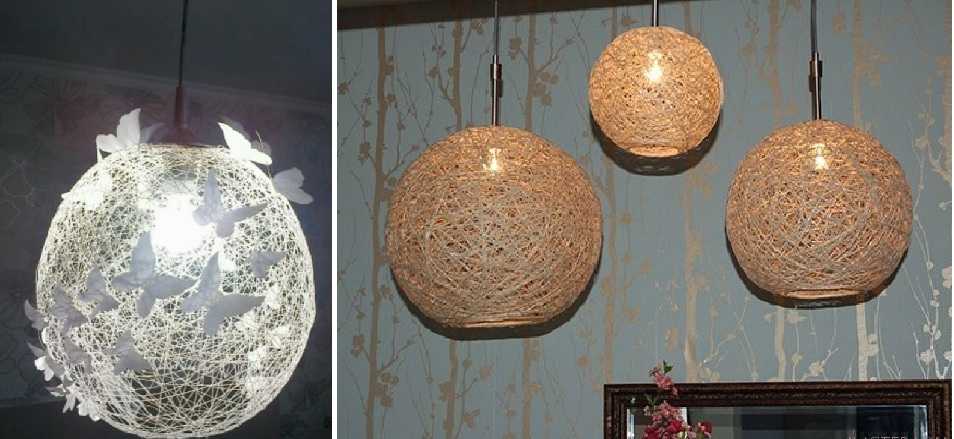
Depending on the threads, we get lampshades for pendant lamps of different style.
The last step is to blow off the ball or ball. If the ball has a nipple, press on it with a thin wire, releasing air. We take out the deflated ball. That's all, you can thread the lamp inside and test the lampshade.
The technology is the same, but the look is very different ...
Using the technology described above, you can make not only round shades. Rectangular, triangular, trapezoidal. Choose a base that is easy to remove, wrap threads dipped in glue, braid, even sticks, newspaper tubes, etc. After drying, remove the base and now, you made a lampshade with your own hands. A couple of examples in the photo below.
If you take a cord, coat with glue, fold a snake out of it and wait until it dries, you get a completely different type of shade / lampshade
From thin plastic or cardboard, wrapped in cling film, we make a cylindrical shade of threads
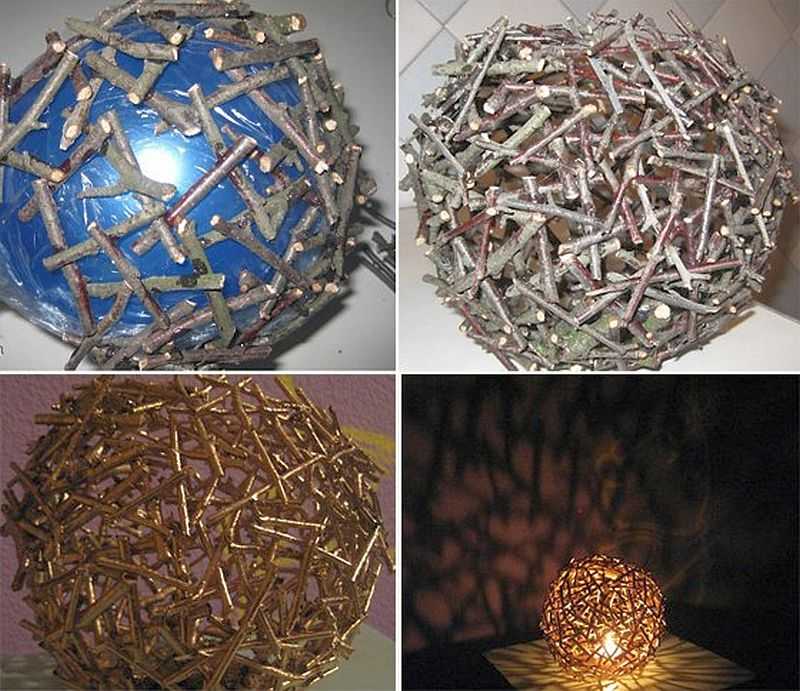
You can also use sticks…. Only wrap the ball with cling film and use not PVA glue, but transparent joiner's
It is a paste-like polymer clay in a tube, which was applied to a milk bag, then dried and the bag was removed ...
Creative homemade shades for lamps, floor lamps and chandeliers
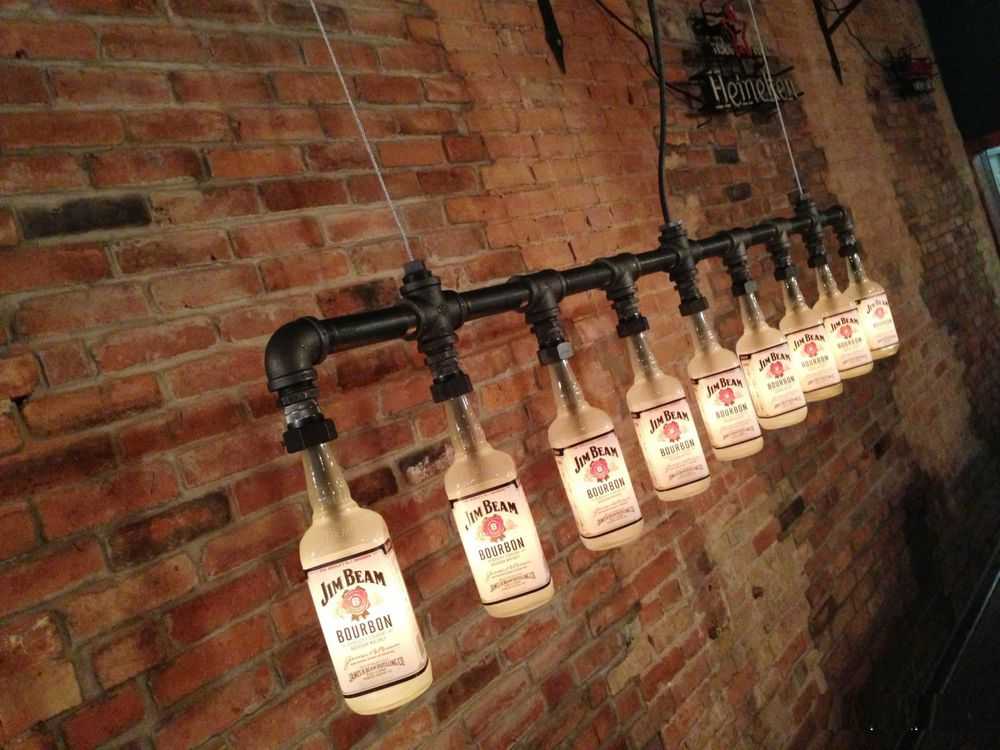
You just wonder why people don't make beautiful and unusual things. A plafond made of a cup, grater, bottle, beer or glass can, metal parts and rings from beer cans ... It seems that everything can be used ...
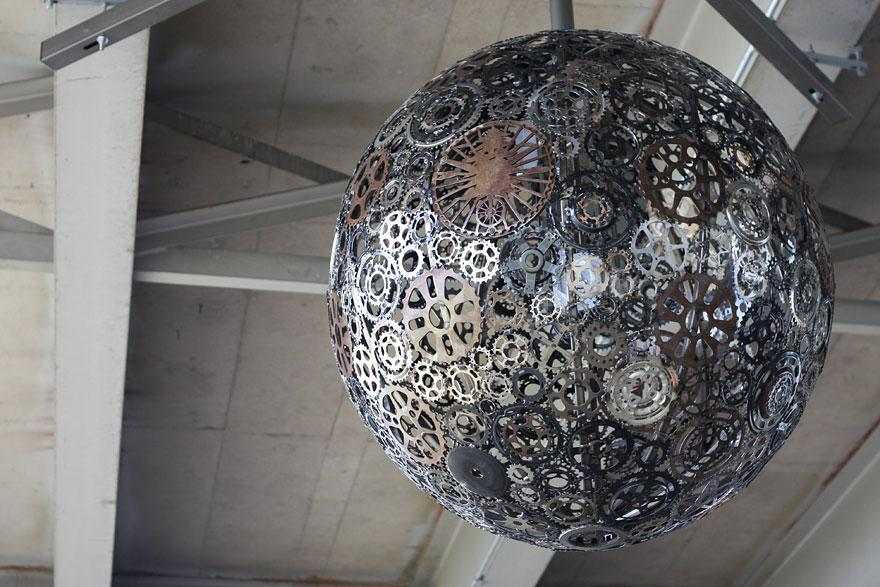
Ideal for style loft
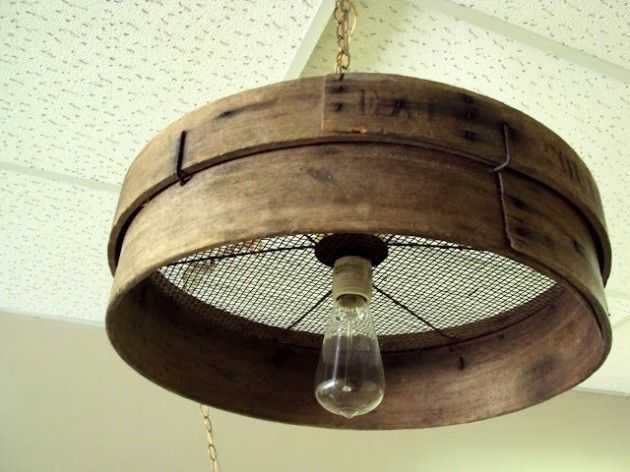
Old sieve shade ... stylish

Do you have old slides and cameras? Make a unique lamp for the photographer!
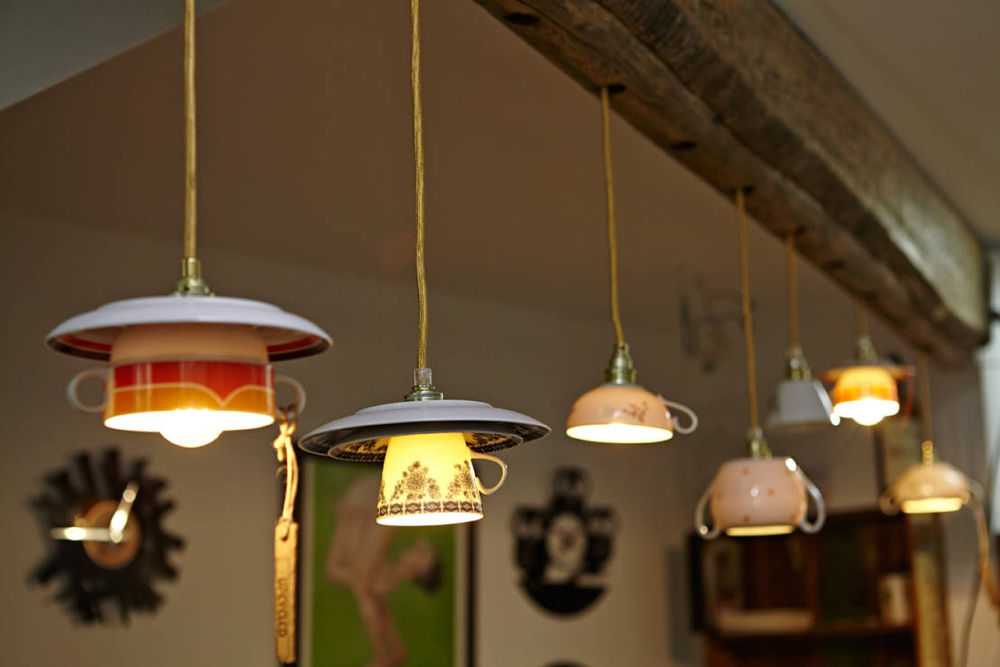
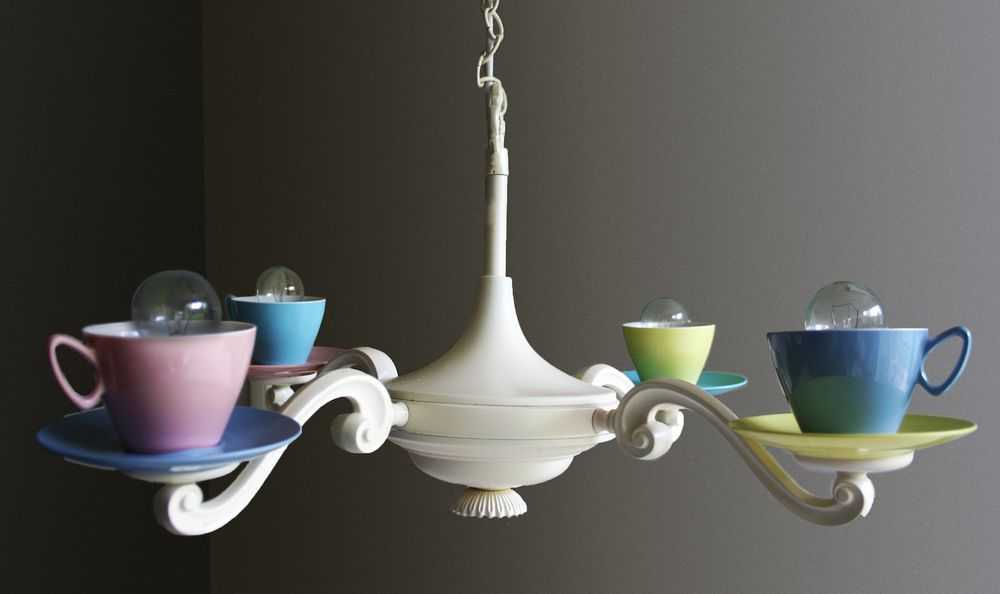
You can't imagine better: shades for a chandelier in the kitchen from cups
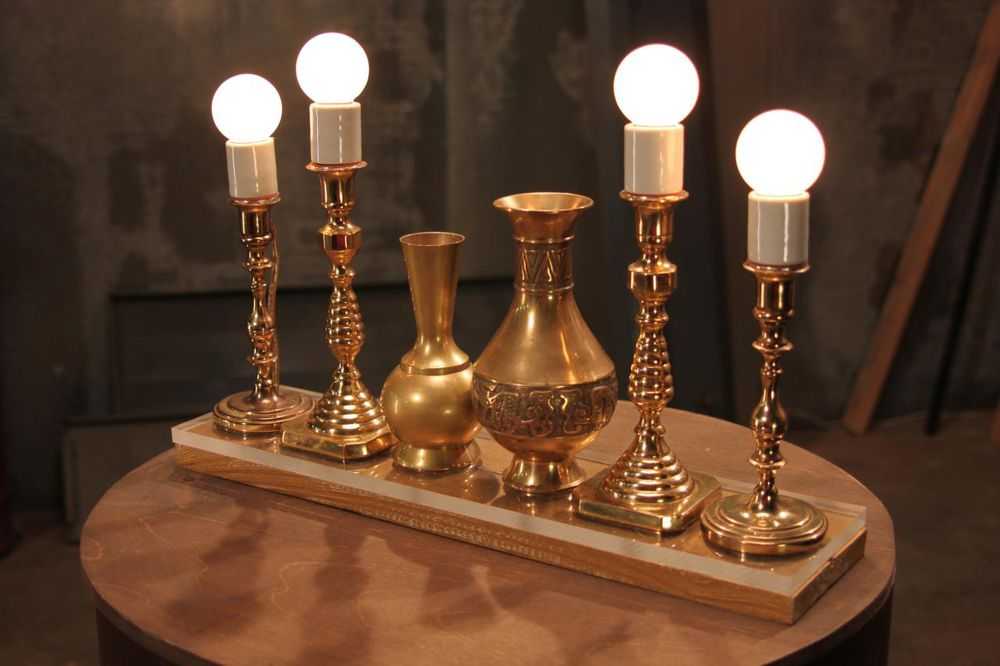
Candlesticks turn into lamps ... without lampshades
Just saw off the bottoms and exclusive shades for a stylish ceiling lamp are ready
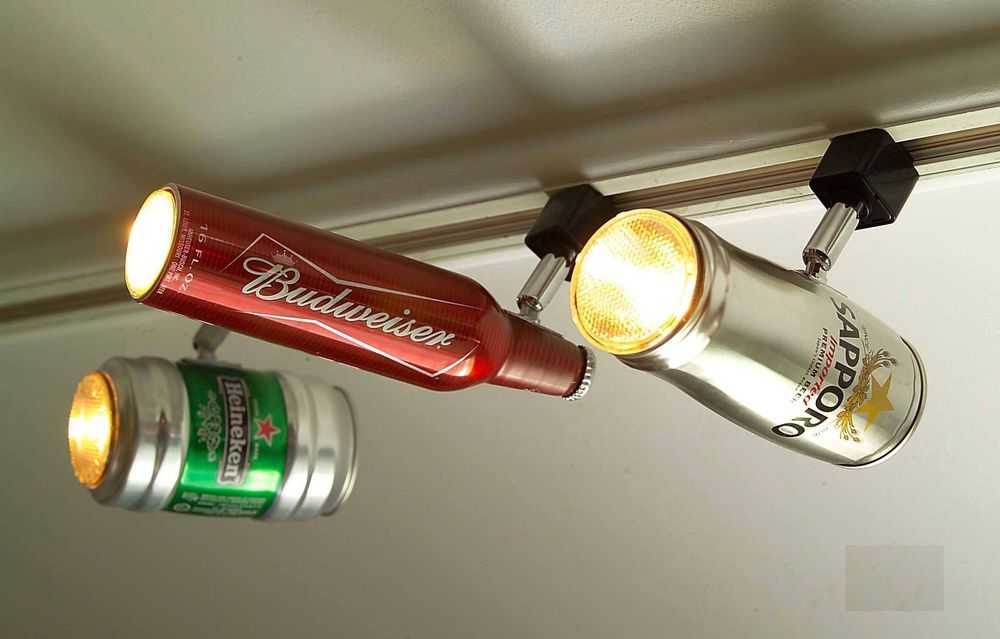
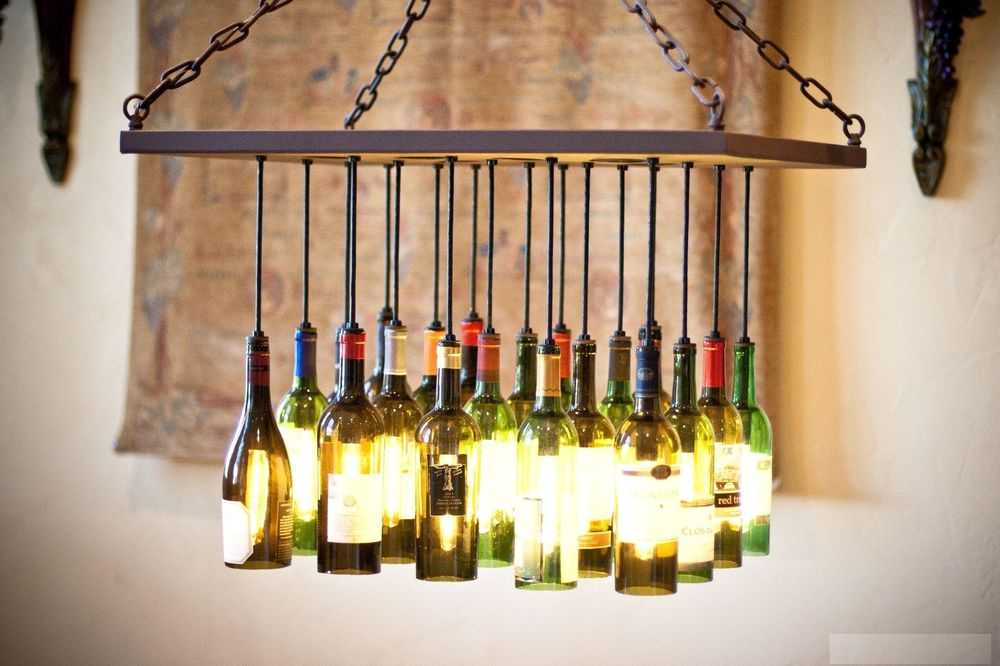
It never would have occurred to me that beer cans and bottles could be used as shades
Another option for a loft
Nice and extraordinary
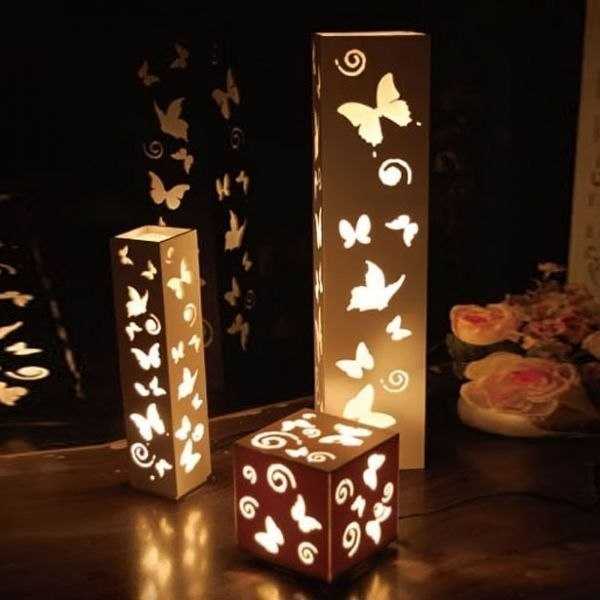
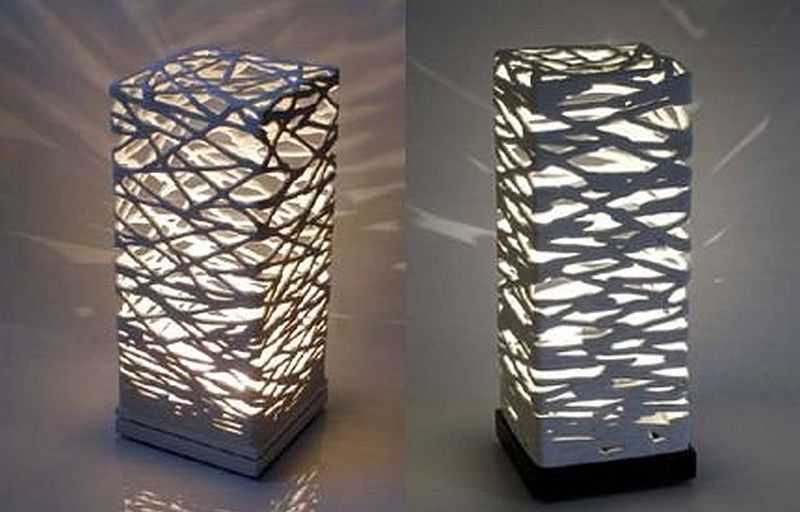
Make curly holes in thin plastic - a beautiful lampshade for a night lamp is ready. Get bored - you can do another
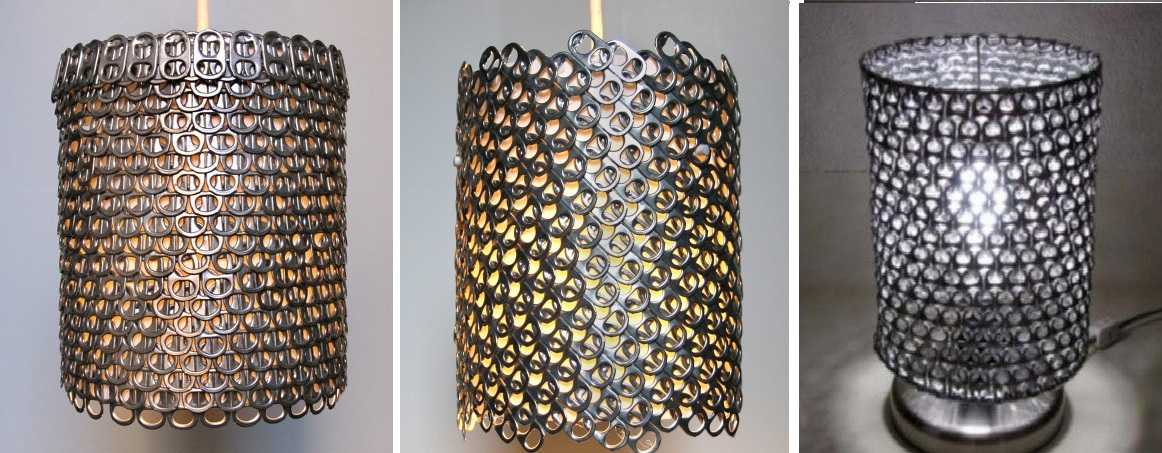
You won't tell in life, but these lampshades are made of hooks used to open metal cans for drinks and canned food ... if you paint them, it will be even more interesting
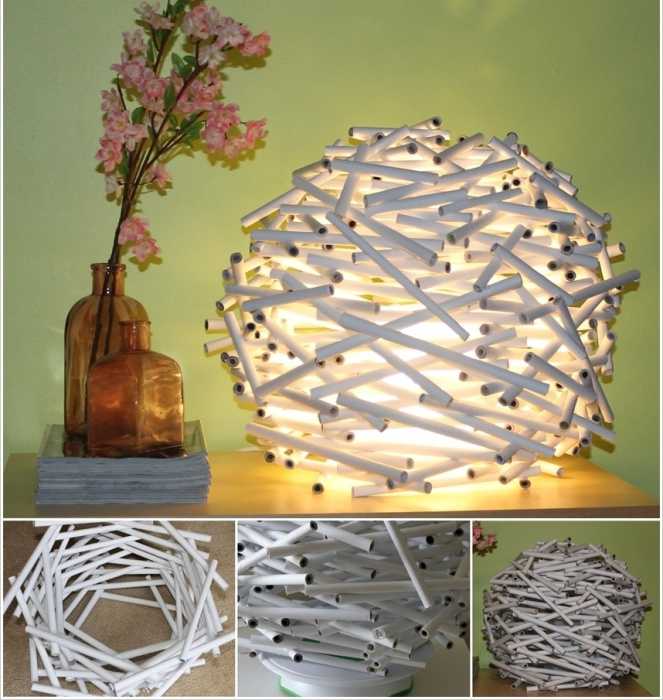
Roll up paper tubes and fold the plafond out of them is a cool idea
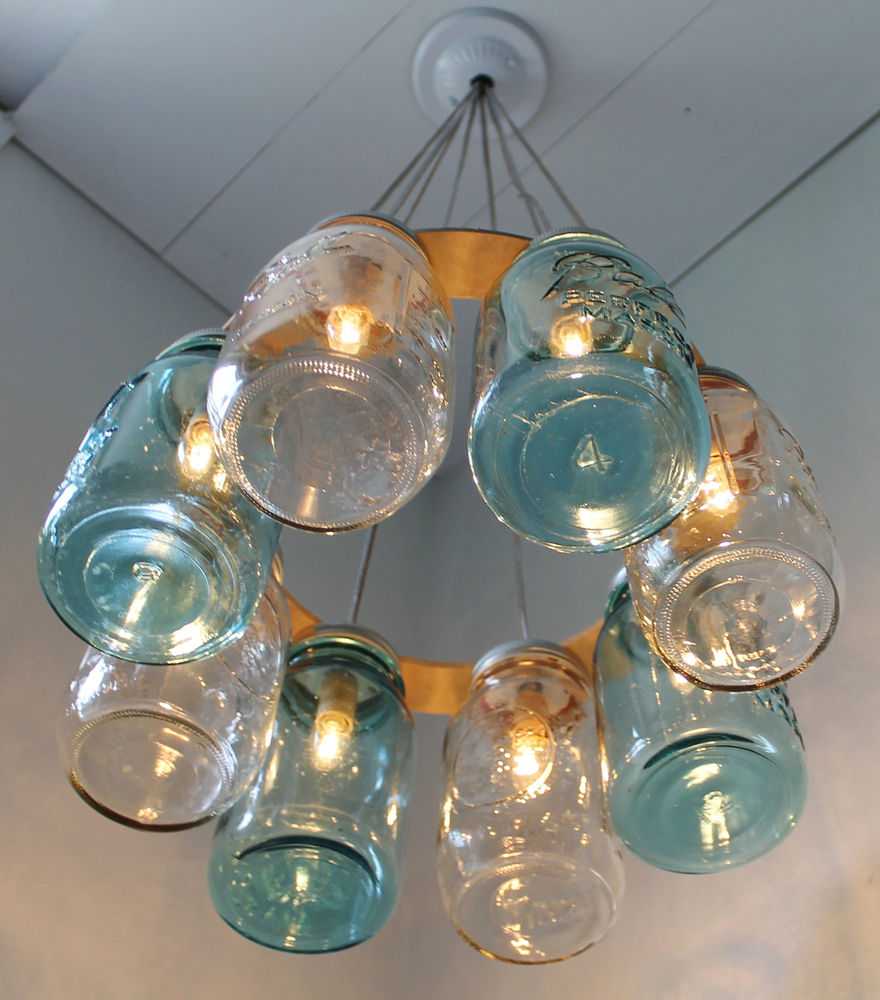
Are there colored glass jars? Make shades for a chandelier in the kitchen

Who would have thought that it would look like this
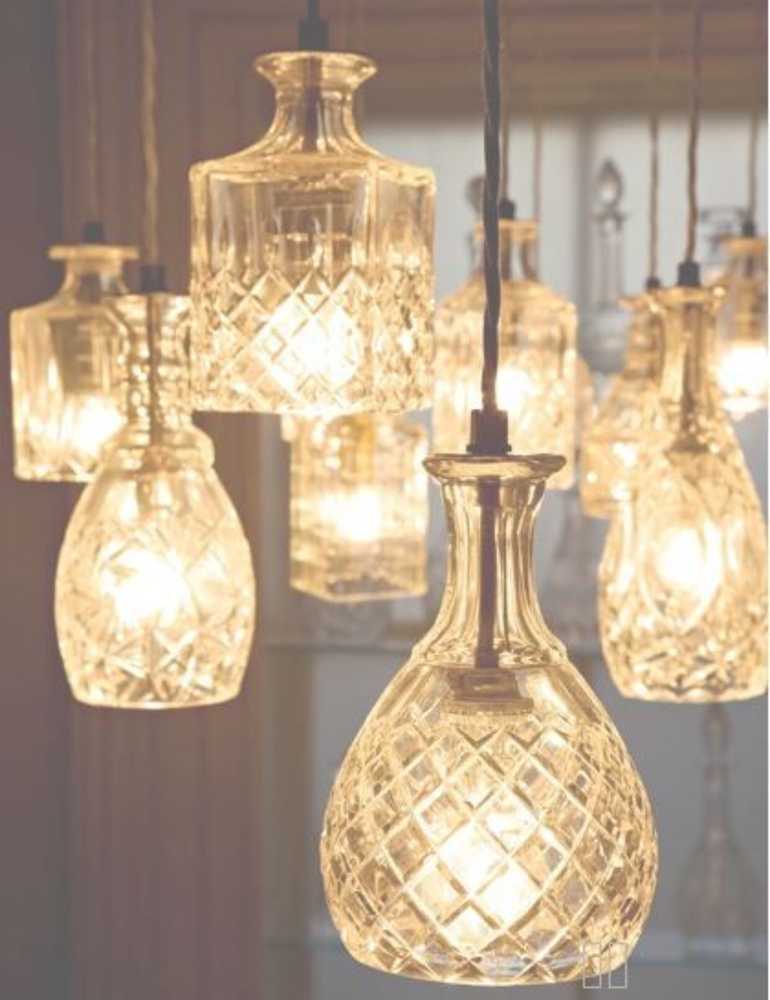
Not sure what to do with grandma's crystal? Make plafonds out of it ...
-
 Buying an apartment: what documents are required, their verification
-
 How to deal with cockroaches in an apartment, the best remedy for cockroaches
-
 How many square meters in a hundred square meters of land: measurement, calculation
-
 Conversion of inches to cm and mm, centimeters to inches, tables, applications, formulas
-
 Floor stands for flowers


super article, thank you!