Toilet flush cistern: device, installation, adjustment, repair
No matter how high-quality the toilet bowl and fittings are, problems periodically arise: either water is not collected, then on the contrary, it constantly flows from the drain. All these problems are associated with fittings (drain and inlet valves), which are placed in the drain tank. Next, we'll talk about how to independently, with your own hands, install it, change, adjust and repair it.
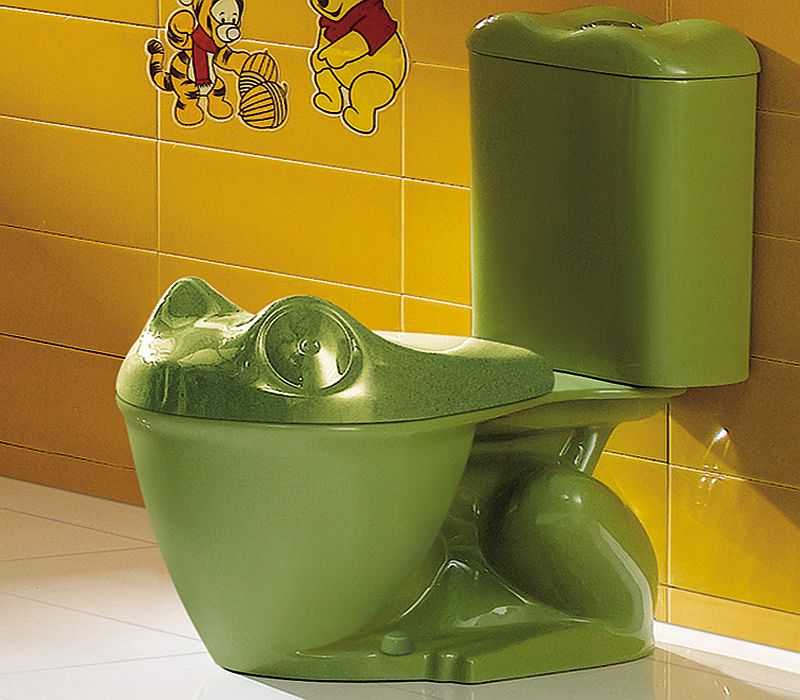
No matter how the toilet looks, the filling in the cistern will be similar
The content of the article
Internal organization
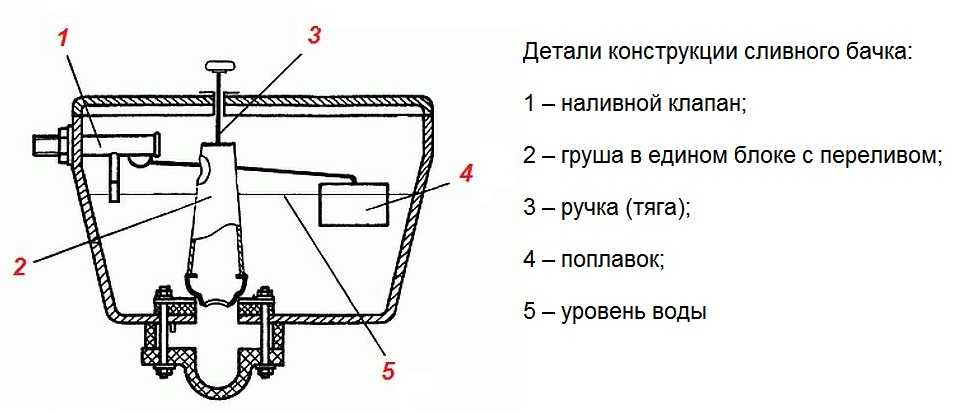
The toilet cistern consists of two simple systems: a set of water and its drain. To troubleshoot possible problems, you need to understand how everything is arranged and works. First, we will consider what parts the old-style toilet cistern consists of. Their system is clearer and more intuitive, and the operation of more modern devices will be understood by analogy.
Internal fittings for this type of cistern are very simple. The water supply system is a float-operated inlet valve. Drain system - lever and bulb with a drain valve inside. There is also an overflow pipe - excess water flows out of the tank through it, bypassing the drain hole.

The device of the cistern of the old design
The main thing in this design is the correct operation of the water supply system. A more detailed diagram of its structure is shown in the figure below. The inlet valve is connected to the float with a curved lever. This lever presses on the piston that opens / closes the water supply.
When filling the tank, the float is in the lower position. Its lever does not press on the piston and it is squeezed out by water pressure, opening the outlet to the branch pipe. Water is gradually collected. As the water level rises, the float rises. Gradually, he presses the piston, shutting off the water supply.
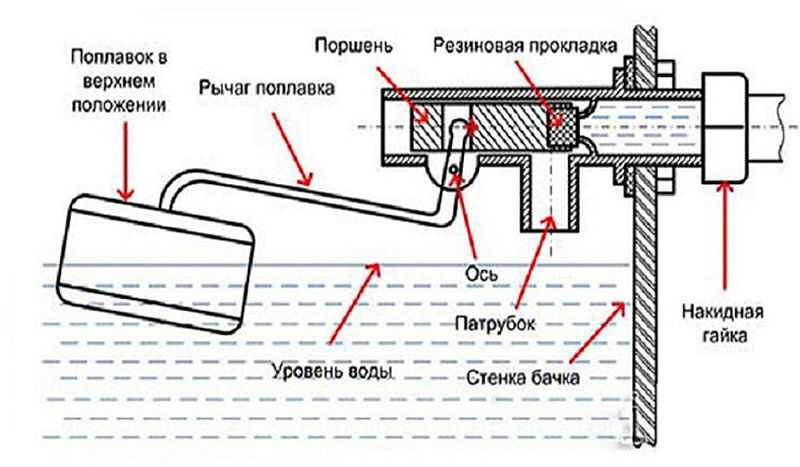
The device of the float mechanism in the toilet cistern
The system is simple and effective, the filling level of the tank can be changed by slightly bending the lever. The disadvantage of this system is the noticeable filling noise.
Now let's look at how the water drain in the tank works. In the variant shown in the figure above, the drain hole is closed off by a drain valve bulb. A chain is tied to the pear, which is connected to the drain lever. Push the lever, raise the pear, the water is drained into the hole. When the level drops, the float goes down, opening the water supply. This is how this type of cistern works.
Modern models with lever drain
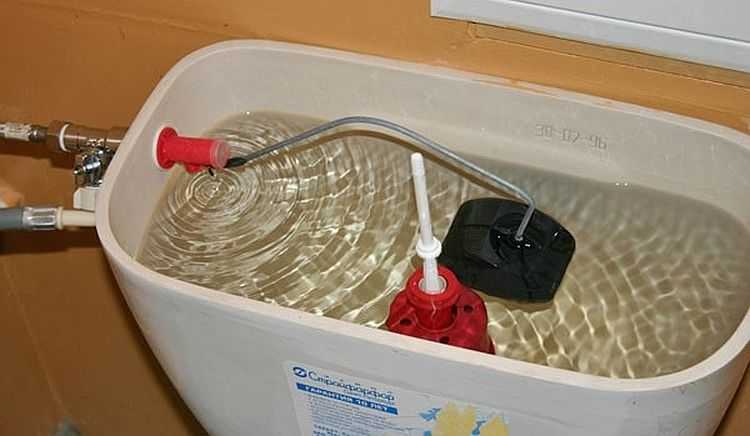
Less noise when filling toilet cisterns with lower water connections. This is a more recent version of the device described above. Here the tap / inlet valve is hidden inside the tank - in the tube (in the photo - the gray tube to which the float is connected).
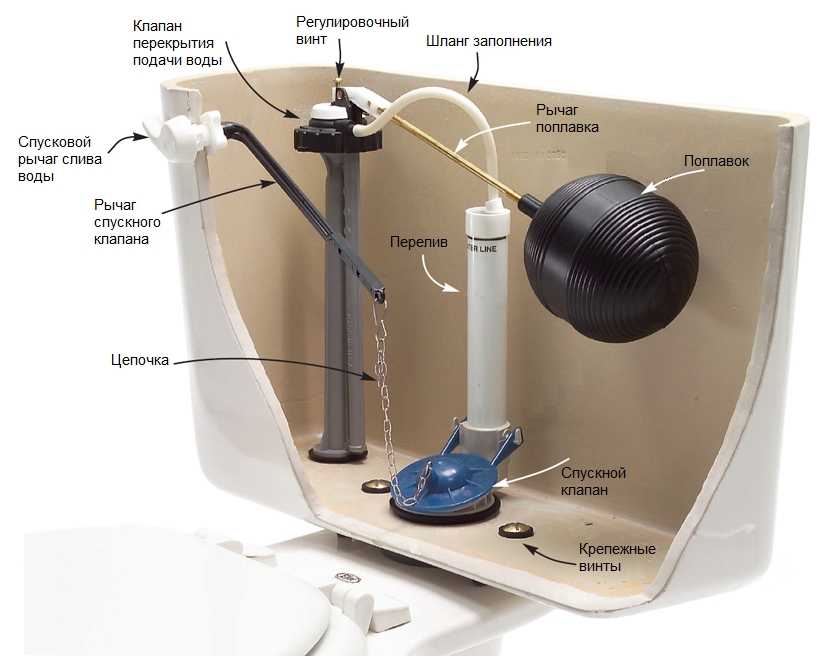
The device of a cistern with water supply from below
The mechanism of operation is the same - the float is lowered - the valve is open, water flows. The tank was full, the float rose, the valve closed the water. The drainage system remained almost unchanged in this version. The same valve that rises when you press the lever. The water overflow system has hardly changed either. This is also a tube, but it is brought out into the same drain.
You can clearly see the operation of the drain tank of such a system in the video.
With button
Models of cisterns for a toilet with a button have a similar water inlet fittings (there is a side water supply, there is from the bottom). Their drain fittings are of a different type.
Tank device with push-button drain
The system shown in the photo is most often found in domestic-made toilets. It is inexpensive and reliable. The device of imported units is different. They basically have a bottom water supply and another drain-overflow device (pictured below).
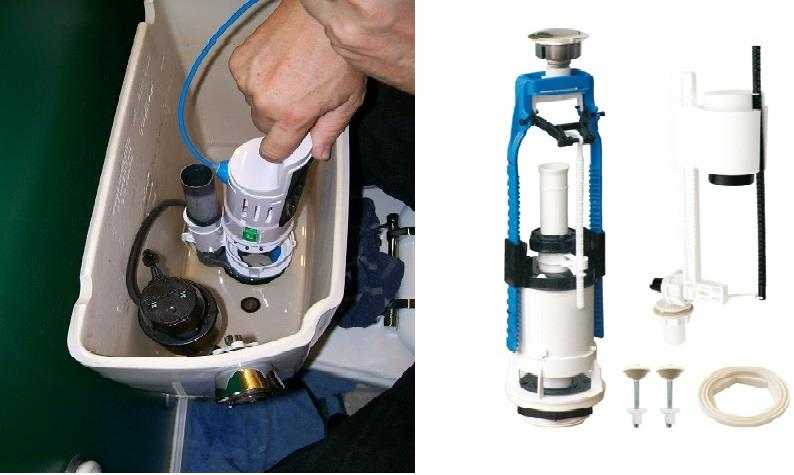
Imported cistern fittings
Such systems are different:
- with one button
- the water is drained while the button is pressed;
- draining starts when pressed, stops when pressed again;
- with two buttons that release different amounts of water.
The mechanism of work here is slightly different, although the principle remains the same. In this fitting, when the button is pressed, the glass rises, blocking the drain. The stand remains stationary. In short, this is all the difference. The drain is adjusted using a swivel nut or a special lever.
Installation and replacement of the drain tank fittings
Most of the problems with the toilet are solved by adjusting or replacing the cistern fittings. In any case, you need to know how to disassemble and assemble the insides of the tank. This skill will definitely come in handy. When replacing, you must first dismantle the old device, and then install the new one. We will describe in detail the whole process, including the installation of new fittings.
How to remove the lid from the tank
If a flush tank with a button is being repaired, it is not always immediately clear how to remove the lid. This is easy to do: press the button, turn the ring.
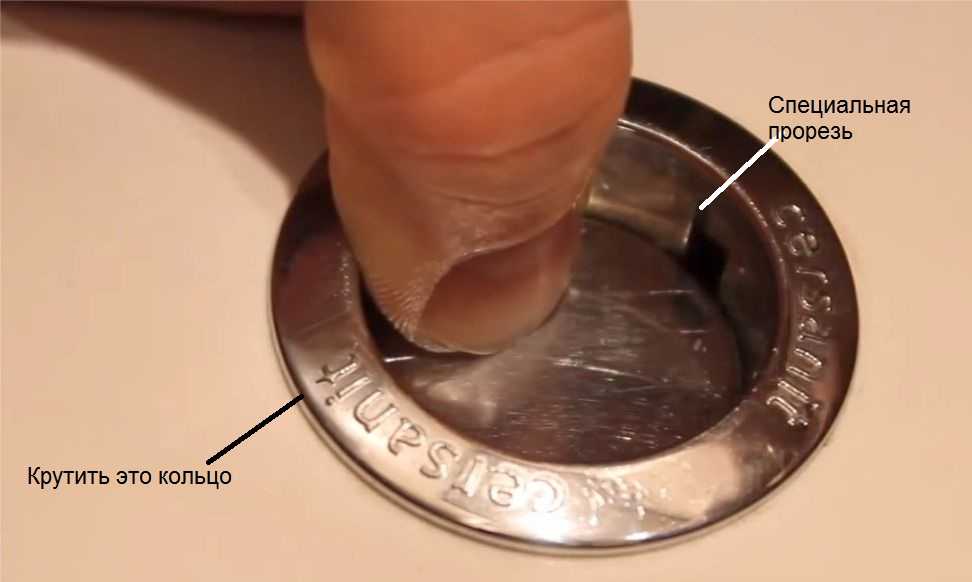
How to remove the lid from a tank with a button
If it does not work with your fingers, pressing the button, consider its inner rim. There are two special slots there. You can take a screwdriver with a narrow end, turn the ring a little with it. Then you can twist it with your fingers.
Then remove the button by pulling it up. That's it, the lid can be lifted.
Dismantling the tank
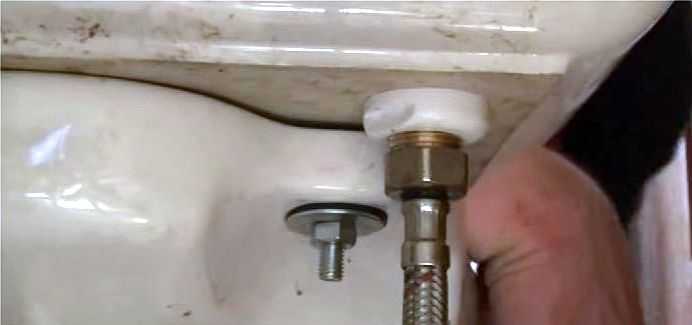
To replace the old cistern fitting, it must be removed from the toilet bowl. First of all, we shut off the water supply, then we drain the water from the tank. Then, using the keys, remove the hose supplying water (it is attached from the side or bottom).
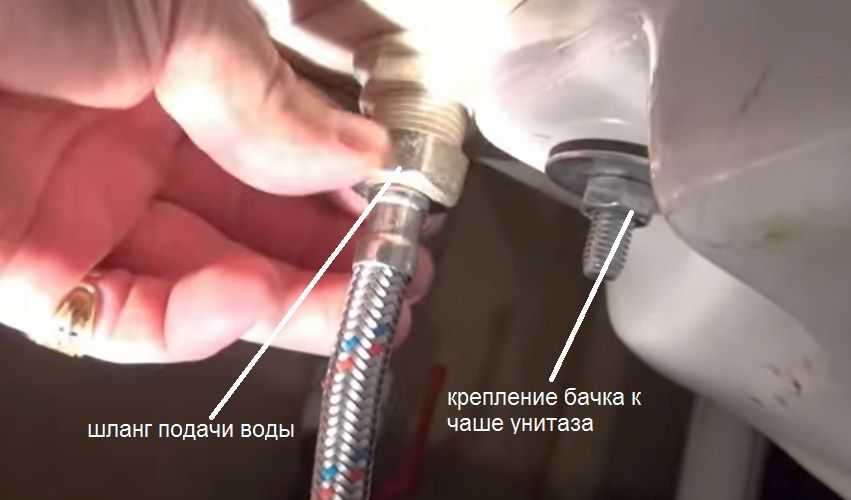
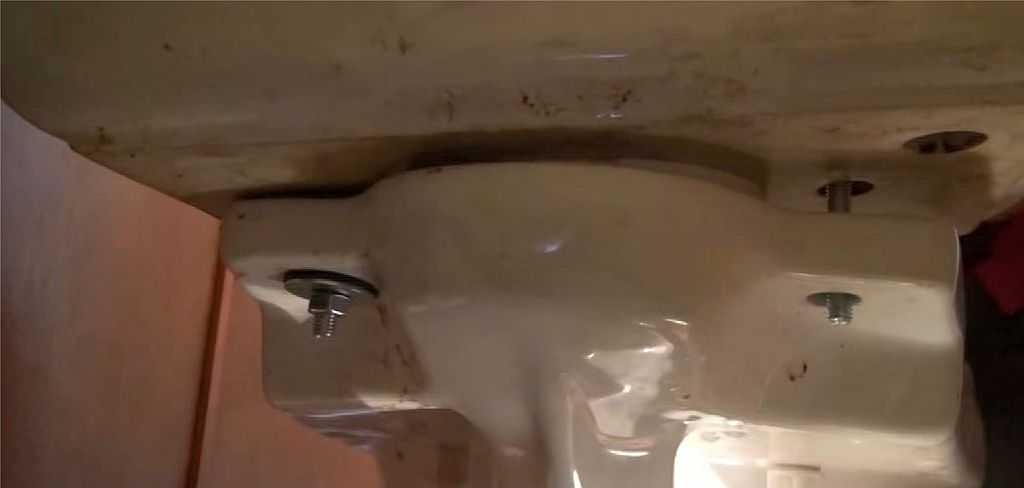
When the water inlet is located at the bottom, it is next to the fastening pins
Next, you need to disconnect the tank from the toilet bowl. If you look under it from below, you can see the bolts, which are tightened with nuts. So we unscrew them using a set of open-end wrenches or adjustable wrenches. Before that, place a container near the toilet bowl or lay a rag - a certain amount of water always remains in the tank, when you unscrew the nuts, it will drain.
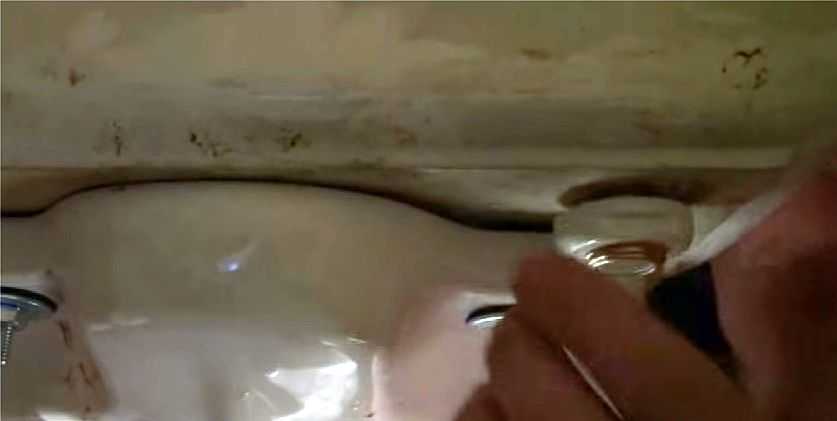
Having unscrewed two nuts - on the right and on the left, we remove the tank. The gasket usually remains on the bowl. If it is deformed or dry, it is also advisable to replace it.
Remove the cistern from the bowl
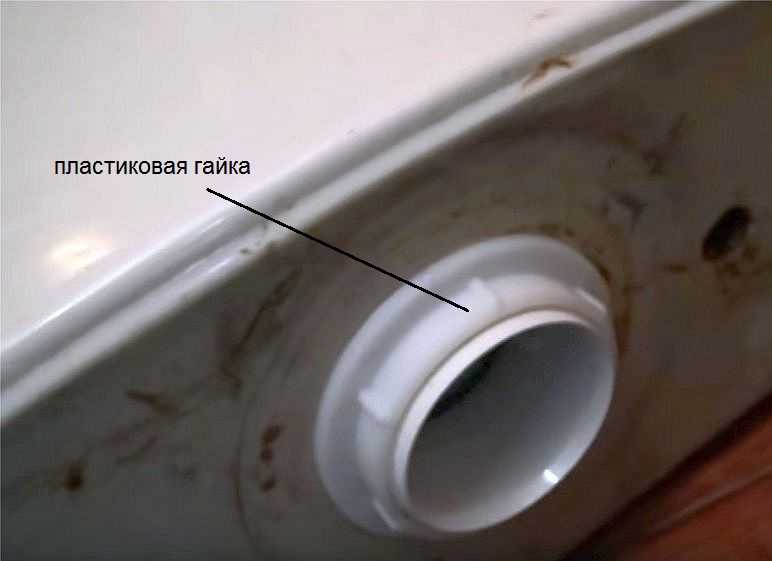
We put the tank on a flat surface. There is a large plastic nut at the bottom. It holds the drain mechanism, unscrew it. Sometimes the first turns have to be done with an adjustable wrench, but do not pinch it too much - plastic can be fragile.
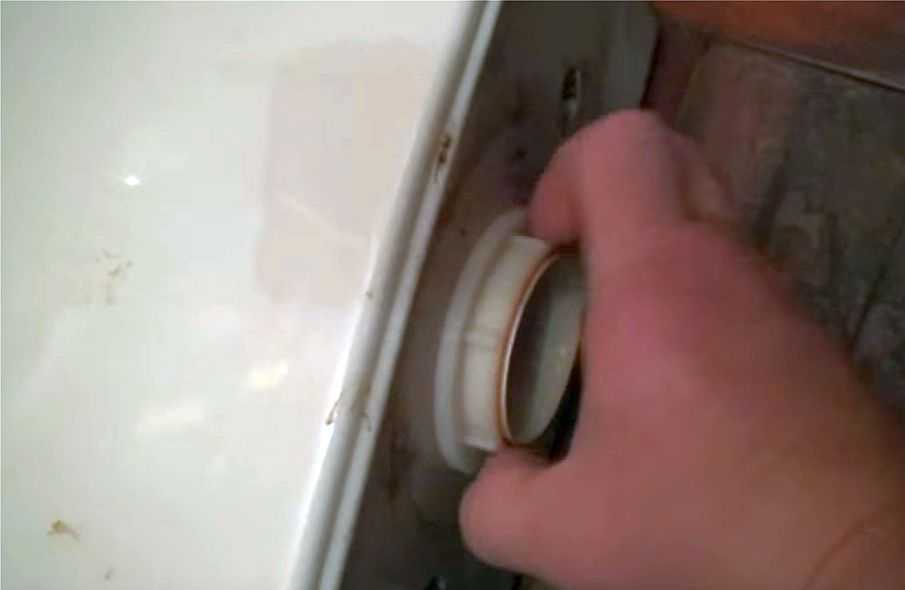
Unscrew the nut holding the drain mechanism
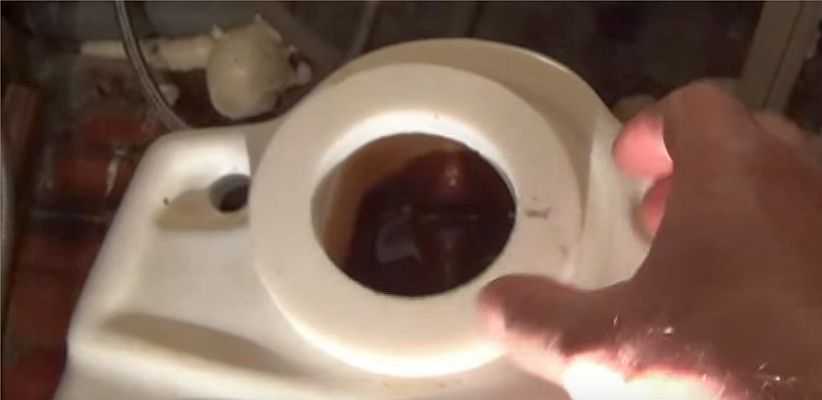
Now the water drainage mechanism can be easily removed.
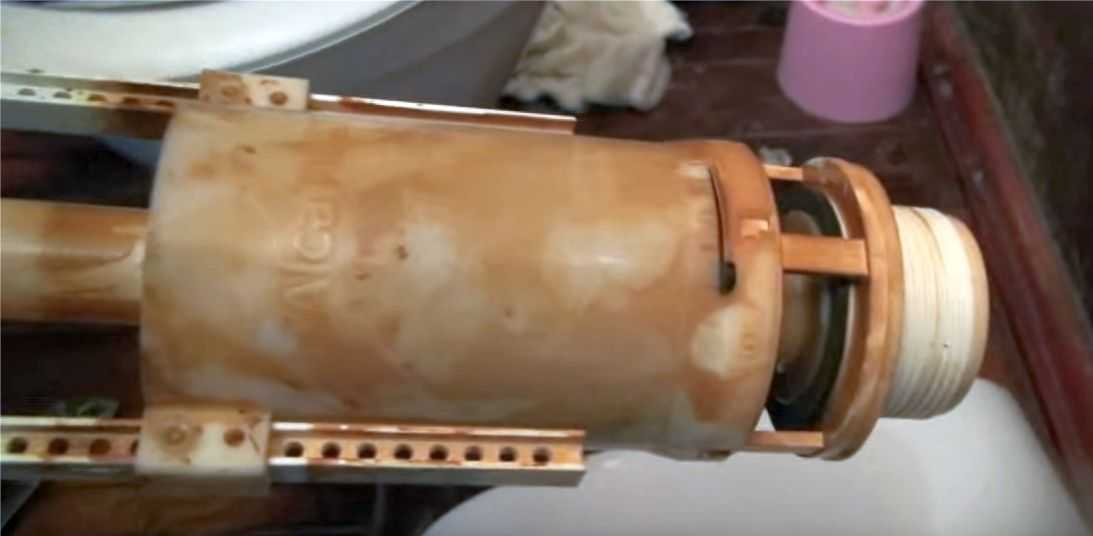
This is how the cistern fittings look after several years of work.
Remove the water supply mechanism in the same way. At bottom feed, the retaining nut is also at the bottom (right or left of center).
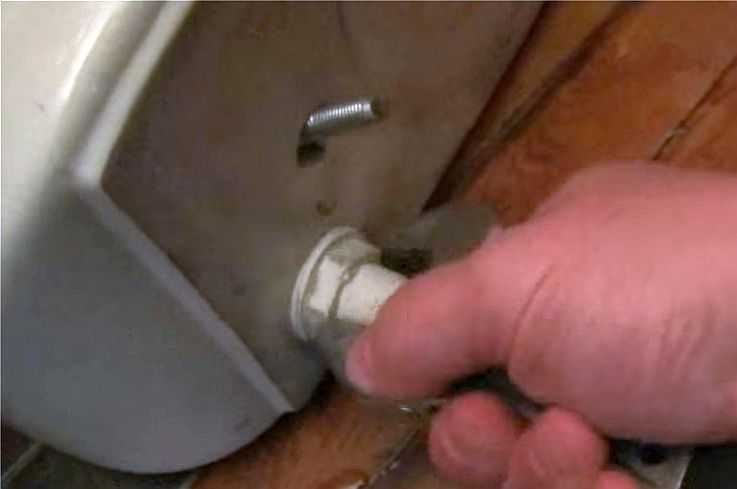
Water feed mechanism retaining nut

This removed the water supply to the tank
After that, we look inside the cistern. Usually, rusty sediment, small metal particles, sand, etc. accumulate at the bottom. All this must be removed, if possible, rinsed. The inside must be clean - debris trapped under the gaskets can cause a leak. After that, we begin the installation of new fittings.
Installation of cistern fittings
Everything happens in the reverse order. First, we install a new stand for the drainage mechanism. We unscrew the plastic nut from it, put a rubber gasket on the pipe. It can be white (as in the photo) or black.
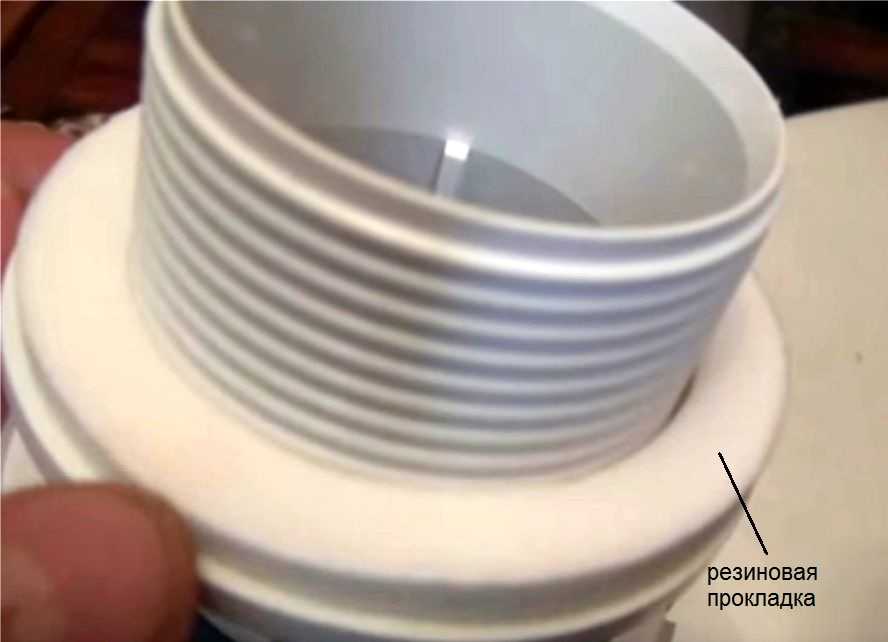
We put on a rubber gasket on the thread
We put the device inside the container, from the outside we screw in a plastic nut. We twist it, as long as possible, with our fingers, then tighten it a little with a key. You can't pull it - it will burst.
Install and tighten the nut
Sealing
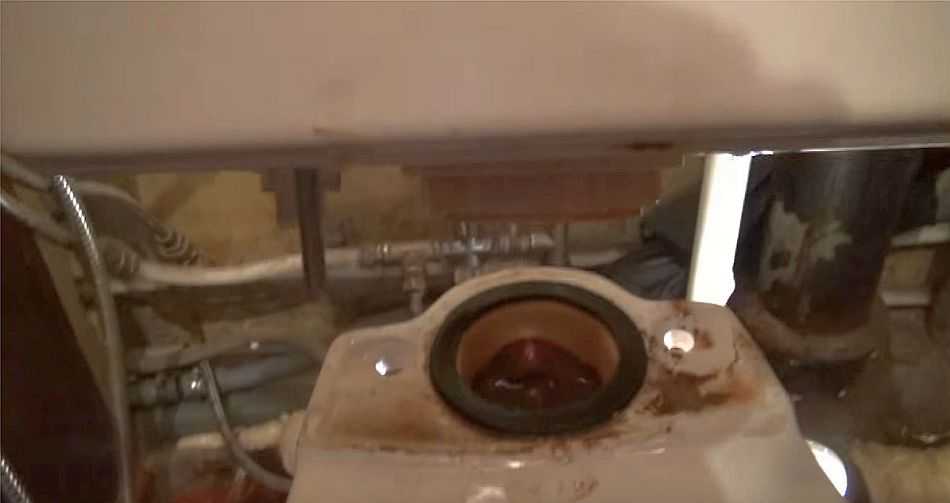
Now, on the toilet bowl, we replace the O-ring that seals its connection with the cistern. Dirt and rust often accumulate in this place - we wipe it off beforehand, the seat must be dry and clean.
We put the O-ring
We install fastening bolts inside the tank, not forgetting to put gaskets. We put the cistern in place until it is possible not to level it. The main thing is to get the screws and the exhaust part into the seats. We take a washer, a nut and screw them onto the screws.
We tighten the mount
When both nuts are installed, but not yet tightened, level the container. Then, using the key, we begin to tighten the mount. We twist it a few turns from the right, then the left.
We put the exhaust valve
Finally, we install the inlet valve for the drain tank. It could have been installed earlier, but then it is inconvenient to install the mounting bolts - too little space. We also put on a gasket on the outlet pipe, then install it inside, fix it with a nut.
We tighten the intake valve mounting nut
The next step is to connect water to the same pipe. Before connecting the flexible water hose, open the water for a while, making it possible to remove the scale that accumulates every time after closing the tap, even for a short time. After draining a certain amount of water (substitute a bucket so as not to wet the floor), connect the hose to the fitting (turn off the water again).
We connect water to the toilet cistern
Although the fitting is metal, it is also not necessary to tighten this connection too much - first with your fingers, then one turn with a wrench. If, when you turn on the water, drops are found, you can pull it up another half turn. After that, we check if the system is working properly. If everything is correct, install the lid, fasten the button. You can test it again. This completes the installation of the drain tank fittings. As you can see, everything can be done by hand.
Adjustment and repair
During the operation of the toilet, problems periodically arise - either it flows, or, on the contrary, it does not collect water. Sometimes, tired of the inconvenience, people buy new toilets. But in vain. Most of the faults are eliminated in 10-20 minutes. Moreover, everything is so simple that everyone can cope. You don't have to call a plumber. You can do everything yourself.
Adjusting the water level
It will be about devices with a bottom water supply. After installation, the toilet cistern needs to be adjusted. By default, they come from the factory set to the maximum amount of water in the container. This amount is often excessive. With the help of a simple adjustment, we can reduce the volume of water in the tank. For this:
- Turn off the water supply, drain the water.
- We unscrew the button.
- Remove the cover.
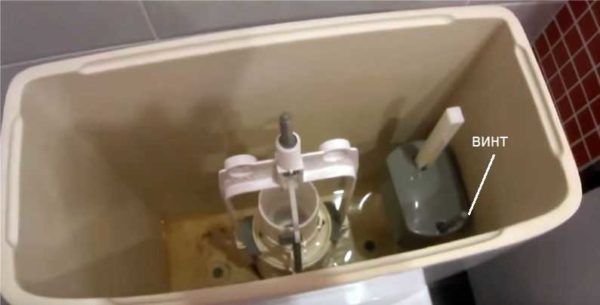
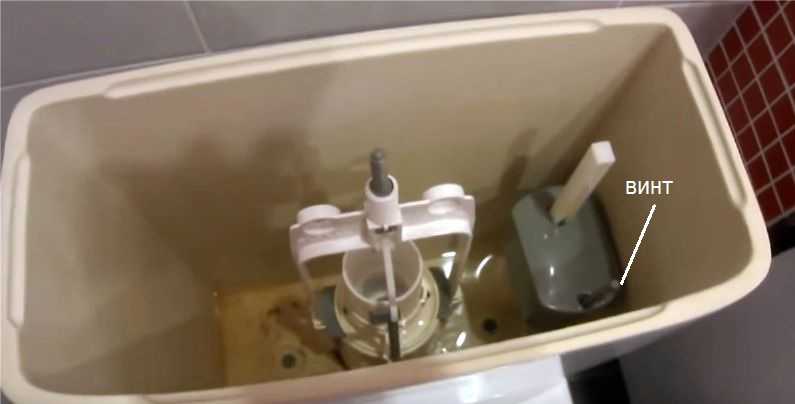
Where is the adjusting screw
- The float mechanism has a plastic screw. By unscrewing / twisting it, we change the amount of water. If you need to reduce the amount of water, tighten the screw, lowering the float down. At the next filling (you can turn on the water), the water level should drop.
- We put the cover and the button in place.
The same procedure is necessary if water is constantly leaking from the tank. One of the reasons is the float raised too high. Because of this, water flows down through the overflow system.
With a side water supply and a float mechanism, the adjustment is even easier - we change the position of the float by bending its lever. On the one hand, it is easier, but on the other, it is more difficult. You have to bend it many times to achieve the required level.
By bending the float lever, we change the water level in the drain tank
Toilet cistern leaking
If the water in the toilet is constantly leaking, and its level is normal, move on. There are several reasons for this leak. And if so, then the methods of elimination will be different.
- The sealing gum under the drain valve in the tank silted up, dirt got under it, a groove (or several) appeared on its surface. The method of treatment is to clean the existing gasket or replace it with a new one. To reanimate the old one you need:
- turn off the water, drain it,
- remove the escapement by unscrewing the plastic nut from below;
- pull out the drain valve, remove and examine the gasket, clean it from settled particles, if necessary (there are grooves), grind it with very fine sandpaper to smoothness;
- install in place, connect everything and check the operation.
- The escapement itself was demolished. To check if this is the case, you can slightly press on the mechanism with the cover removed. If the flow has stopped, then this is the case. Still leaking - try cleaning the gasket (described above) or replacing it. If it stops leaking when pressed, you can replace the fittings or make the glass heavier.
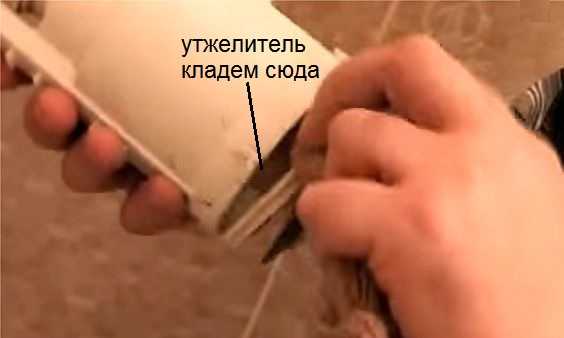
Where to put the weighting agent
To do this, remove the escapement and put something heavy in its lower part. It can be several pieces of metal, a sock into which pennies were poured, sand, etc. We put the device in place and check the work.
Water is not collected
Another problem that you can fix with your own hands is that water is not collected in the drain tank. Most likely the matter is in the blockage - the filter or tubes are clogged. Long storytelling, better watch the video.