How to make a bath screen
You cannot find a ready-made screen for every bathtub. For some, it is set high, for others, on the contrary, it is low; there are also baths of non-standard sizes. In addition, not everyone wants to put plastic - there is no trust in the material or they do not like it externally. In all these cases, you need to make a screen under the bath with your own hands or call a master. In any case, it doesn't hurt to know how you can and should do everything.
A do-it-yourself bath screen can be made with at least two sliding hatches or shelves
The content of the article
Materials and requirements for them
A do-it-yourself bath screen is made from:
- galvanized profile sheathed with sheet material:
- moisture resistant plasterboard;
- moisture resistant or laminated plywood with a thickness of at least 10 mm;
- GVL (a good choice, since it is absolutely not afraid of moisture and does not deform);
- bricks;
- aerated concrete 50 mm thick;
- plastic panels and guides for their installation (this option is exclusively decorative, suitable only for cast iron or steel bathtubs).
All these structures, except for the last one, need finishing. Most often it is porcelain stoneware or ceramictiles, the same as those laid on the walls bathroom.
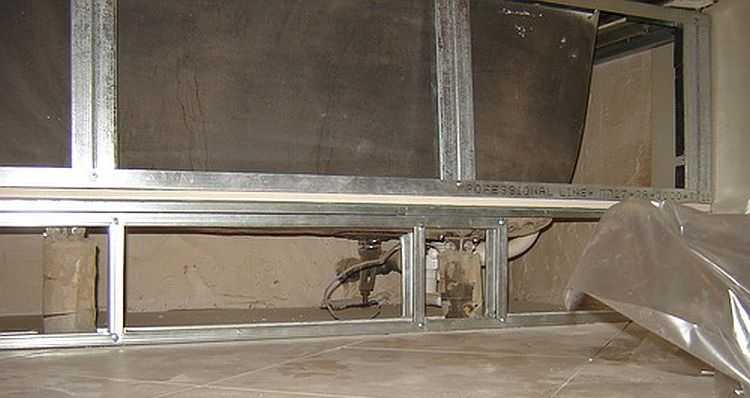
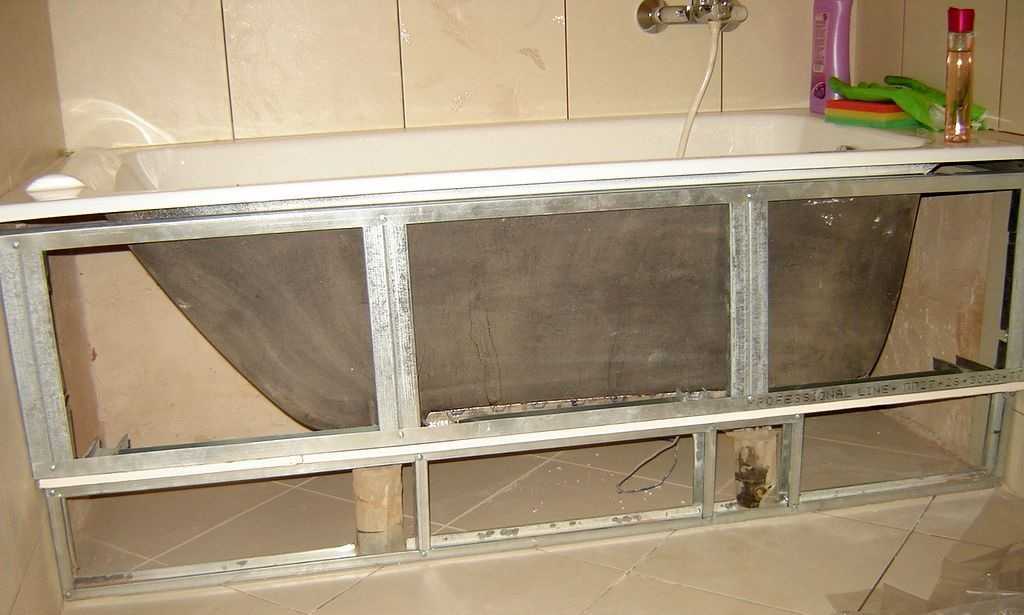
The most common version of a homemade bath screen is made of profiles and drywall. In order for the structure to be reliable and not to bend under loads, the profile must be taken with a thick wall, or reinforced. Also a prerequisite is good quality galvanizing. If possible, you need to take branded profiles so that there are no problems later - after all, high humidity in the bathroom is the norm.
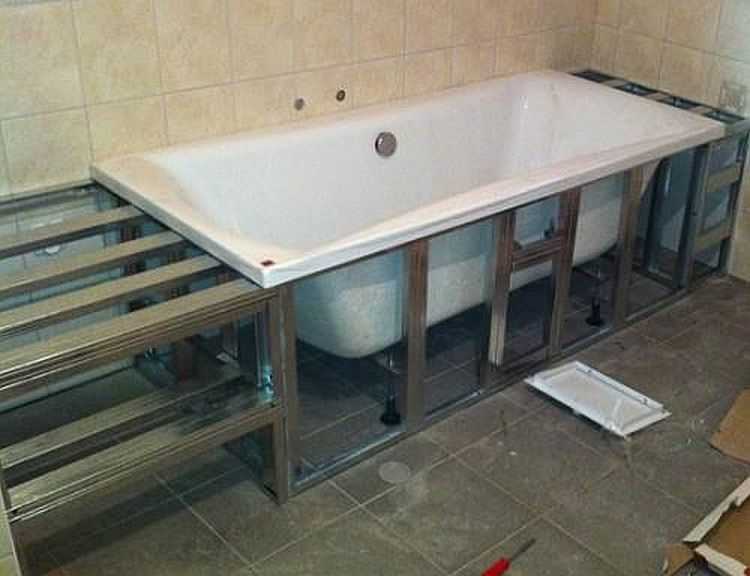
Galvanized profile frame for sheathing with sheet material
The sheet material for the frame must be moisture resistant. This is a prerequisite. And even in this case, before installation, it will not hurt to prime it with a composition that increases its water-repellent properties. It's not bad if this composition is also antibacterial - protection against mold and mildew will not hurt.
Brick screens are made mainly for acrylic baths - so that part of the load can be transferred to the brick wall. Although, if desired, the frame from the profile can be made with sufficient bearing capacity - to make double reinforced racks.
If it is decided to make a brick screen under the bathtub, it must be ceramic, red. It is better not to take silicate because of its hygroscopicity. Ceramic brick is also hygroscopic, but its absorption capacity is less. In order to minimize possible problems (coloring from high humidity), it is advisable to cover the masonry from the inside with a layer of plaster. It is not easy, but if desired, it is possible - to apply the solution as the screen is being erected. Special care is not required, the main thing is to protect the brick from moisture.
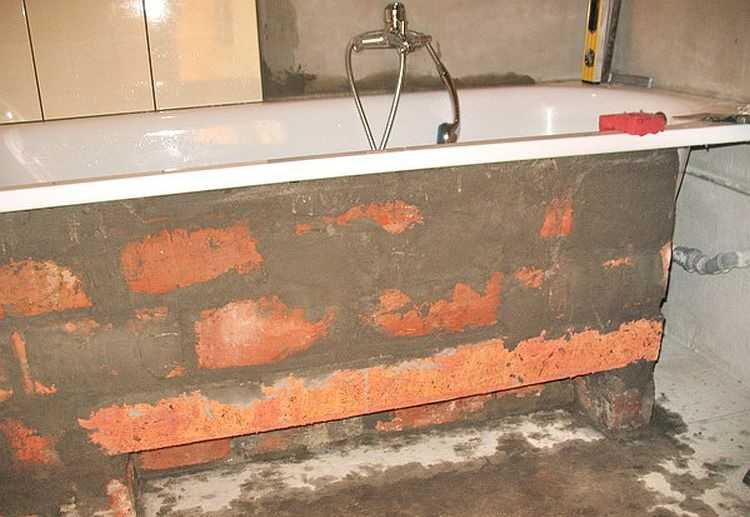
Bathtub brick screen ready for tiling
Another version of the screen under the bath, which you can make with your own hands - from aerated concrete. This material is easy to process. The required relief is formed easily, even with a sharp piece of iron, and the block is cut with an ordinary saw. For all that, the blocks have a good bearing capacity. So this material can also be used for a homemade acrylic bathroom screen. In addition, the blocks are large, so this small wall folds very quickly.
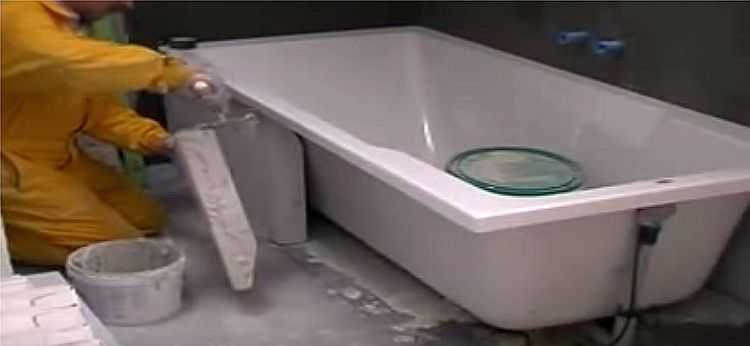
Laying the screen under a foam concrete bath
Note! In the photo above, you see a block that has been worked on one side. This is done so that after laying the tiles, it is flush with the sides of the bathroom, and does not protrude outward.For the same purpose, when installing, the blocks are slightly recessed, leaving a gap equal to the thickness of the tile and tile adhesive.
In the photo, the master keeps the underworked part pointing down, but when laying the block, they turn it over. In this position, glue is applied to its lower part, which fixes the block to the floor. Glue is applied to one more side face and to the top. This ensures fixation with the bath rim and the previous block. The technology for making a screen for a bathtub made of aerated concrete is not difficult, if you have at least some experience in masonry, do it.
Constructions
It will be about how you can make a screen for a bath with your own hands so that it is functional, beautiful and comfortable. Everyone has their own ideas about convenience and beauty. Therefore, we will consider the possible options, and you yourself will decide how best to make it for you.
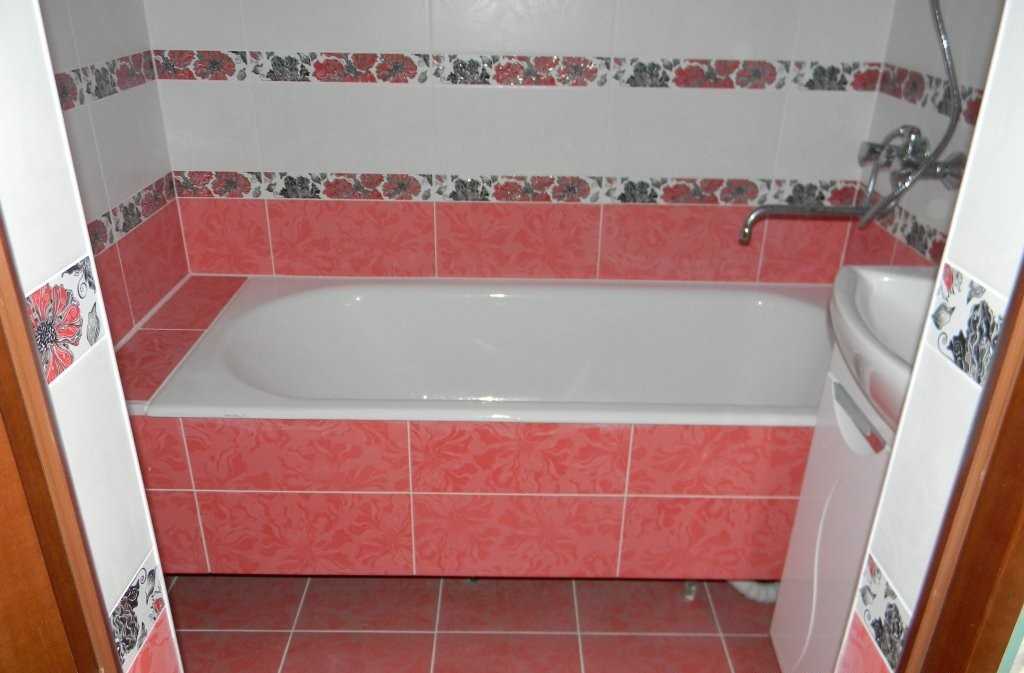
Wide rim or not
Sometimes a wide rim is made around the bathroom. It turns out that it is, as it were, inserted into the case. On the one hand, it is convenient - you can put something on the sides and from an aesthetic point of view, the bathtub fits into the interior more harmoniously.
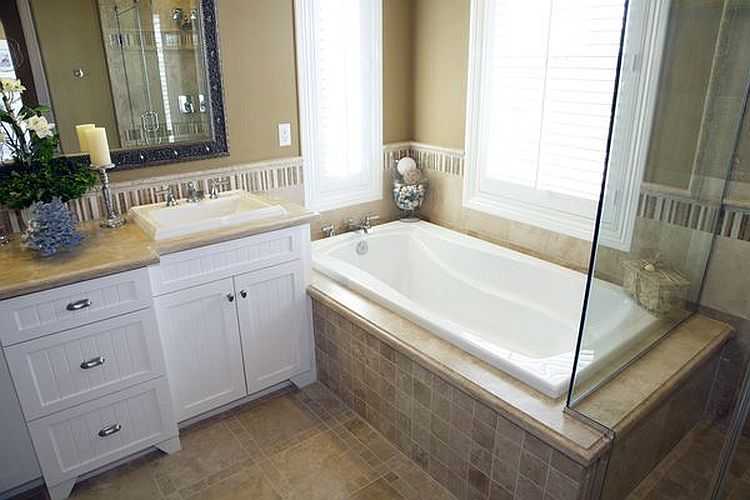
An example of a bath screen with a wide rim
But not everyone can afford to allocate a large space. Bathrooms are usually not happy with their size and the extra 10-15 cm can be critical. In addition, this type of installation can be inconvenient for the elderly. To get into the bath, you have to take a big step, which is not always possible for them.
But this option has another positive point: under the bathroom you can make large shelves. They can be open or with sliding / hinged doors.
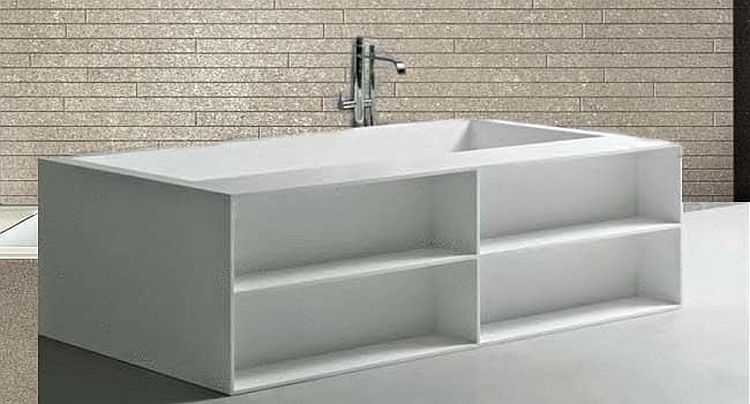
Functional bathroom screen with shelves
Similar shelves are made without a wide rim, but their depth is much less. Although, maybe this is not a minus, but a plus - there will be fewer different things to collect, it is easier to get something out and clean it up.
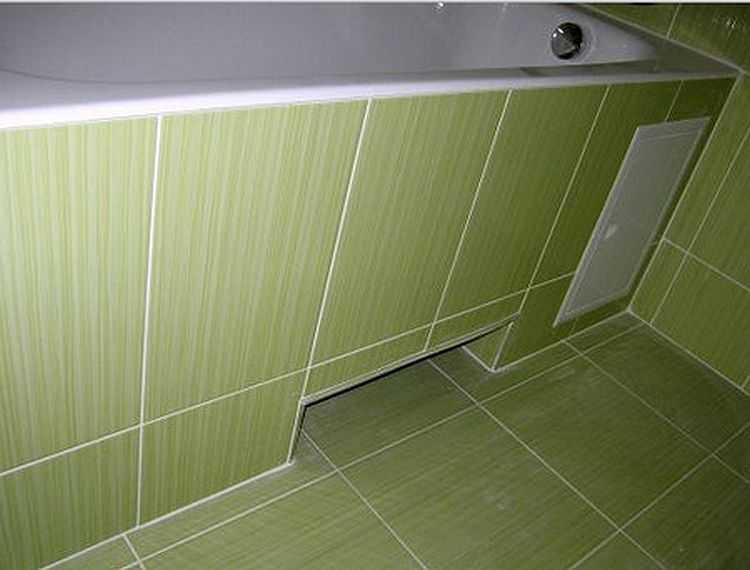
Recess for legs
It is more convenient to wash the bathtub or wash clothes in it if the screen has a recess for the legs. Its depth can be small - 10-12 cm is enough, width - about 35-45 cm. Such dimensions allow you to reach the walls and the opposite side without stress.
We decided on the dimensions, it's up to the little - to choose how it will look. The easiest square notch to organize. It can be made from brick, aerated concrete and profile.
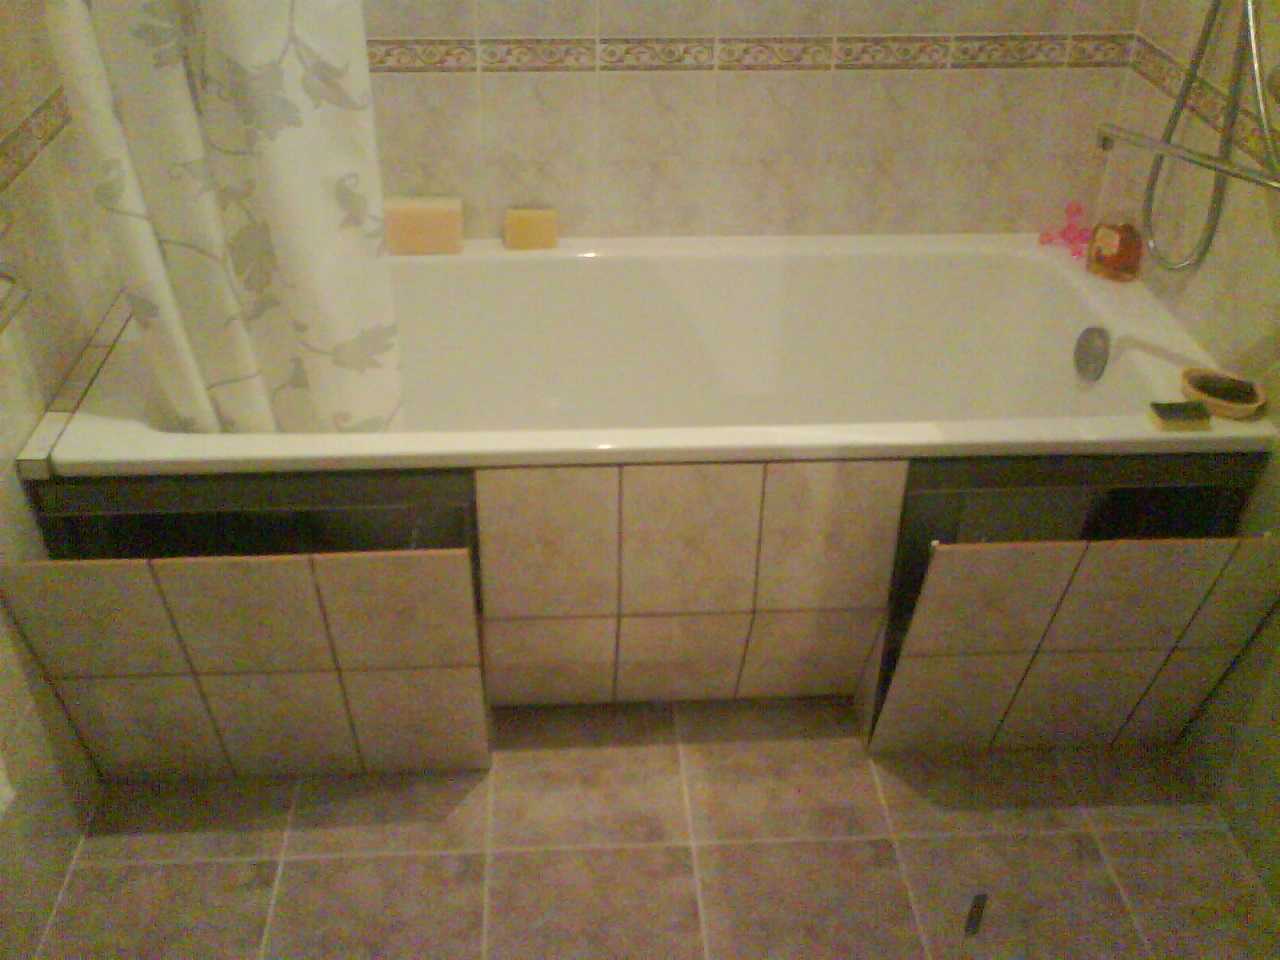
Small depression under the legs of a rectangular shape
The non-standard variation looks more interesting - the whole screen is made of two levels, when the upper part hangs over the lower one (pictured below). In this option, you can mount a moisture resistant LED strip for backlighting. It should be interesting.
Two levels - unusual
The next option is to make part of the screen tilted. In the case of a profile, this is easy to implement - with a brick it is almost impossible, with aerated concrete it is possible, but difficult.
Inclined plane frame

Plasterboard sheathing

What it looks like as a result
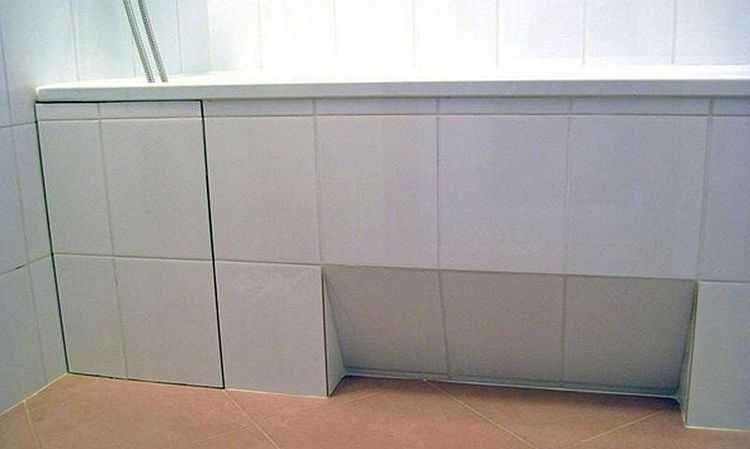
Another option is to raise the top edge of the screen a few centimeters above the floor. It will turn out on legs and no problems with legroom. But there are problems with cleaning. You can't close the cladding high - it's ugly, and if you leave a small gap, then how to clean it? Problem.
The screen under the bath can be made not to the floor
In general, of all these options, you can choose something most suitable for yourself, although they also make a dull flat screen on the floor.
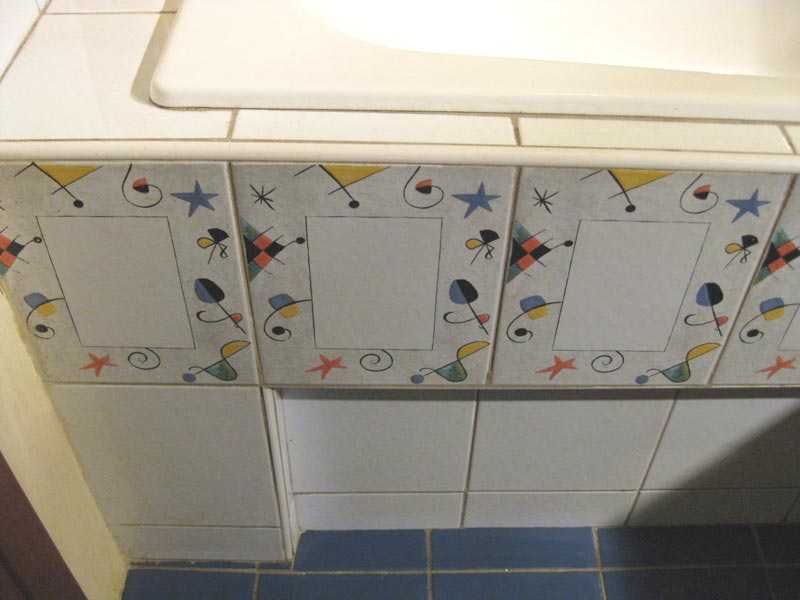
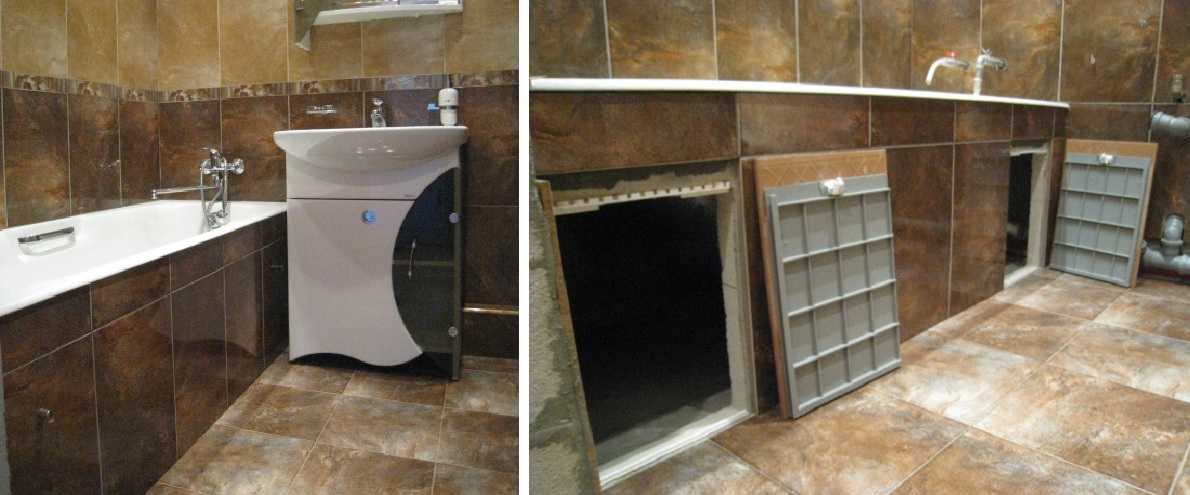
Inspection hatches
The screen for the bath must have a removable / opening part through which you can access communications. There are several ways to do this. The first is to install a plastic hatch. Not everyone likes it outwardly, but this is the simplest and cheapest option.
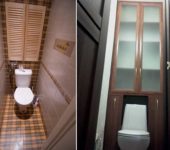
Plastic sanitary hatch
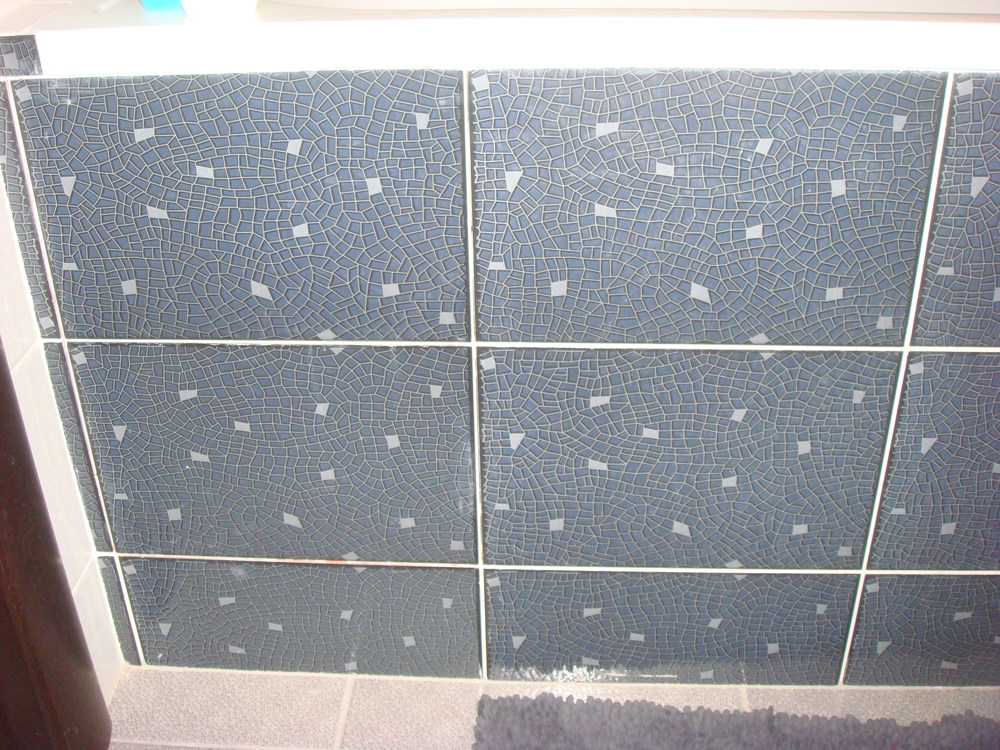
The next possibility is to make a removable panel that will be attached to the frame with magnets. Not to say that this option is difficult to implement, but it requires more experience - it is necessary to calculate the installation location of the hatch so that whole tiles are placed on it.
Instead of a hatch - a removable panel
One point: if you rub the seams with a light paste, the hatch will still stand out. There is no grouting in this place, but there are small cracks, which are very noticeable against a light background.
Gaps are almost invisible on dark tiles with dark grout
The most technologically advanced, but also the most expensive way is to install special inspection hatches. They are of two types - folding on chains and swivel.
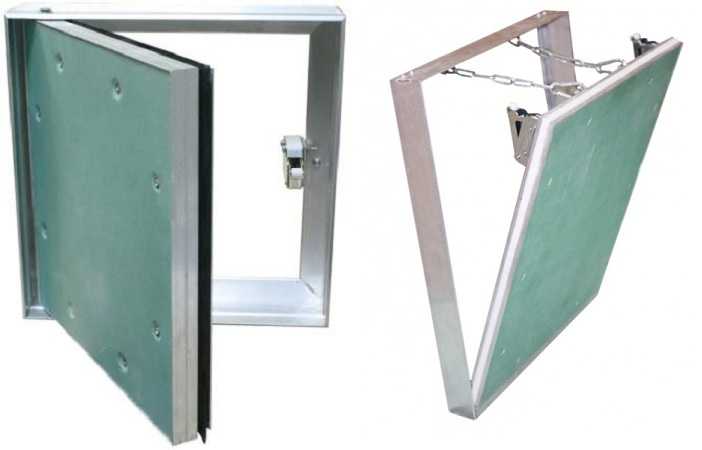
Types of inspection hatches for laying tiles
These hatches, unlike plastic ones, are designed for laying tiles on them. With a good installation and correct calculation, it is not easy to see.
It looks like when closed
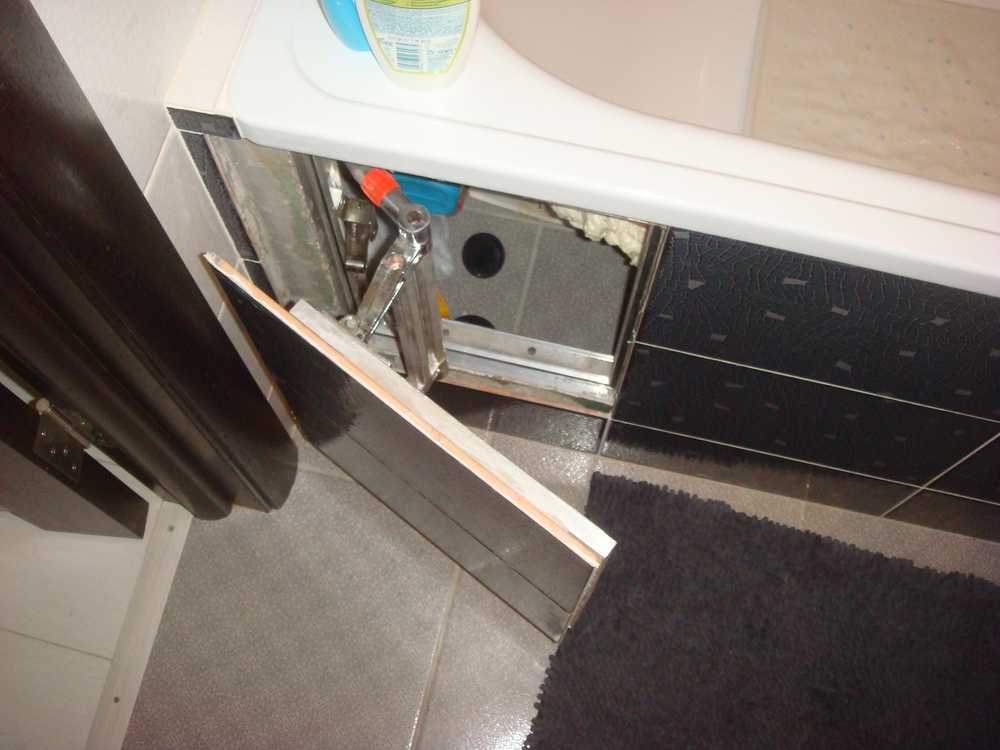
Opens like this
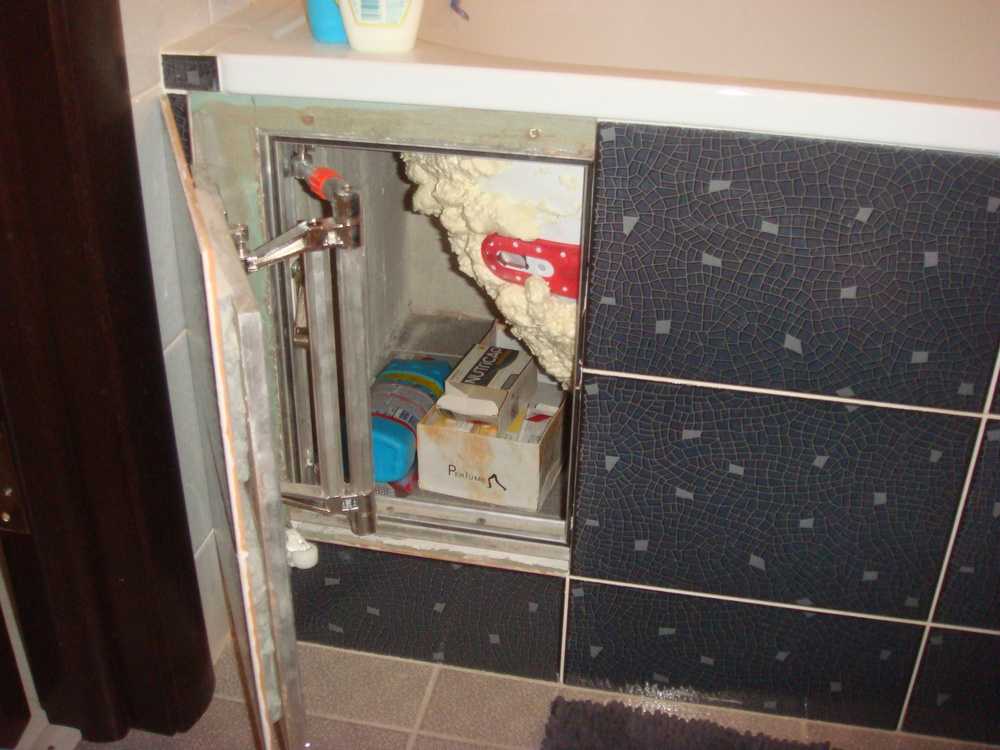
It's convenient to work
How to make a do-it-yourself bath screen
It is not always possible to guess how to make it from the general appearance of the same screen. Those who have at least some experience in repair and construction work will probably figure it out, but ordinary people are unlikely. To make it easier to navigate, we will post several photo reports on the manufacture of homemade screens for the bathroom of different types and types.
From profile and drywall
The production of a screen for a plasterboard bathtub occurs in three stages: first, the frame is assembled, then it is sheathed with plasterboard, and then tiles are laid on the glue.
The order of work is as follows:
- Markings are made on the floor and walls.
- Pieces of the profile are cut to size.
- Fix the bottom guide from PN 27 * 28 to the floor with dowels.
- Install side strips from PN 27 * 28. Height - from floor to side. They are attached to the walls, mainly with dowels.
- A piece is cut from the PN27 * 28 profile, equal to what lies on the floor. This piece will go under the side of the tub. It is supported on the previously installed side posts. The result is a frame. So far, it is fixed on only three sides. The top is not fixed by anything. We will fix it later.

This frame is made for a recess that runs along the entire bath
- Racks are cut from the profile 27 * 60. Their height is the distance from the floor to the side of the bath. The racks are inserted into the resulting frame, fixed to the floor. The distance between the posts is 35-40 cm. It is also advisable to make horizontal jumpers approximately in the middle of the height. This will make the structure more rigid. If the horizontal jumper is not installed, the screen may break under load (if someone rests on a knee).

View from a different angle
- Do not forget to place the struts under the selected hatch, as well as under the foot recess.
- When the entire frame is assembled, we take a can of polyurethane foam, foaming the upper profile.
- When the foam has polymerized, install the hatch.
- We prime the moisture-resistant drywall on both sides (it can be painted with oil paint).
- Cut to size, mount on the frame.
- The joints of the sheets can not be coated, but you can also putty.

Bathtub tile screen ready
- We dilute tile adhesive (for wet rooms), lay the tiles.
- A day after laying, we rub the seams.
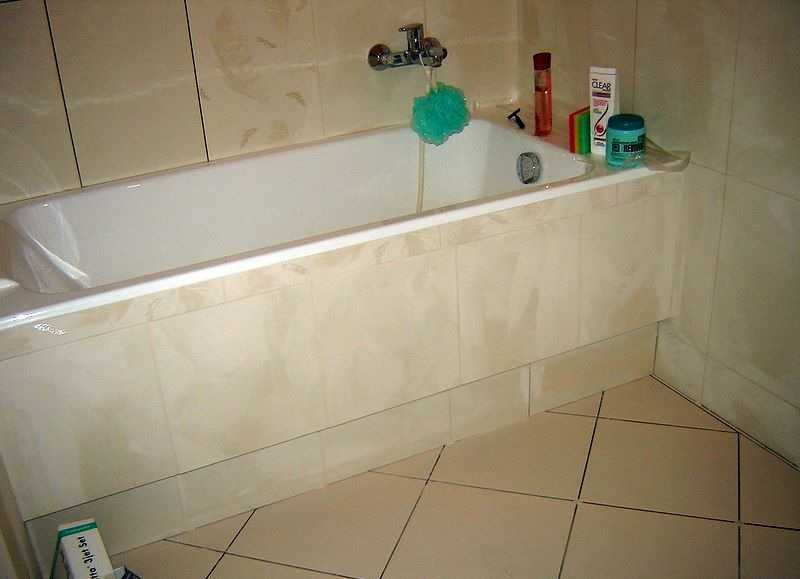
The screen for a plasterboard bath is ready.
An interesting version of the more rigid design of the bathtub floor screen is in this video. It will definitely not break even under significant loads. And all that is needed is to fix the racks to the bathtub body. To do this, a piece of profile is glued to the wall of the bathtub on liquid nails. Then the racks are fixed to this profile with the help of short segments.
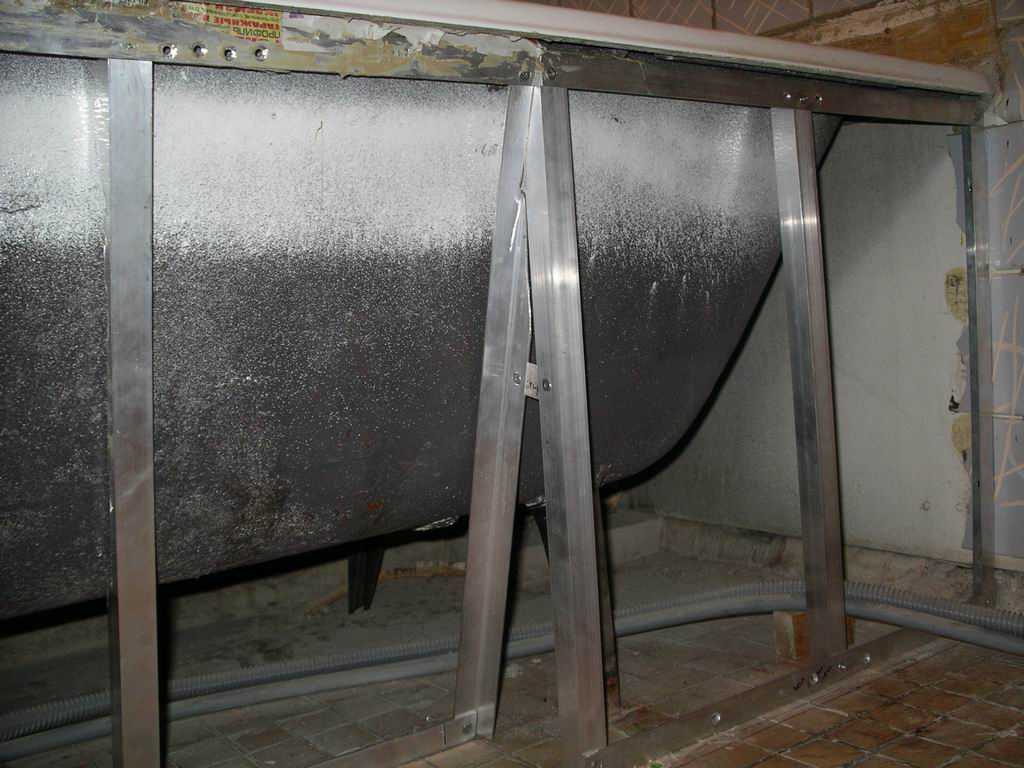
For curved bathtub
When making a screen for a curved bath, the main task is to repeat its smooth curves. In this case, you can also use a galvanized profile for drywall PN 27 * 28. Instead of drywall, put EPS (extruded polystyrene foam) 50 mm thick, high density (preferably the densest). Since acrylic bathtubs most often have a non-linear shape, they need more reliable support than a sheet of drywall. High-density extruded polystyrene foam is a fairly rigid material that will withstand the pressure of the walls of a bath filled with water.
You will also need a grinder or scissors for metal, two or three cylinders with polyurethane foam. The order of work is as follows:
- We cut the PN 27 * 28 profile of the required length (measure the side of the bath), leaving only one shelf intact. We make the cuts every 3 cm.
- We put the cut profile on the edge of the bath, fasten one edge with tape.
- Smoothly and gradually we give the profile the required shape. Bending a small area, glue it with tape to the side. It is important to repeat the shape correctly.
- Having finished bending, we take scotch tape and glue the profile on the side where the petals are cut. They must be securely fixed. So that the shape does not change, we glue it twice.
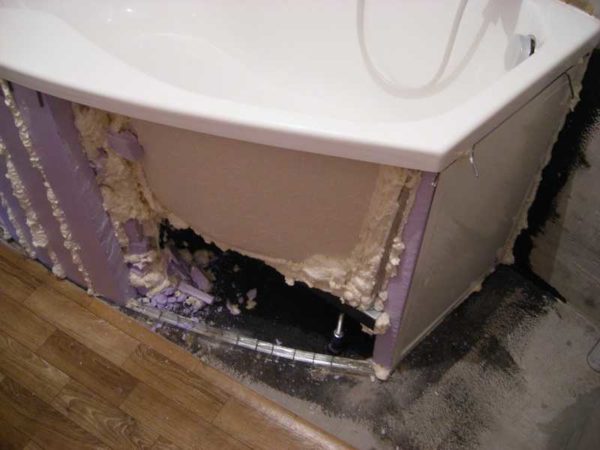
Installing pieces of EPS
- Remove the tape that secures the profile to the side of the tub.
- We fix it on the floor (with dowels). In order for the screen finish to be flush with the side, the profile must be moved inward for a certain distance. This distance is equal to the sum of the thickness of the tile (measure yourself), tile adhesive (2-3 mm on average) and putty (2-3 mm).
- We fasten the sections of the profile to the walls.
- We cut the EPSP into strips of small width. It is difficult to say exactly which one depends on the curvature of the bends.
- In place, the EPSP segment is cut to the required dimensions. We start it from below in profile, from above - under the side of the bathroom. At the top, so that the tile does not stick out either, we put spacers of the required thickness on the front side.
- Putting the plate vertically, fill the gap between the bath wall and the EPS with foam. To prevent the foam sheet from moving, it must stand firmly, make sure that the spacers securely fix it in the desired position.
- So we gradually expose the screen, leaving space for the revision hatch.
- After foam polymerization, cut off the excess. We install an inspection hatch of the selected design.
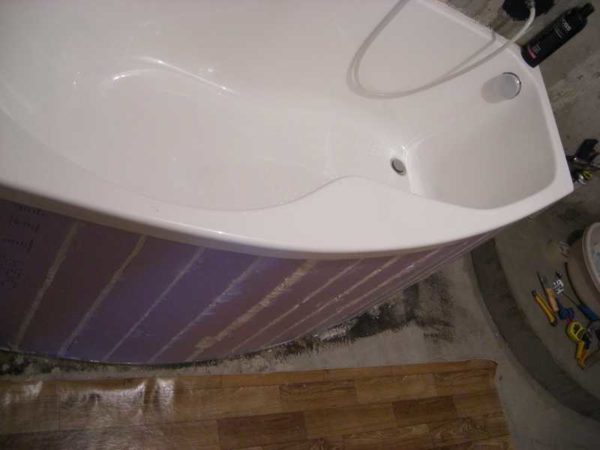
Before putty
- We putty. It is better to take a waterproof putty. After drying, we skin.
- We lay the tiles. For curved bathtubs, tiles or mosaics are suitable for very small sizes.


This technique is suitable for making a screen for an acrylic bath with your own hands. The polyurethane foam will support the walls and also insulate them. This bath will keep warm for a long time.
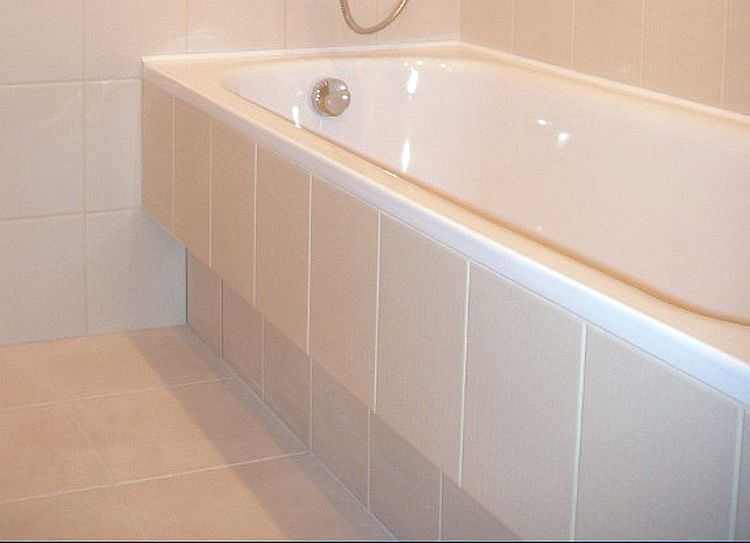
Screen for a bathtub made of PVC panels
This product cannot be called durable, but it is built quickly and the costs are scanty. You will need two strips of PVC panels, starting guides for them, corners, liquid nails. From tools - a ruler or tape measure, a canvas, a floor to metal, scissors.
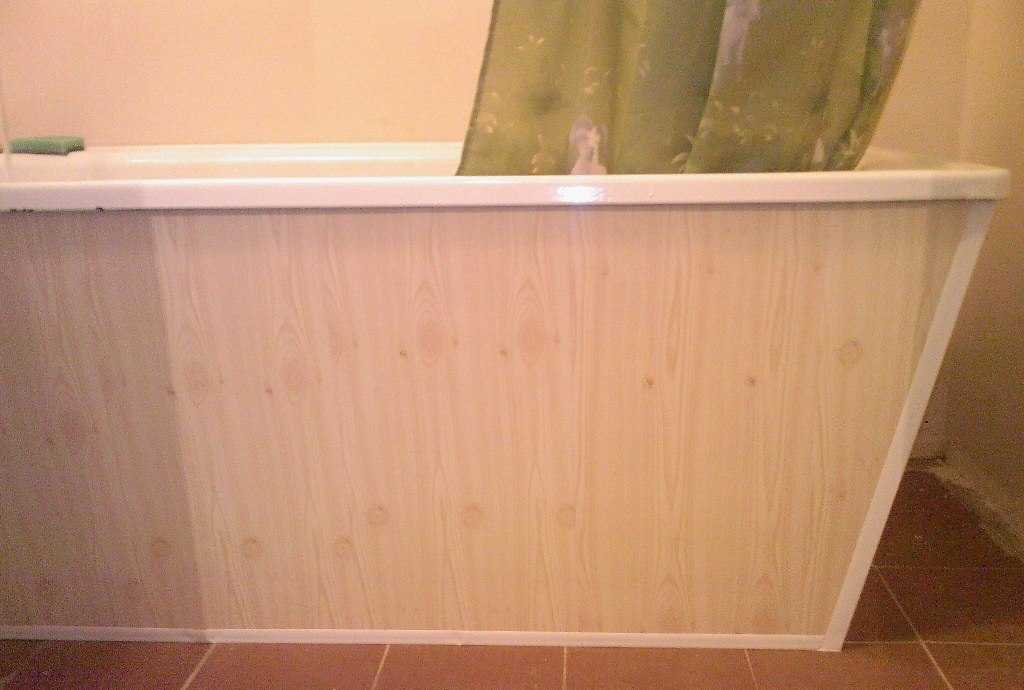
The result is such a screen under the bath
For ease of use, the walls are inclined inward. This design determined the assembly order: if you glue the profile - immediately, you cannot insert PVC strips into them. Therefore, first we assemble the plastic wall in profile, then we put the entire wall in place, gluing the profile (we apply glue, slightly pushing the wall back, then push it into place). This trick succeeded with a short end wall.
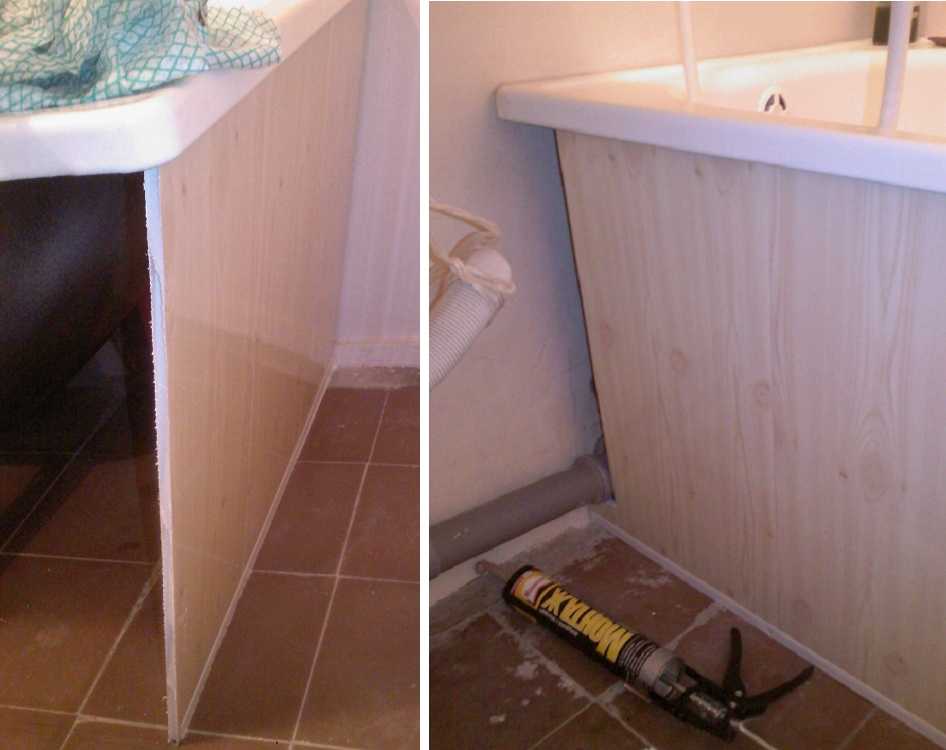
We collect walls from PVC panels
With the length of the wall, I had to do it differently. First, all the pieces were assembled in place into a single canvas (without the starting profile at the bottom). The slats rested on the floor and the notch in the side. Then a guide was inserted under the finished wall. This became possible since the strips were cut 1-2 mm shorter than necessary. In general, all dimensions were measured very accurately, all slats are of the same length. The wall stands securely and without glue. They did not glue it, as it is long, and it is not clear how to put it back in place.
It remains to close up the joints with the walls and finish the corner of the screen. We carefully measure the piece that is missing, transfer the dimensions to plastic, cut it off. We put the cut parts in place.
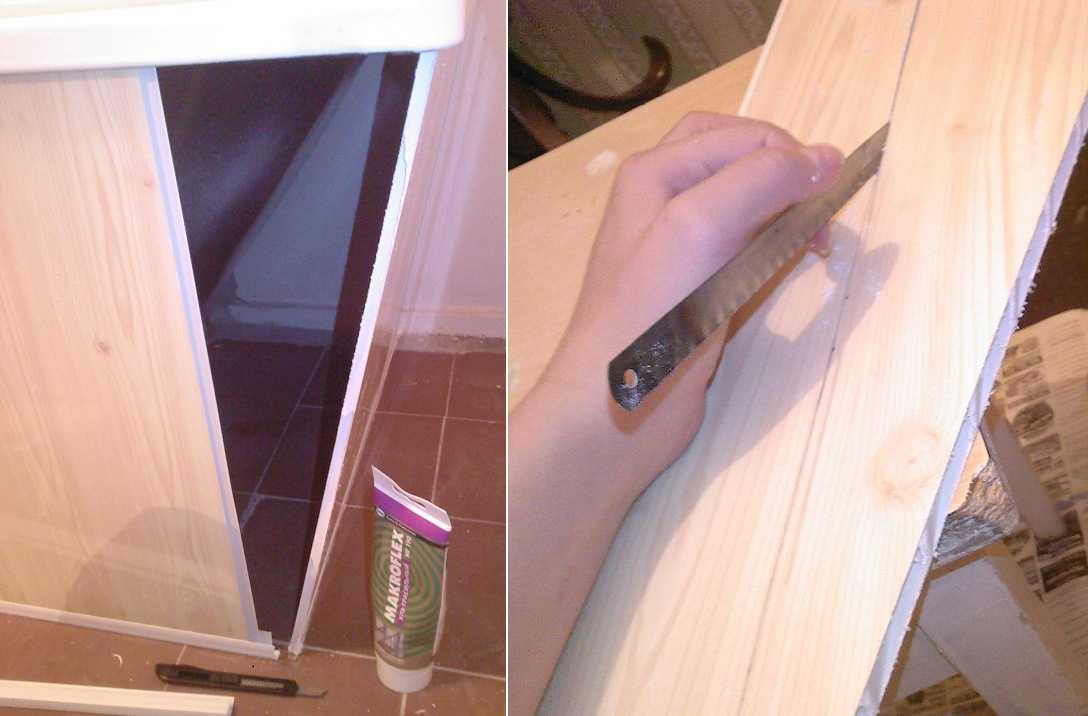
Close the corner
Now we need to refine the joints. Profile guides are slipped under the strips that adjoin the walls. They could have been installed immediately during installation - there would have been less problems.
The joint is closed by a segment of the starting profile
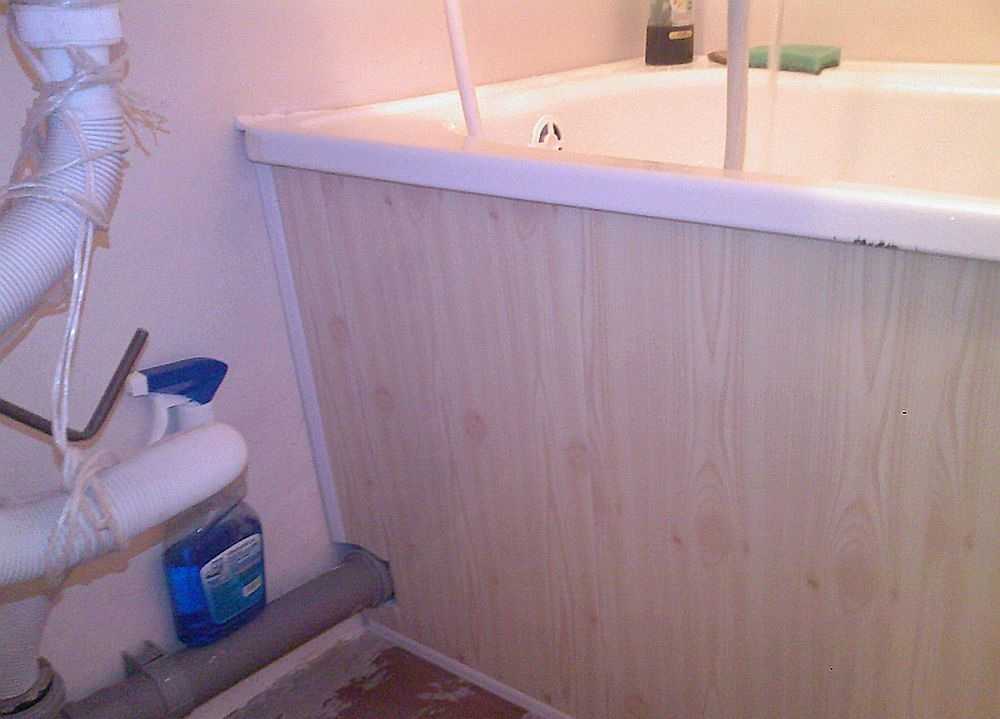
I had to tinker with the corner. It is necessary to simultaneously drive two planes into it. This was only possible with a steel ruler. It took a lot of time.

This corner took a long time
Making this screen under the bath with your own hands is not difficult.Only you need to handle it carefully - the plastic is pressed through very easily. Another disadvantage of this option is the absence of an inspection hatch. As there will be problems - you will have to disassemble a part.