Fence foundation: how not to bury extra money
The construction of a fence begins with solving a difficult problem: it is necessary to choose a foundation for the fence. On the one hand, it is necessary that it does not mow in spring, when heaving, on the other hand, it is reluctant to bury extra money. So you have to solve the puzzle, choosing which of the bases is necessary - just put the pillars, pour the tape tape, or stop at an intermediate version - a columnar with a grillage.
The content of the article
What can be the foundation for a fence
No matter how many fence structures there are, they all stand on several types of foundations. The depth, diameter or cross-section of pipes, width and depth of the base may differ. These parameters depend on the climatic zone and the material from which the fence spans are made. And there are not very many designs and ways of their implementation:
- A little sand and gravel is poured into a hole made in the ground, a pipe is inserted. The gap is clogged with stones and crushed stone, rammed.
- Wells are drilled in the same way, pipes are installed, only the filling around the column is concreted.
- The pipe is installed in a fixed formwork, the gap between it and the formwork is filled with concrete.
- Screw piles are used instead of pipes.
- The pillars are concreted, and a grillage is made between them. To provide the tape with sufficient strength, the grillage tape is reinforced by forming an air gap under it.
- They make a shallow strip foundation on pillars.
- Strip foundation to the depth of freezing.
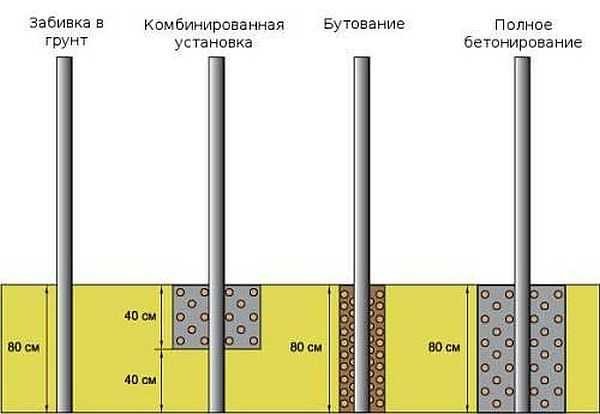
Some ways to install fence posts
The constructions are arranged in order of increasing cost: the lowest cost is the first method, the most expensive is the fourth. The choice of the foundation device for the fence depends primarily on the type of soil and the level of occurrence of groundwater. If the soils drain water well, and the groundwater level is low - below the freezing depth - you can put it on any structure. If the groundwater is located high, you want a "serious fence" made of brick or rubble, for example, and even soil - clay or loam - you will have to make a more serious foundation, which costs a lot.
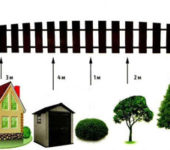
If you do not know how deep they are in the area of water, dig a hole near the planned fence. Its depth is 50-70 cm below the freezing depth for the region. If you got to this level, but there is no water, then you are in luck and you can make a fence with the base of any structure.
Installation of poles for easy fence
A light fence is one whose spans are closed with relatively low weight materials: a chain-link mesh, wooden of any design, made of corrugated board, metal picket fence, welded or forged metal nets. Most often, pillars without plinths are placed under them.
Posts for a fence made of mesh or picket fence
The cheapest and most versatile method is in a wide hole with crushed stone filling the gap. It works wonderfully on heaving soils with a high level of groundwater, it costs many times better than poured into concrete. A correctly installed light fence will never push out in the spring.
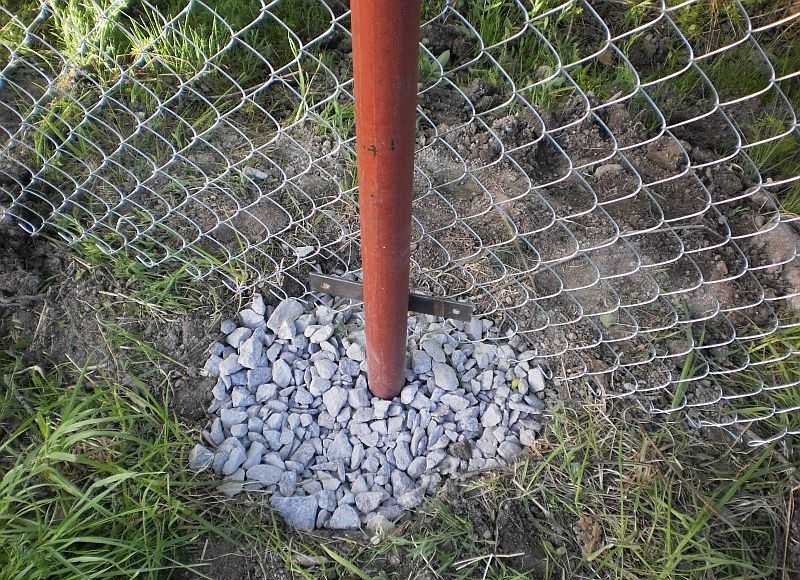
The cheapest, and, nevertheless, reliable way to install the fence - columns in a compacted backfill
Wells for posts of this type are drilled obviously much wider than the diameter of the pipe.Crushed stone or sand was poured at the bottom, rammed it (with a long pole or crowbar), put a post, covered it with rubble around, the post was put upright and fixed with temporary spacers. Pour the crushed stone around in layers - 10 cm each, carefully tamp, to the maximum possible density. That's it, the installation is complete.
On normal soils
It is worth explaining why it is more stable and how such a post works on soils with normal drainage capacity. Water in any quantity through crushed stone goes deep into the depths, where it diverges in a natural way. When freezing, its amount around the pillar is not enough to have a tangible effect. The soil freezing around the column presses on the crushed stone, which, due to its mobility, compensates for it almost completely.
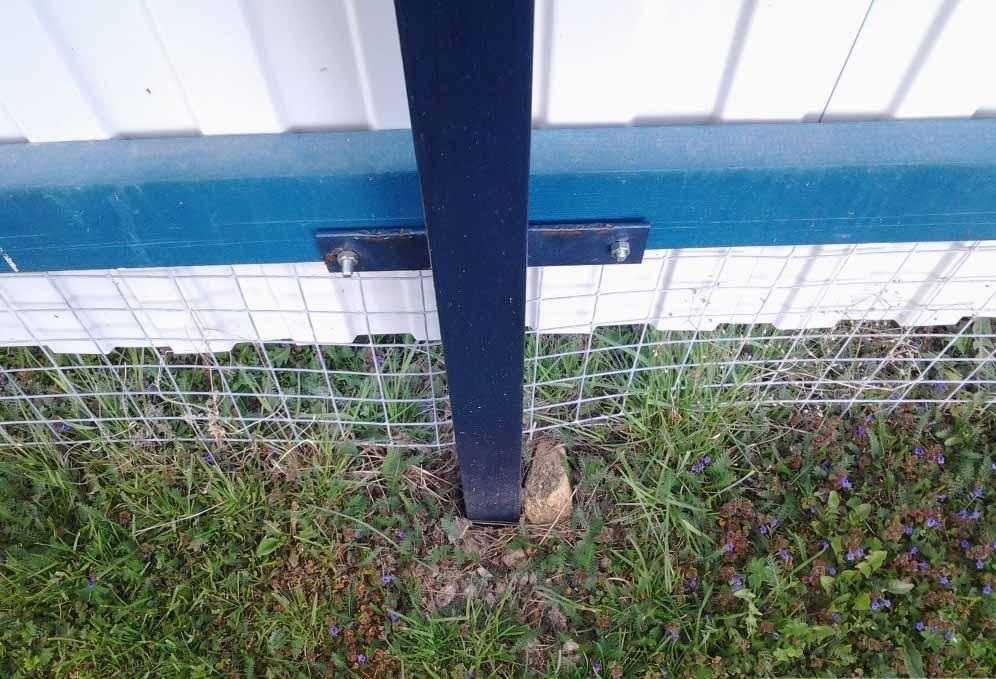
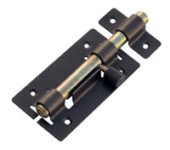
It is better to make the foundation for the fence from the profiled sheet with the pouring of the upper part with concrete, otherwise the wind loads will loosen the pillars over time (see the next paragraph)
On such soils, crushed stone can be replaced with coarse sand. The coarser the grain, the better, and dusty or fine-grained sands will not work. Lay the sand in layers, spill thoroughly. The rest of the system works the same way.
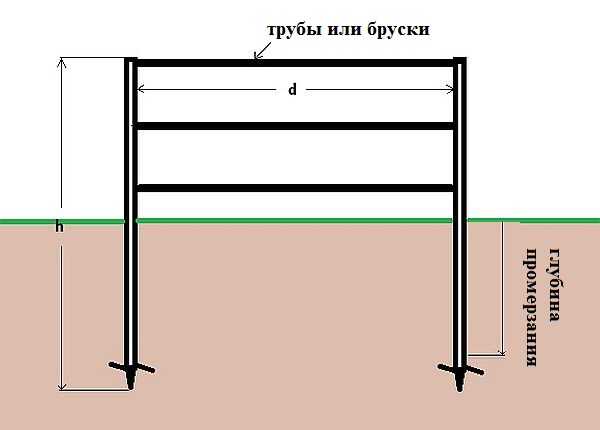
The key point here is the depth to which the post must be buried. If the windage is low and the soil is well draining, it is enough to bury it 1/3 of its height or a little more. In this case, the hole needs to be made a little deeper: so that there is a pillow under the pipe of about 10-15 cm. Water will go into it and the column will remain almost dry. This is good for both its durability and stability.
Depth of holes for pillars in heaving soils
If the soils are clayey, it is necessary to dig 10-15 cm below the freezing depth. Water will collect in this crushed stone cushion, since they do not always have time to leave on clay soils. If the pillow is located below the depth of soil freezing, there will be no problems with heaving: there is still no water around the column, it has accumulated below and is in a liquid state.
If the freezing depth is very large - 2 meters or more, even such an "economy" option will be very expensive. Then you can make a drainage system around the fence to lower the groundwater level. The decision is correct, but the implementation is even more expensive.
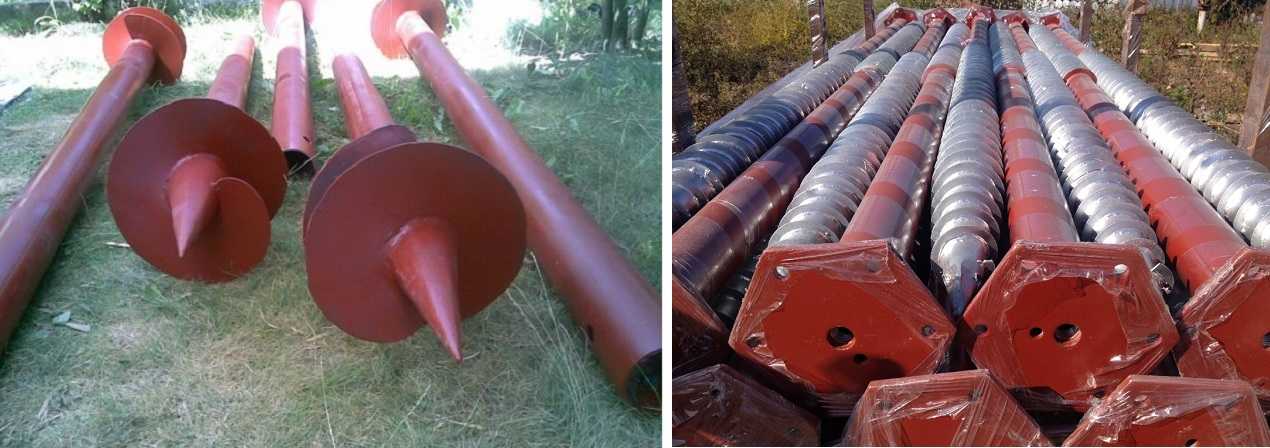
Different types of screw piles
Another option is to use screw piles. They can be drilled 2 meters much faster. But the piles themselves, and the services for their installation, are not the cheapest. You can, of course, first try manually, if it does not work, call the technique.
The most budgetary option in such a situation is to bury the pillars to the depth that is more or less acceptable, to make the hole wider - about 50 cm in diameter or a square with the same side, that is, to increase the damper layer. In winters with average temperatures, the fence will stand normally, in abnormally cold or little snow, some pillars can lead. But in most cases, light fences react to this normally, in the spring everything "sits down" in place. You have to correct the situation only if the post is mowed.
Poles under a light, but "sailing" fence
If the spans have a solid or almost solid surface, a decent load is created on the foundation pillars of the fence when the wind blows. But if the filling weight is still small - profiled sheet, wooden panels - you can still get by at low cost. In this case, to compensate for the wind load, the upper part of the backfill must be concreted. The depth of the concrete block is about 30 cm.
To compensate for windage from the fence, the upper part of the backfill must be concreted
To prevent the concrete block from collapsing during gusts of wind, a reinforcing mesh is laid. You can use a ready-made mesh with a step of 5 cm, you can make it from a 6-8 mm rod. If the mesh is galvanized, it is laid so that it sinks into the concrete by at least 30 mm (keep track of the distance from the sides).When using ferrous metal, the concrete layer at the edges of the rods increases: at least 70 mm. In total, the dimensions of the concreted area with a black metal mesh are: depth 30 cm, sides - at least 34 cm, with a galvanized mesh, the side of the square around the post is 30 cm.
Foundation for fences on loose soils
If the bearing capacity of the soil is very low - these are peat bogs, dusty, loose sands - in addition to backfilling with rubble, the hole must be concreted to the full depth. In this case, the measure is necessary. Concrete creates a significantly larger bearing surface, and this is important for these soils: the load from the fence is distributed over the entire surface and it stands normally.
In this case, bored piles are cheaper: a hole is drilled, a sleeve is inserted into it from a roofing material rolled into a tube of a suitable diameter, preferably 2 or 3 layers. A column is inserted inside this formwork, set up, it is poured around with concrete grade M 300 and not lower.
If at the same time the level of groundwater is high, but the inflow rate is low, you can try to pump it out of the hole, and then pour concrete over it. If the water arrives quickly, take a plastic bag of suitable length. It is lowered inside the formwork, the edges are fixed around the protruding sleeve. A pillar is carefully placed in the bag, concrete is poured. Concrete gradually displaces water and fills the entire mold.
Lightweight fence on screw piles
The second method is suitable if there is a layer of soil with normal bearing capacity below, under the peat or sand. In this case, you can make a foundation for a fence on screw piles. They are twisted to the required depth - sinking 20-25 cm into the bearing layer. The fence posts are attached to the protruding heads, or the remaining length of the pile is used.
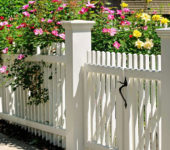
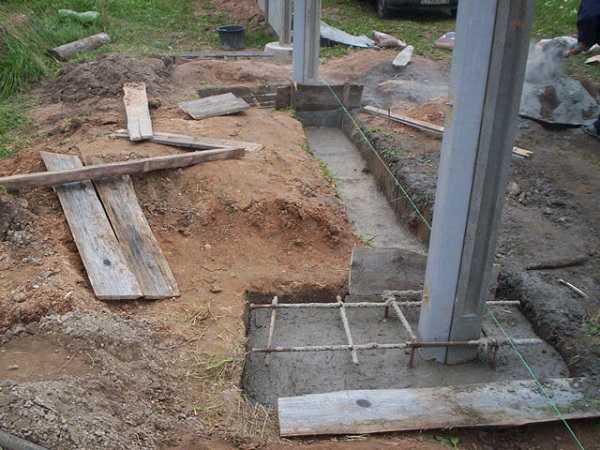
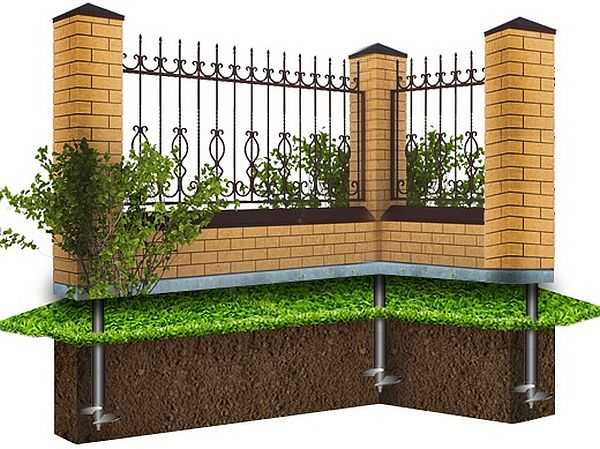
Fence foundation with brick pillars
If you want to make a fence on brick poles, the work and costs will be more significant. Even if at the same time the weight of the span remains small - profiled sheet, wood, forging with some material, paired or without it - it doesn't matter. We'll have to make a solid foundation for the pillars themselves, because they themselves create a serious load.

Fence foundation with brick pillars
Such fences react poorly to uneven shrinkage. A mortgage is usually placed in brick pillars, which is then connected to the crossbars of the entire fence. The bond turns out to be rigid, and with uneven shrinkage, cracks appear in the attachment points of the mortgage, and the destruction of the masonry begins. Therefore, the minimum permissible level of foundation for a fence with brick pillars is below the depth of soil freezing. This approach will ensure stability.
Normally draining, medium heaving soils
Even if, if the water leaves well, in order for the fence to stand for a long time, you have to bury yourself below the freezing depth. But all the same, significant forces act on that part of the pile's body that falls into the freezing zone. When freezing, the soil and concrete freeze into a single mass, and then the heaving forces are able to break the pile and squeeze out a piece of the fence.
To avoid such a situation, the foundation for the fence is made in fixed formwork. In this case, the soil cannot freeze with the concrete and “works” by itself. As a formwork, you can use rolled roofing material, polystyrene or expanded polystyrene in several layers (even packaging from household appliances will go), plastic or asbestos-cement pipes of a suitable diameter.
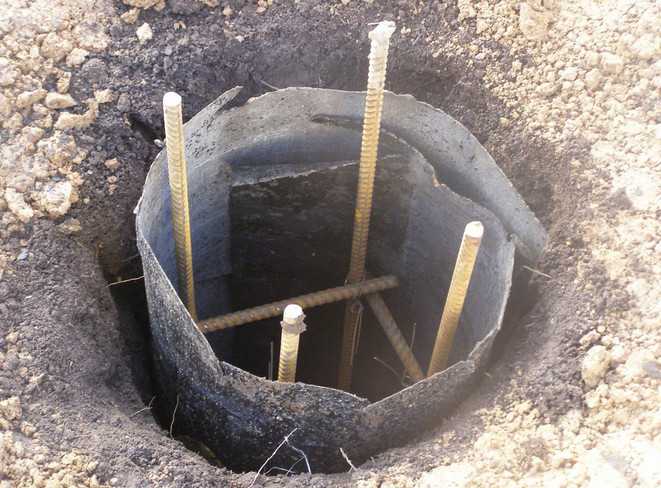
An example of pile reinforcement
In any case, there must be reinforcement inside the pile. This is a structure of 4 bars of 8 mm reinforcement, connected by crossbars of 4-6 mm bars. It goes to the full depth of the pile, with a release into the post. Further, if desired, you can build up the reinforcement, and fill the gap between the bricks in the column with concrete. The second option - a pipe is attached to the reinforcement, around which a column is placed. Recently, this is a more common way to build a brick pillar.
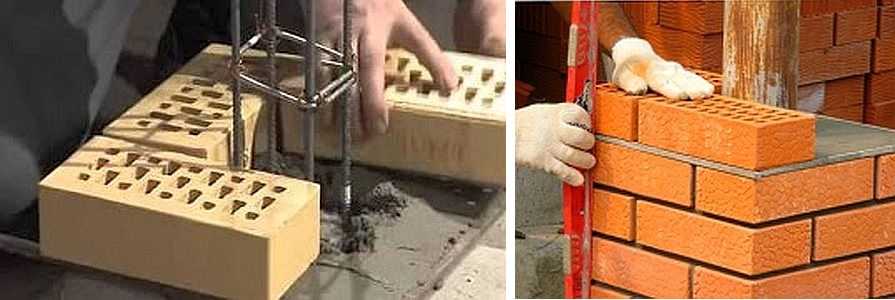
Methods for reinforcing a fence post
TISE piles are more reliable in such a situation. They have a cylindrical expansion at the end, which greatly increases the buoyancy resistance. Such foundations for a fence can be made on weak and medium heaving soils.
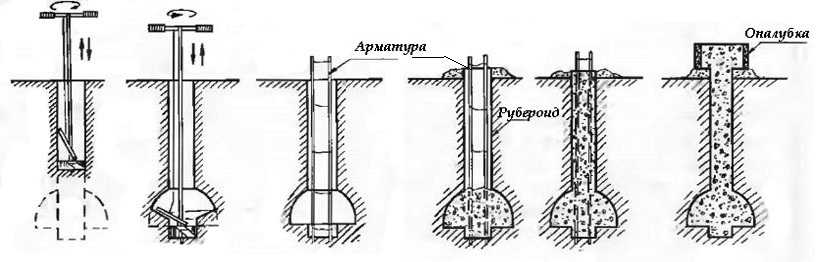
The procedure for the manufacture of TISE piles
For the manufacture of this type of pile, a drill with a folding blade is used, which folds back after reaching the required depth. For such a foundation to work normally, it is advisable to expand the expansion below the freezing depth.
But it is far from always possible to drill with a hand drill. On very dense clays, soils with crushed stone, it is unrealistic to drill a hole. And if the depth of freezing is also about 2 meters or more, then it is impossible to cope with such a task. In such cases, there are several solutions:
- Use galvanized screw piles. It is much easier to screw them in even by hand, in extreme cases there is special equipment.
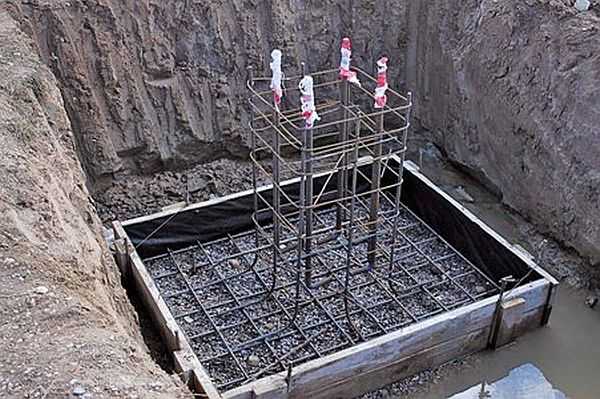
- Make a pile foundation with a pillow. In this case, they dig a larger pit. A crushed stone pillow is made at the bottom, a reinforcing belt (from a bar of 8 mm) is laid on it in the formwork. The belt is made in such a way that outlets come from it into the post (about 30 reinforcement diameters in height, that is, for 8 mm reinforcement, the outlets should be 240 mm). After the concrete of the pillow has grabbed, the formwork is placed and the pile is poured. It must also be reinforced, and the outlet from it goes into the post.

An example of the formation of a pillow and outlets under a post
After pouring the piles on normal soils, backfill from the "native" soil, on those prone to heaving it is better to fill it with crushed stone. Thus, a damper filling is created around the pile, which compensates for the lateral pressure of the soil on the pile. And the pillow will resist the vertical push.
Heavily heaving soils
If the freezing depth is too great or the soil is very puffy, a different solution is required. It is necessary to tie the foundation pillars to distribute the resulting loads. For fences with stone pillars, but light filling, this is done using a grillage - a reinforced concrete tape. In order to prevent it from bending by heaving forces, an air cushion about 10 cm thick is arranged under it.
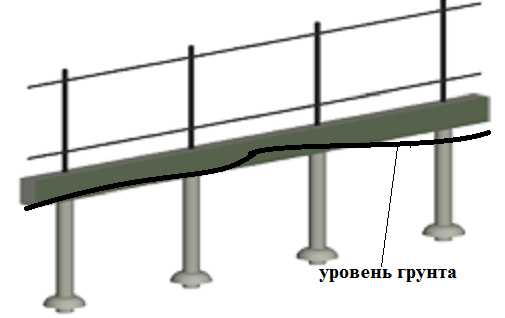
View of the pile-grillage foundation for the fence
Such a foundation for the fence is built like this: after pouring the piles, a trench is dug, which is larger in size than the required grillage: you will need to install the formwork. At the bottom of the trench and around the piles, low density foam, 10 cm thick, is laid. A reinforcing frame is made: four rods of 10 mm in diameter, connected by a 4-6 mm rod. The pile outlets are combined with the grillage reinforcement. Everything is filled with concrete. After setting, the formwork is removed, the foam remains under the grillage. It provides the required air gap: at low density, it is 90% air. After winter, of course, it will squeeze, but it's not scary: the air will remain. But so that sand or debris does not fall into the gap, it is necessary to bury flat slate on both sides, which will block this gap, preventing it from silting up.
The same grillage can be made on screw piles. If they suit you more, everything remains in effect - their cutting parts are buried below the freezing level, and then, like with a grillage, a ditch, formwork, foam, reinforcement, pouring.
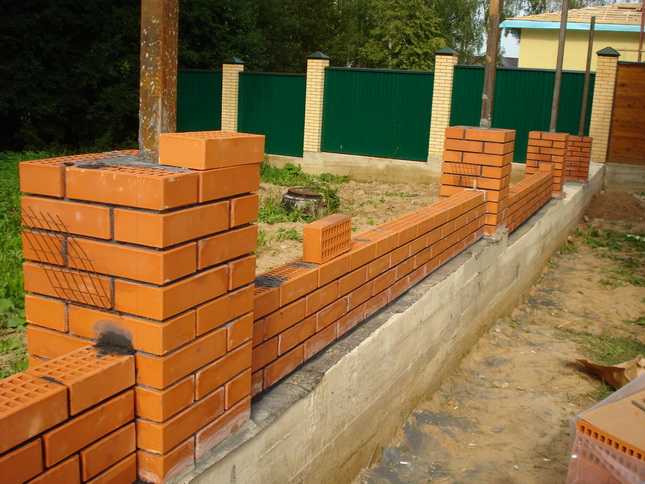
One of the options for the foundation for a fence with brick pillars
Why shouldn't you put sand or rubble under the grillage? Because in this case it will be wet and most likely it will not help much when it freezes. As a result, the grillage will burst.
Foundation under a heavy fence
In principle, the same foundation is suitable as for a medium-weight fence. Only thicker reinforcement is required: 12 mm. When reinforcing, it is necessary to position the rods so that they are at least 70 mm deep in the concrete.Based on this, and the requirement that the minimum distance between the reinforcement rods should be at least 2 filling diameters, we obtain the minimum grillage width - 250 mm. This is if the concrete is filled with crushed stone of fraction 20-40 mm.
In addition to the usual reinforcement of the grillage, it is advisable to lay a layer of metal mesh with a step of 5 cm on the upper longitudinal rods. It will give the upper zone of the tape greater strength. And you will be able to start laying the infill 2 weeks after pouring, not 4.
Do not forget to put waterproofing under the brick
The grillage is made in the same way: with the formation of a damper layer of foam under it. After the concrete has gained most of its strength, it is advisable to coat it with bituminous mastic. This is necessary not so much for waterproofing as to reduce adhesion to the soil. Since the grillage under a heavy fence is most often located in the ground, tangential heaving forces also act on it. To reduce them, coating is necessary.
Do not forget also about the sheet that blocks access to the damper zone under the grillage. Without it, after some time, the gap will become silted up, which will lead to heaving under the tape, and this will lead to cracks in the fence.
Is it possible to make a foundation for a stone or brick fence, a strip foundation? Can. If you make it below the freezing level, it will stand great, but it costs a lot more.