Typesetting blocks for fence posts
Stackable blocks for posts are the only optimal solution for quick installation of the fence. These type-setting structures are made from individual elements that are installed on top of each other and reinforced with locking systems or concrete mixtures.
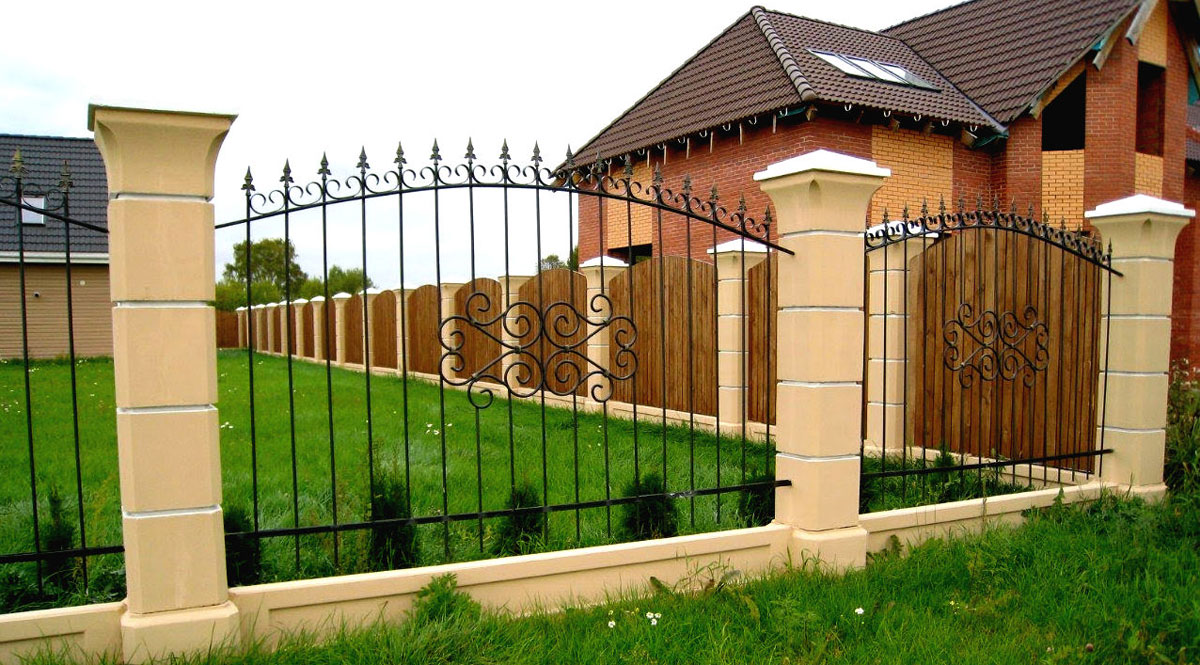
Beautiful fence with pillars from type-setting blocks
The content of the article
Advantages of typesetting posts
Stacked fence posts have a number of advantages:
- Versatility of use. The texture and shape of prefabricated structures is harmoniously combined with fences from any building material.
- Long service life.
- High durability. With the correct assembly of the structure, heavy gates, locking systems and reinforced concrete slabs can be attached to the posts.
- Easy installation. The simple design of the elements allows for easy installation, even for non-professional builders.
- All internal communications can be hidden in hollow modules of prefabricated posts.
- High resistance to negative external influences (shock loads, UV radiation).
- They can be repainted.
- The ability to change the height and limits of the structure.
- Convenient transportation. The dimensions of one element do not exceed 50 cm, which makes it easy to transport them.
- The design can have any shape, texture and shade.
Of course, you can lay out the posts of facing bricks, but this is not necessary, which will be cheaper and faster.
Types of typesetting blocks
According to the manufacturing method, fence blocks are:
- concrete;
- pressed.

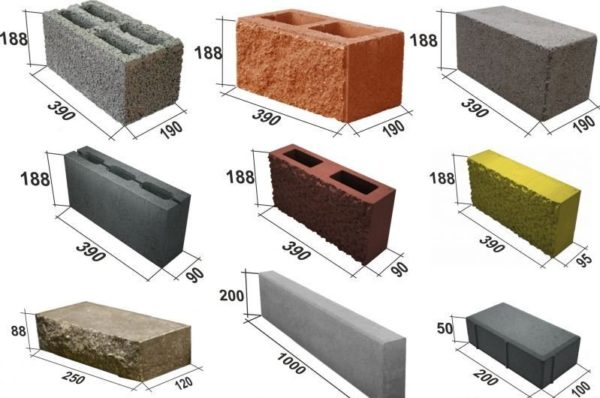
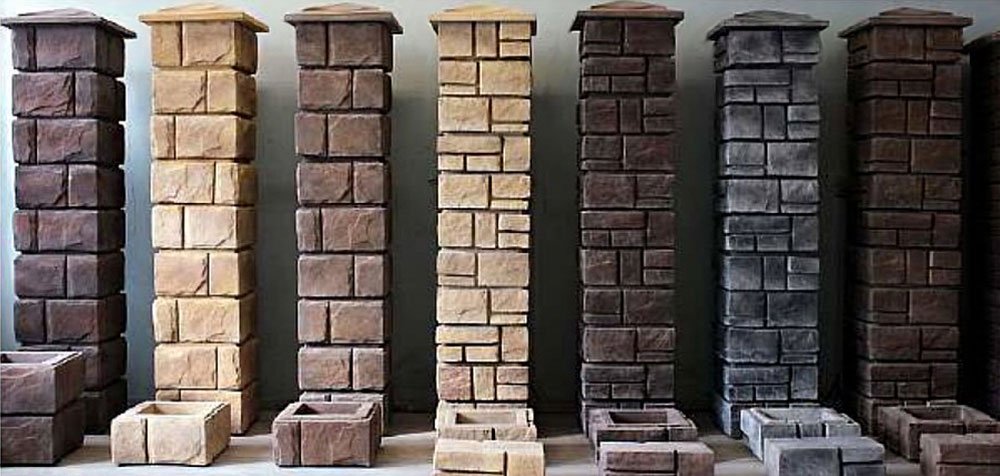
Decorative pressed and concrete blocks
Concrete blocks are quite rare and are made by small entrepreneurs, but they have a place to be. More often you can find ready-made columns. The main manufacturing method is pressing.
It is quite easy to distinguish them by their surface structure. Concrete will be smooth, and pressed will have a slightly porous structure.
They also differ in appearance and can be:
- decorative;
- split (hollow).
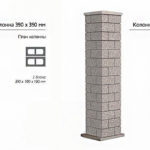
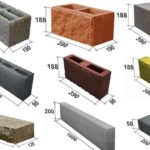
They can be of various shapes and sizes, and you can choose the shape, color and size.
-
- Splitter block post
-
- Ready post
-
- Splitter block sizes
-
- Splitter block fence
Depending on what kind of filling they have, the texture changes:
- Gravel. Such blocks are perfectly fastened together.
- Granite screening is able to give the finished product a dark red hue.
- Concrete battle is notable for its affordable cost and minimal aesthetic performance.
- Crushed stone is used to make the surface of the product decorative.
- Expanded clay. Constructions made from this building material are very light and beautiful.
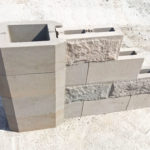
Decorative blocks for a fence are of a special shape, they can be of different colors and textures. Pillars under natural stone are especially popular today. The voids inside are filled with concrete.
Decorative pillars for stone
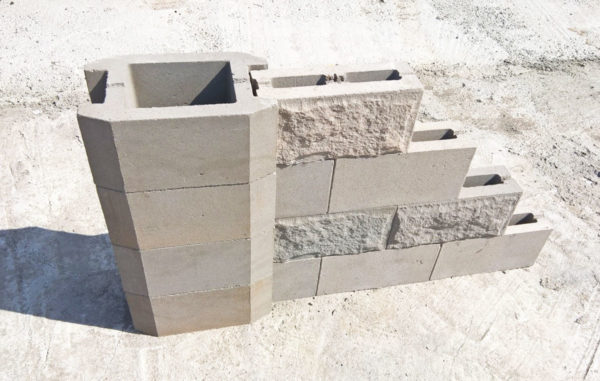
Outwardly, it is no different from natural stone, but it looks solid and attractive. In the manufacture of such forms, dry pressing technology is used. As a result, the product looks like a split natural stone. Fence posts with imitation of torn stone can have a one-sided or two-sided pattern.
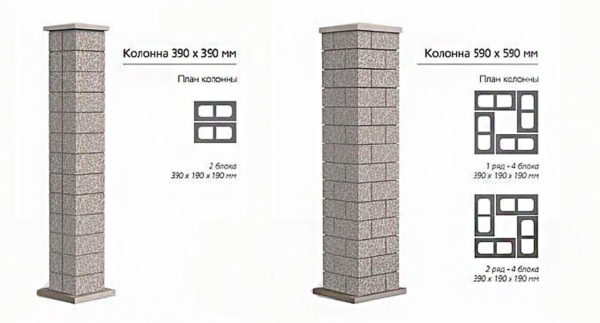
Splitter products are hollow inside. Concrete is poured into the cavity and reinforcement is installed. Thanks to the large block sizes, equal to 7 bricks, such fences are quickly installed.
Splitter elements can be made not only for pillars, but also for the fence itself.
Fence block manufacturing technology
There are two ways to make individual blocks. They were already mentioned at the beginning of the article, these are cast concrete blocks and pressed ones. Both types are easy enough to make at home. It is only necessary to make the shape well, and difficulties may arise if you wish to decorate the plate with patterns.
Concrete
Fence blocks are made by vibratory casting by molding concrete mixtures. To make such elements with your own hands, you will need: sand, gravel, expanded clay, cement, plasticizer, any coloring pigment, marble or quartz chips.
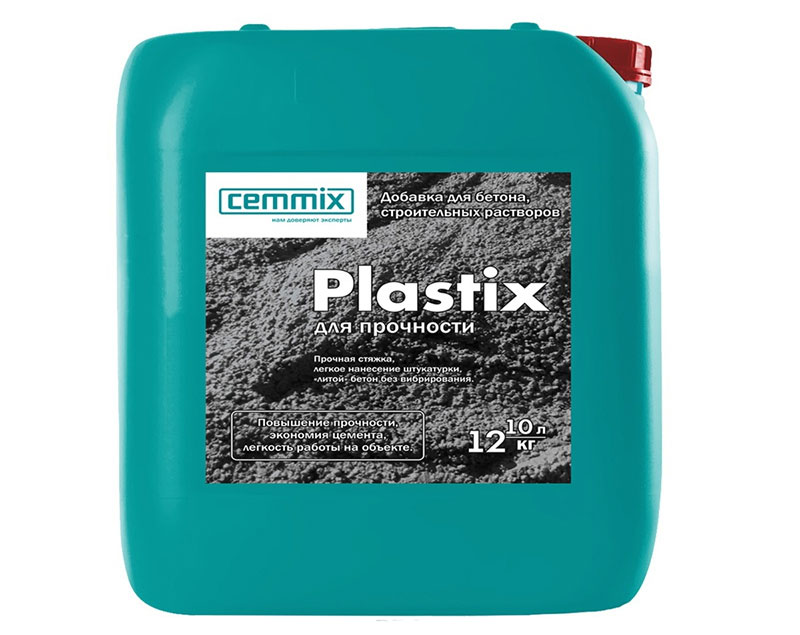
Plasticizer for concrete
To make a reliable and durable concrete block, you need not only high-quality raw materials, but also special equipment and fixtures:
- a vibrating table with a drive, to create the maximum density of the structure and remove voids from the solution;
- special forms;
- concrete mixer, which ensures thorough mixing of the components;
- auxiliary materials: rammers, trowels and water tanks.
The usual square shape is not suitable for making blocks. She must have:
- framework;
- steel inner insert;
- four fiberglass plates;
- external bolts;
- grooved texture elements.
Sequence of work:
- the assembled form is laid out on a vibrating table;
- we make concrete for pouring fence posts in the following proportions: 2 parts of sand, 1 part of cement grade 400-500 and the required amount of plasticizer;
- to give a decorative effect, you can add 2 parts of granite screening, fine gravel, etc.;
- for high-quality preparation of the mixture, a concrete mixer is needed;
- the volume of the mold is filled and air bubbles are eliminated;
- completed forms are placed on the drying table;
- after three days, the form is removed, and the finished concrete block is left to dry completely.
Important! The modules should dry well. Wet structures and elements with voids are considered unreliable. Such blocks cannot be used to build a fence.
Pressed
The process is quite different. Most importantly, one form is enough to work.
- as in the case of a concrete solution, we prepare a mixture in the same proportions: 2 parts of sand, 1 part of cement grade 400-500;
- add water 2.5-3 liters;
- mix the mixture well with a concrete mixer;
- gradually filling the volume of the form to make ramming
- remove the form;
- leave blocks to dry.
Block production recommendations
- the solution must be tamped very well;
- when concreting, mold stands must be sprinkled with sand or covered with polyethylene;
- after removing from the mold, the blocks are dried on each side for 2-3 days.
Do-it-yourself installation of fence blocks
The initial stage is the preparation of the territory and column blocks for the fence. Earthworks, concreting are carried out, time is given to dry the base and build strength. Construction begins with pouring the foundation
Installation of the foundation
The installation of the fence around the entire perimeter of the house must begin with pouring the strip foundation. To do this, you need to dig a trench around the perimeter of the fence.
The work must be carried out in the following order:
- Determine the required distance between the posts, mark the area, and only then start digging holes. If you plan to make a foundation 60 cm deep, then you will have to deepen the hole for the posts by 1 meter. The trench width should be wider than the post width.
- Sprinkle a small layer of gravel (10–12 cm) on the bottom of the pit.
- Install metal pipes or profile vertically in the middle of the pit.
- Cover the pit with formwork. For its framing, a factory formwork or one made independently from boards, taking into account the above-ground part of 11-14 cm, is suitable.
- Provide internal reinforcement. This will strengthen the structural support.
- Pour in concrete mix.It can be independently made from sand, cement and crushed stone in a 2: 1: 3 ratio.
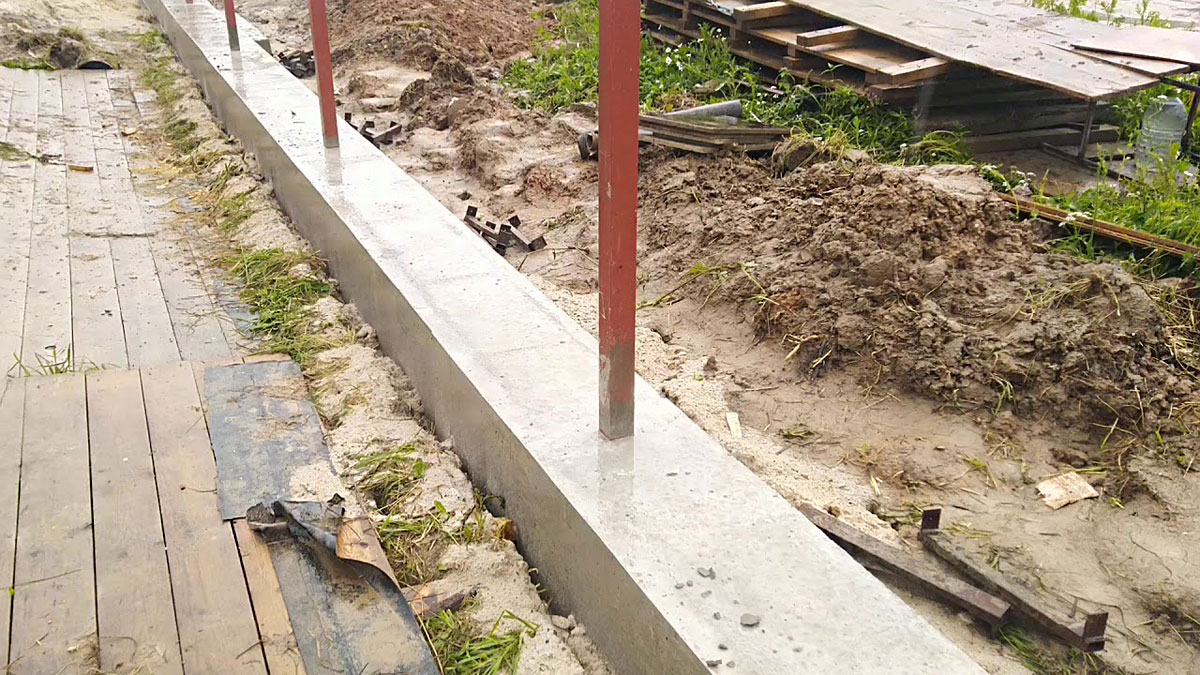
Foundation for a fence for typesetting blocks
You can start assembling the pillars only after the base dries well and gains strength.
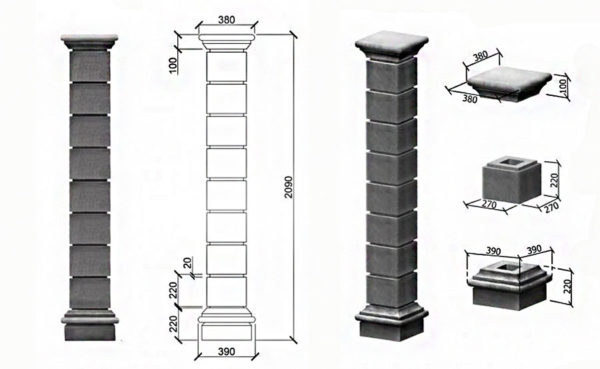
Installation of poles
The assembly of type-setting elements is carried out in the following sequence:
- Step by step, one element at a time is strung onto the central metal rod (if the blocks are of a solid structure). If there is a locking system, the structure must be assembled at the installation site of the fence.
- Then the rows are connected with a concrete mixture. To make a concrete mixture, it is necessary to mix sand and cement in a 3: 1 ratio with the addition of a plasticizer.
- A box made of metal or durable plastic is installed inside a hollow structure. It must be installed if you plan to hide the wiring and communications inside the pillars.
- To make the structure more reliable, it is necessary to make additional reinforcement before pouring concrete into the internal cavities.
- The filling of the internal space should be carried out in stages (by installing 3-4 blocks). When the concrete hardens, it is necessary to lubricate the walls of the foundation with mastic and glue the roofing material laid in the trench earlier.
- At the end of the work, do not forget to cover the poles with caps. They will prevent snow and rain from entering the column, which can lead to concrete destruction and increase the life of the structure.
When installing the blocks, it is necessary to take into account and coordinate the work carried out specifically for the fence that you are going to install. So, for example, if the plans include a fence made of corrugated board, then the blocks are mounted simultaneously with the crossbars. That is, grooves are made, lags are laid and fastened, and the block is put on again.
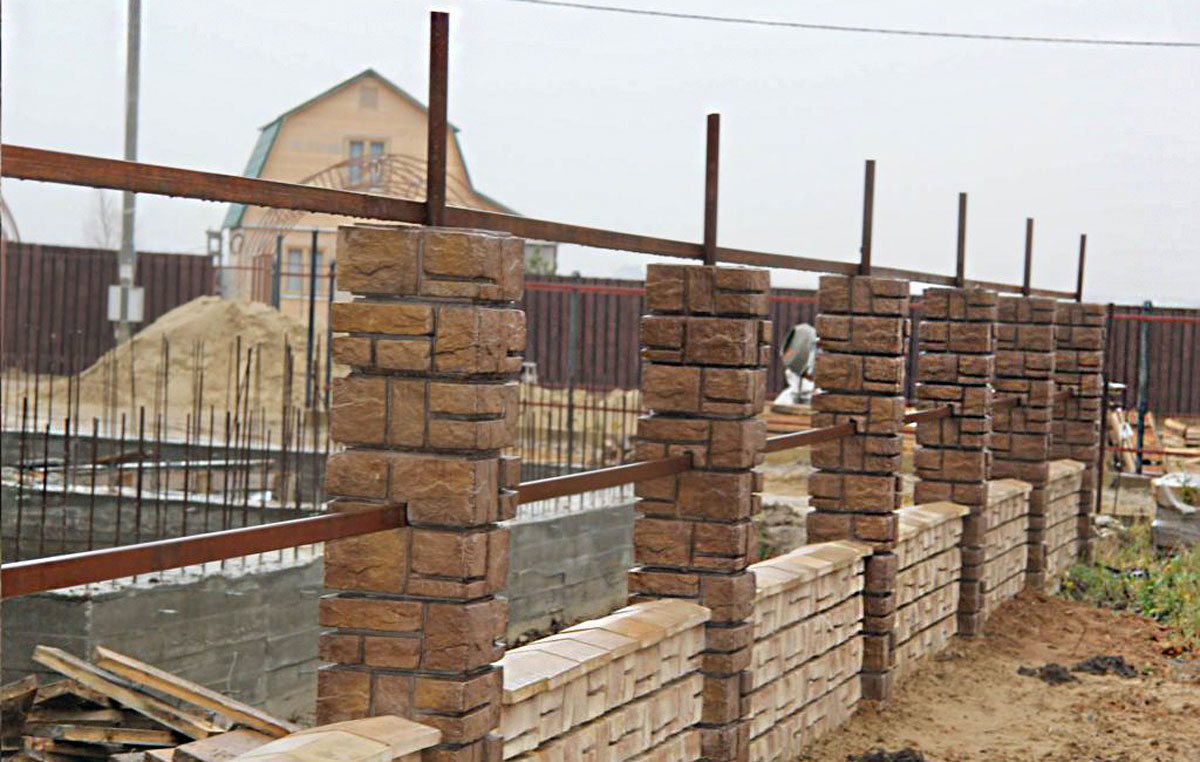
Installation of fence blocks
Important! Concreting must be carried out at a temperature above 4 degrees Celsius, since concrete cannot gain the necessary strength in the cold.
Laying blocks when installing concrete sections of the fence
There are three ways to install typesetting posts:
- All pillars must first be installed around the perimeter, and then proceed to laying the sections from above into the corresponding grooves.
- The second installation method is performed in the following sequence:
1) The first support is laid.
2) Hollow blocks are installed in the grooves of the post and fixed with temporary supports.
3) The second pillar is lowered at an angle into the pit, after which the groove is aligned with the edges of the sections.
4) A pit is poured under the second support and, using this technology, a fence is installed around the entire perimeter of the site. - The third is a combined method. Initially, one section and pillars are mounted along the entire perimeter. Only after the concrete has completely hardened can you start laying the remaining sections in height.
Before installing the columns, it is necessary to study in detail each of these methods and consult with the builders. If we consider it as a whole, then the second of the above methods in its execution is considered much simpler than the others. Installation of concrete fences using a similar technology does not require significant efforts when laying sections. Therefore, it can be carried out independently without involving construction crews.