How to make drywall slopes: three ways
There are two technologies for decorating door slopes: plastering and decorating with hard finishing materials such as laminated MDF, plastic, drywall, etc.Leveling the door slope with plaster - the most reliable method from the point of view of safety: there are no gaps and gaps left, it will be very difficult to knock out the doors. Therefore, slopes are usually plastered near the front doors. But, as always, there are drawbacks: this work takes a lot of time, and without skills it is difficult to achieve good results. It's easier to sheathe something. You don't need to be a visionary to assume that most often they make plasterboard slopes with their own hands. Why - it is clear: the material is inexpensive, the technologies are known, it is easy to work with it, the result is good.
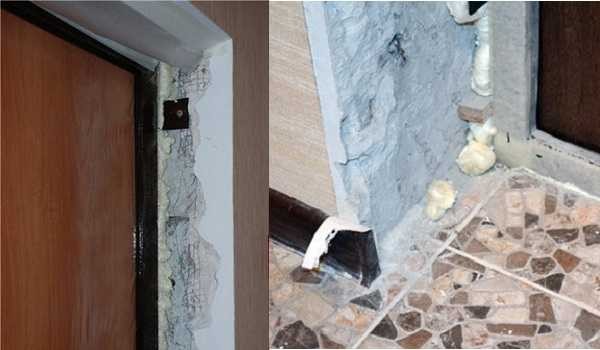
Doors have this look after installation - you need to make slopes
To decorate the slopes indoors, use ordinary drywall. If there is a need to make a slope outside or in a damp room, you need to take a moisture resistant one. The thickness of the sheets is normal, such as used for walls - 12.5 mm.
You will also need a good clerical paper knife for work, you may need perforated painting corners and polyurethane foam. You will definitely need a putty: fill up the cracks and bring everything back to normal.
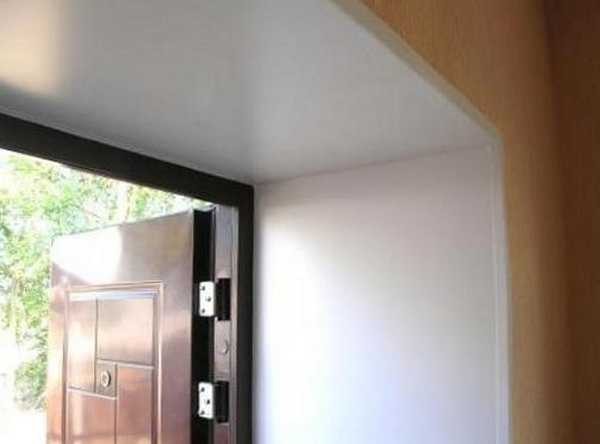
This is how the doors may look after finishing the slopes with igpsokarton, and you can do it yourself
The content of the article
Preparation for finishing
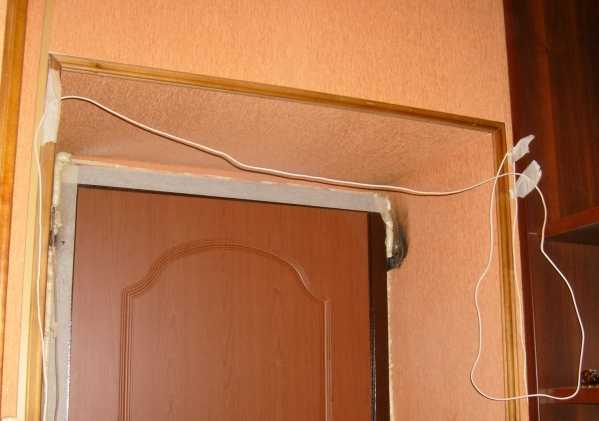
Before starting work on finishing the door slopes, all communications are laid that must pass through the doors. For example, if the doorway of the front door is being drawn, it can be a bell wire, lighting above the door, etc. If the slopes of interior doors are made, it can be a telephone cable or twisted pair for connecting the Internet.
Having passed the necessary communications into the gap between the door frame, fixing them, the cracks are sealed with polyurethane foam. Foam is applied no more than 1/3 of the volume of the cracks: it expands greatly and can even bend a wooden door frame. Therefore, if the box is wooden, while the reaction takes place, it is recommended to install spacers that guarantee constant geometry.

Making door slopes with your own hands begins with sealing the gaps between the door frame and the wall
The time required for the foam to harden depends on the temperature and humidity of the air, but on average is 8-12 hours (for some species, it may take a day). The excess of hardened foam is cut off with a knife, plaster, which does not adhere well, is removed, dust and dirt are swept away. You can start finishing the doorways.
How to make drywall slopes
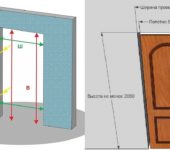
When installing drywall slopes, it is important to correctly and accurately measure the necessary elements. To do this, measure the distance from the door jamb to the corner in several places, measure the height of the required parts. Measurements are made for each side separately: rarely, the walls have perfect geometry.
All dimensions are applied to a drywall sheet, connected by lines. Once again everything is measured and, if everything is correct, cut out.
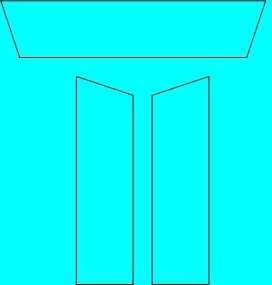
This is roughly how a "pattern" for a drywall slope looks like
We cut drywall
Cutting drywall is simple: you need a good knife on paper, a long ruler (one meter or so) and a block of wood. A ruler is applied to the drawn line, a paper is drawn along it with a knife, cutting a sheet of cardboard and trying to cut the plaster at least a little. A block is placed under the place where the cut was made and lightly tapped on the sheet along the cut.At the same time, the gypsum breaks, and almost perfectly exactly along the cut line. All that remains is to cut the bottom sheet of cardboard.
The video shows how to cut drywall without a saw.
In this way, it is convenient to cut drywall in a straight line. Where curved lines are needed, a hacksaw is used for metal - she has a small tooth and she almost does not tear cardboard. They also use a jigsaw, but there is a lot of dust. You can also cut in a straight line with a hacksaw or jigsaw if you don't like the previous method.
Instructions for installing gypsum board slopes
Elements cut from drywall can be installed:
- on polyurethane foam;
- on putty;
- on the frame.
On polyurethane foam
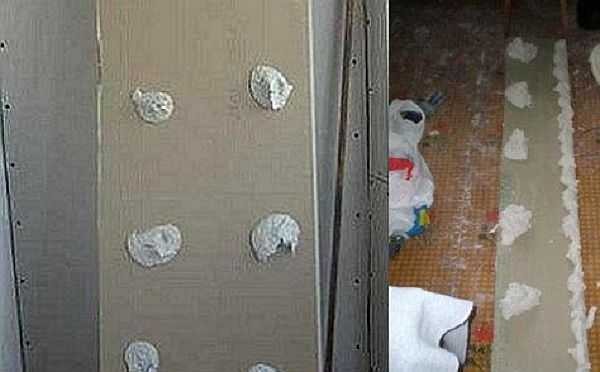
The methods of applying "patches" from the putty can be different. The main thing is that the element holds well
The disadvantages of this method are the same. It is only necessary to say that the slopes on the windows in our apartment are made in this way. It was already 9 years ago, and so far - no problems.
On the frame
A more laborious, but also more reliable and versatile method of installing drywall slopes is on the assembled frame. The frame is made of wooden blocks or special profiles.
The guides are set vertically along the door frame and at the corner. Small transverse bridges are placed between them, at a distance of 50-70 cm.
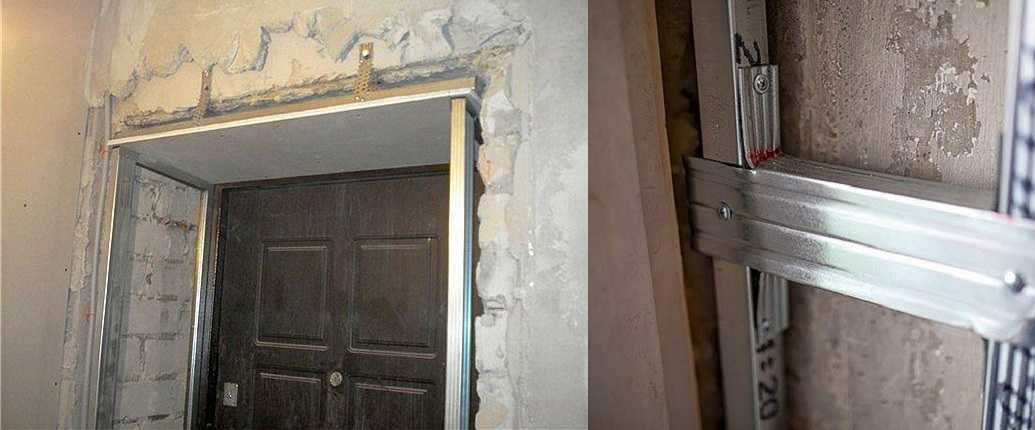
To install drywall slopes with your own hands, the frame is first assembled. It can be made from profiles or timber
With this method, there is one feature: measurements are taken after the frame has been installed. The cut parts are put in place and secured with self-tapping screws.
If the frame is assembled from profiles, self-tapping screws are needed for metal, if from bars - for wood. In any case, you need to twist carefully so as not to tear the cardboard. If overtightened, the plaster may even burst or crumble. A large number of rejects of this kind will lead to the fact that the plasterboard slope will not hold well.
Sealing gaps and designing the outer corner
The finishing touches before finishing the slope on the door is the sealing of the cracks. They can be glued with special tape for sealing corners, and then putty. This method is useful in the place where drywall is connected to the door frame or where the vertical and horizontal parts of the slope are connected. If the cracks here turned out to be very small, they can simply be covered with putty and leveled well.
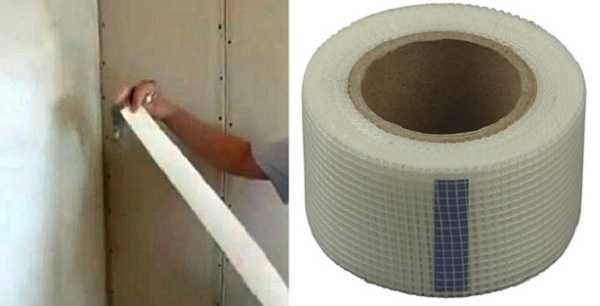
Corner tape can be paper or fiberglass. Both do their job well - prevent cracking
There are also several ways to design the other side. The first is to glue it over with the same tape for finishing the corners. But this method is suitable if the angle is even, there are no problems. For beginners, this situation is rare. More often the angle needs to be "taken out". In this case, use a metal painting corner. It has perforations on two sides, which allows it to be fixed in several ways:
- into pieces of plasticine;
- on a thick trowel;
- on self-tapping screws or carnations.
In the case of carnations, you need to be careful: they can get hurt while working. In general, this method is convenient, but again, if the angle is almost perfect.
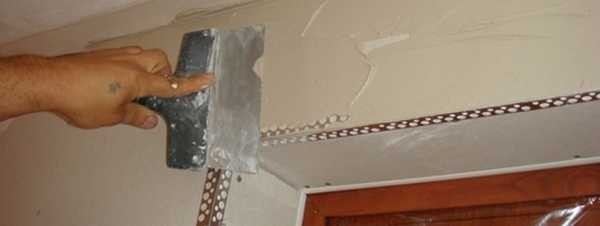
Having fixed the corners, the drywall slopes are finally put in order - they putty
Perforated corners are set in level and in the same plane with the main wall. The resulting voids are filled with putty diluted to a pasty state. For initial leveling, use a starting putty. After it dries, all irregularities are smoothed out with a special mesh. It is used instead of sandpaper, which clogs up instantly with putty. A sanding net for putty is sold at the same drywall stores. On the leveled surface, then a layer of finishing, leveling putty is applied. After drying, it also needs to be brought to a perfectly even state.This is done with the same mesh, only thinner.
If such a gimp with putty seems complicated to you, read about how to make slopes from MDF... There is definitely no putty.
In general, outside corners are difficult to make perfect without experience. Even when working with drywall. By installing perforated metal corners, we greatly facilitate our task. But, all the same, it is not always possible to do everything perfectly. But in this case, there is a way out: decorative plastic corners. They are installed after the walls are finished. They are selected either to match the door, or to match the finish. They are glued to liquid nails. All you need to do is cut them to the required length. They are cut with ordinary scissors. The main thing here is to cut the corner exactly at 45 ° at the top.
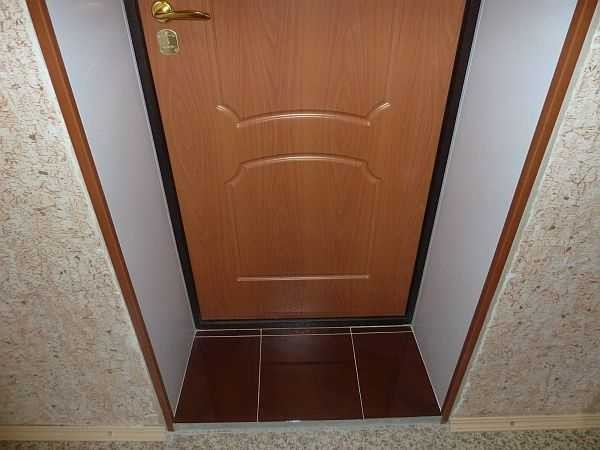
A decorative corner for slopes will hide all defects
If wood is more suitable for the style of decoration, you can find a similar corner made of wood.
You can also arrange the outer corner of the slope using a wooden corner
Actually, the role of a decorative corner for slopes is not only decoration. It also protects the corner from damage. This is especially true for front doors. If everything is covered with wallpaper, it also protects them from damage, which also often happens. That's all, plasterboard slopes are made, and with their own hands.
All these methods can be combined, as, for example, in the video.
-
 How to open a door without a key if the door has slammed or the key is lost
-
 Dimensions of standard doorways: interior and exterior
-
 Magnetic locks and latches for interior doors - modern and practical!
-
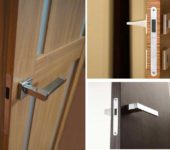
 Door handles for interior doors: types, choice
-
 How to choose a video peephole (door peephole with a video camera)


