How to plaster slopes: doing it right
The design of door slopes is an obligatory part of a major overhaul or decoration of a newly built house. Plastering can be considered a classic design today. Although this method takes a lot of time, it is the most reliable: with such a finish, no voids remain. Although this is not an easy matter, if the technology is followed, plastering the slopes with your own hands can also be done at a good level. In any case, you can prepare the surface for wallpapering yourself.
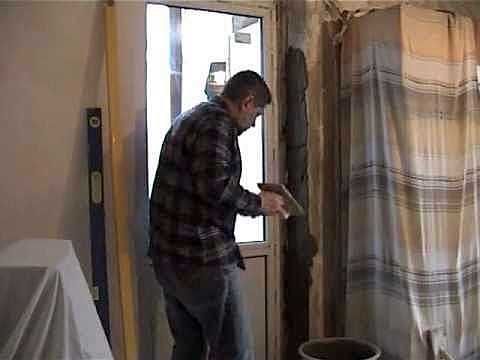
We plaster the slopes with our own hands: if the technology is followed, everything will work out
The content of the article
How to plaster the slopes
Plastering slopes for a door can be made using different compositions:
- Cement-sand mortar (CPM). For 1 part of cement, take 3-4 parts of sand and dilute with water (less than a part) to a state of thick sour cream.
- For a faster "setting" of the mortar and increase its plasticity, you can add a little alabaster or other similar additive to the cement-sand mortar.
- Special mixtures for plaster type (Rotband) and MP 75 by Knauf.
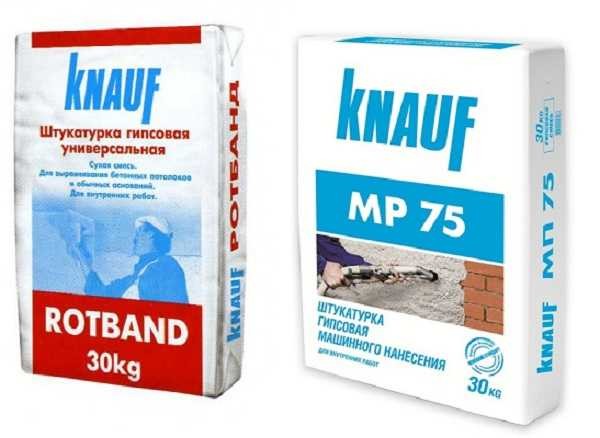
These compounds can be used for plastering door slopes.
What plaster is better to plaster the slopes? It is easier to work with Knauf compounds, cheaper - cement-sand. What is preferable for you is up to you.
Technology
Slope plastering begins after the surface of the main walls is leveled. The work to be done is dirty, therefore it is advisable to close the door leaf, floor and door frame with a film, oilcloth or other similar materials. The jamb can be pasted over with masking tape - it will be easier to clean.
Preparation
The first stage of work is surface preparation. First, remove poorly adhered plaster, pieces of brick, and other building material. If the doors are changed, the old plaster can stick out a lot. In this case, even if she holds up well, she is beaten.
If the old plaster sticks out strongly, it is chipped
Then grease or oil stains, if any, are treated with neutralizers. Old paint is also peeled off: plaster does not adhere well to it. After - dust and dirt are removed.
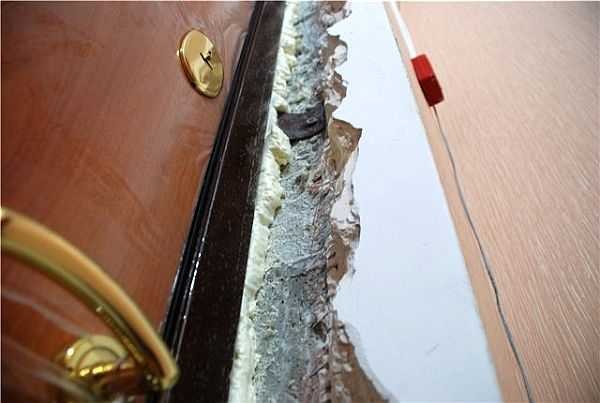
If the cracks were not foamed when installing the door, you will need to do it now. Polyurethane foam is applied to the wetted surface in volume - no more than 1/3 of the required amount. First, all dust is cleaned, then moistened with a spray bottle. After a few minutes, it will greatly increase in size, filling in all the empty gaps. After waiting for the foam to polymerize (harden), cut off the excess with a knife. It is more convenient to do this with an ordinary stationery for paper.

Do-it-yourself installation of door slopes begins with sealing the gaps between the door frame and the wall
If the plastering will be a cement-sand mortar, the surface is moistened. This can be done from the same spray gun or with a brush or roller.
Setting up the guides
Plastering slopes with your own hands, as well as walls, is more convenient along the guides. Outside the doorway, to obtain an even and hard edge, a perforated paint corner is usually placed.Once well secured, it can be used as a guide.
It is cut to the height of the doorway. The upper edge of the corner, which will be adjacent to the main wall, is cut down at an angle of 45 °. It is better to do this, since during work this edge for some reason always bulges up and causes a lot of inconvenience.
There are several ways to fix the corner:
- Gently apply the mortar to the inside of the corner, then press it against the corner.It is necessary to apply the solution carefully: the walls are made very thin and even from a small mass it breaks. Therefore, it is better to use the second method.
- The solution is applied to the corner, and the corner is pressed into it.
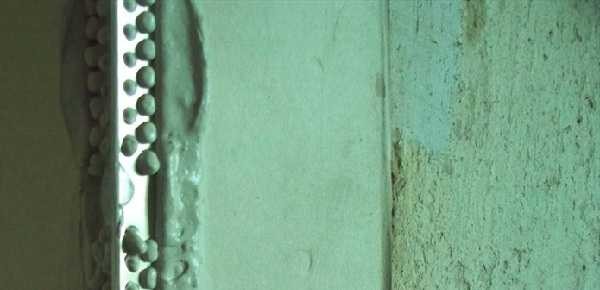
Too much solution should not be, but voids too
Having pressed the corner well, it is leveled so that its edge is flush with the main wall. The solution protruding through the holes is removed with a spatula. Then they take an even bar (you can use a building level or a rule), apply it to the corner, checking how even the corner is exposed. Check both from the side of the main wall and from the side of the slope.
The procedure is repeated on the other side, and then from above. At the junction of the corners, the absence of drops can be checked by sliding your finger along the junction.
There is another way of attaching the corners - with nails or screws. This method is good when working with drywall, but when plastering it is not used: the hats get in the way.
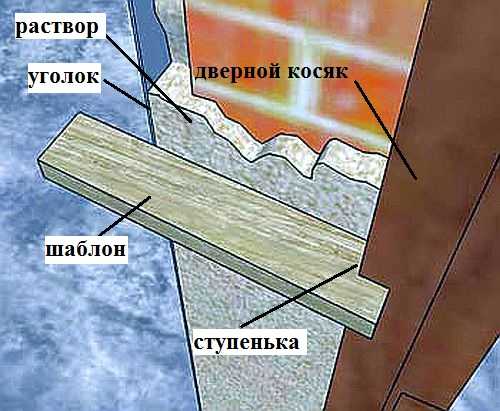
When plastering door slopes, it is convenient to use a template
The second guide is the doorframe. When installing the doors, they were exposed exactly, so this is a good reference point. But since the solution should not cover the entire surface of the jamb, a template is cut out of some dense material, with which the solution is then leveled. It is better to cut it out of a piece of plastic: both the edge is smooth, and it slides well, and quite dense. You can use a piece of flat wood plank. Only the edge that will cut off the excess mortar should be perfectly flat. The part of the template that will slide along the jamb is made in the form of a step. This protrusion will remove the excess solution.
You can work with a spatula or with a rule, but then a beacon is installed and fixed along the jamb at the required distance. The tool rests on it when cutting off excess mortar.
Slope plastering can be carried out along the guides
In this video lesson on plastering slopes, the technology of attaching perforated corners is explained in detail, and explanations are given on the technique of applying putty for finishing.
DIY rough plaster of slopes
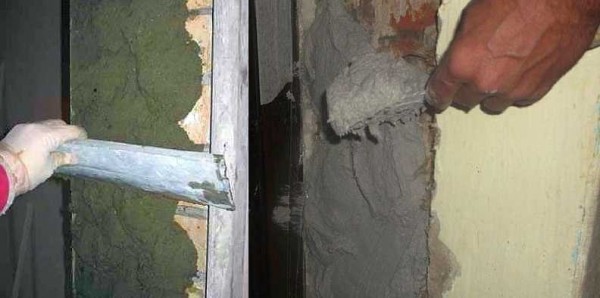
The process of applying plaster to the slope is no different: a solution is poured onto a dust-free and moistened surface. Do it with a wide spatula or a painting bucket - as you are used to.It is more convenient to start from the bottom, moving up.
Leading with a rule or pattern along the guides, swinging from side to side, the solution is leveled, the excess is removed back into the container. For the first penetration, it is possible not to achieve a particularly flat surface, but it is imperative to monitor the condition of the corners - remove excess mortar regularly.
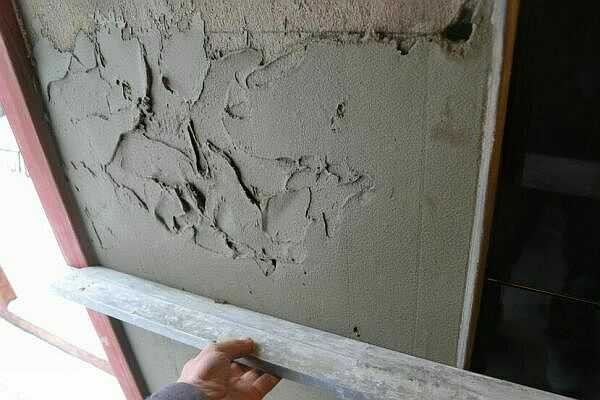
Plaster slopes are made in two stages: the first is rough, the second is final
Some problems can arise when plastering the upper slope: it is more difficult to apply the mortar here. It is taken with a wide trowel (spatula) and slightly pressing, applied with a small broach. If the surface is rough, there are usually no problems. They can occur if a concrete beam is installed on top. To such a surface, a solution, especially a cement-sandy one, “sticks” badly. In this case, you need to pre-soak it with a primer, which serves to improve adhesion (adhesion) with finishing materials.
Processing may be required even if the surface on which the DSP plaster is applied strongly absorbs water (silicate and clinker bricks, for example). Only in this case, the primer should further reduce moisture absorption. The second way out is to use special Knauf compounds - they do not react so sharply to a lack of fluid. And the third way is to apply a layer of tile glue to the surface treated with primers, forming a wave with a notched trowel. Tile adhesive adheres remarkably to the most difficult surfaces, and itself serves as an excellent base.
If all this seems very difficult to you, read the article on how make slopes from MDF... Everything is extremely simple there. No mortar or spatula needed and the result is great. Or you can do plasterboard slopes... The view is almost the same, but to do faster. After installation of plastic windows can make slopes out of plastic.
Finishing layer
After a while, or the next day, the dried plaster is leveled by applying a second finishing layer. Too early to start leveling it is impossible - the solution "floats", loses its shape. Touch the plastered surface: the mortar should crumble, but not "float".
For a fine leveling, the solution is made a little more liquid. It is also applied and stretched. Only this time you need to make sure that the surface is flat. If necessary, the solution is re-added to the voids, filling even minor pits.

Secrets of smooth plaster: pull the rule not evenly, but in zigzags
Grout
This stage creates a perfectly flat surface. It is possible to rub the plaster only after the solution has set. For this, at least 16-24 hours must pass (depending on humidity and temperature). To determine if grouting can start, grab some mortar from the wall with your fingers and rub. If it crumbles, you can work, if it is smeared, we wait for more.
The solution is made even more liquid. It is no longer applied, but rather poured onto the surface. And it is distributed not with a spatula or a template, but with a grater - a foam surface with a handle. With this float, the solution is distributed over the surface in a circular motion. At the same time, the plaster becomes even, monochromatic. This procedure is optional, especially if then everything will be putty. But so your do-it-yourself plaster of slopes takes on a finished look. But again, this is not necessary.
This video describes how to plaster door slopes with cement-sand plaster. The case is not easy, the explanations are detailed, only in some places the sound is not the best.
Finishing of plastered slopes
If the slope is painted further, the putty is aligned perfectly. For this, two layers are applied: starting and finishing. The starting putty has a larger grain, it can be laid in a layer up to 1 cm. With its help, all flaws that are difficult to remove with cement mortar are eliminated. After the finishing putty has dried, all irregularities and protrusions are sanded with a special mesh. After that a layer of finishing plaster is applied. It is even more plastic than the starting one, and it can be applied in a very thin layer. With its help, you can achieve perfect smoothness.
For a beginner plasterer, getting a perfectly flat surface for painting is very difficult. It is much easier to align the slope for gluing wallpaper. In this case, you can stop at the starting putty.
If, during the installation of the door, the old slopes were slightly damaged and they can simply be restored, there will be less work. You only need to throw the solution into the cavity and level it with a long trowel (spatula).
Plaster doorway
Sometimes doors are not placed in the opening, but in this case, the doorway requires finishing. And the easiest way to do this is with plaster. The technology of the plaster itself is similar, but the guides and methods of their installation are different.
Plastering of a doorway begins only after both adjoining walls have already been plastered. The opening itself is covered with a primer (the selection principle is the same).
The guides are installed from the sides. These can be boards, metal profiles, two rules, pieces of plastic, fiberboard, etc. One is installed on the right, the second on the left, they are fixed. The most convenient way is to fix them with clamps. If there are no clamps, powerfully use nails or screws - the remaining holes will then need to be carefully repaired.
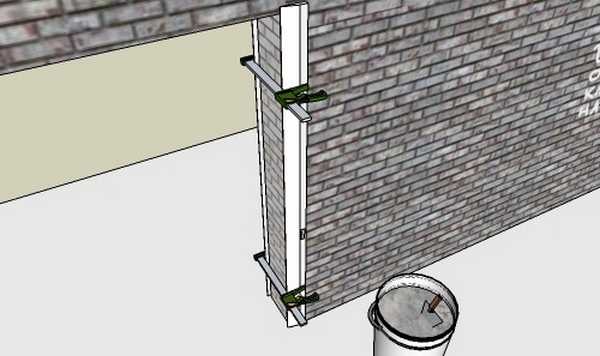
To plaster a doorway, two guides are needed, which are installed on both sides
The leading edges of the guides will serve as the base on which the rule or wide spatula will move.The sequence of actions is the same: the first layer is rough, the second is finishing, if it is necessary to bring it to an ideal state, grout is done. For more information on how to putty a doorway, see the video.
-
 How to open a door without a key if the door has slammed or the key is lost
-
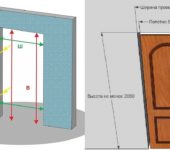 Dimensions of standard doorways: interior and exterior
-
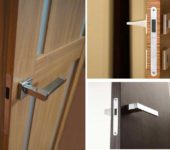 Magnetic locks and latches for interior doors - modern and practical!
-
 Door handles for interior doors: types, choice
-
 How to choose a video peephole (door peephole with a video camera)


