We make door slopes from MDF, laminated chipboard, laminate
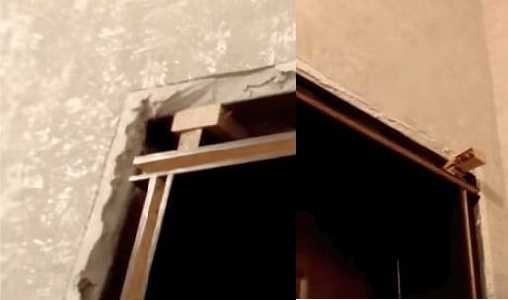
After installing the door, the walls adjacent to it - the slopes - have a deplorable appearance. Perhaps the fastest way to put them in order is to trim them with laminated panels. It can be MDF or laminated chipboard (Chipboard). There is not much difference. The main task is to choose a pattern and shade to match the door or other decoration in the room, and it is not difficult to make door slopes from MDF or chipboard. Moreover, there is a method that requires a minimum of time.
Laminate slopes are made quickly, while the appearance is at least good. No special skills are required, you need to be able to handle a saw or a jigsaw - in order to cut fragments of the desired size. The rest of the work is simple and straightforward: glue, polyurethane foam, wooden planks, self-tapping screws are used. You don't even need plaster as when finishing plasterboard slopes.
The content of the article
The easiest way
The easiest way to close up a door slope is to use "L" -shaped additional strips, They are made, as a rule, from MDF. All that is required in this case is to cut the required depth, correctly and accurately cut at 45 °. Then you need to coat the end part with liquid nails, apply mounting foam on the inside and press everything against the wall.
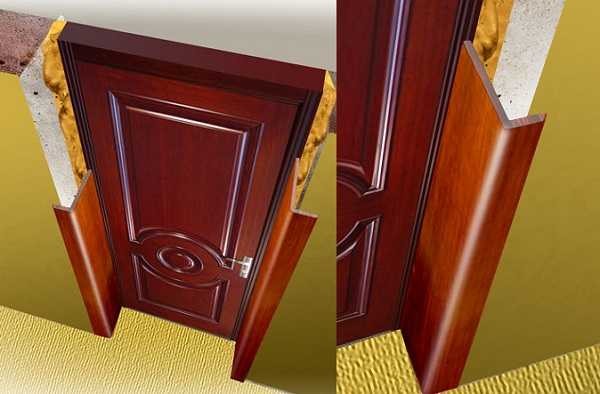
The easiest way to create a slope is to use "L" -shaped panels
And, as always, there are "buts", and serious ones. First, these platbands are expensive. Second, they are available only in large cities and in specialized retail outlets. Third, there are usually only a few colors available, all others are supplied on request. Therefore, more often they use other methods of facing MDF door slopes.
Installation of a slope on liquid nails and polyurethane foam
If the width of the slope does not exceed 20-25 cm, the laminated panel can be installed on liquid nails and polyurethane foam. The method requires a minimum of time, and the result is good.
Cooking slope elements
Laminate door slopes consist of three parts: two side and one top part. If the slopes are made at an angle, then one edge at the sidewalls will be beveled.
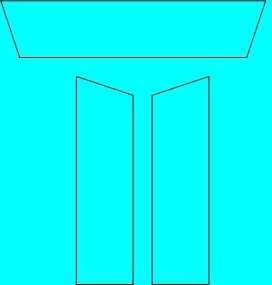
This is roughly how the "pattern" for a slope made of MDF or laminated chipboard looks like
Measure the distance from the doorframe to the corner in several places, cut off the plank of the required width and height. The cut sidewalls should be a couple of centimeters higher than the required length - just in case, they suddenly missed the size. You can cut off, but build up - no.
Try on the sides, insert the top. If the edge is flush with the main wall, and the gaps near the door frame are minimal, everything is done correctly. If there are flaws, we correct them.
Cut off the parts and try them on the spot
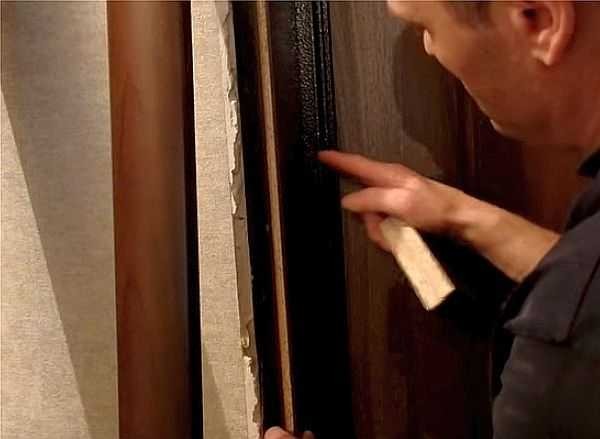
Then the outer edge of the chipboard or MDF is trimmed - they stick the trimming film: you are not nailing the platbands to the very edge, so that some part will be visible. Therefore, it needs to be decorated. You can do without trimming if the edge is trimmed with a decorative corner to match. But it is made of plastic, and how good it will look is the question.
It is not difficult to stick the trimming tape. It is glue-based. Only the edge should be smooth and clean - free of dust and dirt. Glue the trim strip on it, then take a dry cotton fabric that does not fade, and iron the end through it with an iron (at medium power). Then it is glued tightly, but all the irregularities are visible, so saw off exactly.
If you can pick up a plastic corner to match, it looks good, and there is less work: it is glued to liquid nails or silicone
If a telescopic casing is used at the finishing stage of finishing the slope, a groove is made under it with a cutter, in the laminated end. The width is just under the spine of the casing, the depth is slightly more than required for it to “sit down” well. Nothing is needed for a regular MDF casing. It just sticks to liquid nails.
Installation of slopes
After completing all the preparations, proceed to the installation of MDF (laminated chipboard) slopes. The butt, which is directed to the door, is coated with liquid nails. It is better to take the composition transparent - it will not be visible. The jamb to which the MDF is glued is degreased. Pressing the sidewall, it is set in the desired position, checking the verticality and observing the same indent. Then peel it off and wait until the glue dries a little. After 5-7 minutes, the fragment is set in place, adjusting the position relative to the walls.
In the same way, the second side panel is installed, and then the upper part. The top additionally expands: spacer wedges are installed above the place where it joins the sidewalls. This will not allow the trim to bend and additionally "clamp" the sidewalls.
Having installed all parts of the slope from MDF, put wedges at the top
Fixation
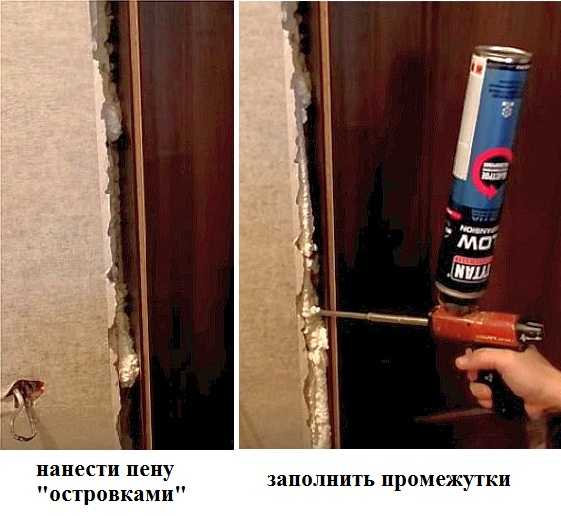
After the wedges are inserted, check how everything is standing correctly and evenly. If everything is fine, take the foam, and put “patches” between the panel and the wall - apply a small amount of foam in islands. They should be at full depth, but not wide. It is not necessary to fill the entire volume: a lot of foam is required, and it can bend. Therefore, do just the islands.
After polymerization of the applied foam, the fragments of the slope are held rigidly. Now you can start filling the empty space. It is also more convenient to seal it up with foam, but not to the full depth, but only in front.
The procedure for fixing the slopes of laminated fiberboard
After the foam has hardened, its excess is cut off with a knife. You can start finishing.
Installation of platbands
This section of work takes place in a standard way: first, one side bar is measured and cut off, then the top, then the second side. After trying on everything folded and checking the accuracy of the docking, the platbands are set on foam or liquid nails, depending on the situation.
How to plaster the slopes is described here.
Door slopes from MDF on planks
If the width of the slope is large (more than 25 cm), additional supports are required for rigidity: the foam may not be dense enough. In this case, the strips are fixed. These can be lumber or metal profiles. You can attach the strips vertically or horizontally. The installation diagram of the slope from MDF panels with vertical slats is shown in the photo below.
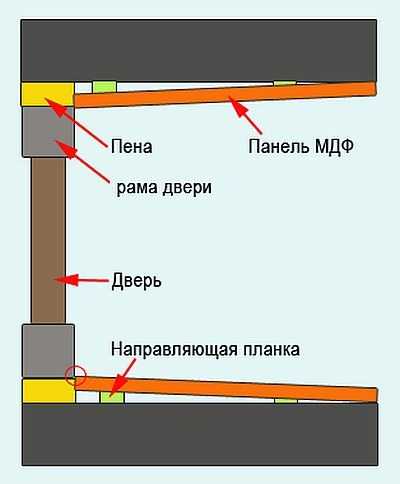
How to attach wide MDF slopes
The strips are attached to dowels (they are used more often) or self-tapping screws - depending on the wall material. After the supports are fixed, the slopes are cut to size, the procedure is the same. First, the ends and places where the slope is adjacent to the slats are coated with liquid nails, the panels are peeled off for a few minutes. Further, all actions are exactly the same.
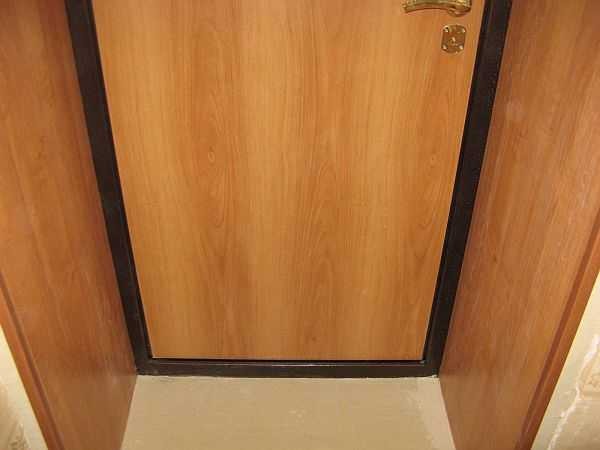
If, as in the figure, the joint between the panel and the wall is ideal, you can do without foaming the cracks and installing platbands. In this case, there is little work at all.
MDF door slopes can be installed on horizontal slats. They are aligned so that they are all in the same plane. On the lateral sides, four supports are enough, at the top - three (stepping back 10-15 cm from the edges and in the middle). Further, the whole technology is the same.
How to make slopes on PVC windows from plastic.
Laminate slopes
Often, after repair, a certain amount of building materials remains. Why not adapt them? When making slopes on the door from MDF, the material must be bought. If, after laying the laminate, you still have a certain number of planks, you can also make slopes from them. There will be more work than using a single piece, but the material is free.
Assemble the sidewalls from the laminate boards.They need to be docked with a shift, the joints from the inside out should be fixed with strips - it is possible from an aluminum profile - it is less in weight. If necessary, the edge can be trimmed. How to make the slopes on the door from the laminate, see the photo below.
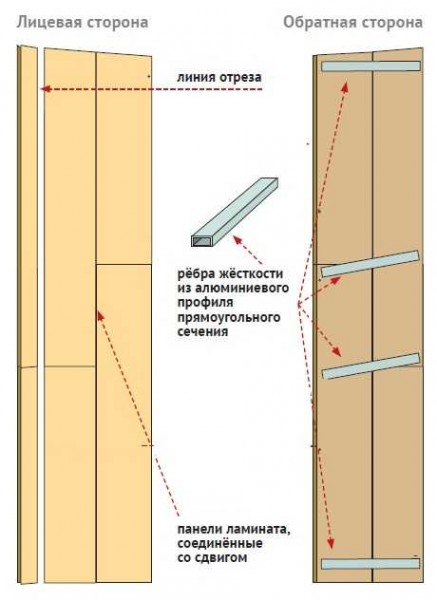
Prefabricated door slopes can be made from laminate planks
They can be installed on polyurethane foam. To give greater rigidity, apply it to the back side with a snake and press it well against the wall: in this case, you cannot leave large gaps: the material will bend.
In the video below, laminate door slopes are made in a panel house. The width of the slope is small - 7-8 cm, the sequence of works is described clearly. Useful video tutorial.
In general, it is better not to put homemade laminate slopes on the front doors: bulky things are often brought in there, and it is easy to damage the laminate even with a heavy bag. This type of compartment is best used for interior doors. The load there is much less. At the entrance, it is better to make door slopes from MDF or laminated chipboard, slopes from drywall showed themselves well, but the most reliable - plastered.
-
 How to open a door without a key if the door has slammed or the key is lost
-
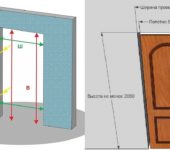 Dimensions of standard doorways: interior and exterior
-
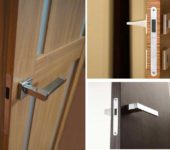 Magnetic locks and latches for interior doors - modern and practical!
-
 Door handles for interior doors: types, choice
-
 How to choose a video peephole (door peephole with a video camera)


