How to glue ceiling tiles
If you need to tidy up your ceiling quickly and inexpensively, look at styrofoam or polystyrene tiles. If you approach the matter correctly, you can get a very decent result. How to glue tiles to the ceiling correctly, what to use for this, and we will talk further.
The content of the article
Views
If you look closely, for all its similarity, the tiles on the ceiling have significant differences. It's not about the pattern and shape, but about the appearance - density, smoothness of the surface and other "little things" on which the appearance and service lines of this type of finish depend. This is explained by the use of different materials and technologies:
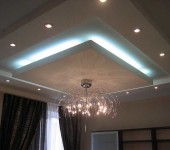
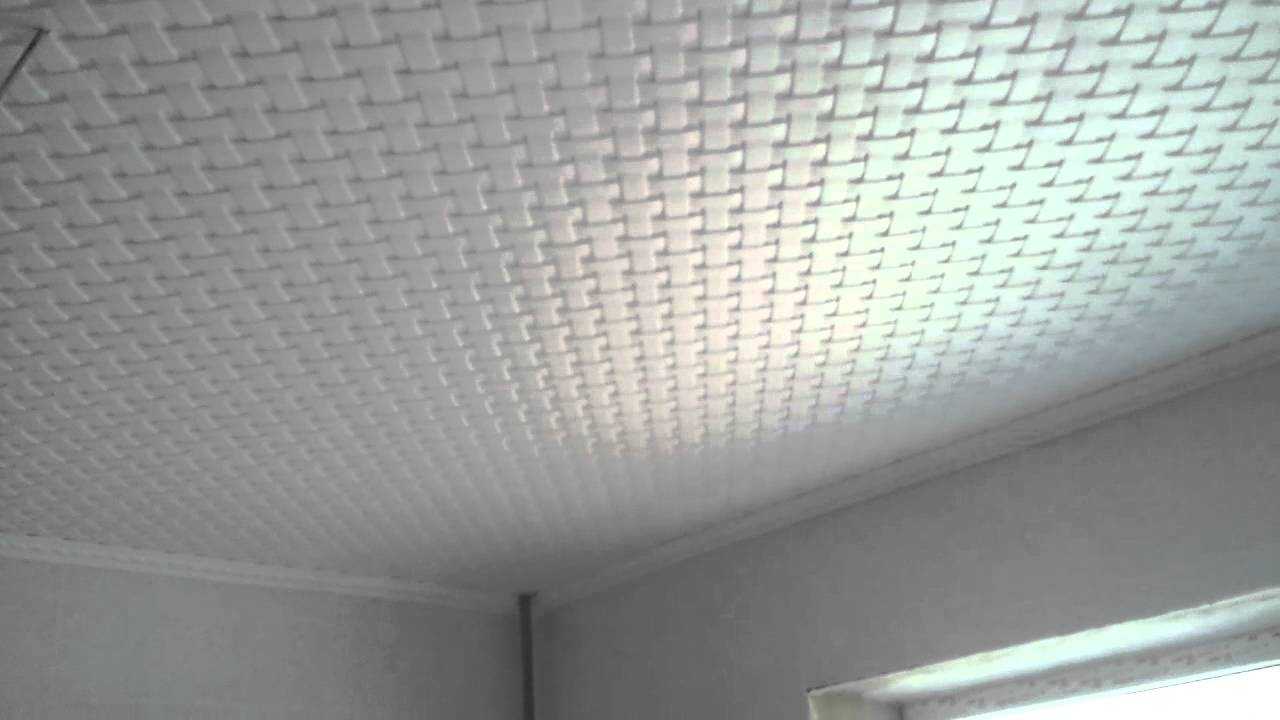
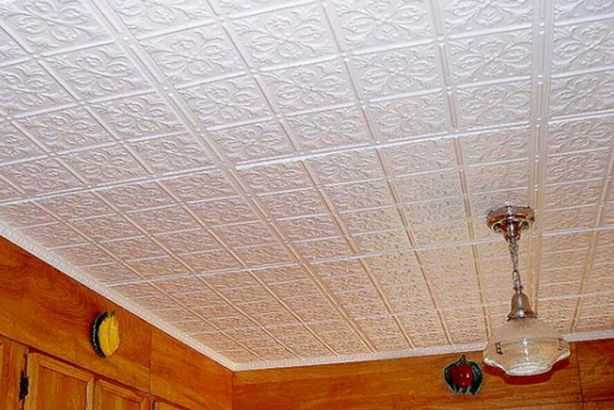
If done correctly, the result looks very good.
- Extruded. The surface is smooth, without visible grains, the thickness is small 2-3 mm, the material itself is dense, it can be painted in different colors, including imitation marble or wood. This type of tile is not painted on the ceiling - the paint "rolls off". Manufactured from expanded polystyrene. Easy to maintain, easy to glue, but the cost of this type of ceiling tile is high.
- Foam or stamped. Loose in appearance, graininess is clearly visible. The surface is more porous, clogged with dirt, difficult to care for. Therefore, after gluing it is desirable to paint it, but not with an aqueous emulsion, but with an acrylic dispersion. The thickness of the slabs is 6-12 mm. The drawing is applied to a sheet of foam plastic under a press - squeezed out. It is inconvenient to work with it - it often breaks down, wrinkles. When purchasing, take at least 10% of the stock. Its plus is the lowest price.
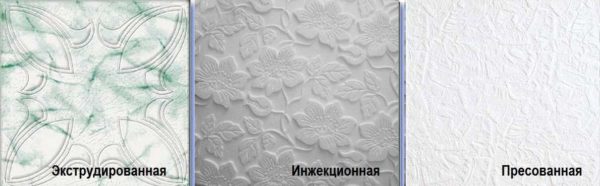
Types of ceiling tiles by production method
- Injection tiles. Expanded polystyrene is "baked" in a special form. The main difference is a clear drawing. In terms of price and characteristics, it is an average between those described above. It's good to work with it, you can paint it if you want.

The easiest way is to glue and maintain extruded polystyrene tiles. The second in quality is injection, and the most "capricious" in care and installation - stamped. Now you can choose the type of tile yourself, but the appearance remains.
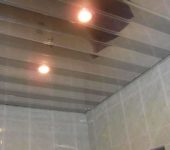
Ceiling tiles are most often produced in the form of squares with a side of 5o cm. There are non-standard options - rectangular. According to the type of surface, the tiles have an edging that forms a clear seam at the junction, there are seamless options. The edges of the seamless slabs can be straight or curved.

Types of decoration - piped, seamless
The principle of gluing does not change from the type of edge, only the appearance of the product changes. There are a lot of design options for this type of finishing materials. There are geometric, floral, no pattern, but with a variety of relief. In general, there are a lot of options.
Calculation of the number and features of choice
Before gluing the tiles to the ceiling, you need to calculate their quantity. This is not difficult. Most often it is produced with a side of 50 cm. This means that there are 4 tiles per 1 square meter. If you know the area of the room, you can easily determine the required number of tiles: multiply the area by 4. For example, a room has dimensions of 3.2 m * 2.8 m. The total area is 8.96 m2. Rounding up, we get 9 m2. To calculate the number of tiles, multiply by 4: 4 pieces * 9 m2 = 36 pieces. It will take some more for trimming, some may be broken. Therefore, we increase the total number by several pieces. How much exactly - you need to look at the layout, but usually 10-20% of the stock is enough.
One of the seamless options
To make ceilings made of foam plates look beautiful, when choosing a material, pay attention not only to the appearance and type.Carefully evaluate the geometry: all tiles should be the same size, the same thickness, angles exactly 90 °. The quality of the picture should be stable, clear, there should be no sagging or irregularities on the side edges. When choosing pressed boards, pay attention to the "grain" sizes. The smaller it is, the better.
What to glue on
Most often, ceiling tiles are glued on glue such as "Titan", "Naset", "Moment" or liquid nails. All of them are not bad, but with their use you need to hold the tile for a while. You have to hold from 3-5 seconds to several tens, and this is not very convenient. The Moment "seizes" the fastest of all, but it is not ideal either: the applied glue has to be kept in the air for some time.

Traditional ceiling tile adhesive
In addition to these compounds, there are mastics for ceiling tiles. They are sold in small buckets, they are paste. It is easier to work with this type of adhesives, as they are more "sticky". Tiles smeared with this composition stick to the ceiling, it does not need to be kept as long as greased with ordinary glue.

Ceiling Tile Mastics
All of the above options are for flat or flat ceilings. Where there are drops (plate joints), this method is not suitable. If the ceiling is uneven, you can glue the tiles on a gypsum plaster) or Perlfix glue. The starting or finishing composition - depends on the required layer, the finish is suitable if the height difference is no more than 5 mm, with a larger layer, take the starting one, but it is better to pre-align such a ceiling or use another system (for example, armstrong - also an inexpensive and quick way to tidy up a frankly crooked ceiling).
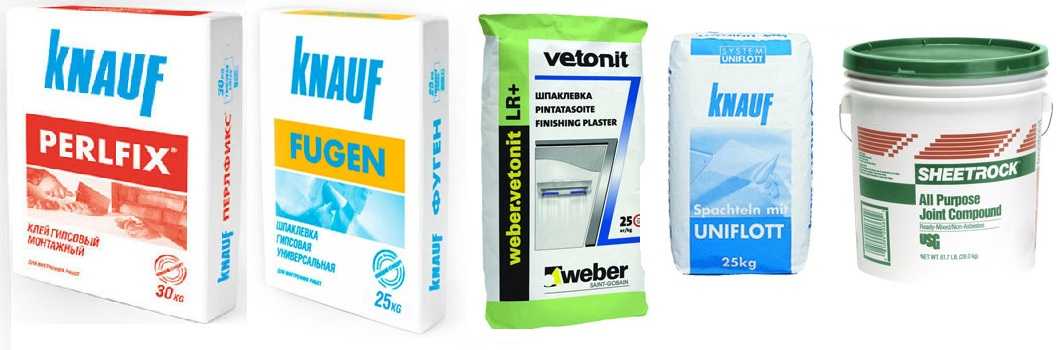
How can you glue on an uneven ceiling
Both of these materials allow you to simultaneously level the ceiling and glue the ceiling tiles. Only the method of gluing changes, and radically (more on this a little below).
Foundation preparation
Before gluing the tiles to the ceiling, the surface must be prepared. First, remove anything that might fall off. If there is a significant layer of whitewash on the ceiling, it is better to remove it - although the ceiling tile weighs little, it may fall over time with the whitewash. Therefore, we clean it dry with a spatula or rinse it off with water. If in the process of stripping large "craters" have formed, it is better to close them up. It is easier for this to use a starter putty or the remains of any plaster composition.
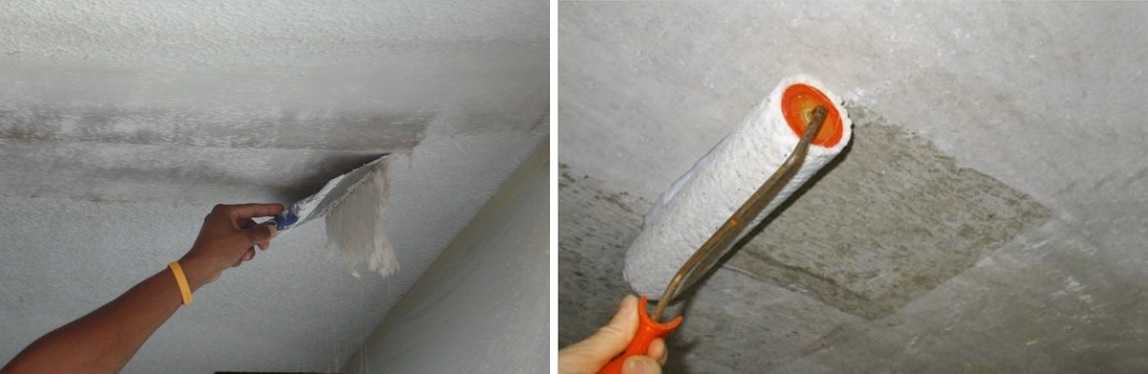
Before gluing the ceiling with tiles, it must be prepared
If the base is loose, loose, you cannot do without a primer. For concrete it is better to choose "betonokontakt", for gypsum base - any composition of deep penetration. After drying, you can start gluing the polystyrene or foam tiles to the ceiling.
Placement methods and markup
Squares on the ceiling made of foam or polystyrene are placed with faces along the walls or diagonally. When glued diagonally, the material consumption is higher - more scraps and not all of them can be used, but visually it looks better - it is more difficult to notice the seams.
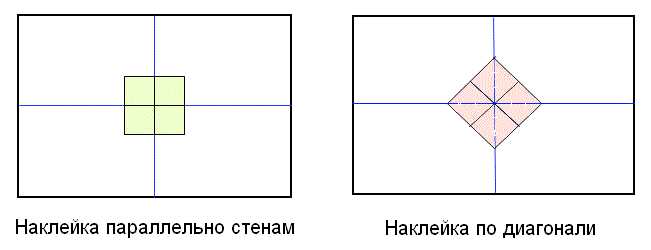
Methods for placing squares on the ceiling
Most often they start gluing from the chandelier. In this case, it is easier to "inscribe" it, since the edges of the plates can be cut a little, and the resulting gap will then close the cartridge from the chandelier. But not all rooms have a chandelier - often there are several lamps and they can be located on the walls. Then they begin to glue from one of the walls, most often from the opposite to the entrance. With this approach, most likely the extreme row will be cut off, and it will not be so noticeable near the entrance.
If you need to glue the tiles on the ceiling from the chandelier, you need to markup. Everything is simple in a square room - we find the center, we start from it. To do this, we take a paint cord, one end to one corner, the other to the opposite, pulling the cord and letting go, we get a line on the ceiling. We repeat the operation with another pair of corners.The center was found, it is not difficult to glue the tiles from it. For diagonal gluing, there are already guides, and for parallel gluing, you will have to make two more strips - through the center to the opposite walls (in the picture above).
But this is a very rare case. Most often the rooms are rectangular, and the chandelier is not in the middle of the ceiling. Therefore, you will have to do more complex markup.
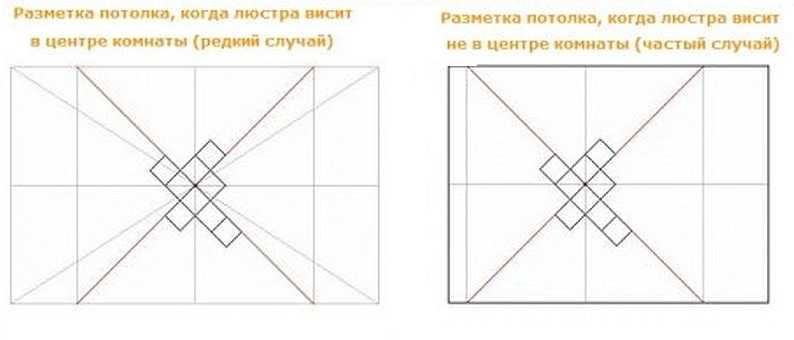
Marking methods for different arrangement of the chandelier
To begin with, we also find the center of the room (diagonally paint cord). If it coincides with the place where the chandelier is attached, it is great that we "dance" from it. If not, move the starting point to the chandelier. Further, the markup is the same. We measure the distance from the starting point of installation to the nearest wall. Using this value, draw the squares as shown in the picture above (using a paint cord). Having drawn the diagonals, we get the guides for laying the flow tiles. Along them we level the edge of the first row. The more precisely we set this row, the easier it will be to glue the tiles to the ceiling further.
How to glue tiles to the ceiling: two technologies
Foam or polystyrene tiles on the ceiling attracts by the fact that it allows you to quickly and inexpensively put in order a far from ideal ceiling. If the ceiling is relatively flat, the tiles are glued with special glue. It is applied in a thin layer, but provides a secure hold.
With uneven ceilings, this method will not work: the tiles simply will not stick with large drops, or the view will be deplorable. alignment is not always time, desire, or opportunity. Moreover, this finishing option is often considered as temporary, then planning to make suspension or stretch ceiling... Therefore, it makes no sense to waste time and money. In this case, another technology is used - for an adhesive composition for drywall or putty. They work no worse than glue, at the same time leveling the base.
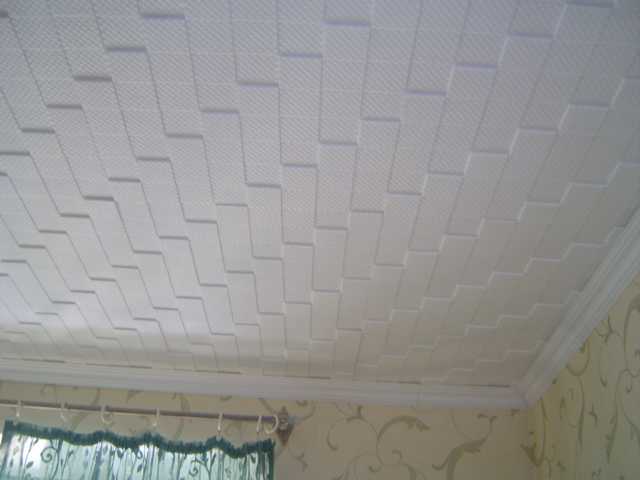
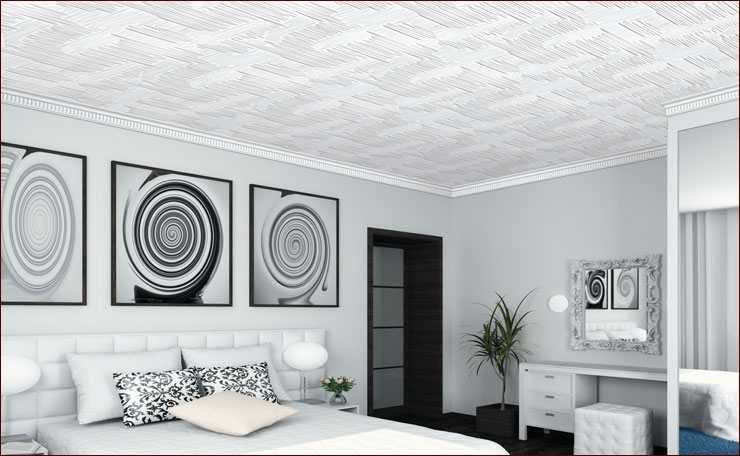
After gluing the ceiling tiles, you will get something like this
Before starting work, unpack all the material, make sure that it is the same color, size. If there are irregularities, nodules, they are cut off with a blade or a sharp knife. Now you can start installing the ceiling tiles on the ceiling.
How to glue on a flat ceiling
If the ceiling is even, ordinary glue for polystyrene or foam tiles is used, the technology is as follows:
- We spread a thin strip of glue around the perimeter of the square and diagonally. It is not necessary to coat the edges of the tiles.
- We put the tiles in place, smooth them by hand.
- We hold it for a while - until the glue “grabs”.
- Repeat the same with the next tile. We apply it to the edge of the already glued one, if necessary, we combine the drawing, and then we press the rest. Docking must be carried out as accurately and accurately as possible, so that subsequently no steps are formed. Align the edges to the nearest millimeter.
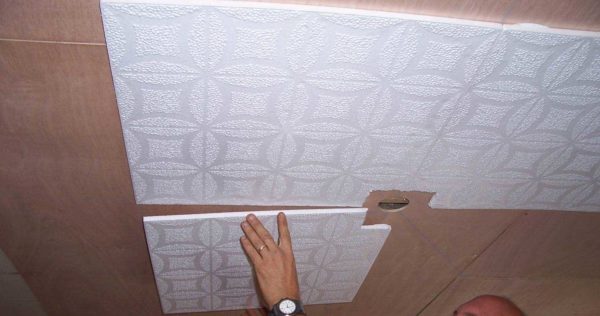
The main thing is to combine the edges and the pattern.
- Repeat with the rest of the fragments.
- Tiles can be trimmed to the ceiling if necessary. It is convenient to do this on

As you can see, everything is very simple and these are all the rules for how to glue tiles to the ceiling. Only one nuance: you need to press one square to another tightly. If you have already glued it, and there is a gap, you can move it by pressing a wooden strip to the free edge. When you try to do this with your hands, you can break the foam or polystyrene, and it is easier to achieve what you want with an even bar.
If the ceiling is uneven
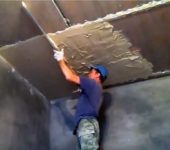
If the ceiling has significant irregularities, it will not work to glue the tiles with ordinary glue. To remove significant differences, use drywall glue or putty. The mixture is diluted to a pasty state, applied to the ceiling, grooves are formed with a notched trowel. The amount of glue depends on the overall curvature, but it is advisable to start with a minimum layer. The area on which the glue is applied at a time is about 4 fragments. During this time, the composition will not have time to grab, and it is not difficult to align such a fragment.
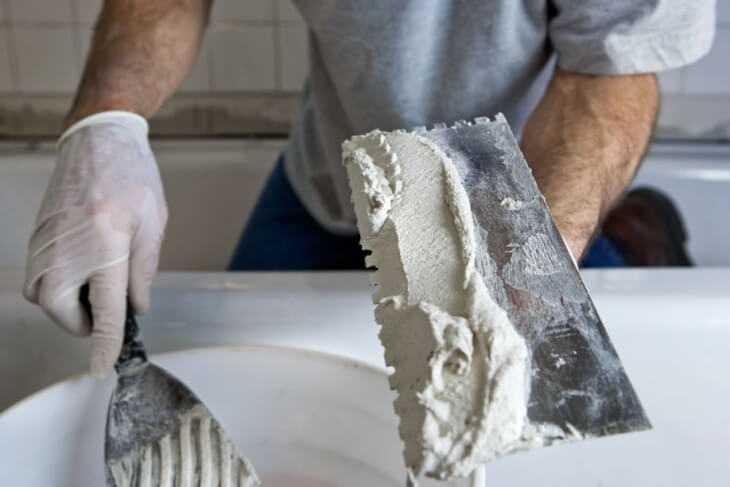
Apply a thin layer of putty to the ceiling
Tiles are laid on the layer of glue. It adheres well, moves without problems. Having aligned the edges of the laid fragments, take a rule or a building level (preferably one and a half meter) and expose the tiles in one plane. Just press down the fragments harder in the right place.
Then the composition is again applied to the ceiling, and, again, on about 4 tiles. All of them are exposed in the same plane, or at least so that there are no sharp changes. Only in this case it is necessary to ensure that the required layer of glue does not grow too quickly - it is better not to apply more than 3-5 mm, otherwise everything will fall.
Cleaning and sealing
You know how to glue tiles to the ceiling, but there are some nuances left, without which a decent result is unattainable. When working on the face of the tile, adhesive often gets into. It must be removed immediately and completely. You can use a sponge or a soft, non-fading cloth. Wipe off the surface immediately after placing the fragment in place. In a few minutes it will not be possible to do this and traces will remain. Therefore, keep a bucket of water and a sponge / rag close at hand while working.
Neat seams do not spoil the view
If there are small voids left between the plates, you can fill them with the same mastic or putty (if it is white), only remove the excess immediately. Another option is a white acrylic sealant. It perfectly masks all the cracks, adheres well to polystyrene and polystyrene. Fine gaps can be filled with a rubber trowel, and the excess can also be wiped off immediately with a damp cloth.