How to make a bathroom in a wooden house
Recently, wooden houses are becoming more and more popular - from a bar, logs. They are beautiful and cozy, but decorating such a house is a serious matter. There are too many features to consider. Particular attention should be paid to wet areas. Only a properly made bathroom in a wooden house will not become a source of problems.
The content of the article
How to make a floor
The bathroom floor in a wooden house can be made of any waterproof material. Traditionally, these are ceramic tiles or porcelain stoneware, but you can put linoleum (economy option), PVC tiles (in terms of quality and characteristics, the coating is similar to commercial grade linoleum), glue plug (it is 100% hermetic, as it is covered with several layers of varnish). You can even make a wooden floor, but the board will need to be treated with special compounds and take care of the ventilation of the underground space.
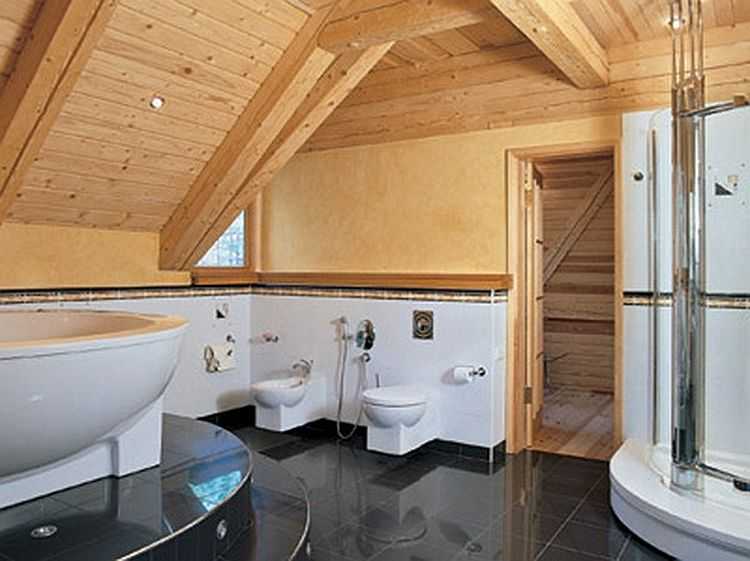
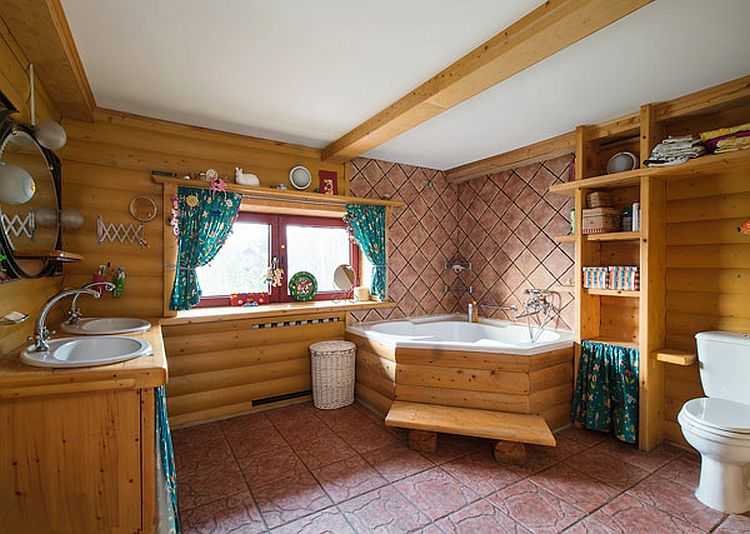
Bathroom in a wooden house - room for imagination
All coverings except wooden boards are compatible with warm floors. It can be water or electric heating. Only when choosing a floor covering, pay attention to its compatibility with the warm floor. In this case, it is better to take ceramic tiles that are not very thick - in order to speed up the heating of the array, but in principle any one is suitable. The characteristics of the remaining materials must contain a mark about compatibility with the warm floor.
A bathroom in a wooden house is most often finished with tiles. In any case, the floor is made mainly of this material. It is practical, easy to clean. Ceramic floor tiles or porcelain stoneware can be installed on a cement or dry screed. As a base for a dry screed, moisture-resistant plywood, GVL, Chipboard... There is also a new material that can be used in dry screed - Knauf Aquapaneli.
If necessary, on a dry screed, you can lay a film warm floor, and on top - the selected finishing material. Can be laid in cement water heated floor or cable mats (you can just use a heating cable). It is undesirable to use a film floor in a screed, since the film in concrete quickly collapses and the heating simply stops working.
How can a bathroom be made in a wooden house
All other types of bases can also be used with these two types of bases. Only there is an additional requirement for the screed: for linoleum, PVC tiles and cork, the base must be strong and even. The permissible deviation is 2 mm by 2 meters. Therefore, the usual screed is poured with a self-leveling mixture. The rest
Cement screed on a wooden floor
Usually, finishing the bathroom starts after the subfloor is ready. If you decide to make a cement screed, the procedure is as follows:
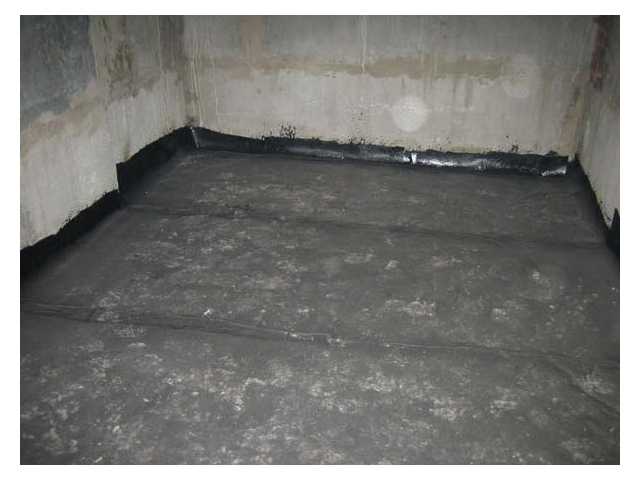
- A waterproofing roll material is laid on the base. It can be rolled Hydroizol, other similar materials. A dense polyethylene film (density 250 g / m or more) is suitable as an economy option. Waterproofing is laid in accordance with all the rules: with overlaps from one canvas to another, carefully gluing the joints with mastic. In addition, the walls give us about 20 cm of material (they also coat it with mastic).
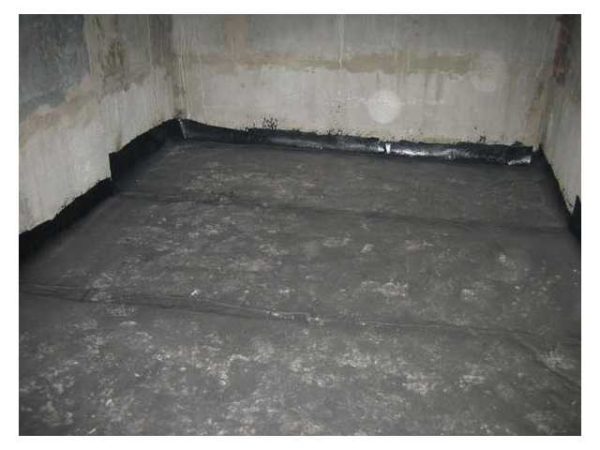
Waterproofing laid on the subfloor and a screed poured over it
- A reinforcing mesh is laid on top of the waterproofing. Since the room is small, a ready-made reinforcing mesh from a bar of 5-8 mm in diameter is enough. Water floor heating pipes or heating cable can be tied to this mesh.
- The net is placed on special stands (pebbles about 3 cm high can be used). The bottom line is that the reinforcing mesh is in the thickness of the concrete and does not rust, but a 3 cm layer of concrete can protect it.
- Pour with concrete and level. The minimum thickness of the concrete screed is 5 cm.
After the concrete has gained strength (one to two weeks depending on the temperature), tiles can be glued to the floor or a suitable other type of flooring can be laid.
There are some more points. To avoid water leakage between the screed and the wall, it is advisable to glue the joint with a waterproofing tape (Knauf has it) around the perimeter, or you can smear it with liquid waterproofing. The next point: before laying the tiles, the surface is dedusted (cleaned well with a vacuum cleaner), then primed (for cement substrates under the tiles). The soil reduces the absorbency, which allows the glue to gain its strength, and not dry out due to the fact that all the water has gone into the concrete. In this case, a bathroom in a wooden house will not create problems for its owners - the tiles on the floor will lie for years and will not bounce.
Dry screed
It is not necessary to use cement to make a tile floor in a bathroom in a wooden house. You can make a so-called dry screed. A moisture-resistant sheet material is laid on the rough floor. It can be plywood, chipboard or gypsum fiber board. The best option is plywood with a thickness of at least 14 mm. Particleboard can also be used, but it is more prone to warping when humidity rises. GVL did not show itself very well in operation - it does not tolerate shock loads (it can crack on impact). Therefore, it is advisable to put plywood after all.
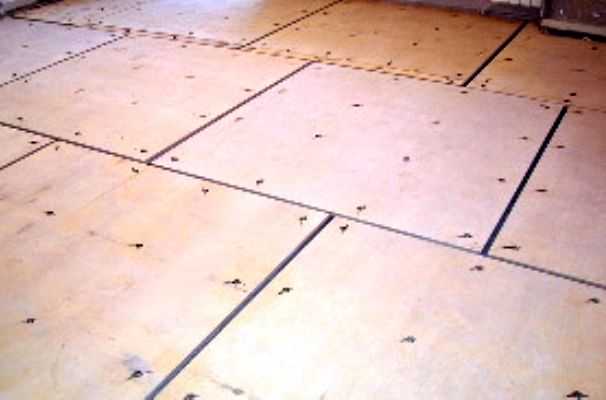
How to lay plywood on the floor correctly
It is laid apart - so that the seams do not coincide. A gap of 3-4 mm is left between the sheets. It is needed to compensate for thermal expansion as the temperature rises. Fasten plywood around the perimeter with nails to the subfloor, then in the middle in a checkerboard pattern (the distance between the fasteners is about 15 cm). The seams are sealed with a moisture resistant sealant, which does not become tough after drying.
Since the tiles require a rigid base, a second layer of the same plywood is often laid. They lay it according to the same principle - with a breakdown, but so that the seams of the first and second layers do not coincide. The rules are the same, only the second row is attached to the first, and not to the rough floor.
A waterproofing tape is glued along the perimeter of the base made (Knauf has it). In addition, although plywood is moisture resistant, it is advisable to cover it with a layer of liquid waterproofing. Just choose the composition on which you can lay the tiles. After drying, you can immediately start laying the tiles.
Preparing walls for decoration
A bathroom in a wooden house, like in any other, is usually tiled. If the house is made of timber, logs, or is made using frame technology, you cannot immediately stick tiles on the walls - the surface does not allow. Under the tiles, the walls are sheathed with moisture-resistant sheet material:
- Moisture resistant GVL.
- Aquapanel from Knauf.
- Moisture resistant plywood.

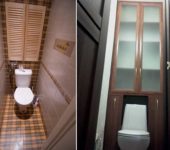
Option for finishing a bathroom in a wooden house
Fiberboard and GVL are also used, but for the same reasons (warpage and fragility), it is undesirable to use them. The sheet material is attached to a batten, which can be made of galvanized metal profile for gypsum board or wooden blocks. When using bars, they must be treated with antiseptic compounds.
The lathing of wooden bars is usually made under wood sheathing (a bathroom in a wooden house can be sheathed with wood, and then impregnated with protective compounds). They try to make a frame from a galvanized profile under the tile. But this is not the rule. It's just that wood is easier to attach to wood, and it is easier to mount gypsum plasterboard and other sheet materials to galvanized.
How to make a crate
When making battens in a wooden house, it is worth remembering that it constantly changes its dimensions. Several years after construction, it actively sits down - takes on operational dimensions. But then, throughout the entire period of operation, it changes slightly in size. This phenomenon is called seasonal fluctuations. Therefore, it is not worthwhile to rigidly fasten the crate - it can break and the whole finish will fall off. If you do the decoration without taking into account this feature, the bathroom in a wooden house will be a source of problems - the tiles from the walls will crumble or burst.
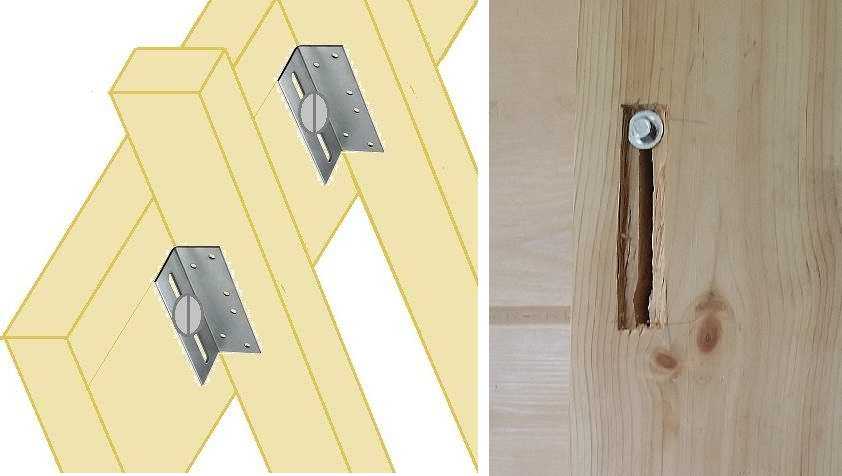
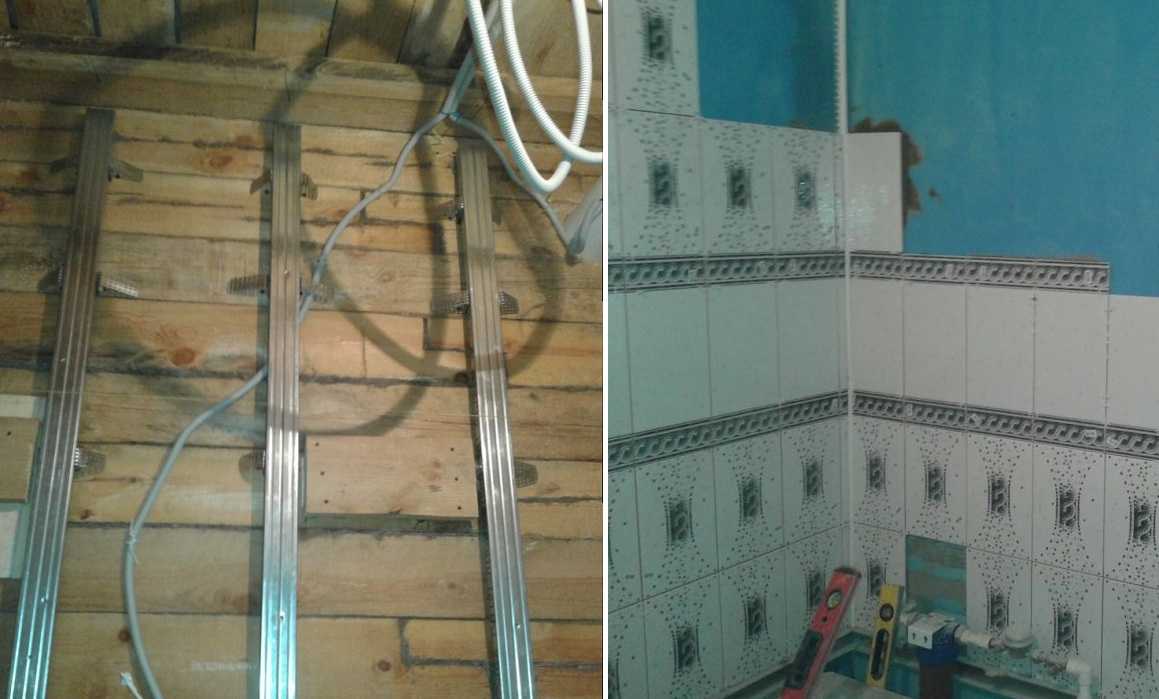
Therefore, the lathing strips are made a little shorter - so that they do not reach the floor and ceiling. The second point is that they are not attached directly to the wall, but through special devices. For fastening wooden blocks there are metal corners with slots on one of the shelves. These are the mounts for the floating crate device (pictured on the left). They are rigidly attached to the lathing bar, and to the wall of a wooden house - through a slot with a self-tapping screw with a large flat head or a bolt with a washer. It turns out that with vertical movements of the wooden wall, the crate on it will be in one position.
Bathroom in a wooden house: how to make a floating crate
The second way to make a floating crate in a wooden house is in a bar using a hand router make several through cuts about 10 cm long. Through this cut, fix the timber to the wall using the same wood grouse with a washer. To prevent the bolt head from sticking out, make a recess with a router. Its depth is equal (or slightly more) to the height of the bolt head, and its width is the size of the washer (in the photo on the right). For a newly built house, fasteners are installed in the upper quarter of the cut, for an established house - approximately in the middle.
The procedure for arranging bathroom walls in a wooden house
As for galvanized profiles, they are attached to the same corners for floating purlins. The second option is perforated hangers. This type of fastening is not so reliable, but it still gives some freedom of movement. Perforated hangers can be used in a well-established wooden house where the movement is already small.
Tile base
A moisture-resistant sheet material is attached to the crate. The priority here is moisture-resistant drywall. Sometimes it is fixed in two layers - to increase the bearing capacity and for better heat and steam insulation. Before laying the sheets of the second row, the joints of the first row are putty, and the gypsum board itself is positioned so that the seams of the two rows do not coincide.
But this is still gypsum plasterboard - an imperfect base, since both cardboard and gypsum are hygroscopic, and their absorbency is reduced with the help of impregnations. Therefore, for greater reliability, moisture-resistant gypsum board is impregnated with a protective composition. For example, FLACHENDICHT (Flechendicht). This is a waterproofing, which is just designed for waterproofing gypsum plasterboard and other gypsum bases.

The frame is sheathed with moisture-resistant gypsum board
You can also use the Knauf Aquapaneli. They are made according to the same principle as gypsum plasterboard, but the core is cement with a filler, and the "wrapper" is glass fiber. Both materials are resistant to moisture without pretreatment. Their difference is that they are made absolutely even, without grooves along the edges, which the gypsum board has. They are joined end-to-end, a special adhesive is applied to the abutting edges. Immediately after installation, the surface is smooth, ready for further finishing. It doesn't even need to be putty. Moreover, one side of the aquapanel is made even - for wallpapering or painting, and the other rough - for laying tiles.
Also, as a base for tiles on the walls in a log or log house, you can use moisture-resistant plywood, GVL. They are also fastened to the frame, leaving gaps in the seams, which are filled with silicone non-drying sealant.
Ceiling
The ceiling in the bathroom of a wooden house is usually made suspended - from moisture-resistant gypsum fiber board, which is putty, then painted.Another option is to make a tension, aluminum rack, PVC panels, hem with a beautifully crafted board. The problem is not that, but how to keep steam out of the overlap. For this, vapor-tight membranes are used. They are attached to the ceiling usually with staples from a construction stapler.
The main task when installing a vapor barrier is to ensure tightness. For this, the material is placed on the walls, the membrane strips are laid with an overlap and double-glued with double-sided tape. Also, all places where the fasteners are installed are glued with tape. Everything is done carefully.
Decorating the bathroom in the house: how to make a ceiling
The second component that ensures a normal microclimate is good ventilation. In the bathroom of a wooden house, it should be both natural and forced - with a fan. With this approach, the fan in the bathroom will turn on at those moments when natural ventilation will not cope.
How to decorate a bathroom in a wooden house
In this chapter, we will talk about finishing methods, selection of materials and design techniques. The traditional way of decoration - walls and floors in tiles or porcelain stoneware - has already set the teeth on edge. And not everyone wants to cover wooden walls with such "cold" material. If before there were almost no alternatives, today they are, and in sufficient quantities.
We have already written about moisture-resistant materials for the floor - these are PVC tiles, linoleum, glue stopper. All of them are normally used in bathrooms. Another option is to make a plank floor and cover it with varnish or oil. The second option does not create a hard film on the surface, but protects it just as well.
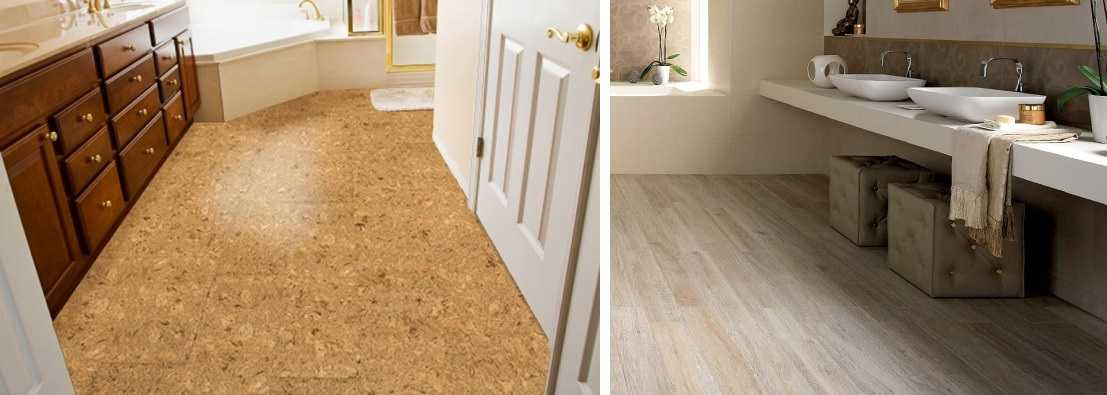
The bathroom floor in a wooden house can be made of cork or PVC tiles.
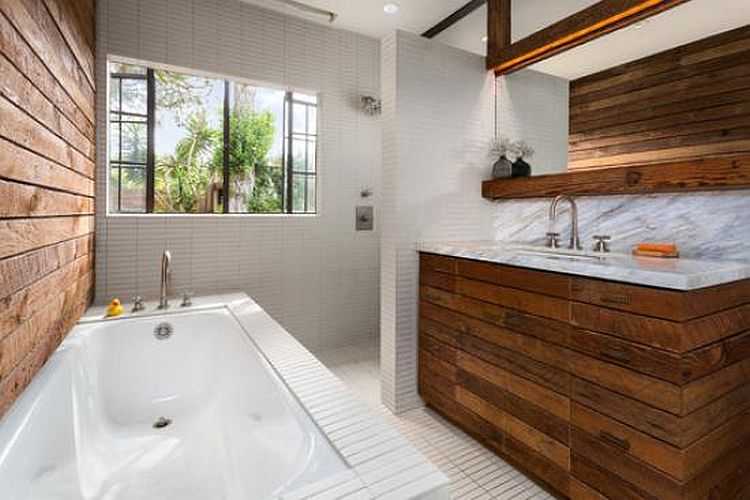
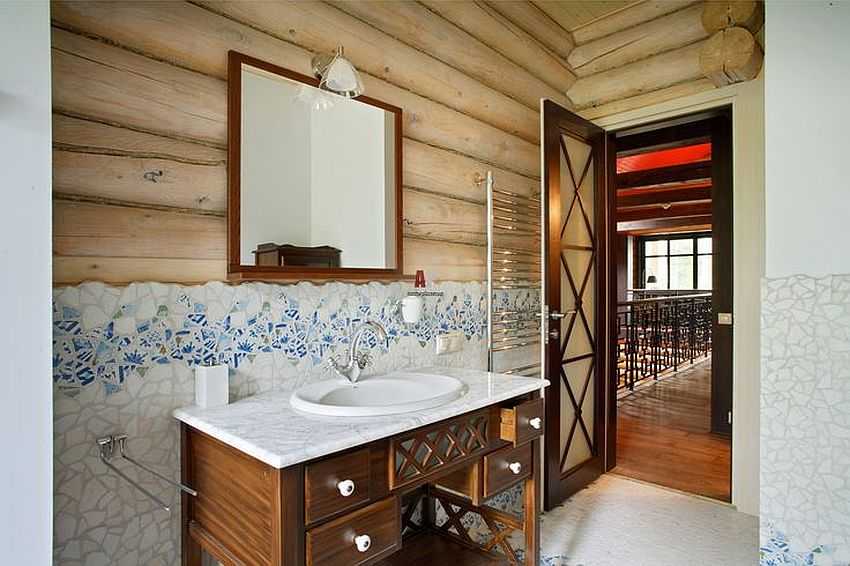
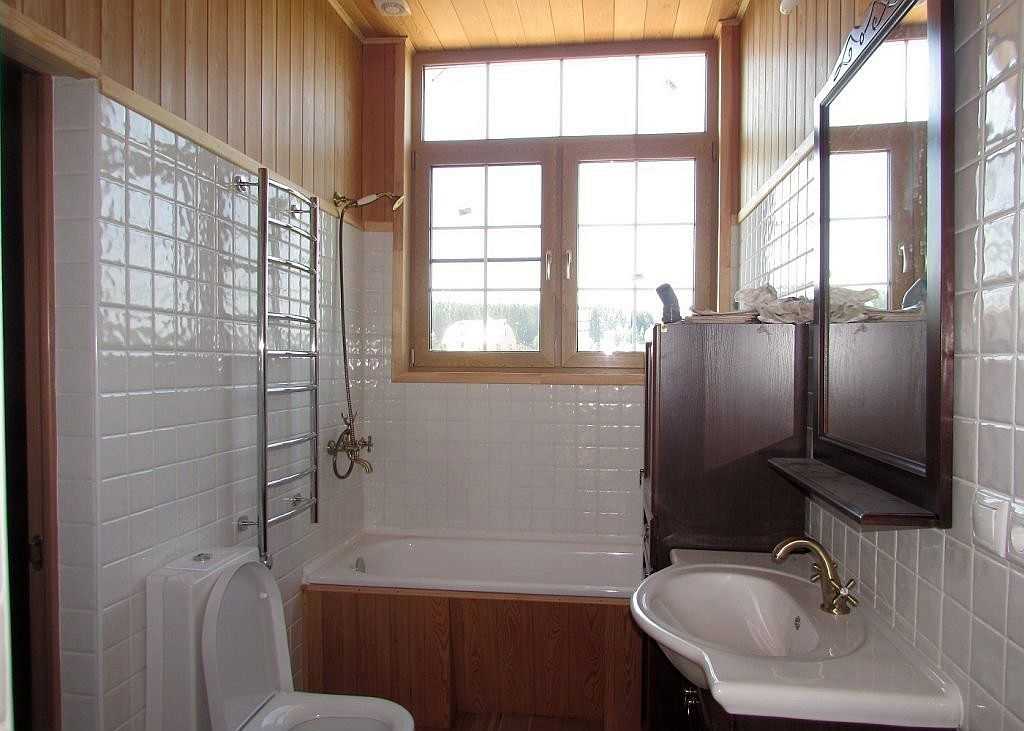
Bathroom walls do not have to be tiled. Even such an option as a mosaic is used mostly fragmentarily - they prefer to tile the walls in the area of direct splashing - near the bath, in the shower, near the washbasin. Another option is to make the panels with tiles to a height of 120-150 cm, and trim all the space free from ceramics with wood. Pine is not very suitable for these purposes - it is too resinous. Larch or more expensive species are used more often. Most often they put an imitation of a bar, but this is a matter of taste. In any case, the wood on the walls in the bathroom is also subject to processing and you can also use varnish or oil-based impregnation.
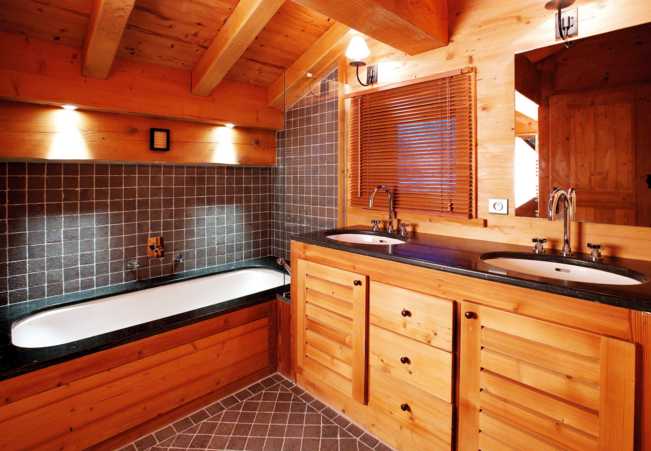
The most "wet" areas are tiled
In general, you can use any finishing materials suitable for bathrooms. It's just not practiced a lot - natural wood has become too rare a finishing material to use the usual wallpaper or paints in a wooden house.
Only the lower part can be coated with moisture-resistant materials
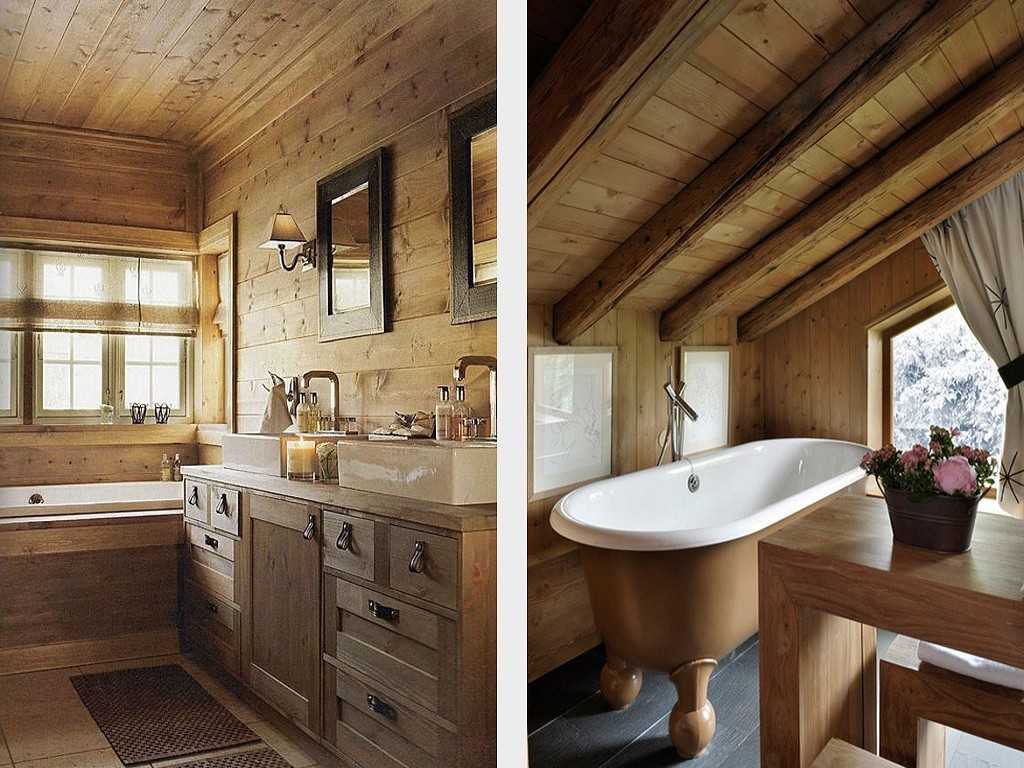
Oil-based coating emphasizes the nobility of the wood
Combinations are always interesting
Bathroom in a wooden house - wood is everywhere
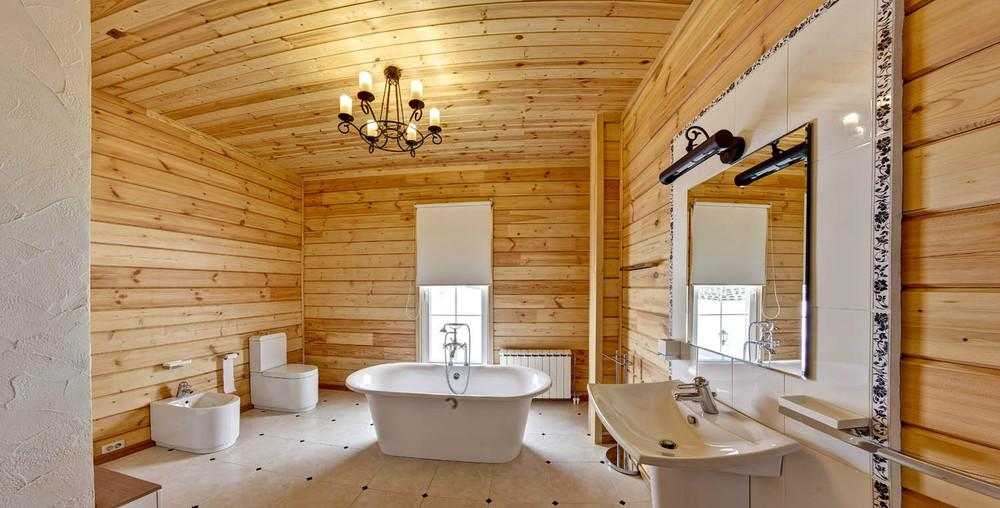
Tiling wooden walls is practical
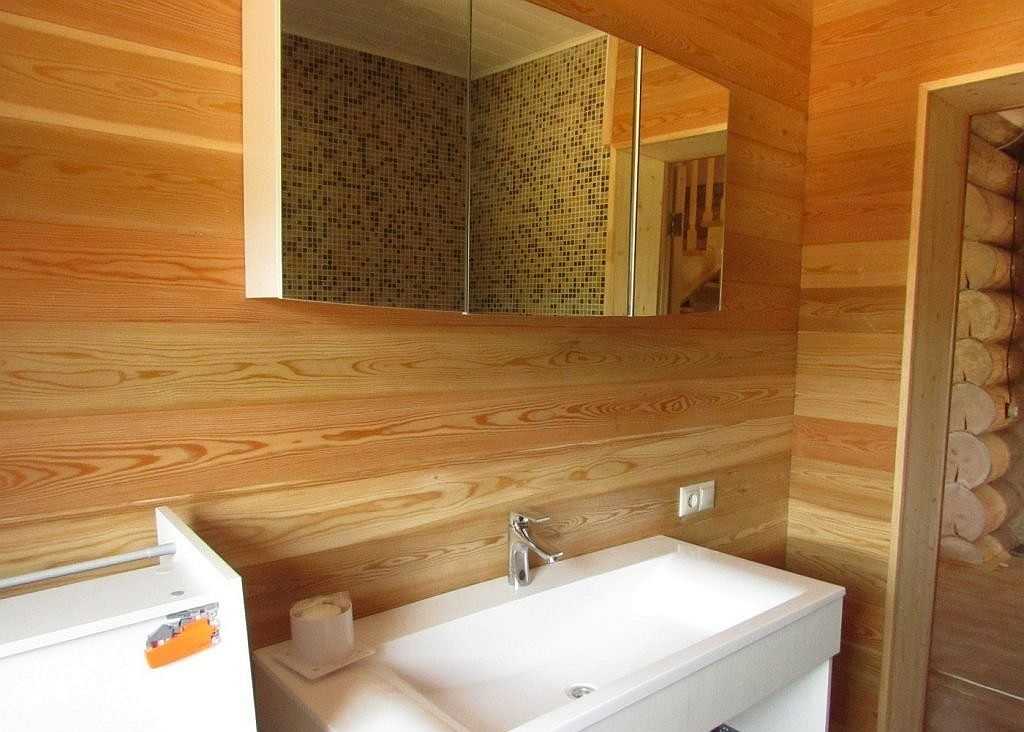
Larch bathroom finish - beautiful texture, excellent performance