How to lay the cork on the floor
Cork is an excellent floor covering if you want a “quiet”, pleasant to the touch, warm floor. The installation of cork is very different depending on the type of material chosen. The castle cork floor is easy to install, the adhesive requires certain knowledge. But you can cope with both of them yourself.
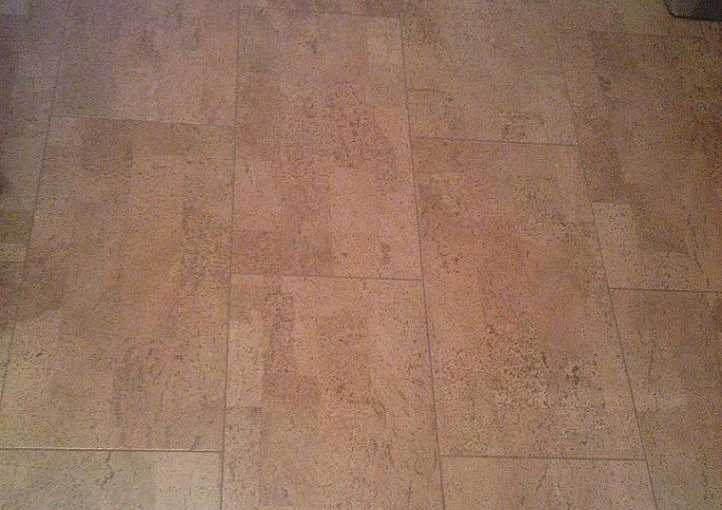
Laying non-adhesive cork is not an easy task. It is complicated by the fact that the material is natural and there are drawbacks on the surface of some tiles during production. There are also differences in the size of the tiles (the discrepancy is up to 1 mm) and thickness. Therefore, for self-installation, it is better to choose either the castle option - it fits like a regular laminate. You can also put a cork bag, which is put on the glue. But it is better to take it with a chamfer - it will be easier. If there is a chamfer when laying, the different thickness of the tiles is not visible (the difference can be substantial) and it is easier to work with joints. But when buying, you need to take material with a large margin - about 10%: the offset should be strictly the same, and this is an additional consumption of material.
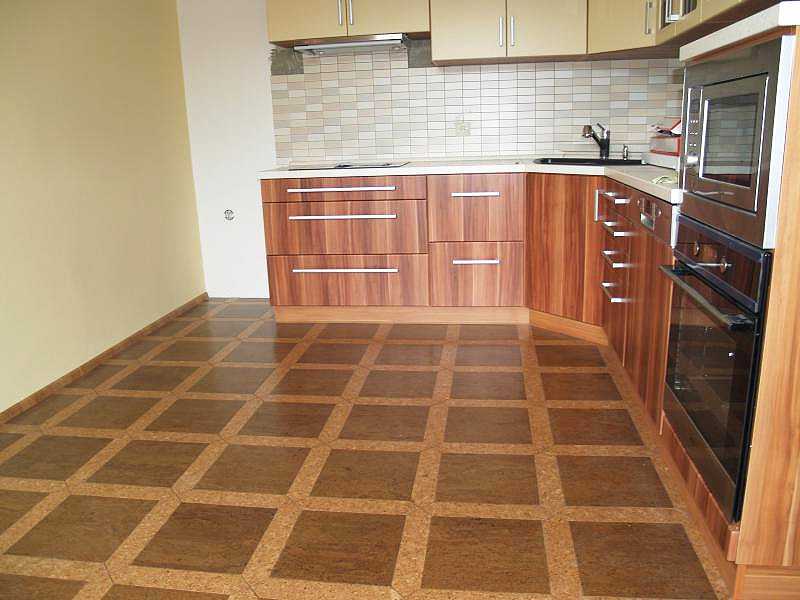
Cork flooring, which is laid on glue, is also called cork parquet
In any case, you should carefully read the installation instructions - there are a lot of nuances that have a significant impact on the result.
The content of the article
Base
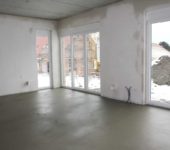
Cork laying requires careful preparation of the substrate. A concrete slab or screed leveled with a self-leveling mixture is suitable as a base for an adhesive cork floor. They are also called self-leveling floor... Compositions Vetonit 3000 or Osnovit T-45 have shown themselves well, but the like can be used.
Under the glued cork flooring, manufacturers recommend achieving a perfectly flat base at all without drops, under the lock on the floor there can be drops of up to 2 mm by 2 meters (checked with a ruler, level or rule). In practice, it turns out that the glue cork (cork parquet) normally falls on not quite even substrates. It is only important that the grooves / humps are very smooth, without steps, cracks, cavities, etc.
Laying the cork cover is possible only after the screed is completely dry. Permissible humidity - no more than 5%. If there is no moisture meter, take a piece of polyethylene with an area of about 1 square meter, glue it to the base with tape. It is necessary to glue tightly. Leave for a day and then tear off. If there is no condensation on the film, the floor has the required moisture content, a cork can be glued to it.
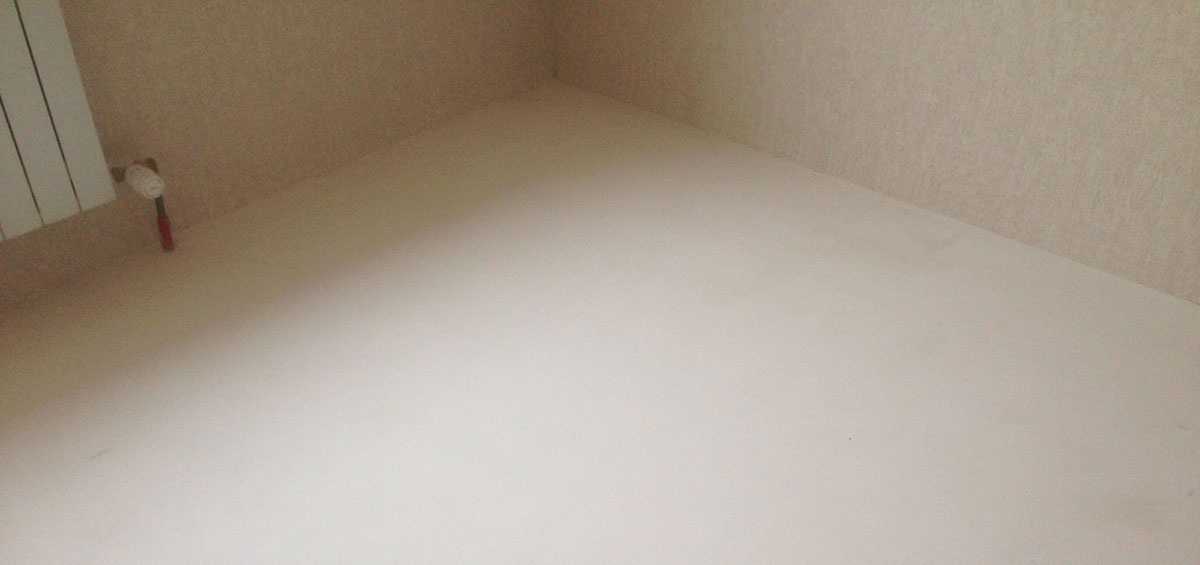
Cork can be laid on such a base - it is even, dry, clean
Before laying, the base is thoroughly cleaned - first with a broom, then with a vacuum cleaner. There should be no debris or dust on the surface.
Wooden floors are leveled with "dry screed" - moisture resistant plywood, OSB, Fiberboard, Chipboard, GVL. Sheets are laid "in a runaway" - so that the seams do not coincide. When laying, gaps of 3-4 mm are left between the sheets, the sheets are attached to the subfloor using self-tapping screws. Their caps must be recessed into the material (if necessary, pre-drill holes).
Seams and holes are sealed with putty. It is better to take an acrylic putty - it is more elastic than gypsum, glue “lays down” on it without any problems. After drying, sand the putty so that the entire surface is even. The base is cleaned of dust, it can be primed - to reduce the consumption of glue.
Tools
Glueing the cork flooring requires a number of tools.The set is not very large and does not require large material costs. Difficulties can arise only with a notched trowel - it must be with a very fine tooth, and these are rare.
- Steel ruler.
- A sharp utility or construction knife with replaceable blades. The blade holder must be metal, as the effort will have to be significant.
- Rubber mallet.
- Velor roller for applying glue and then for varnish. You will need several rollers - one for glue and one for varnish - according to the number of layers.
- Fine-toothed metal or plastic spatula (2-3 mm). Make no mistake, a square-tooth spatula will not work.
- Roulette and pencil.
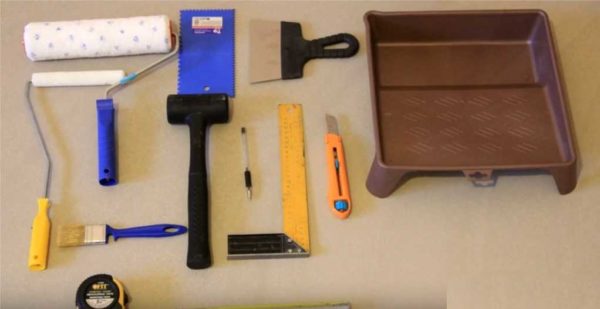
Cork adhesive flooring tools

If you could not find a spatula with a fine tooth, you can make it from an ordinary one using a file. The correct cutting depth is obtained when you pass the corner of the file along the edge two or three times. It won't take long.
Laying method
There are different styling schemes, including patterns. But they need to be calculated, and this requires certain knowledge and time. The first self-laying of the cork flooring is desirable using the simplest offset schemes. It looks good and is perfect for building experience.
If you have a non-beveled adhesive floor plug, you can use the haphazard method. Usually at the end of the row, the bar is not whole. The rest of it goes to the beginning of the next row. The same procedure continues further, with the only restriction that the "gap" of the seams should be more than 15 cm. If it turns out less, lay this piece through the row or a little later. As a result, there is no displacement pattern (well, almost), and the joints are almost invisible.

The two easiest styling methods
If a cork floor was bought with a bevel, then the offset should be clear - the borders of the tiles are clearly visible, therefore there should be order. In this case, an offset of 1/3 or 1/2 of the strip length is applied. The consumption with this method of laying cork is higher and this should be taken into account when buying.
Preparation of adhesive cork floor tiles
The tiles are unpacked (all packs) and left for a day at room temperature. During this time, the tile will take on "working" dimensions and subsequently no gaps will appear. By the way, there are requirements for "weather conditions": humidity 40-70%, temperature from + 18 ° C to + 30 ° C.
While the tiles are acclimatized, they must be sorted. This material is made from natural raw materials and defects are common. When sorting, you will need masking tape (paper) to mark the found defects so as not to search for them again. We sort the tiles into three categories:
- without defects;
- with small defects (dents, slightly knocked edges and corners);
- with significant deviations (potholes, foreign inclusions, delamination of the decorative layer).
Next to each "marriage" we glue pieces of paper tape - it will be easier to find. There may be a lot of tiles with a defect, but this is not scary - there will be a place for them. We glue those tiles on which there are minor deviations near the walls. There is usually no direct light and these flaws are not visible. Severely defective tiles are placed last in the row. We choose such that the defect is under the plinth, and the remaining piece, already without flaws, goes to the beginning of the next row.

Laying the cork with photo printing
There is one more defect that is difficult to see in a separate tile, but it is very clearly visible in the installation. It happens that the decorative layer along the edge is sanded so that the substrate appears. We look at all "good" bars for this drawback. We put them in the first or last row along the wall so that the chamfered edge is also under the skirting board.
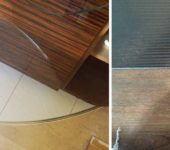
There are also tiles of different thicknesses, so everything must be checked on this basis.We take a reference piece (you can cut it off from the defective strip), put it on one side and on the other, run your finger, checking if the thickness is the same. We put aside the thinner ones. We will lay them closer to the wall, where the differences are not so visible. For thicker ones, sand the edges. To do this, glue a strip of medium-grained sandpaper to the standard with the grain down, grind off the excess from the seamy side. The cork rests on the floor, sandpaper cuts off excess. As soon as the thickness is equal, we stop. After this preparation, laying the cork on the glue will be easier.
Markup
It is best to start laying the cork floor in the middle of the room. We find the center, through this point we draw lines perpendicular to the walls (at an angle of 90 °). In this case, we will lay the tiles along the walls. If you want to lay the cork cover diagonally, draw the lines at 45 ° in relation to the walls. It is easier to beat them off with a paint cord (a regular cord smeared in blue).
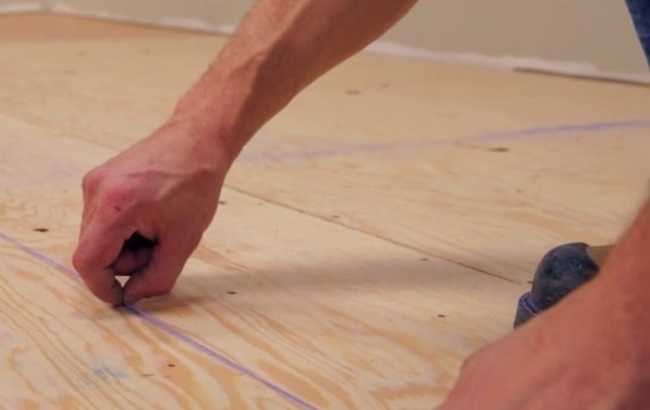
Find the center of the room before laying the cork floor.
Usually, the long side of the cork strip is placed along the long wall, but this is not required. Having decided how you will lay out the cork tiles, you need to check whether the last plank will be wider than 5 cm. To do this, "dry" tightly one to the other, lay the tiles in a row on the floor - from wall to wall. The gaps at the walls should be more than 5 cm. If not, move the tiles so that the rule is fulfilled. It is necessary to check on the "narrow" - transverse side. Then you can lay the cork flooring, but the process itself is more complicated for cork parquet, and we will talk about it further.
Cork styling adhesive
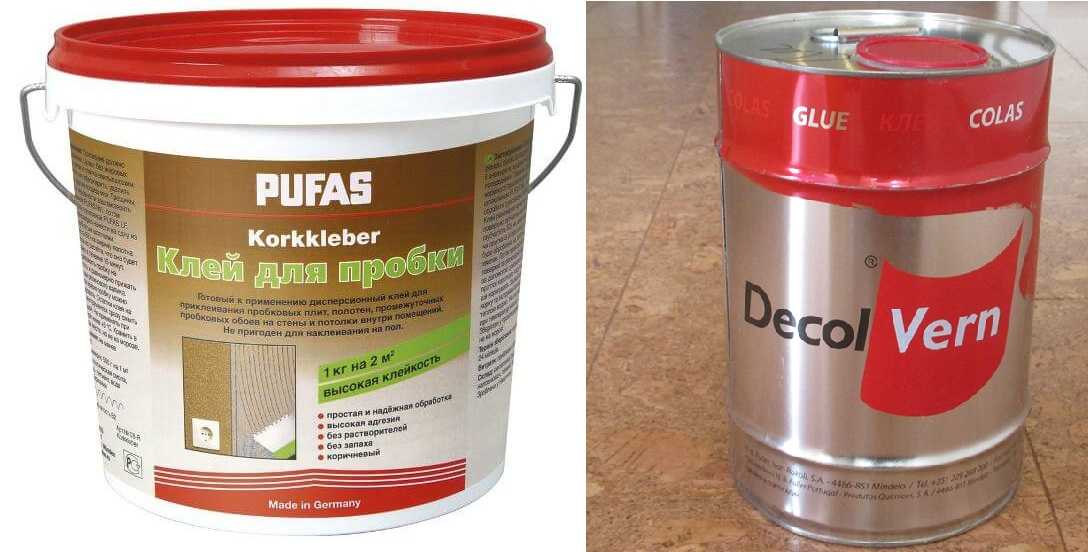
This is a very important point. When placing cork on glue, manufacturers usually recommend a specific brand. It is advisable to listen to their opinion, but it is quite possible to use a replacement of a similar quality.
A solvent-based neoprene contact adhesive is used to lay the cork. It "smells" very much, so it is advisable to work in a well-ventilated area, but it is still better to have a gas mask. Without protective equipment, there can be a severe headache, vomiting, and hallucinations.
You need to glue the cork to the floor with a special glue
One more point. The glue and its vapor are highly flammable. Therefore, there is no smoking and even the close presence of fire. Just one spark (short circuit, for example) leads to ignition. Even dried glue burns, and fresh glue burns like this over the entire surface. Therefore, handle it very carefully.
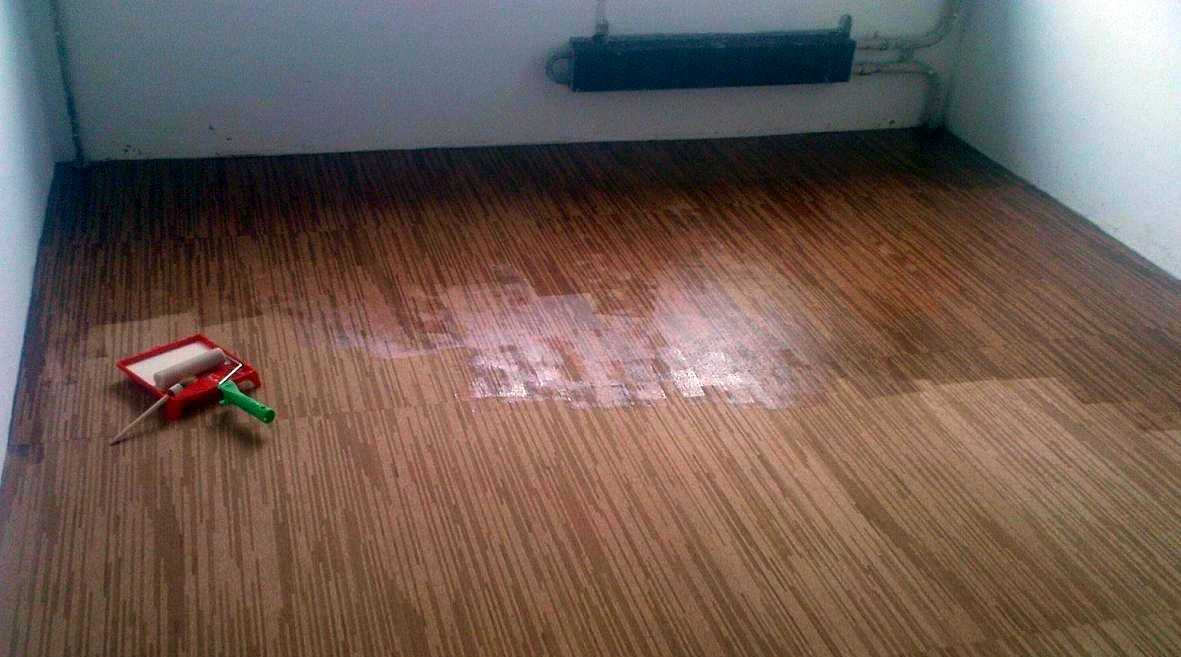
On the back side of the cork tile, the glue is applied with a velor roller, it rolls out well in an even layer. It is poured onto the floor, then spread over the surface with a fine-toothed spatula. After application, the glue should dry for 30-40 minutes (more precisely, see the instructions on the can), and the pot life of the glue should be several hours, so there is time for gluing and eliminating defects. But it will not be possible to tear off the laid and "knocked" tiles entirely, therefore, when laying the cork covering, we try on well and only then begin to press it.
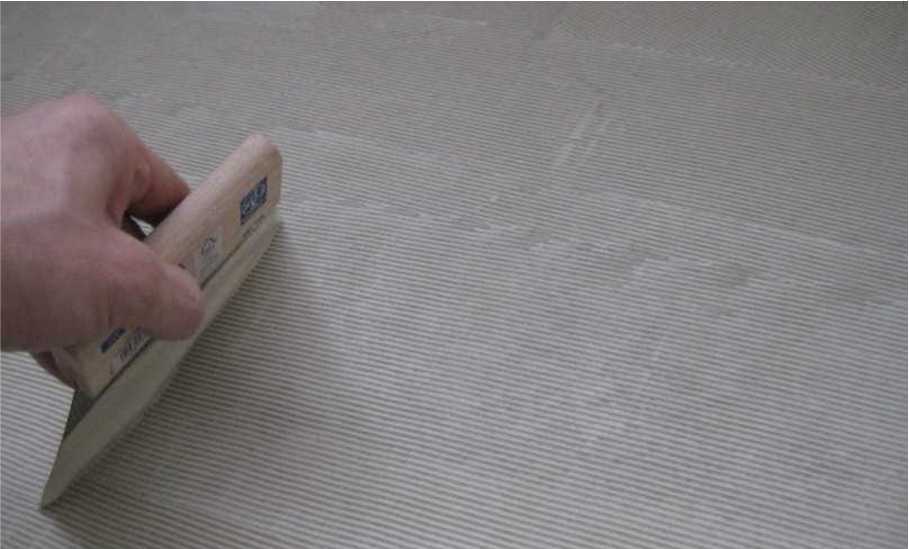
The adhesive is spread over the floor with a notched trowel with a very fine tooth
When coating the tiles, it is important to try not to stain the front side - all stains appear under the varnish. If, nevertheless, there are stains, we remove them immediately after gluing with white spirit or another solvent for your brand of glue.
To make the work move faster, find a flat sheet (cardboard, fiberboard, hardboard, any other material) that fits 5-10 tiles. Lay the tiles seamy side up, close to each other, joining wide parts. You will get a track. We coat all the tiles at a time and leave to dry.
Subsequently, in order for the work to go faster, it is better to have two planks on which the glue dries and to coat two areas with glue on the floor. Each time to wait 30-40 minutes - it will take a lot of time for styling, and so, while the first is laid, the second is almost ready.We clean the freed board from glue, put the next batch, coat it, etc.
How to cut cork
Cutting the cork is simple - with a sharp blade along a metal ruler. If the tile is thick (there are 4 mm and 6 mm), approximately 1/3 of the thickness is cut in one pass. If the cut is hidden by the floor with a plinth, raise the bar, bend it along the cut line, it breaks. If necessary, you can help yourself with a knife.
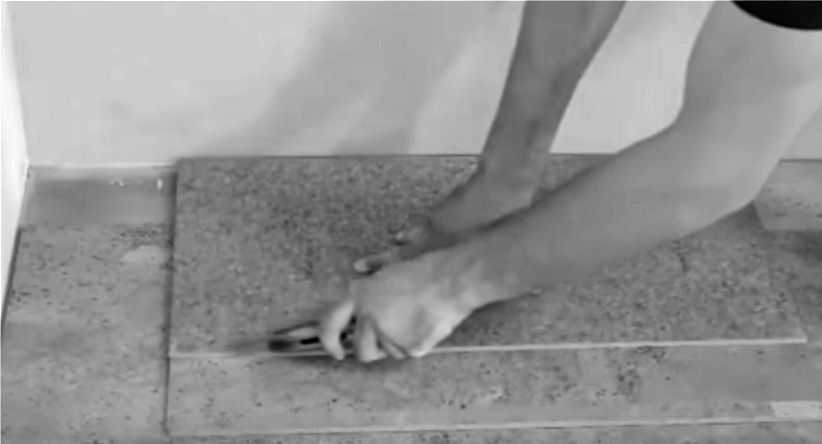
Use a knife to cut the cork flooring
Sometimes the cutting line has to be joined. Then you have to cut it off with a knife. You will have to carry out 2-3 times, and in order for the cut to be smooth, it is necessary that the ruler does not move. To do this, several pieces of double-sided tape are glued to the seamy side of the ruler. So that the scotch tape is not too sticky, it is "powdered" - with dust, building mixture, flour, etc.
Installation process
Next, the actual laying of the cork covering on the floor begins. We lay the first row along the drawn line. It is very important to lay it flat, without distortions and deviations. All joints must be absolutely even, therefore, in the first two rows, select tiles with exactly the same dimensions from the stack "without scrap". They can be laid out on the unstained part of the floor, checking the size and thickness match.
We spread the selected tiles with glue, wait for the allotted time. Getting started with the installation. We spread with one edge strictly along the line. With the first, everything is simple: they put it down, pressed it down with their hands, tapped it with a mallet.
The next one must be laid so that it goes 1-1.5 mm with its edge on the laid tile. So the joint will turn out to be tight and the cracks are not even subsequently formed. To do this, we try on it, holding it in weight, making sure that it does not stick. When you are convinced that the edge comes to the desired distance, you can lower the far end, set the long side of the bar exactly along the line, set the second end butt-to-end. A wave forms near the joint. It will expand due to the elasticity of the tile, but the adhesive cork floor will more resemble a continuous coating and there will be no gaps between the tiles.
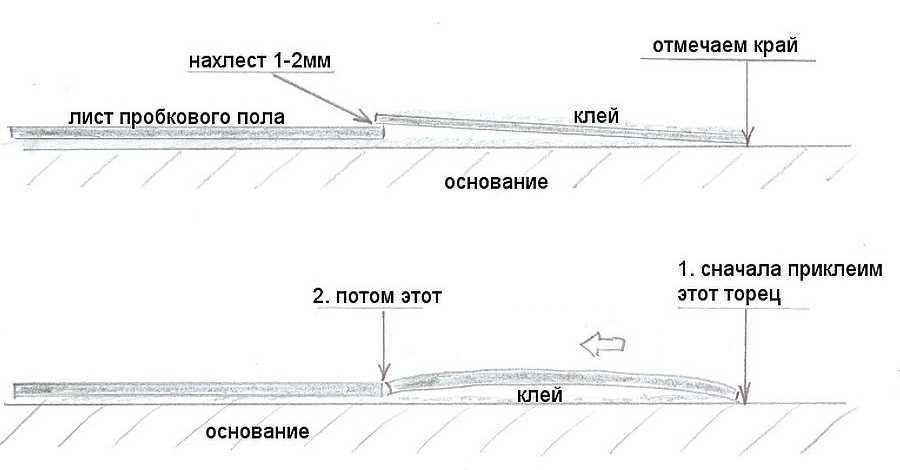
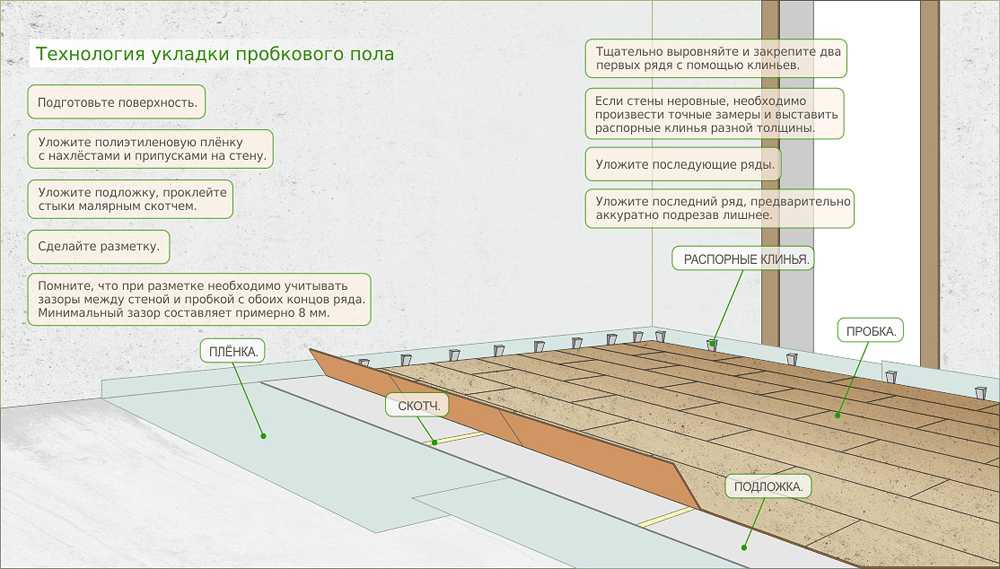
Schematic illustration of cork flooring technology
We glue the laid strip from the far end, first smoothing it down with your hand, then tapping it with a mallet. We put the “wave” last. It is nailed with a mallet towards the joint. It turns out a very tight seam. All other tiles are laid according to the same principle. They should be a little "cramped". Due to the resulting wave, we tighten the seam, in subsequent rows, due to elasticity, we also correct the discrepancy of the planks in size.
When laying the second and subsequent rows, the longitudinal joint is also compacted by creating "tightness", but not in such a volume. Tightly, with a slight bend, we put the bar to the edge of the laid one, then we lower the opposite edge (the joint on the short side is still with the wave). We carefully tap each tile along the entire plane with a mallet, paying special attention to the joints.
We cut the tiles at the walls so that a gap of 5 mm remains. This distance compensates for thermal expansion of the floor covering and does not swell when the temperature rises.
Difficult places
Cork installation is rarely straightforward. It is usually difficult to bypass pipes. Try to have a tile joint on them. If not, we cut the cork in this place. but not straight, but obliquely, and so that the upper front part lies on the lower one.
In any case, first we make a template from thick paper or cardboard. We lay the cork floor so that there is less than one tile left to the pipes, wait a while for the glue to dry even better, otherwise the paper or cardboard will simply stick and cannot be torn off without damage. In general, we are waiting for about an hour or a little more. Now the template will not stick "tightly". Cut out a piece of paper (cardboard) to the size of the tile, then cut out what you should get out of it. We apply cork to the sheet, circle it and cut it out, then glue it in place.It is long, but it will turn out beautifully and without flaws. If something goes wrong, the imperfections can be repaired with a parquet sealant before varnishing.
After laying, the entire cork floor is supposed to be rolled with a pressure roller according to the technology. This is an ordinary roller, but its weight is 50 kg and it tightly presses the coating to the glue. Since not everyone has such a device, you can try to replace it - you yourself gently trample over the entire surface. The weight is not less, so the effect should be.
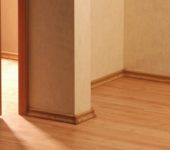
Cork skirting board
The penultimate stage of cork installation is the installation of cork skirting boards. It is "tightly" glued to the floor covering, then it is still filled with varnish. The cork parquet laid in this way is absolutely airtight - a kind of trough is formed on the floor, the burs of which are the baseboard. Therefore, we pay special attention to fitting - the joints must be tight.
The fitting process is not much different from the installation of a plinth made of ordinary materials: the corners are cut with a carpenter's miter box here article about the ceiling plinth, but the floor is cut as well). The tailored cork skirting board is glued to the floor surface, but not to the wall. He only leans against the wall.
Beveled cork floor - so you don't have to worry about the joints
According to the choice of length, the approach is as follows - we cut off a little longer than necessary, so that the joints are without gaps. After everything has been cut, folded to dry, the joint has been checked (the flaws can be improved with sandpaper), you can glue the cork skirting board. We glue a strip along the width of the plinth on the floor, on the underside of the plinth itself, wait for the right time, glue it in place, pressing it well with our hands.
Now the floor is almost ready. The laying of the cork coating on the glue is completed, the final stage remains - varnishing. We leave the finished floor to dry for several days (usually 72 hours, but just look at the instructions for the glue) and for now we try not to walk on it - so as not to move or get dirty. After the adhesive has set completely, varnishing can begin.
How to varnish
The varnish is applied in a few words with a velor roller. The number of rollers is based on the number of layers. Before varnishing, carefully inspect the cork floor for defects. They will definitely be - you laid tiles with flaws, in addition, in the process of work, new ones may appear: somewhere an edge has jammed, somewhere a dent has formed, etc. After the first varnishing, all these flaws are covered with parquet sealant. The first layer consumes a lot of varnish, but the film does not form on the surface, but all the flaws "climb" out. We eliminate them. Please note, if the tile is already with a protective varnish coating (there are some), use the sealant immediately.
We take a parquet sealant of a suitable color. Sometimes you have to mix several different colors to get the desired shade. We use it to seal the grooves, chips, etc. We wipe the excess immediately.
First coat of varnish
After applying the first coat of varnish, be prepared for the fact that all flaws will become more visible and the surface will be rough. We close up all the flaws, after the sealant has dried, we smooth out the roughness along the entire surface of the floor with medium-grain sandpaper. We remove the resulting dust with a vacuum cleaner, wipe it with a damp cloth. After drying, cover with a second layer of varnish. We pour it without sparing it, we fill in all the irregularities (chamfers, if there are any). Sometimes this is enough (the floor is smooth), sometimes a third layer is required. If you need the next layer, again remove the roughness with a sandpaper with a slightly finer grain, remove dust, wipe, dry, varnish. So until the result satisfies you.
There is a separate article on varnishing at home. You can read it here.
Laying the interlocking cork cover
It is not for nothing that this type of cork is called "cork laminate". Laying - one to one. A backing is also required, only it is better to use cork.The difference is that it is also recommended to lay a dense plastic wrap under it. It is better if it is seamless, but you can also spliced two canvases. This will require double-sided tape.
Installation of interlocking cork cover
Two canvases are spread with an overlap of 10-15 cm. The knock is glued with two strips of double-sided tape. This ensures a sufficient degree of sealing. This layer cuts off the possibility of capillary suction of moisture in the event of a wet overlap.
A substrate is laid over the spread film, and a cork floor with locks is already laid on it. The whole process is similar to laying a laminate, and it is described here.