Homemade concrete mixers: manual, electric
For the improvement of the site, either mortar or concrete is often needed. Kneading it by hand is difficult and long, and the quality of the solution is far from the best: it is difficult to achieve homogeneity. But not everyone wants to buy a concrete mixer for its periodic use. A good solution is a do-it-yourself concrete mixer. You need a little money, in terms of performance, home-made units are no worse than Chinese ones, and sometimes even better.
The content of the article
Manual concrete mixer
There is not always electricity at a construction site, and large volumes of mortar and concrete are also not always required. The way out is to make a small concrete mixer, which will rotate manually (with a manual drive). The designs of these models are simple and straightforward.
From a milk flask
The simplest hand-held concrete mixer can be made with an ordinary metal jar (before, milk was sold in such a bottle). You will also need pipe trimming or some other scrap metal. The design is simple, such a do-it-yourself concrete mixer is realized in a couple of hours. The main thing is to weld the frame. The assembly of the concrete mixer itself will take a couple of tens of minutes.
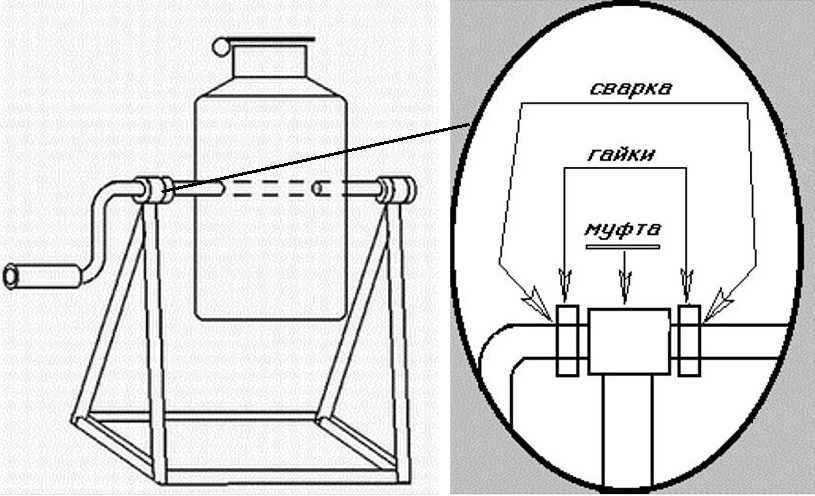
Milk flask manual concrete mixer design
You make a bed, bend a handle from a round pipe. At the top of the bed, weld two water couplings (for example). Their inner diameter is slightly larger than the diameter of the pipe used for the handle. The pipe is passed through a flask, welded to the body.
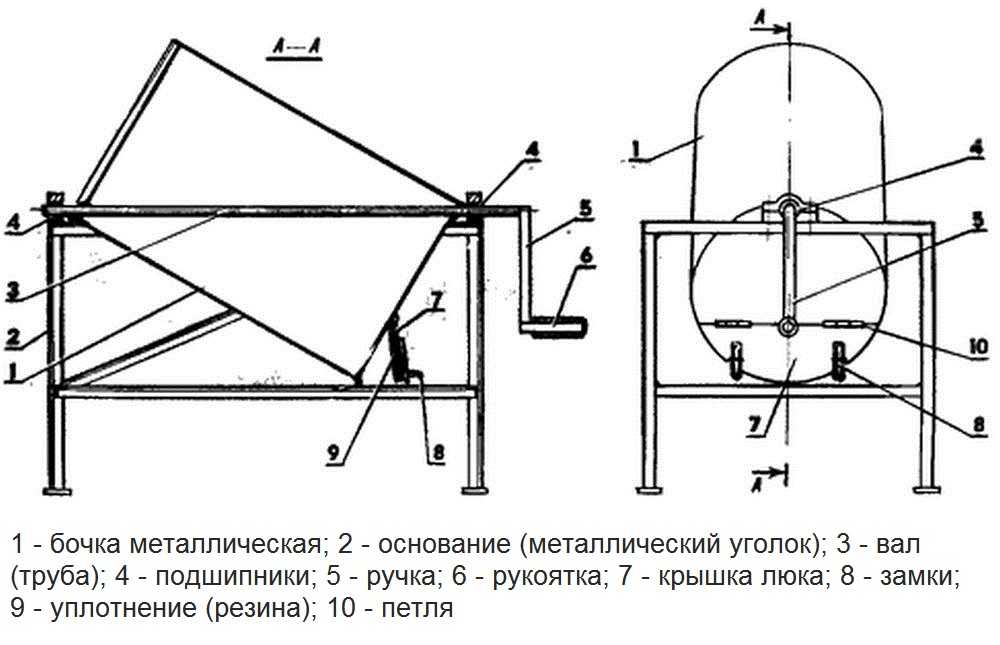
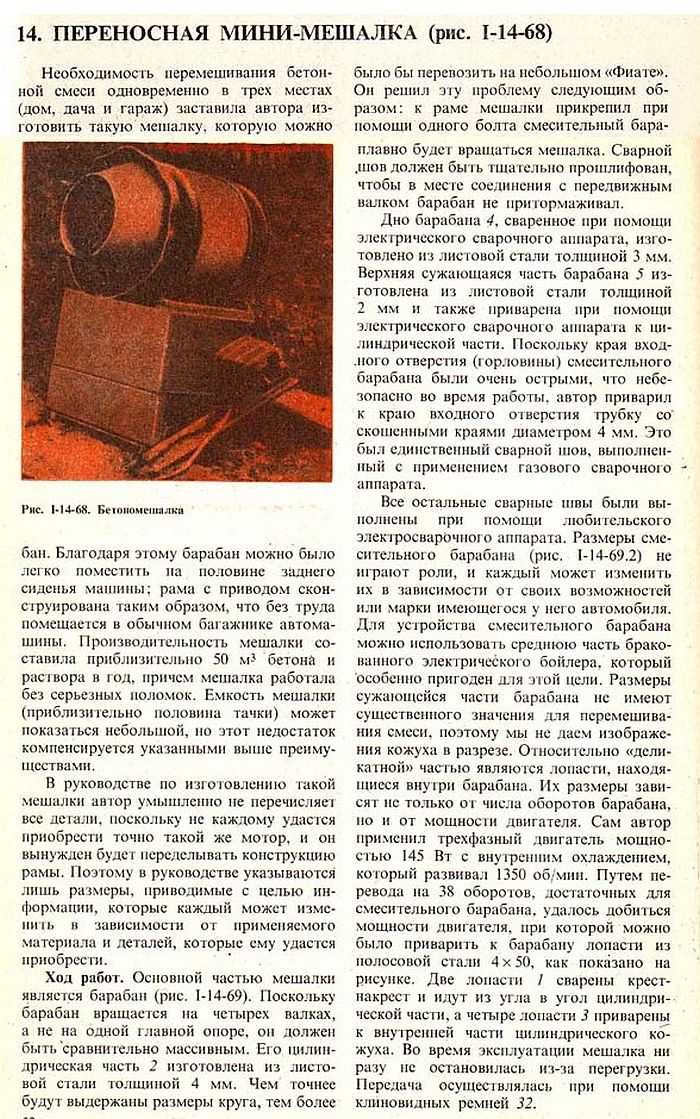
Drawing of a manual homemade concrete mixer from a barrel
In the upper part of the frame, bearings are installed in the center, into which the handle is threaded. Thanks to them, the 200 liter barrel turns easily. Just choose a container with thick walls - it will last longer. Inside, no additional blades are welded: they only trap the components, interfere with mixing and complicate unloading.
In the original design, the loading / unloading hatch is located in the bottom. This is a cut-off part (about 1/3), attached with loops to the bottom, fitted with a sealing rubber around the perimeter and closed with two locks. When loading, the barrel is turned so that the hatch is at the top. When unloading - turn down. The solution moves by gravity into the substituted container, and the adhering one can be removed by knocking on the body with a hammer or sledgehammer.
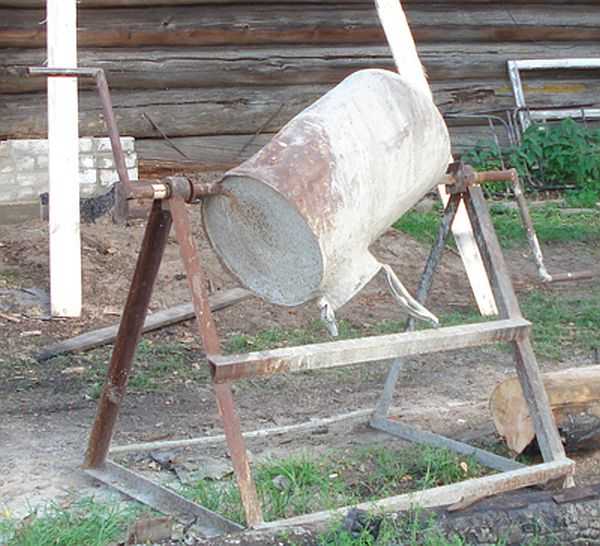
Improved homemade concrete mixer from a barrel
This design served the author for 10 years, although it was made for one-time work, but it turned out to be very successful: 2.5 buckets of solution are well mixed in 20-30 revolutions. During this time, it was repeated and improved by neighbors and acquaintances. Basically, the alterations concerned the hatch. Experimentally, its most successful design has been revealed - similar to the one used in a milk flask. Such a "neck" is welded to the barrel from one side (see the photo above). They also make handles on both sides - for the possibility of working together.
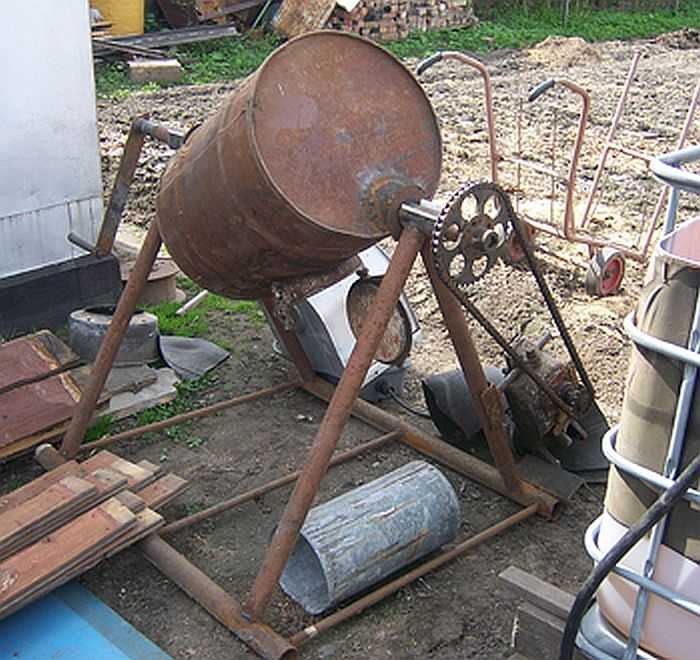
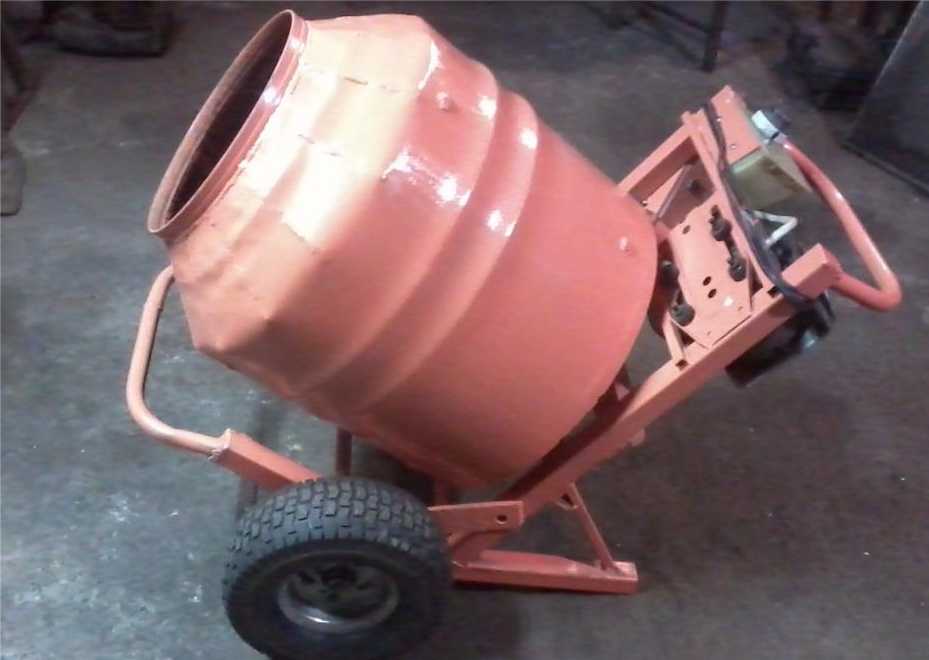
Mechanization in action: manual concrete mixer turns into electric
This design easily converts into an electric home-made concrete mixer. A not very powerful engine is installed - 1 kW for a 200 liter barrel is enough, to the axis of which a small sprocket is attached, a larger sprocket is welded to the pipe axis (to reduce the number of revolutions), they are connected using a chain (from a scooter, for example).
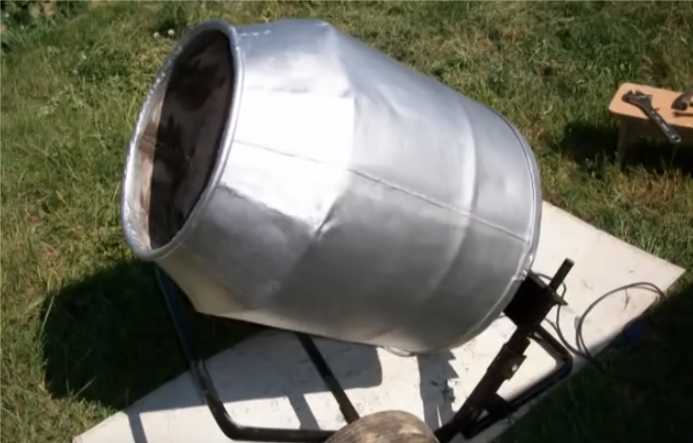
Do-it-yourself electric concrete mixer from a barrel and a washing machine engine
This concrete mixer is gear type. To make this model you needed:
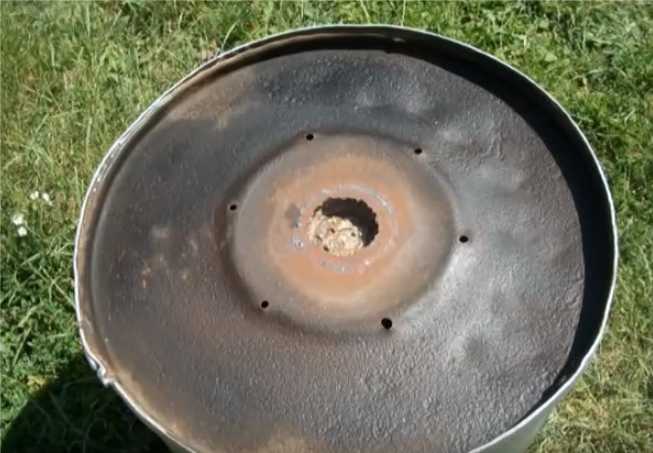
- a barrel made of galvanized steel for 180 liters (diameter 560 mm, height - 720 mm);
- washing machine motor - 180 W, 1450 rpm;
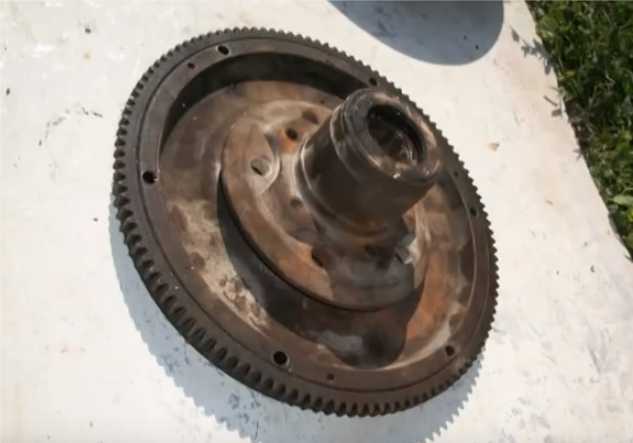
- flywheel and starter gear from Moskvich 412;
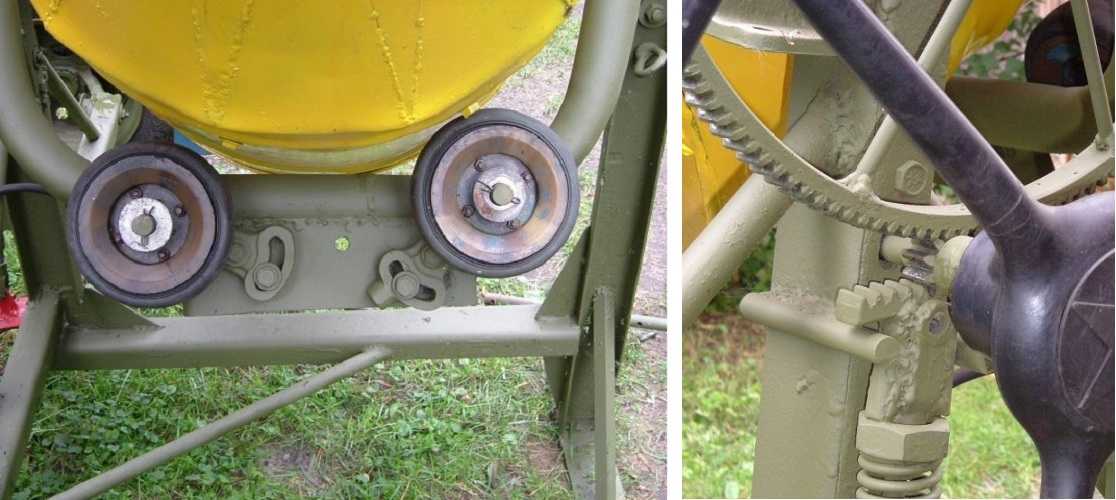
- two pulleys from a washing machine with a diameter of 300 mm and 60 mm;
- garden cart wheels;
- scrap metal for the frame.
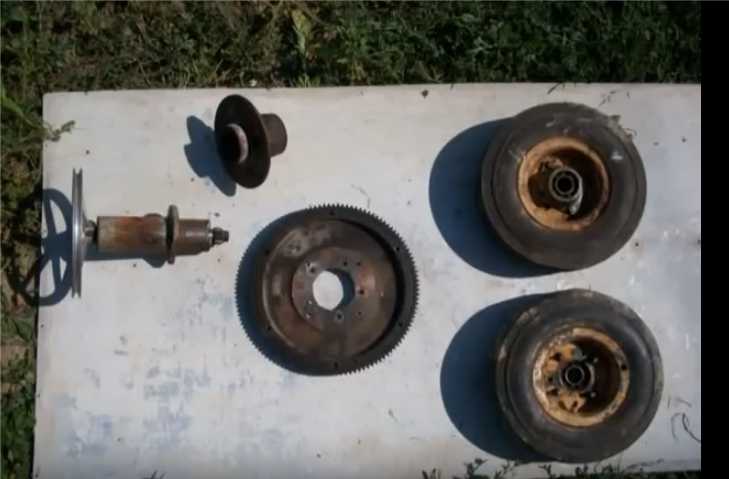
Gears, wheels - everything is old, everything was in the garage
This is not new either
First of all, we clean everything from rust, treat it with a rust converter and cover it with soil.
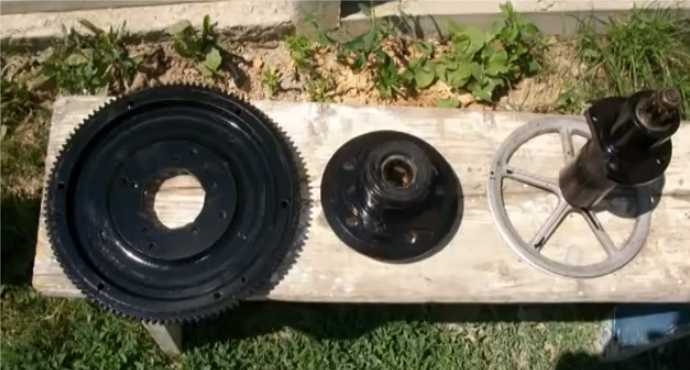
We process details
We cook the frame from pipes, channel. We strengthen the corners of the frame by welding metal plates. Everything should be tough and reliable. We make the crossbar serious: a barrel of solution will "hang" on it, and even everything will vibrate and spin.
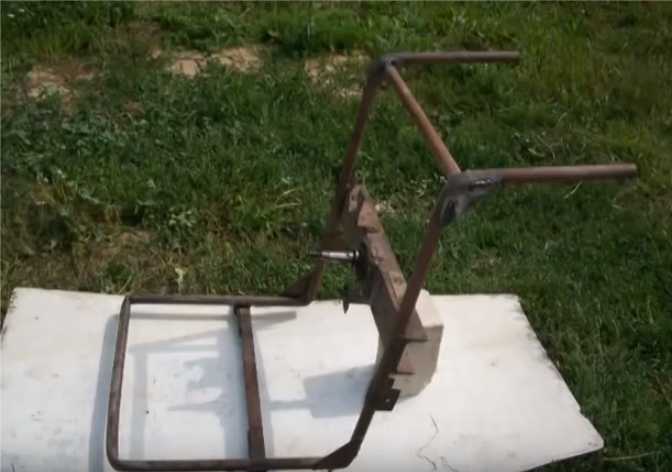
The frame is the basis of the structure. The pipes are almost new))
We weld the pins, the seat for the transmission gears. We clean it from rust, treat it with a rust converter, prime it.
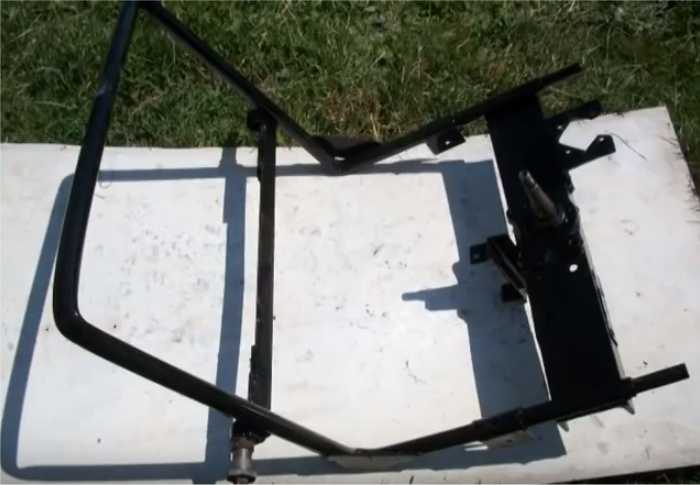
Finished frame
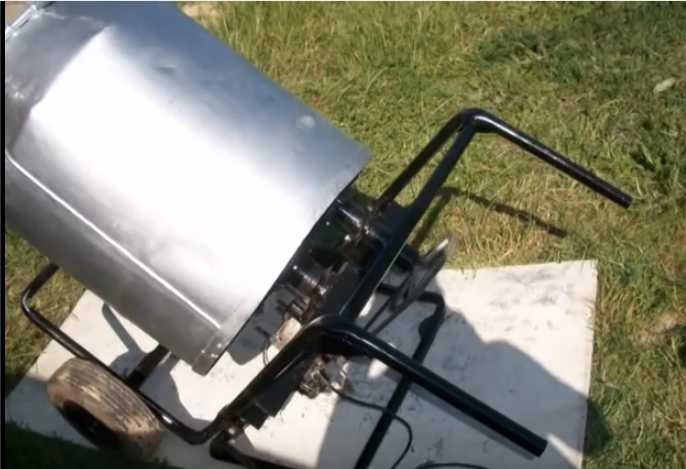
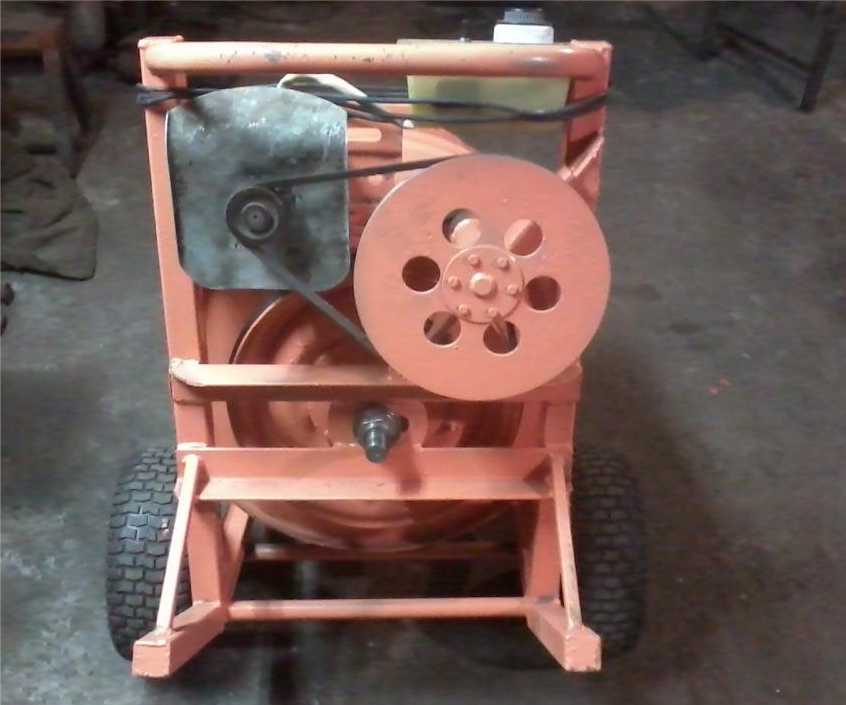
We fasten the wheels from the cart. They are with wide treads and justified themselves: it is not difficult to drag the concrete mixer even just across the site.
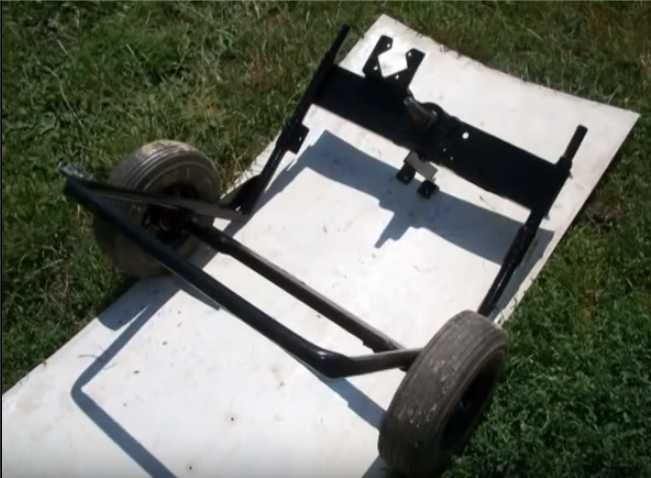
Attached the wheels
We also cook constructions from pipes for an emphasis and installation of the entire "filling".
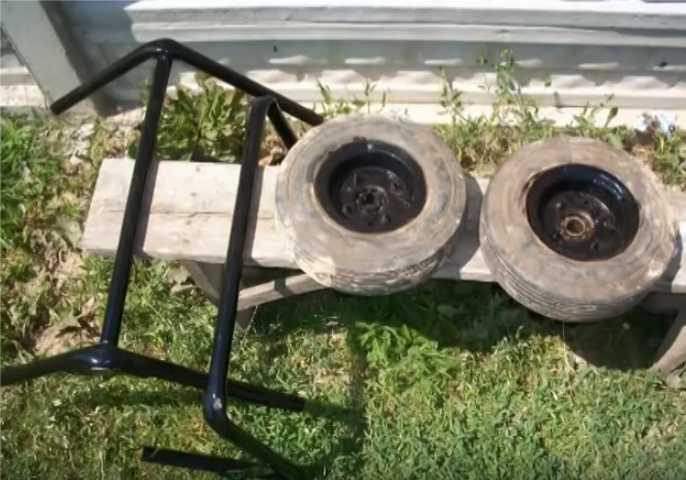
Two more triangular designs
We also attach them to the frame
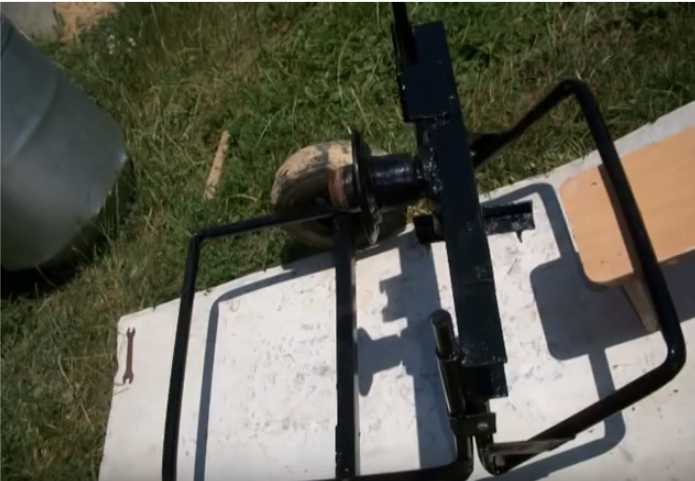
The second is for greater stability
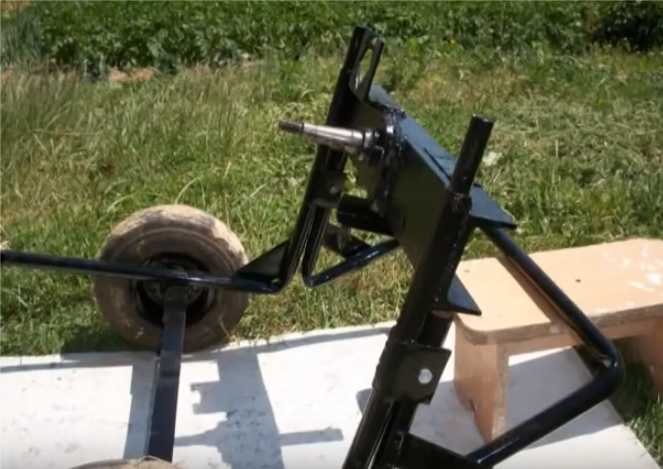
We begin to assemble the drive. First, put the large gear on the previously welded pin.

We put the big gear
In the seat we install the assembly - a small gear connected to a wheel for a belt drive.
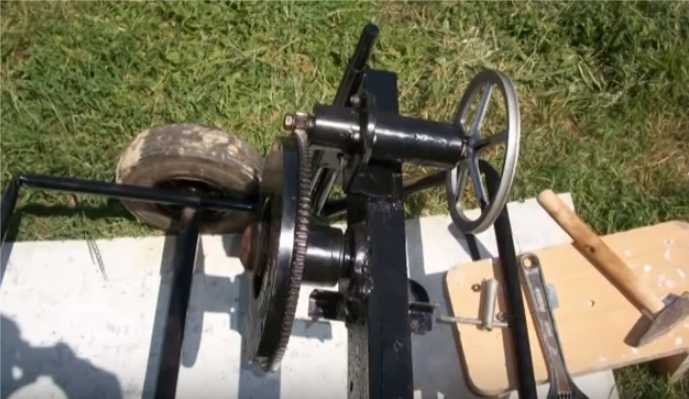
Large gear transmission
We attach the engine to the pre-welded plate.

We hang the engine
We hang it so that the two wheels of the belt drive are on the same level. It is also necessary to ensure the correct tension of the belt.
Motor installed
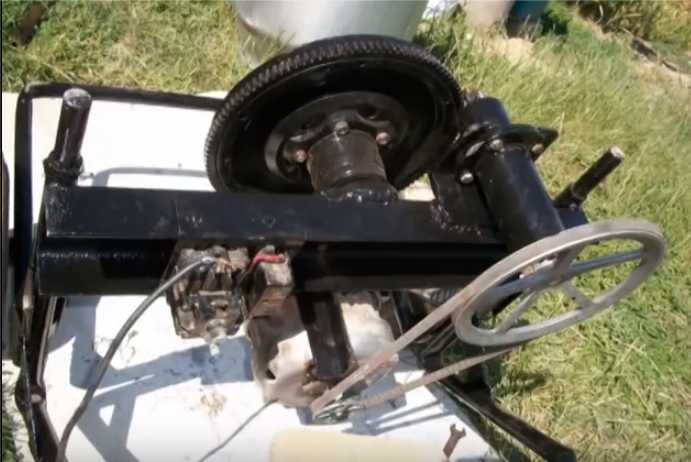
It remains to attach the barrel. In it in the center we make a hole for a large pulley, we drill a hole for fasteners. We put it in place.
We make holes in the bottom of the barrel. When installing, do not forget about the sealing gum
This is how she looks on the frame
Another angle
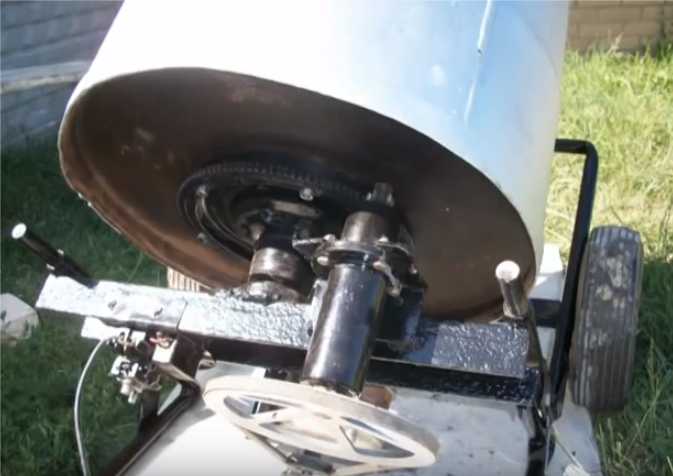
Transfer closer
Only the electrical part remains. We connect the cable through starter with a button.
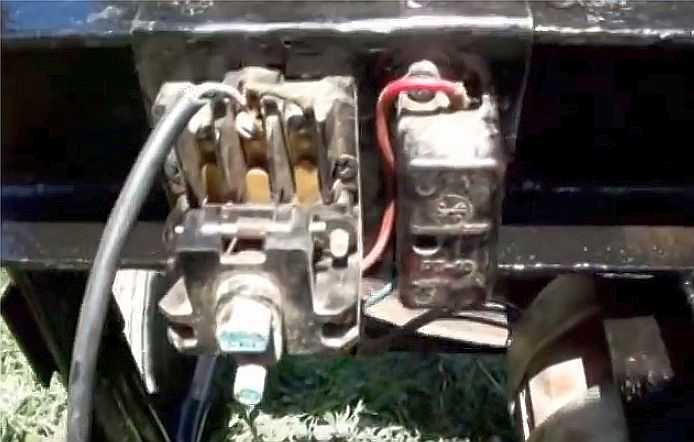
We connect the cable through a starter with a button
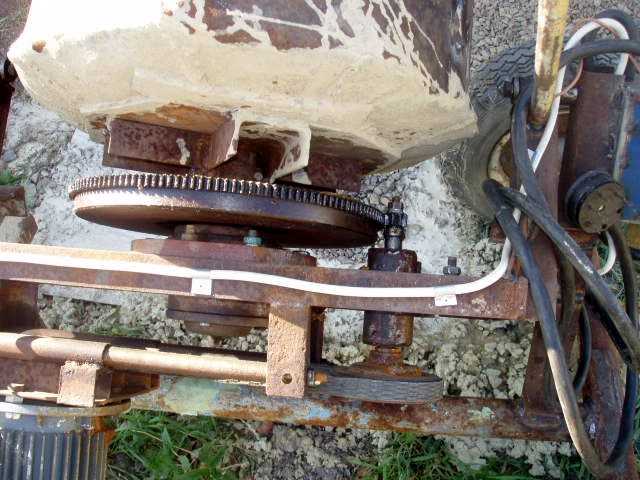
Several photos of the main units. Maybe someone needs to look closer.
Gear and barrel mount
Motor suspension on the plate dampens most of the vibrations
From a different angle
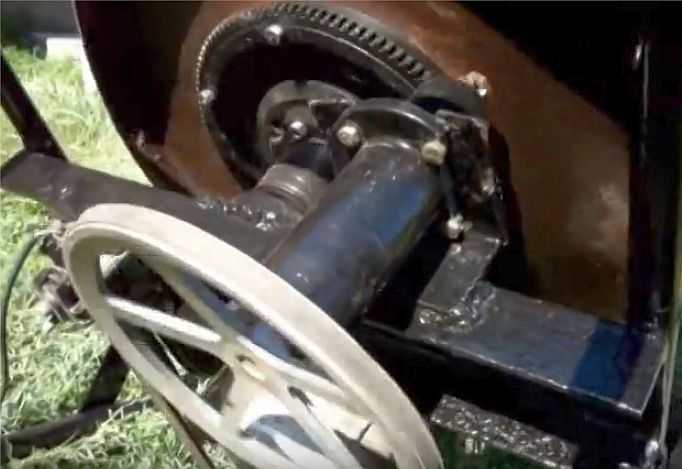
The second transfer option is from a car drive
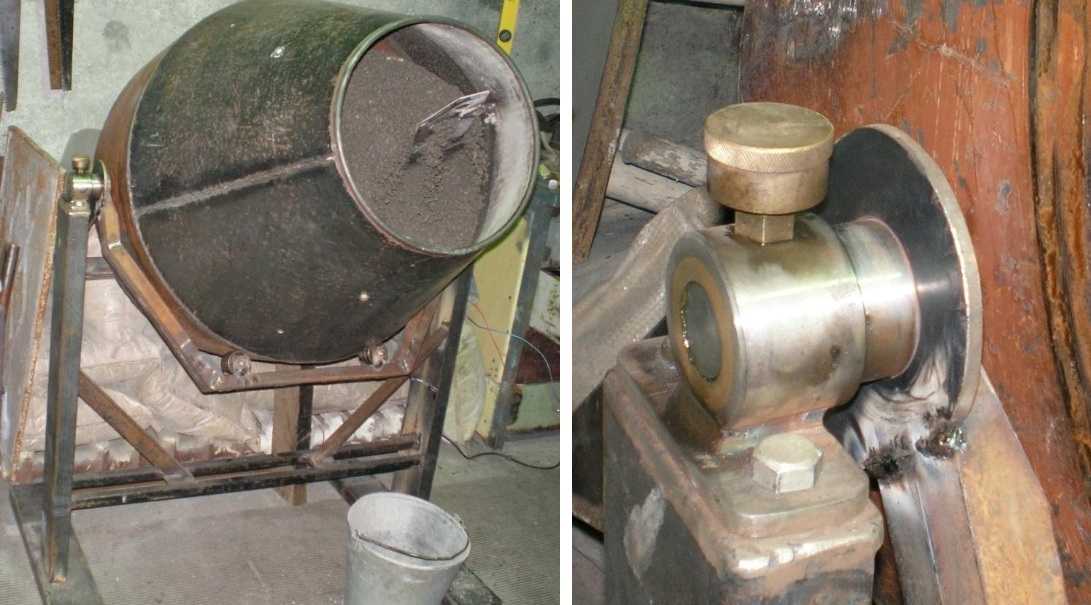
The barrel is 200 liters, its edges were cut, bent and welded, forming the usual "pear".
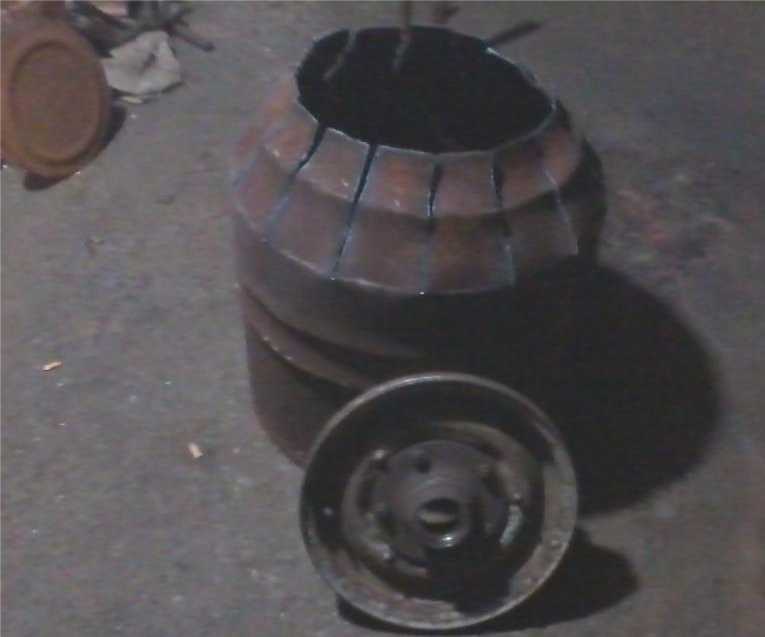
Made from a barrel "pear"
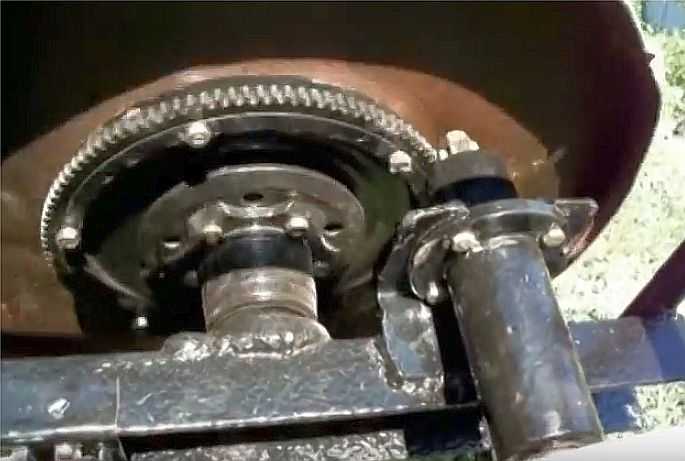
The car rim was bolted to the underbody (with rubber pads). It was selected so that a recess for the belt transmission was formed. The hub was pre-attached to the disk.
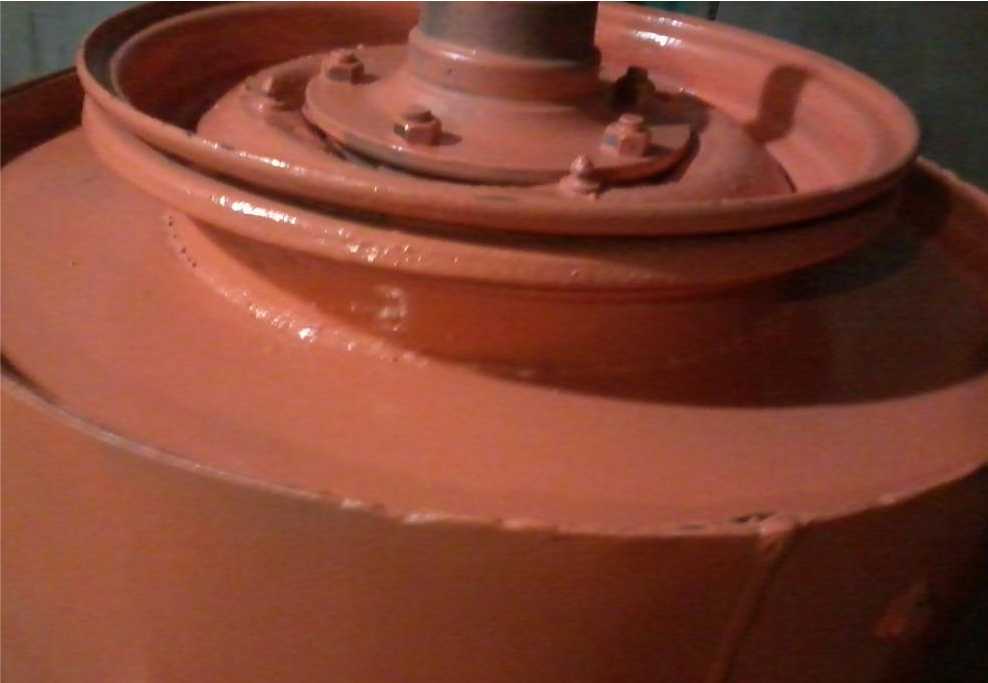
For belt drive
Blades were welded inside the barrel for more efficient mixing of the solution.

Blades inside
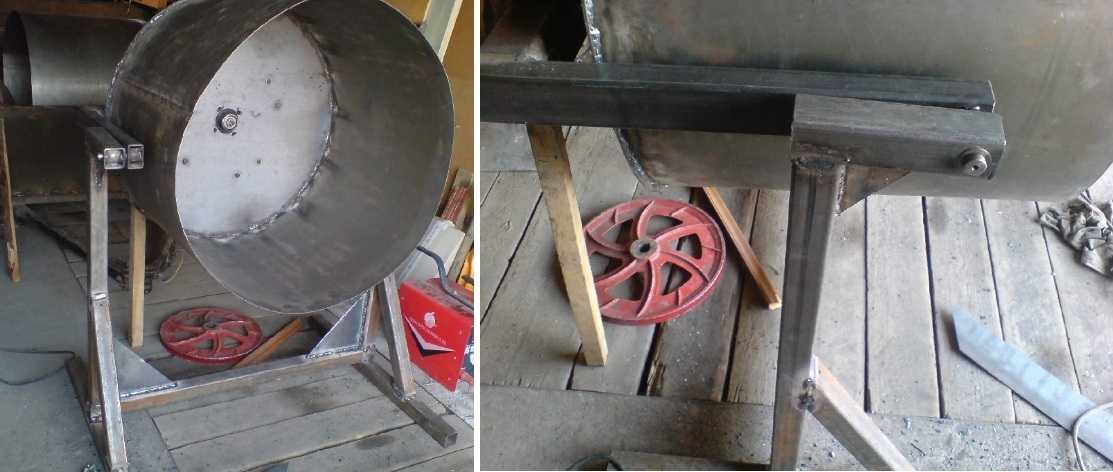
All this economy was attached to the frame.
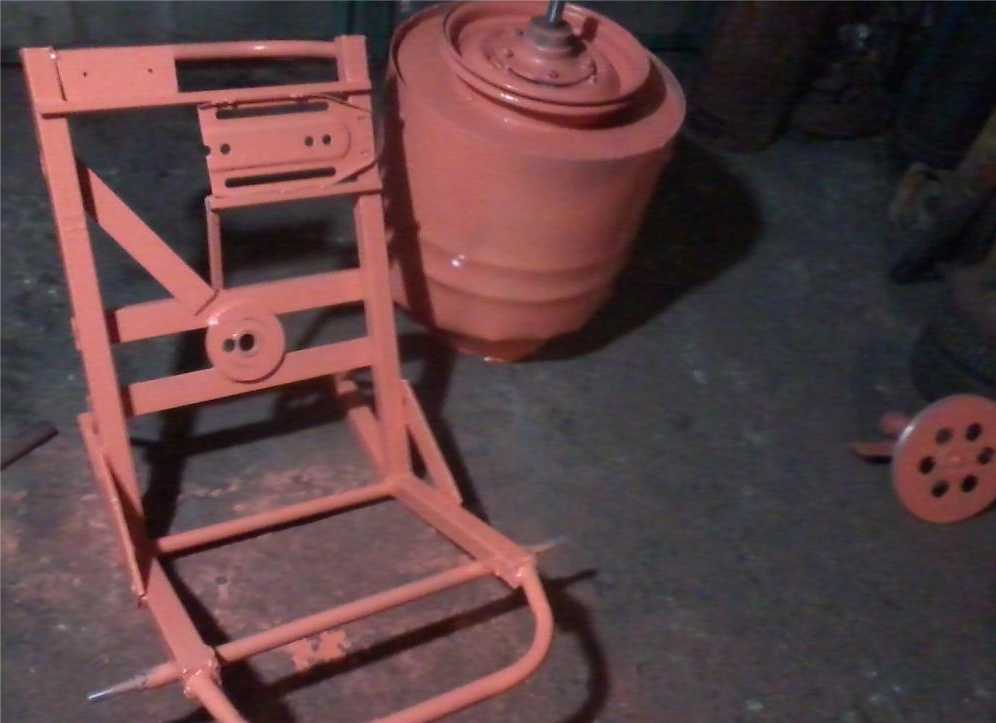
The drum and disc for the belt drive were installed on the frame
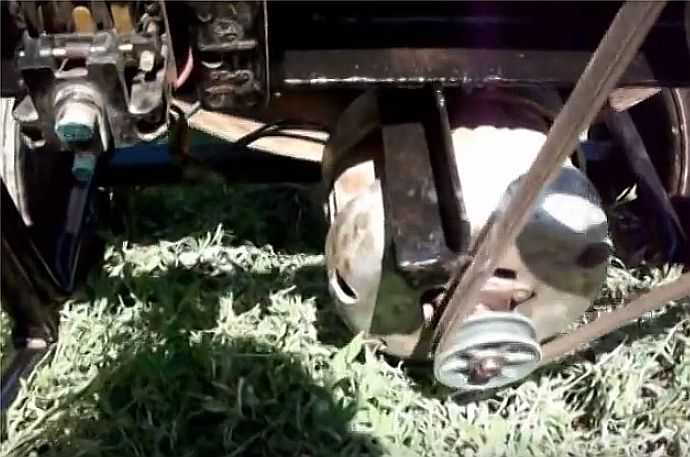
Where the plate is welded is a place for the engine. We set it so that the belt runs smoothly. Power was supplied through a toggle switch, a timer from the washing machine from which the motor was removed is sequentially turned on.
Back view. Under the sheet of metal the motor
In general, the rotation speed turned out to be 35-40 rpm. Should be enough.
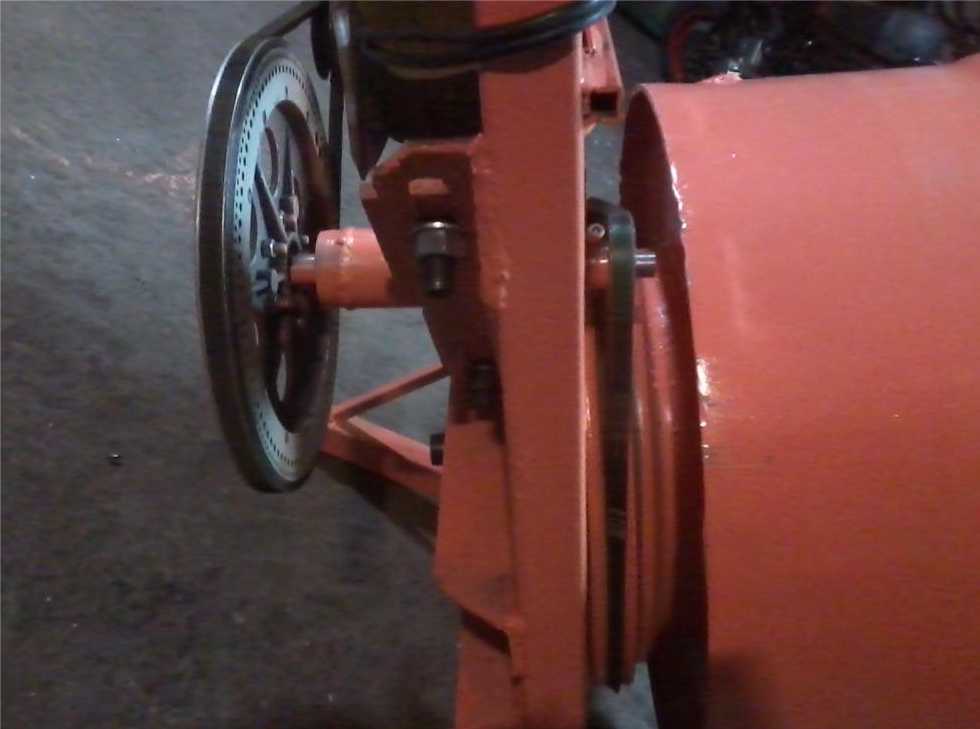
The whole transmission looks like this
Side view
Homemade stirrers in the video version
If you understand the general principle of how a concrete mixer is made with your own hands, you can modernize and alter it, adjusting it to the existing parts. Help in this video collected in this section.
Crown type
Another option, only not a gearbox, but a crown type. The crown, by the way, can be bought (cast iron or plastic) and installed on a barrel.
With rollers as support
Dismountable stirrer from a barrel
First page

Concrete mixer drawing

Work description
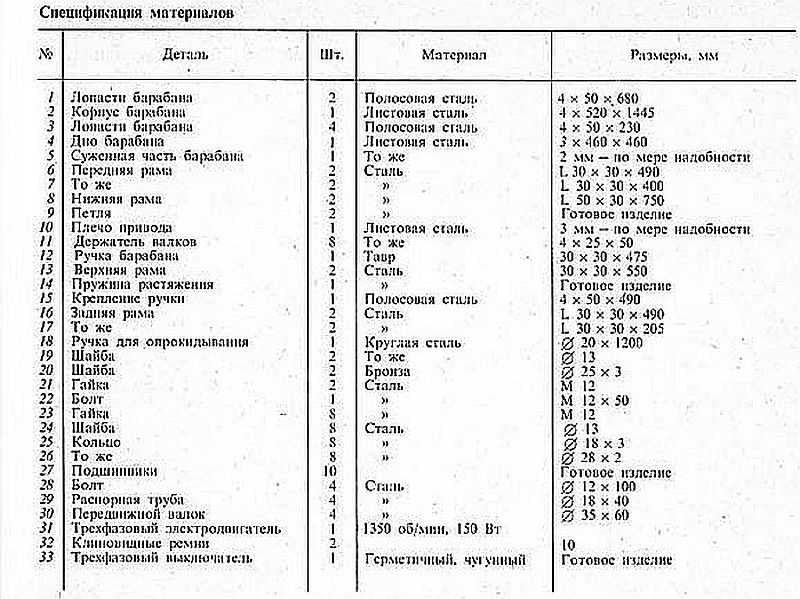
Specification
Photo of units of homemade concrete mixers (it may be useful)
Each or almost every DIY concrete mixer has some original solutions. Few people repeat the design completely without making any changes - they have to adjust to those parts and assemblies that are available. Some interesting solutions are in the photo.
If you leave the bottom of an ordinary barrel without reinforcement, thin metal (3-4 mm) may not withstand the loads and will simply twist it. Therefore, it is better to weld on corners or U-shaped rolling
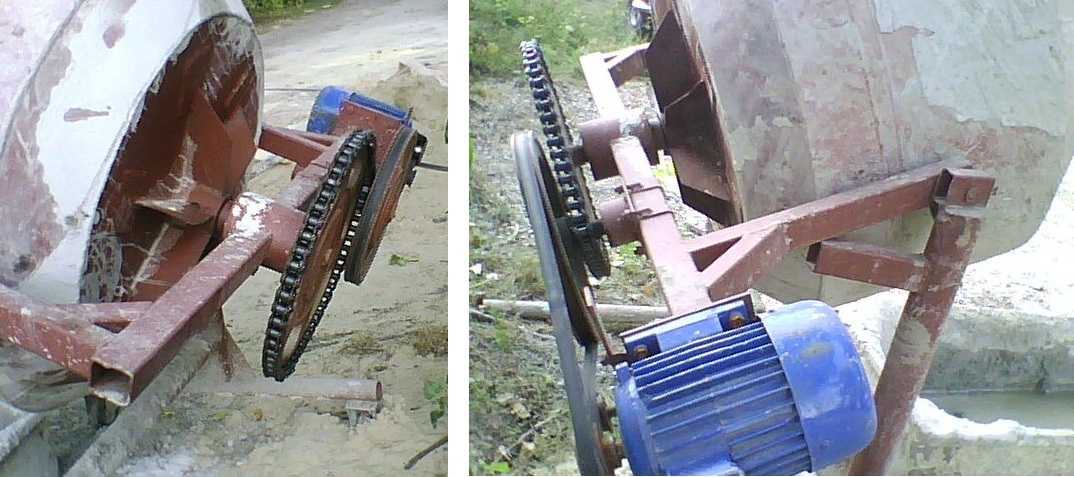
Organization of transmission using a motorcycle chain and the second - a belt
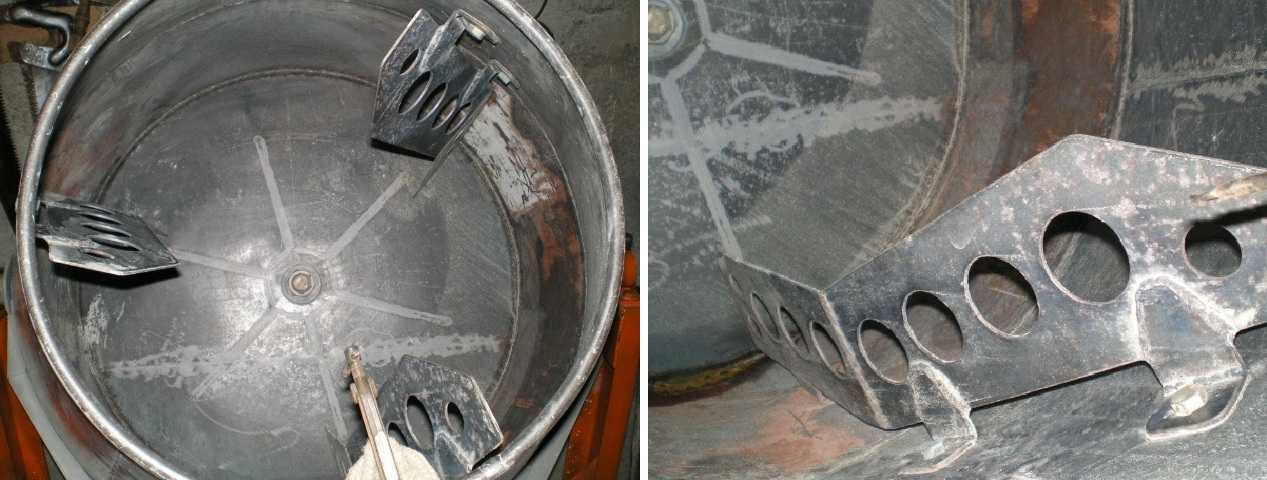
The shape of the blades is a tricky thing. It is necessary that they improve mixing, and not stop the concrete from falling down
How to make a container movable so that you can turn it out
Another way of mobile connection
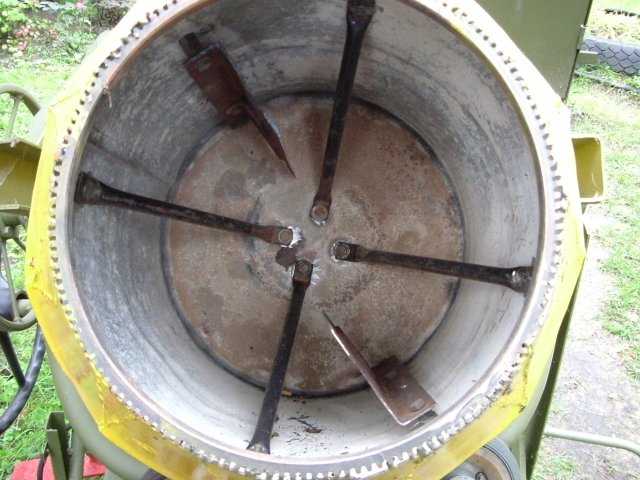
Blades again
The casters can be made adjustable
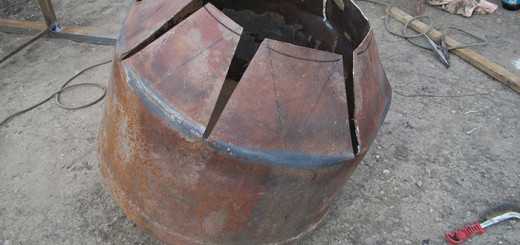
This is how an ordinary barrel turns into a pear