Retro style open wiring
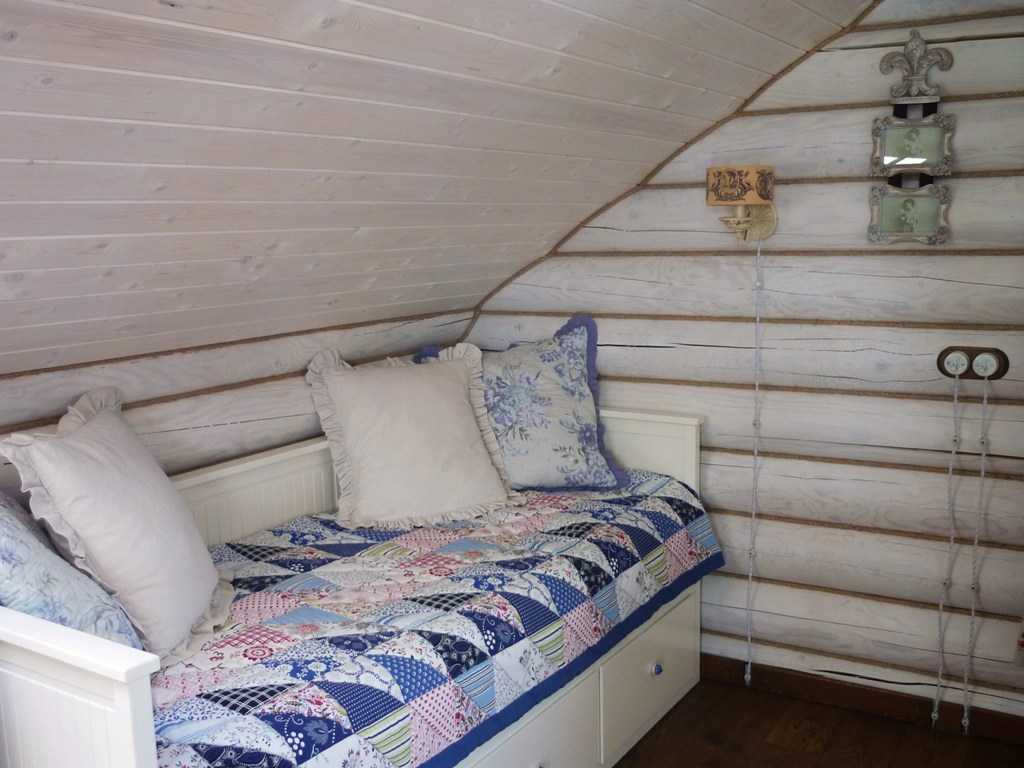
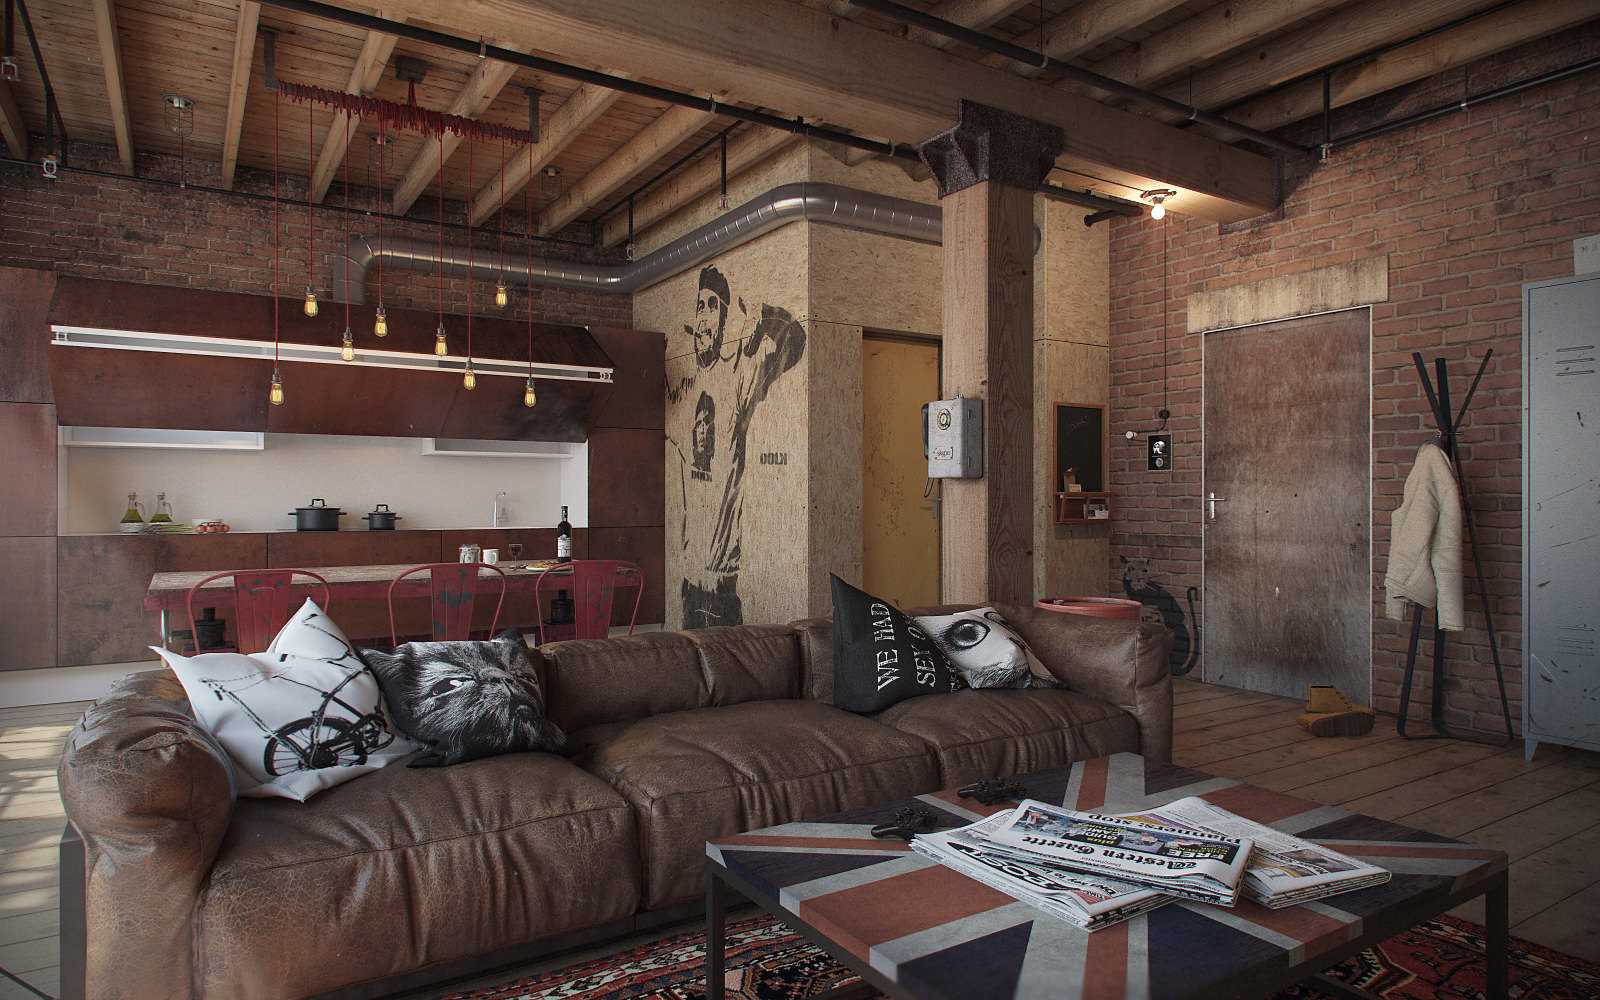
Some time ago, this was exactly how the wiring was done - insulators were nailed to the wall, twisted wires were attached to them. Then came the fashion for hidden wiring. Everyone tried to hide the wires as much as possible, leaving only the frames of sockets and switches outside, and make them as less noticeable as possible. But the latest fashion trends are reviving the open type of wiring again. It fits perfectly intoloft style, looks great in wooden houses made of logs. In log cabins, retro wiring certainly looks better than using plastic cable ducts. And internal wiring in wooden walls is a very difficult, almost impossible undertaking.
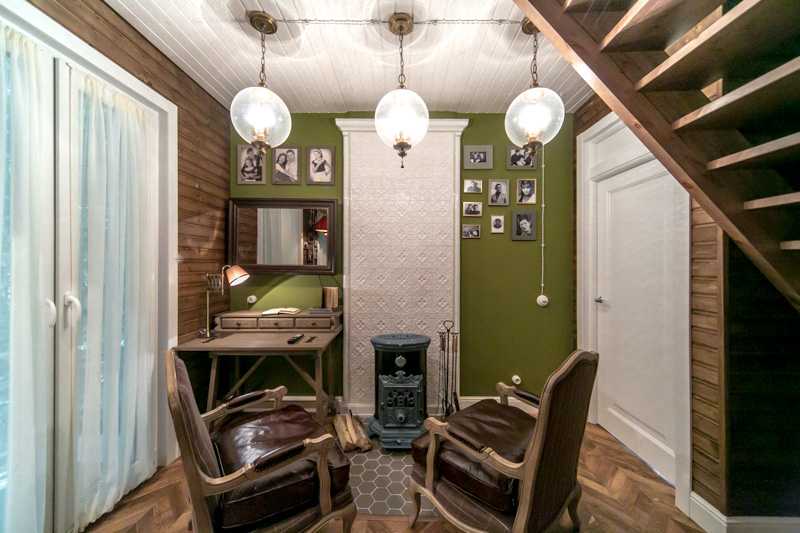
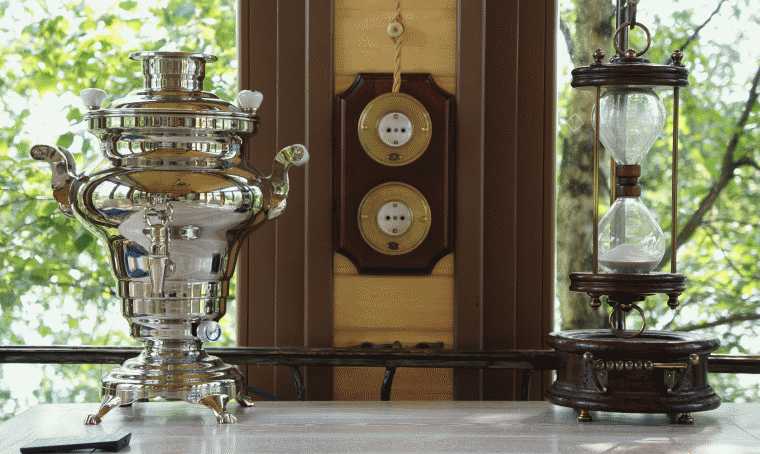
Some retro styles match wiring perfectly
The content of the article
Reasons for choosing outdoor wiring
The first reason is clear - aesthetic considerations. The second is the technical difficulties when performing hidden wiring in log houses. According to the requirements of the PUE, in combustible structures (wooden walls), wiring can be carried out only in blind (without perforation) metal boxes. The second option is in non-combustible plaster. Moreover, a layer of 1 cm should surround the conductor. To put it mildly, this is difficult to do.
Well done retro wiring serves as an interior decoration
The problem in laying the wiring cable in metal boxes is not only that you have to make deep grooves. The main difficulty is that a wooden house changes its height all the time. Even after the main shrinkage has passed, there are changes and they are seasonal in nature - during wet periods the wall becomes higher, in dry periods it settles. The difference in height can be up to 5-7 cm per floor. Since metal boxes do not stretch, this becomes a serious problem. In general, it turns out that open wiring is easier to make. Well, since the wires will stretch over the top, then you can make decoration from them, which is what happens if you correctly make retro wiring.
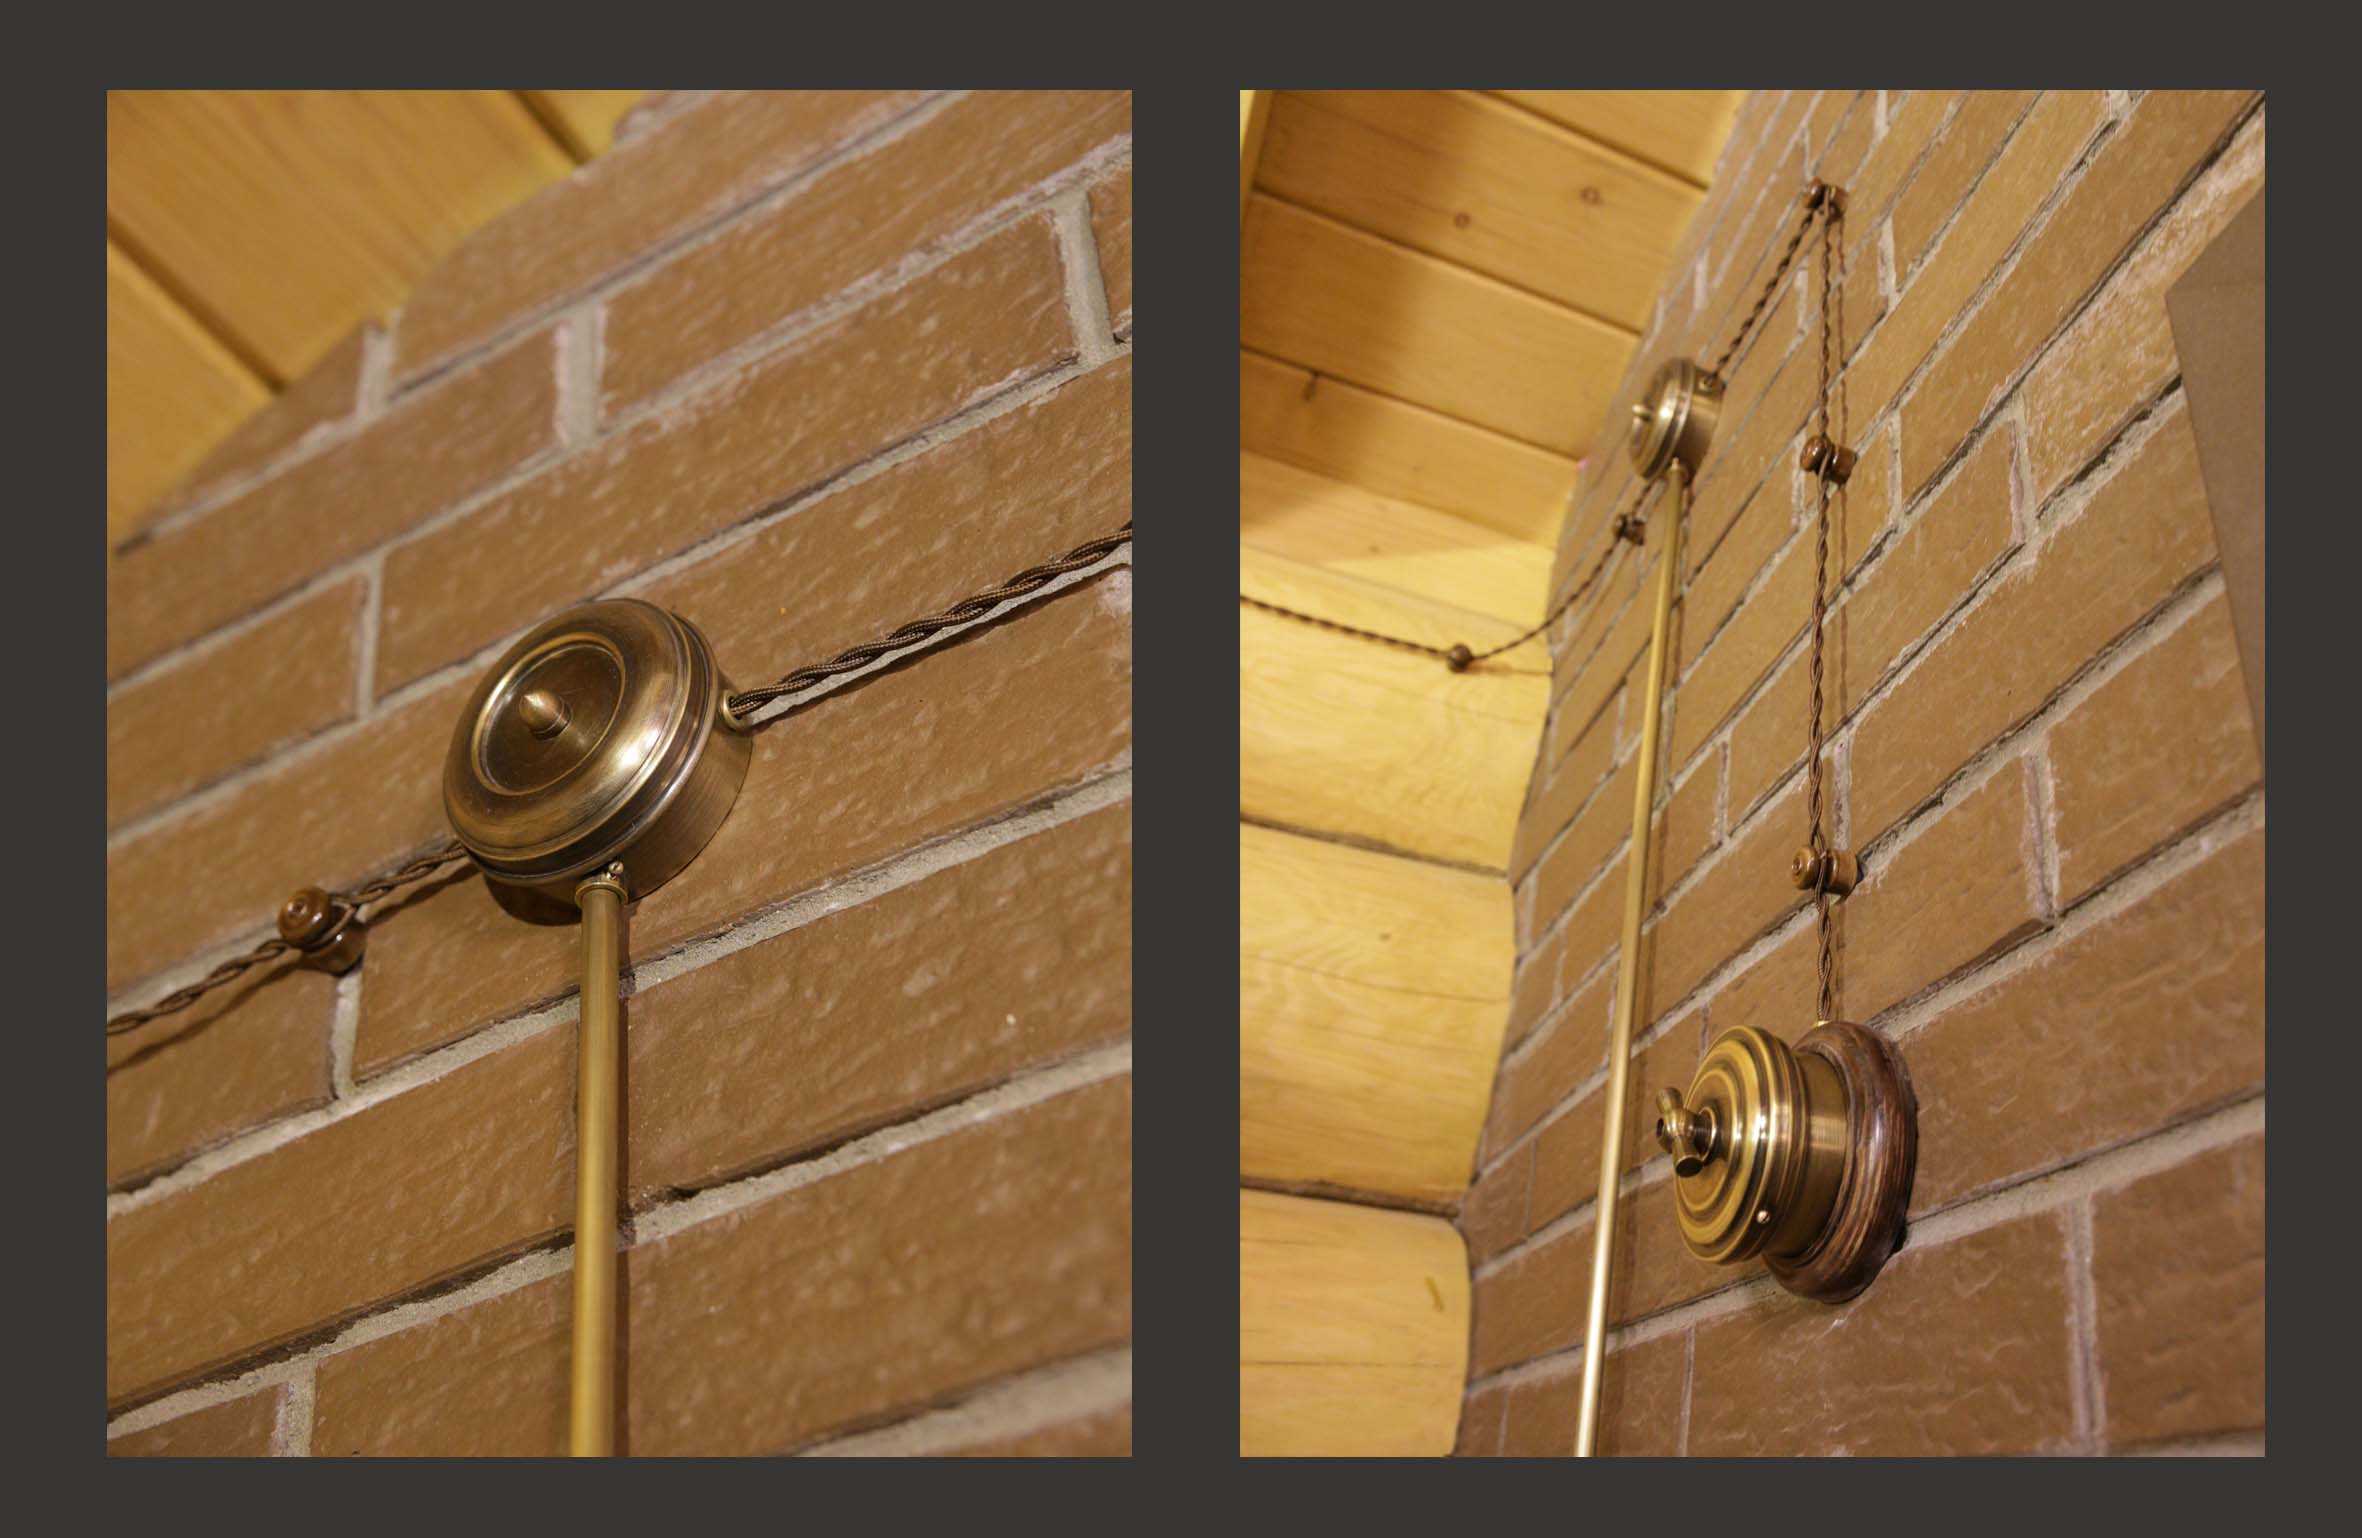
From the point of view of fire safety, it fully complies with the requirements: it is mounted at a distance of 12-18 mm from combustible walls, rests on ceramic or metal (non-combustible) insulators. The wire for laying is twisted, with reduced flammability. So there are no problems from this side either.
If you keep everything in the same style, it looks very good
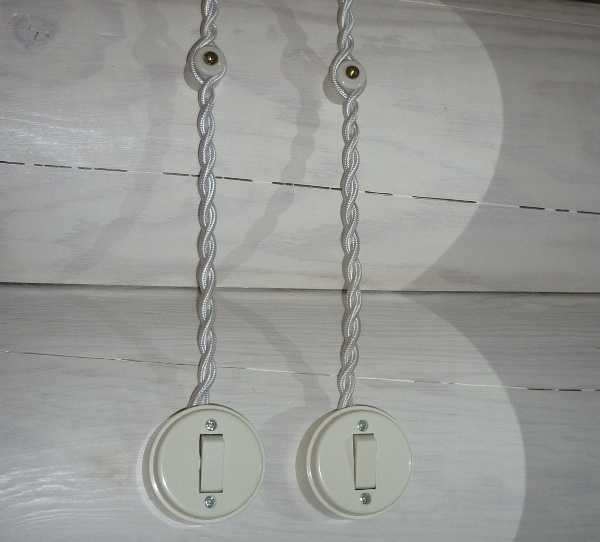
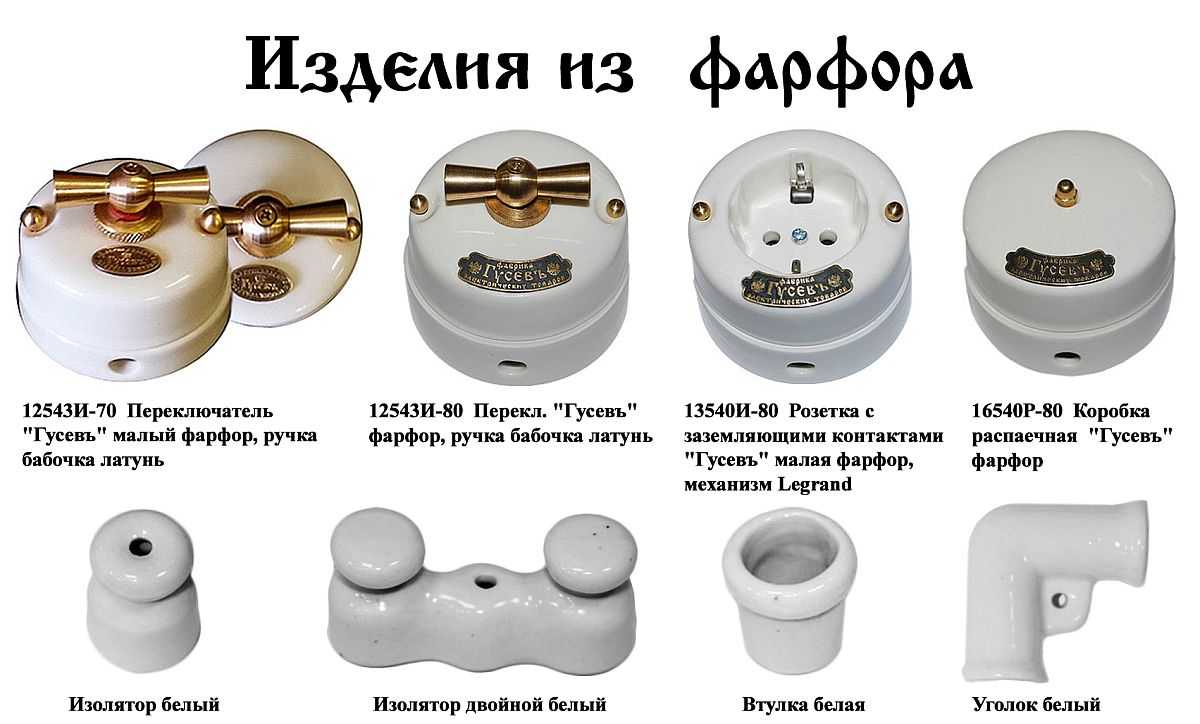
Sockets, switches, junction (mounting) boxes can be used ordinary - plastic. But to make everything look organic, it makes sense to put porcelain or metal ones and also in "retro" style. They also meet safety requirements as they are made of non-combustible material.
Materials for retro wiring
A special twisted cord and insulators (rollers) are required for the retro wiring device. The rest of the components - junction boxes, switches and sockets for saving, you can take ordinary plastic ones. It is important that they meet the requirements: they must have back walls made of non-combustible materials. That is, you can take those that are allowed to be mounted on combustible walls.
Twisted cable
A twisted cord for retro wiring is made on the basis of a stranded copper conductor, which is packed in PVC insulation. There are two such shells. A textile casing is applied over the second. Usually it is technical silk, which is impregnated with anti-friable compounds (they reduce flammability). There may be cotton braid.
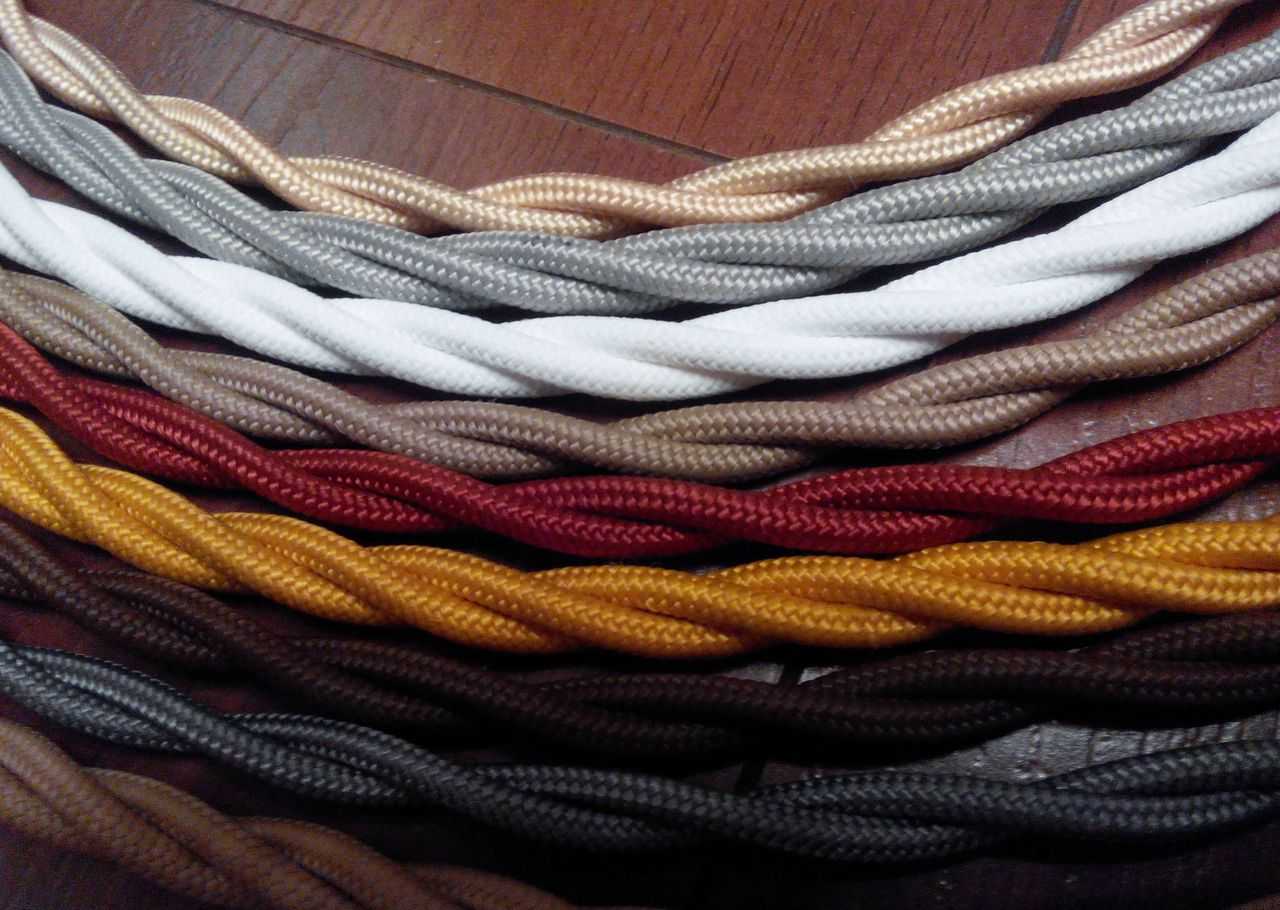
Coiled cable for retro wiring
Types of cables
Cables come in 2, 3 or 4 conductors.To carry out retro wiring in accordance with all the rules, you will need a twisted cable of three wires: one conductor will be phase, the second will be zero (neutral), the third will be protective ("ground").
Twisted cables are available with a cross-section of 1.5 mm2 and 2.5 mm2... There are no large sections. When developing a circuit, it is necessary to take this into account and design the wiring as a beam wiring. The sockets take a cable with a cross section of 2.5 mm2, on each line you can "hang" 2-4 pieces. But the total power of the connected devices should not exceed 3 kW, and the value of the consumed current should not be more than 16 A. Here you have to twist, especially in the kitchen, where a lot of powerful household appliances are turned on. But for the kitchen, tiles are often chosen as finishing, and they are laid on a wall lined with plaster. On the tile, the twisted cord will not look exactly, so it makes sense to do hidden wiring.
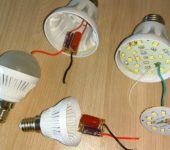
A twisted cable with a cross section of 1.5 mm is taken for lighting2, on one line the maximum load is 2 kW or 10 A of the consumed current. For lighting, this is usually more than enough even for two rooms - you can turn on 20 hundred-watt lamps, and even more housekeepers or LED ones.

The cord for retro wiring should be chosen not so much in appearance as in quality indicators
Manufacturers
Manufacturers of stranded cables for retro wiring offer a fairly wide palette of braid colors to choose from. There is no problem with that. On sale today there is a cable of European and Russian production. The European one is about 20-30% more expensive. The most famous Italian firms are Gambarelli, Cordon Dor, Fontini Garby. Of these three manufacturers, Gambarelli has the best wire. It is the toughest, fits well on insulators. But these cables cost a lot: a 3 * 1.5 meter costs about $ 2-4, and 3 * 2.5 will cost $ 3-5 per meter. There is also the German manufacturer Replikata, and there are many others, but they do not have representative offices in Russia, you have to order on their “native” website. True, an order with delivery costs almost 2 times less than buying a similar product “on the spot”. So it's worth the strain.
Retro style electric cables are imported and domestically produced
There are also Russian manufacturers: the Gusev electrical goods factory, VILLARIS (Russian-Spanish), Gemini Electro, Bironi. Here the prices are much more modest: the price per meter of a three-core twisted cable 3 * 1.5 is from 87 rubles (this is about $ 1.3), with a thicker core - 2.5 mm2 - 121 rubles / m (about $ 1.8).
How to save
Even if we take relatively inexpensive Russian-made wires for retro wiring, the amount eventually accumulates. There are many lines, because the outlet groups must be pulled each separately from the shield. It turns out a solid footage. To save money, you can weave the cable yourself from a cord that is suitable for the characteristics. There are two options:
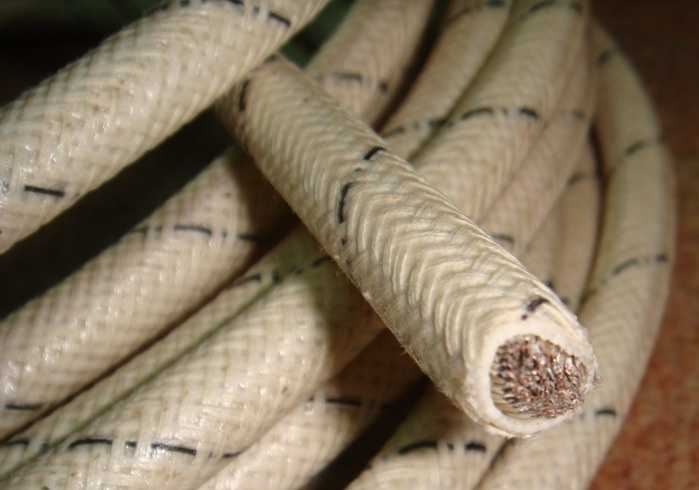
- BPVL. Side wire, copper stranded. Each vein was tinned. Sheath - PVC platyficate, on top of which a varnished HB winding. It can be of different colors, but since this is a technical wire, not a designer one, you need to look at what colors are in stores. Price per meter of wire with a cross section of 2.5 mm2 (PodolskKabel) - about 8 rubles (with a dollar of 65-66 rubles). Even taking into account the fact that one cable needs 3 cores, and even 25-30% of the length will be spent on twisting, it turns out that a homemade one will cost a little more than 31 rubles. True, one must take into account the time spent on "weaving".

BPVL wire from which you can weave a retro cable
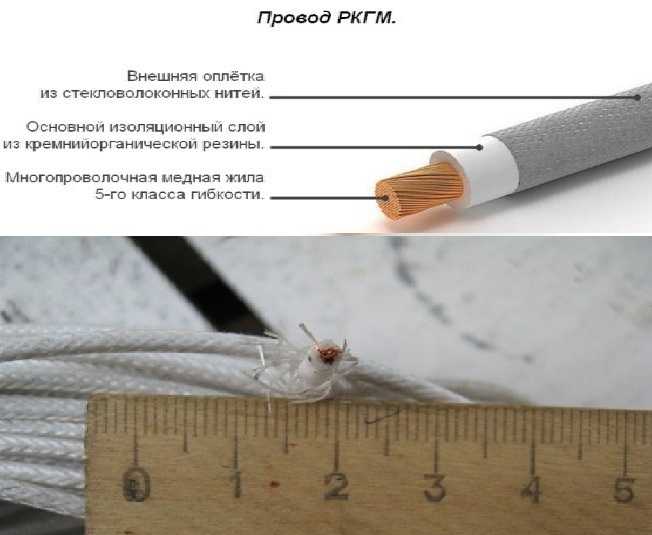
- RCGM. Copper stranded wire in two-layer silicone rubber insulation, on top of which a fiberglass braid with silicone impregnation is applied, varnished on top. This wire is good because it can withstand temperatures up to 180 ° C, but it is bad - the presence of fiberglass and the lack of colors. It can be white or gray. Costs more - one meter with a cross section of 2.5 mm2 - from 30 rubles / m. So here the cost per meter of finished product is 117 rubles, which is quite comparable with finished Russian products.But such a cable has a much greater safety margin. But how much it will be in demand is a question.
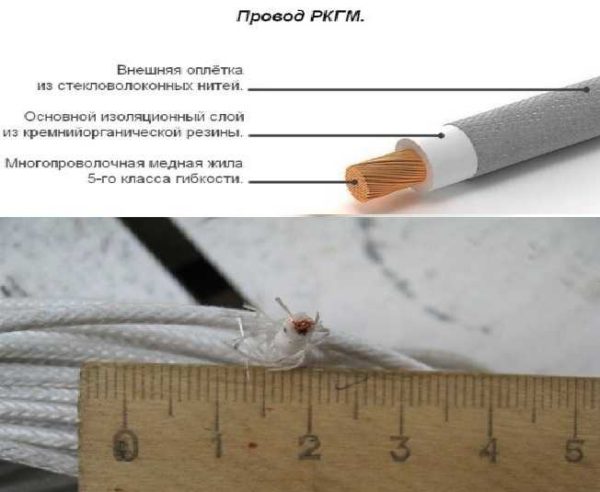
This is the RGKM wire
In addition to saving, this option is good because, if necessary, you can weave a larger diameter cord. These wires are available for both 4 and 6 mm2. So you can dare. The second plus - you can not just twist and twist the cord, but weave something, even an ordinary pigtail. True, the cord consumption will be greater, but the look will definitely turn out vintage.
It is better to weave in place - they cut off a piece of the desired length, adding 20-30% goes for twisting (for 1 meter of the finished cable, 1.2-1.3 meters of cord goes). Fastened at the top, then twist clockwise to the place of installation of the first insulator. Bypassed the insulator, and then twist in the opposite direction - counterclockwise and so on. Why is this option good? No need to suffer with tangled ends, they are untwisted "automatically", and, when a wooden house shrinks, it will be possible to remove the wiring from the insulator, making a few turns, eliminate the sagging of the cable.
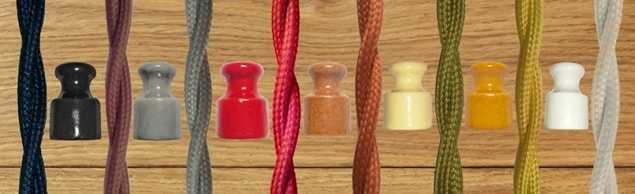
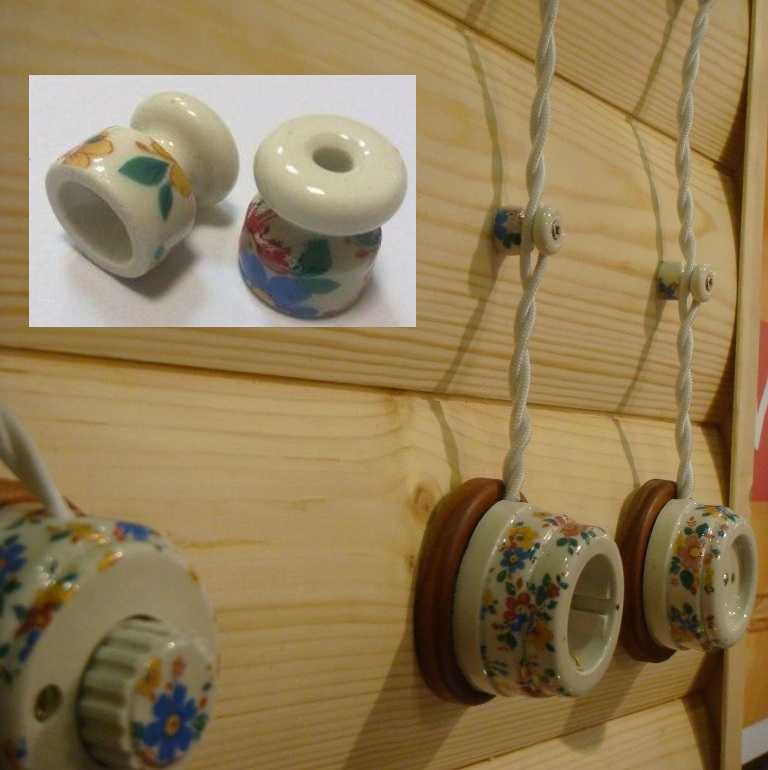
Insulators
Insulators or rollers are required to fix the coiled cable. They are made of ceramics, they can be painted in different colors. The base diameter can be 18-22 mm, height - from 18 to 24 mm. The upper part is available in two sizes: narrow and wide.
If you will use the cable from two wires, you can take those with a narrow top, if there are three wires, it is more convenient with a wide one. Otherwise, there are no requirements or restrictions.
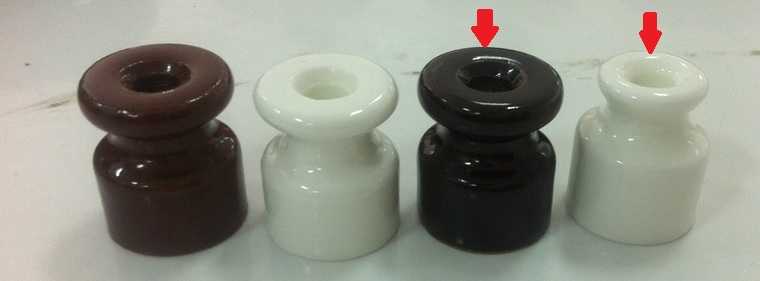
The top can be narrow or wide
To install the fasteners, a through hole goes through the entire insulator. Depending on the size of the insulator, you need to choose a self-tapping screw for wood or a dowel for stone or concrete walls. You select the color of the fasteners depending on the color of the ceramics, and along the length - it should go into the wall at least 2/3. So you have to look for long and thin ones. Some manufacturers sell complete hardware. Very convenient and time-saving.
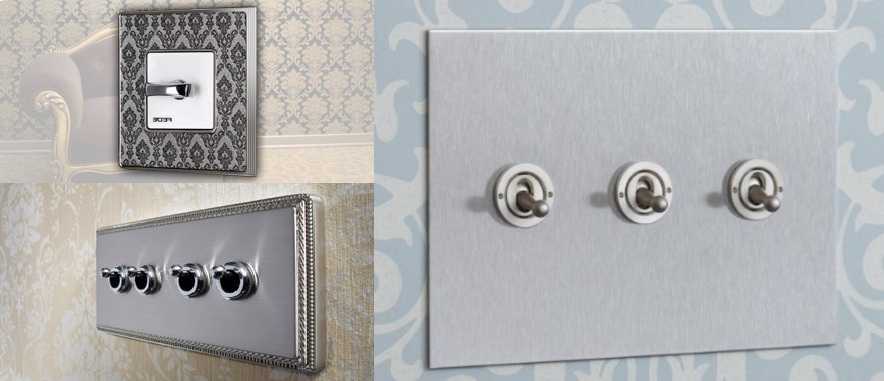
Sockets, switches and junction boxes
As already mentioned, you can use ordinary sockets / switches, but the retro wiring itself looks a little strange in this case. The main chic is just in these strange and unusual things, which just give the whole venture that very charm.
A very interesting series of the Russian company Bironi (Bironi)
On the market, again, there is a retro electrician from Europe, there is a Russian-made one. If in terms of design, domestic manufacturers are not inferior in anything, then European products are still better in terms of the quality of the electrical part. You can also find similar products made in China. Here again, in appearance, everything may be fine, but the quality of contacts is as lucky (actually, as usual).
Nevertheless, they usually buy Russian-made ceramic sockets and switches. The difference in price is too high. One ceramic unit of sockets / switches from Europe costs from 20-30 € (there is also much more expensive). Russian-made switches cost from 1000 rubles (about 14 €).
When installing, you can, as in the photo, use frames or pads. They are also available in a fairly wide range. You can choose them to match the walls, you can buy unpainted ones and arrange them on the spot as you want. In principle, you can do without them, but only in a log house.
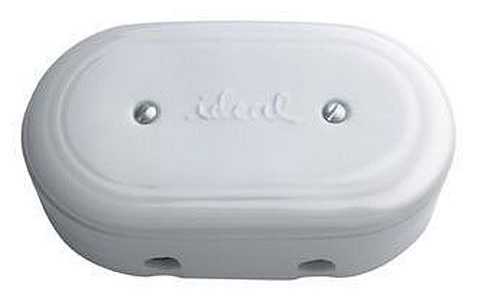
Long junction box for retro wiring
There are also junction boxes made of ceramics. They are usually round, but relatively small. Only the Spanish company Llinas has long porcelain mounting boxes. By the way, they have lower prices for the rest of the products by about 30% (when compared with the average European), and the quality is quite decent.
Device rules
In general, the general rules for wiring must be observed:
- each branch is made in a mounting (soldering) box;
- from the box, the line goes down vertically;
- the minimum distance of the socket / switch from the door jamb or window slope is 10 cm;
- distance from communications (water supply, gas pipeline, heating) - at least 50 cm;
According to modern standards installation height of sockets and switches not standardized, and the wiring from the machine can go under the ceiling or in the floor. Many people do not like the large amount of wires that will have to be pulled in plain sight. In each room, at least under the ceiling, there should be two separate routes - for lighting and for electrical outlets. Already such an abundance of wires is difficult to make attractive. Therefore, some owners prefer to hide the eyeliner behind the clean ceiling. There, with an ordinary cable of a suitable cross-section, power is supplied from the machine installed on house dashboard... The junction box is installed immediately under the ceiling (not a violation, but it is inconvenient to work), a twisted wire is lowered down from it to a switch or outlet.
Rules for laying open retro wiring
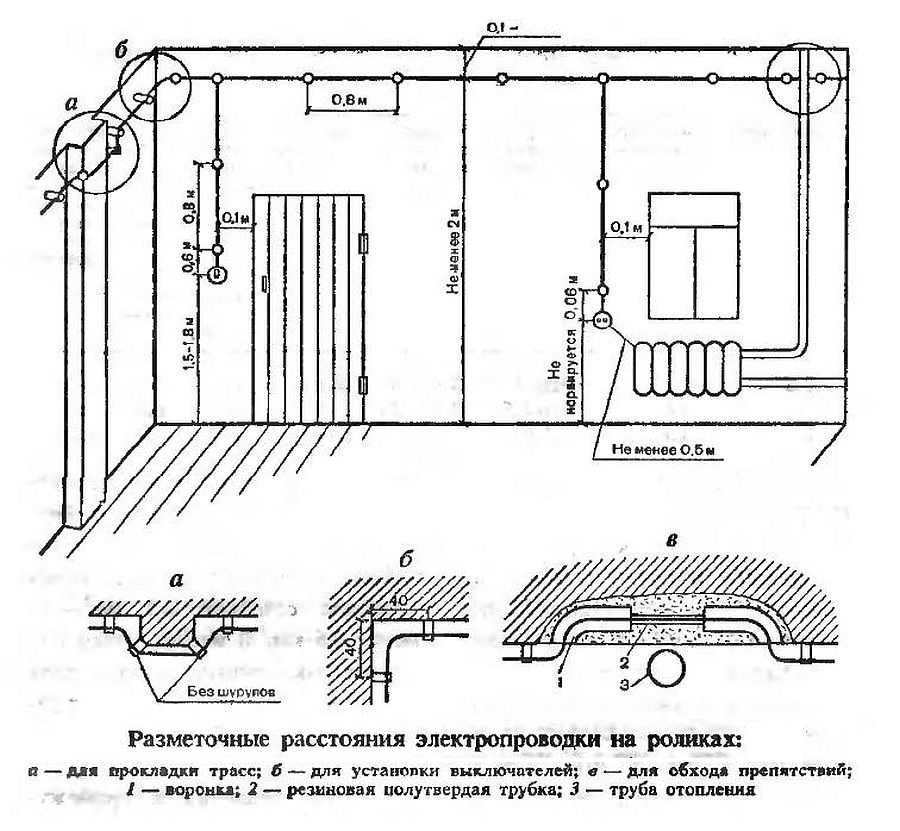
But these were general rules. Now about how to mount a twisted electric cable. Insulators are installed first. The maximum distance between them is 80 cm, the optimal one is about 50-60 cm, in some cases you have to make 30 cm. If we talk about a log house, insulators are installed for retro wiring in every second crown. This is the best option.
As shown in the figure above, the socket or switch is placed approximately 50 cm from the last insulator. This distance can be made a little smaller, but it is better not to increase it - the wire may sag. It, of course, can be cut and reconnected, but you don't always want to mess around.
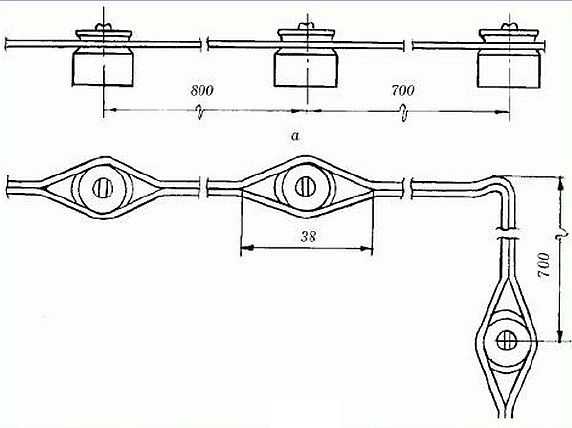
Standards for the placement of insulators from the old book
The photo above shows the distance from each other to install insulators when turning the wiring. These are norms from an old textbook, but they are most likely still valid.
Retro wiring in the interior
In general, to make the open wiring look good, you have to try very hard. After all, everything is in sight, all the flaws are striking. If retro wiring is done in a wooden house, then every wrong screw leaves a trace that is difficult to disguise. Therefore, before starting work, draw everything on the plan, transfer all the markings to the walls and only then start. If you are not sure if you have placed the sockets / switches correctly, if you do not know if they will look good in this place, try attaching a cord to the ceiling (at least on masking tape, at least with very thin studs). So you can more likely imagine how everything will look together.
Combined version - in pipes and without
Another moment. If the wooden house still "sits down", pull the wires. If the frame has already settled down or is made of laminated veneer lumber and you should not expect shrinkage, it is better not to pull the wires. They should not sag, but they cannot be too taut. In general, good luck! And for inspiration, a few photos of how you can make retro wiring.
Photos of interiors
It is always better to look at several “ready-made” rooms. This makes it easier to understand what exactly you like and what not, to get a preliminary idea of how everything might look.
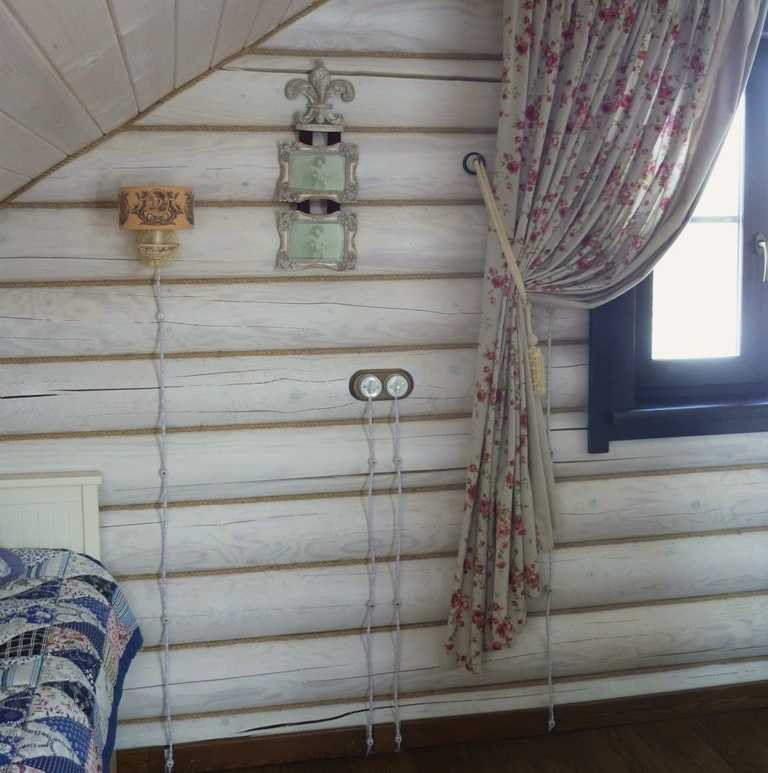
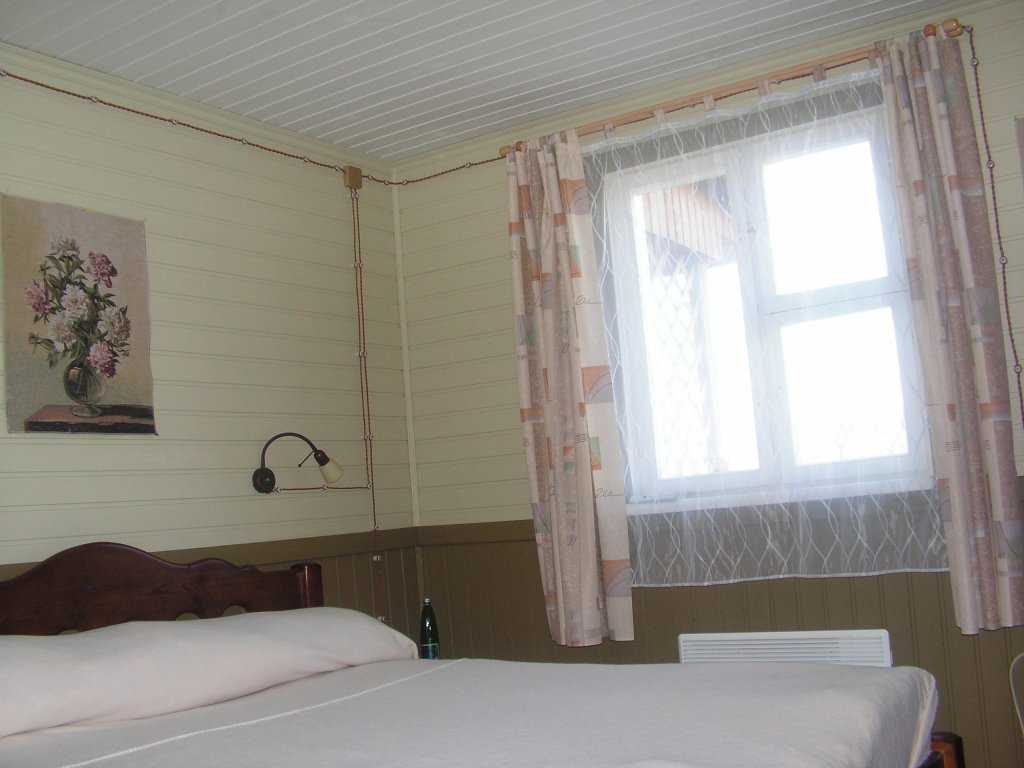
An example of wiring from below - the cable goes under the finished floor in a metal box, only twisted cords rise along the walls to the installation site of sockets and switches
The color of the box can be in contrast to the wall, but it should also be present in other interior details.
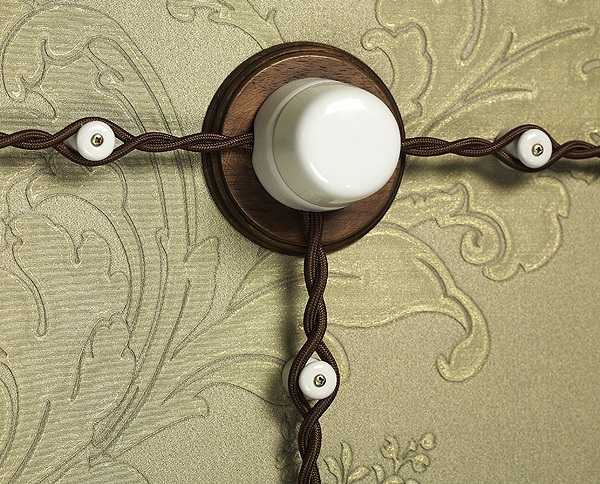
They also look good on wallpaper, so retro wiring can be done in the apartment, but the style must match….
This is an option with plastic junction boxes and switches
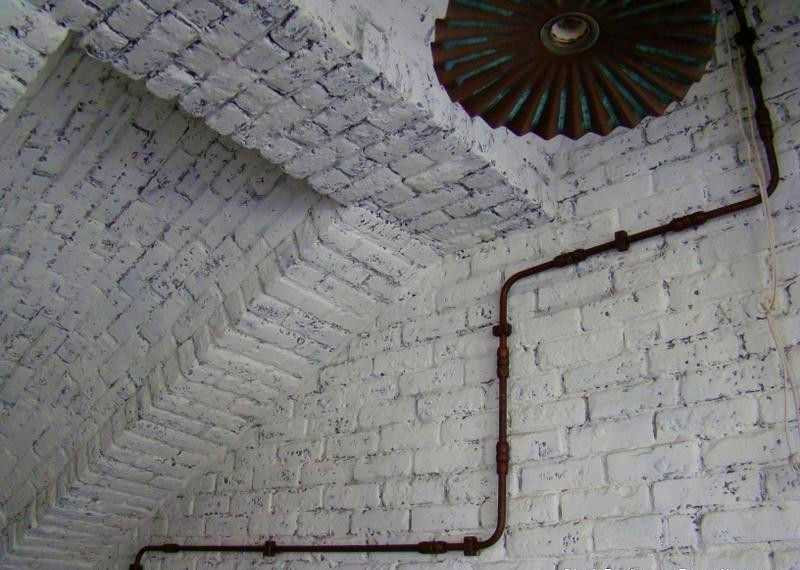
Retro wiring can be done in pipes. An ordinary cable is laid in them
It looks like a retro wiring from pipes in the interior
How can you arrange a double socket in a narrow partition between the windows
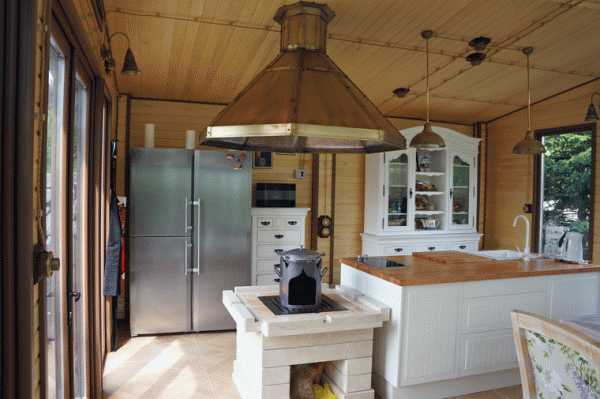
In the kitchen, retro-style wiring also looks quite organic.
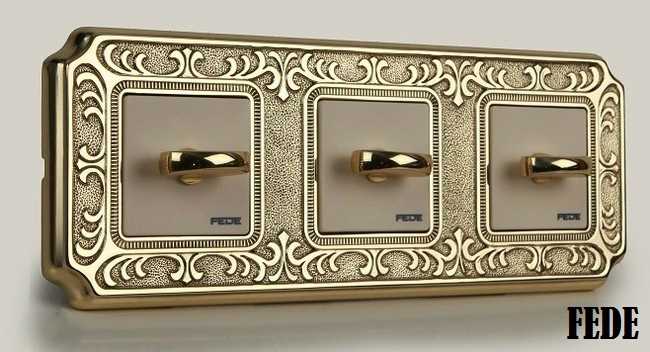
Retro style socket / switch collections
Often a specific thing can push the idea of decorating an entire room.If we are talking about special electrical installation products in a retro style, then even a socket or a switch can become such a thing. We will post some collections and interesting models from different manufacturers below. They are different in design, you may like something.

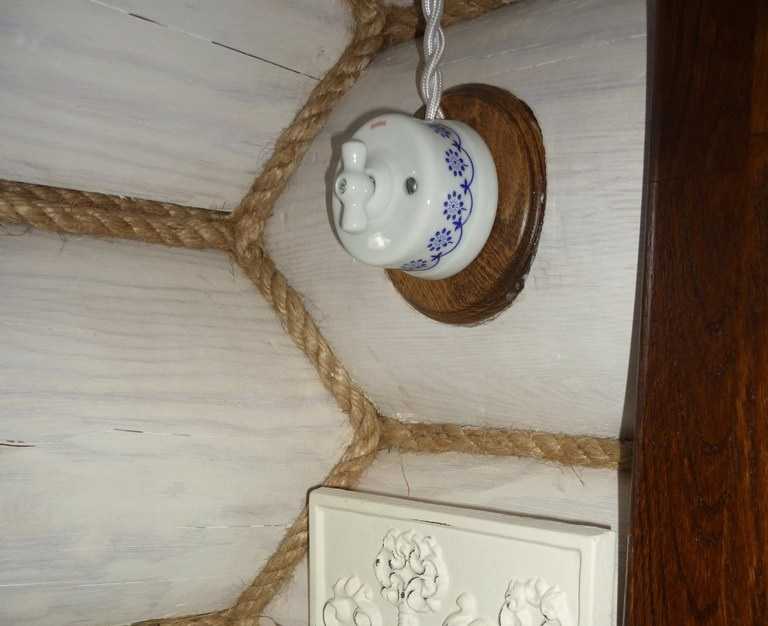
The most popular model of retro switches is the so-called butterfly
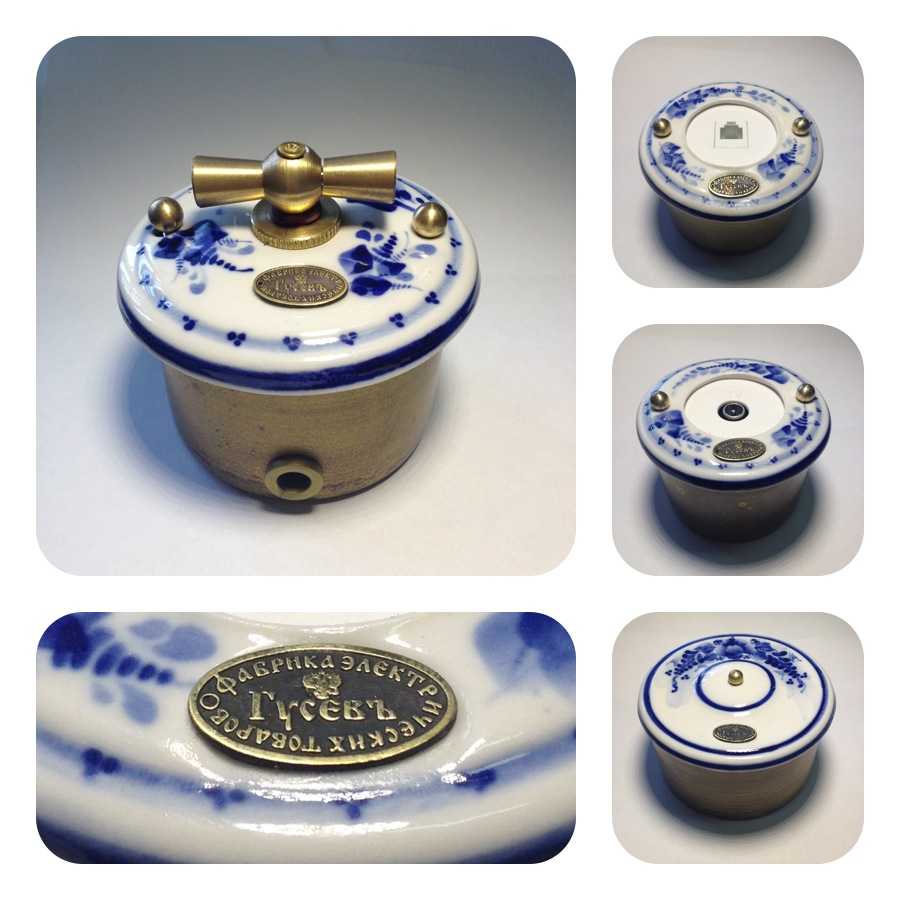
Russian firm Gusev produces painted porcelain sockets / switches
This is their electrician in white with brass elements
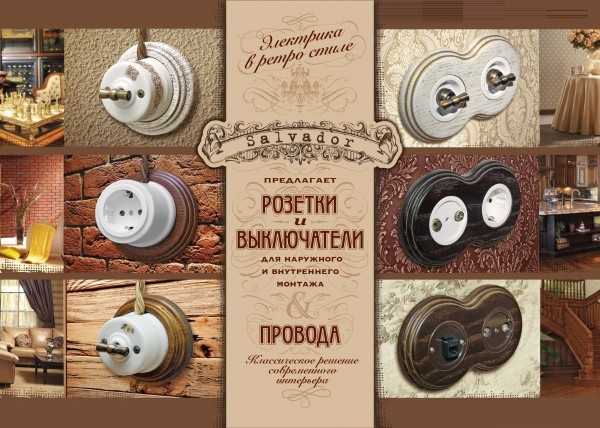
Another well-established firm - El Salvador
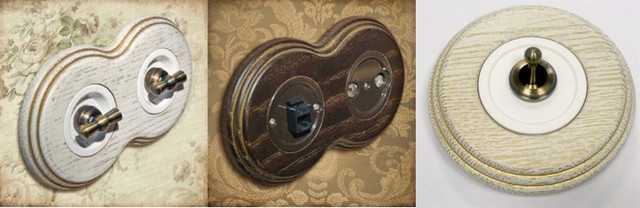
These are their interesting twin sockets.
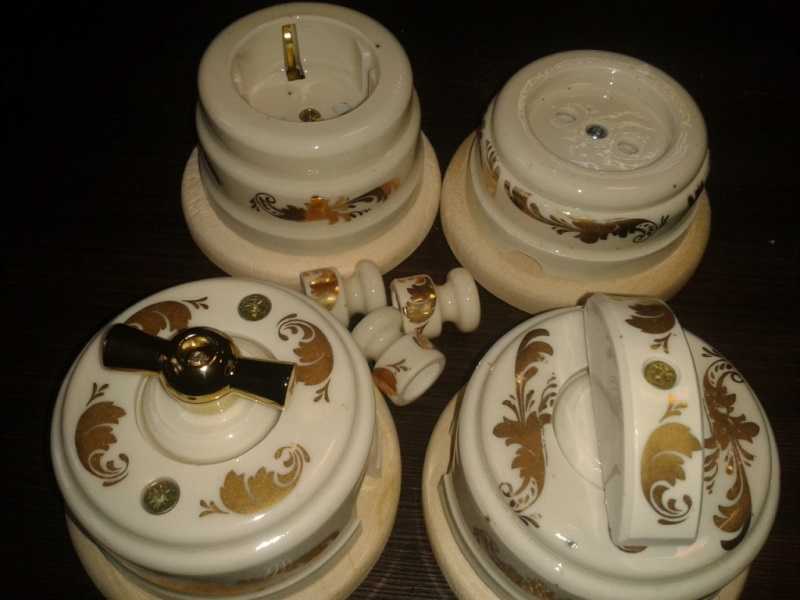
The painting still looks good, but requires the style to match
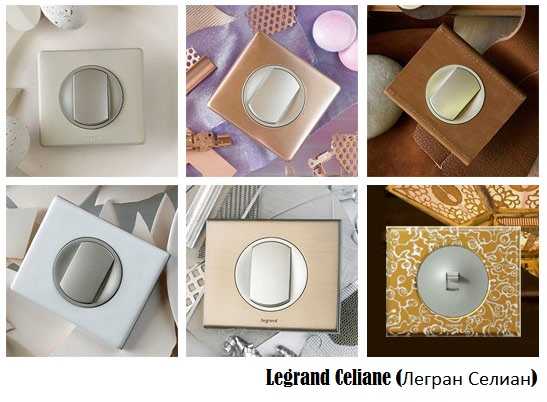
These porcelain switches are well known from Legrand. The style is completely different
There are some. They will be more combined with modern or retro style.
And such an option. It seems that you can even fit it into the classics


Good day! I am interested in retro wiring with all accessories. Please tell me the delivery time to Kazakhstan, Atyrau. Thank you!
Good day! We do not trade. The site is informational. You need to find a supplier.
Good day!
I have a question about your article - can you contact me by mail?
They answered the mail.
bonjour je suis interese en le cablage retro