Play house for children: step by step photos, diagrams, drawings
From the point of view of psychologists, every person and especially children need their own territory. It is not for nothing that they have a craving for the construction of huts, halabuds, bases and other buildings from any suitable and not very materials. If you have your own yard or a child spends a lot of time in the country, build a children's house for him. The easiest way is using wireframe technology. Examples of the construction of wooden playhouses for summer cottages in photo reports.
The content of the article
Playhouse for summer cottages with a sandbox below
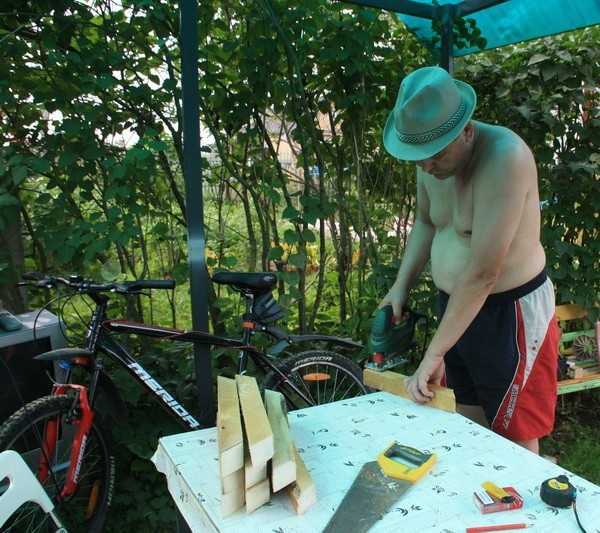
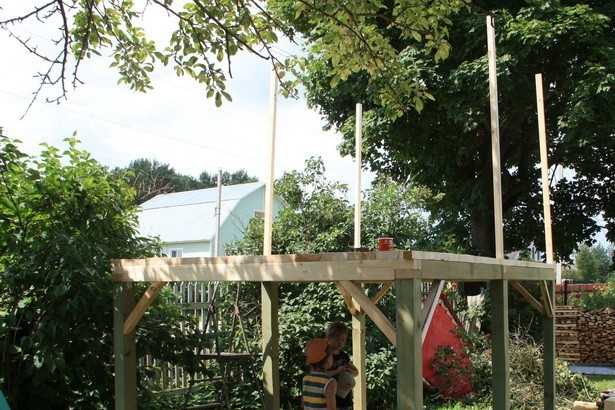
We bring the brought beam 100 * 100 mm to smoothness. You can use a plane, you can use a drill with a fixed skin. First with a large grain, then with a small one. After we treat it with a protective compound against decay, paint it. While the pillars are drying, we drill holes (our diameter is 23 cm, depth is 60 cm). We fall asleep in them to the bottom near the crushed stone shovel. We put the pillars, set them vertically, fill them with crushed stone, compact them, and concrete them.
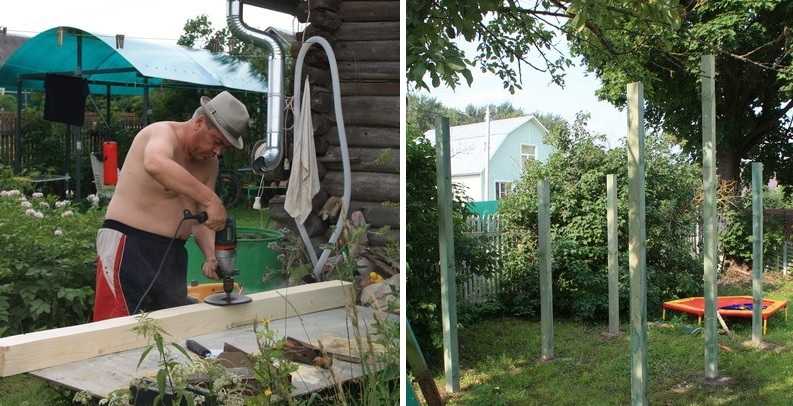
We prepare the pillars, impregnate, set up and concrete
We cut the exposed pillars all into one level. We fix the same beam 100 * 100 mm from above. It is also carefully processed so that there are no splinters. We connect in half a tree: at the ends we cut out recesses in half the thickness of the timber. For a beam of 100 * 100 mm, cutouts of 50 mm in depth and in an area of 100-100 mm: so that the same sawed edge of another beam lies flat.
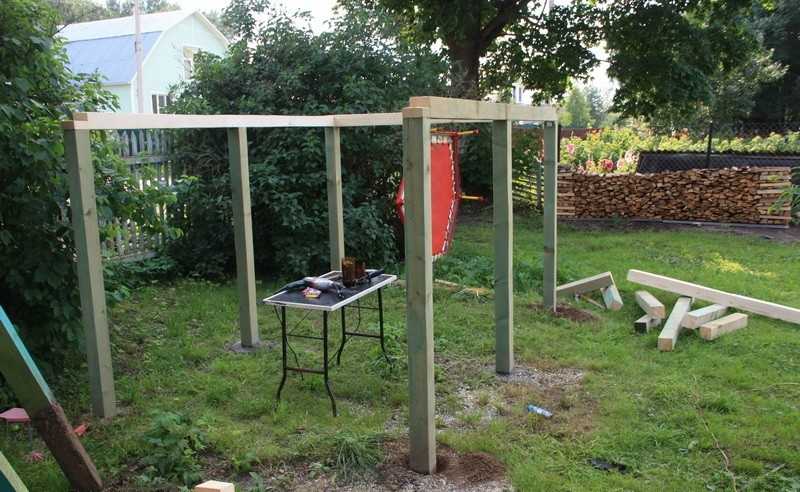
We fix the upper beam. Collected three, while the fourth lies.
We fix it securely: on top of 2 long nails (200 mm), on the sides of the corners with screws.
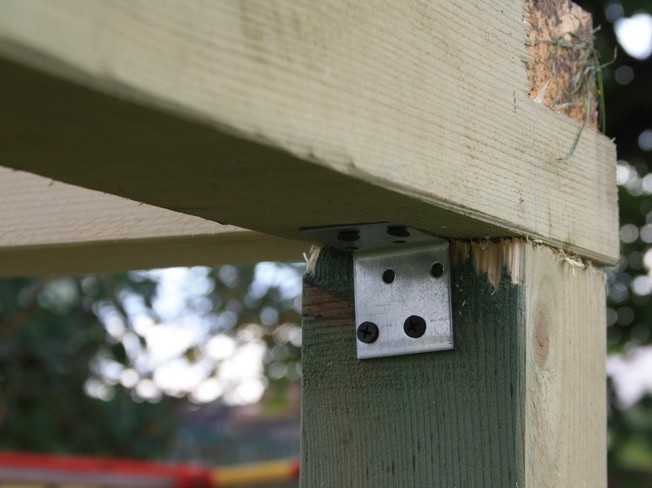
Corners on both sides
We attach an additional beam on the long side. Under it, in the middle - above the rack - we cut out a recess also half the thickness of the timber - 50 mm. It is no longer necessary for the wood to burst. We cut the laid timber at the ends in the same way as those that go along the perimeter: in half a tree. It fits into the prepared gash.
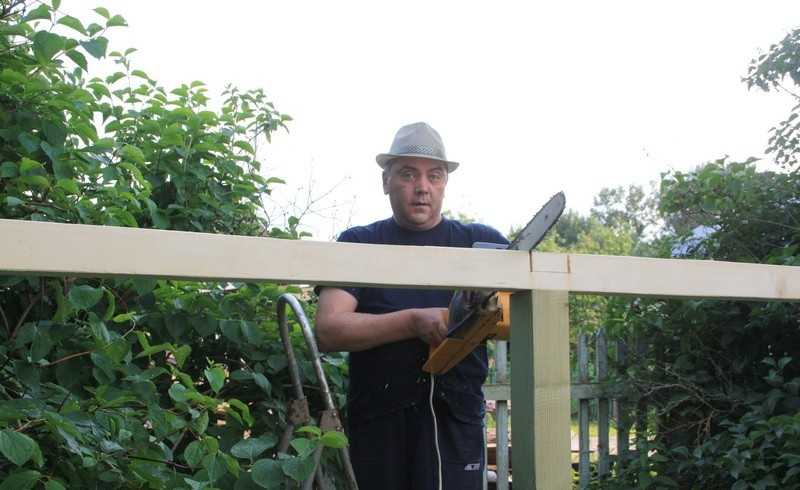
Cut out the seat for the cross bar
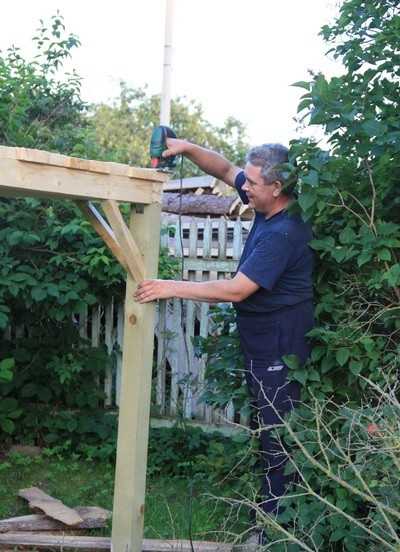
The children's house must have a solid margin of safety. Therefore, we are reinsured in every connection. To give the structure stability under lateral loads, we will put jibs. We cut them from a bar of 50 * 50 mm, cut the ends at 45 °.
Cooking jibs
Putting it by surprise, clenching it well.
Installation of jibs
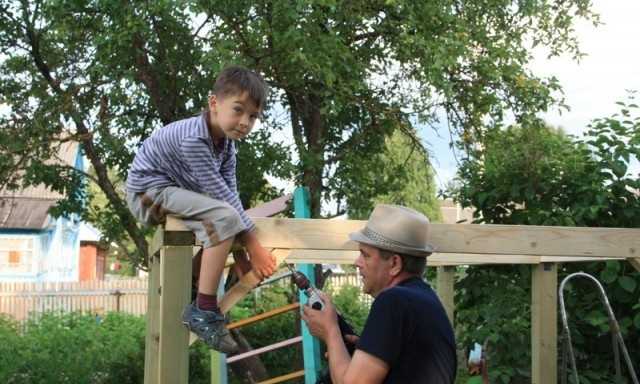
After installing the jibs, we lay the board. This will be the floor of the house.
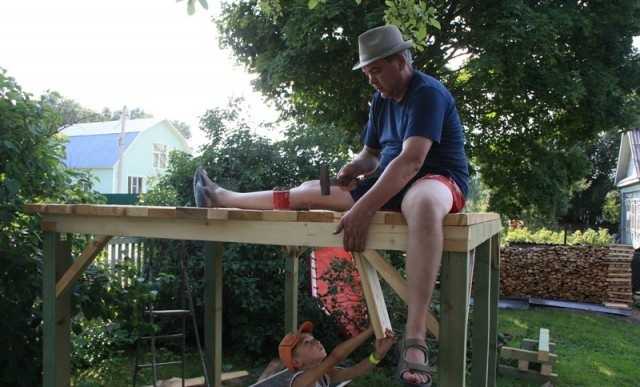
Without an assistant - no way
We cut the flooring from the boards. It is more convenient to work with an electric jigsaw, but you can also use a hacksaw.
We cut off excess boards, leveling along the timber
On the finished flooring, we assemble the frame of the play house. We use a beam of 50 * 50 mm. We set the bars strictly vertically, fasten them first with nails - two on both sides, then reinforce them with corners on self-tapping screws (also on both sides).
Assembling the frame of the house on the second floor
We increase the rigidity of the structure by installing jibs. Then we nail the harness of the second floor. We just nail these bars between the posts. They must be sawed off with great accuracy so that the building does not warp. We strengthen the joints with corners, then we put jibs.
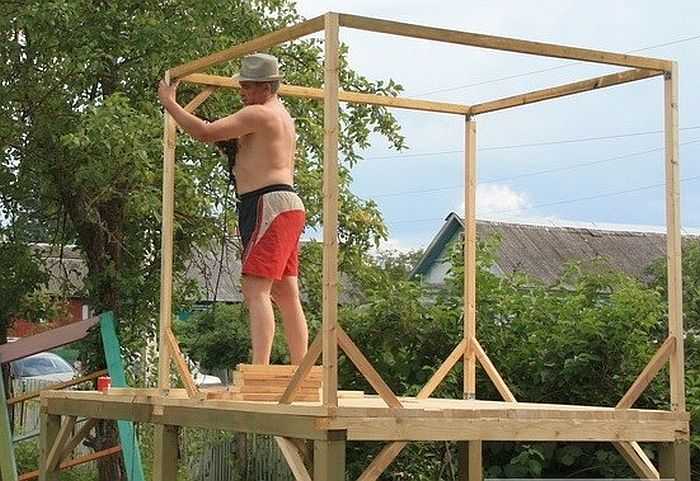
We put the jibs at the bottom, then we collect the upper harness
We do not nail the jibs in the place where the entrance will be.
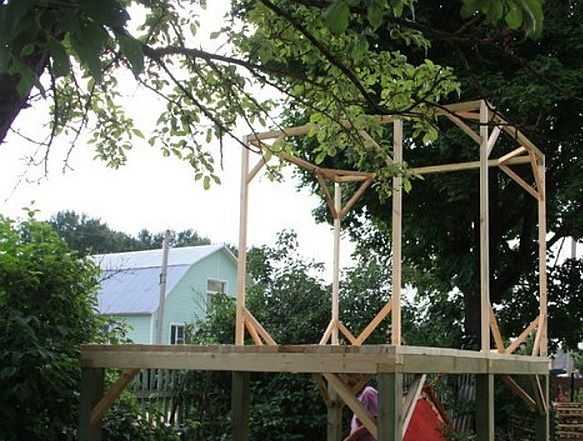
Main frame assembled
Next, we put intermediate racks to form windows. The fastening method is the same: two nails at the top / bottom, then two corners.
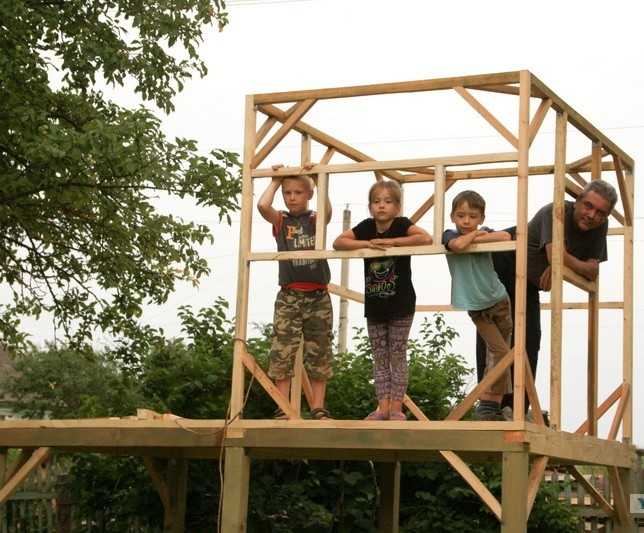
Ready for planking
Sheathed with a board left over from the equipment packaging. You can use from pallets, buy an inch board (12-13 mm thick), sheathe with clapboard or imitation of a bar, log, siding.
Sheathing goes fast
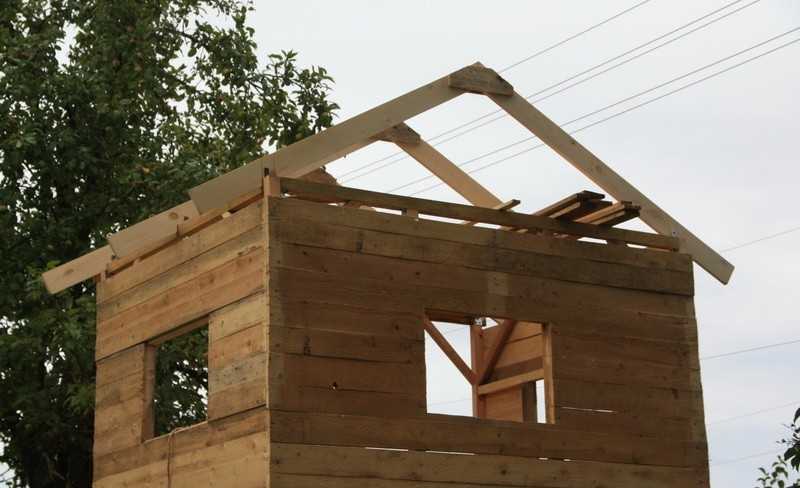
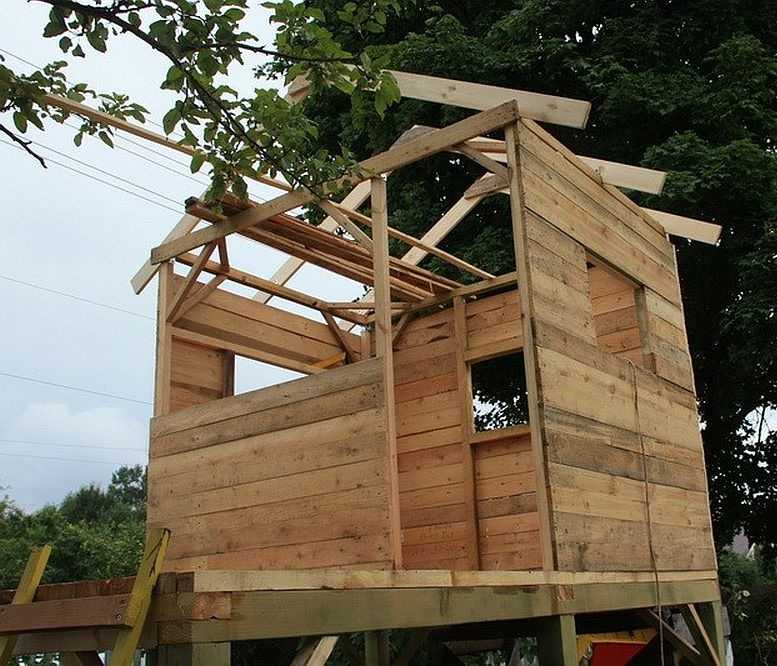
When the sheathing is almost finished, we begin to assemble the rafter system.It is easier, of course, to make a pitched roof - to make one wall higher and no problem. But the gable looks better, although it is more difficult to perform.
For the rafter system, we put two boards per edge, connect at the top, sawing off the corners. The rise depends on the desire and the amount of snow. If there is a lot of snow, raise the skate higher. If not, it can be about a meter or less. We knock down with nails, then we reinforce the connection with overhead plates.
We collect the rafter system
When building houses, either a metal plate or a piece of board is placed here. Decided to use a board.
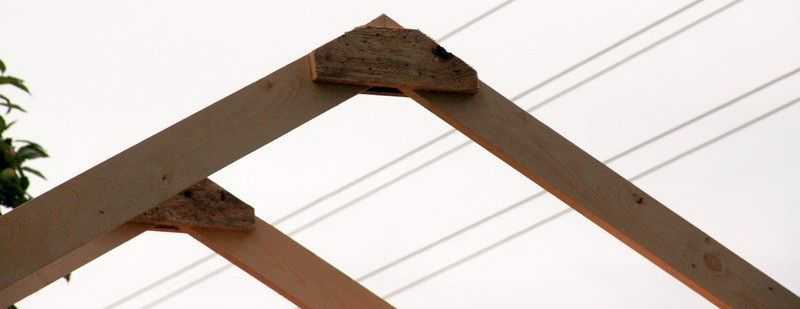
Reinforcement plate
Next, you need to form a wash down so that the resulting triangle rests on the upper bar. We put it, mark the place and roughly cut it out. Then we adjust so that the rafters "sit down" tightly.
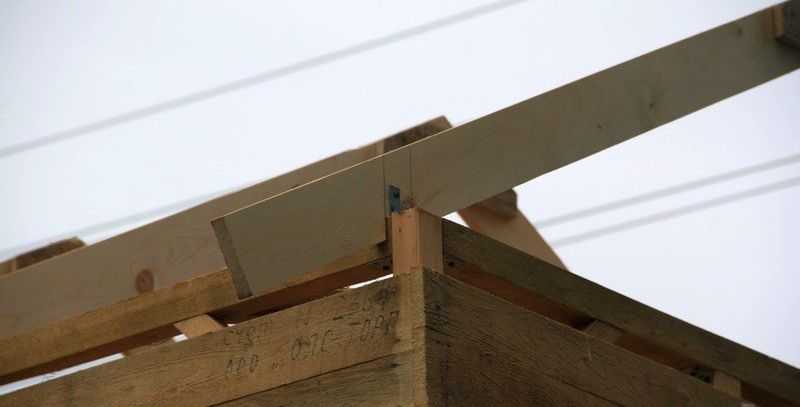
It is important to plant the rafters correctly
According to the finished sample, we mark out other rafters. Cut out, knock down under two rafter legs at an angle (all should be the same as a carbon copy). Having installed it on the top of the house, we check the verticality. Then we nail with two nails on both sides and set the corners.
The rafters stand
Now sheathing boards are laid on the rafters. The roofing material will be ondulin. We put the board 11 * 100 mm with a step of 30 cm.
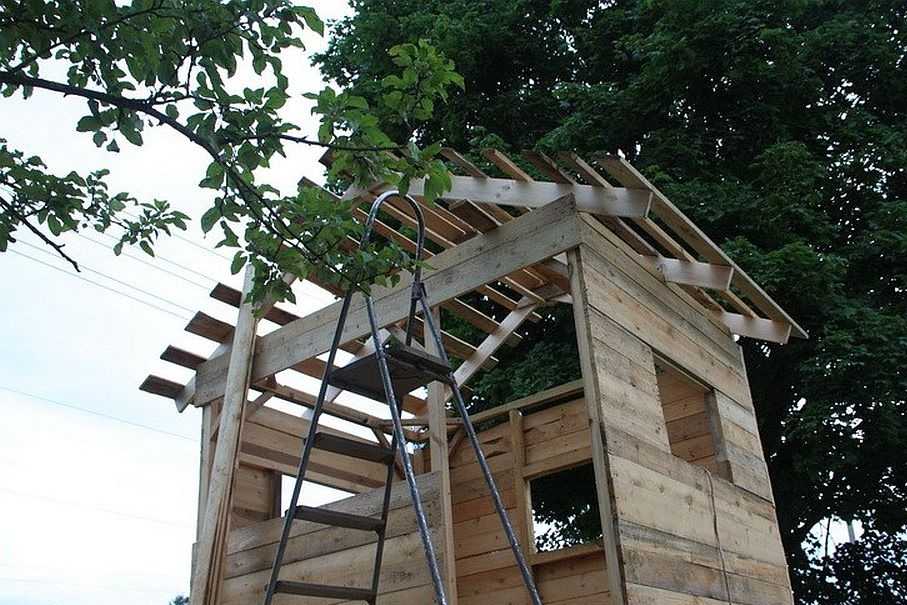
The lathing is mounted
Based on the thickness of the board (11 mm), we take self-tapping screws 25 mm long for fixing the ondulin (so that they fit well into the board. We put rubber gaskets under the caps so that it does not flow.
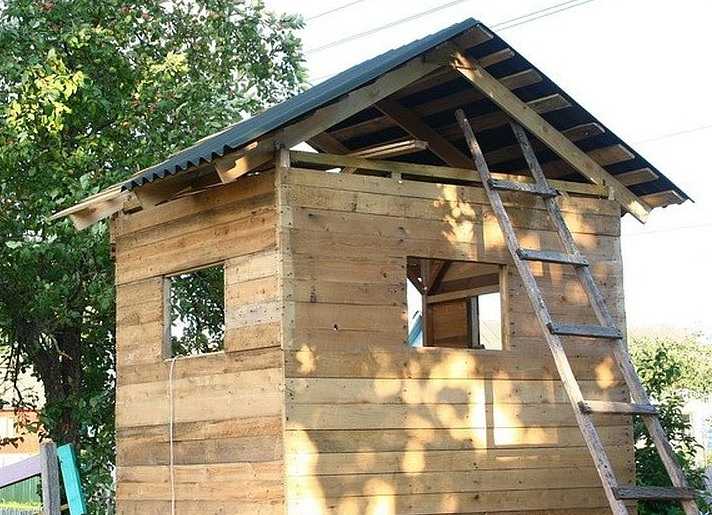
Installation of roofing material on the roof of the orphanage is completed
Next - finishing work and security - railings.
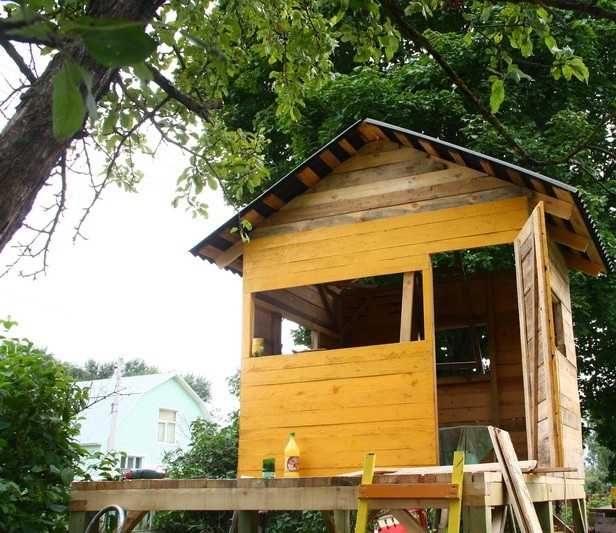
Start painting
Handrail made from processed, sanded board. They are screwed onto powerful self-tapping screws 90 mm. Two for the bottom beam - one for the planking.
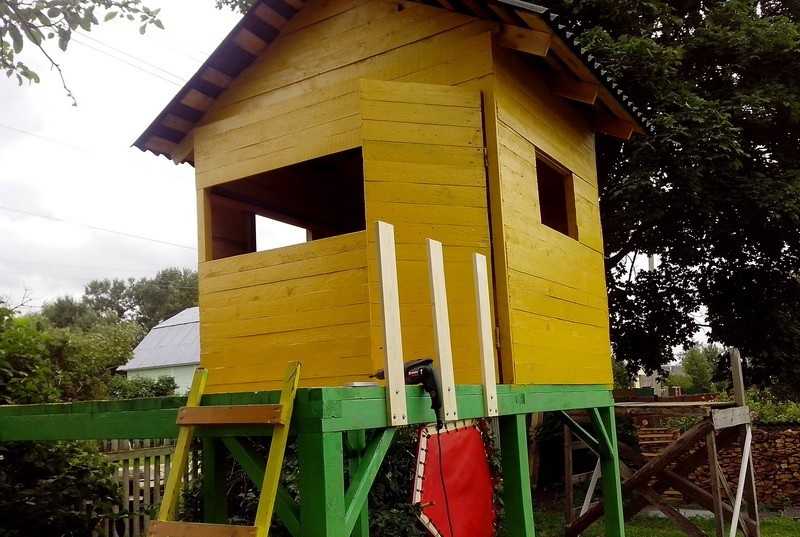
Railings are installed on the "veranda" of the house
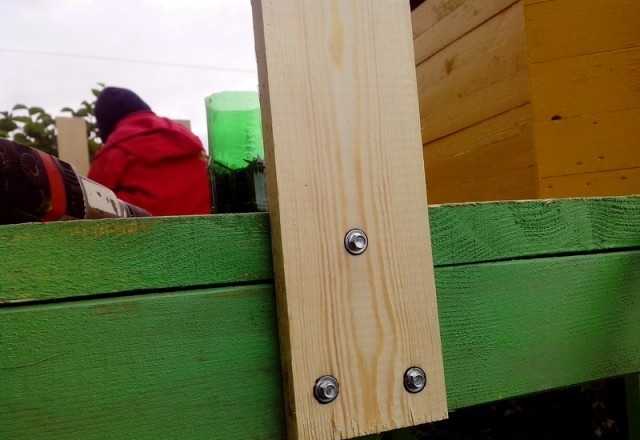
Powerful self-tapping screws, three for each plank
At the top, the railing is connected with a 30 * 30 mm bar. Then a board will be nailed to it - a handrail.
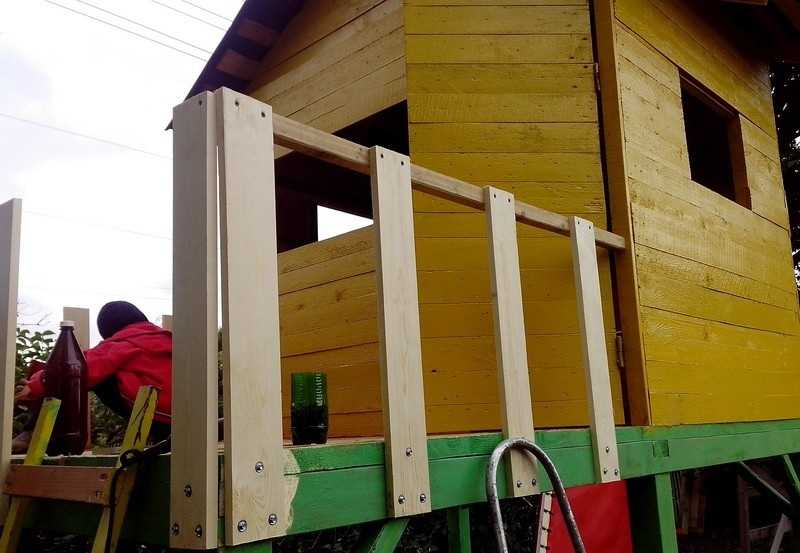
In almost finished form
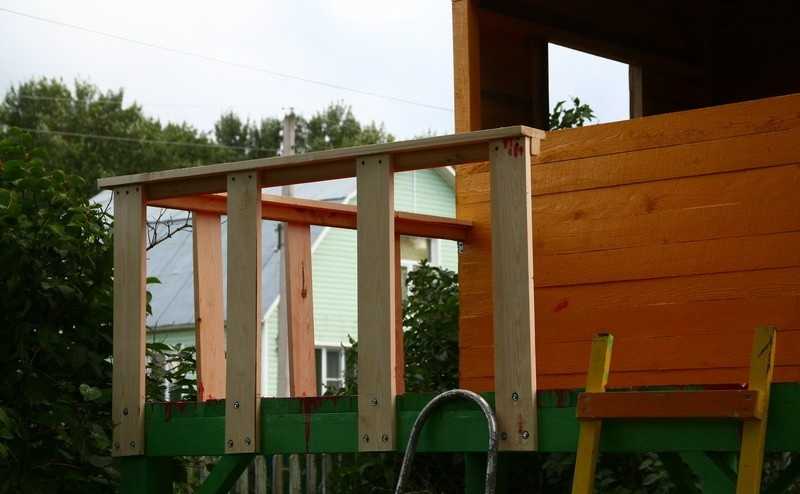
The railing is ready for painting
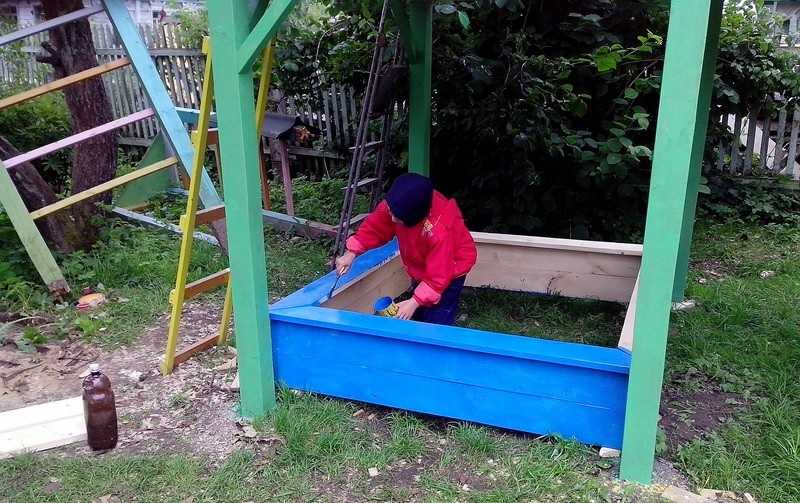
It was decided to put a sandbox below. It is not difficult to assemble: eight boards on the walls, connected at the corners with the help of bars, A board-side is nailed on top. Then the sandbox is painted.Read about how to make sandboxes here.
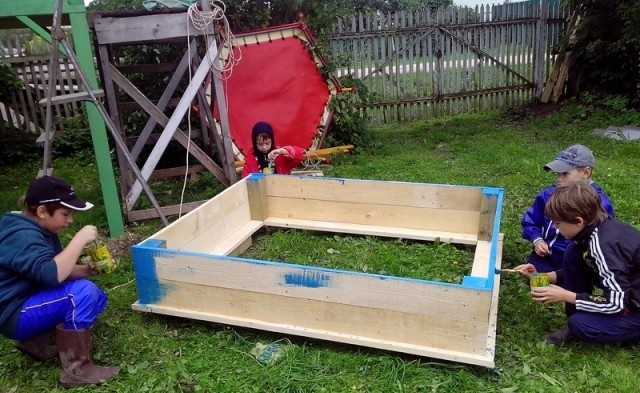
Painting a sandbox in four pairs of hands
Installed in place
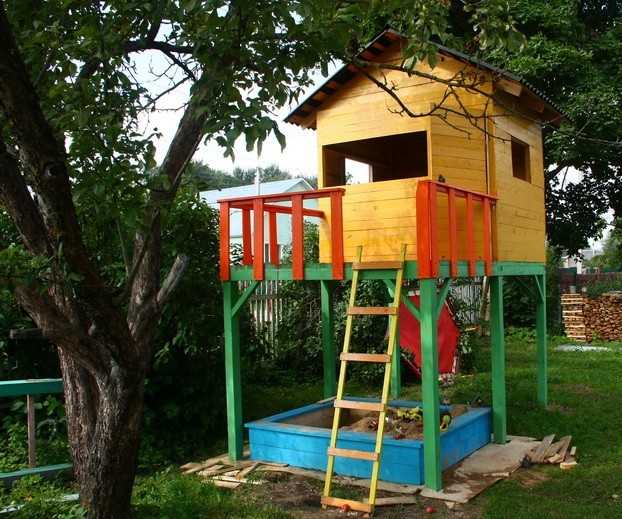
Final version (for now)
Even a “non-builder” can build such a children's house with his own hands. There are no particularly complicated works, you can get by with an elementary tool.
Several options from the same series are shown in the photo below. Two are houses with a slide, and one is a one-story version, more suitable for girls.
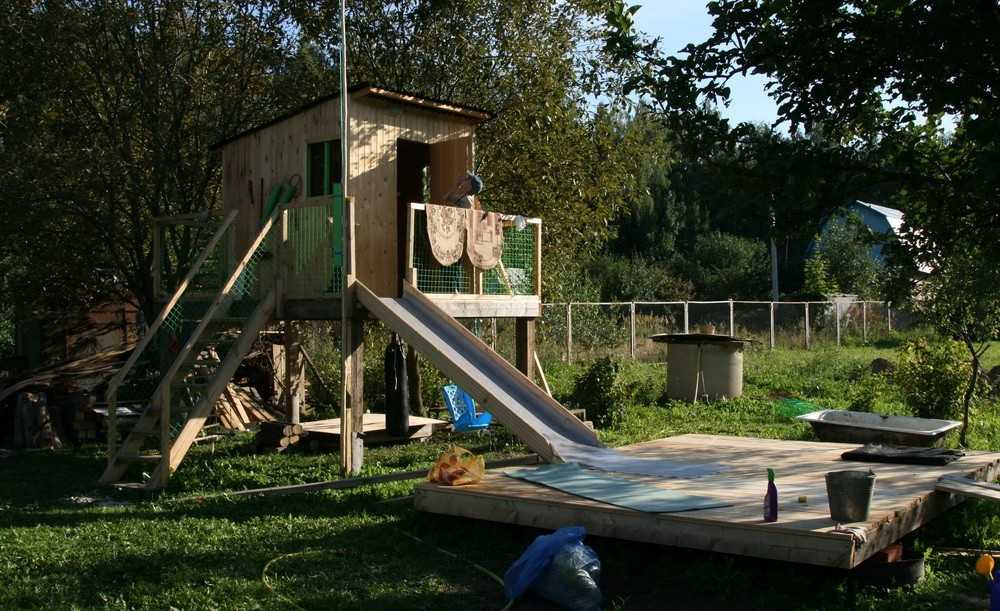
Downhill
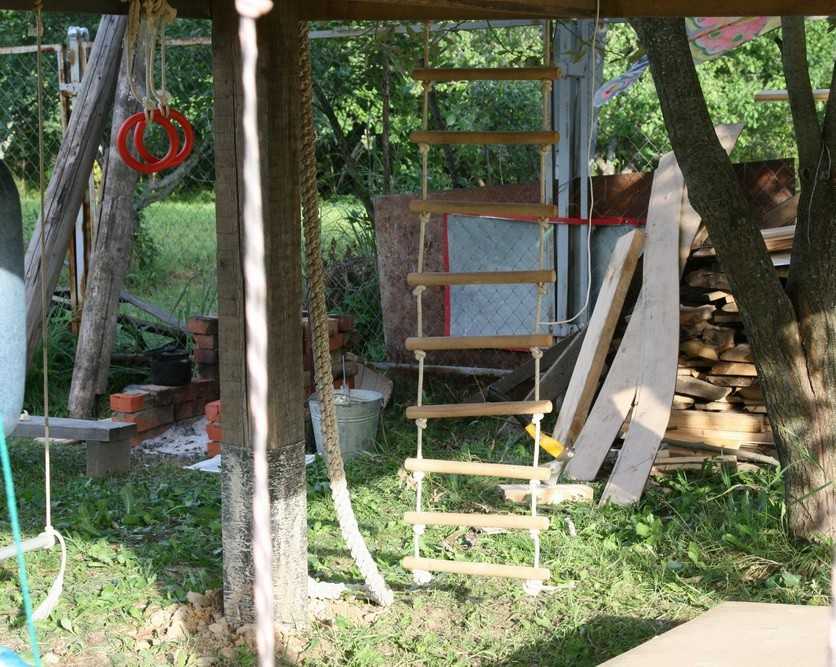
Sports corner at the bottom
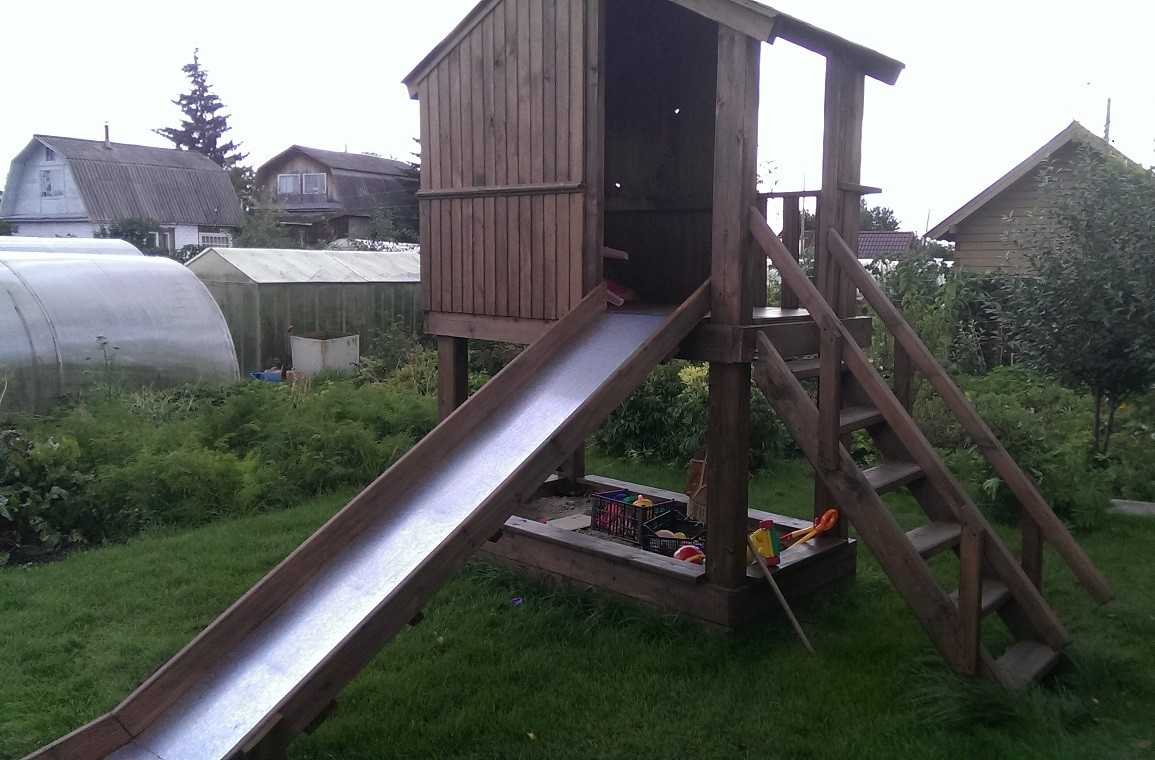
Children's house with a slide

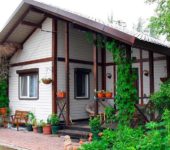
One-story "open" option
The independent production of a playground is described here.
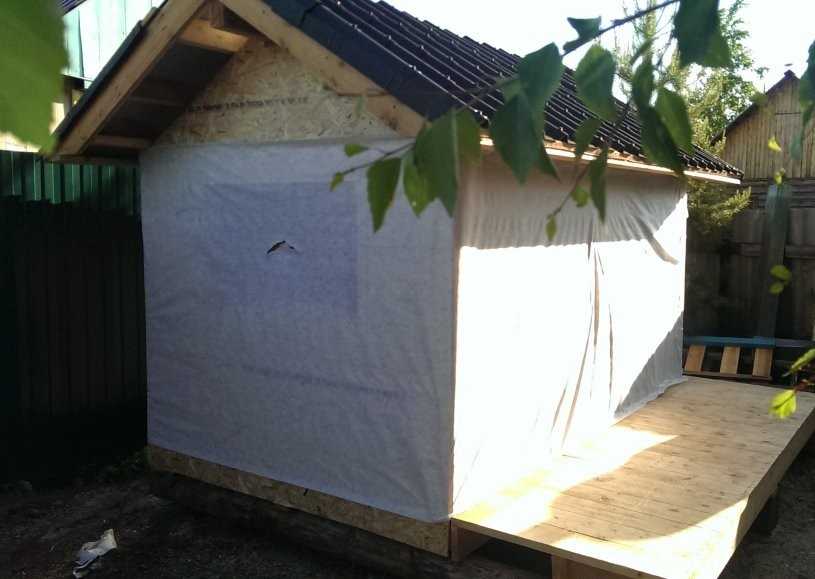
How to make a children's house from OSB and plywood (frame technology)
It was decided to make a house using frame technology - a base from a board, sheathing from OSB. The dimensions in the plan are 3 * 2 m, the height of the walls is 1.5 m, in the ridge 2.2 m. Boards of 50 * 100 mm were purchased for the frame, an inch board (100 * 12 mm) for the subfloor, OSB 9 mm for the floor and outer sheathing , for internal - sanded plywood FSF 6 mm, foam for insulation 100 mm thick.
Preparatory work - the assembly of boards for the orphanage - was carried out in the garage: it is still cold. Later, as it gets warmer, the house will move to the country house, to the place of permanent registration.
The first stage is the manufacture of the floor frame. We knock down a rectangle with sides 3 * 2 m, nail down transverse boards (floor logs) with a step of 50 cm.
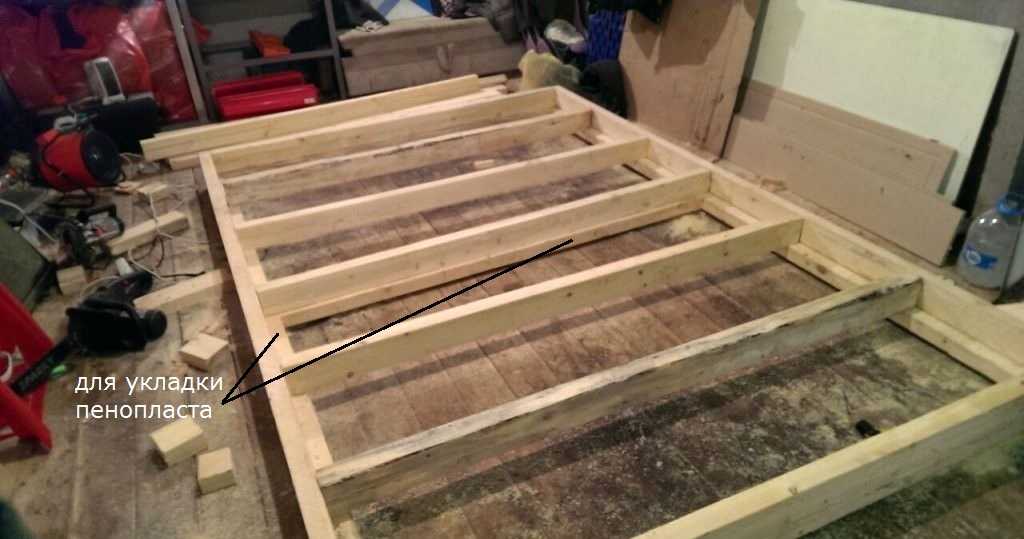
Floor frame ready
The floor will be insulated with foam. Children love to sit on the floor, so we insulate well - with 100 mm foam. We fill thin strips under it from the lower side - so that it does not fall through. We insert the foam. The slots can be filled with polyurethane foam.
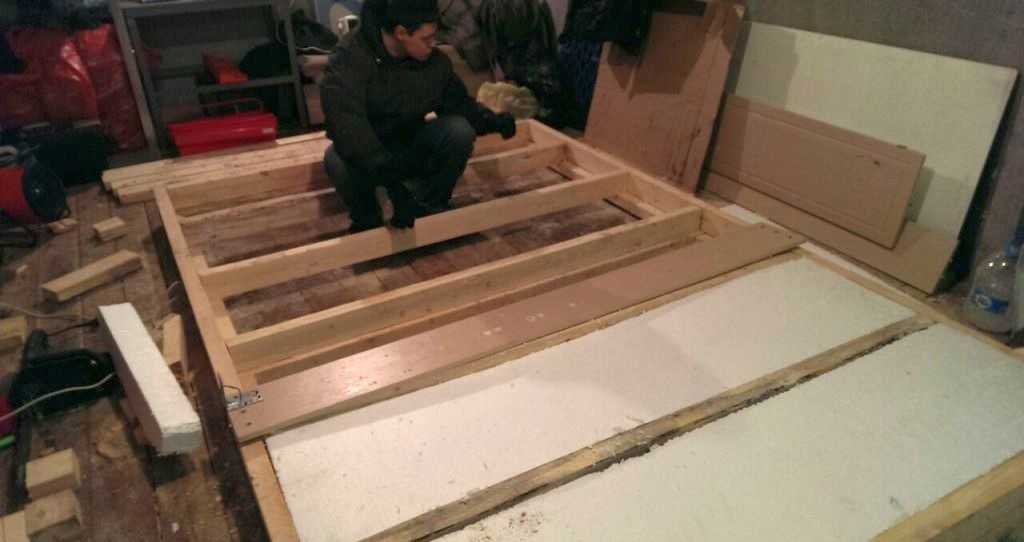
Installation of foam
It's good that the building is small. We put on the side and hem from below with an inch board. This will be the subfloor. After turning it over, we sew up the OSB.
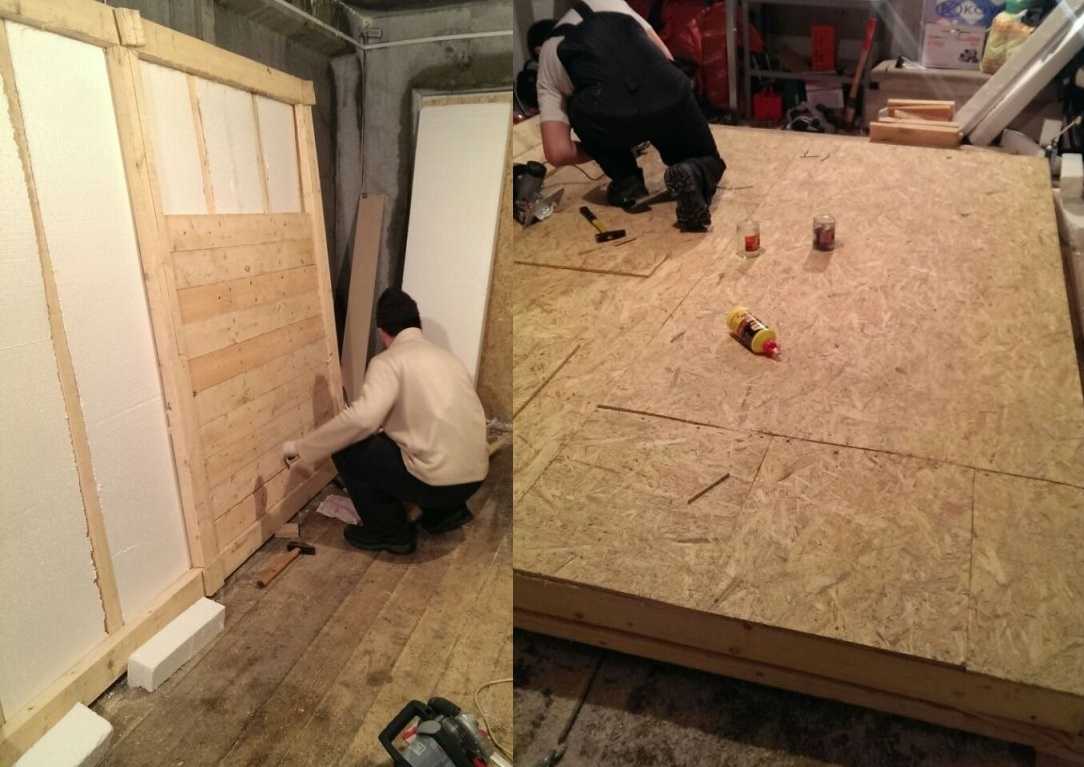
Preparing a platform for the orphanage
Later, when the house was taken to the dacha, an error in the installation of OSB was revealed.He was nailed close. In the humid air, the material swelled and the sheets were bent in some places. Therefore, when installing sheet material, leave a gap of 8-10 mm.
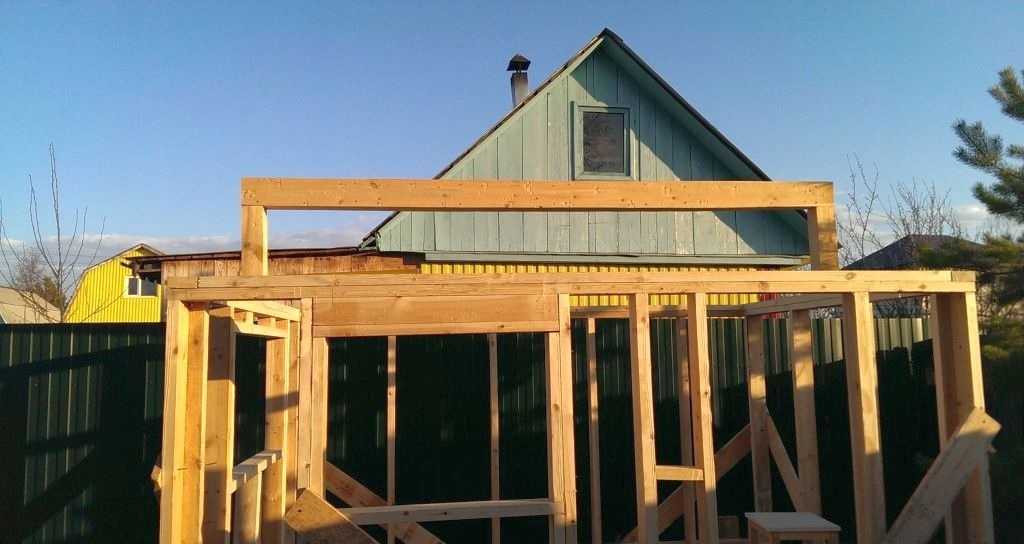
Next, we collect the frame of the walls. We put the racks in increments of 1 meter, under the windows and doors - doubled. Since the top will be stuffed with OSB on one side, and plywood on the other, the structure will be rigid. We do not put jibs. They are needed if the orphanage will be upholstered with clapboard or other rack material.
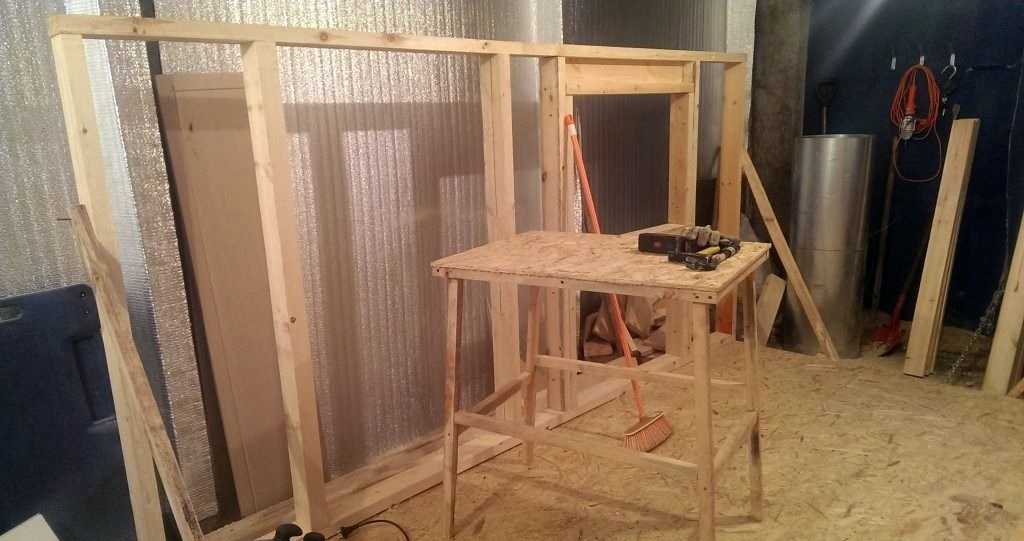
Assembling the wall frame
Fitting walls on the floor
The work was moved to the dacha. Three old logs were used as a foundation. They are hewn, the tops are aligned. The logs are set on a level, a board is nailed onto them, on which the platform will be installed. The width of the house is 2 meters, and the logs are 3 meters long. We will arrange the rest as a terrace or porch.
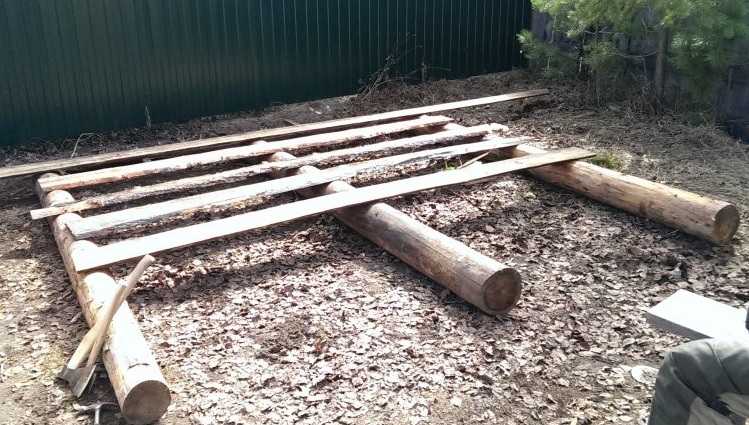
The basis for the orphanage
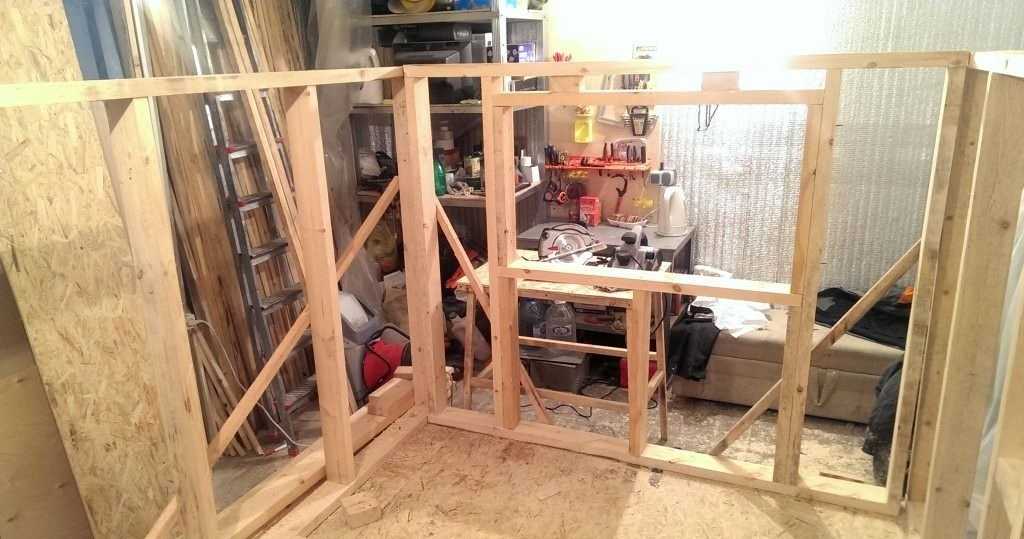
We installed the platform. It is attached to the logs with large pins that connect the log and the platform. We began to expose the frame of the walls. They must be placed exactly vertically. To fix, they used temporary cuts - they nailed them with boards on the side.
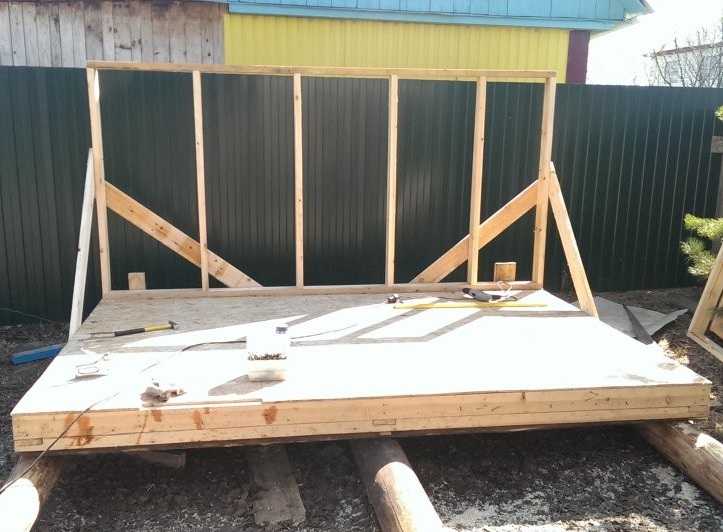
We put the first wall
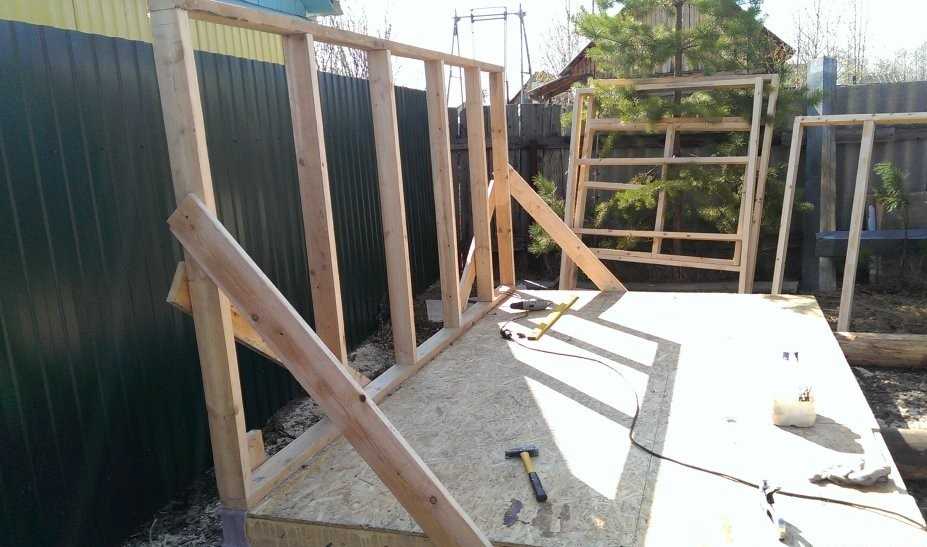
Side view
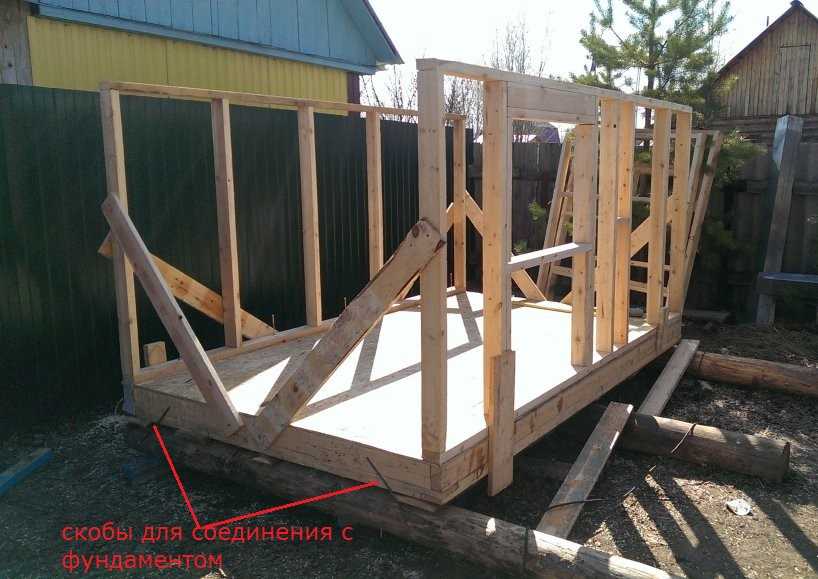
Fixed externally (connecting brackets are visible in this photo)
Along the way, having exposed and checking whether the wall is level, we nail it to the platform with long nails. The length of the nail is such that it at least reaches the middle of the frame board.
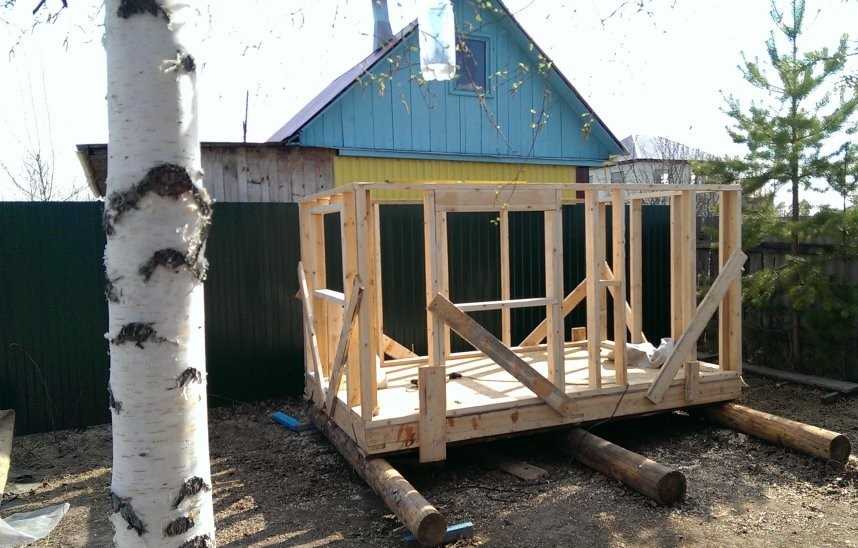
Side walls inserted

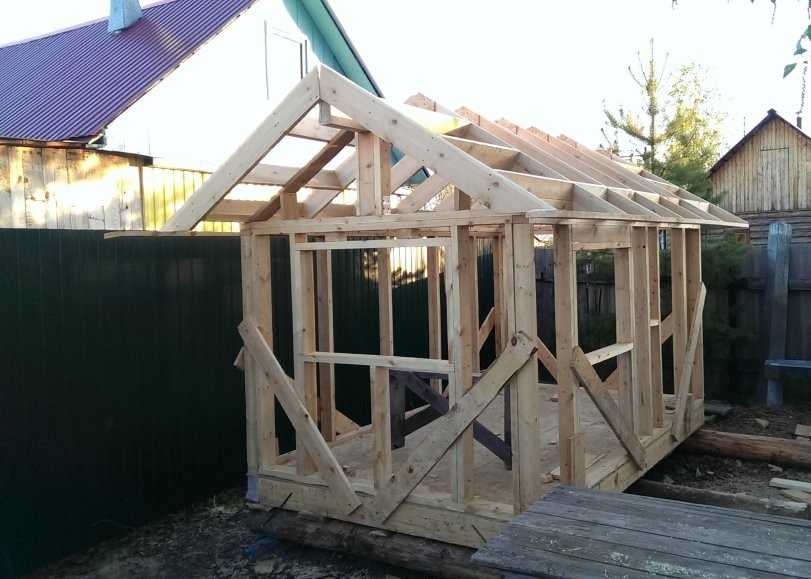
The whole frame of the orphanage is in place
Next, the assembly of the rafter system begins. First of all, we put a ridge - a board in the middle, which will form the roof slope.
We attach the ridge to the house
Then the fittings begin: you need to properly cut the corners under the rafter legs so that they lie flat on the boards. First, we cut it out approximately, gradually ensuring that there are no gaps.
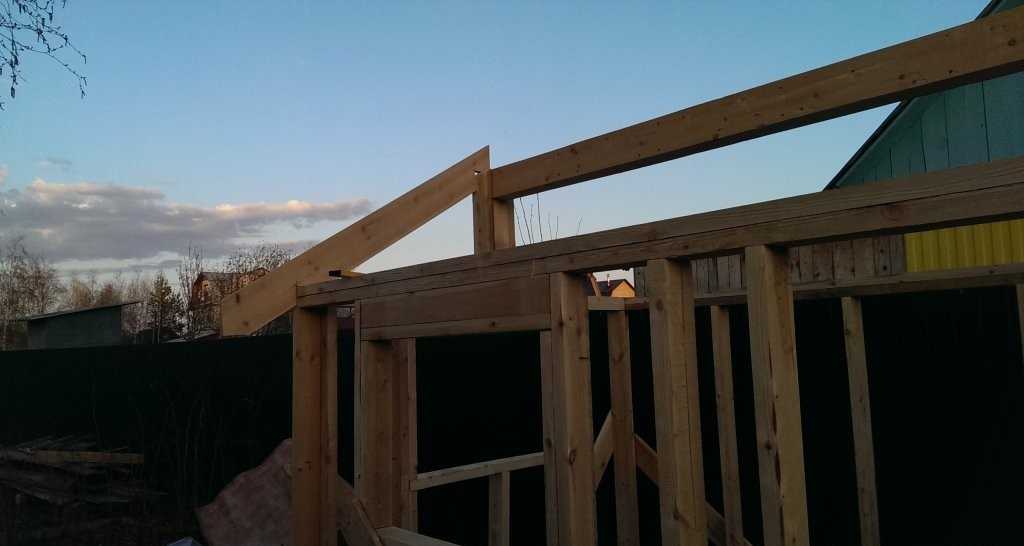
Trying to "create" a rafter leg
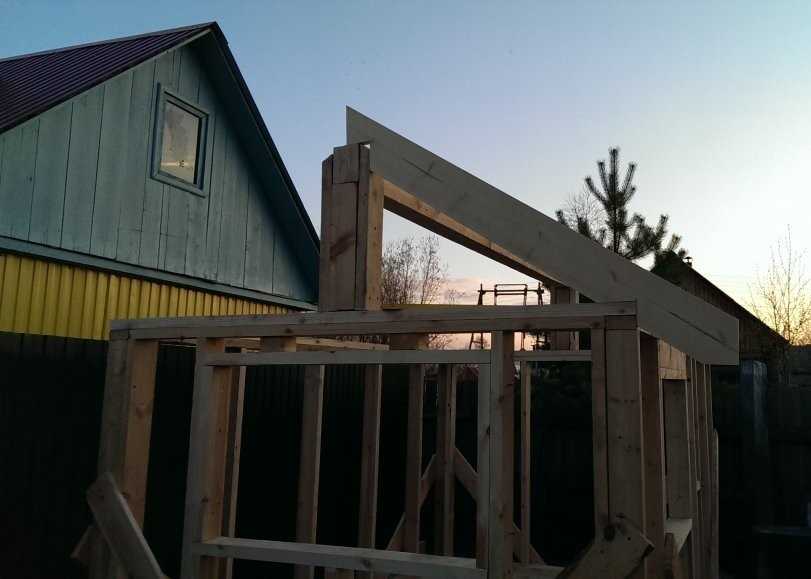
Trying on, fixing
Another angle
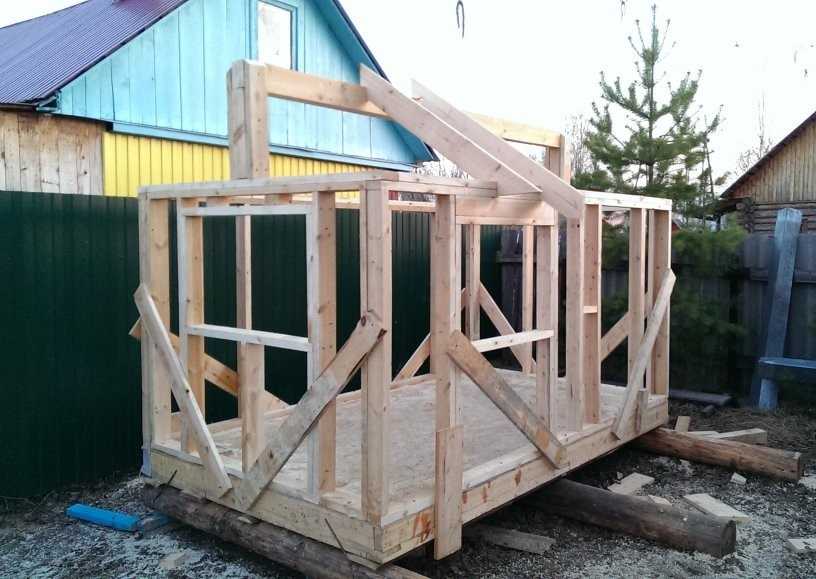
When the shape of the cuts is clear, we transfer it to other boards using a sharpened pencil. We cut everything evenly (with a jigsaw, if available, or with a hand saw). Then we nail all the boards to the frame. We stuff transverse boards between the rafters - the ondulin will rest on them. It turns out such a house.
The roof is almost complete
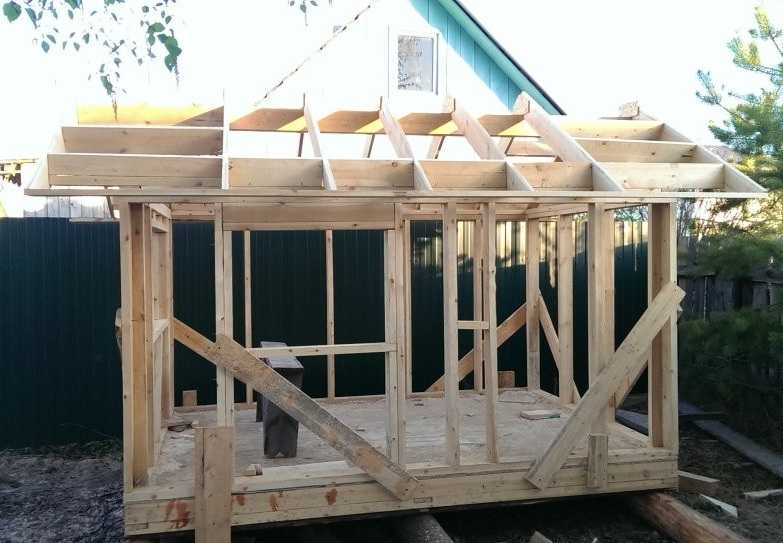
The construction of a children's house in the country is nearing completion
After the construction of the rafter system, only the cladding remains - inside and out. Outside we stuff OSB. We make it so that the joints fall on the racks. We nail it down, you can use wood screws. Whom it is more convenient.
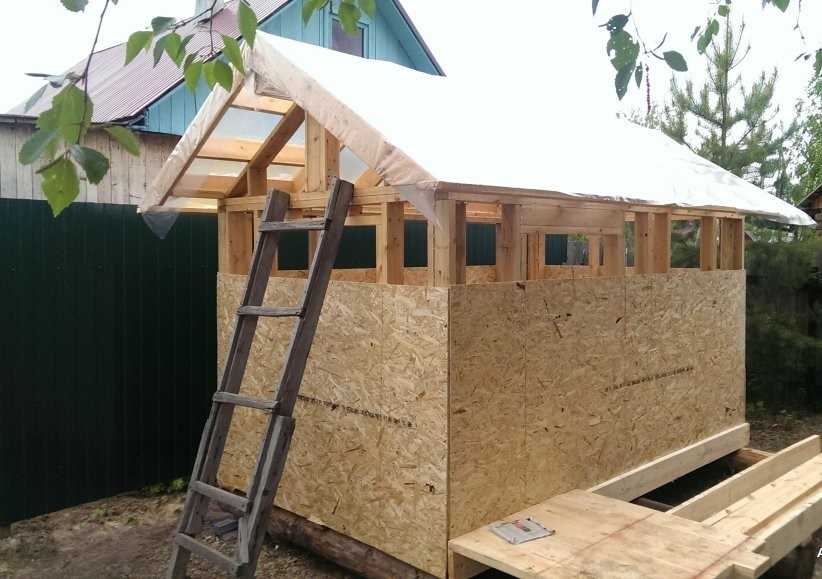
Sheathing outside OSB
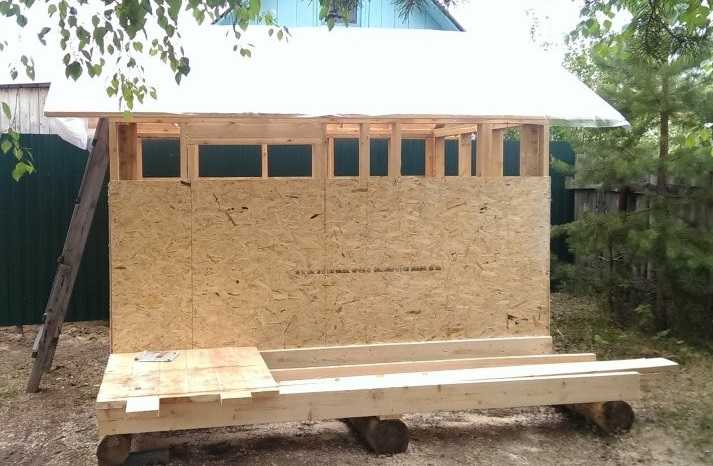
Left a little
Ondulin is laid on the roof
Then it's up to the interior decoration and insulation. First, a windproof membrane is stuffed (so that it is not cold), then basalt wool is attached (10 cm thick, so that it becomes just at the depth of the board.
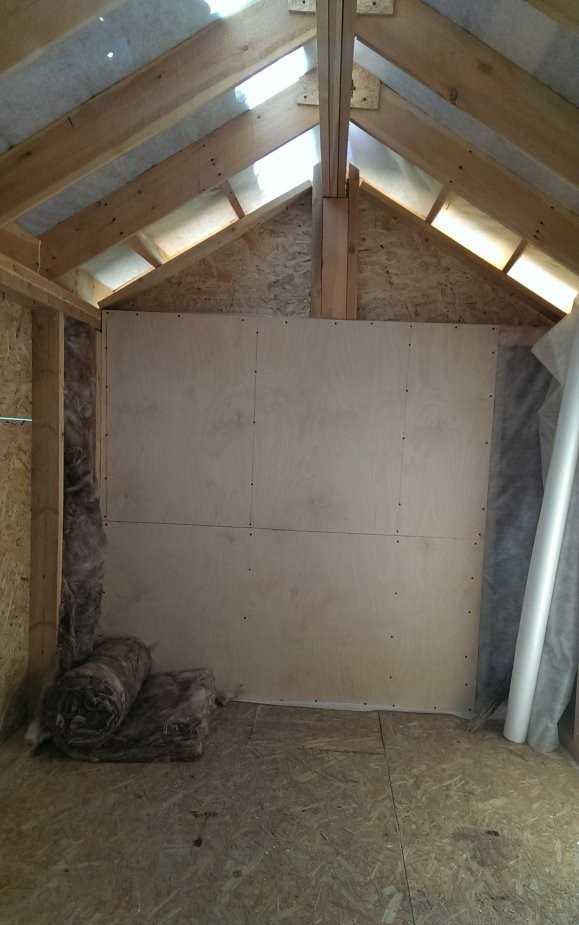
Insulation of the house inside - mineral (basalt wool)
Everything is nailed from above with plywood. And that's all. It's done - paint it and you can put it into operation)))
Using the same technology, you can build a tree house. It will be necessary to secure the site, and everything else is very similar.
Drawings and diagrams
Each homemade orphanage differs in size. Based on how many "inhabitants" are planned in it. If the child plays alone, then 1.5 * 1.5 m is more than enough. If there are two children, larger sizes are already needed. At least 2 * 2 m. In height, too, decide for yourself. But it is better not to do less than 1.5 m.
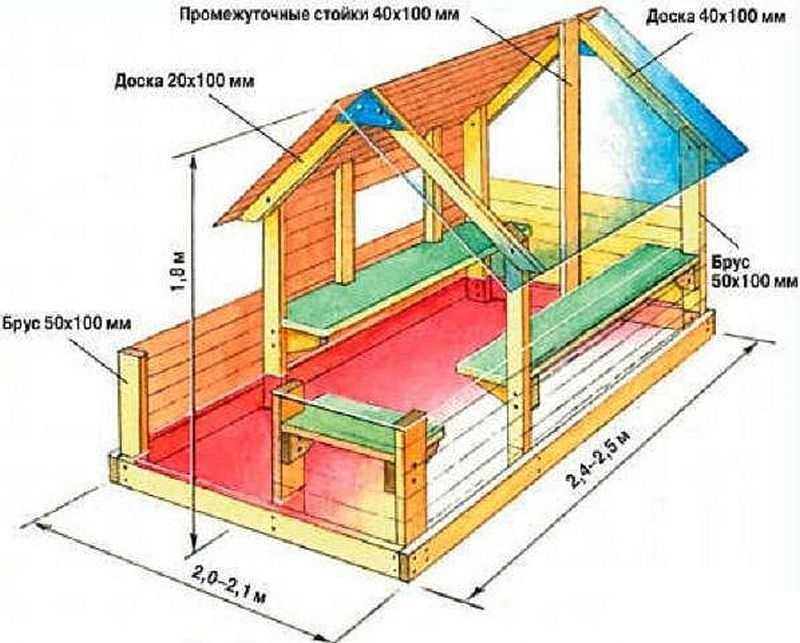
The approximate dimensions of a house for children's games
Dimensioned drawing and layout

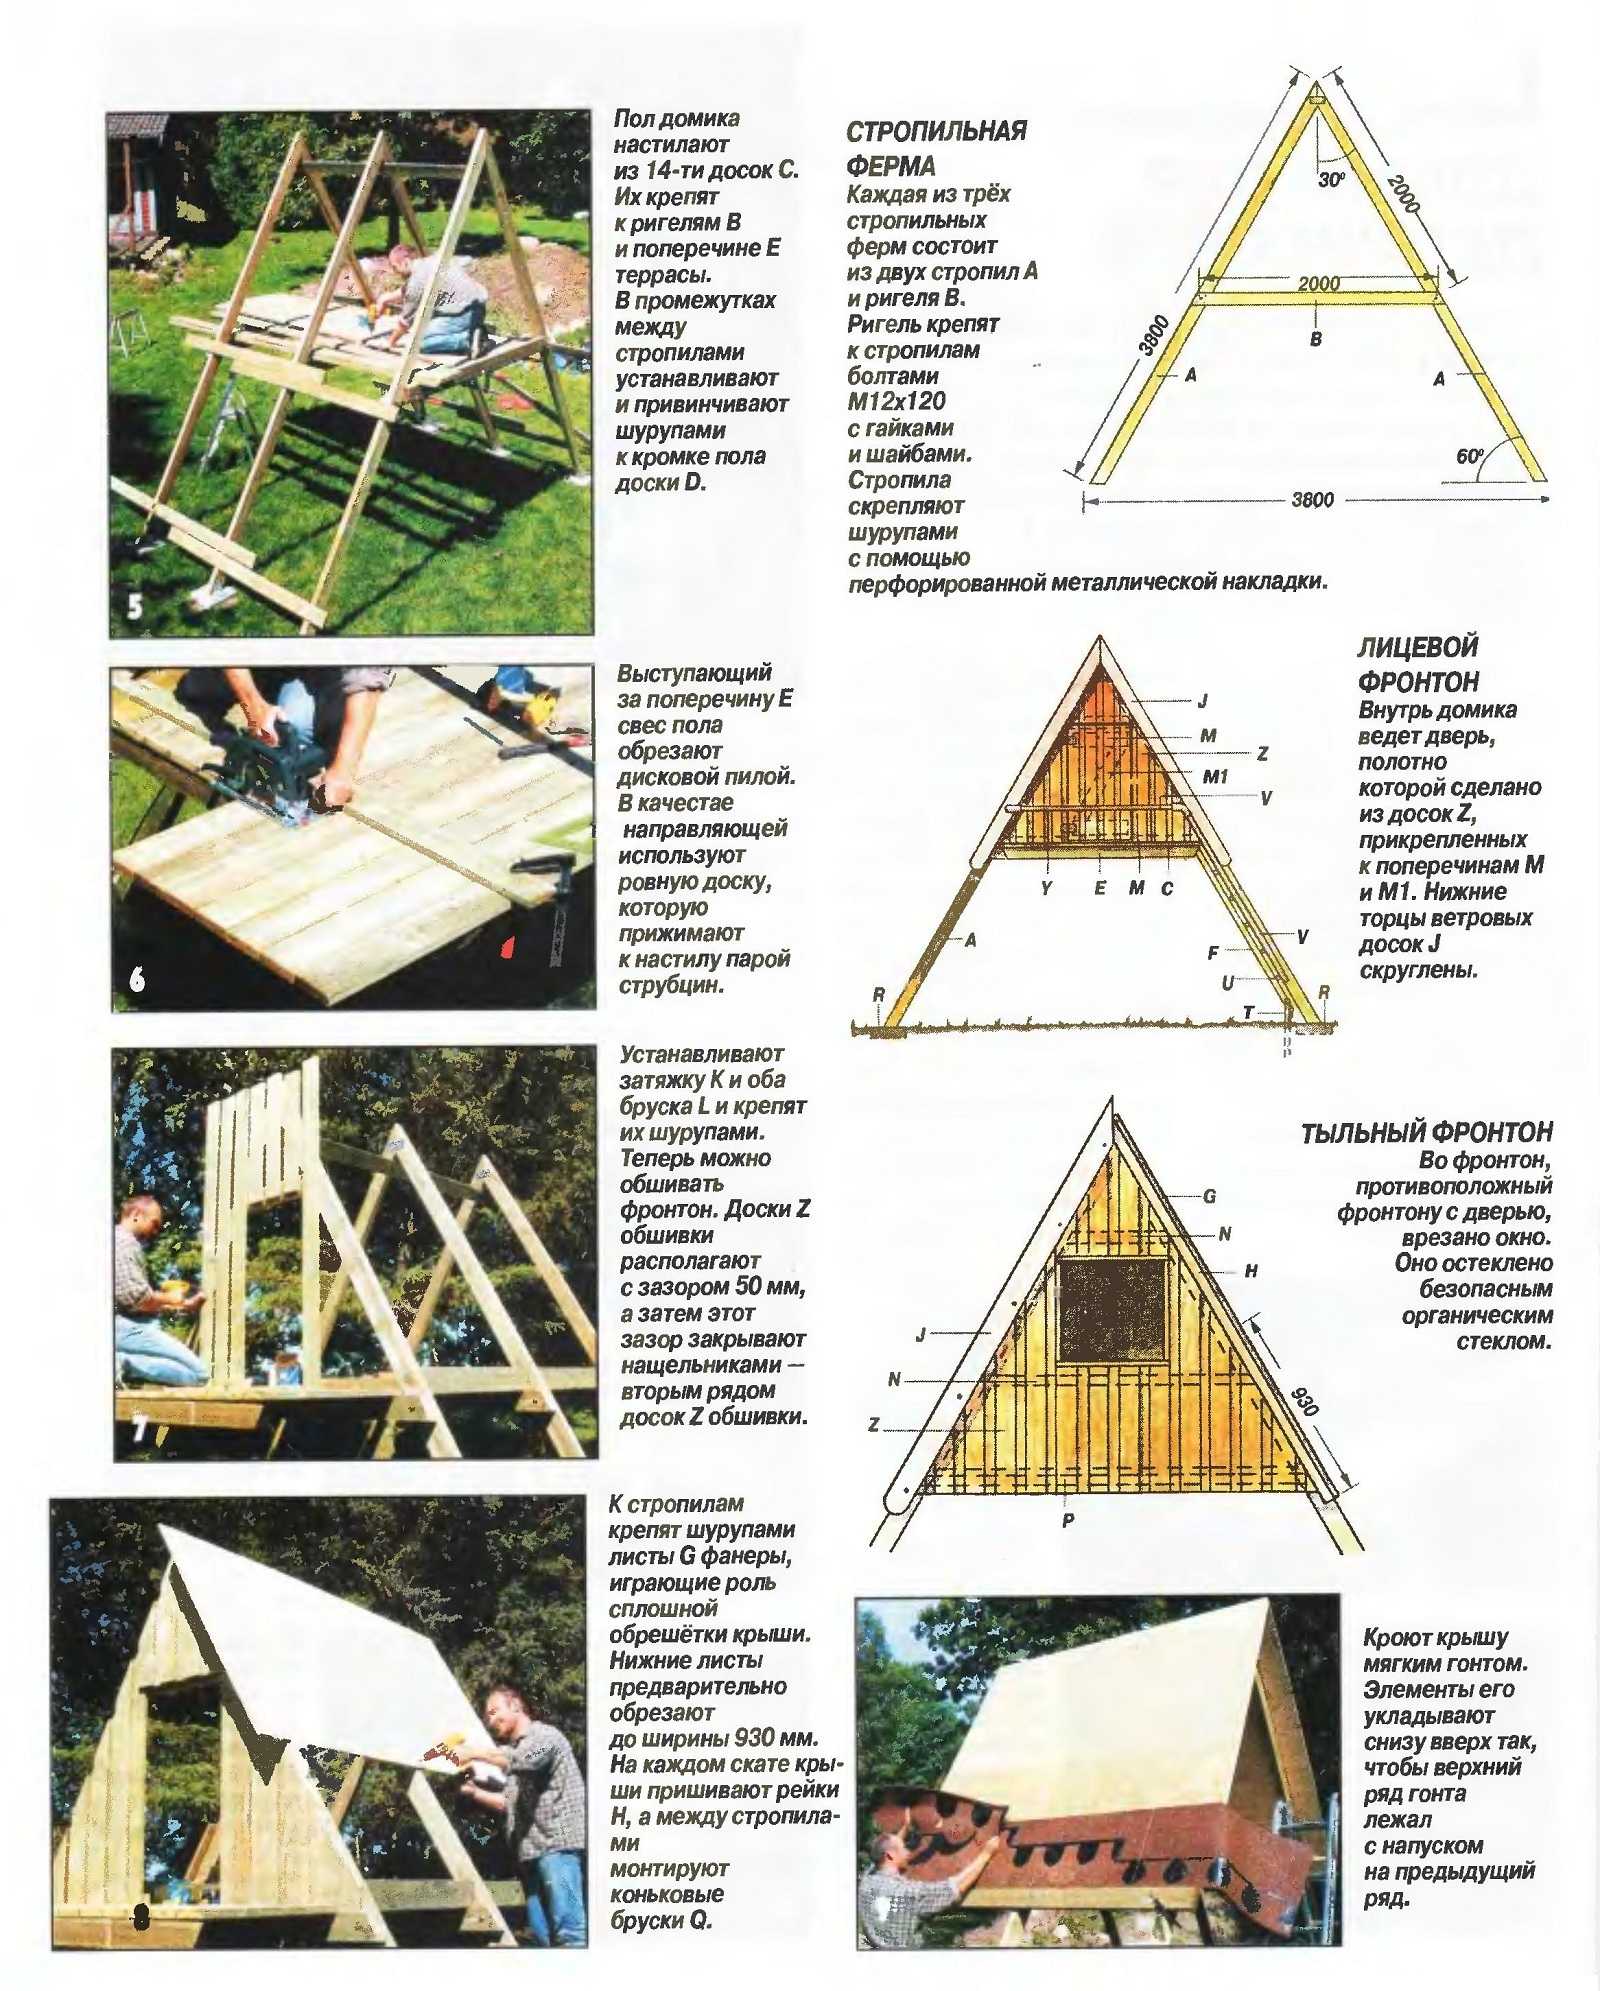
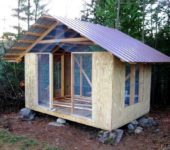
House-hut
House made of boards and plywood with a slide roof
House for children with a slide
Stages of construction of a children's house with a roof in the form of a slide
Materials for the construction of a children's house
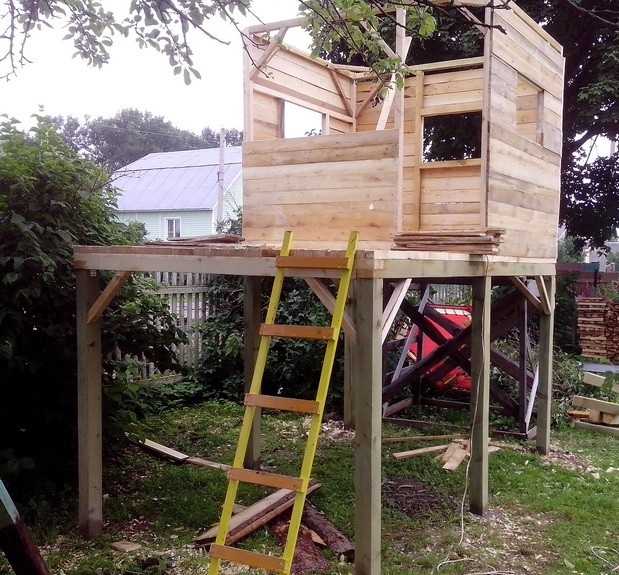
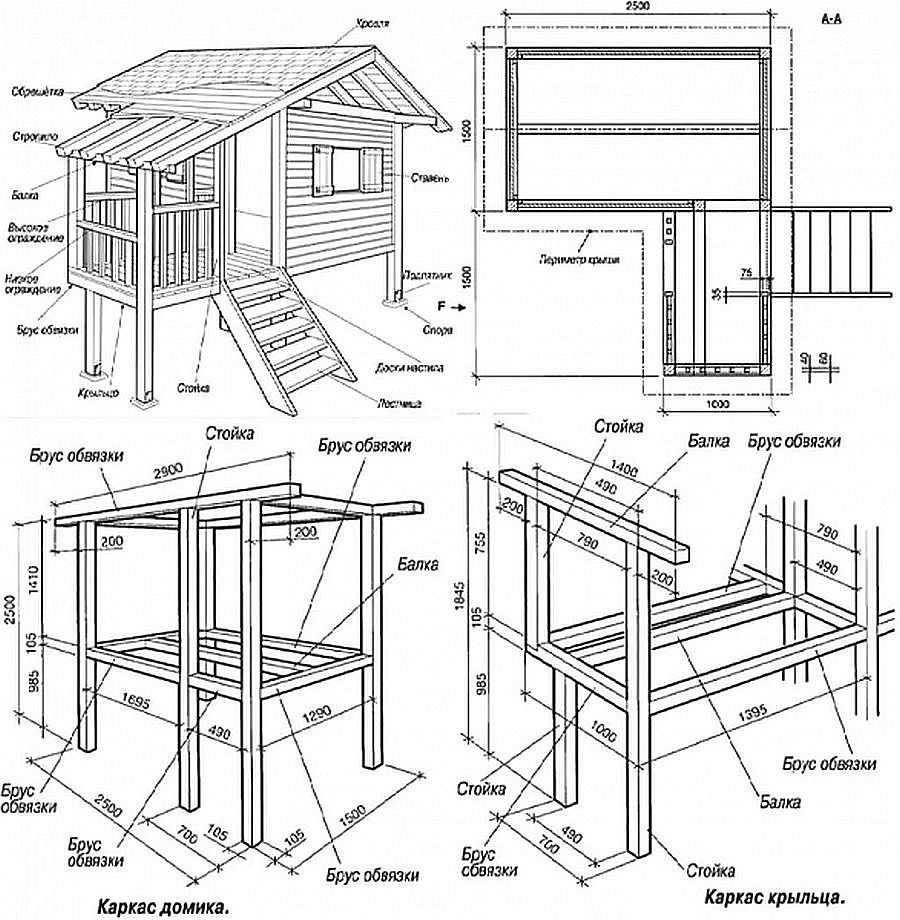
House-hut for games
A hut with a playground on the second floor
Construction stages


Hello! Nice photo report, thanks! Could you tell me the dimensions of the house itself?
This one was 1.8 * 2.5 / 2 m. The height of the house was taken taking into account that an adult could be inside.