How to make a shower cubicle with a tile tray
Small bathrooms often have showers. They are popular in saunas and dachas, they are put instead of a bathroom in apartments and houses, they do it in addition - who like. But not everyone likes plastic cabins: they are too flimsy. A shower cabin with your own hands, although it takes more time, is more reliable.
If you want to make your own shower stall in order to save money, do the math first. Many people note that a homemade shower stall is not cheaper. And that's still good. It often turns out even more expensive. But the plus is that you can make it exactly the way you like. As large as you want (or as it turns out). Just estimate the cost for each of the items and summarize. Here's what you need.
Homemade shower stall is not as cheap as it seems
- You will need good waterproofing, and most likely for swimming pools.
- A good drain is simply necessary.
- To install the drain, you will need to raise the floor, and this is a decent amount of solution with plasticizers that increase water repellents.
- For finishing you will need good floor tiles with a non-slip surface or mosaic, and glue (water repellent).
- It would also be nice to make floor heating - it is very unpleasant to stand on a concrete floor in winter.
- You will also need doors, although you can do with a curtain.
The amount is already considerable. If you also need to build walls, even from drywall, then there will be no savings for sure.
An independent shower stall device is inexpensive only if there is a ready-made nook, which is simply fenced off with a door or curtain. But even in this case, the costs of installing a drain and floor do not go anywhere.
The content of the article
Methods for organizing a drain in a shower stall
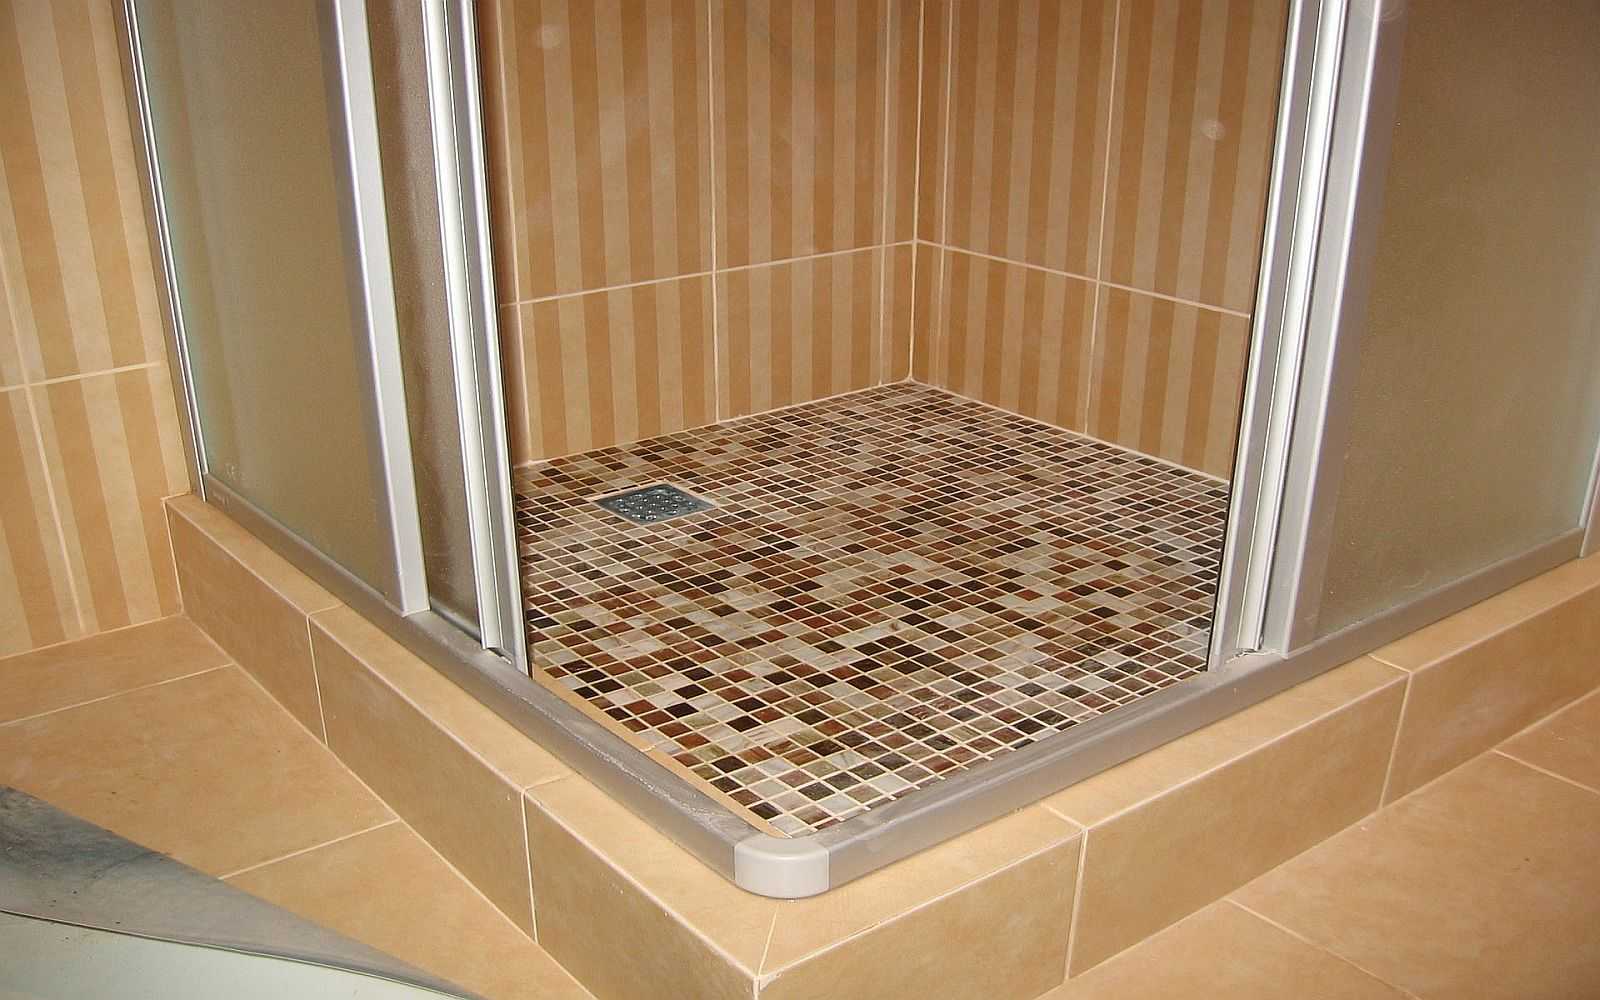
Despite the outwardly almost identical appearance - the walls and floor are tiled, some kind of doors, homemade shower stalls have many options for the internal arrangement. There really is plenty to choose from.
Seen from the outside, there is not much difference
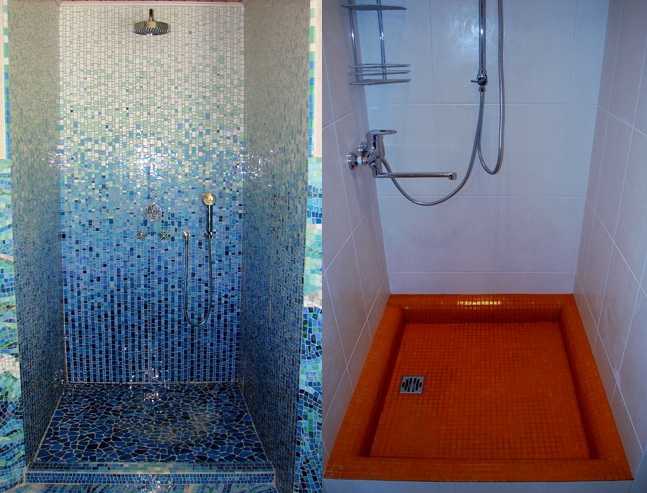
Pallet types
The easiest and most reliable option to make a waterproof floor in the shower stall is to put a ready-made pallet. It can be installed on bricks or made of foam blocks. By “finished pallet” we mean two types: acrylic and enamelled. Acrylic is lightweight and non-slip, but turns yellow over time. Enamelled - not bad in operation, but slippery when wet: you have to put a rubber mat. The plus of acrylic is that it feels less cold.
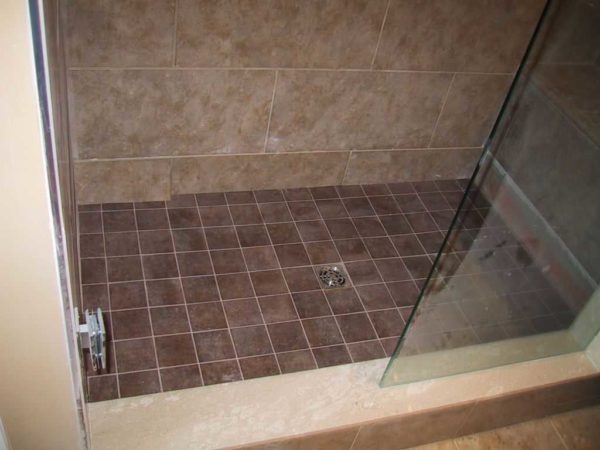
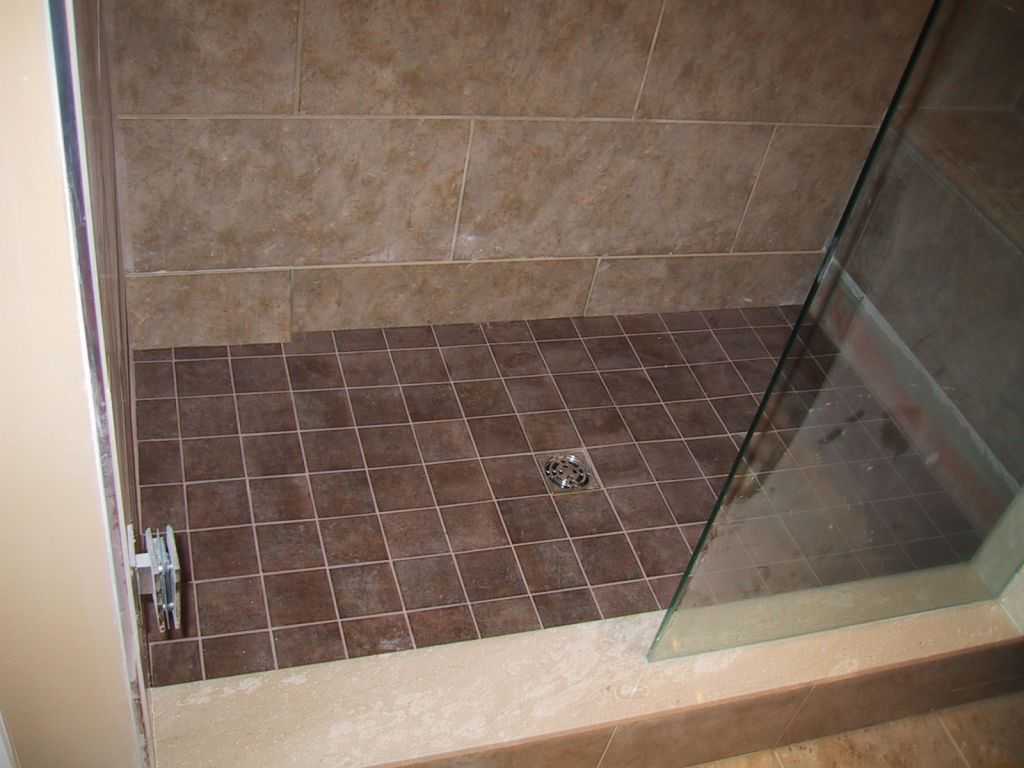
If both options do not fit, they make a pallet of brick or monolithic concrete, which is then tiled with tiles - ordinary, for floors, or mosaics. This is a major decision, but difficult to implement. If you decide to make a shower tray from tiles, and you live in an apartment building, you will need a very good multi-layer waterproofing so that there are no problems with neighbors from below and from the side. This does not mean that in a private house, a do-it-yourself shower stall is made without waterproofing. Simply if you "screw up" you will suffer yourself.
Half finished brick shower tray
There is one more option - an intermediate one. A "trough" of suitable dimensions is cooked from metal, well treated with anti-corrosion materials. They are installed on a podium made of bricks or foam blocks (a drain is also needed), if necessary, they are laid with a brick outside, forming a side or a step. A mosaic is glued from the inside.
Of these options is usually chosen. There is also a device without a visible pallet at all, and the drain can be made into the wall, but then in the entire bathroom it is necessary to raise the floor level and form a slope towards the drain.
Dimensions and shape: choose
Now about the dimensions of shower cabins and pallets in particular:
- 70 * 70 cm is very small, it is difficult to bend down even for a slender person, you constantly touch the walls;
- 80 * 80 cm - somewhat better, but still cramped;
- 90 * 90 cm - can be considered optimal for a person of average size;
- 100 cm and more - you already feel normal, you can sit down without any problems.
It makes sense to make a homemade shower cubicle rectangular
If you want comfort, make at least a meter gap from wall to wall, but if the dimensions are very limited, try to still leave at least 90 cm. One note: a square is not the best shape for a shower. The rectangle is more practical in this regard. With a booth "depth" of 80 cm and a width of 100 cm, you already feel free. And if the width is 110-120 cm, this is complete freedom.
Organization of drain
Next, you need to choose how the drain will be arranged. There are two devices: a siphon and a ladder. The ladder is more expensive, but it is usually smaller in height and more reliable. Its safety margin will last for a decent period and it can be poured into concrete, which is usually done.
Installing the ladder
The siphon is cheaper, but when installing a pallet, you will have to provide for the possibility of replacing it. Just monolithing it is not a good idea, since if a question arises with repairs, you will have to work with a punch to get to it. You present the results. Therefore, when using a siphon, leave an inspection passage, which is closed by a hatch or a small door.

DIY shower cubicle: how to make an inspection hatch
In any case, the drain must be serviceable. This means that the upper part - the net - can be removed and the pipe can be cleaned with a cable. And so that this is possible, lay the drain pipe so that the maximum angle of rotation to the sewer is 45 °, but it is better not to do more than 30 °.
Now about the slopes. So that the water in the pipes does not stagnate, the pipe from the ladder to the sewer is laid with a slope of at least 4-5%. This means that for one meter of length, the height difference is 4-5 cm. The floor should have approximately the same bevel: water should drain to the drain.
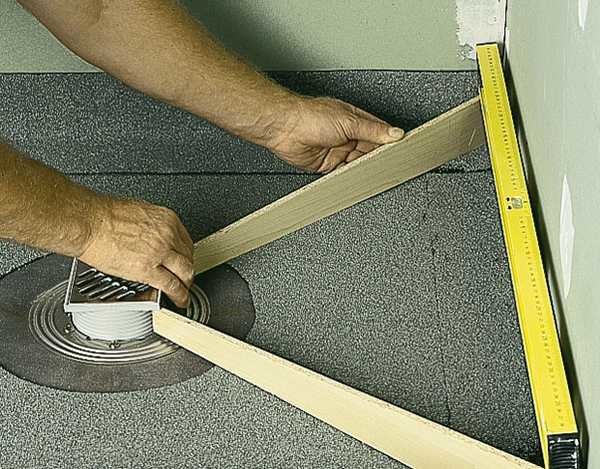
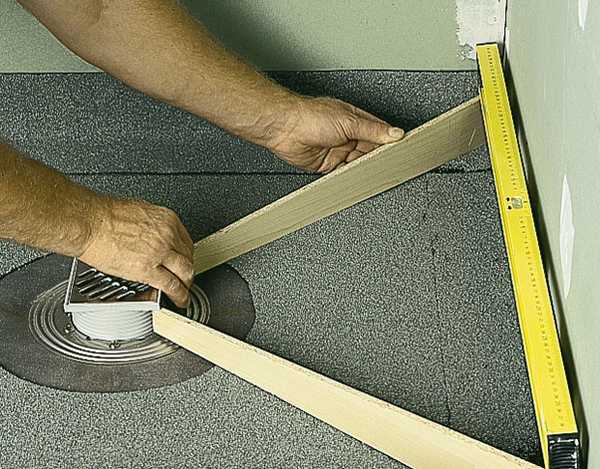
How to make a shower tray
It will be about exactly how to make the floor in the shower stall yourself, with your own hands. The floor height inside the shower stall is far from arbitrary. It depends on how it is done shower drainhow high the ladder or siphon is. And he, in turn, is set with such a condition to form the necessary bias. That is, the lower you enter the sewer, the less you will need to lift up the ladder and floor.
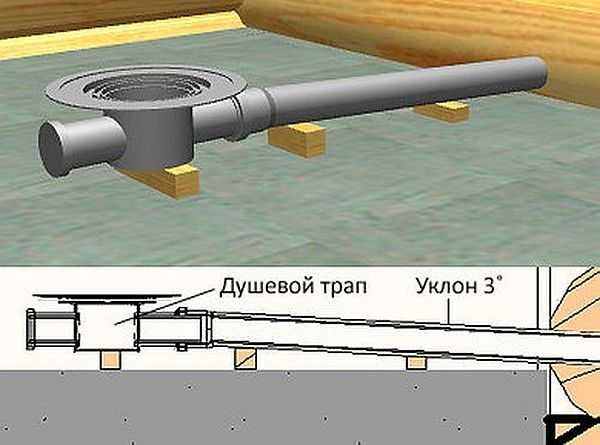
Floor drain installation diagram
That is, before starting work, you will have to put a ladder. A cup - for sure. But wrap it well and close it, plug the drain with a crumpled newspaper or rag so that nothing gets inside during work. Keep a decorative grid close at hand so you can try it on in time.
How to install one of the ladder options - linear - see the video. The model may be different, but the general principles will remain the same.
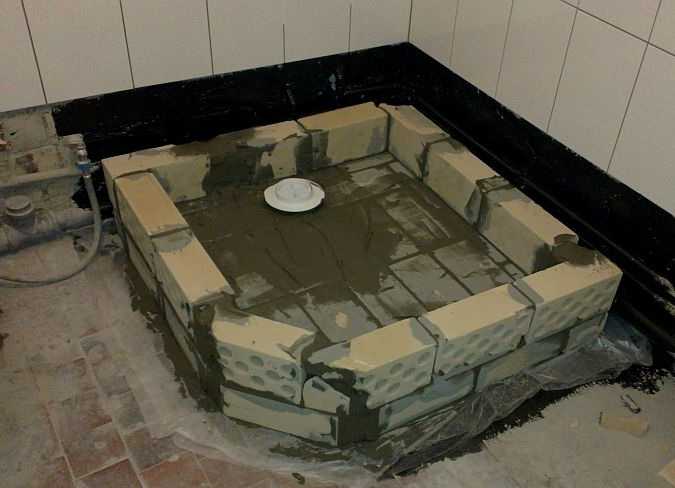
Homemade shower cubicle with a brick pallet (with step by step photos)
When installing a brick shower tray, the floor should be at least relatively flat. If there are already very large differences, level them in advance (make a rough screed). They expose the drain device, connect it to the sewer, and then step by step like this:
- Base waterproofing. In the simplest version, it is bituminous, but many are afraid of the smell. Can be coated with liquid glass, cement-based hydrophobic impregnation, waterproofing for swimming pools. What you find or what you like more in terms of properties, then use it. The best option, of course, is a composition for pools.These compositions are designed for high water pressure, therefore they are reliable. Slightly worse in such conditions - impregnation based on concrete, but moisture absorption is reduced significantly. They are often smeared two or three times: to be sure that nothing has been missed.
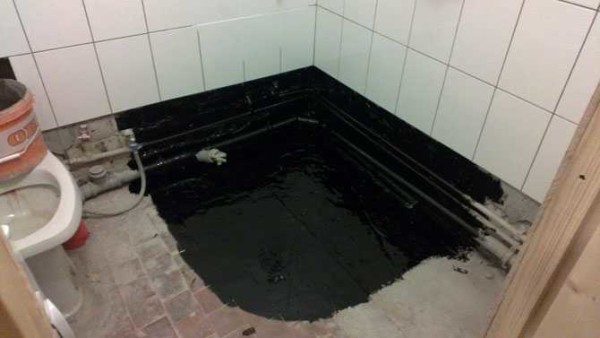
Three times smeared with bituminous mastic
- Bonding the joint with the wall with waterproofing tape. The minimum height of the tape entering the wall and floor is 10 cm. This is an additional protection of the most vulnerable place, where water usually seeps into the rooms below.
- Brick layer. Use exclusively full-bodied ceramic, since silicate quickly deteriorates from moisture.
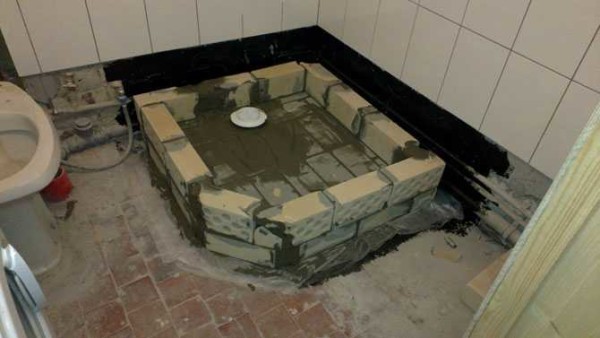
Brick laid on mortar
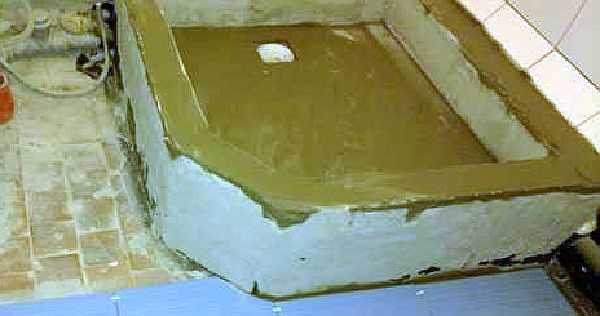
- Concrete screed for lighthouses. At this stage, a slope towards the drain is already formed, but the level should be slightly lower than the drain level: you will have to put tiles on the glue. Usually, some substances (additives) are added to the solution that increase the water-repellent properties. The most common are PVA and liquid glass.
- After the concrete has set, it is sometimes covered again with waterproofing, but this time it is best to use it based on cement: any tile fits well on such a base.
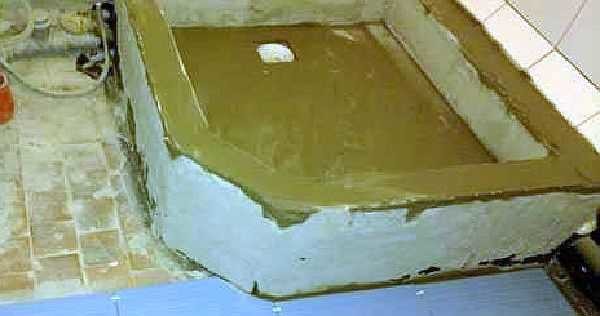
After concreting, a couple of days later, it was coated with cement-based waterproofing (concrete contact)
- On water-repellent adhesive lay tiles.
- The seams are rubbed with a hydrophobic paste.


If you want to do in the shower heating floor, two more layers are added. A layer of mortar is placed on the brick, leveling the base. After the solution has set, a heating cable or cable mats (cable on a grid) are placed on it. From above it is poured with a special compound for a warm floor. The layer thickness above the cable is at least 3 cm. And do not forget to form a slope towards the drain. After setting, you can lay the tiles (you can turn on the heating only a month after pouring, otherwise cracks will go).
To make the heating work more efficiently, you can put insulation on the layer of mortar on the bricks, in particular, extruded polystyrene foam. Its thickness is at least 3 cm, it can be up to 5 cm. A metal mesh is placed on it with a step of 10-15 cm, a heating cable or cable mat is placed on top, and only then - a solution.
Monolithic concrete
When making a concrete shower tray with your own hands, you need to assemble the formwork. It is best to use a thick board (at least 25 mm thick) or trim OSB, fiberboard (thickness from 16 mm).
If the shower stall has a concrete floor covered with tiles or mosaics, it is advisable to insulate it. It is your choice to do heating or not, but it should be 100% for insulation, otherwise you will have to pour hot water “idle” for a long time in order to warm the floor a little or throw a grate knocked out of wood. For a bath, lattices are an acceptable option, but hardly for permanent use in a house or apartment.
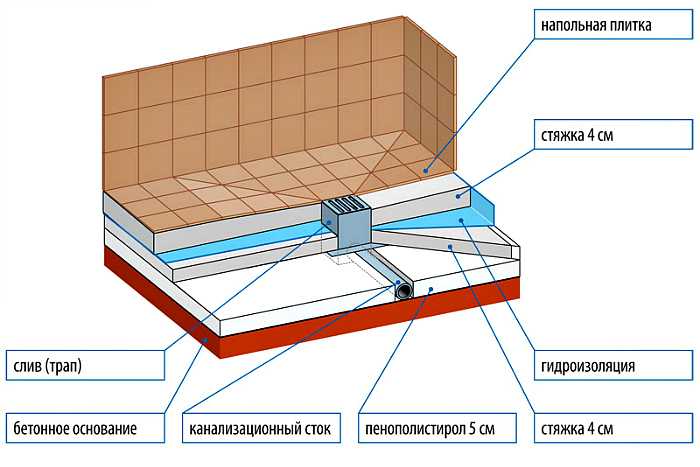
So, the sequence of layers is as follows:
- Base waterproofing. All the same: we coat well.
- We glue the perimeter with waterproof tape.
- If there is heating, we also put a damper tape or a layer of insulation along the walls around the perimeter.
- We lay polystyrene foam with a density of at least 35kg / m3, thickness - from 5 cm. Glue the joints with reinforced tape.
- Metal mesh with a mesh of 10 cm.
- We expose beacons, forming a drain.
Cut plywood strips can be used as beacons. They are cut taking into account the flow formation
- A layer of mortar in half the height of the screed. We close the screed with a minimum of water, only so that it can be stirred, we lay it tightly, clapping it with a trowel. It is impossible to pull it - too dry.
- We lay the other half with a solution of normal consistency so that it can be leveled with a rule.
After 24 hours, beacons are removed, traces are rubbed with a solution. A little later, after setting and gaining strength, they are covered with a coating waterproofing, and only then they proceed to laying tiles.
If you are going to build such a shower cabin with your own hands in an apartment building, it is better to add another layer of waterproofing: break the screed layer into two parts. Schematically then everything looks like in the photo below.
The screed is divided into two layers, and between them waterproofing
Determination of the screed height
Regardless of whether you are making a pallet from bricks or from concrete, you need to know at what height to pour the screed. Its height should be slightly lower than the drain grid - siphon or ladder. It is more convenient to repulse its position on the walls using laser level... If it is not there, you will have to transfer the marks with watermarks. To make it a little clearer, watch the video. It shows how to set the screed levels on the walls and how to make a rough screed.
Shower doors
If the cabin is rectangular, everything is more or less simple to solve: a rectangle can also be cut out of glass in the workshop. There are many glass door hinges, you can choose more convenient for your occasion. Just order doors with awnings: you will have to drill holes for them, and it is best to try them on.
It is advisable to take tempered glass. Even if it breaks, it will break into small fragments with blunt edges, which are difficult to injure. But, most likely, the fragments will remain hanging on the film. The downside of this glass is that it is expensive. To save money, you can order the usual thick one - 5-6 mm, and at home you can glue it on both sides with a polymer translucent film. You will have to tinker, but the effect will be almost the same as with tempered glass: the fragments will be on the film.
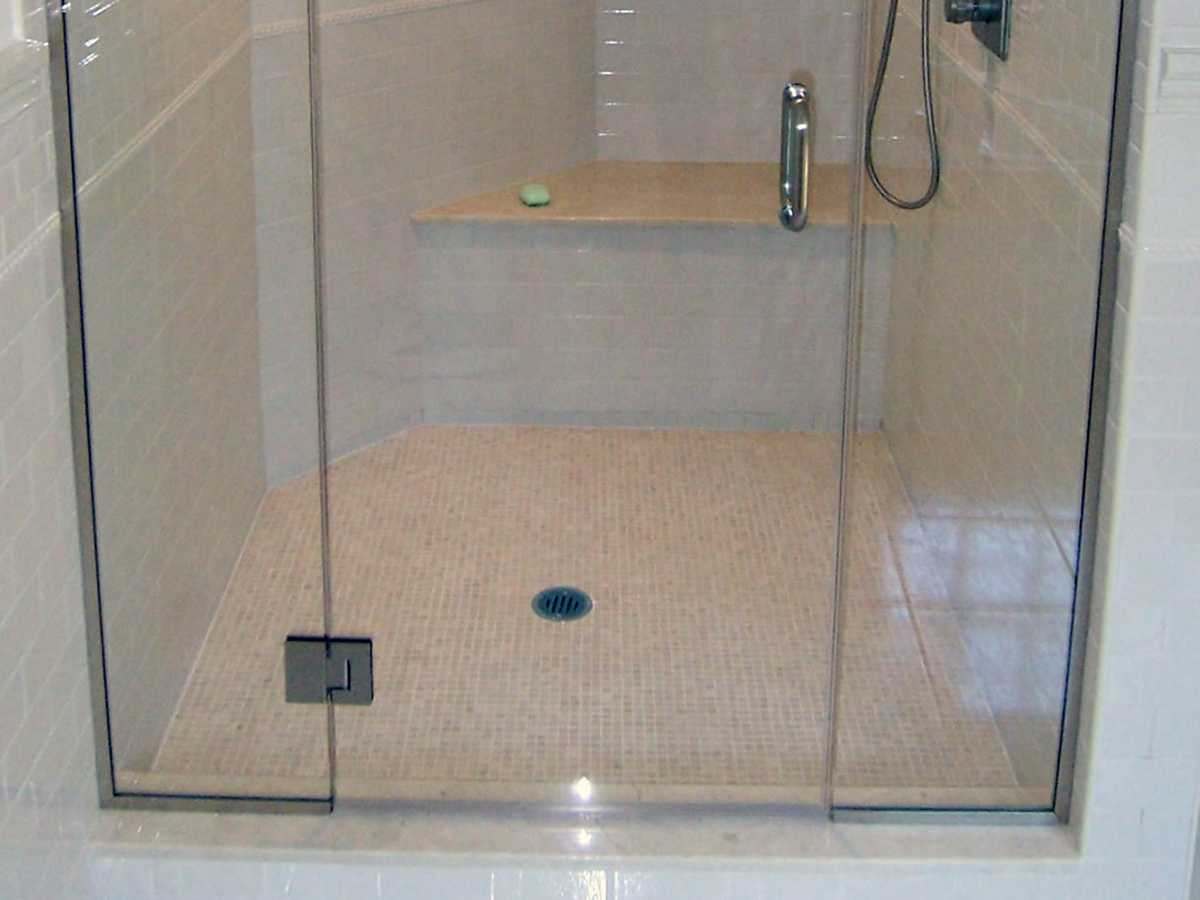
The simplest, but not cheap option is to put glass doors in a homemade shower cubicle
One moment: the glass is washed before applying the film, then degreased. The film is glued onto wet glass. This makes it easier to expel air bubbles, and you can also move the film for a while.
If you do not want glass doors, but you need translucent doors, you can make them from polycarbonate, but not cellular, but sheet. We'll have to find a suitable furniture profile, make a frame out of it and put polycarbonate into the frame on a sealant. For reliability, you can attach through and through with screws and washers.
Another option is to buy ready-made doors. There are also glass ones specially for cabins, but you can adapt plastic folding "accordion"as in the video.
Video in the topic
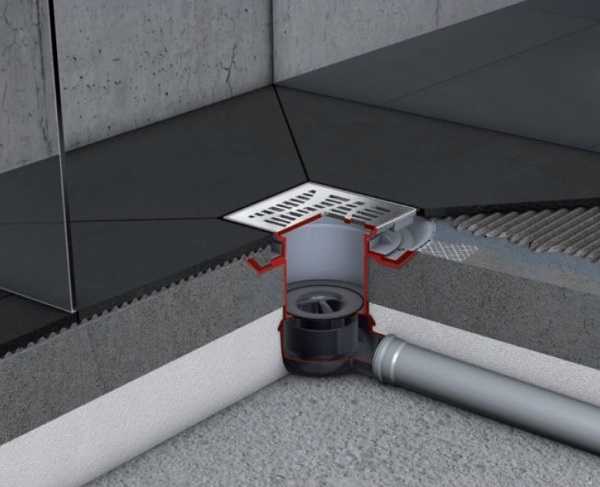
Shower drains are of different designs: ordinary ones, which look like a round or square mesh in the floor, like a tray. There are more modern models - wall-mounted. A shower channel and a wall drain are necessary if the cabin is made with a high water consumption. In this case, the conventional design may not cope with the bend and more efficient models are required. And there can be two drain devices in the tray. Features of their installation in a video from one of the manufacturers.
One of the ways to waterproof a shower stall
And one more type of waterproofing