How to connect and install metal-plastic pipes
Steel pipes are gradually being forced out of the market: worthy competitors have appeared that cost less, are easier to install, and serve no less. For example, hot and cold water pipes and a heating system are made of metal-plastic. How to properly install metal-plastic pipes, which fittings when to use, how to use them to connect the segments into a single whole - all this will be discussed.
The content of the article
- 1 Types of fittings for metal-plastic pipes
- 2 Preparing for installation
- 3 Installation of metal-plastic pipes using compression fittings
- 4 Installation of crimp (press or push) fittings on MP pipes
- 5 How to bend a reinforced plastic pipe
- 6 How to attach to walls
- 7 Non-standard connections: with metal pipes, transition to another diameter
- 8 An example of a water supply system wiring
Types of fittings for metal-plastic pipes
The structure of metal-plastic pipes is such that it is impossible to weld or solder them. Therefore, all branches and some bends are made using fittings - special elements of different configurations - tees, adapters, corners, etc. With their help, a system of any configuration is assembled. The disadvantage of this technology is the high cost of fittings and the time that will have to be spent on their installation.
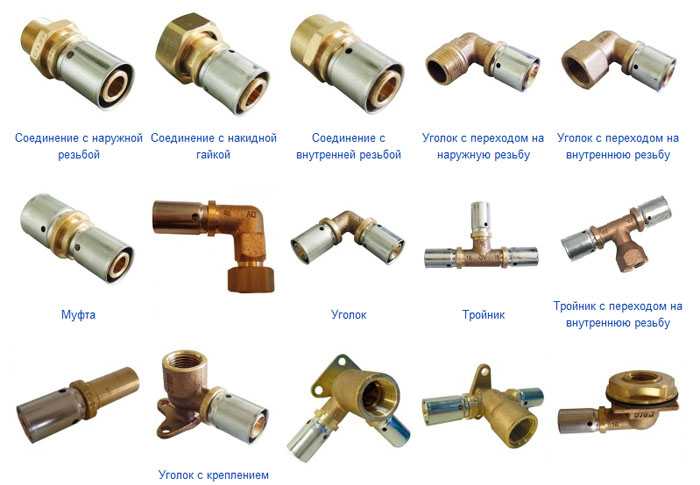
An approximate range of fittings for the installation of metal-plastic pipes with a press
The advantage of metal-plastic pipes is that they bend well. This allows fewer fittings to be used (they are expensive). In general, fittings for metal-plastic pipes are:
- Crimp.
- Press fittings (press).
Deciding what type of fittings to use is easy. Crimps are used for pipelines, to which there is always access - over time, connections need to be tightened. Press rooms can be walled up. That's the whole choice - you need to know what type of installation of metal-plastic pipes will be at a particular site.
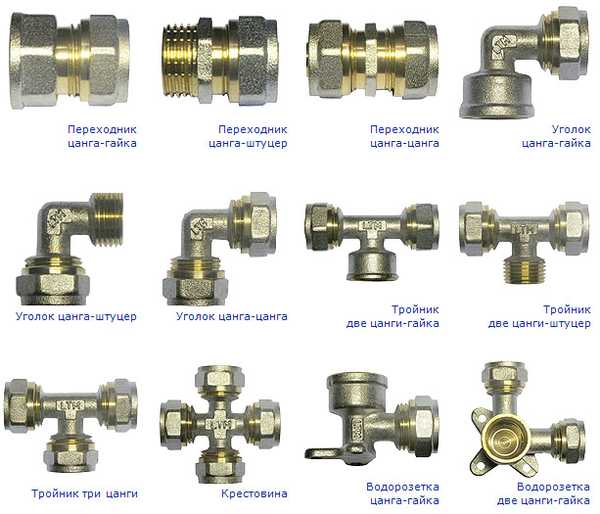
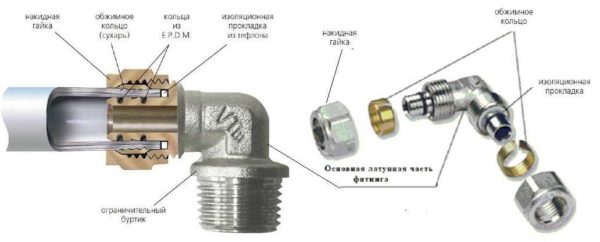
Appearance of some swivel nut fittings - screw or crimp
A common disadvantage of metal-plastic pipes is that due to the design of the fittings, at each connection, the cross-section of the pipeline is narrowed. If there are few connections and the route is short, this cannot have any consequences. Otherwise, either an increase in the cross-section of the pipeline or a pump with a higher power is necessary.
Preparing for installation
First of all, you need to draw the entire plumbing or heating system on a sheet of paper. At all branch points, draw the fitting to be installed and sign it. So it is convenient to count them.
Tools
For work, in addition to the pipe and purchased fittings, you will need:
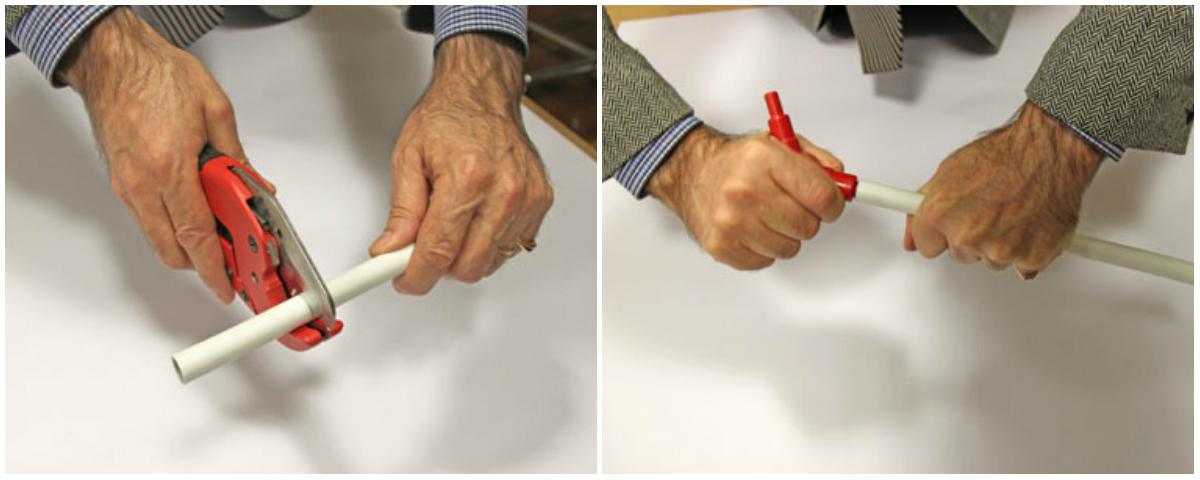
Pipe cutter. A device resembling a scissor. Provides the correct location of the cut - strictly perpendicular to the pipe surface. It is very important.
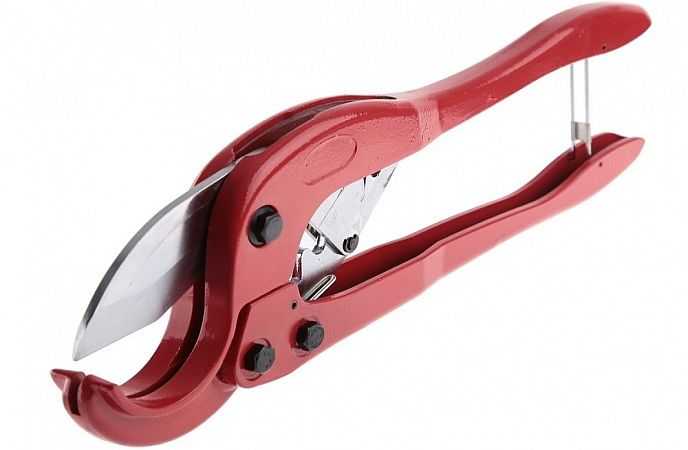
This tool is used to cut metal-plastic (and not only) pipes
Calibrator (caliber) for multilayer pipes. In the process of cutting, the pipe is slightly flattened, and its edges are slightly bent inward. The calibrator is just needed in order to restore the shape and align the edges. Ideally, the edges are flared outward - this will make the connection more secure.
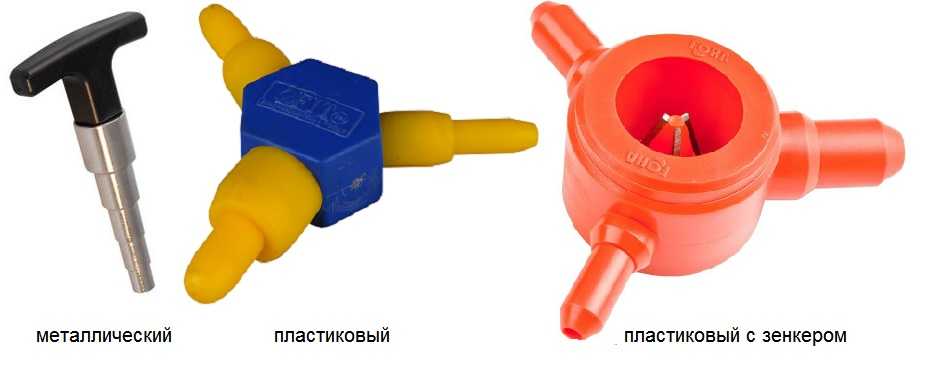
Calibrator types
- Countersink - a device for chamfering. A construction knife or a piece of sandpaper will also work. Calibrators often have a chamfering tab, so this tool can be dispensed with.
- Fitting installation equipment:
- crimping requires two wrenches of a suitable size;
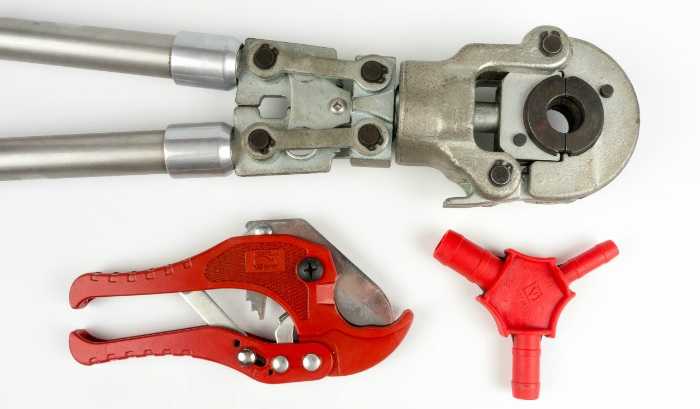
- for press fittings - crimping pliers.

Manual crimping pliers or press, MP pipe cutter and calibrator.Actually, this is all the tool necessary for the installation of press fittings and the installation of metal-plastic pipes
Basically everything. Instead of a pipe cutter, you can use a saw with a metal blade, but you will need to make cuts strictly perpendicular to the surface. If you do not trust your eye, take a carpenter's miter box.
Preparation procedure
Small diameter metal-plastic pipes in coils are on sale. Before installation, a piece of the required length is cut from the coil. In this case, it is necessary to take into account the length that enters the fitting. That is, you need to cut off a piece with a small margin - 1.2-1.5 cm.
The edges of the segment are inspected, if there are burrs (they do not exist when cutting with a pipe cutter, this is a drawback when cutting with a saw), they are leveled. Then, using a beveller or a piece of sandpaper, they remove the chamfer - grind the plastic at an angle both inside the pipe and outside.

Cut, calibrate, chamfer
After that, they take the calibrator, forcefully driving it into the pipe and turning it, align the geometry, at the same time straightening the "crushed" edges inward. After that, you can proceed with the installation of metal-plastic pipes and the installation of fittings.
How to align a piece of reinforced plastic pipe
As already mentioned, this type of pipe goes in bays, that is, they are twisted. Having cut off a piece, you straighten it a little with your hands, but how to achieve perfect evenness. This is important if the pipeline installation is open. The recipe is simple:
- Find a flat board or piece of chipboard, plywood, etc.
- Wrap the straightened section in a soft cloth (you can use an old terry towel).
- Roll out on the board, even.
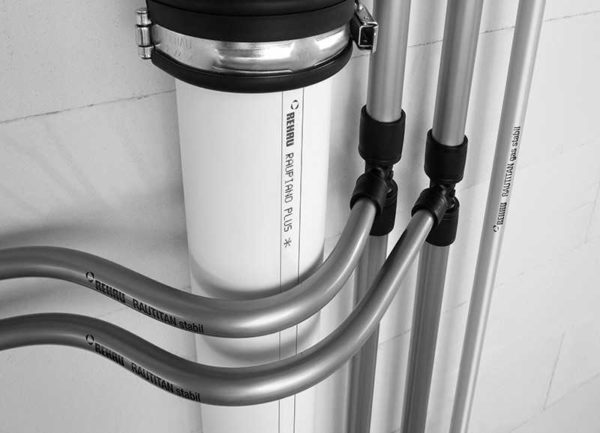
Usually, when laying a water supply system, in places the route has to bend, in places to lay straight sections
After the line is straight, you can calibrate its edges.
Installation of metal-plastic pipes using compression fittings
Compression fittings are made up of several parts. The base is a cast body with a thread. There is also a ferrule that secures the piece of pipe to the fitting and a flare nut that secures the connection. An important detail is the O-ring, which ensures tightness.
This installation method is good because no special equipment is needed. The second plus is that the connection is collapsible and, if necessary, the fitting can be replaced. If it fails or it becomes necessary to change the configuration of the pipeline. And this is very convenient.
But there is also a drawback: from time to time, a leak occurs on the thread. Everything is eliminated simply - by a half-turn tightening. But because of this, all connections must be accessible and cannot be walled up. The need to check is also annoying - it did not flow. Not everyone likes it.
This is what compression fittings look like
The range of fittings is wide: angles, tees, crosses, adapters (from one diameter to another). And all this from different angles, in different diameters.
The installation of metal-plastic pipes on compression fittings begins with the fact that the union nut and the compression ring are removed, the presence of a sealing rubber is checked. After that, the assembly actually begins:
- The nut and ring are put on the pipe.
- The section is pulled over the fitting until it stops. The stop is indicated by a special small ledge-shoulder.
- The ring is also pulled up to the stop on the fitting.
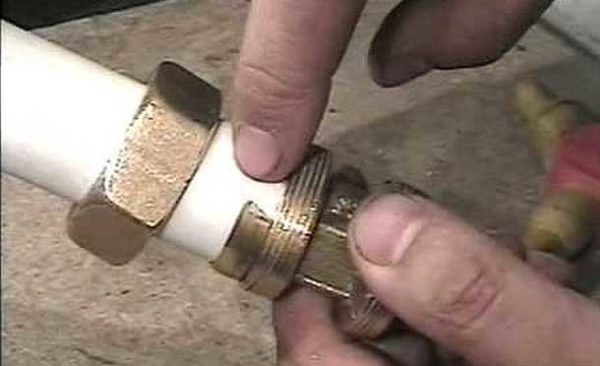
Before tightening the nut
- The union nut is tightened. First, by hand, the connection of the metal-plastic tubes is tightened using two keys. One holds the fitting body, the other twists the union nut.
That's all, the process of mounting the compression (screw, threaded) fitting is over. There is only one caveat: if you pour antifreeze into the system, immediately change the gaskets. Those that come in the kit will flow with anti-freeze very quickly. Use paronite or Teflon. Only they can ensure tightness. In general, for systems with antifreeze, it is better to use press fittings.They definitely don't flow (if crimped correctly).
Installation of crimp (press or push) fittings on MP pipes
Installation of metal-plastic pipes using crimp fittings requires special pliers. They are manual and electric. Any are supplied with a set of pads for different diameters. Manual ones, of course, are cheaper. You don't have to buy this equipment - you only need it once. It is much more profitable to rent.

Press fitting for MP pipes
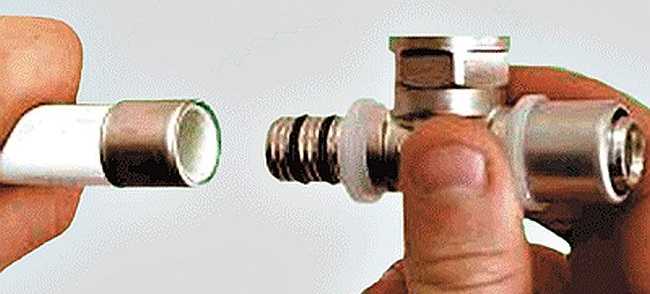
The press fitting consists of two parts - the body itself and the crimp sleeve. Before connecting the metal-plastic pipes, the cut is prepared. It is the same as when using compression fittings, but only chamfer from the inside. Further, the procedure is as follows:
- A sleeve is put on the pipe.
- A gasket is placed on the fitting to prevent galvanic corrosion.
- The tube is put on the fitting - until it stops. There is a hole on the body of the fitting where the end of the pipe should be visible.
- Take pliers, in which suitable linings are installed (of the required diameter). Pliers are installed close to the edge of the fitting, connecting the press handles together and crimping the part. As a result, two concave stripes should be clearly visible on the sleeve. Their depth should be the same. Once crimped, the fittings can rotate around the pipe.
That's all, the installation of metal-plastic pipes using a press fitting is finished. Such a joint can withstand pressures up to 10 atm, which is sufficient for most systems. Not suitable only for heating systems of houses with a number of storeys. more than 16. Their pressure in the system may be higher.
How to bend a reinforced plastic pipe
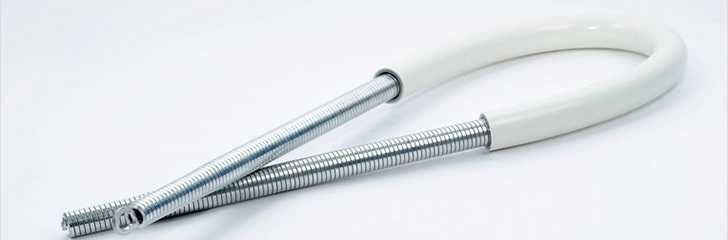
Often the installation of metal-plastic pipes arises the need to bend the pipe. This can be done with your hands or with a spring. It is easier and faster to work with a spring, but you have to buy it (it is inexpensive). The spring is inserted into the pipe and bent in the required direction. The pipe follows the bend, the spring is removed. It is easy to bend metal-plastic pipes with a spring - no big efforts are required, the actions are easily controlled, it is possible to correct the result.
What is good about this method is that you will not be able to pinch the walls, which happens when you apply excessive efforts in the manual method. It is also impossible to make a steeper bend (with a radius less than the minimum) and compress the walls at the bend, narrowing the flow area.

Spring for bending metal-plastic pipes
It is necessary to bend MP-pipes with your hands gradually. Take your hands on both sides of the bend (at the same distance from the center of the future arc), your thumbs support the pipe from below. In this position, you begin to lower the edges down, at the same time press up with your thumbs.
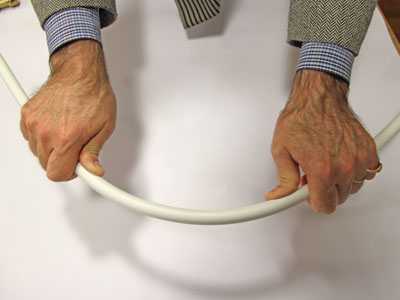
Manual bending of metal-plastic pipes
With this method, sometimes from excessive efforts, the pipe loses its geometry. This negatively affects its bandwidth. Such areas cannot be placed in the water supply or heating system. To avoid such situations, the fold is heated. This can be done only with a construction hair dryer. You cannot use open fire. It is easy to bend the heated plastic. At the same time, it does not squeeze (the main thing is not to overdo it).

Methods for bending MP pipes
Another way to avoid deformation is to pour sand inside. It will not let the walls shrink.
How to attach to walls
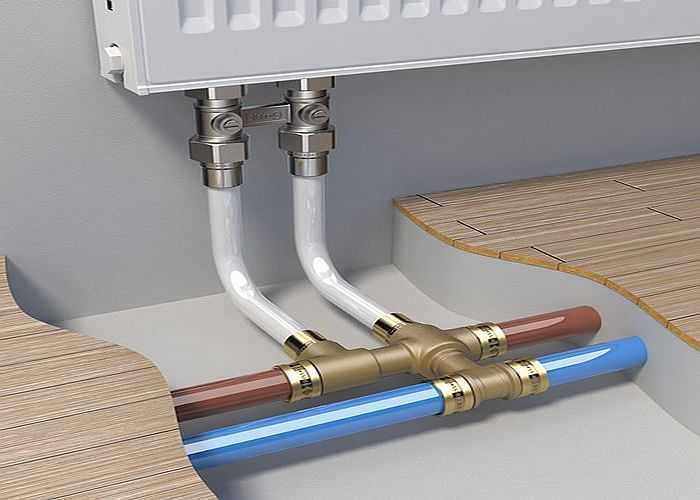
When laying the pipeline open, it must be somehow fixed on the walls. Usually, special plastic clips are used for this. They are single - for laying one line of the pipeline. Typically used for plumbing. There are double ones - most often they are installed for heating - the supply and return in two-pipe systems run in parallel.
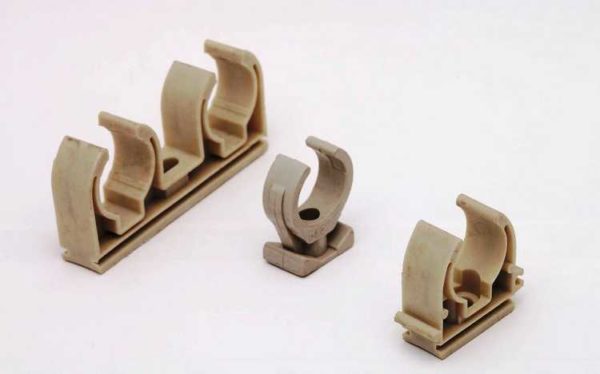
Clips for mounting metal-plastic pipes on the wall
These clips are installed every meter (more often).A hole is drilled in the wall under each, a dowel of the required type is inserted (selected depending on the type of material from which the walls are made). A heavy load is not expected, but plumbing and heating look much more attractive if everything is laid out exactly, like a ruler.
Non-standard connections: with metal pipes, transition to another diameter
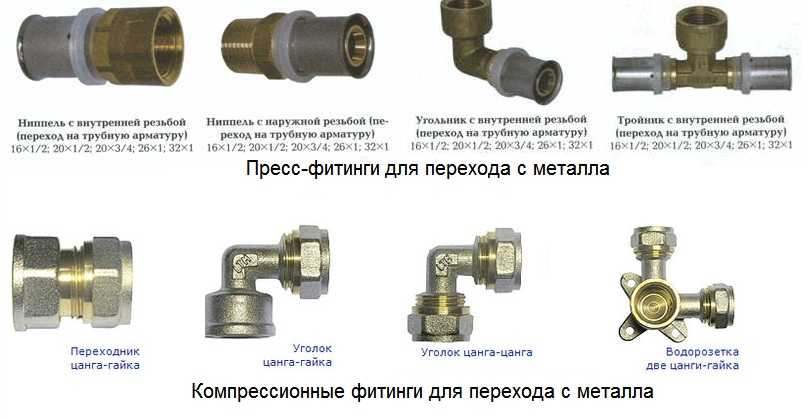
When replacing a water supply or heating, it is often necessary to combine metal and metal-plastic. Most often this happens at the outlet from the riser. In this case, the metal pipe is cut at some distance - 3-5 cm, and a thread is cut on it. Next, a fitting with a union nut (collet) or an internal thread is screwed onto the thread. Further, the installation of metal-plastic pipes is carried out according to the usual technology.

Some types of fittings that can be used when changing from metal to metal-plastic
The fitting is selected according to the diameter of the metal pipe, and the thread on the adapter must be internal - the external thread is cut on the pipe. This connection requires a seal. Wrap up with flax and grease with packing paste or just use fum tape.
The connection of two pipes of different diameters is exactly the same. Only a suitable adapter fitting with nuts / nipples of the correct diameter is required.
An example of a water supply system wiring
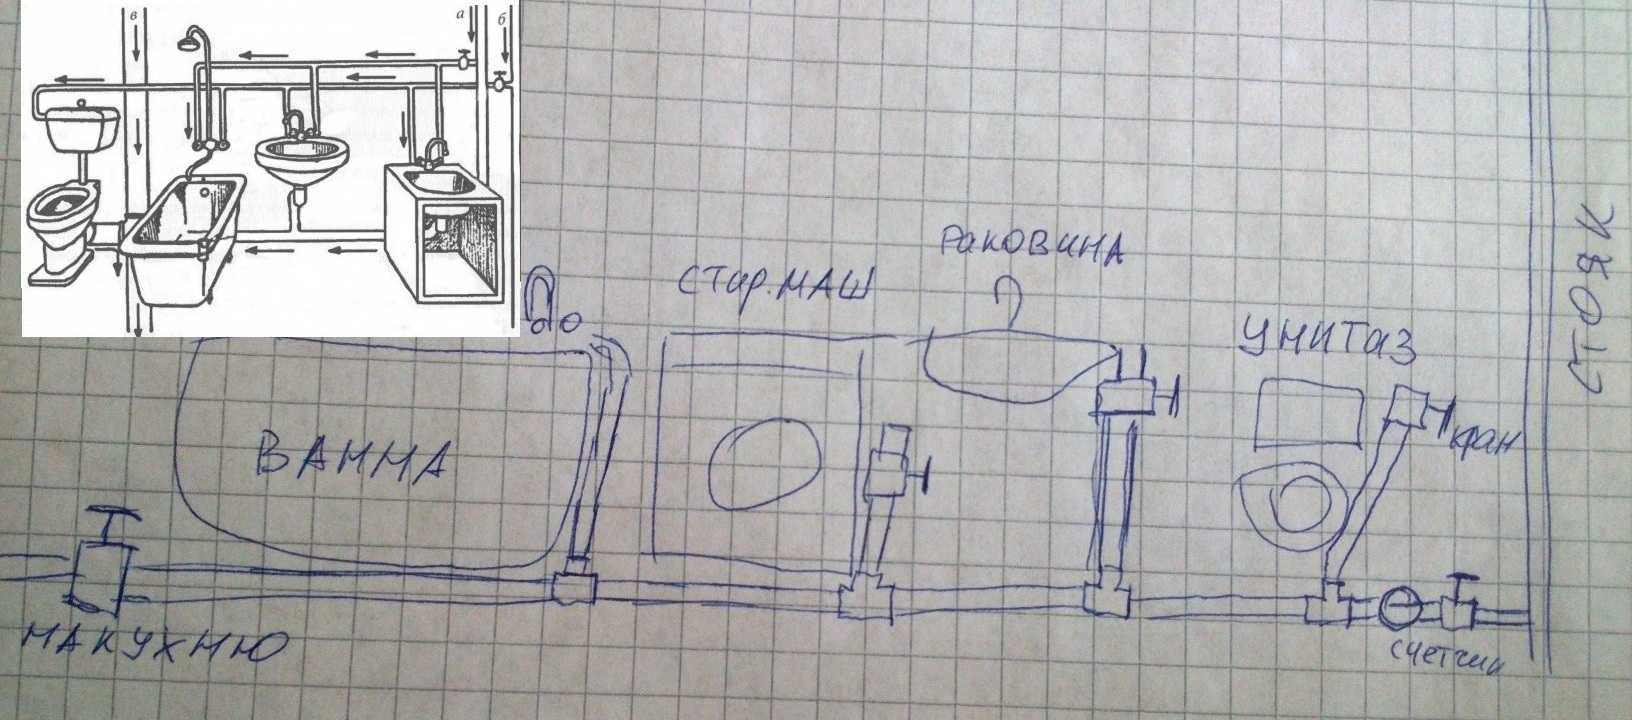
First, draw a plan for the water supply system. This can be done on a piece of paper, indicating the necessary fittings. Please note that a threaded end fitting is required for the installation of taps. Cranes are needed at the outlets to household appliances and plumbing fixtures, to heating radiators. This makes it possible to turn off devices without covering the entire system as a whole. The type of thread and its size are selected depending on the type of valve used.
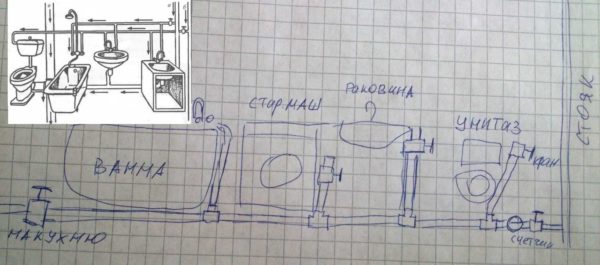
An example of a water supply system on metal-plastic pipes
Also, transition fittings are needed before and after the meter (water or heating depends on the type of system). Having drawn a detailed plan, put down dimensions in all areas. According to this drawing, consider how much and what you need. Fittings can be purchased strictly according to the list, and it is advisable to take pipes with some margin. Firstly, you could make a mistake when measuring, and secondly, in the absence of experience, you can spoil some piece - cut off less than required or compress it incorrectly, etc.
Agree on the possibility of exchange
When buying everything you need, agree with the seller that, if necessary, you can change / return some fittings. Even professionals are often mistaken with them, and even those who decided to do the wiring of the water supply or heating system from metal-plastic with their own hands and even more so. No one will take the remains of the pipe back from you, and the fittings are easy. But keep the receipt for sure.

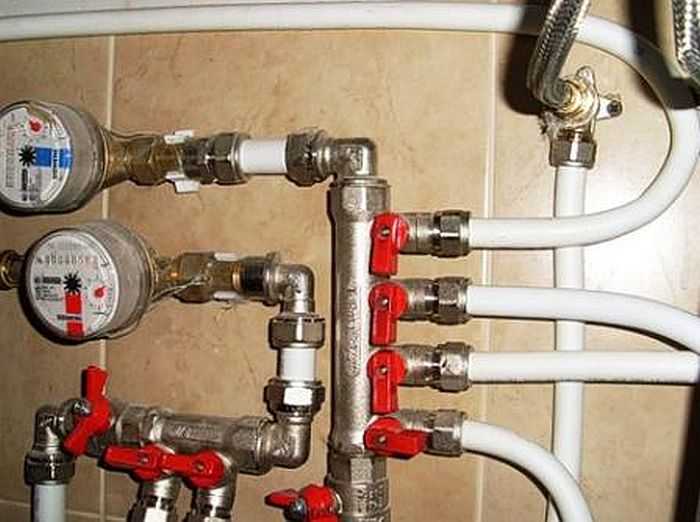
Sometimes it is more convenient to use collectors. They allow you to connect several consumers in parallel. There are collectors for water supply and for heating (when installing a warm floor)
When and how to get started
Arriving home, lay out the fittings, proceed: the installation of metal-plastic pipes in summer can be done immediately, in winter you need to wait some time (12 hours) until all the elements are heated to room temperature. Cut off one piece of pipe at a time to the desired length. It takes a little longer, but you definitely won't get confused. Further actions depending on the selected type of fittings.

Heating wiring with metal-plastic pipes is done only on press fittings
After completing the installation of metal-plastic pipes, the pipeline is checked. If it is a water supply, it is enough to open the tap at the entrance. This should be done gradually and smoothly. The system will immediately begin to fill with water. If nothing has flowed anywhere, you did everything right. If any connections are leaking, they must either be redone - if press fittings were used, or tightened - if the assembly was on the crimp connectors.
If a heating system was assembled from metal-plastic pipes, before starting it must pressurize - test with increased pressure by pumping cold water into the system. If the test is successful, you can do a heating test run.
Related Videos
Once again, specialists from Valtek (Valtek), whose products are considered one of the best in this market, will explain how to correctly install metal-plastic pipes.


-
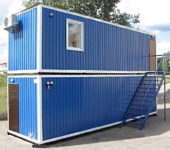 Modular houses from block containers: types, manufacturing features and layout options
-
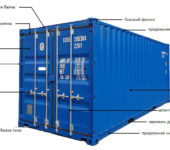 Houses from shipping containers: construction options, layout
-
 Types of wooden beams for floors, length calculation, installation
-
 Mobile homes for year-round use
-
 Polymer / composite decking (WPC decking): types, sizes, installation


