Do-it-yourself drywall putty
In order for the plasterboard structure to take on a finished look, it must be putty. How to putty drywall, remove corners, close up joints - everything in this article.
The content of the article
Do I need to putty drywall?
Nobody wants to do extra work. In addition, putty is a long and difficult process that takes a lot of time. The question arises reasonably - why putty the flat surface of drywall sheets. Maybe you can do without it when finishing? Some finishes are possible, but not all.
It is always necessary to close up sheet joints, corners and screw caps. For any type of finish. Be sure to putty plasterboard for painting. The surface of the drywall is far from perfect, and new irregularities are added during transportation and installation. If you paint the surface without prior leveling, they will all be clearly visible, especially if there is at least a small degree of gloss.
Preparing drywall for wallpapering - you can only putty the seams, then prime the surface
Knauf, one of the leaders in the production of drywall, allows the entire surface of the sheets not to be putty under tiles and wallpaper. Only joints, corners and screws. Nobody putsty under the tile, but under the wallpaper - yes. And all because the wallpaper pasted without preliminary processing in places comes off along with the cardboard and sometimes to plaster. So the second time putty is simply inevitable.
You can do without putting putty on the entire surface of the sheet using a primer. In this case, water-dispersion acrylic paint diluted with water serves as the primer. It creates a film on the surface with which the glue interacts well, but also this film does not damage the cardboard when tearing off the wallpaper.
It is necessary to putty for painting, drywall completely, and to perfect condition
So, it is completely necessary to putty drywall for painting, preferably - for pasting wallpaper (at least in one layer) and seal only screws and seams for tiles.
Primer for gycardboard: why, what and when
The primer has two different functions. First, it improves the adhesion (adhesion) of two materials. As a result, when puttying, the chances of bubble formation and material delamination are reduced. The second function is to even out the absorbency. The result is less material consumption and a smoother surface with putty. So it is undesirable to skip the primer.
In theory, it is necessary to prime during finishing work before each new operation. For example, a plasterboard primer is needed before the putty to improve adhesion to the putty. Before painting or pasting wallpaper - to reduce paint and glue consumption. You also need a primer before applying the finishing layer - the starting one has to be leveled, which makes the surface dusty. Without soil treatment, the finishing layer lays down poorly, rolls down and can even fall off.
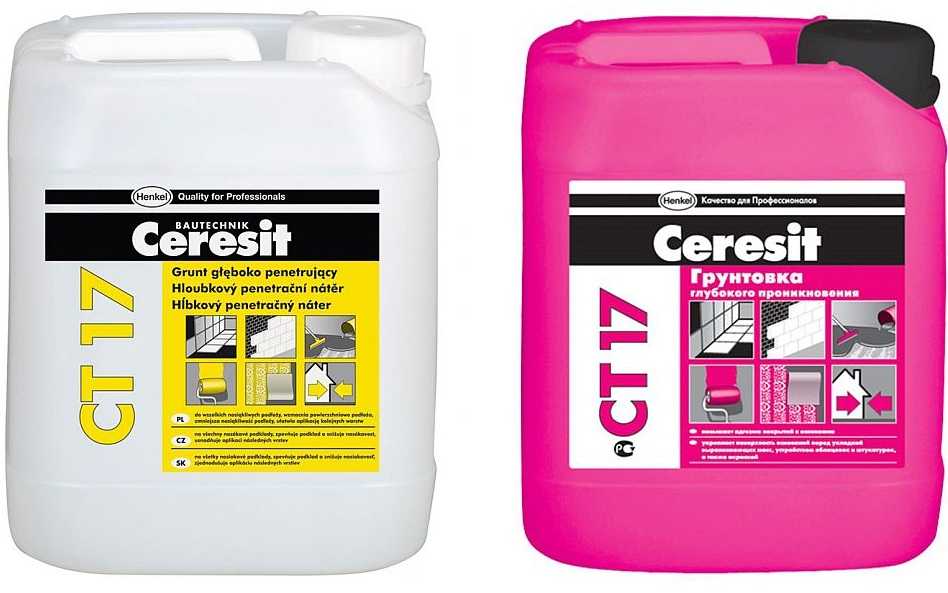
Ceresit drywall primer is also suitable for interior work
What primers are needed? Depends on the stage and on the type of finishing material:
- Before puttingty plasterboard (starting and finishing layer), use a deep penetration primer or for porous, highly absorbent surfaces.
- The same composition can be used before painting and wallpapering.
- Under the wallpaper, the putty surface of the gypsum board can be primed with wallpaper glue diluted with water. The proportions are indicated on the glue package.
- For painting, you need to look at the recommendations of the manufacturers. Sometimes the primer is paint diluted with water. Unless otherwise indicated, use a deep penetration compound.
In summary, it should be said that priming is a necessary operation. It allows you to get good results and reduce material consumption.
Technology: work sequence
After the sheets of gypsum plasterboard are fixed on the frame, it is time to prepare the drywall for finishing. Let's consider a case with a full cycle - for painting. In this case, drywall should be putty in at least two layers. For other finishes that are less demanding on surface quality, we simply remove unnecessary stages. The order of work is as follows:
- Deep penetration primer coating.
- Sealing holes from self-tapping screws.
- Putty of joints using a serpyanka mesh or special paper tape.
- Sealing corners - external and internal.
- Plasterboard primer.
- Putty on the entire surface with starting compound and sanding irregularities.
- A primer for plasterboard.
- Putty with finishing compound and putty on irregularities.
- Coating with a primer for finishing.
Plasterboard plasterboard with your own hands - we study the nuances

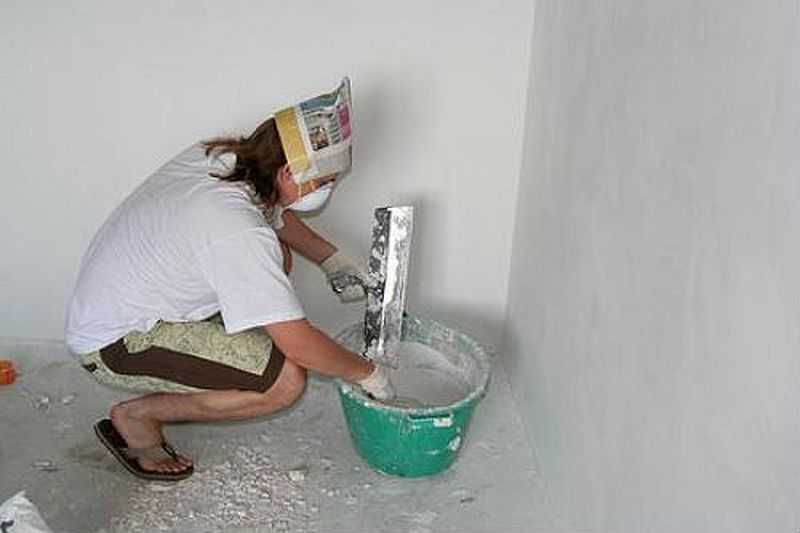
A few words about which putty is better to use for gypsum plasterboard. Any one is suitable - based on gypsum or polymers (latex). Polymer putties are usually finishing - they give a very thin layer and an even surface. There are both starting and finishing gypsum. Difference in particle size. You can use any, as long as the quality is good.
There are two forms of release of drywall putty - dry in bags and diluted in buckets. Dry before use must be diluted with water in the specified proportions and stirred until the lumps dissolve. The formulations in buckets are already ready for use, but they are more expensive. But they are guaranteed to have no lumps.
Coating with a primer
Before puttingty drywall, we prime the surface. Any primer is applied on a dry, clean surface. Therefore, we first remove the dirt from the surface, remove the dust (you can use a vacuum cleaner or a slightly damp cloth). After that, we prepare the soil according to the instructions (sometimes it is necessary to dilute with water, sometimes it is enough just to stir), pour it into a container and apply with a brush or roller.
Primer application: choose the method convenient for you
Drywall primer is available for dry and damp rooms. For the bathroom and kitchen, choose a soil for damp rooms, for the rest you can use any. When choosing a soil, pay attention to the presence of antibacterial components. They prevent the development of mold and mildew. This is especially true for the kitchen and bathroom.
| Name | Consumption | Appointment | Drying time | Additional properties | Price |
|---|---|---|---|---|---|
| Optimum penetrating primer (10 l) | 6-8 sq.m / l | For priming bricks, concrete, drywall in dry rooms. | 30-40 minutes | 600 rubles for 10 kg | |
| GLIMS Grunt / GLIMS Grunt (10 l) | 5 m2 / l | For rooms with normal and high humidity | 30 minutes | Antifungal and anti-mold additives | 600 rubles for 10 liters |
| Tex Universal acrylate primer | 5-14 sq.m / l | For priming porous surfaces, including plasterboard and putty surfaces | 30-40 minutes | For dry rooms and rooms with high humidity | 650 rubles for 10 liters |
| Internal primer Prospectors 10l | 5-10 m2 / l | For priming porous surfaces, including plasterboard and putty surfaces | 60 minutes | Antifungal and anti-mold additives | 350-400 rubles for 10 liters |
| Feidal Tiefgrund LF 10 l | 10 sq.m. / l | For highly absorbent surfaces, including drywall | quick dry | For indoor and outdoor use, frost resistant | 850 rub for 10 l |
Usually, for a drywall primer, it is enough to apply the composition in one layer, but in the kitchen or bathroom you can do two: to guarantee the result.After the soil has dried (the time is indicated in the instructions), you can proceed to the next stage.
Sealing screws and seams
For seams, there are special compounds Knauf-Fugen, Knauf Uniflot, Fugenfuller and their analogues. After the soil has dried, we dilute the putty to the consistency of thick sour cream. Please note that these putties dry quickly, so dilute a small amount at a time.
We take a small spatula, apply the composition to the installation sites of the screws, remove the excess. There should be just enough putty in this place so that the surface is even. Thus, we go through all the screws. They can be sealed parallel to the seams, or they can be done first. It does not matter.

The principle of working with putty - a roller from the composition is placed on the edge of the spatula, then it is stretched in the right place
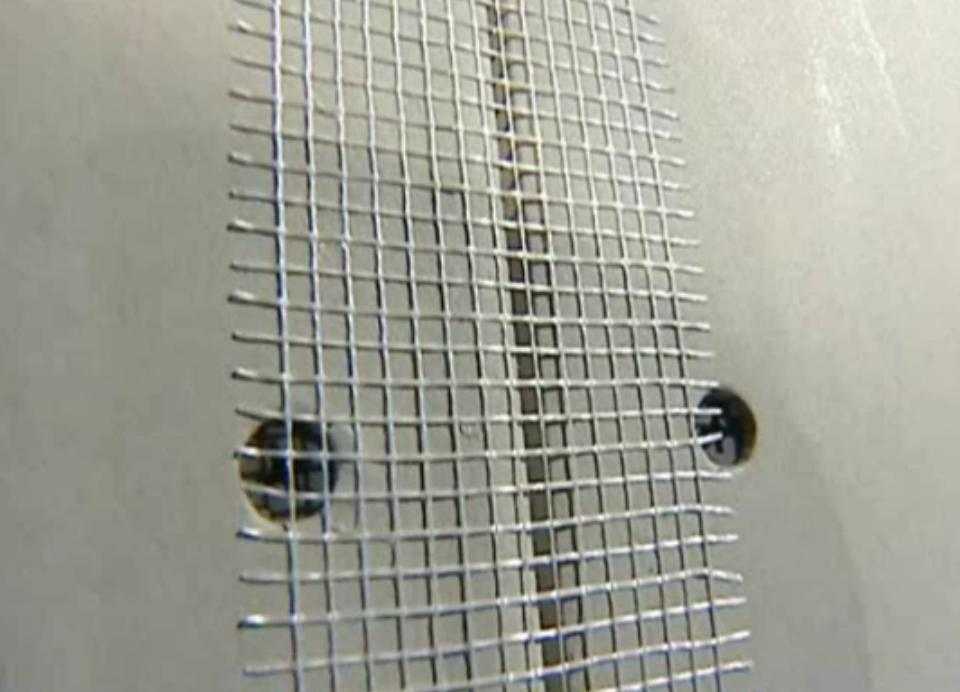
There are two types of drywall joints. Along the long side of the gypsum board, the edges are uneven - for easier sealing of this joint. But the sheets are also connected in height, where there are no ledges. You also have to cut the sheets and the connection is also end-to-end. Such connections require a special technology and more about it below.
Vertical joints
When puttying vertical joints of drywall with normal factory edges, they are first carefully filled, then glued.
After filling, while the composition has not yet dried, it is glued with a serpyanka mesh or paper reinforcing tape. This is necessary so that cracks do not form at the joints. If a tape is used, it is torn into the necessary pieces, soaked in clean water for 10 minutes (while the seam is filled).
The tape is recessed to the desired distance
Having filled the seam, the tape is taken out, holding it between the fingers, remove excess water, stick to the seam. After that, they take a spatula 8 cm wide (this is mandatory) and press the tape below the surface of the gypsum board. She "sits down" on one of the factory ledges. Start pressing in from the middle to the edges. When pressed, the putty is squeezed out from under the tape, we collect it. As a result, if you put a wide hard spatula (at least 20 cm wide) to the surface, you can see that the tape is below the surface of the cardboard. Then they again pass with putty, leveling the joint to the level with the surface.
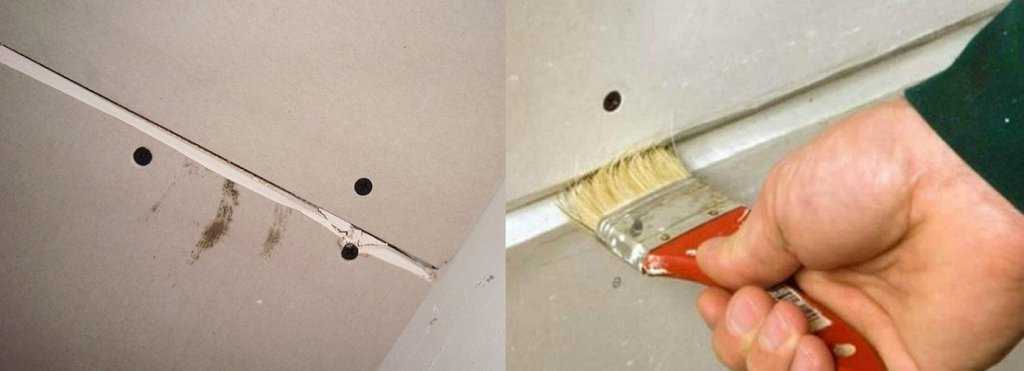
Trim seams
It is better to putty drywall in the places of horizontal joints - where two plates are connected or on vertical ones, but without edges it is better after preliminary processing. First, the surface is moistened with water - dip the brush in water and grease the junction well. Walk several times to get the plaster wet. Then use a sharp knife to cut the grooves at an angle of 45 °. These joints can be treated prior to priming. It's even more convenient.
Preparation of joints for putty
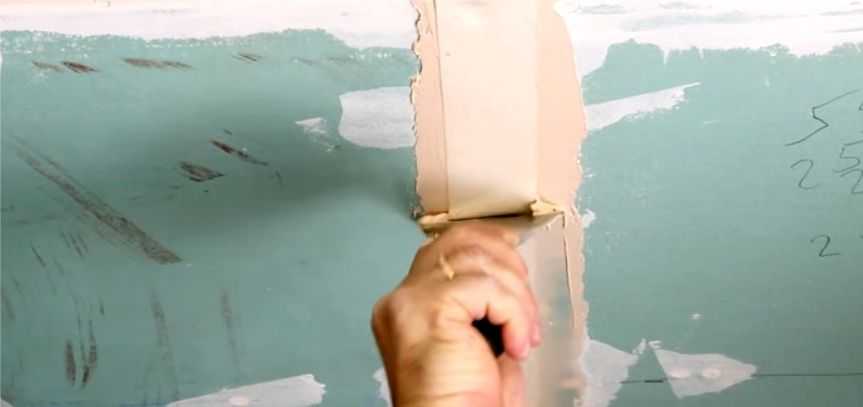
We coat the prepared joints with soil. In this case, it is more convenient to use a brush. After drying, fill the seam with a compound for plasterboard joints. It is more convenient to work with spatulas 10 cm wide and 20 cm hard. Apply the composition with a small one, remove the excess with a large one. We fill it well by pressing the composition into the seam. If you did everything correctly, a small roller forms, slightly protruding above the surface.
Once again we go through the seam, applying a fresh putty about 0.5 mm thick, take the soaked reinforcing tape and glue it to this compound. We take a spatula 8 cm wide and press the tape well to the surface, squeezing out the excess putty from under it.
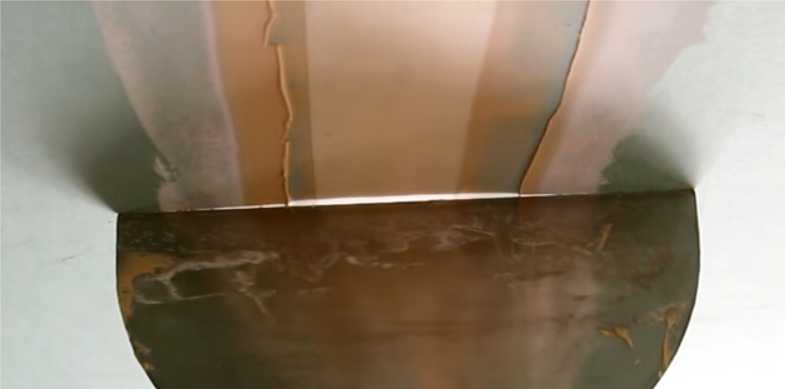
Putty of cut seams on gypsum board
In this case, a wave of paper is formed (in the photo you can see), we make sure that it does not wrinkle, we catch up with it to the end, where it straightens out. We remove the excess solution in the tape and the adjacent area of the sheet. And the last stage - again we take the putty and coat the glued tape on top with a thin layer. We make this layer as thin as possible, as they say - "on sdir". Actually, stretch the remaining putty with a very thin layer.
Second technology: first tape then putty
There is a second technology - a serpyanka or paper reinforcing tape is first glued onto gypsum, then it is putty. It turns out this way faster, but the drawback is the voids that remain under the tape. In these places, the wallpaper can wrinkle or the putty, decorative plaster can crack.
This is how they stick the serpentine on drywall
Instead of paper tape, they also use a serpyanka mesh. Serpyanka is more difficult to work with - it is tough and its edges often stick out of the solution. To make it a little easier, the mesh is pre-glued, after the glue has completely dried, it is putty. In order not to think about glue and to speed up the work, use a self-adhesive serpyanka (there is one).

An example of a seam putty with serpentine
But, all the same, it is more difficult to putty drywall - its surface is uneven, the spatula "jumps" on the fibers and a small wave is obtained, which is not at all easy to smooth out.
Outside and inside corners
Outer and inner corners non walls and partitions made of gypsum plasterboard done with:
- reinforcing paper;
- serpyanka;
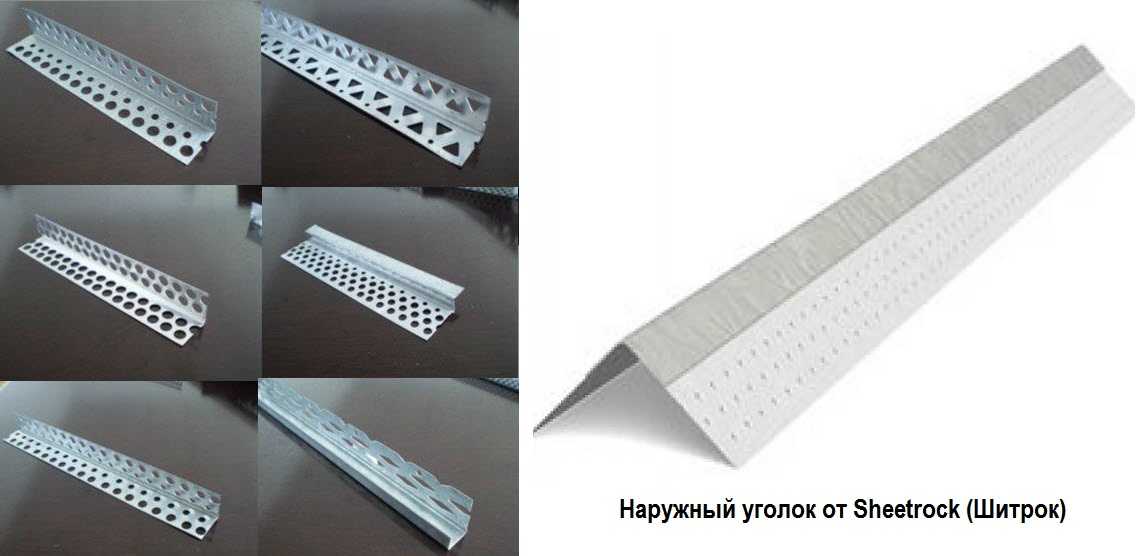
- perforated aluminum corners;
- special metal corners Sheetrock with paper.
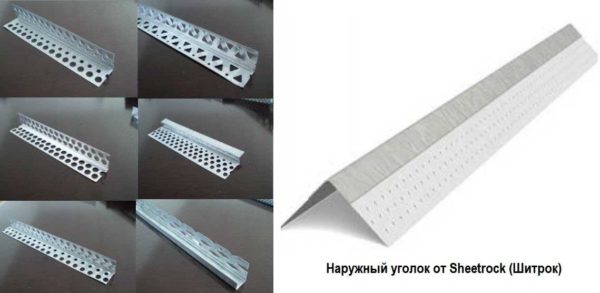
There are different perforated corners, but it is more convenient to work with the Shitrok metal corner
Internal corners are most often trimmed with paper and serpyanka - the joints of the walls, as well as walls and ceilings. The technology is similar to sealing joints. A certain amount of putty is applied to the corner, paper or serpyanka is glued onto it, a reinforcing strip is pressed into the composition with a narrow spatula, and excess putty is removed. After that, go through the corner again, applying a thin layer of putty on top.
Perforated corners are used to design outer corners - slopes, ledges, etc. First, a piece of the desired length is cut. The metal is very thin, it is cut even with ordinary large scissors, but if there are scissors for metal, it is easier to work. Edges are trimmed at 45 ° or less, not 90 °. So, when plastering drywall, the edge will not wrap.
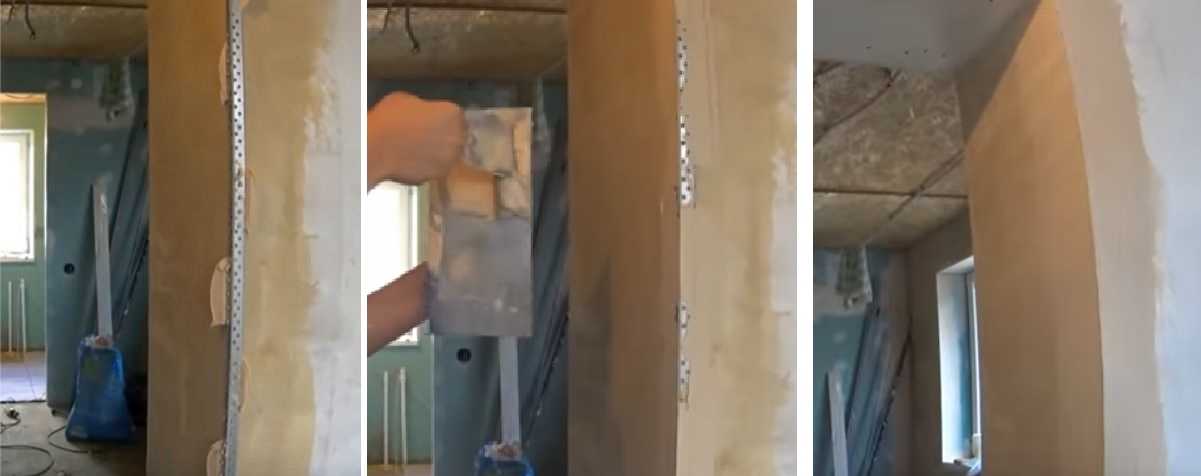
Decorating the outer corners of plasterboard walls with a perforated corner
Putty is applied to the outer corner on both sides in small islands approximately every 10 cm (it can be staggered). A perforated corner is pressed into the solution, the verticality or horizontal position of its installation is checked, and corrected. Pick up excess mortar with a spatula, aligning the edges in one plane with the surface of the sheet. The set corner is left for a while - until the putty dries, after which it is sanded, and again putty if necessary.
What is the difference between Sheetrock metal corner? Thin strips of metal are applied to a paper base. They are tougher than simple reinforcing paper, but it is more convenient to work with them than with ordinary perforated ones, since due to the presence of paper, the transition to the plane is smoother.
Grinding seams and corners
If the layer is well leveled when grouting drywall, sanding can be kept to a minimum. Why is it better to sand less? Because, firstly, it takes a long time, and secondly, it is dusty. Moreover, the dust is very fine, it flies in the air for a long time and rises again from any movement. To reduce the amount of flying dust, wet rags, damp sawdust, etc. can be placed on the floor. Doors leading out of the room are covered with a wet cloth; it must be larger than the size of the door - so that dust does not scatter to other rooms.
To begin with, you can walk with a sharp, even spatula, cut off all the most protruding irregularities. Next is the grinding process. Since corners and seams at this stage do not need to be cleaned to perfect smoothness, they take a mesh for grinding with a 180-200 mesh and a wooden block. A mesh is attached to the bar (you can use staples from construction stapler, but the staples should not stick out). With this device, the surface is leveled. When working, it is desirable to highlight with an oblique light - this way all the irregularities are more visible. But you can not putty drywall under the wallpaper so carefully.

There are special holders for the net, but you can do with a bar
One moment - it is better to grind with a respirator and goggles. Gloves will not be superfluous. The dust is very fine and penetrates literally everywhere. After the seams and corners have been sanded, the surface is primed again. Moreover, all completely, since dust has also settled on the untreated areas, and it worsens adhesion.
The most inconvenient places for putty and sanding are the inner corners. See the next video for the secrets of fast, high-quality corner grinding.
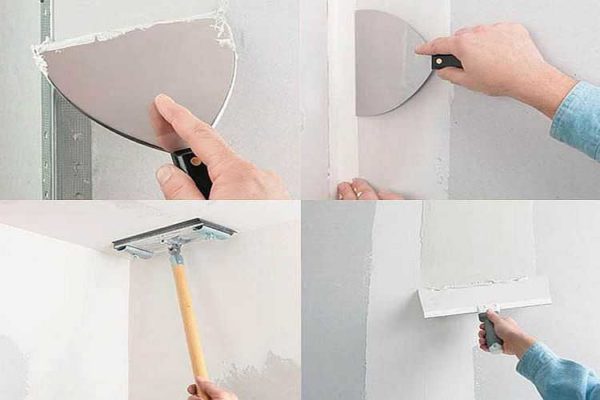
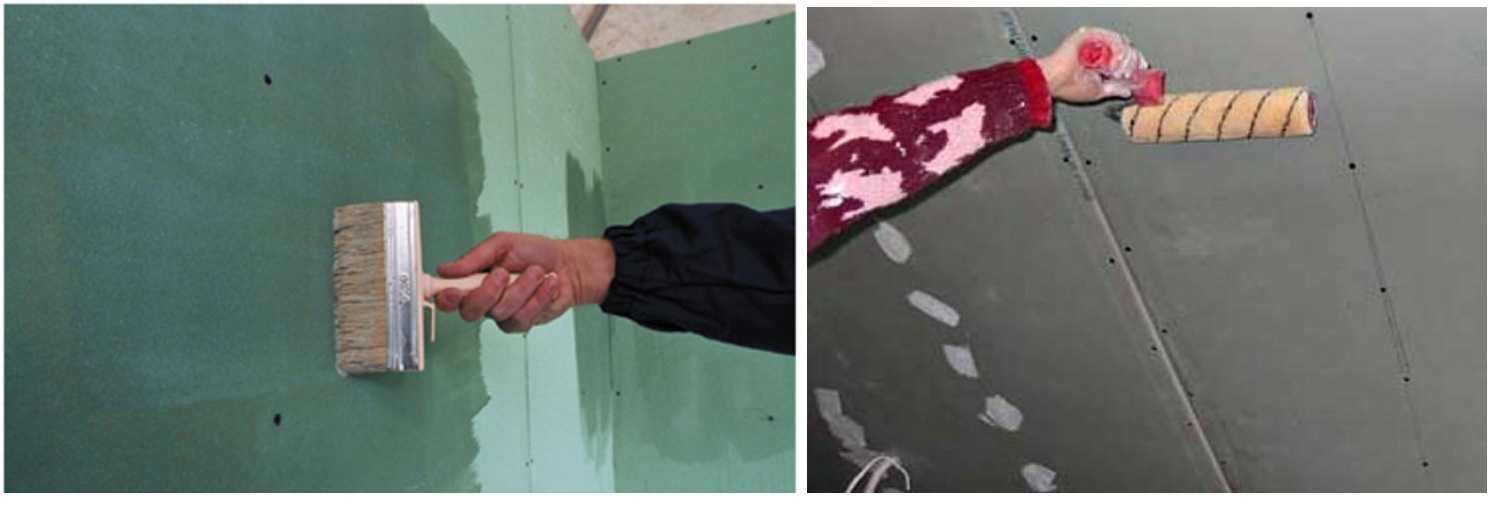
How to putty drywall: align the planes
To putty surfaces, you need a large spatula - with a blade of 40 cm or more and a narrow one - by 10 cm. The first layer is applied with a starting putty. It is laid in a layer of about 5 mm (the maximum should be seen in the instructions for a particular putty) and hides all the irregularities. Dilute it with water to a thick sour cream, stir thoroughly so that there are no lumps.
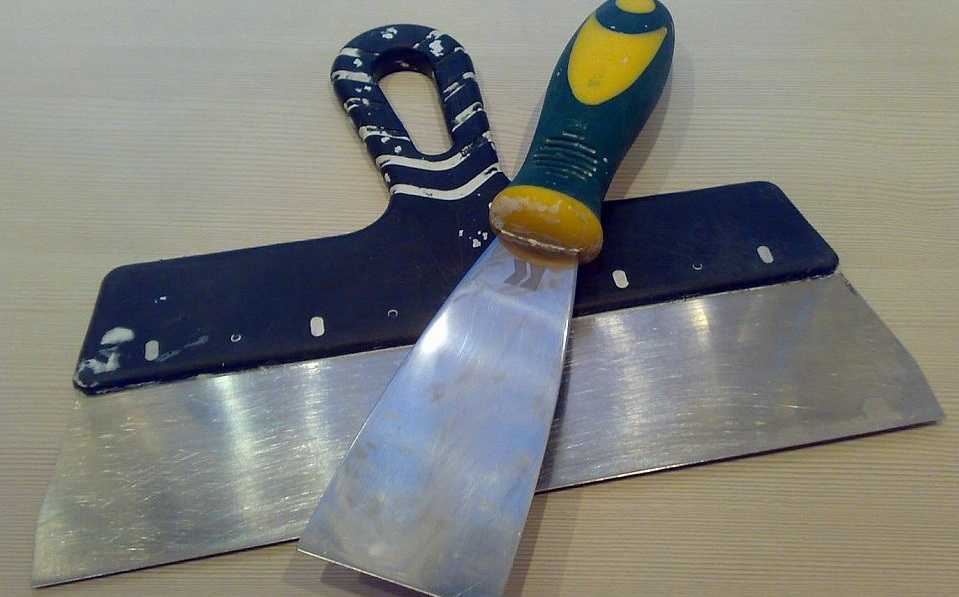
Such spatulas are needed for plastering drywall over the entire surface.
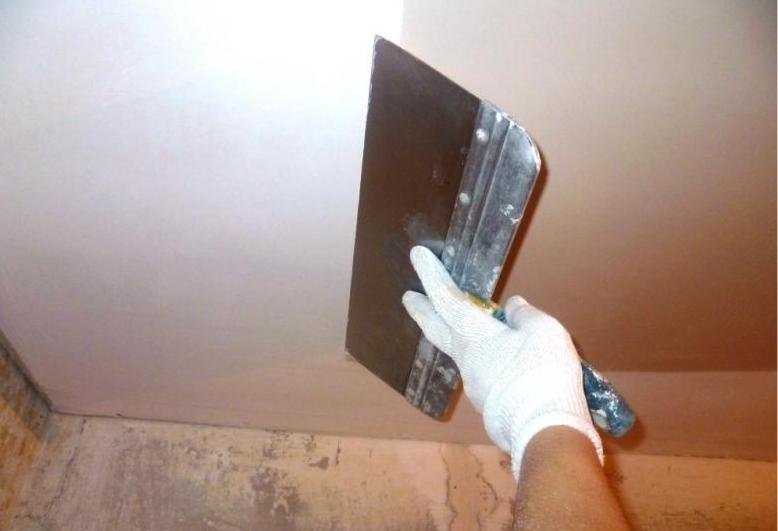
The technique of plastering the surface of drywall is simple: we take a large spatula, at its end with a small spatula, lay out the roller from the putty. We press the blade to the surface and stretch the composition. We repeat several times, filling in some piece of the wall or ceiling. Then we clean the blade and run it over the surface that has just been putty, leveling it. Align as carefully as possible - it will take less time to sand.
When you have finished puttingty drywall, wait until it dries. Then you take the already familiar tool - a bar with a net and level out all the flaws. Sanding is completed, remove dust, pass the surface again with a deep penetration primer. After drying, proceed to applying the second layer.
So hold the spatula
Next, you need to putty drywall with a finishing compound. As they wrote, it can also be based on gypsum, like the starting one, or maybe based on polymers. Both are suitable, but with some it is more difficult to work - they quickly begin to roll down and freeze.
The finishing putty is made more liquid and applied in a thinner layer. The application technique is the same, nothing changes. In addition to the fact that it is more difficult to work, it spreads worse, but you need to stretch it in a thin layer and quickly align. On the primer, everything is much better, and without it, the lower layer quickly draws moisture from the fresh plaster and it begins to roll. After applying the finishing putty, they again wait until everything is dry, then begin to level. But this time, not a mesh is used - noticeable grooves remain from it, but sandpaper with a fine grain. It is not so convenient to work with it - it quickly clogs up, but the surface is smooth. If you prepare the surface for painting, we make the backlight from below or from the side and you can use not an incandescent lamp, but an LED one - all the flaws are visible. Even very small ones.
It is difficult to tell in words how to putty drywall - the movements are difficult to describe. In the video you can see how to hold the spatula, how to move it, how to apply or remove the solution. For details on the technology, see the video.
And further.
-
 Modular houses from block containers: types, manufacturing features and layout options
-
 Houses from shipping containers: construction options, layout
-
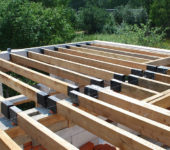 Types of wooden beams for floors, length calculation, installation
-
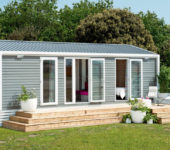 Mobile homes for year-round use
-
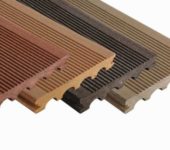 Polymer / composite decking (WPC decking): types, sizes, installation


