Diy metal pipe gazebo
Some people like metal gazebos, some don't. Mostly disliked by those who prefer wood. But those who have come across the care of a tree that is on the street all year round knows how much time, effort and money it takes to maintain its normal appearance. From this point of view, metal is better: carefully processed and painted, it does not rust for years, it does not warp, it does not dry out and does not swell, does not rot, is not affected by fungi and does not become moldy. the worst thing that can happen to him is that he will rust. But there are proven medicines for this "disease": sandpaper, rust converter and paint. Therefore, metal arbors are often assembled with their own hands. They are also good in that they can withstand significant loads and can be combined with any finishing materials for both walls and roofs.
The content of the article
Types and methods of assembly
In addition to different shapes - rectangular, hexagonal, octagonal, round - the metal frame can be installed in two different ways:
- The vertical pipes of the frame are concreted into the ground. The rest of the structure is then attached to these racks. With this method, the presence of a foundation is not provided. In principle, having made the lower strapping at some distance from the ground, you can lay the floor, but most often with this method of making an iron gazebo, the site is concreted or laid out with paving slabs.
Wells are drilled under the metal racks, a pipe is inserted, the empty space is covered with rubble. The pipe is exposed evenly, crushed stone is rammed, then poured with liquid concrete
- First, a shallow columnar or strip foundation is made, sometimes a monolithic slab is poured, the site is laid out with tiles, etc. The frame is constructed separately and fixed after at least the lower harness and racks are ready. If the foundation is columnar or strip, the pipe is placed on it and connected in place: only a crane can lift the finished structure.

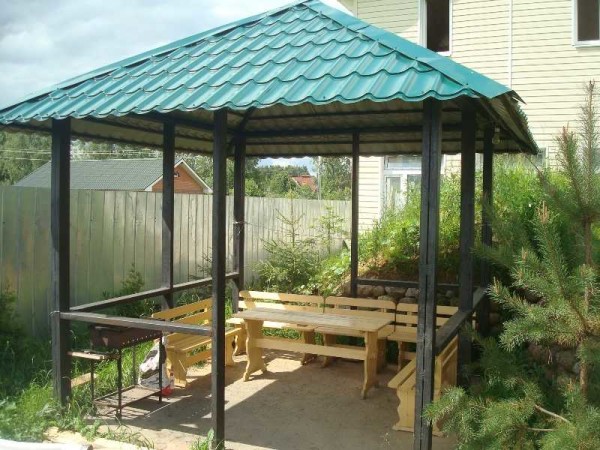
This is a gazebo made of a profile pipe on posts
Which is the best way? It depends on which side you look at. If from the side of fastening reliability, it is better - the first: the racks are walled up. Also, this option is more economical: there is no bottom piping and there are no costs for making a foundation. But such a structure, if it is without a floor, is only a summer gazebo. For winter, closed, you need a floor.
A gazebo on a foundation is better from the point of view that it initially assumes the presence of a floor. In addition, the elevation, even if it is small, protects against splashes and dirt from entering.
Assembly methods
Traditionally, metal is joined by welding. It is fast and reliable. But in the case of a summer cottage, a collapsible design may be needed. After all, leaving a large amount of iron for the winter in an unguarded summer cottage is very unsafe. In the sense that it can easily be stolen. In this case, the modules are welded, which are then bolted together. As a rule, such collapsible metal gazebos are a frame to which an awning is attached, or another similar quickly mounted or dismantled fence and an equally light roof.
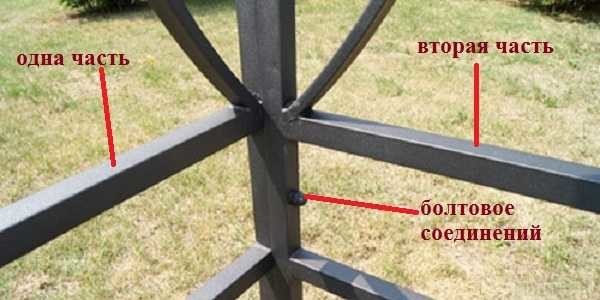
For a prefabricated metal gazebo, frames are separately cooked for each side, then assembled with bolts
The frame in collapsible arbors is broken along the edges. If it is quadrangular, four separate circuits are boiled with all the necessary jumpers. In hexagons there are six of them, etc.
What metals are made of
Most often, do-it-yourself metal gazebos are made from a profile pipe: it is easier to work with it. The wall thickness must be at least 2 mm. Thicker to nothing: they sell it mainly by kilograms, so with the same outer dimensions with a thicker wall, they are decently more expensive.
If you use round pipes, the wall thickness remains the same. It is more difficult to cook them, but if you already have experience, why not: they cost less than specialized ones. You can also use a metal corner. But its thickness should be already 2.5-3 mm: less rigidity. Under the cladding, such a gazebo would also look good.
How to cook with an inverter welding machine read here.
It was about steel above. But profile pipes and corners are also made of aluminum. The design will turn out to be much easier, which in the case of a collapsible gazebo can be very useful. But such a pipe costs several times more.
About, read how to attach a veranda to the house here.
How to make a gazebo from a profile pipe: step-by-step instructions with a photo
Before you weld a gazebo, you need to purchase metal. For racks, the profile pipe is suitable for the following dimensions:
- 50 * 50 mm, if the roofing material is light - profiled sheet, metal tiles, bituminous tiles or slate;
- 75 * 75 mm with slate or tile roof.
For the jumpers, a thinner profile is taken. Maximum 50 * 50 mm, minimum - 20 * 30 mm. Its dimensions strongly depend on how large the structure will be. For powerful construction sites take a larger section, for smaller, of course, smaller. Here it is worth taking into account the weight of the finishing material with which the frame will be sheathed from the sides (if any).
Homemade gazebo from a profile square pipe, size 3 * 3 meters
For the manufacture of a square gazebo 3-3 meters (photo above), with a height of 2.2 m, the following materials were used:
- piping for strapping 50 * 50 * 2 mm - 12 meters;
- profile pipe for lintels:
- 40 * 40 * 2 mm - 14 meters;
- 20 * 20 * 2 mm - 6 meters;
- 40 * 20 * 2 - 30 meters;
- metal strip 20 * 4 mm, 2 m long.
Pole marking and installation
If the site was planted, grass grows on it, the fertile layer must be removed. Otherwise, plant residues under the floor will rot. During the construction, this was not done and the smells for two summers in a row were, to put it mildly, "not very".
The resulting pit, if you have good water from the site, is covered with sand or "native" soil, but without a vegetation layer and infertile. If the soil is clayey, be sure to cover it with the same clay.
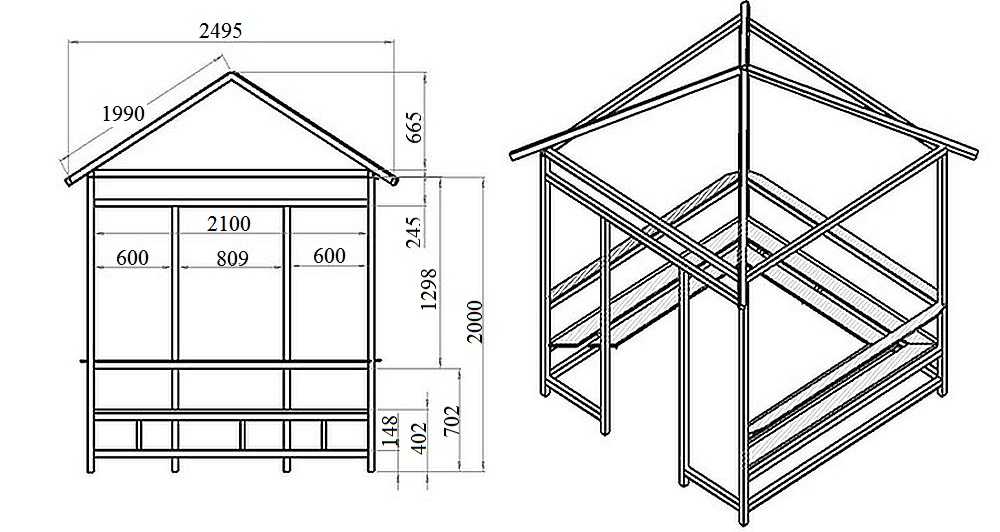
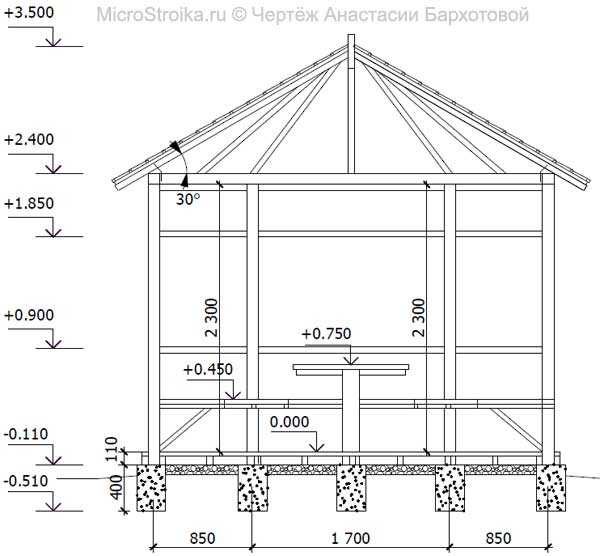
If you really need a drawing, here is a diagram showing a square gazebo with a hipped roof. Dimensions 2.4 * 2.4 m, height to the top harness - 2 m (can be increased if necessary)
If you are going to install pipes directly into the ground, you should carefully prime them. Then drill holes, about 70-90 cm deep. The diameter depends on the hole you have. A pipe is inserted into the finished pit, filled with a large fraction of crushed stone or construction waste, set exactly vertically, crushed stone is rammed. The exposed rack is poured with concrete. If Portland cement M 400 is used, 3-4 parts of sand can be taken, the concrete must be liquid so that it spills well into the depths.
The second option is that someone is holding the stand upright, or you have found a way to secure it. Then it is required to fill the hole with concrete with medium fraction crushed stone aggregate. The proportions can be as follows: 1 part of cement, 2 parts of sand, 1.5 - crushed stone. Read about concrete brands here.
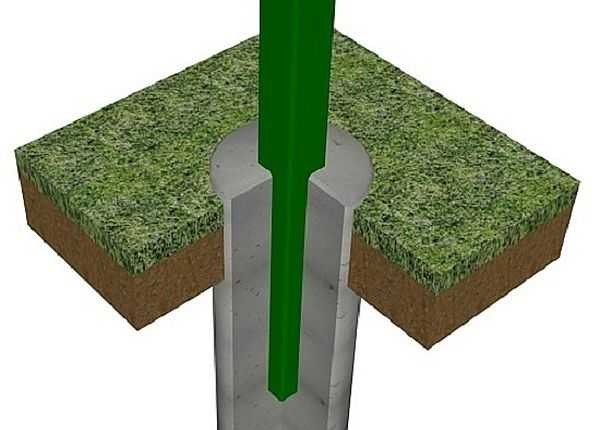
What does such a rack look like in section
One more point: the verticality of the installation of the racks is checked not by the building level, but by a plumb line. The level has too much error. And the plumb line practically does not know how. Magnetic plumb bobs are very convenient for working with metal: they have a magnet in the case. Just place the body in the right place, and the plumb bob will hold itself.
If you prefer to raise the gazebo, you can place it, for example, on foundation blocks.Since a whole block for a gazebo is a luxury, blocks of 200 * 200 * 400 mm can be cut in half (with a grinder with a diamond disc). The resulting cubes are arranged over the area: one in the corners, four more between them, and in the middle in a checkerboard pattern, another 4 pieces. The circuit is the same as in the picture below. The blocks in the middle are needed so that the pipe does not bend: three meters with an edge of 50 mm sag without support.
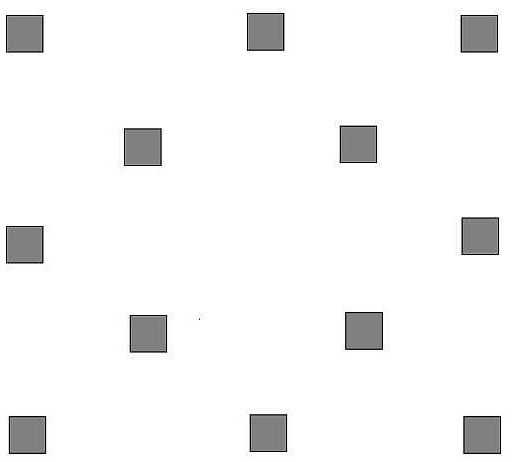
The layout of the posts under the gazebo 3 by 3 meters
To prevent the concrete from pulling moisture, it was smeared with bitumen mastic from all sides, because they are black in the photo. You can tar, whoever has resin, or put roofing material on top in two layers. But the roofing material will crumble in a couple of years, its quality today is nowhere worse.
All blocks are set to one level. To make it easier to set the corners, they drive in the pegs, pull the thread, checking the diagonals, set the blocks according to a given pattern. All their tops must be in the same plane. This can be done in several ways:
- pull the laces, check and expose them, and already align the blocks along them;
- use a long flat rail (board) on which to put the building level (checked and with a small error), and so set all the blocks;
- use a laser level, but in sunny weather it will not work with it - it is almost invisible (or you need a special one with this function).
As you understand, the hassle of placing blocks can be avoided by fixing the pipes in the ground. True, the harness belt will also need to be done exactly.
Bottom rail and racks
After the blocks are exposed, pieces of square pipes are laid on them. In the manufacture of the lower strapping of the metal arbor, a profile pipe 50 * 50 mm was used. If you wish, you can take a more powerful one, but the gazebo has been standing for 5 years, although more than 10 people have not yet gathered.
The pipes are laid, the horizontalness is checked again using a level. Cooked in the corners. Then, from a pipe of a smaller section - 40 * 20 mm, two jumpers are made, on which the floor boards (or plywood, if you want to use it) will rest.
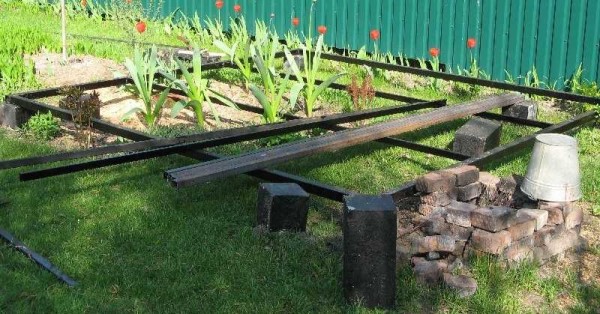
Finished bottom rail
All pipes are painted twice with a primer, special attention was paid to the welding places. The racks are made with a height of 220 cm so that the head does not support the roof. The racks turned out to be heavy (50 * 50 * 2 mm), and in order to secure them more securely, mounting braces from a 20 * 4 mm metal strip were welded (see photo).
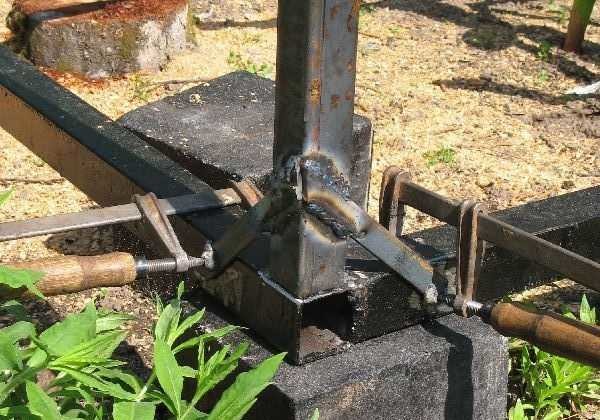
Method of fastening vertical racks with mounting braces
The post is placed evenly, its direction is checked with a plumb line (more conveniently magnetic), after which the jibs are clamped with clamps. It's easier to cook this way: the drain is almost dead and an assistant is needed only for insurance. First, you weld the pipe around the perimeter, and then alternately removing the clamps and also the jibs. They hold well even at a height of 2.2.
The racks at the doors from a profile pipe 50 * 50 mm in this gazebo end at the level of the railing. To increase the stability of the structure, it is better to put them at the same height. But in this case, the owner decided that the structure was stable (due to jibs) and decided to save a little.
About Read the basics of welding with an inverter welding machine here.
Railing and top rail
The height of the railing in the gazebo is 95 cm. But it is possible less and more - it does not matter. It is even possible without a railing. For example, for solid glazing with polycarbonate. Or by covering one or two walls with opaque trim (from neighbors and / or from the street side).
The middle rail - railings - is made of 40-20 mm pipe, the same section and the upper rail. To increase the rigidity between the first and second strapping, two vertical posts are welded (height 95 cm, section 40 * 20 cm). The whole structure is in the next photo.
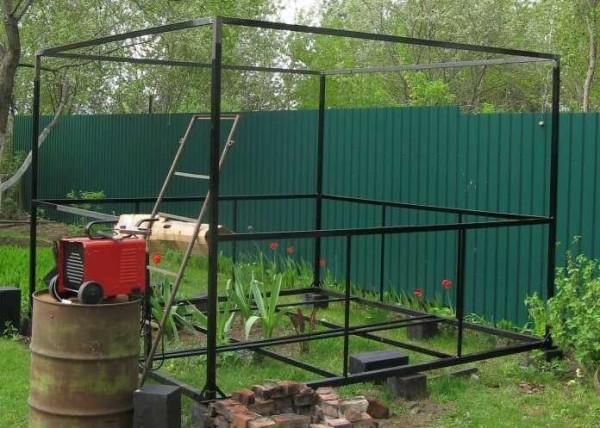
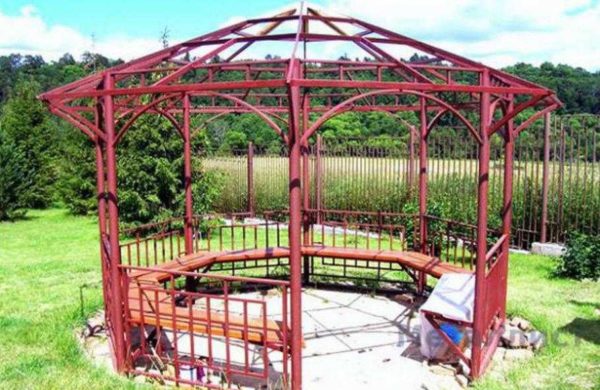
Fully assembled frame made of shaped pipe for the gazebo
Roof
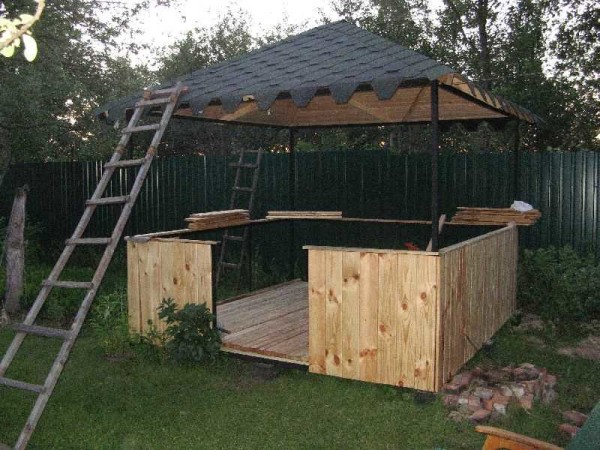
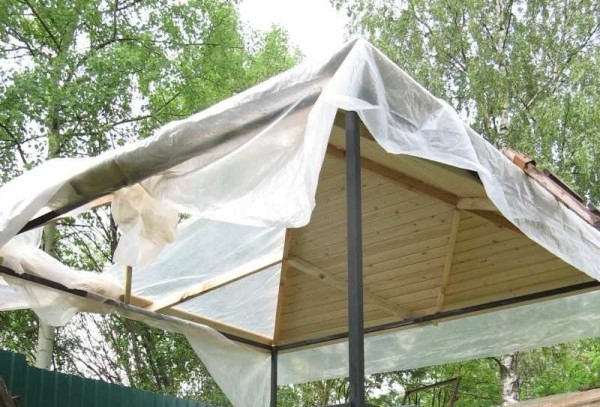
Then the turn of the roofing came. This iron gazebo will be covered with bituminous tiles, because the rafter structure is made of wood.For the frame, a bar of 75 * 40 mm was taken, lining was used on the crate for soft tiles: so that the bottom view was also attractive (you can replace it with moisture-resistant plywood).
Pieces of wood are hammered into the open ends of the racks so that this cork enters the pipe by at least 10 cm. Pieces of 5-7 cm stick out from above. Rafters are attached to these corks. They can be trimmed almost at the root, leaving a little so that you can trim them at an angle if necessary.
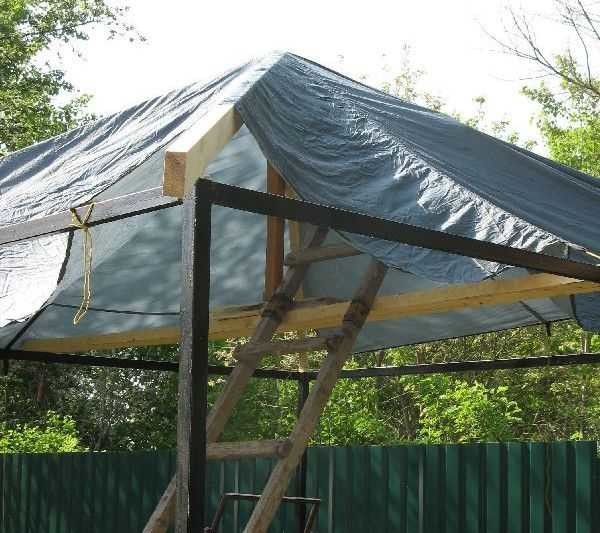
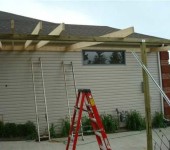
How the rafter system was installed (covered from rain)
Additional jibs were nailed under the crate (from the same bar 75 * 40 mm). How this is done - see the photo below.
So that the board (at the bottom it turns out to be more than 3 meters long) does not bend, jibs are nailed from about the middle (the film is from rain, although the wood is processed)
The lathing for soft tiles was made of lining. It is more expensive than edged board, but its aesthetic appearance is better. After the installation of the battens, bituminous tiles are laid. It is simply spread out and nailed into the mounting holes with studs. Installation starts at the bottom, moving up. Cut on site with scissors, easy to work. On the sides, at the junction, it is nailed in 5-6 cm, special corners are laid on top.
Floor and side trim
An edged board 70 * 40 mm was laid on the floor. A floorboard is not recommended: small gaps are needed, which will allow the wood to swell in high humidity. A floor board with a tenon and a groove is useless here.
The sides are also finished with edged boards, only 70 * 20 mm. The lining was not used for the same reason: it can turn out if it is wet for a long time (fog, rain). A board was nailed on top of the trim, covering the ends of the sheathing, and you can put something on it.
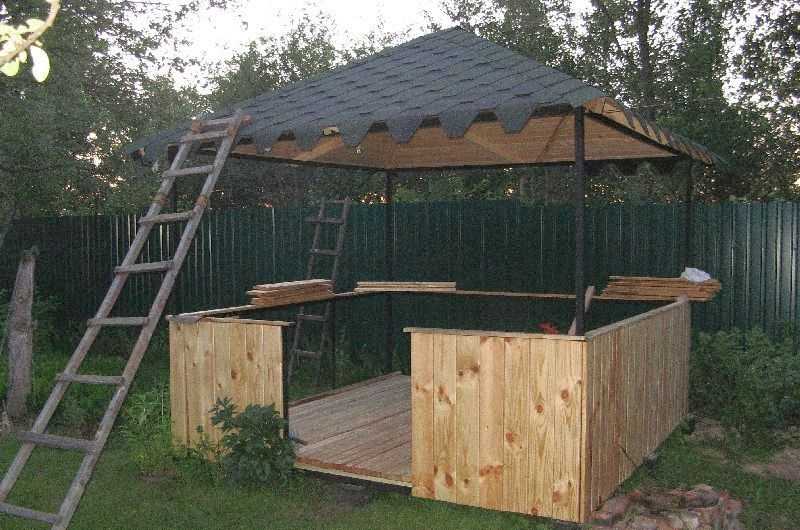
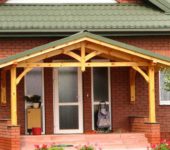
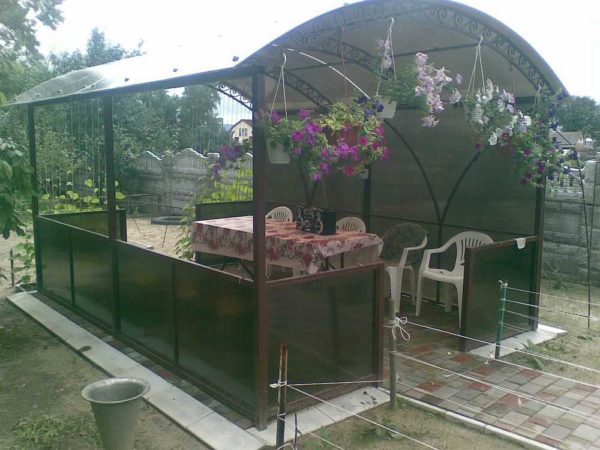
Photo of a gazebo made of metal and wood: almost finished
For this gazebo, a rafter system is made of metal from metal. It turned out rather a gazebo made of metal and wood. You can use exactly the same principle to weld the rafter system from the profile, immediately welding additional jibs. You can make a welded arbor with an arch from the same pipe. How to make a double arch, see the video.
About, read how to make a wooden gazebo here.
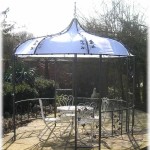
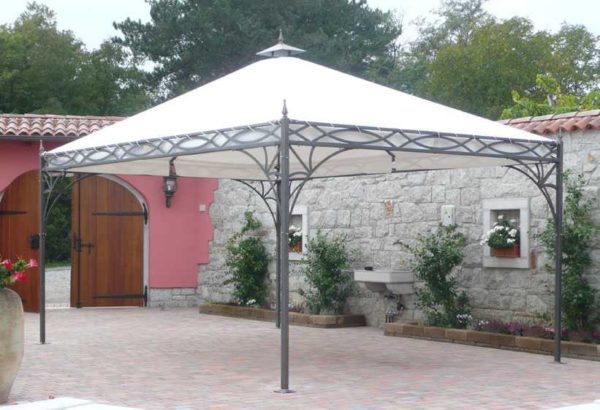
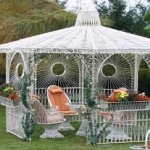
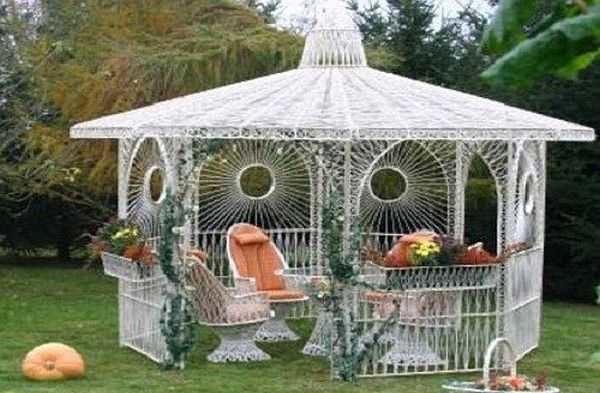
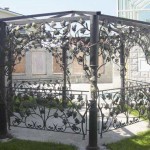
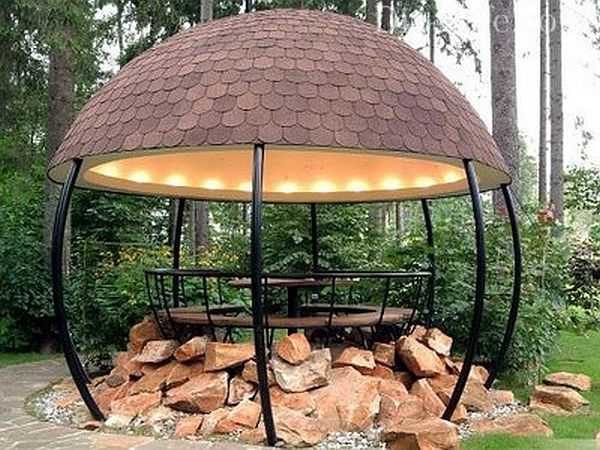
Photo of metal arbors
In general, the options for arbors made of metal structures are very numerous: welding, forging, various materials with which the frames are finished. Profile pipe, round, made of steel and aluminum, there are even options from stainless steel. All this is complemented by any shape: from a square and a rectangle to any complex shape. Metal is so plastic that there are a lot of variations. Some of them are collected in the photo gallery.
-
- Unusually shaped roof and awning, which were visible decorative elements, stretched from the inside
-
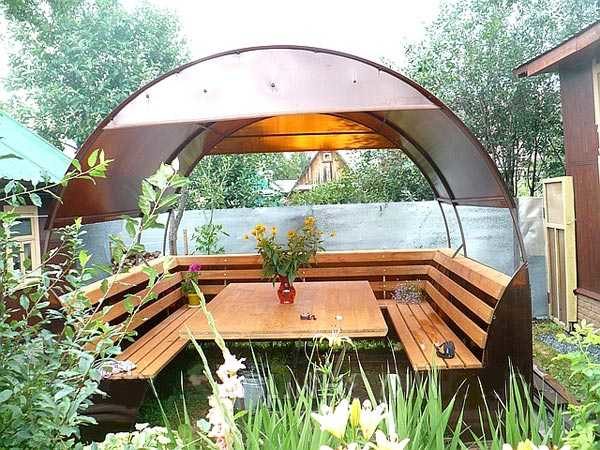
- Metal frame, covered with an awning instead of a roof: there is a shadow, not hot and inexpensive
-
- Unusual openwork made of thin pipes, painted white gives the structure lightness
-
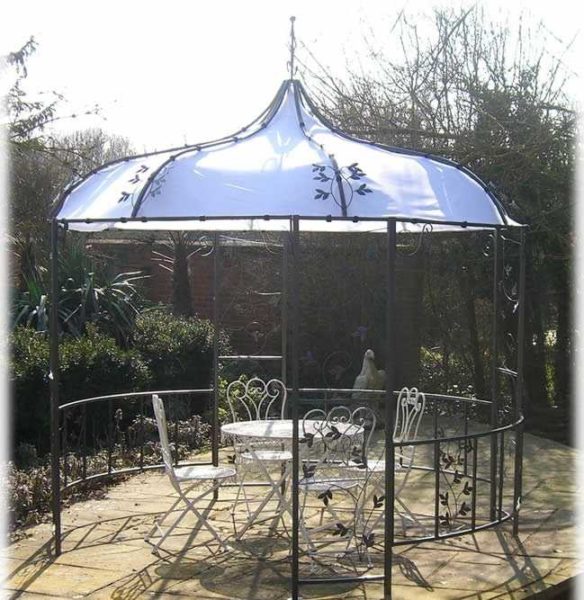
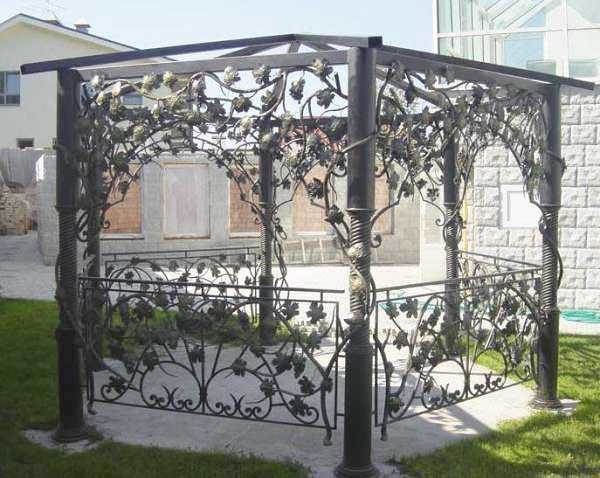
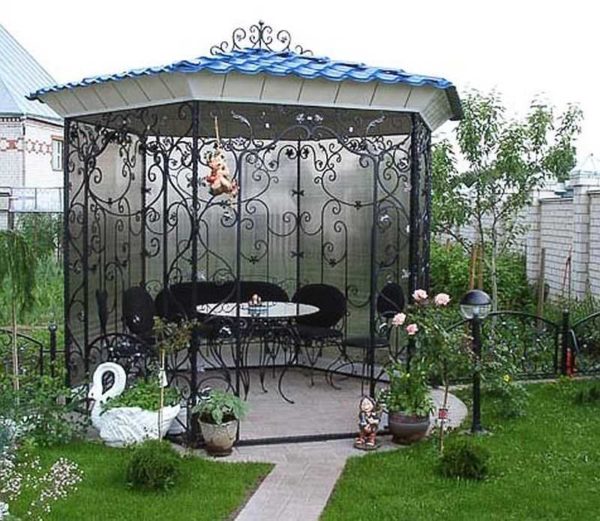
- Very nice decor. This is not a metal gazebo, but a song in metal
-
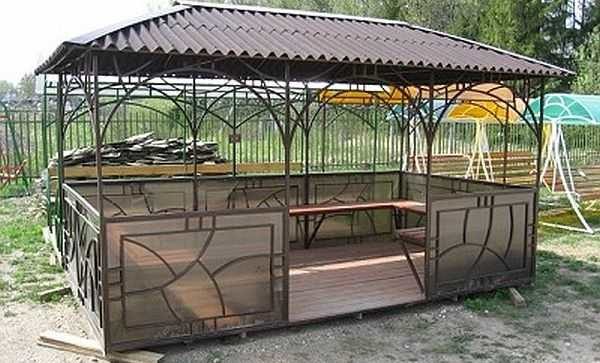
- Another option for a multifaceted gazebo

-
- Artistic forging in the design of the racks - elegant and exclusive

-
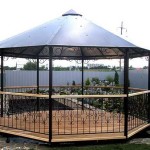
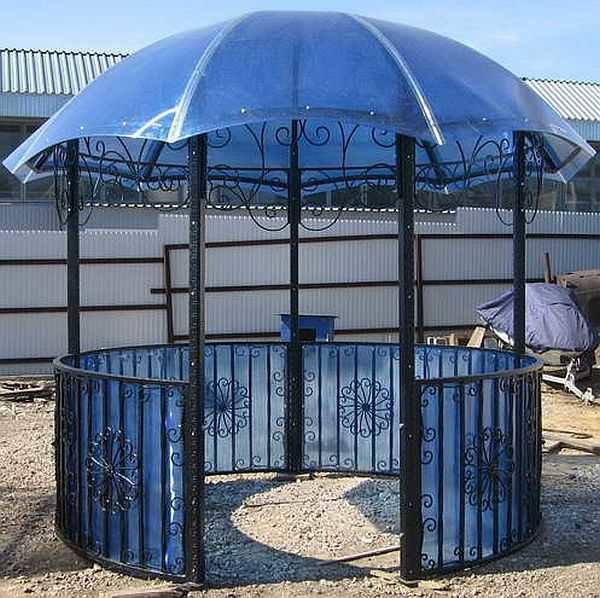
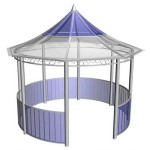
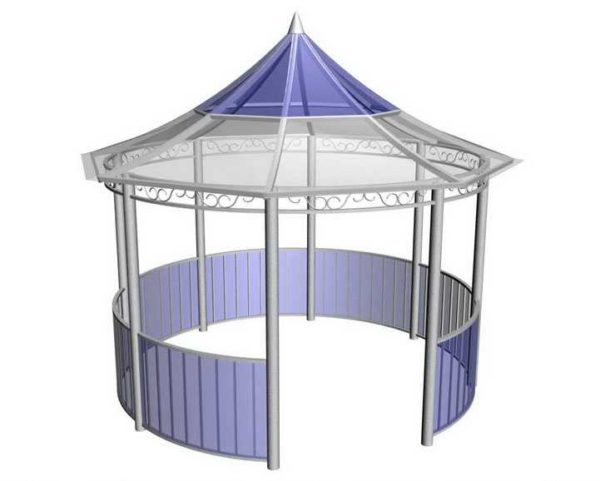
- Round gazebo for summer cottages under blue polycarbonate - romantic
-
- A simple solution for a summer residence: a square gazebo covered with beige polycarbonate
-
- The rafter system can be beautiful

-
- Unusual structure is a very interesting solution
-
- You rarely see a metal gazebo made of round pipes. The welder is a master of his craft
-
- An openwork gazebo made of metal - a summer option for a summer residence or in the yard near the house
-
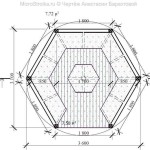
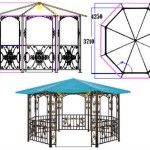
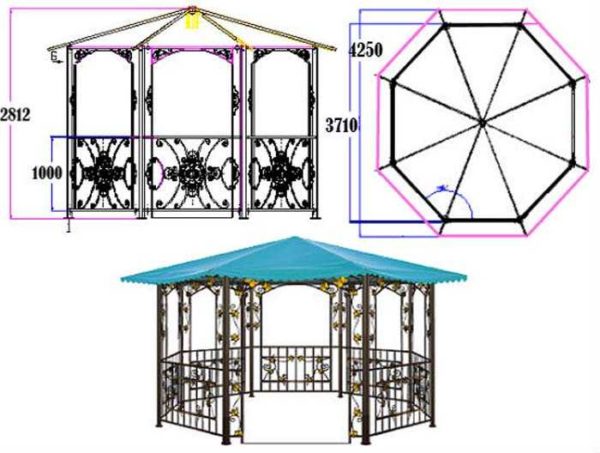
- Drawing of a hexagonal arbor - top view

-

- Drawing of a hexagonal arbor - frontal part
-
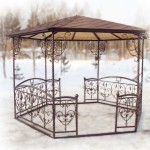
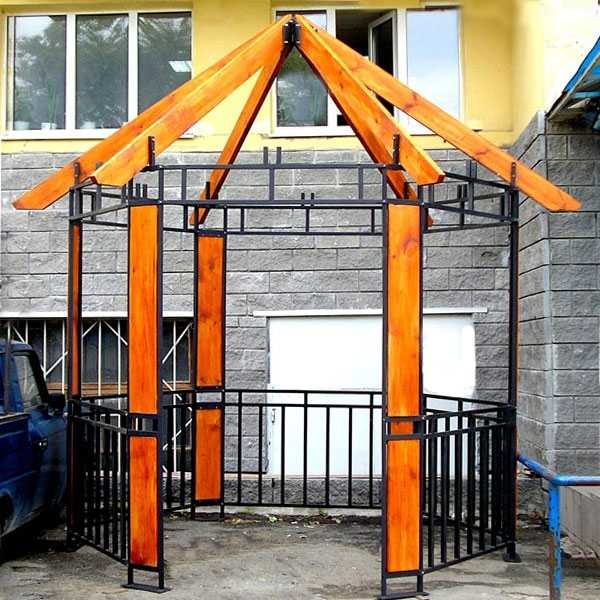
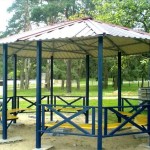
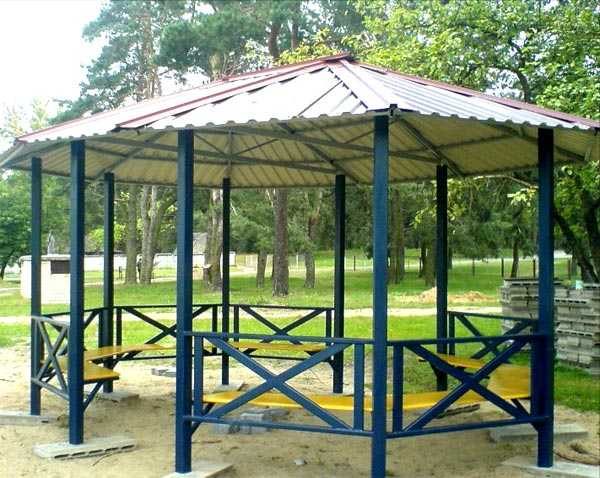
- Iron hexagon open gazebo
-
- A sketch of a metal gazebo with polycarbonate finish.In the lower part, a figured finish of pipes, which are closed with dark translucent polycarbonate
-

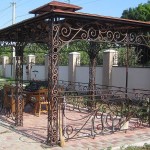
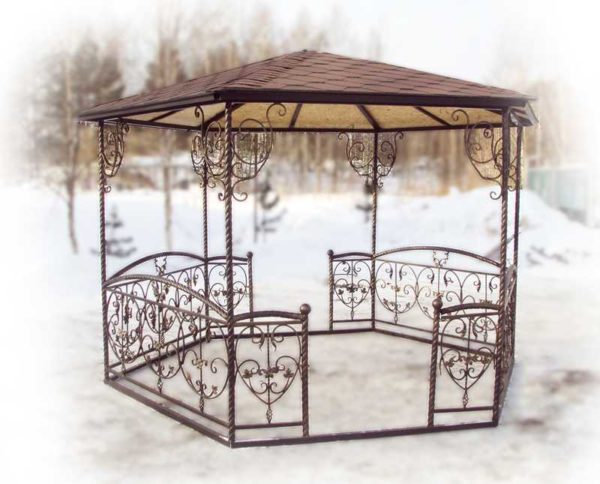
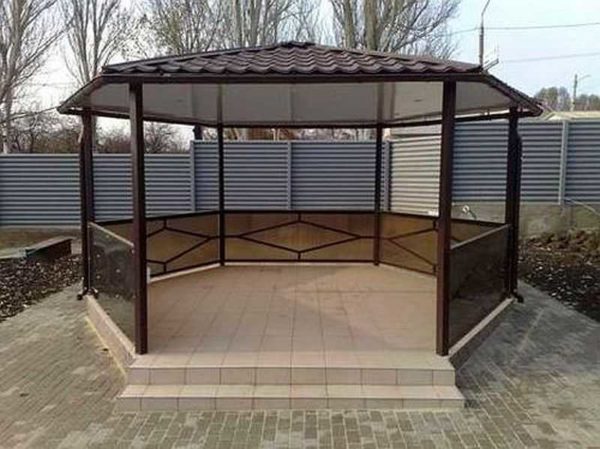
- Photo of a hexagonal gazebo made of metal profile with partial wood trim
-
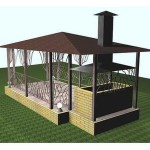
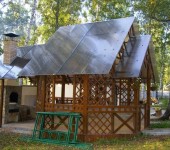
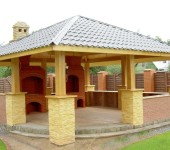
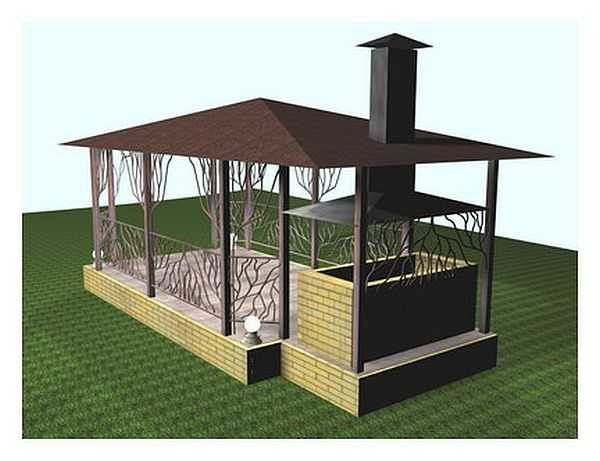
- Broom gazebo with BBQ
-
- Drawing of an octagonal metal gazebo with dimensions
-
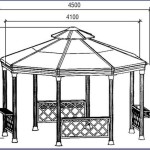
- Sketch of an octagonal metal gazebo with dimensions
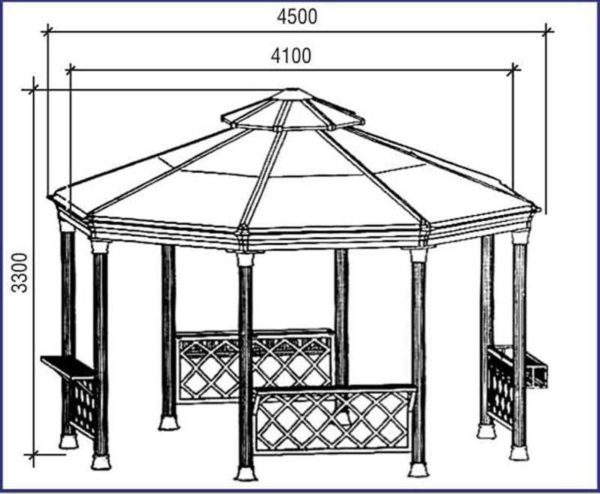
-
- Metal octagonal gazebo
-
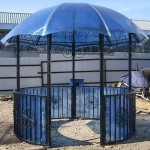
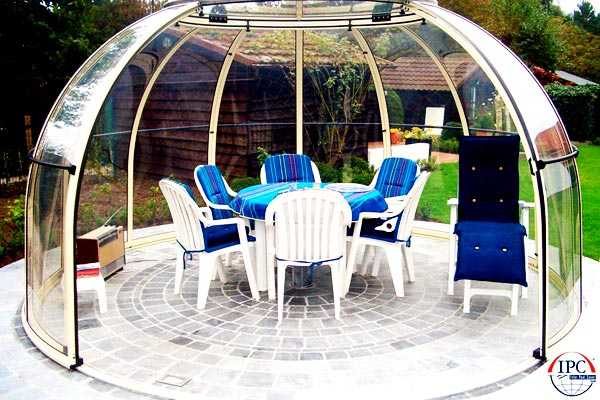
- Round gazebo with metal frame and polycarbonate sheathing
-

- Metal frame combined with tinted polycarbonate sheathing
-
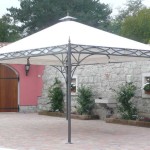
- This is probably the simplest gazebo: two bent pipes that are fixed on the backs of garden benches. Polycarbonate is attached to the pipes. Summer garden gazebo is ready
How to cook a gazebo for a summer residence, see the video.