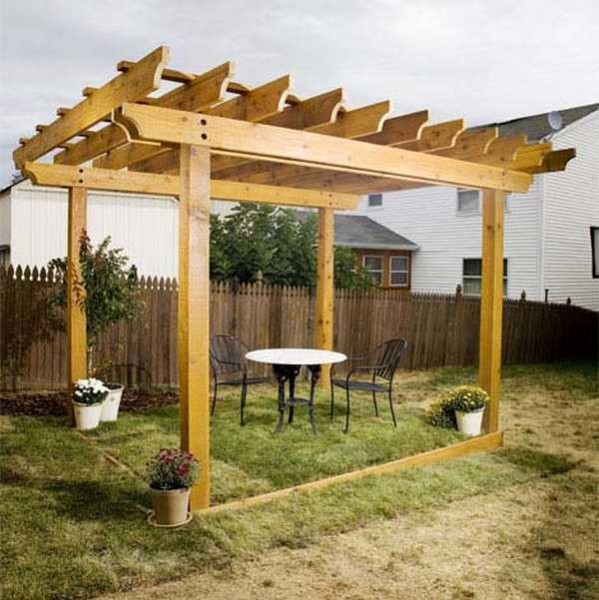
How to make a pergola with your own hands
Under the strange for our ear the word "pergola" hides a variety of arches for a variety of climbing plants. They were originally built in southern countries as a support for grapes. And the word itself has Italian roots (pergola - canopy, annex), where the vines supported the hammered bars. The simplicity of the design contributes to their independent manufacture, and in this article we will talk about what it is and how a self-made pergola will decorate your yard, cottage or garden.
The content of the article
What are
In ancient times, pergolas were not only in the vineyards. Similar structures, only on a large scale, were made in courtyards to protect them from the scorching sun. The hottest midday hours were spent under them. These were rather awnings, one part of which rested on the wall. Their design has remained the same, the materials have changed: now the pergola can be not only wooden, but also metal, concrete and even plastic.
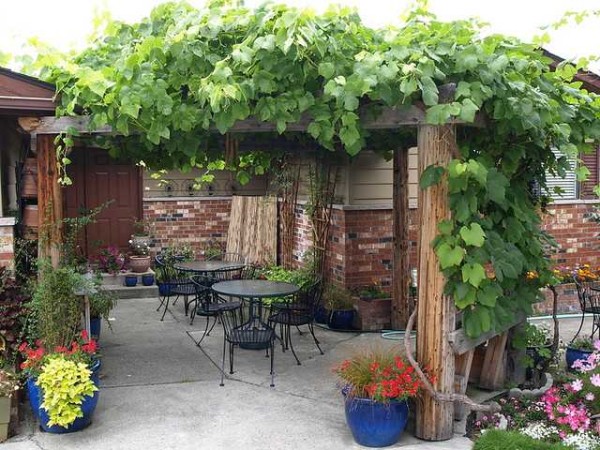
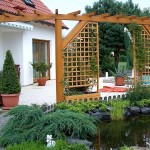
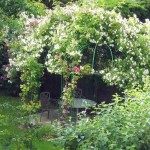
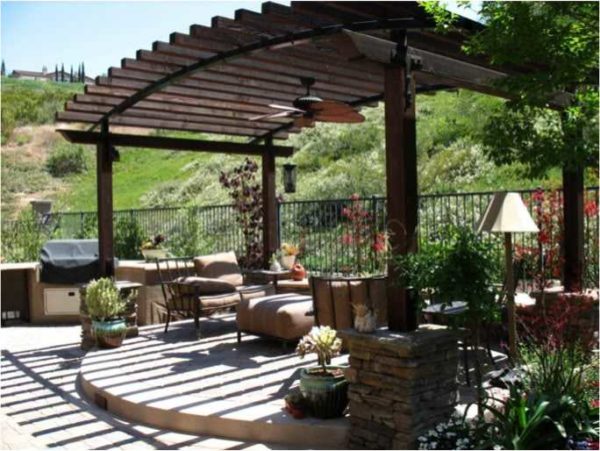
Pergola canopy near the vine house - dense shade even at noon
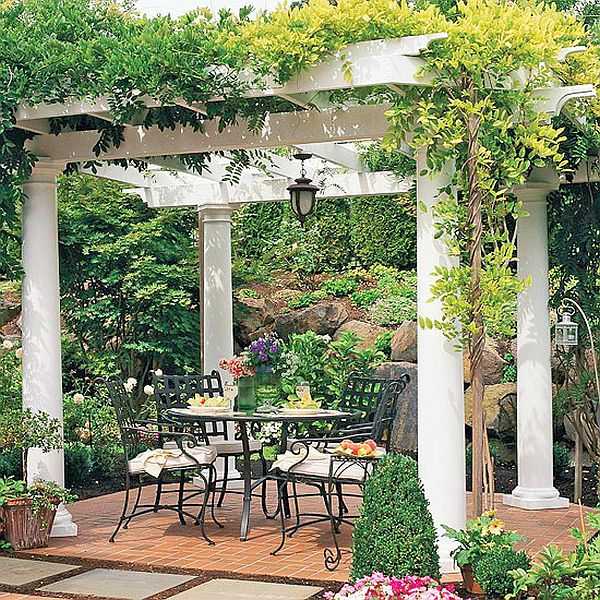
Besides being a useful structure - supporting vines and shading - it's beautiful too. This was appreciated by the architects. Gradually, pergolas migrated to the gardens of the nobility. Only there they had a more refined shape, expensive materials were used up to marble columns, beams were made of pretentious shapes. It twisted along them not only and not so much grapes as ornamental plants, roses, bindweed and lianas.
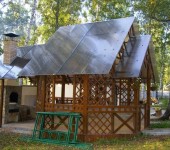
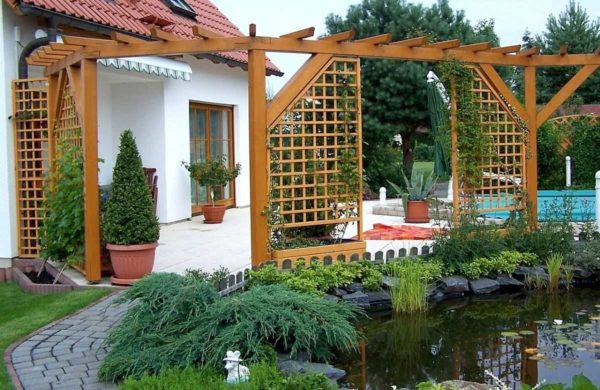
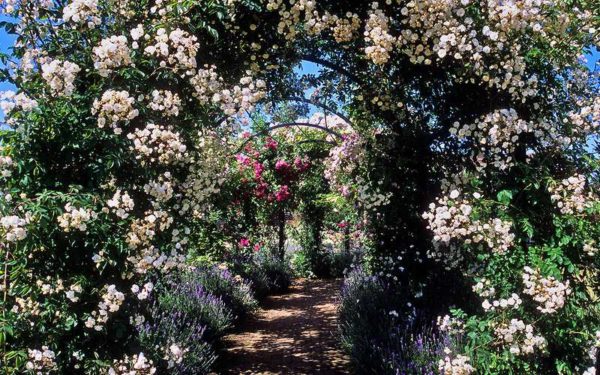
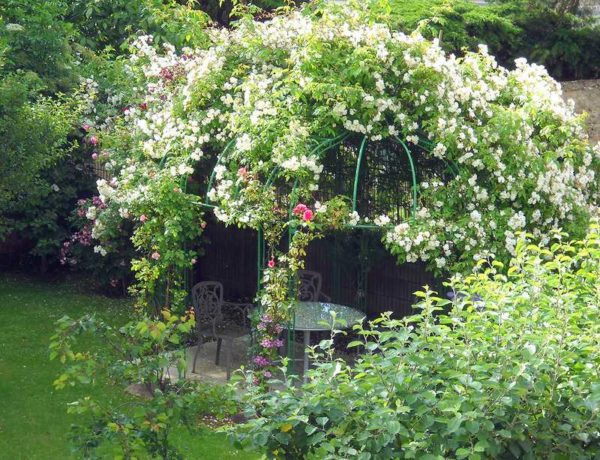
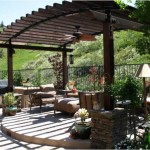
This is also a pergola, but the look and design is completely different, although the principle of construction is the same
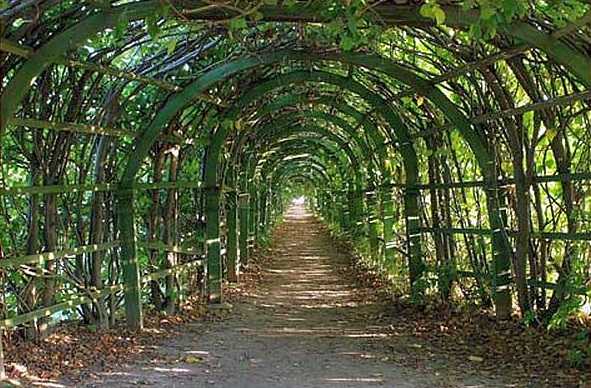
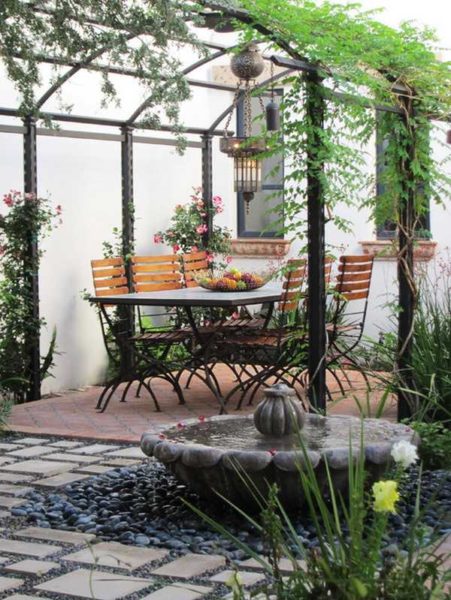
They also make it in the form of a gallery, covering from the sun all the way from one building to another. These arcades serve as a support for perennial vines, climbing species of roses. Where they do not survive due to the harsh climate, annual bindweed can be used, they are no less decorative, the flowering period can be chosen so that the flowering continues throughout the warm season.
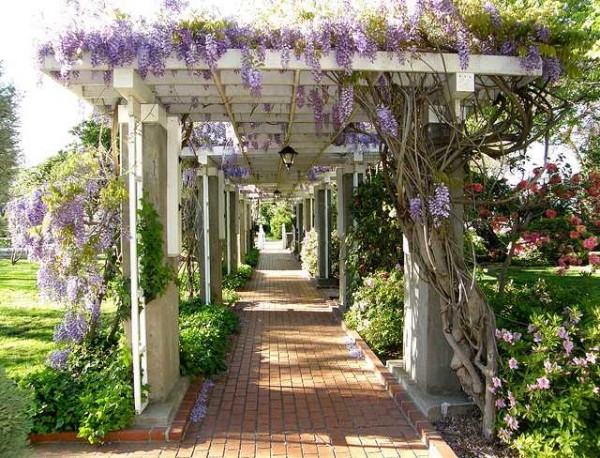
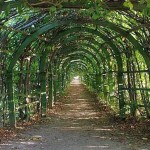
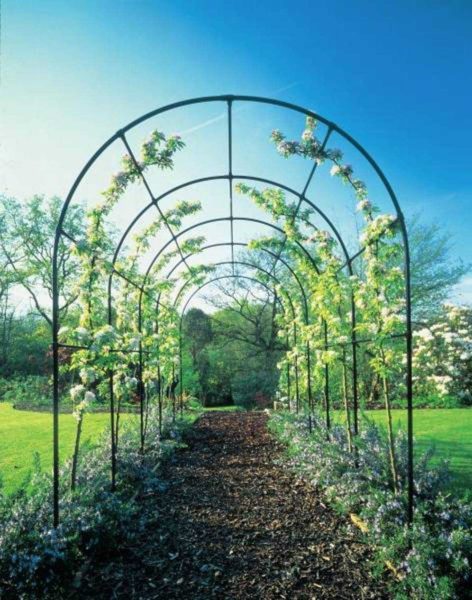
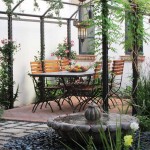
A whole gallery of arches can close the path from one building to another or to a resting place
In the modern sense, it is rather a canopy or an open summer gazebo, which instead of a roof has a network of beams along which plants climb.
-
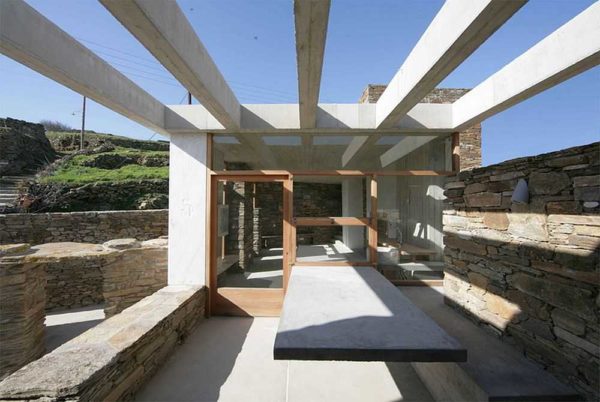
- Concrete pergolas require careful design
-
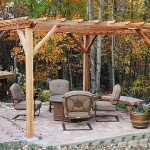
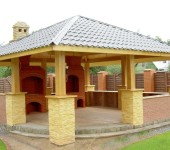
- And this too. This is more like a summer gazebo for a pleasant pastime

-

- Custom design. However, this is also a kind of pergola.

-
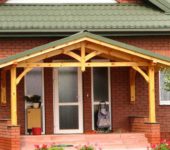
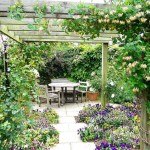
- So, with the help of a pergola, you can arrange the entrance to the house - this is a canopy that looks good even without plants, and when they grow it will be even more comfortable
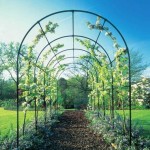
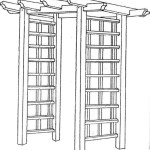
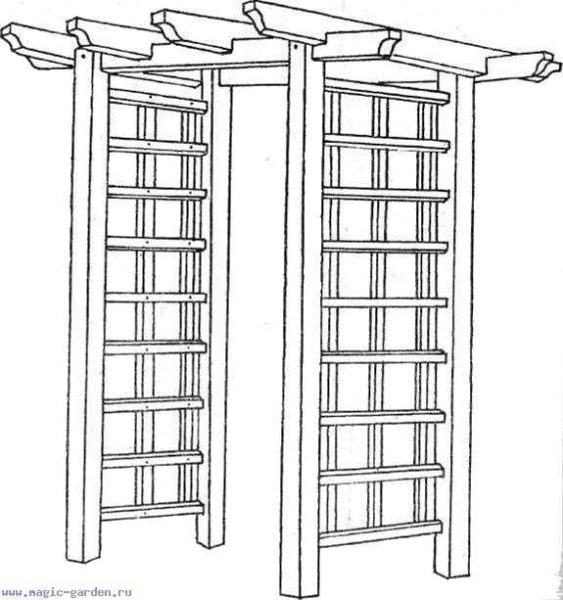
The altered pergola is the arch on which the flowers or grapes rest. If we say "arch", then most often we mean a metal product with a rounded top.
-
- The arch for grapes is also a pergola, only with a modified shape of the upper part
-

- The arch under the climbing rose is the same pergola. But the mass of a rose is less than that of a vine, and wooden structures are still made for it.
-

- Hang flowerpots with ampelous plants on top - and the arch becomes even more elegant
-
- Powerful columns wrapped around lianas - protected garden

-
- Blooming honeysuckle on a pergola arch

About the basics and rules of landscape design read here.
Main nodes
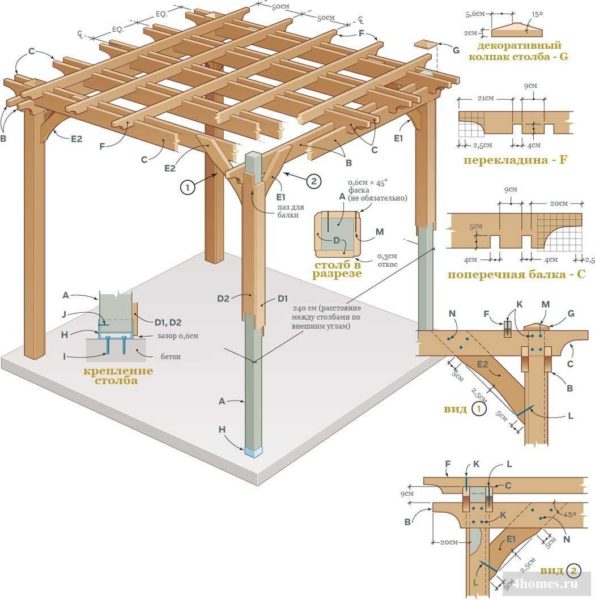
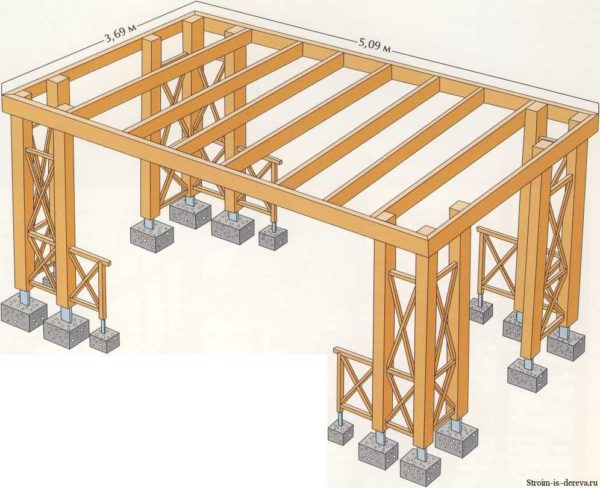
Despite the fact that the design is simple, it is necessary to correctly assess the load that plants can create. For our country it is not worth dumping the scales and snow pressure. Especially after the plants have braided the structure.Therefore, all connections, fastenings, are made reliable, it is better to play it safe and put corners than to disassemble a blockage of plants and a collapsed arch. In this regard, the supporting columns and beams of the arch must be strong and reliable.
If you plan to build from wood, support posts for a medium-sized pergola use at least 200 * 200 mm. Beams - from a board of at least 40 mm thickness. Be sure to make stops and jibs: they will add rigidity. If the support pillars will be built of brick or stone, they are placed around a pipe - round or square - your choice, but it should be.
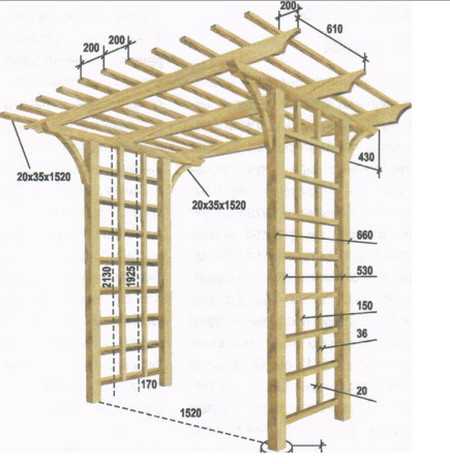
Dimensions
A little about the size of the pergolas. They should be in proportion to the area. If it is small, then the distance between the posts can be one and a half meters. You should not do less: taking into account the foliage, only one person will pass through such a passage. For larger areas, a wider width is required - too narrow will seem scanty.
The standard height of a garden pergola is 2.2-2.4 meters. Then the whole structure is harmonious, and foliage and flowers will not crush.
How to connect parts at the top
When building an arch, special attention should be paid to the joints. How to make them look at the photo.
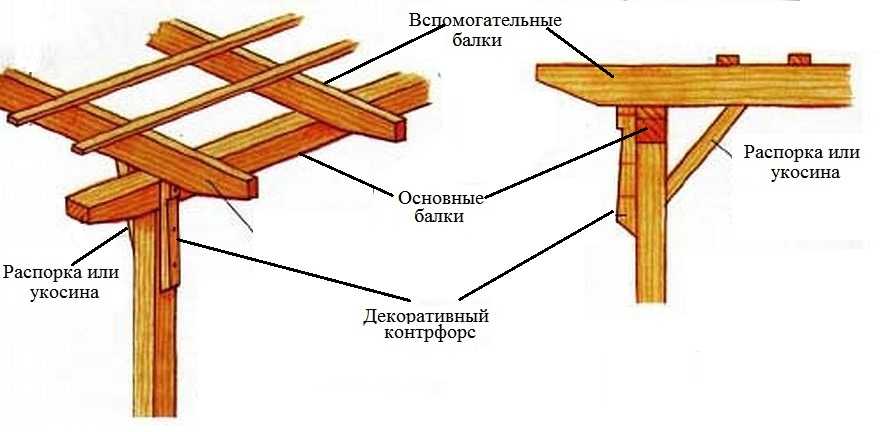
The easy way to connect the uprights to the main beams
For those who are not very good at carpentry, it can be difficult to cut the recesses for the installation of beams. There is a simple and reliable way to do without this work: connect the uprights and main beams with a decorative buttress. This is not only decoration, but also a way to make the connection more reliable.
A beam is laid on top of the support pillar (rack) and nailed through with nails or long screws. However, with lateral forces, they can turn out. To eliminate this, after the auxiliary beams are laid and secured, a decorative buttress is nailed. It holds the three elements together into a single whole. Even greater rigidity of the structure is given by a spacer set obliquely, which is often called a jib.
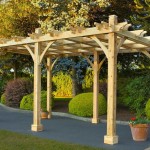
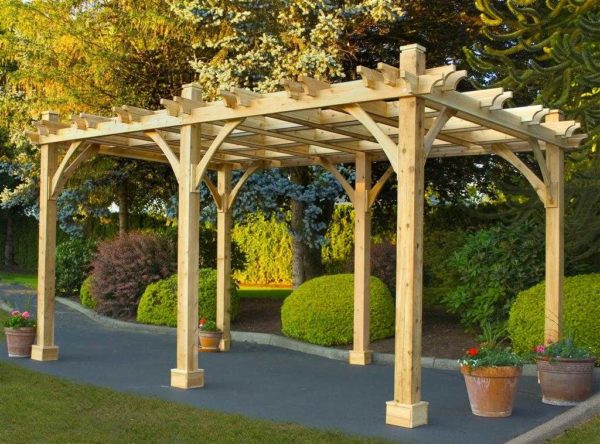
In the simplest case, the pergola consists of four posts connected by main and auxiliary beams.
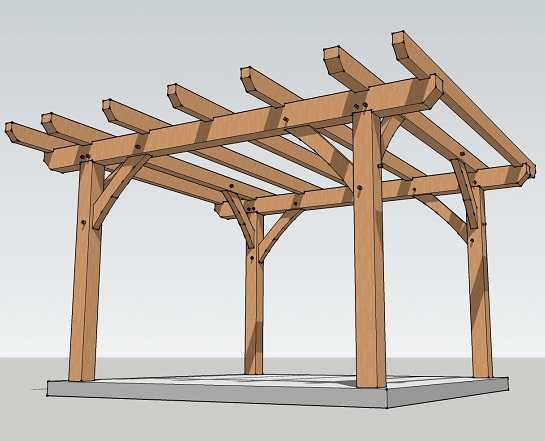
The simplest pergola design
Beam edge decoration
You can slightly diversify the appearance due to the different design of the ends of the auxiliary and main beams. Several ways to wash down are shown in the photo below. To make them all the same, make a template from a small piece. Then you apply it to the workpiece, trace with a finely honed pencil as close as possible to the template. Cut along this contour.
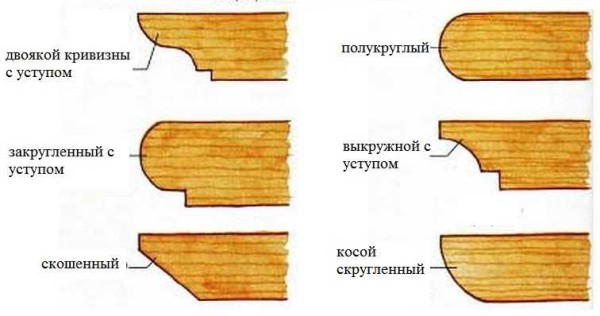
How can the edges of the beams be made
Reducing the cost of construction
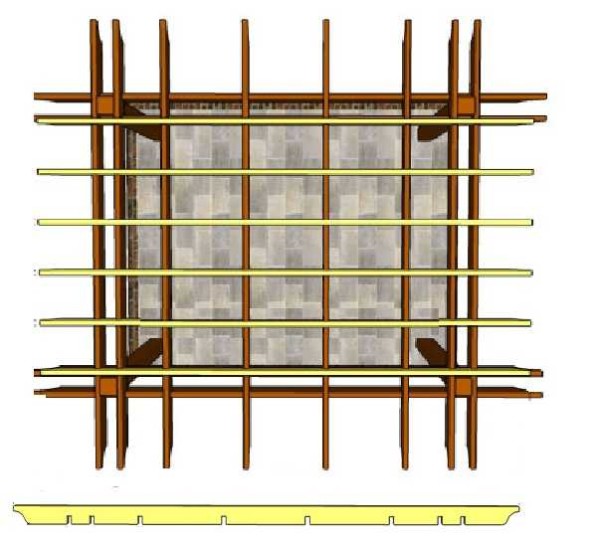
The beam for the columns must be of a large section, and this is not cheap. The main beams should also be of the same size, which further increases the cost of the structure. But you can save money if you nail two thick boards from both sides to the racks at the top. How it looks from above, see the following figure.
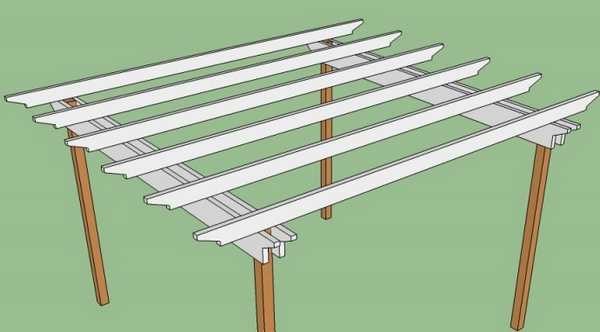
To reduce the cost of the quality of the main beams, you can use two boards
You can connect them with nails-screws, or you can use bolts. This is even safer: the bolted connections can be tightened if necessary. Look at the photo to see how such a structure looks "live".
Pergola with double planks instead of main beams
How to build read the wooden gazebo here.
Step by step assembly instructions
First of all, you need to decide how you will fix the support pillars. If your pillars are made of larch, there are no questions, you can just bury them in the ground. With other wood, everything is more complicated: direct contact with the ground is extremely undesirable. You can, of course, treat the ends of the pillars buried in the ground with an antibacterial impregnation such as SENEZH or Senezh Ultra, put them on for a couple of hours.
The second option is to make a concrete pile with an embedded stud (or several studs, depending on the size and weight of the structure). Attach the rack to the stud with a gap of 5-8 mm.
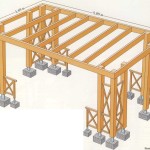
Another way is if the site is concreted or covered with a covering.Then they take metal thrust bearings. Most often they are in the form of an inverted letter "P", fasten it to the surface of the site. Bolt the pillar through these plates. This type of fastener is suitable for a garden, where the error will be covered by plants. If construction is going on in an open area, other thrust bearings are used.

Ways of fastening poles (racks)
After the method of installing the pillars has been chosen, all the wood that will be used in construction is covered with a protective compound - antibacterial and against insects. The formulations must be intended for outdoor use (not for indoor use, but only for outdoor use). After processing, you can start building:
- Site marking. Using pegs, laces, a tape measure and a building level, a site of the required size is marked. In its corners, a place is marked for the pillars, they are installed in the chosen way.
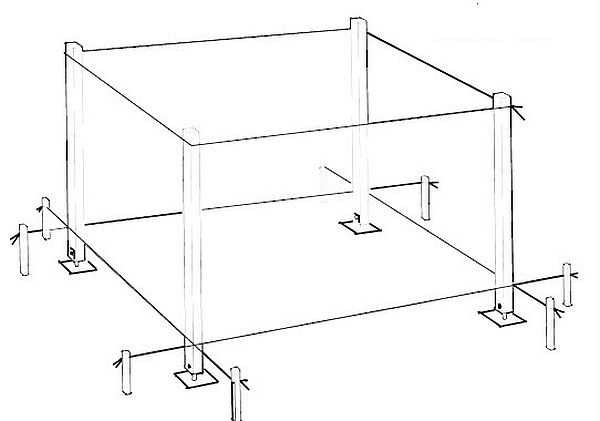
Site marking and installation of pillars
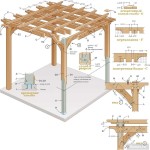
- Two main beams are nailed to the exactly exposed posts. To reduce the cost of construction, we use two boards instead, which are attached just below the top - 5-6 cm below. The beams must be fixed strictly horizontally. As already mentioned, you can use nails, screws or bolts. If you connect with self-tapping screws, take white, not black: they are much stronger and can withstand heavy loads.
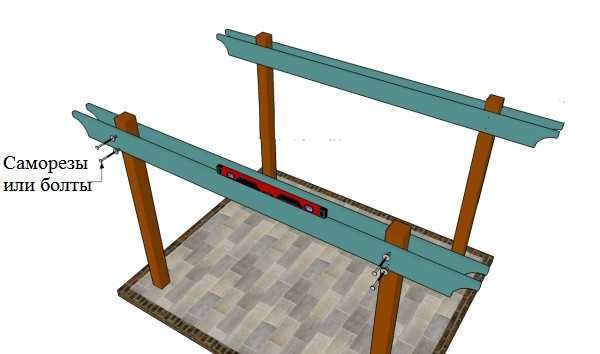
We fix the main beams. We make them composite - from two boards 50 mm thick
- The auxiliary beams are now mounted. If possible, make cuts for the main ones: this will make it easier to fix them. Otherwise, you will have to use corners, which in one part will be attached to the lower beam, and the second will hold the transverse one.
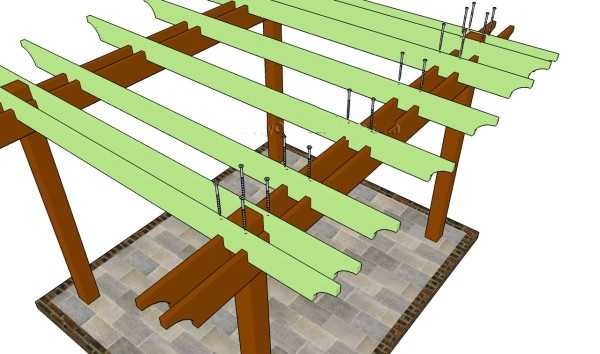
Installation of auxiliary beams
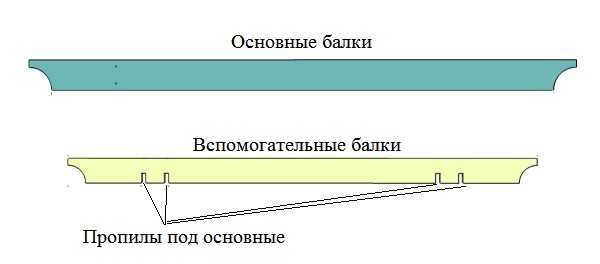
Beam shape
- Actually, the installation of jibs remained. They will give the structure more stability.
- To make the shadow thicker at first, even thinner strips can be stuffed on top - 5-7 cm thick.To keep them well, cuts are made 2-3 cm deep under each auxiliary beam.
Installation of crossbars
Everything, the wooden pergola is assembled by hand. You can watch the assembly sequence in the next video.
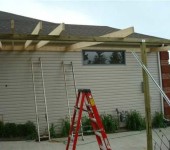
Features of the pergolas attached to the house
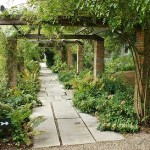
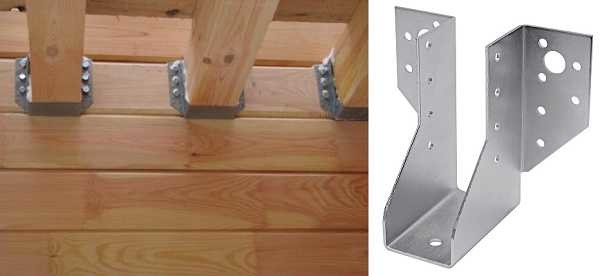
The pergolas adjacent to the house are open summer terraces. One part of the beams rests on holders mounted on the wall of the house, the other on beams lying on the support pillars. There are several ways to attach them to the wall. You see the first one in the photo below: a support bar is nailed to the wall, the landing nests are cut in nm. Additionally, the strength of the connection is provided by corners, which are fixed on both sides.
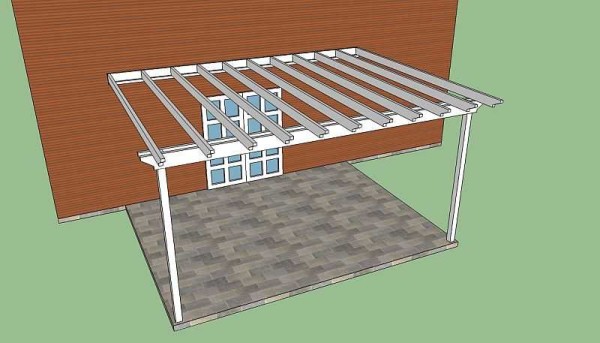
Beams with one side rest on the pillars, the other on the wall of the building
The second way - special stops are mounted on the wall: steel plates of the corresponding shape.
Fastening beams to the wall
The main construction steps are similar, but have some nuances:
- Mark the locations of the posts and install them. The pillars are installed at a certain distance from the house, equal to the width (depth) of the terrace-pergola. The second part of the marking is made on the wall of the house - the second ends of the auxiliary beams are installed there. Either a support bar or plates are fixed there.
- Attach two boards or a support bar from above to the exposed posts.
- Lay auxiliary beams on them, which are attached to the support on the wall with one side.
All. What you should get as a result is shown in the picture below.

Schematic representation of an attached pergola from above
You can watch the sequence of actions during the construction of a pergola adjacent to the wall in the following video
On the same type, but with a roof they build verandas. How - read here.
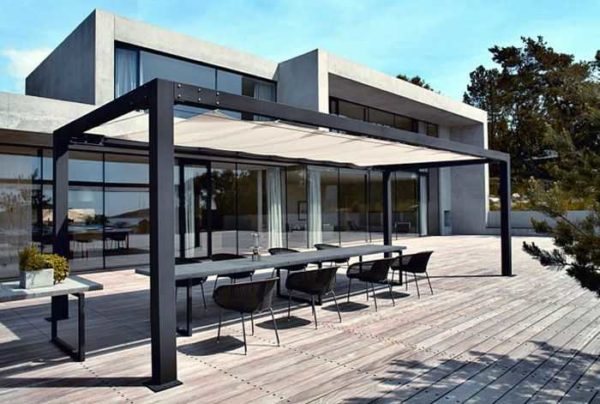
Building a metal pergola
The peculiarity of using metal as a building material is that it is more reliable and requires less maintenance. The metal is immediately primed, then painted.With a high-quality coating with good paint, this will last for several years.
With a tree more hassle. In our climate, we have to renew our coverage every year. Therefore, it is better not to use varnishes: they crack, turn white, come off in parts. To renew the coating, you need to clean everything, then re-cover. Therefore, it is better not to use even the best varnishes for open garden or outbuildings. For processing wood that is outside all year round, there are oils to which color is added. They do not give shine, but they perfectly protect the surface from climatic influences. The worst thing that can happen is a little fading. For re-treatment, the surface must be cleaned of dirt and dried. You can paint. Drying "to touch" is usually a couple of hours. Convenient, beautiful, reliable.
The difference between the metal is also in the assembly method. This is either welding or bolting. Everyone chooses the method himself. Due to the high corrosion resistance of the painted metal, it can be simply concreted. Therefore, there are fewer difficulties with installing pillars. It's only more difficult to work with him because of the mass. But there are disadvantages everywhere.
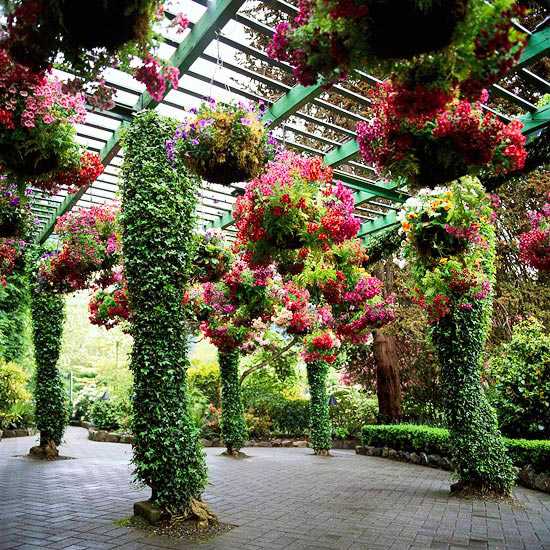
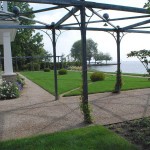
And the variety of metal pergolas is, perhaps, even more than wooden: you can forge it, make bent forms. Metal is combined with stone, brick, wood. An awning is pulled over a metal frame, wicker mats are laid, roller blinds are fixed. See examples in the photo gallery (it expands to full \ tap, if you need it).
-
- The pergola itself is not visible under this carpet. It is built like a gazebo: a frame made of pipes is welded, everything else is plants. By the same principle, you can make a gazebo for grapes
-
- How to connect metal and wood
-
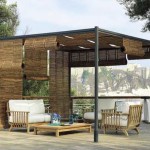
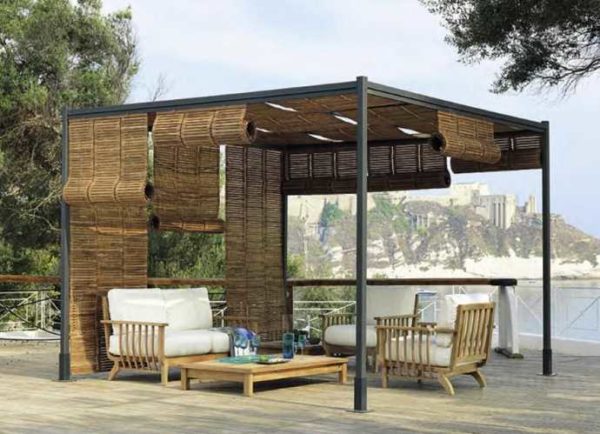
- Rolls of mats were fixed on a metal pergola. Adjust the degree of openness at your discretion
-
- Another rose arch is the garden pergola we see most often.
-
- This is the pergola, which we call the "arch for flowers or grapes
-

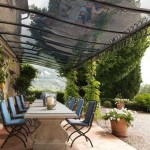
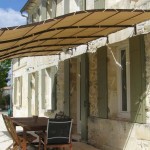
- Another example of using an awning. The main highlight is in contrast
-
- Another combination of wood and metal, but the design is different, a different feeling. Such a pergola can be arranged on an open balcony
-
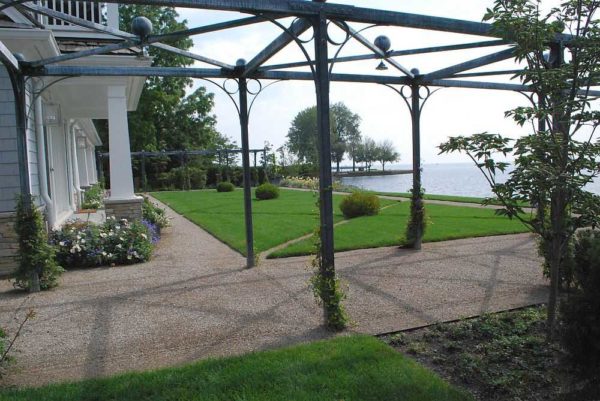
- Forging elements are always relevant. Plants overgrown over time will turn this pergola into the most comfortable place
-
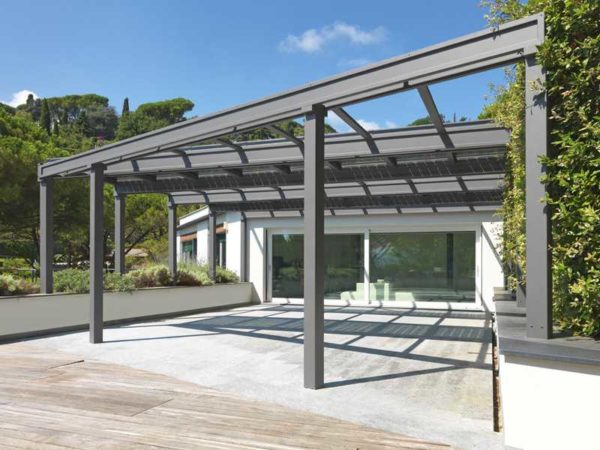
- A combination of metal and polycarbonate. Both materials allow for curved shapes. Even a slight nonlinearity turns a banal canopy into an interesting addition.

-
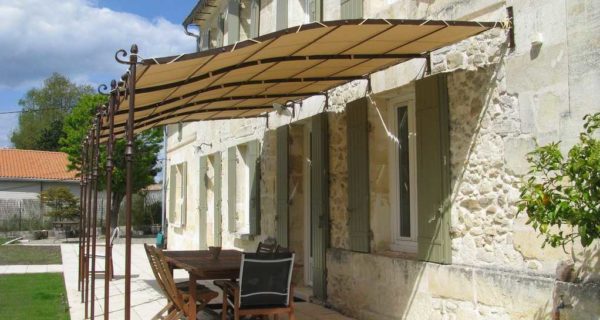
- Light pergola above the entrance - an awning is stretched over a metal frame
-
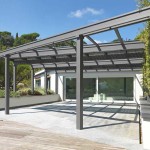
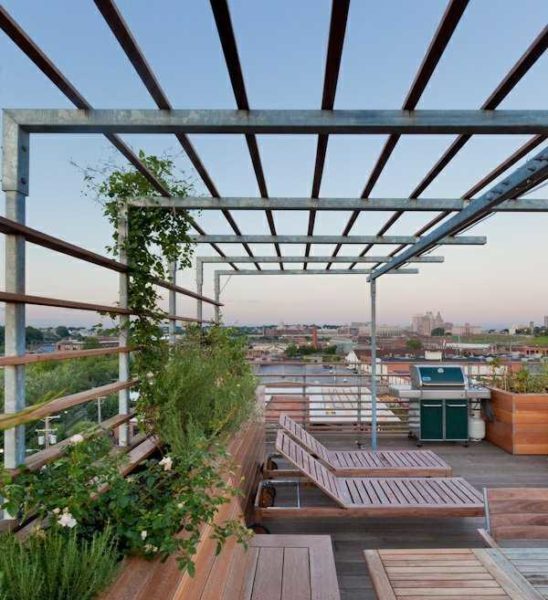
- Clear geometric lines, powerful columns, simple and stylish
-
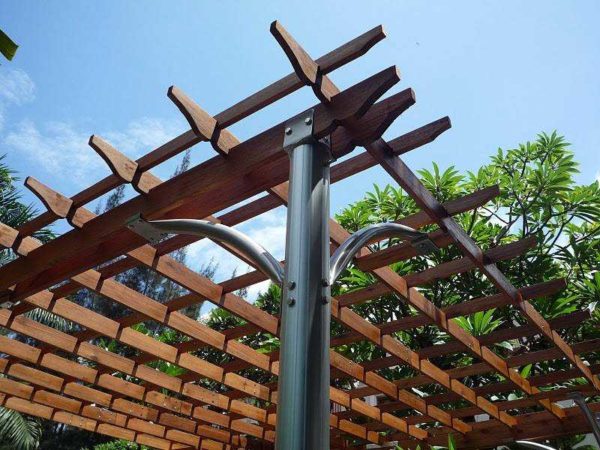
- Metal uprights and main beams, wood auxiliary beams
how read here to make a metal gazebo.
Blueprints
It is worth noting that all of the options presented can be made of wood or metal, or columns can be made of stone, concrete or marble. The idea is important, and the embodiment can be different.
-
- Simple rectangular with strong beams
-
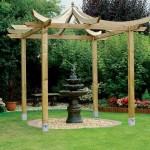
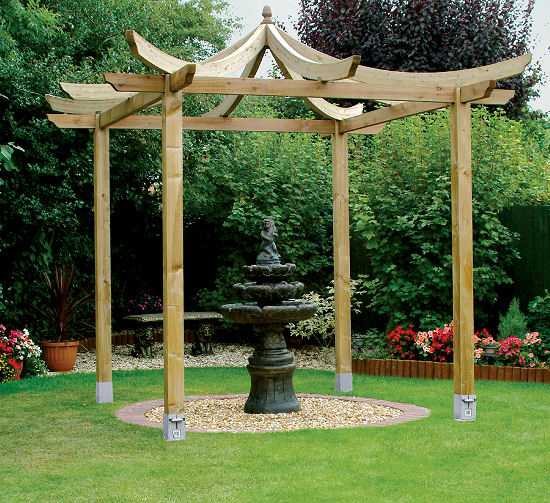
- Chinese style
-

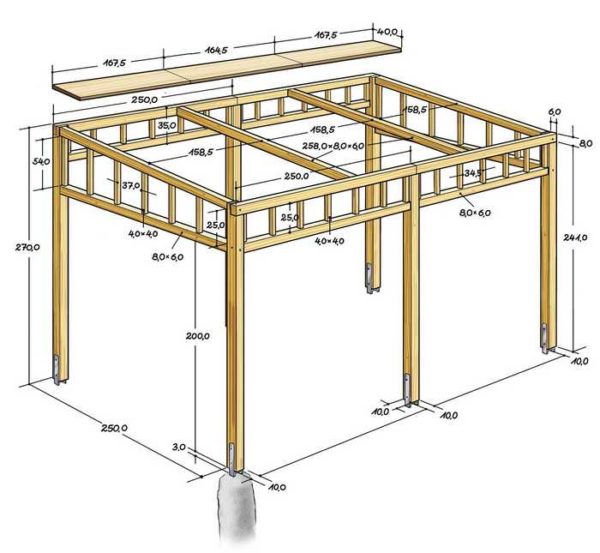
- Pergola drawing with dimensions
-
- Columns are interestingly decorated - a great option for installation near the house
-
- You can make an entrance to the garden or rose garden
-
- Instead of wooden columns, steel, sheathed with wood were used