How to make a gazebo out of wood: instructions with a photo
A gazebo in the country house or in the yard of the house is a place for tea drinking and gatherings in the summer. In buildings slightly larger, can be installed brazier... Then you can think about glazing it: barbecue in winter is a rare pleasure, and the grill will simultaneously warm the air inside. They usually start with simpler and cheaper models: they build a gazebo with their own hands, most often there is not enough time. Hence the choice. We will talk further about how to do this correctly, about materials, methods, methods of construction.
The content of the article
A little theory: what are the gazebos
Nothing complicated: let's talk about the types of gazebos and the materials from which they are built. First of all, buildings of this type are divided into open (summer) and closed (glazed). This does not mean at all that there are only two of these types: there are also combinations with removable glazing, but there are also awnings made of transparent film, which, if necessary, are pulled over the frame of the gazebo. Another option - some of the walls are closed, some are open. Choose the one that is closer to you.
With and without floor
More gazebos can be divided into those with and without floor. Arbors without a floor are placed on a prepared area of paving slabs, poured with concrete, lined with paving stones, etc. Although no one bothers to build directly on the grass. Only the frame must be treated appropriately: direct contact with the soil requires enhanced protection measures. If we are talking about a wooden gazebo, it is impregnated from rot and fungal infections, if it is made of metal, it is treated with an anti-rust composition.
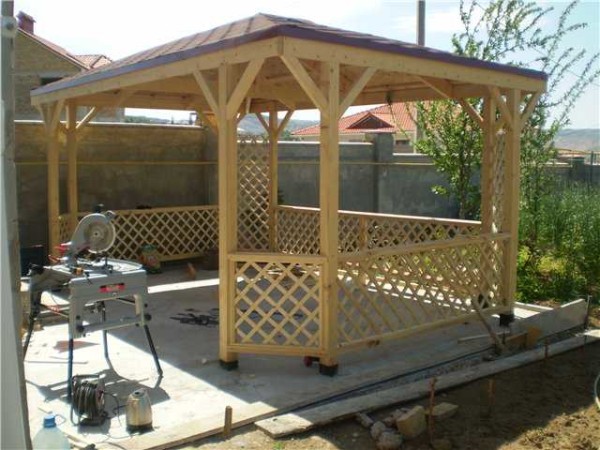
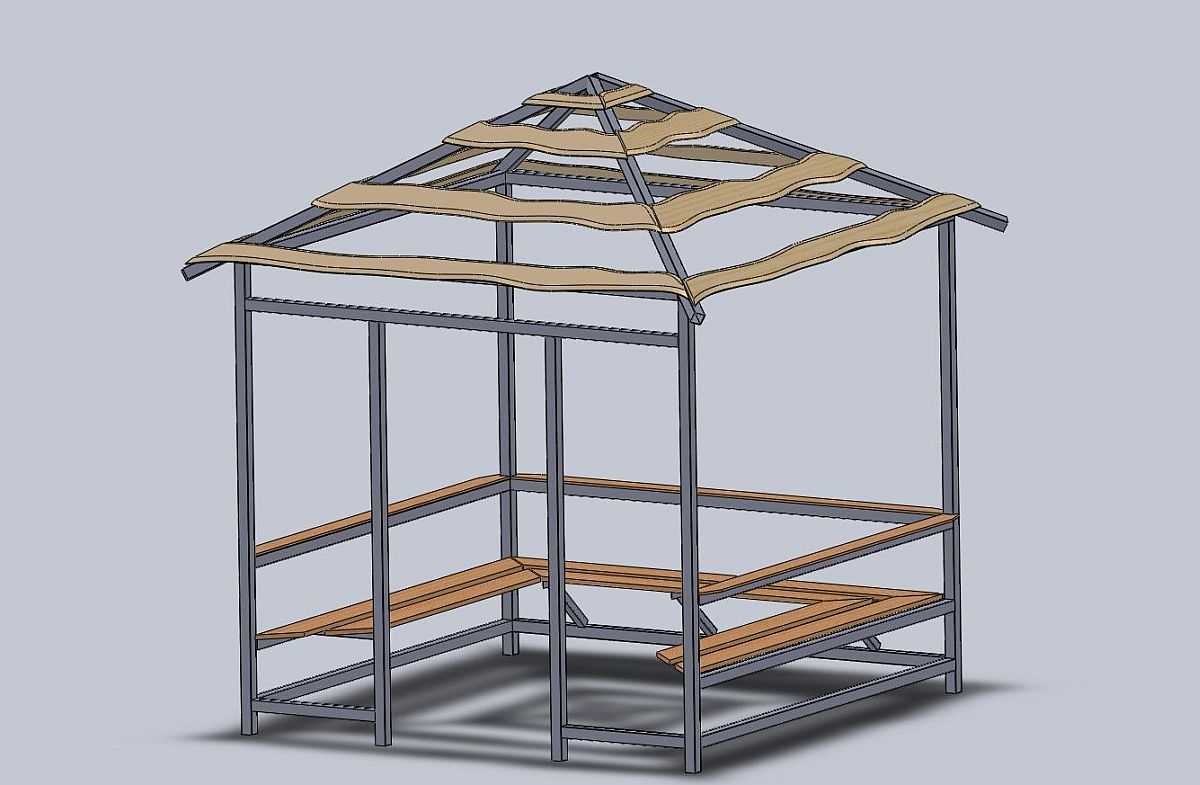
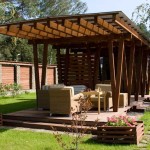
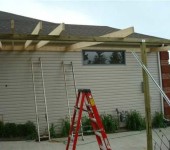
This is a wooden frame gazebo without a floor. Please note that the roof is quadrangular, and the gazebo itself is with beveled corners
Floor gazebos require a foundation. Most often, columns are made. They can be folded from brick or rubble, poured out of concrete, or put foundation blocks. If you have large flat-topped boulders that you can lean against, use them. But all this - if the building is light - on a frame made of wood or metal. For brick arbors required strip foundation, albeit shallow (20-30 cm below the level of the fertile layer).
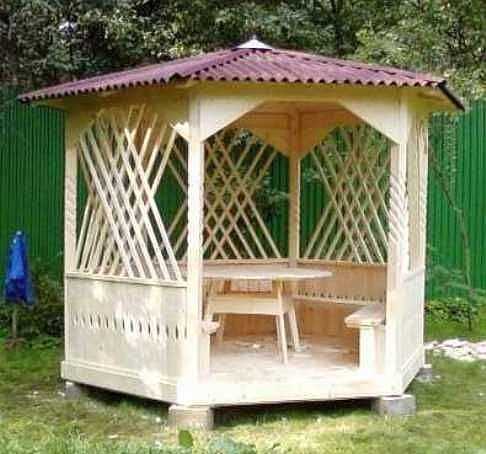
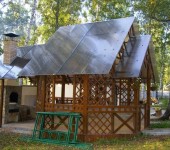
This is also a gazebo made of wood, but with a wooden floor. Therefore, it is raised on supports. The upper part is originally finished in it - the binding of processed thin boards looks great.
If you want to lay out the floor in the gazebo for the summer residence with tiles, you will have to pour concrete into the insulated slab, and put frost-resistant types of tiles on it. Moreover, the insulated slab should be at least 50 cm wider in all directions than the building on it. And these 50 cm are made at a slight slope so that moisture can drain. This is actually blind area, which will not allow the soil to freeze under the gazebo. So the tiles will not turn out and they will not crack.
Materials
The frame of garden or summer cottages is made of three materials:
- small diameter wooden bursa or round timber;
- steel pipe (more convenient from the profile);
- polymer pipes (PVC).
The only material that does not require protection are polymers. They do not rot, they are not affected by fungi. Some species tolerate freezing and thawing without much harm.So they can stay for the winter. That's just for the gazebo for giving PVC pipes to be durable, they need a solid diameter and with a thick wall. And even in this case, you do not need to rely on the frame: you will have to put in such furniture that will not put pressure on the plastic. Well, the grill will need to be set aside (if provided).
PVC plastic pipes can serve not only as a frame, but also as braided walls
In order for a wooden garden gazebo to retain its attractiveness for a long time, all wood that will be used in construction must first be covered with a protective impregnation in one or two layers. The cheapest today are SENEZH and Usadba impregnations, and the reviews about them and their protective properties are very good. These manufacturers also have colourants.
Metal frame for the gazebo processed twice. The first time the pipe is primed before starting construction, then they are carefully primed at the welding site. Moreover, if there is rust, it is either cleaned off, or passes through a rust converter and only after that is primed. Why such difficulties? So that the appearance is solid for a long time. After the primer has dried, everything is covered with metal paint for outdoor use.
A gazebo made of plastic. May not be environmentally friendly, but no problems with painting, fungi or rust
Sheathing of gazebos for the garden can be almost any. Most often, wood is used. This is a planed board, blockhouse, lining, small diameter round timber. If there are used pallets, they are disassembled, the board is sanded and the lower part of the frame is sheathed with it. It turns out very economically. And due to the fact that the wood has dried up long ago, after processing with protective compounds, it serves for a long time.
Gazebos for a summer residence and a garden are sheathed with the following materials:
- polycabronate (read about polycarbonate gazebos here);
- profiled sheet (corrugated board);
- tempered glass;
- cloth;
- transparent PVC films;
- bamboo.
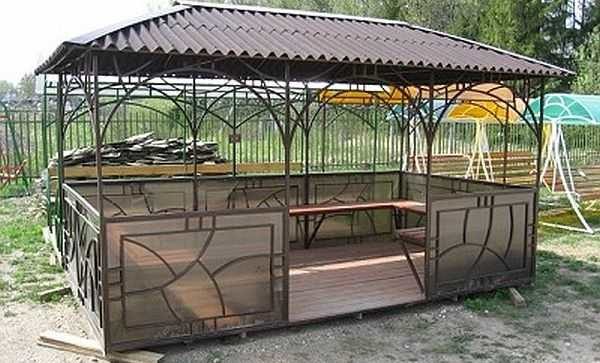
Metal frame combined with tinted polycarbonate sheathing
Frameless gazebos
It was about frame gazebos. Now about frameless. This is when they erect on a strip foundation or on a monolithic insulated plate brick walls, building blocks (most often from aerated concrete) up to a height of about 2 meters. One or two walls can be roof-high. Columns are made on the rest, on which the rafter system rests. Building such a gazebo is not cheap.
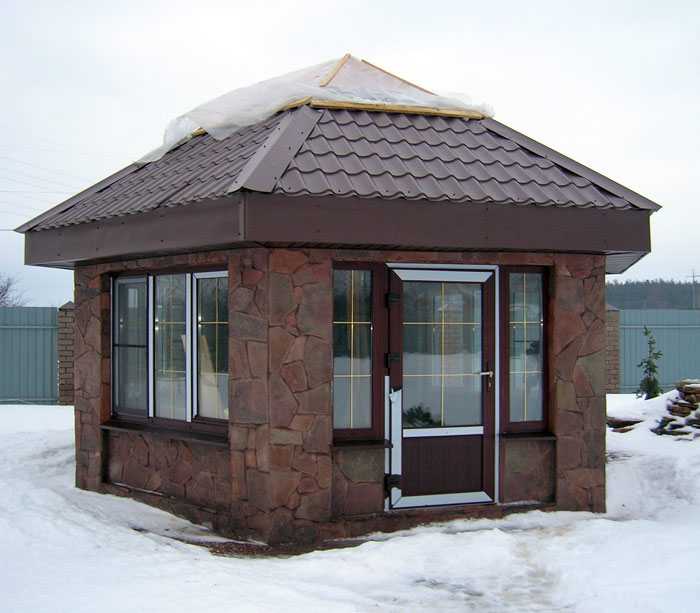
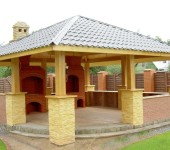
An example of a capital glazed gazebo trimmed with wild stone. Any building block can be at the bottom. Glazed with double-glazed windows
Brickwork, if made beautifully, can be left without finishing. If a gazebo was built from foam blocks, its decoration is no different from the decoration of the same house. The surfaces are sheathed with a metal mesh under the plaster, then plaster. You can put any finish on the aligned walls: even decorative plaster or stone. Garden gazebos made of stone, brick and foam blocks are most often glazed: they will be warm in winter too.
Roof
The choice of roof structure depends entirely on the shape of the gazebo. If it is rectangular, the choice is wide: one or two-slope, four-slope. Rectangular gazebos under a pitched roof are the easiest to build. The gable is not much, but more difficult.
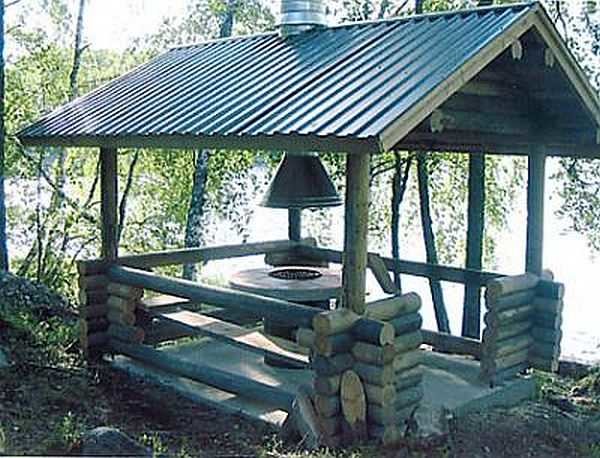
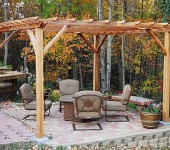
Summer rectangular gazebo made of round timber under a gable roof
If the shape of the gazebo is more complicated: pentagonal, hexagonal, octagonal, then you will have to make a hipped roof. It is even more difficult: you have to figure out how to connect all the rafters in the middle.
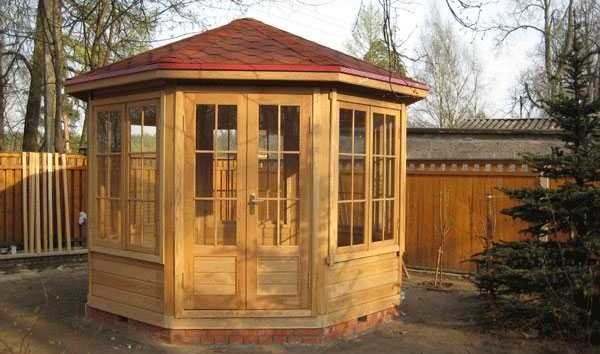
The domed roof is the most difficult. If the gazebo is being built for the first time with your own hands, and there is little experience with wood, it is better to find another option
By using flexible roofing and metal or PVC as the frame, the roof can be generally rounded. The pipes are bent, material is attached to them with seals for bolts or self-tapping screws. Such garden gazebos are very easy to look at, build them (with the ability to handle welding machine and a pipe bender) can be done in a few hours.
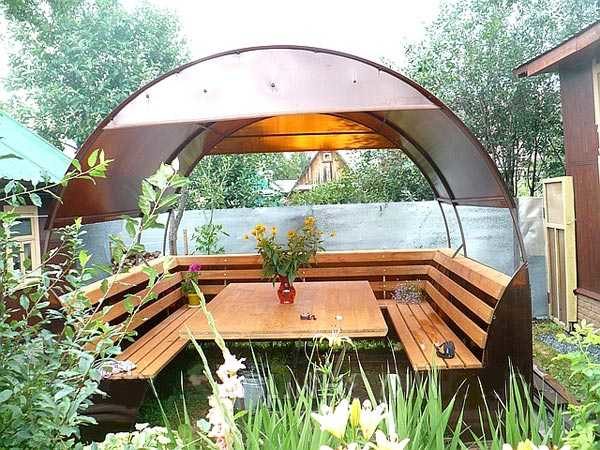
This is probably the simplest gazebo: two bent pipes that are fixed on the backs of garden benches. Polycarbonate is attached to the pipes. Summer garden gazebo is ready
That's all. Others play very rarely. By the way, if you are interested in gazebos under the same roof as the house, they are called verandas. You can read about them here.
This is the whole theory in short. There may be some other special cases: there are many materials, as well as the possibilities of their combination. We will publish the most interesting original gazebos made of non-standard materials at the end of the article. Now, practice.
How to make a gazebo with your own hands
Most often, we build garden arbors from wood on our own. The second most popular is metal. Everyone else does it infrequently. Brick and other building materials due to the fact that they are expensive, from PVC pipes - because there is no trust in the material.
We will analyze an example of building a frame gazebo made of wood. But even if you are going to make it from metal or PVC, the procedure will be the same. Another principle of joining the frame materials, but otherwise, everything is the same.
When working with wood, it must first be treated with antibacterial and flame retardant (reducing the flammability of the material) impregnations. Only after the compositions have dried can you work. If this is not done, the wood will darken very quickly and lose its attractiveness.
How to build a gazebo made of metal read here and in this article we are talking about gazebos made of polycarbonate.
Drawing
Two similar projects were implemented, of the same type: a quadrangular gazebo under a gable roof, only with different sizes and they were designed in different ways. A drawing of one of them, see the photo below.
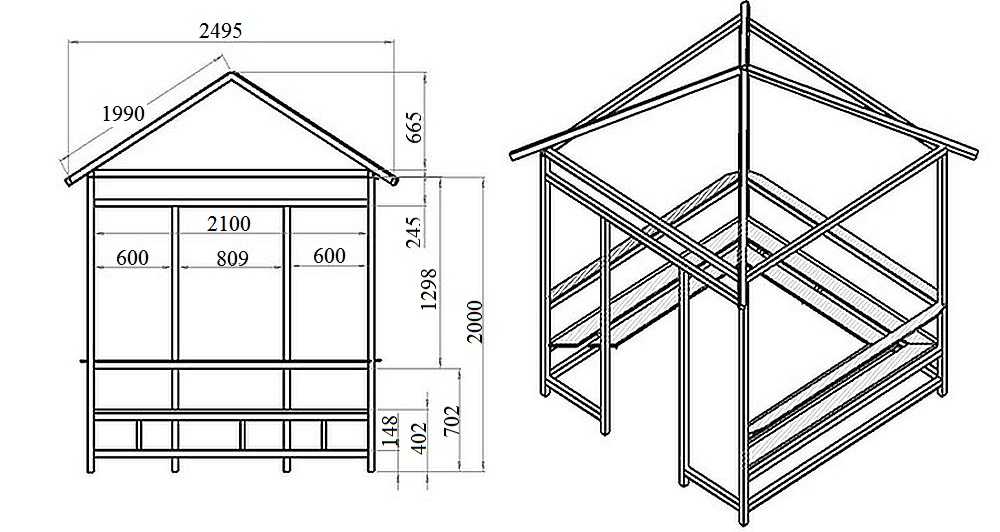
Rectangular gazebo with a gable roof (in one project the roof was replaced with a gable roof)
Step by step instructions with photo
It all starts with the preparation of the site. If there is sod, it is removed, and the fertile layer is also removed. If this is not done, roots, greens and all residues will rot. On sandy or sandy loam soils, screenings, crushed stone or broken construction waste are poured into the pit, everything is rammed, and covered with sand from above. On clay soils, on which water does not drain well, it is better to fill and tamp your own soil (clay, but without a fertile layer) into the pit. Otherwise, water will accumulate and stagnate in the pit, which will lead to the appearance of an unpleasant odor. Not at all what you need.
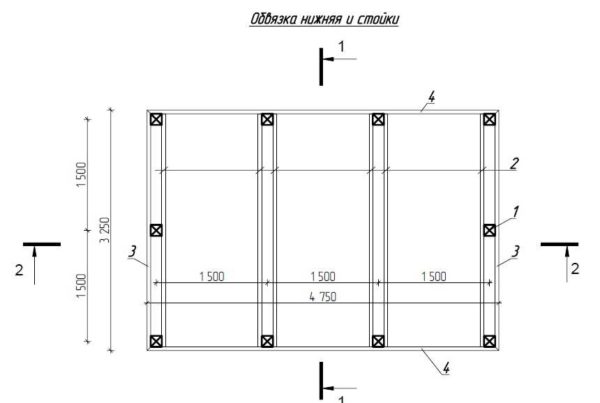
Selecting the type of foundation and bottom piping
If there is little time, the fastest way is to install ready-made concrete blocks on the tamped pillow. More time will have to be spent if you fold the posts of bricks, even more - pour them out of concrete. The distance between the supports should be no more than 1.5-2 meters. More specifically, it depends on the thickness of the timber from which you will make the strapping. Under a beam of 100 * 100 mm, the distance is 1.5 meters, under a metal profile pipe 60 * 60 mm, you can put it after 2 meters.
When all the supports are installed and level (use pegs, stretched lace and a building level), waterproofing is laid on them. This is roofing material or roofing felt, rolled in two layers, or bituminous mastic, which is also impregnated with the surface twice. Then the lower harness of the gazebo is laid from a bar. It is hammered together with nails of at least 150 mm in length or connected with self-tapping screws for wood. For greater strength, corners are used (if you find reinforced ones - as in the photo - it will be great). Although the gazebo was originally built as a summer one, after a while the majority decides to glaze it. Then the margin of safety is required.
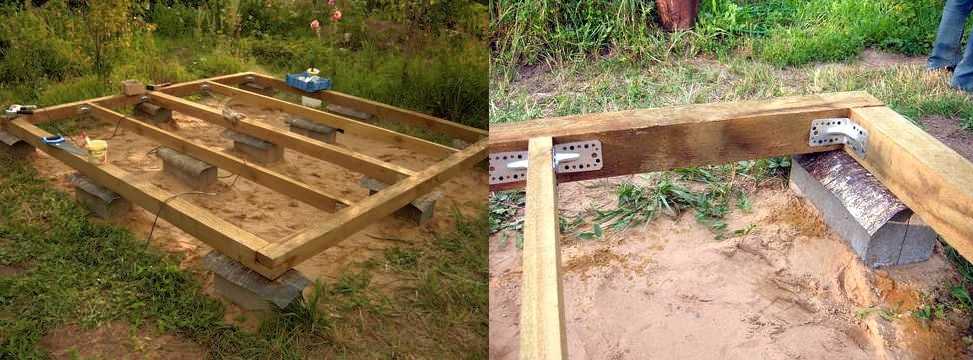
This is how the assembled lower harness looks like
Installing racks
Next, racks are installed from a bar. They are placed in the corners, in front of both sides of the entrance, on the rest - above the posts of the supports. They are also connected from above with a strapping.
At this stage of the construction of a garden gazebo, it is important to put the racks strictly vertically.It is undesirable to use the building level: it has a large error, especially in household models that developers usually use. Therefore, we take the good old plumb line and set it along it. Check the vertical from two adjacent sides so that the posts do not fall anywhere.
Fix the racks with jibs (seen in the photo). If they interfere with you in the future, you can make a temporary version, as in the photo on the left. If the sheathing at the bottom is opaque, do it thoroughly: saw down the beam at 45 ° (it is more convenient to use a miter box) and nail it with two or three nails obliquely. Check if it is out of order after installing each cut. These small triangles give rigidity to the entire structure and it stops wobbling.
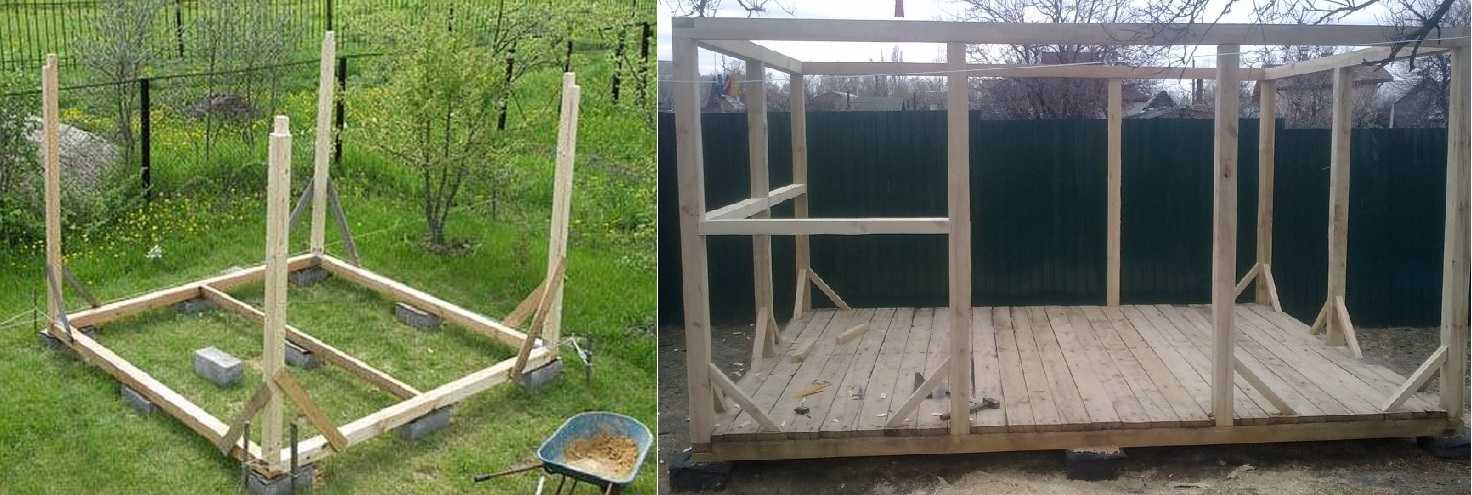
Two projects and two ways to set the correct corner bars. On the left - temporary jibs, after installing the strapping they will be removed, on the right - permanent
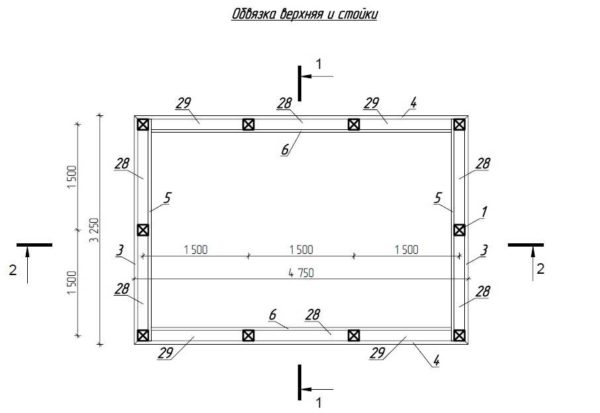
Top rail and floor boards
Further, after all the racks are installed and secured, the upper harness is mounted. This shouldn't be a problem. Use corners to increase the reliability of the connection. Racks, by the way, can also be fixed on the sides with corners. Especially if there are no permanent jibs. Otherwise, your structure may collapse from lateral loads.
After that, the floor boards are laid. It is highly desirable to treat them on all sides with an antibacterial impregnation for wood that is in direct contact with the ground. Senezh has two such teams. One of them is called "Senezh", the other "Senezh-Ultra". They differ in that "Ultra" does not stain wood, while "Senezh" gives it a greenish color. If you cover everything with a dark stain, the greens are invisible, such a composition is not suitable for a light one.
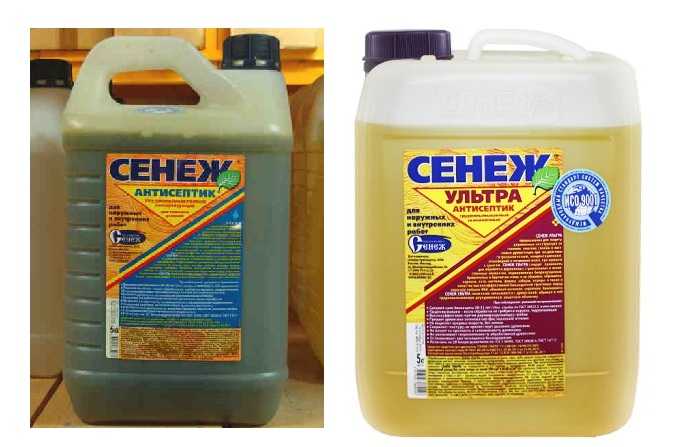
Impregnation for wood in direct contact with the ground
After laying the floor, it is better to paint the boards, otherwise they will get dirty while the construction is completed. So take the time to apply varnish or oil-based tinting paints - the best option for wood outdoors. Do not confuse with oil paints! These compositions are often called oil for wood, because the base is oil, to which protective substances and coloring pigments are added. As a result, the wood acquires a different shade (even pink or green, if you so desire), but the texture becomes clearer and not painted over.
Middle strapping
The next step is to install the middle strapping, if there is one according to the project. A quarter is taken out under the bar in the racks - a small depression, in this case with a bar of 100 * 100 mm, a quarter is 25 mm.
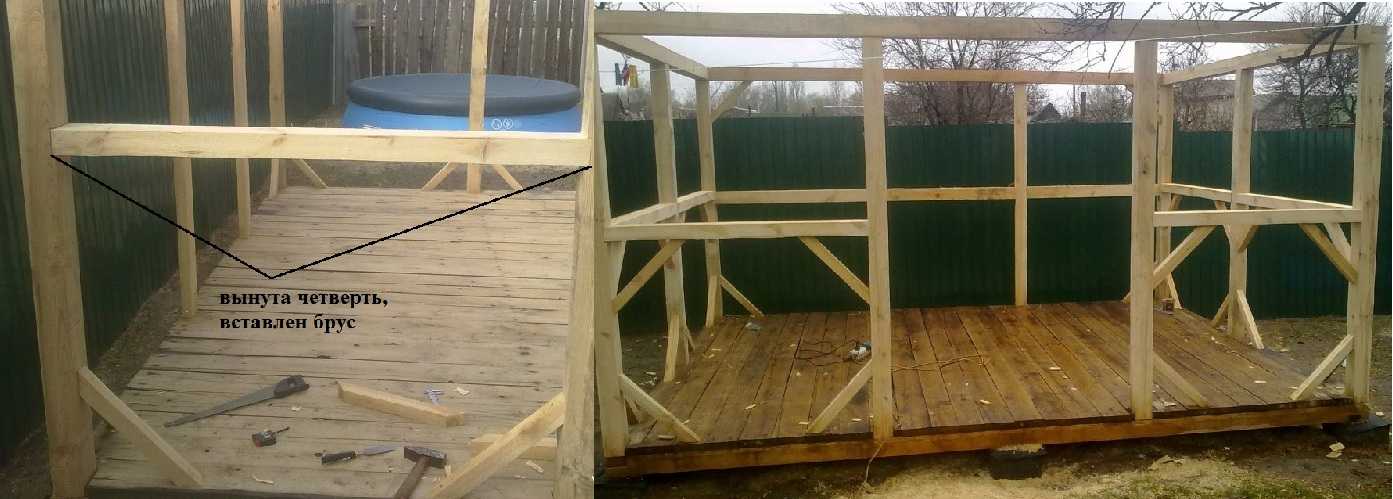
How the middle harness is fixed
Further, the frame can be painted with the same composition as the floor.
About manufacturing pergolas (open gazebo with almost no roof) read here.
Making the roof
While the frame of the wooden gazebo is drying, you are assembling the rafter system. It represents triangles (see the photo below).
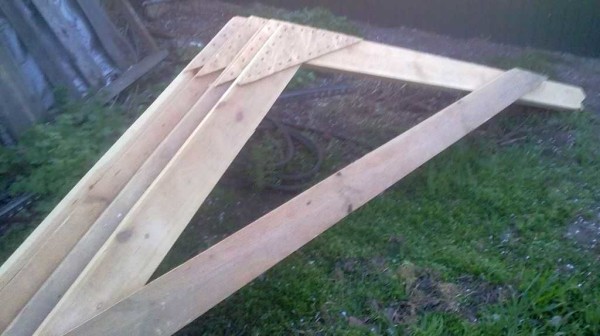
Triangles for roofing material
They are installed on the frame. In this project, the overhang of the roof is not provided. Therefore, they are simply placed strictly vertically and nailed directly to the beam of the upper harness. It is easy to put such a roof, but the rain will pour heavily inside even with a slight wind.
If you do it with overhangs (the roof protrudes beyond the perimeter of the gazebo), then in the timber you will have to cut out "seats" for the rafters. They look like triangles (see photo).
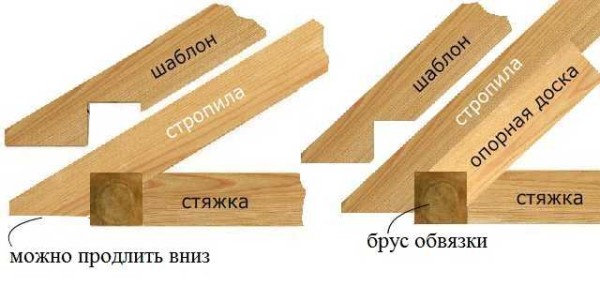
How to properly make a roof on a gazebo: we cut the rafters
There are two options shown. In fact, there are more of them, but since the roof is small, then the first, the simplest, will be enough. In order not to bother with each triangle, sawing the wood at the top, they make a template. Take a piece of board, cut out a hole in the desired shape, try on, check, adjust. Then just put one by one to all the rafters, circle with a finely sharpened pencil and cut out. How is it more convenient to cut? A jigsaw, but you can also use a hand saw.Having prepared all the triangles, throw them up and install (with long nails obliquely from the sides, you can also fix them with corners). Remember to check the vertical and horizontal before fixing.
After installing the triangles, crossbars are packed: two on both sides of the ridge, and then with a step that depends on the type and type of roofing material. Under soft tiles, for example, a solid crate is generally needed. Then the entire rafter system is painted. And then the roofing material is mounted (in this case, the metal profile).
Finishing
The finish on the bottom is nailed last. In this project, lining was used, which was then painted with oil for wood.
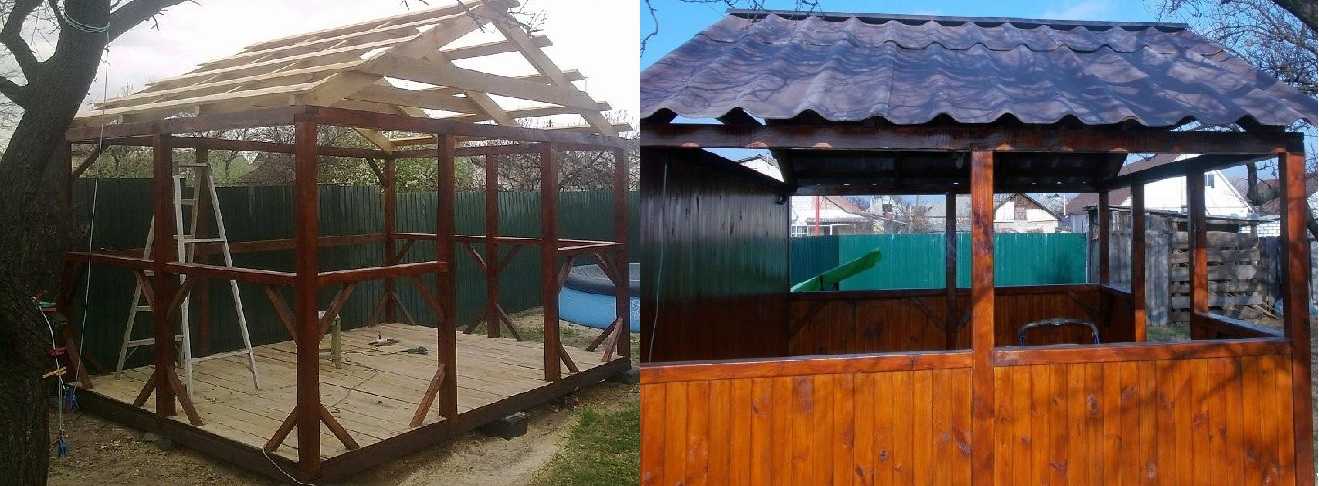
Final stages of construction. DIY gazebo is ready
This summer cottage is from the category of "simple, fast, cheap." Having her as an example, you can make something of your own, more attractive, in your opinion. Here, for example, what happened according to the same project, but in a different version: veranda cladding from a blockhouse, which is painted in a light color, and the frame in a dark one.
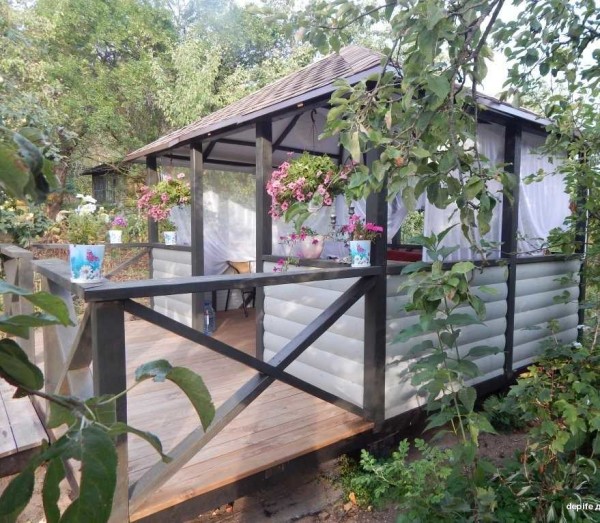
Another option for the same project
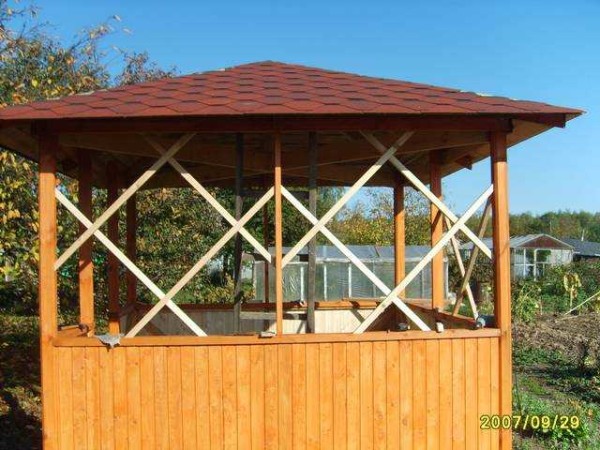
And also - this option: summer houses for this project are completely different
We will lay out several more complex projects with drawings and dimensions below, and even more interesting photos, but without drawings at the very bottom. Maybe someone will come in handy ...
Sketches of gazebos with drawings and dimensions
Available sizes can be increased or decreased proportionally. It is important that you understand that as the size increases significantly, the frame requires a more powerful one. Do not forget about this, and you will succeed: a self-made gazebo will be beautiful and reliable.
Simple gazebo made of wood
Almost the same project, but with different dimensions: the top point of the roof is raised higher, which makes it visually seem lighter. The gazebo is also quadrangular, the roof is hipped.

Square gazebo made of wood for a summer residence or garden
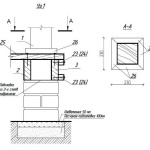
When installing such a roof, the most problematic are two places (nodes), indicated by circles. How to do them, see the photo below.

Problematic nodes when installing a hipped roof on a gazebo
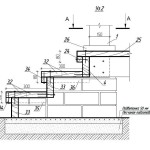
Something like this you can mark it in height and fill the crate under the roofing material
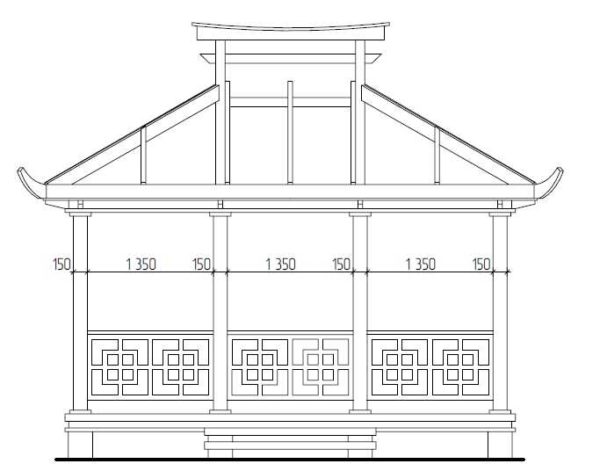
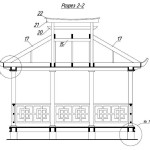
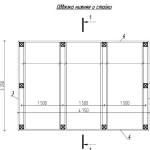
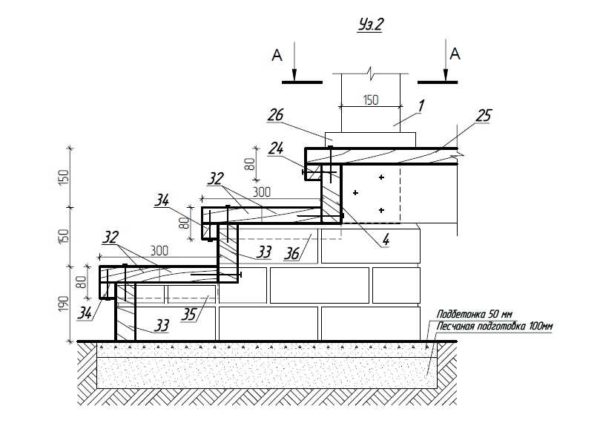
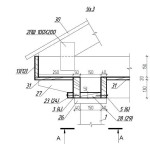
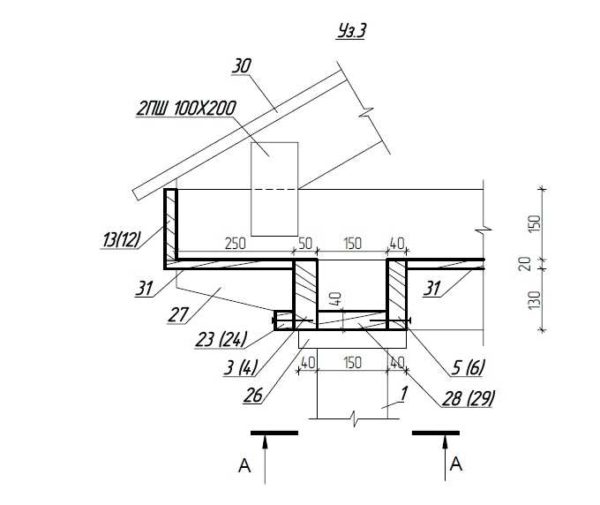
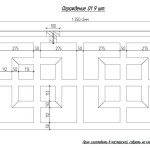
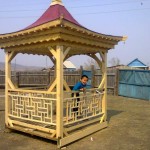
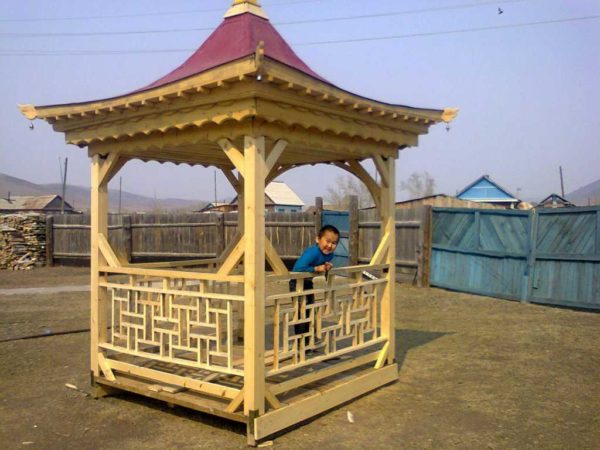
Chinese style gazebo (with drawings and dimensions)
Project with all dimensions, foundation markings, roof truss system, etc. Arranged in a photo gallery.
-
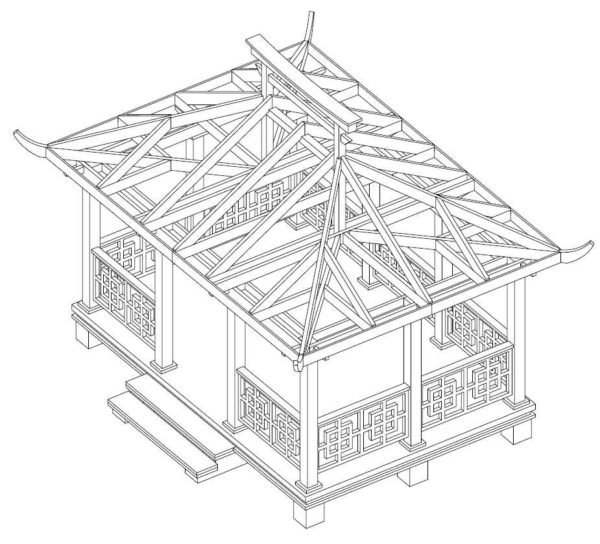
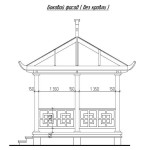
- Chinese style wooden gazebo exterior
-
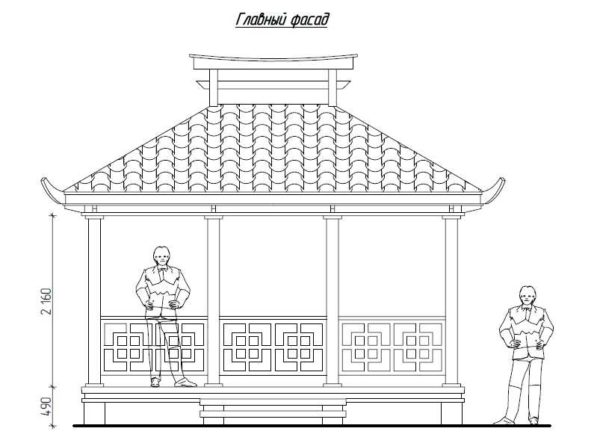
- Main façade - height from floor to top rail 2,160 m
-
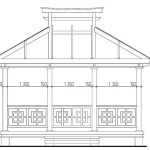
- Main facade without roof: vertical posts 150 * 150 mm
-
- Side view . The railing (railing) is 740 mm high, raised 150 mm above the floor level. The height of the railing in the gazebo is 890 mm

-
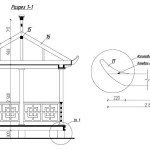
- Cross section of a wooden arbor. In the photo on the right - how to make raised roof ends
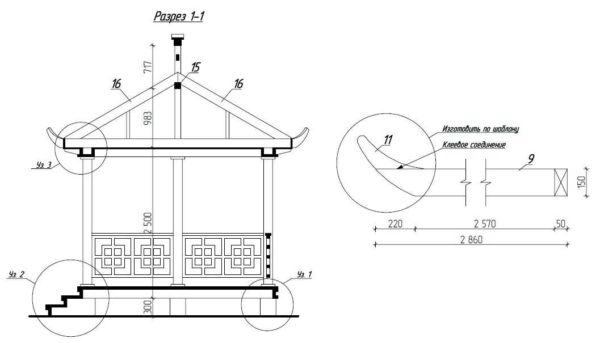
-
- Lengthwise cut

-
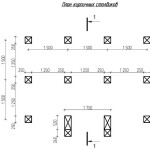
- The layout of the columns under the gazebo

-
- Bottom harness. The locations of the racks (timber 150 * 150 mm) are marked with crosses
-
- Top harness
-
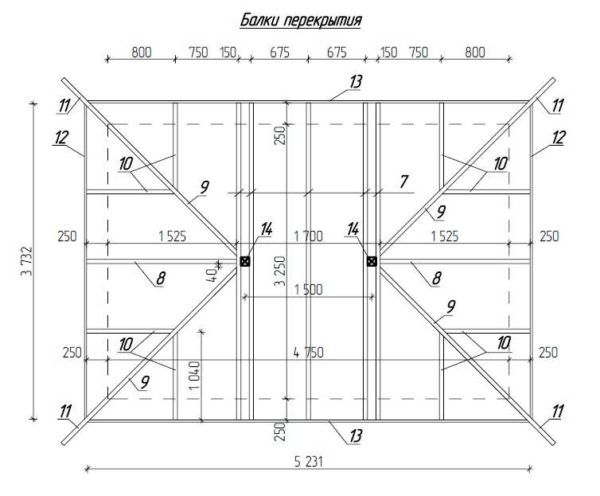
- Installation of floor beams (numbers are the designation of material from the specification)
-

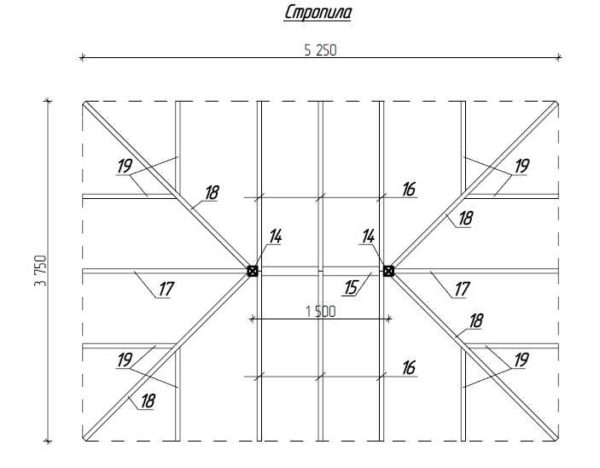
- Rafter system
-
- Detailing Node 2 - How to Install Racks

-
- How to make steps to the veranda - node 2
-
- Fastening the rafter system to the upper harness - on wooden pins
-
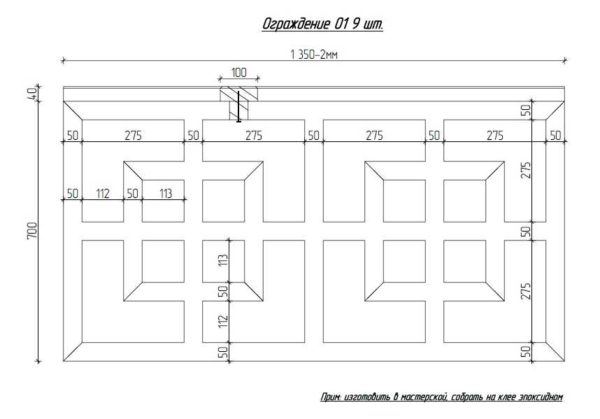
- Detailing the fence
-

- Specification with the dimensions and volume of lumber required for this wooden arbor project

-

- Specification with the dimensions and volume of lumber required for this wooden arbor project

Large gazebo on the foundation
Before building this gazebo, you need make a strip foundation... Its parameters depend on the soil, on the material that you are going to use for the frame: metal or wood, and what you are going to glaze with. In general, the width of the tape is about 20 cm, the depth is 20-30 cm deeper than the level of the fertile layer.On heaving soils, it is better to do pile foundationt.
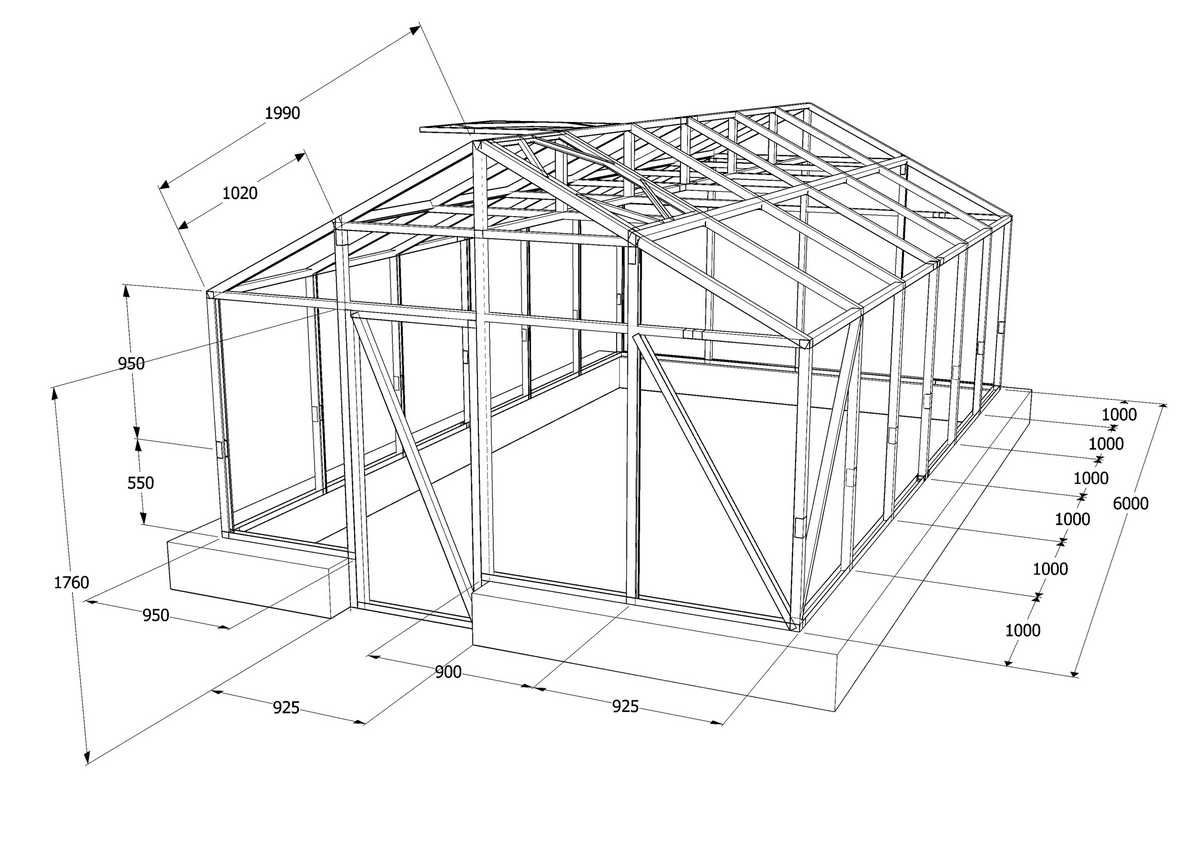
Large gazebo for glazing
Drawing of a swing gazebo
The swing gazebo requires special attention: it is fixed very firmly so that the arising variable loads do not loosen or overturn the structure. To do this, you can extend the legs down, dig a hole under them, fill them with rubble, tamp, and then pour everything over with liquid concrete. If the frame is made from a pipe, there are no questions; for a tree, you can use "P" -shaped mounts with a pin mounted in the lower part. Here it can be bent and filled with concrete.
For even greater reliability, crossbars are attached to the legs, which turn out to be slightly recessed in the ground. They are hammered in with U-brackets.

According to this drawing, you can build a swing gazebo with your own hands
About the manufacture of ordinary swings of different types can be read here.
Photo of the original arbors made of wood without drawings
-
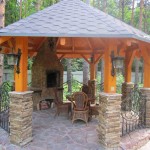
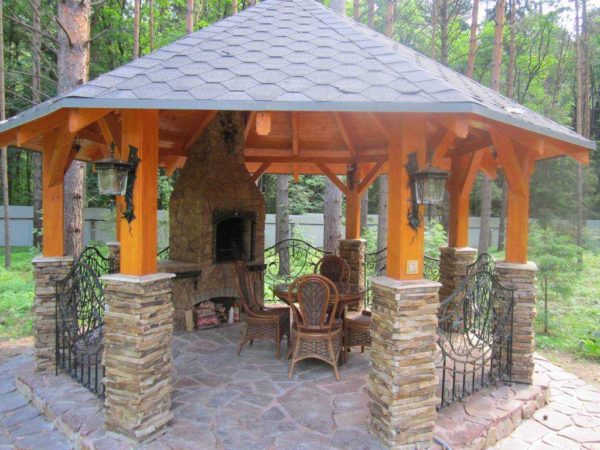
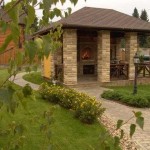
- This option is both stone and wood. Oprah from a bar are installed on the columns of rubble stone
-
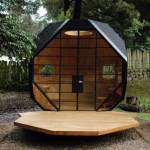
- Wooden gazebo in a modern style

-
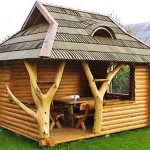
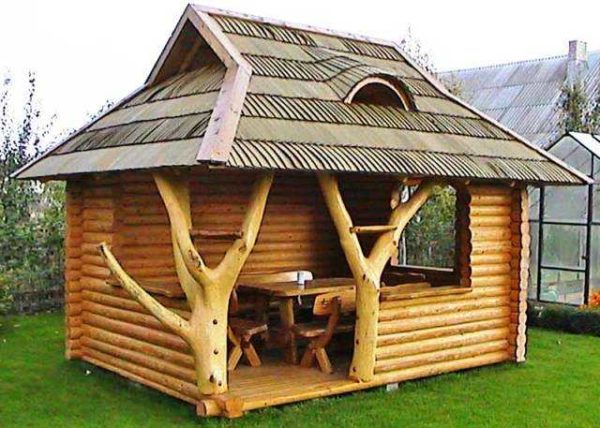
- For lovers of non-standard solutions, she is also a gazebo made of round timber, into the interior of which two trees are perfectly inscribed
-
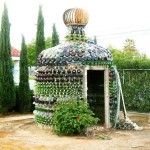
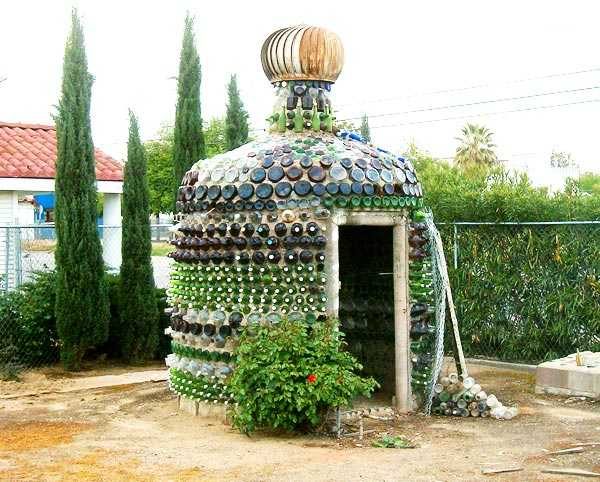
- Also interesting: a gazebo made of bottles
-
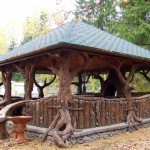
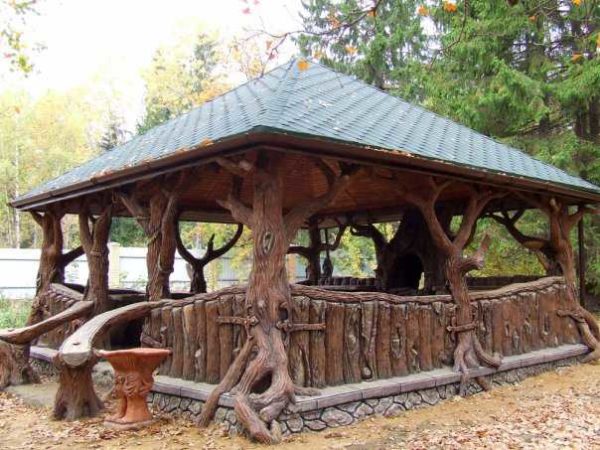
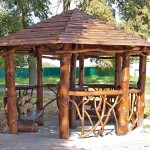
- The style is the same - dried trees are used as supports.
-
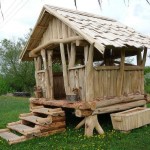
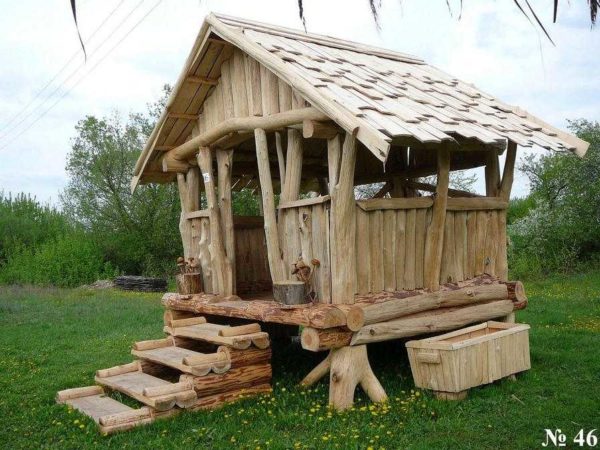
- And quite a fabulous style: a gazebo, similar to the hut of Baba Yaga
-
- This is easier to implement, but only for those with spatial imagination everything is fine.

-
- For lovers of solid buildings: a gazebo made of stone

-
- Original gazebo made of wood octahedral
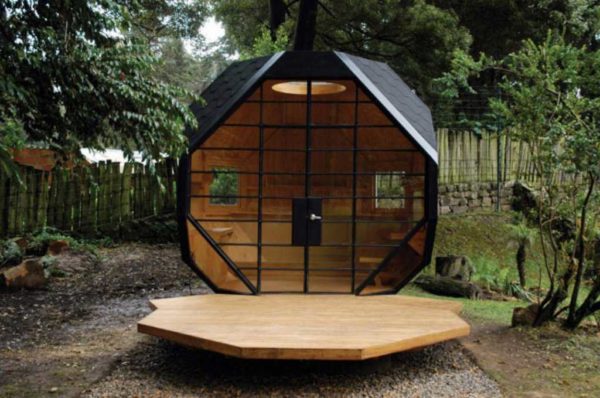
-
- Chinese-style gazebo


It's still rather rustic from wood, it is better to build from a frame, then you can make it more beautiful. Especially if you do an open gazebo. I've ordered and built from the tower, it looks great, and it's made quite soundly
Dima, show your gazebo!
Dima! show yours. And what does simple mean? You can even make a palace out of wood.