Useful DIY garage accessories
A garage is more than just a parking space. It is also a workshop, a place of rest, and a club of interests. Therefore, the arrangement of the garage should be convenient and thoughtful. A lot of things must be placed in a small area, and it should be convenient to use them. Homemade products for the garage will help with this. What people do not do with their own hands. From an elementary shelf to a complex device. All this can be made by yourself. But you need to know how. Several ideas for modernizing the garage and a plan for their implementation in the article.
The content of the article
Homemade garage: ideas for arrangement
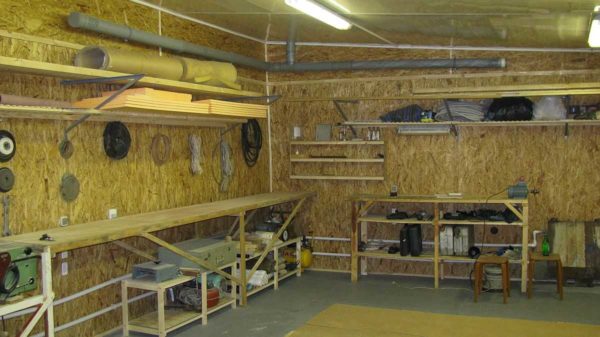
Arranging a garage is a lengthy process. It will not be possible to do everything right away, you have to constantly modernize something, change, make something new. In this case, they mainly use homemade products for the garage. It requires less money and is also a pleasure - making the necessary thing out of the garbage is worth a lot.
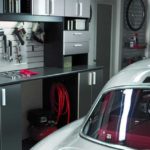
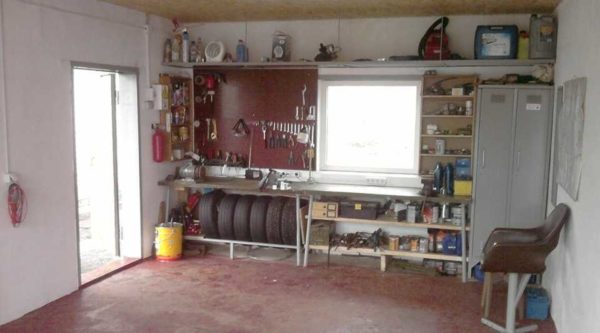
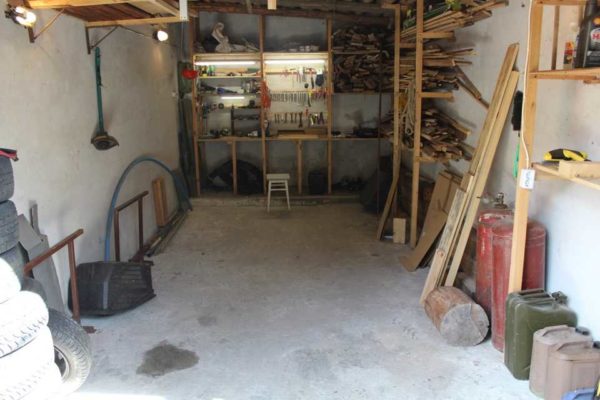
Even in a small area, you can fit everything
Storage of tires and wheels
Every car owner is faced with the problem of storing off-season "shoes" for the car. Where to stick the tires is a sore point. In general, the way tires are stored depends on whether they are mounted on disks or not.

Tire storage methods
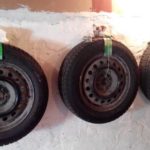
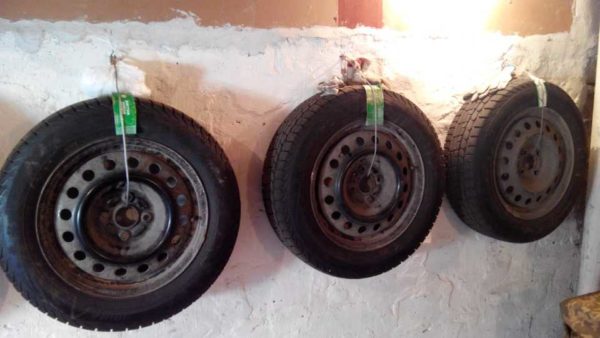
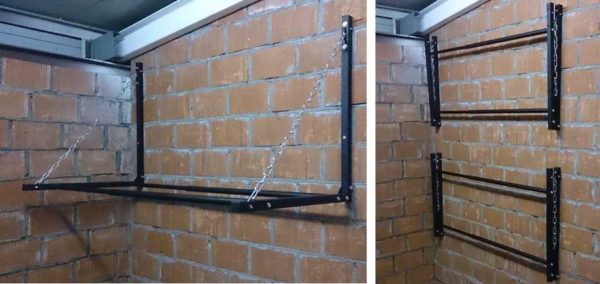
So tires with disks can be suspended or stored lying down - in the form of a stack, stacking them one on top of the other. To hang the tires, you can use luggage belts, chains, a metal cable with a diameter of 4 mm or more in a polyethylene sheath. Attach belts to the ceiling, wall, to the top beam.
-
- PE-sheathed rope, ring anchors and clamps for tightening
-

- Luggage straps are best attached to rings in the ceiling or hooks on the walls

-
- Drive pins of sufficient length into the wall, but such that the pin does not stick out of the tire
-

- Not only a pin will work, but also a hook with a small bend radius

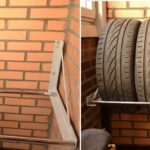
Another affordable way is to drive pins or hooks with a small bend radius into the wall. The distance between the hooks is slightly more than the diameter of the tires. The length of the pins should be such that they do not stick out beyond the tire. You can stuff them almost under the ceiling so that the wheels fit.
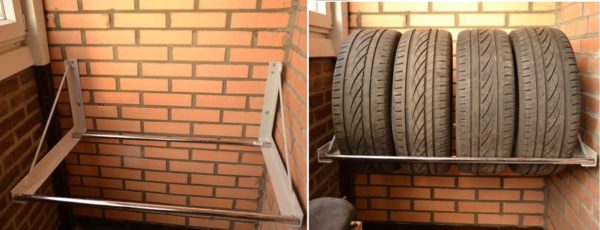
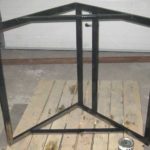
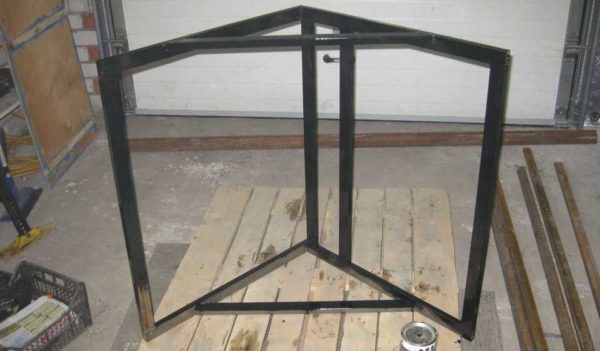
Tires without disks can only be stored "standing". Special shelves are made for them. They are usually welded from a profiled pipe. 20 * 20mm, maximum, 30 * 30mm. You can also use a corner. It is inconvenient to cook a round pipe, but cross-members can be made from it - the tires fit and hold in this case better.
The shelf width is 4 times the tire width, plus a 10-15 cm margin for some freedom. The height of the rear wall is just above the outer diameter of the wheel. The design is simple = from the side it resembles a right-angled triangle. Having inverter welding machine, it will not be difficult to weld such a shelf.
-
- Tire storage shelf - great homemade garage
-
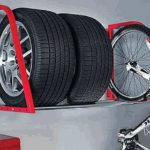
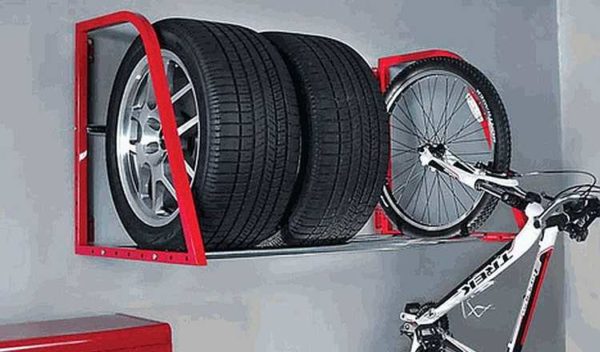
- This is a factory version with a completely inhuman price tag. But you can borrow the idea - the crossbars can be rearranged depending on the size of the tires ... you never know
-

- Tire rack in a garage with limited space. No tires - you can fold the shelf
-
- Just cooked and painted
These shelves are usually hung on the wall. But the place must be chosen so that no light falls on the rubber - it deteriorates from this. Not the most difficult homemade garage items, but very useful.
Workplace
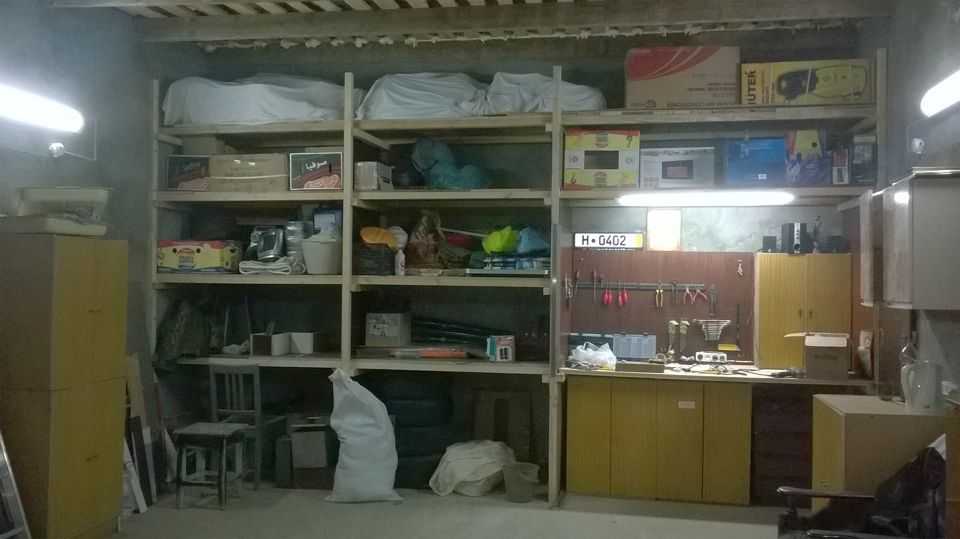
Probably the largest number of homemade garage items is associated with the equipment of the workplace and tool storage systems. Moreover shelves and racks in the garage Is not the only way to solve this problem. First of all, you need to decide where the workplace will be located. There are three options:
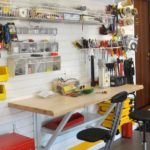
- The entire width of the far wall. If the garage is long enough and it is possible to "steal" about 1.5 meters. Dignity - everything is located compactly, at hand, does not interfere with walking along the car. The disadvantage of this solution is that you have to carry the tools far away if the work is carried out on the street.
-

- Table top and lots of drawers. The main thing is to remember where what lies
-
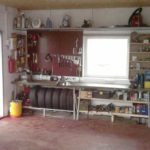
- Example of compact arrangement of tools and tires in a garage
-
- Along one of the long walls. This arrangement is chosen if the garage is wide, but not long enough. It makes sense to place the table and workbench to the left of the entrance - from the driver's seat. But this is not critical. The disadvantage of this arrangement of the workplace in the garage is that you have to move with some caution, but it is more convenient to bring in / take out tools outside.
-
- You can't count on such chic furniture, but the idea is clear
-
- Option with a small folding table for very tight garages
-
- The main thing is to place the tools correctly
-
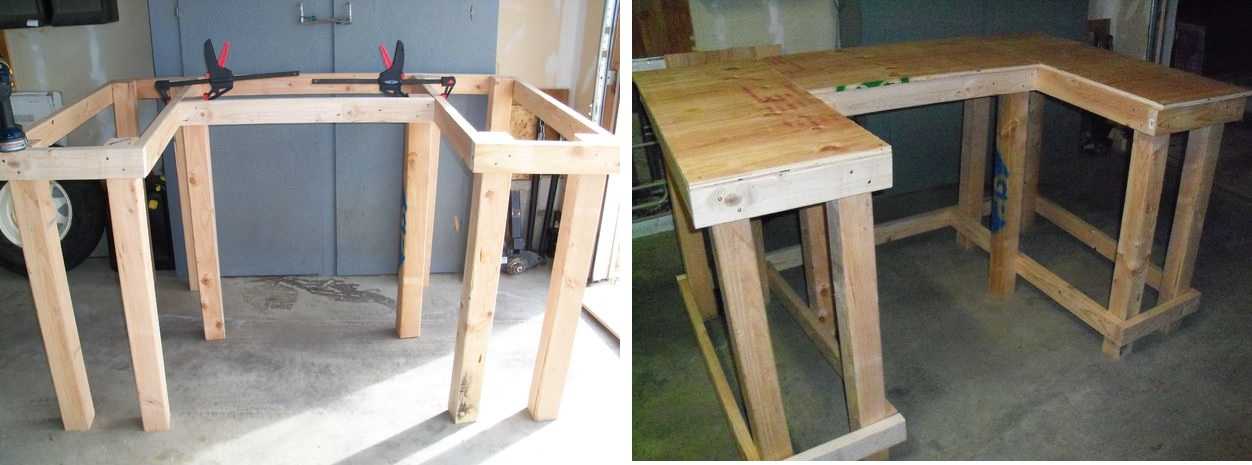
- Taking one of the corners. This is an intermediate option. Moreover, one of the sides can be made longer, the other shorter.
-
- Placing a desktop in the corner of the garage, and placing a sofa next to it is not a solution to the problem
-

- Occupying two adjacent sides is a great idea.
-

- Another such option
-


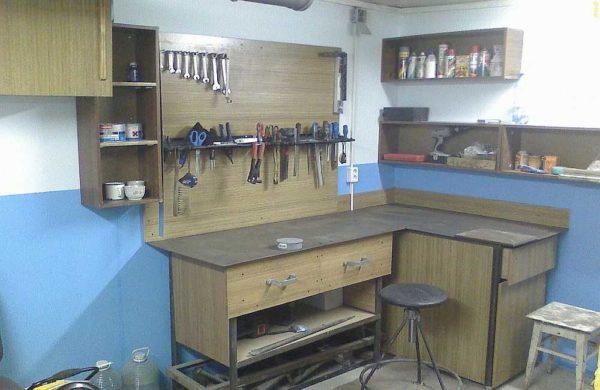
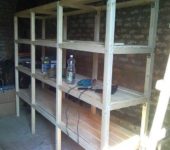
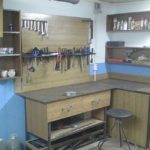
A table or workbench for a garage is made of boards, sheathed with plywood. Inexpensive, quite reliable. If you have a welding machine and verification skills, you can weld a frame from a corner or profiled pipe. Sheathing again is better with moisture-resistant plywood. The result is a smooth, abrasion-resistant surface. You can, of course, use and laminated chipboard (chipboard)but the laminate is quickly damaged.
U-shaped workbench for garage
So that the place "does not walk", you can install shelves or drawers under the tabletop. Drawers are more convenient, but making them is still a hassle. It is quite possible to make shelves and put boxes knocked out of plywood on them. Plastic boxes and baskets are also suitable. But the walls must be thick.
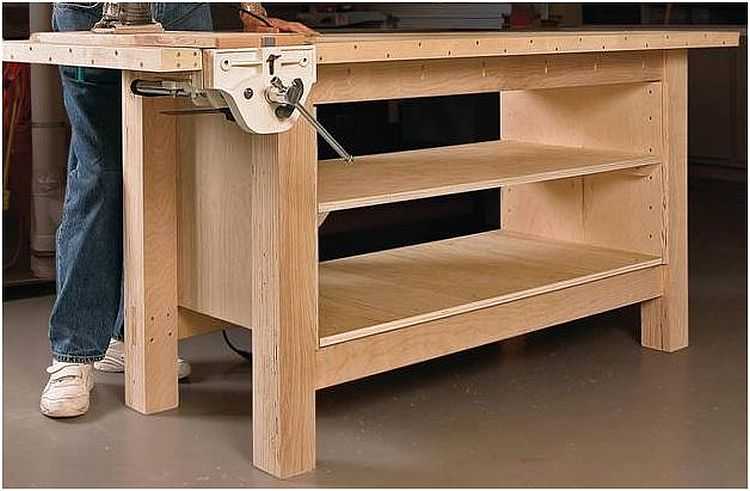
Drawers can be placed on shelves
By the way, there is a useful idea - to make a rack for storing tools from used cans. Find ones with a handle on top. Then everything is simple - one of the sidewalls is cut out and in the future this canister is used as a box.
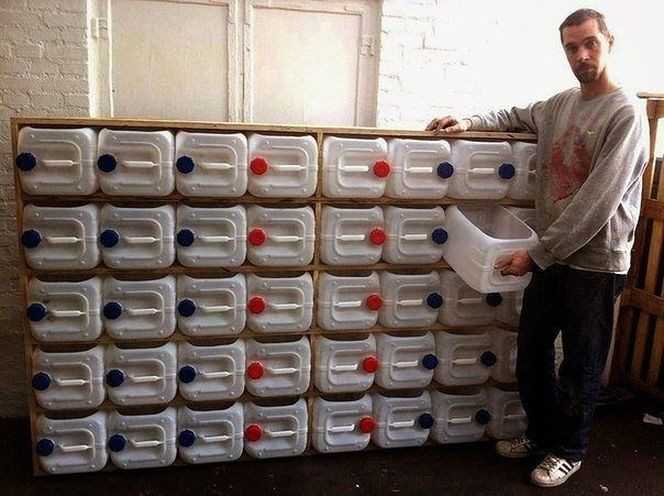
Useful and simple homemade garage items
It is not necessary to make a whole rack - it is still difficult to remember where, what is. But by the same principle, you can make drawers for shelves. On the ends, by the way, you can stick inscriptions or pictures (recognition with pictures is faster). Such homemade products for the garage bring satisfaction - making a useful thing out of garbage is a pleasant feeling.
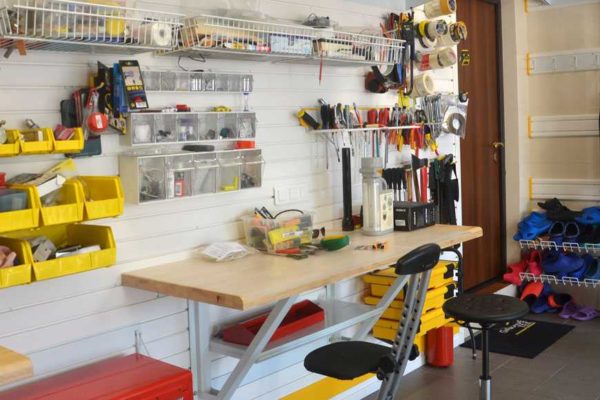
Tool storage
The most difficult task is organizing storage of the tool in the garage. It is necessary to make sure that everything is in order, but, at the same time, is at hand and in plain sight. Moreover, closed boxes are suitable only for very organized people who always put the thing taken in place. Otherwise, you will constantly rummage through the boxes, forgetting where that lies. There are several ideas for convenient storage of small items and tools. These are very simple homemade products for the garage.
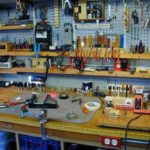
An ordinary metal mesh will help to quickly solve the problem. A reinforcing mesh made of 2 mm wire, a 10 cm cage is suitable. Attach it to the wall, bite off some twigs, bend them, make hooks, crossbars, etc. You can buy special hooks that are attached to the net (available in stores that sell commercial equipment), ordinary double-sided hooks that can be bought or made from wire are also suitable.
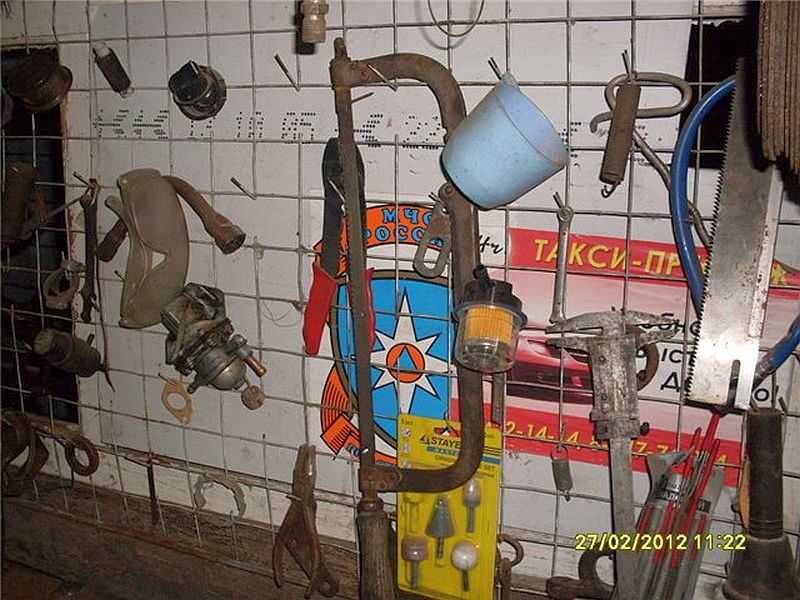
Wall mesh - a way to quickly organize tool storage
It is convenient to store screwdrivers on a special shelf.Take a board, plywood, 10-15 mm thick. The board must be sanded well so that there are no splinters. Then, in the plane, drill holes of different diameters in one or two rows. If the board is wide enough, you can make larger holes for chisels or even hammer handles. Clean all the chips again. Now we need to come up with a wall mount. You can use a regular bracket. Screwdrivers, chisels, and other similar material are inserted into the holes. Convenient, fast, everything is in sight.
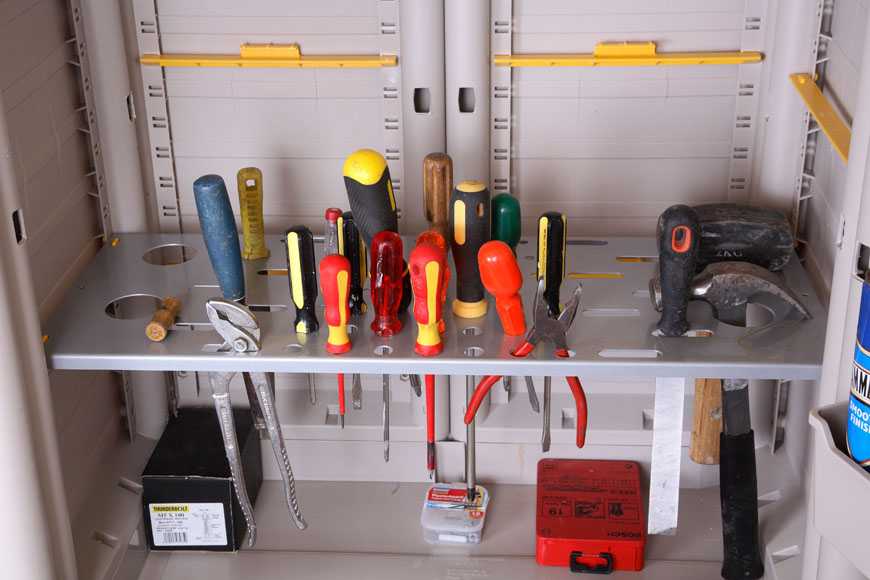
Idea for storing screwdrivers in a garage
There are also useful homemade garage items that allow you to organize the storage of hand tools. Pliers, pliers, wire cutters, etc. to place conveniently is problematic. It can be hung on a net; it is convenient to take off, but not to hang up. But there is a simple solution - to attach a narrow board and put the tool on it. To make it "sit down" comfortably, grind off the board from one side. In cut, it should look like an isosceles triangle.
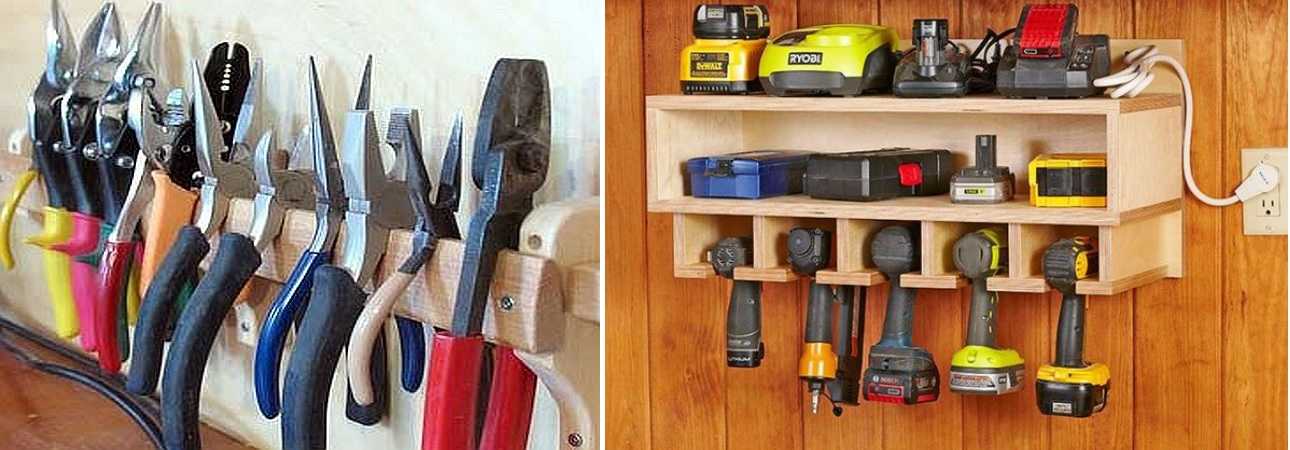
Storing hand tools in the garage
Another simple idea for storing a cordless tool, chargers and spare batteries for them. Make a shelf as in the photo above. In the lower part, cuts of various formats are made, and the upper ones are used as ordinary shelves. The idea is that everything is in one place, quick to get / set in place. These garage homemade products will make your workplace comfortable. It will be easy to maintain order.
DIY garage carriers
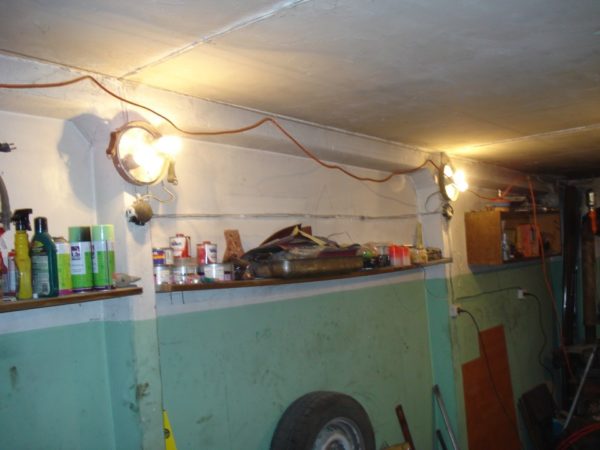
Even with very good lighting in the garage itself or outdoors during the day, visibility is very low under the car's bottom. To illuminate the front of work, portable lamps are used - carriers. These are the simplest homemade garage items. With them, you can start the epic of the arrangement and equipment of the garage space.
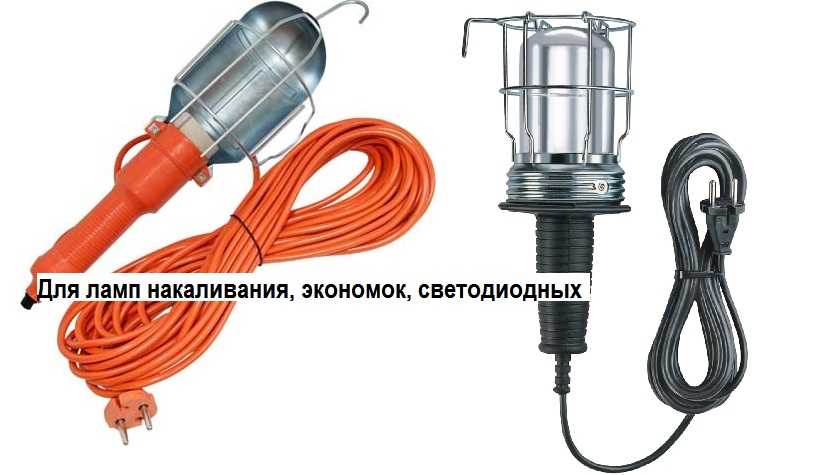
The most widely used type of garage carrier. Self-made ones usually make very similar
In the simplest version, this is a cartridge attached to a wire, a small screen with a hook can be attached to it. Such a completely uncomplicated thing. Light bulbs are used conventional - incandescent or housekeeping under a standard cartridge. Everything is not bad, except that these bulbs are beating very often, you need to look for how to hang them so that they shine in a specific place. In general, the design needs to be improved. There are several rework options.
Unbreakable lamp holder
This plastic bottle lampshade perfectly protects the fragile bulb of an energy saving lamp. You can also use an LED lamp, but incandescent will not work - it gets too hot. The design is usual - a cord with a plug and a cartridge at the end.
The main task is to find a plastic vessel with walls made of translucent milk plastic of medium thickness. Transparent will not work - it will not scatter light, too thin walls will not save the lamp from blows. After finding a suitable vessel, a trifle remains:
- cut a window about 1/4 of the bottle's diameter;
- cut the neck so that the lamp can be inserted, but so that the screwed-in bulb presses it against the cartridge;
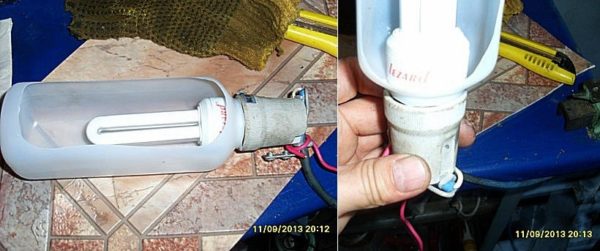
Homemade products for the garage: shatterproof cover for carrying
- assemble the structure, try it out.

It's simple, but such a shade allows you to brightly illuminate exactly the desired area, the rest of the space is flooded with even light that does not cut your eyes.
Carrying LED recessed light
The simplest and most common homemade garage items are portable lamps. Without them, it is inconvenient to work not only in garage pit, and even just on the workbench. You need a flat recessed LED luminaire that can be turned on at 220 V. These models are called "pills" because of their shape. You also need a cord with a plug, a piece of plastic windowsill - to build in the lamp. A piece of the window sill should be larger than the lamp. You select the specific dimensions yourself. Further actions are as follows:
- In the window sill, on one side, we cut out a circle with a diameter slightly smaller than the diameter of the lamp body.
- We remove the standard fixture of the lamp (it will be even thinner).
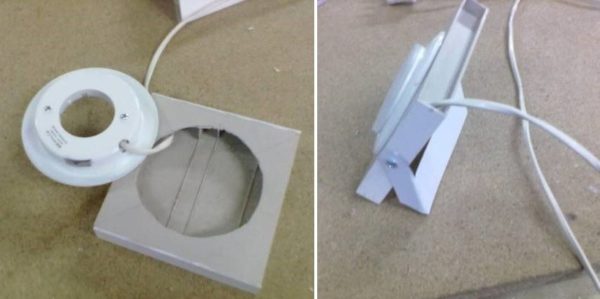
Carrying a garage with your own hands from an LED recessed lamp
- We pass the wire through the cells of the window sill, bring it out into the hole made.
- We connect the lamp.
- We glue it to the base.
- We glue the sidewalls with strips cut from the same window sill (you can not do it, but it's more beautiful).
- We bend the bracket out of a piece of tin, fasten it with screws to the lamp.
That's it, the homemade carrier is ready. This option is for floor installation. The movable leg allows you to change the angle of inclination. To make it turn over less, a couple of weights can be fixed inside the case (in its lower part).
Attach the carry cord to the ceiling
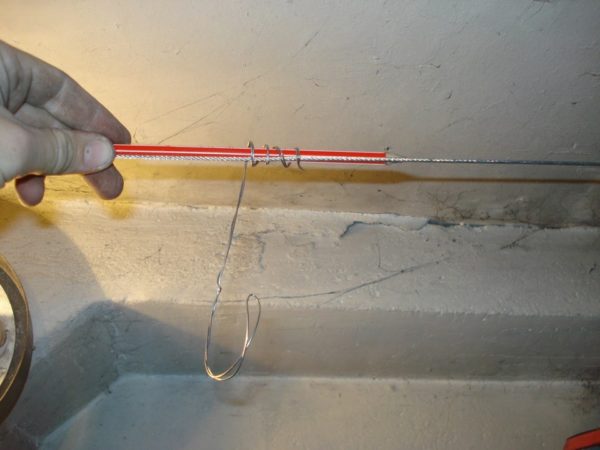
Conveniences are made up of little things, and very simple homemade products for the garage help in this. For example, you can remove the cable from a portable lamp that always gets tangled under your feet. Carrying is usually done with a cheap cable. It is not the most flexible, does not fold well, its turns on the floor fall under your feet. In general, it is inconvenient to use. You can protect yourself and carry - hang the cable from the ceiling. The solution is simple, but very effective.

Such a "suspension" to the ceiling for carrying you can do it yourself in an hour
Looking for:
- Two anchors with a ring at the end.
- Cable tie.
- Clamping clamp.
- Metal rope. The length depends on the size of the garage - it is necessary from one wall to another.
- Steel / plastic rings or steel wire and a piece of pipe to make these rings.
- Carry with long cable - roughly double the length of the garage.
The cable runs along the long side of the garage. More convenient - not far from the "working" wall, where the workbench or other equipment is located. Little work:
- On the ceiling, on one side and on the other, at a distance of 30-50 cm from the corner, we drill a hole in the ceiling, screw in the anchor.
- On one side, we attach the cable to the screed.

We install the anchor with loops, fasten the cable
- On the other hand, pulling the cable, tighten it with a clamp (it is easier for them to fix it on this side).
- We put rings on the cable - 4-6 pieces, depending on the length. If they are one-piece, they must be put on before the cable is fixed. If there are no ready-made rings, you can twist the wire around the pipe, cut the rings, then tighten them a little to make the wire “run”.
On the rings to the cable we hang the cable from the carrying
- We pass the carrying cord through the rings.
- We bend a hook from the wire, which we attach to the cable. Attach a pencil to the cable, wrap the free end of the wire from the hook around it. Take out the pencil. That's it, the hook is fixed to the cable. It is convenient to hang excess wires on this hook.
We make a hook (or several) for hanging the cable loops
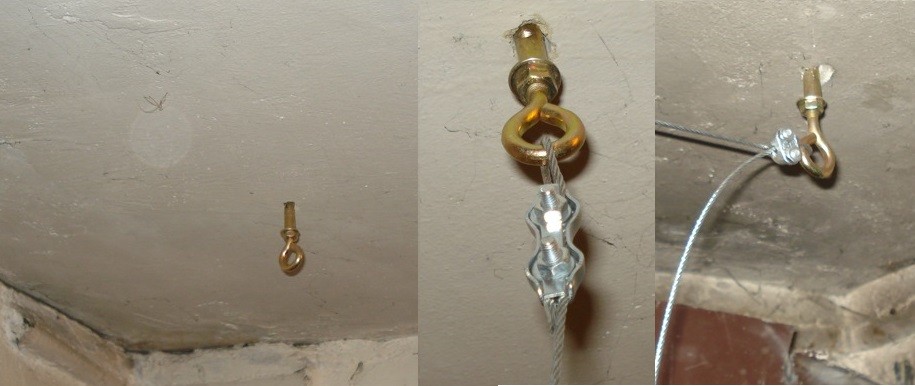


Well, that's all. You can use it. With such a device, the carrier can be pulled to either end of the garage, while the cable does not get confused or cling. Convenient, requires little time.
DIY garage compressor
A compressor is needed in any garage. And by the way, this is not the most difficult homemade product for a garage. A low-power compressor for a garage for tire inflation and other small work can be done by hand from auxiliary materials. For example, from a compressor from a refrigerator. For this you will need:
- compressor from the refrigerator;
- a sealed cylinder with thick walls (you can use a flask from a fire extinguisher, a small gas cylinder);
- safety valve for 8 atm;
- pressure gauge;
- fitting;
- oxygen hoses with couplings (the length is selected based on the size of your spare parts);
- base for the compressor - a thick board, a piece of plywood will do.
In order not to pump any muck into the tires, it is advisable to also put a filter to separate oils, dust and other contaminants. A diagram of a homemade compressor is shown in the photo.

Homemade compressor circuit
The compressor must be equipped with a starting device. We plug it into the network, look at which tube the air is sucked in, mark it.You can put a car filter on it - clean air will be pumped in.
We collect the receiver-oil separator from the cylinder and the safety valve. To do this, we cut two fittings into the cylinder - for the inlet and outlet of air. We put a safety valve on the inlet and connect the compressor outlet with an oxygen hose.

Homemade compressor for the garage based on the compressor from the refrigerator
We put another car oil filter on the outlet of the oil separator receiver - to remove the oils completely. We connect the filter to the pressure gauge, and from it there is already a hose, which is connected to the bus through the corresponding adapter.
The assembly is complete. But in order to carry this device conveniently, everything must be fixed in some way. You can weld the frame to size, attach wheels and a handle - for easy transportation. One of the compressor options for inflating the wheels is described in the video. There is no receiver, but an oil filter performs its function. You can do that, but with a receiver, the design is more reliable.
Since the compressor in the refrigerator is small, it can take a long time to inflate the wheels. It can be made more powerful by installing two compressors that will start at the same time. Accordingly, the pressure will build up twice as fast. But in such an installation, a more solid security group is required. Such homemade products require a little more equipment, since the circuit is still more complicated.