How to make an inspection pit in a garage
Many people try to do maintenance or minor repairs on their own. In order not to lie on your back under the car, you need an inspection pit in the garage.
The wiring must be installed before you start laying / pouring the walls
The content of the article
Dimensions of the inspection pit in the garage
You will not find strict recommendations for the size of the garage pit. They are mainly based on the parameters of the machine and their own growth. The dimensions of the garage pit are selected from the following considerations:
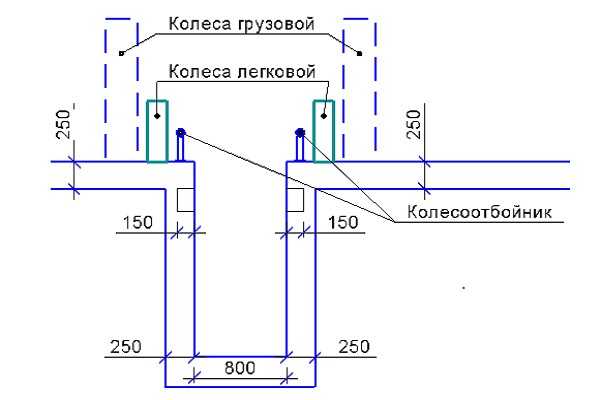
- The width should be large enough for you to work comfortably in it. At the same time, it is limited by the distance between the wheels of the car - each wheel must have room to maneuver. On average, the width of the inspection pit is from 80 cm and more.
- Its length depends on the length of the vehicle. Add 1 meter to the size of the car. This is enough for a comfortable work.
- The depth is calculated depending on your height: your height is + 10-15 cm. In this case, you don't have to worry about hitting your head. If you need to work for a long time with your hands up, you can knock down a special small stool and stand on it. You can raise the floor in the observation pit a little more using wooden ladders.

Sectional view of the pit
This is far from being dogma. Everyone does as he sees fit. To some, deep pits seem uncomfortable and they make them almost exactly in height, and sometimes even lower - 1.5 meters. If we take into account the clearance of the car, from the floor of the pit to the bottom of the car it will turn out to be about 1.7-1.8 meters. You can do that.
Another moment in length. Sometimes a long pit cannot be made. Then it is made about half the length of the car, driving it in front or back, depending on which part of the car needs inspection or repair.
Now about where to place the hole in the garage. Usually it is slightly shifted to one of the walls, leaving a wide side for installing equipment, storing spare parts, etc. In this case, from the edge of the pit to the near wall should be at least 1 meter.
That's all for this. Just note that we were talking about the final dimensions of the pit. When marking the pit, it will be necessary to add thickness to the walls, and dig deeper to the height of the floor screed (if you do it).
What materials are they made of
The inspection pit in the garage (its walls) is laid out with bricks, heavy building blocks, made of monolithic concrete. If we talk about brick, it is better to use ceramic brick: it is not afraid of moisture. The walls are made in half a brick or brick. The thickness of the wall, depending on the method of laying, turns out to be 12 cm or 25 cm. This must be taken into account when marking the pit.
You can use bricks on dry, dense soils. The groundwater level should be low. If the water rises high, it is better to make the pit walls of reinforced concrete.
The second method of external waterproofing
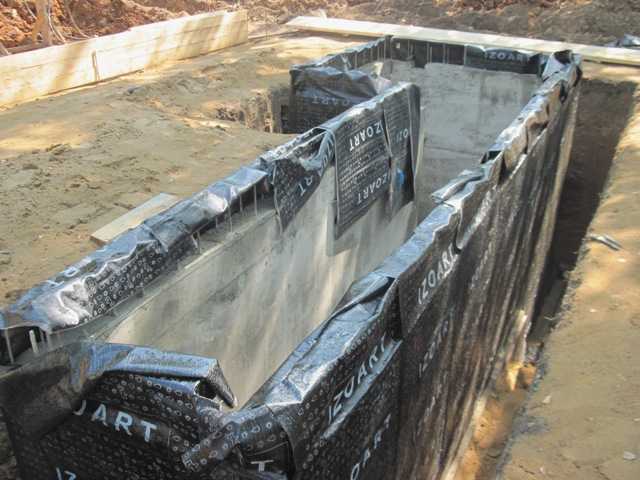
How to prevent moisture from entering the inspection pit in the garage? Most often, waterproofing films or membranes (butyl rubber, aquaizol, etc.) are used. They are laid with panels, covering the pit from one edge to the other, with 10-15 cm protruding from each side of the pit to the garage floor. The sheets are laid with an overlap. They should overlap by at least 15 cm. To get a more airtight joint, they are glued together with double-sided tape, in two strips - at the beginning and end of the "overlap". The film is well straightened so that it fits snugly against the walls of the pit.During further work, it is important not to damage the membrane.
Internal waterproofing
Internal waterproofing is usually the impregnation of walls with coating waterproofing. If possible - composition for swimming pools. It creates a waterproof, dense film that closely resembles rubber. It has a blue color and after hardening it washes well. It is better to process the walls with this composition twice, or more.

Impregnation of deep penetration significantly reduces the hygroscopicity of the material
Another option is a cement-based deep penetration primer. The polymer particles contained in it block the capillaries through which moisture penetrates through the thickness of the material. One such treatment significantly reduces the hygroscopicity of the material. In the case of water in the garage pit, at least two treatments are required (and even more is better).
Caisson device
There is another option to escape from the ground - to make a metal caisson. A box of appropriate dimensions is cooked from sheet metal, treated with anti-corrosion compounds, then installed in a pit. If the welds are sealed, there will be no water, but another problem may arise. Large quantities of water can squeeze out the caisson. They say that it "pops up".
To avoid such a situation, corners, rods, which go 1-1.5 meters into the ground, are welded to the sides of the caisson from the outside. So that at the same time the volume of earthwork is not very large (the foundation pit, taking into account these struts, turns out to be large), you can cheat. Before installing the caisson, drive corners or metal rods into the ground, releasing their ends outward. They can be welded to the caisson body after installation. The pit will still have to be made larger (it must be cooked outside), but its dimensions will still be smaller. The second plus of this method is that the rods will be driven into dense soil, which means that they will better hold the caisson.
Another way to exclude the "floating" of the caisson is to make a hole in the wall at some height. If the water rises to its level, it will begin to pour inward. The water can then be pumped out, the main thing is that everything remains in place. The inspection pit in the garage, arranged according to this principle, stood for more than 20 years - until the metal rusted.
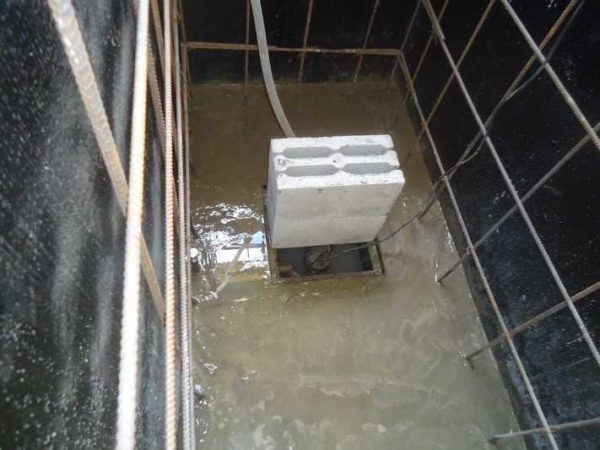
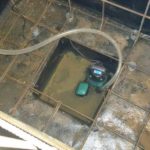
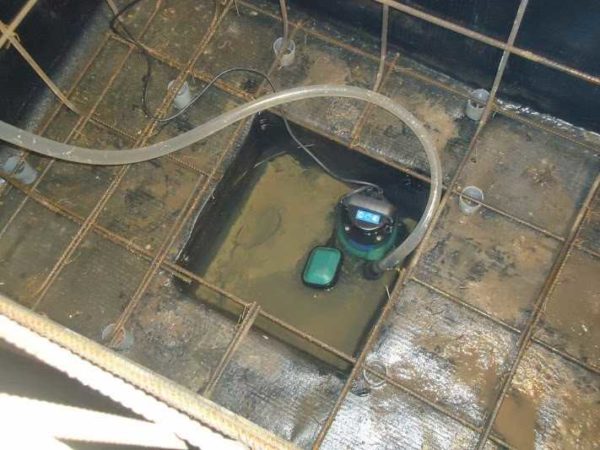
Water collection pit
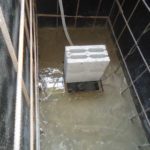
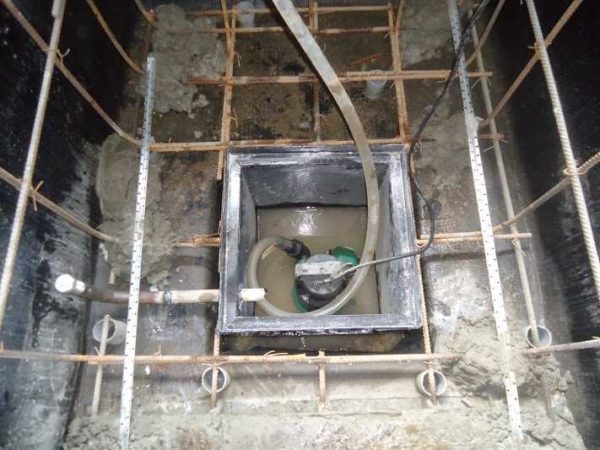
If the pit has already been built, and the coating waterproofing or impregnation did not give the desired result, it is necessary either to arrange a drainage system around the garage, or to collect water in one place. To do this, a pit is made in the garage inspection pit, at one of its ends. Water accumulates in it, from where it is pumped out by a pump. In order for the system to work in automatic mode, a water presence sensor is installed, which, when triggered, turns on the pump.
Formwork is made under the pit, poured with concrete. Then the pit is waterproofed together with the entire pit waterproofing. For reliability, you can also put a metal caisson inside.
-
- Concrete, caisson crushed by a load
-
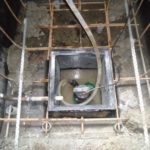
- Now the water in the caisson
-
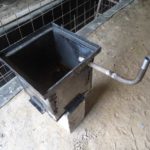
- This is a metal pit box

-
- We made waterproofing, we pump out water from the pit with a submersible pump. At the same time, we assemble a reinforcing frame for the concrete walls of the inspection pit
-
- Pit dug, formwork installed
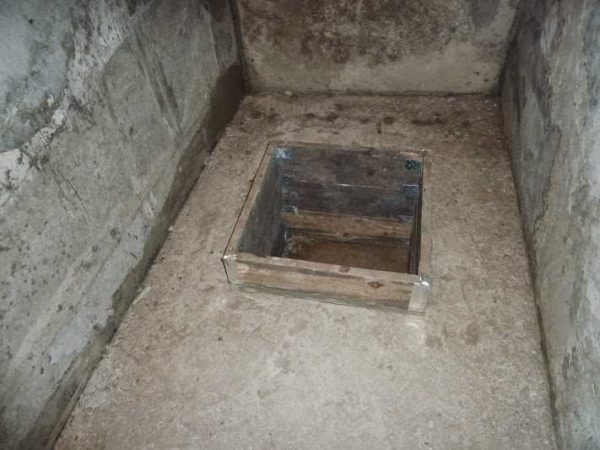
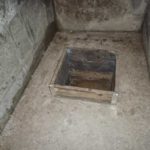
Since it is impossible to get rid of the dampness completely in this case, the boardwalk is knocked down onto the floor of the pit. To make the boards rot, they can be impregnated with working off. If you don't like its smell, take a special impregnation for wood that has direct contact with the ground (Senezh Ultra, for example).
Insulation of the inspection pit in the garage
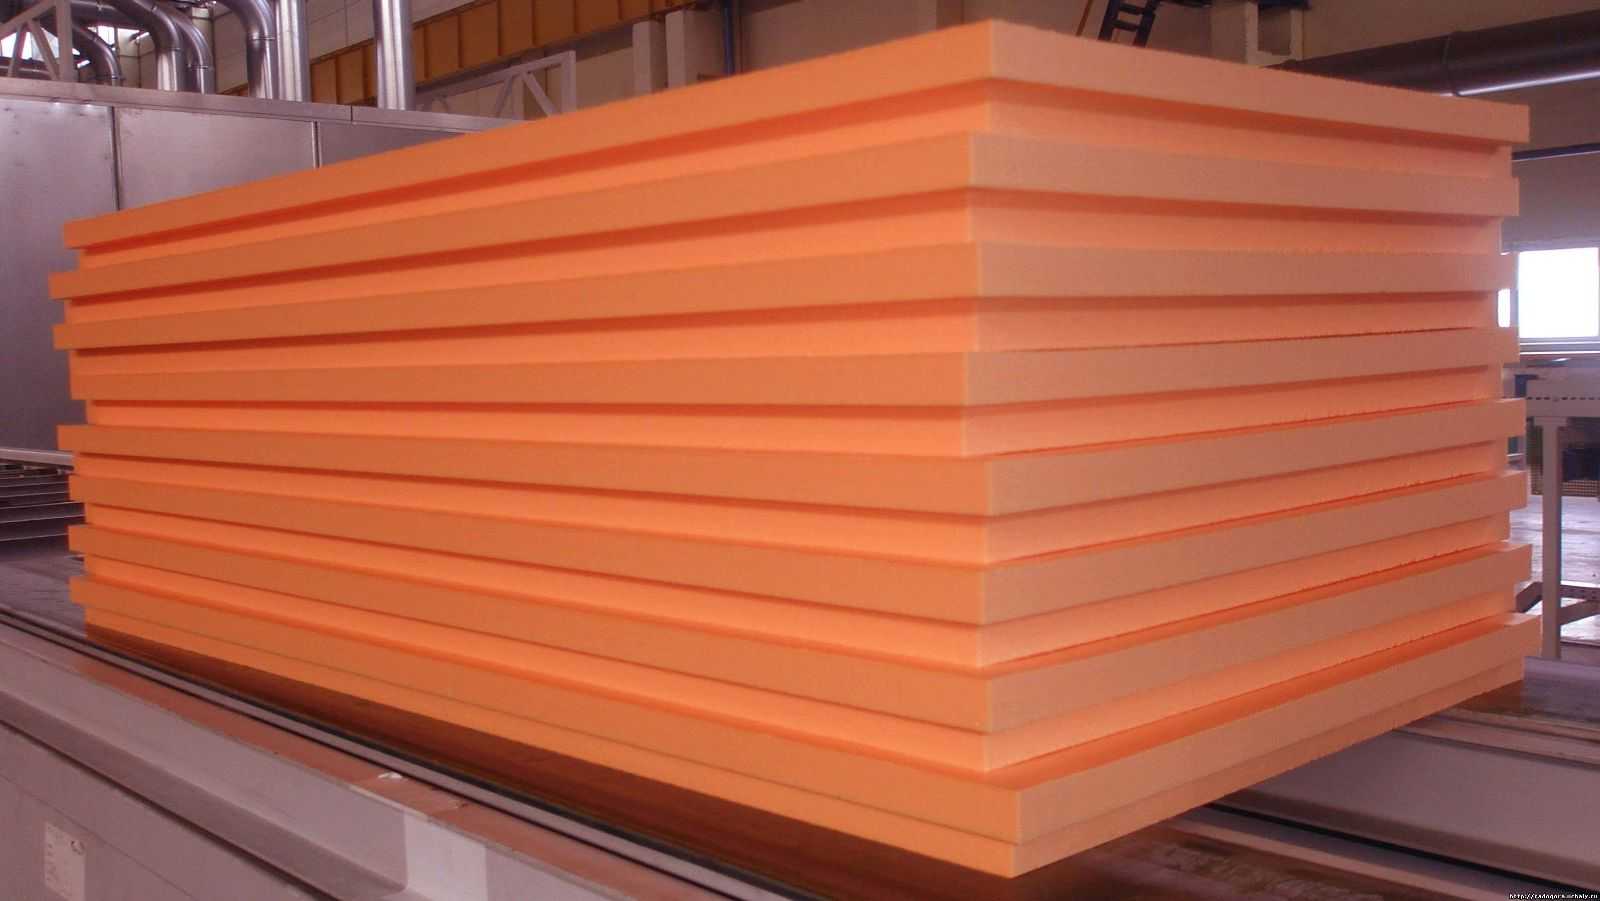
If you spend a lot of time in the garage, then you will most likely have heating. To warm up faster and faster, it makes sense to insulate the pit. EPPS (extruded polystyrene foam) is best suited for these purposes. It withstands significant loads, is not afraid of dampness, does not rot, fungi and bacteria do not multiply on it.
EPS thickness for creating a tangible effect - from 50 mm.They lay it between the ground and the wall of the pit. Then the outside-inside pit will look like this:
- waterproofing film;
- EPPS;
- wall.

It is EPS extruded polystyrene foam
Expanded polystyrene can also be laid under the screed at the bottom of the inspection pit. A reinforcing mesh is usually laid on top of it, and then concrete is poured.
How to make an inspection pit in a garage
After you have decided on the dimensions and what material you will make the walls from, what thickness they will be, you can start marking the pit. This can be done with pegs driven around the perimeter. The second option is to pull the string / rope between the stakes driven in the corners. We begin to dig a foundation pit according to the markings. The land is usually taken out and temporarily stored near the gate.
Made of bricks: a step-by-step photo report
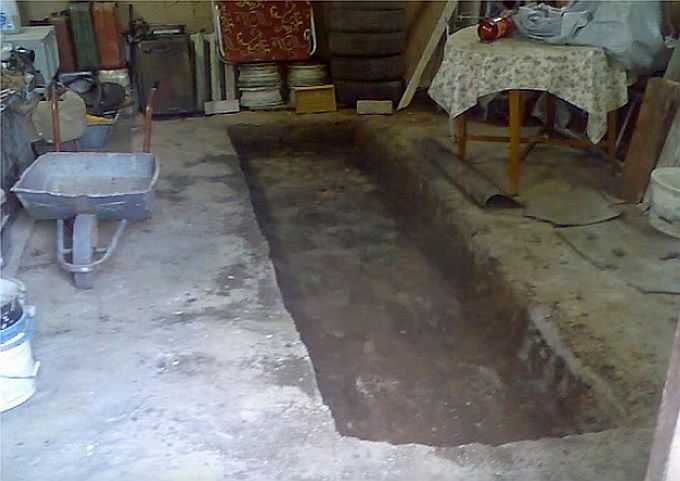
We started to dig a pit
Along the way with excavation, monitor soil moisture. If you have reached the design depth (required + floor screed thickness), and there is still no moisture, you can do without waterproofing. Those who do not want to take risks can be advised to immediately lay the film.
We level the walls. It is not necessary to achieve ideal geometry, but there should be no noticeable humps and pits. We also level the bottom of the pit, ram it, compacting the soil well. Usually a manual rammer is used. A layer of crushed stone is poured onto the bottom (twice 5 cm each), each layer is also carefully rammed. Next comes a layer of sand. It is enough 5 cm. The sand is moistened, tamped to a high density - so that the foot is not imprinted. Next, we lay a waterproofing film.
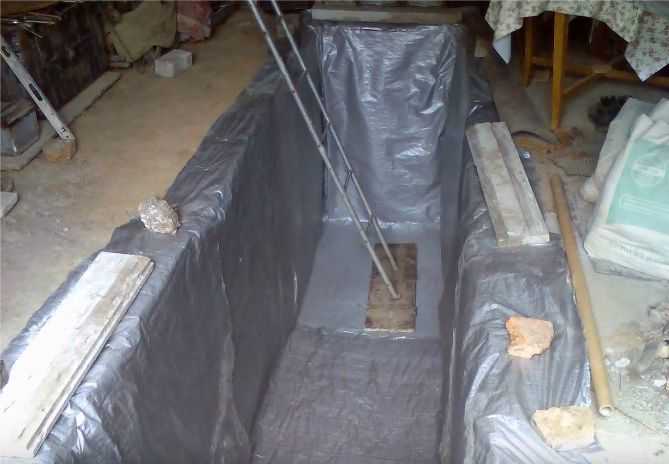
We cover the bottom and walls with a waterproofing film
We level it well, tucking it into the corners. We lay the sheets with an overlap of 15 cm, which we glue with double-sided tape. To prevent the edges from rolling, we press the materials at hand - boards, stones.
We put a layer of insulation on the bottom, on it - a reinforcing mesh made of wire. We fill all this with concrete of the M 200 grade. The layer thickness is at least 5 cm. To make it easier to navigate when laying, we make marks on the film by which you can control the layer thickness.
If you use Portland cement M 400, the proportions will be as follows - 1 part of cement, 3 parts of sand, 5 parts of medium and fine crushed stone.
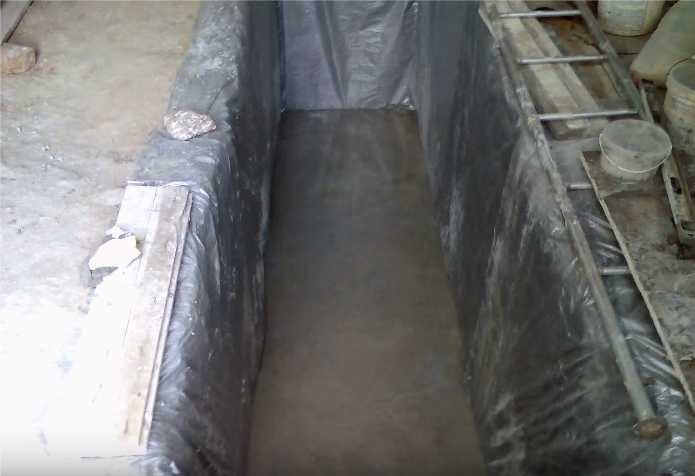
An inspection pit is being built in the garage: the floor is filled with concrete
We are waiting for several days until the concrete gains 50% strength. The exact time depends on the temperature. If it is around + 20 ° C, you will have to wait 5-6 days. If + 17 ° C it is already two weeks.
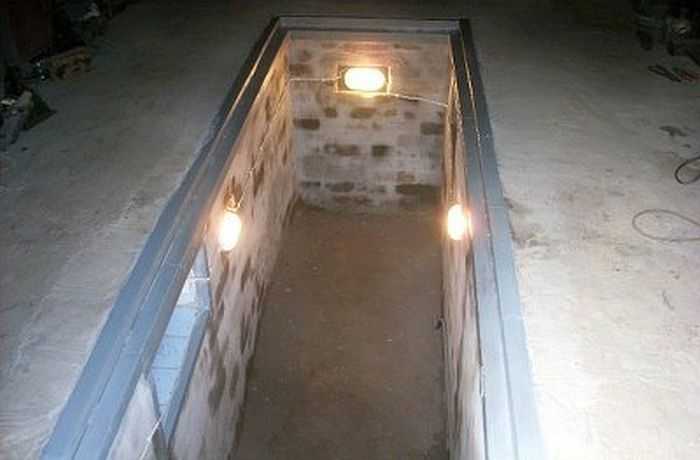
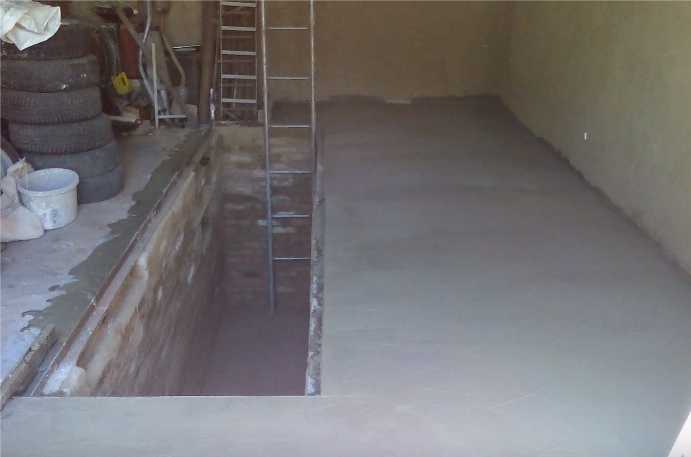
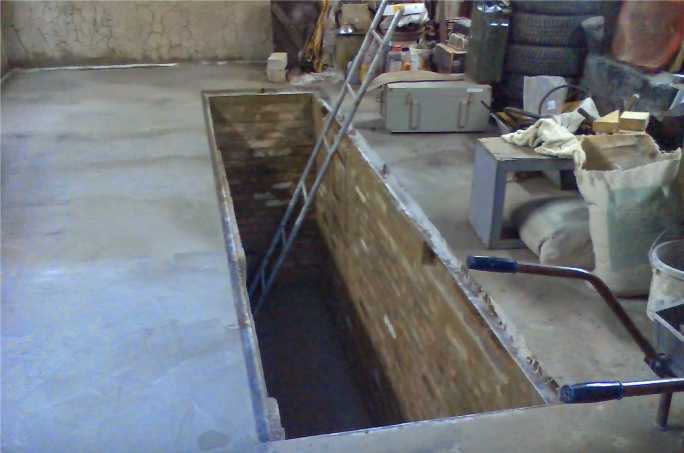
We start laying out the walls. It was decided to do it in half a brick. Used bricks were used, about 850 pieces went (pit size 4.2 * 0.8 * 1.7 m). The walls were laid out in a circle to the level of the elbow.
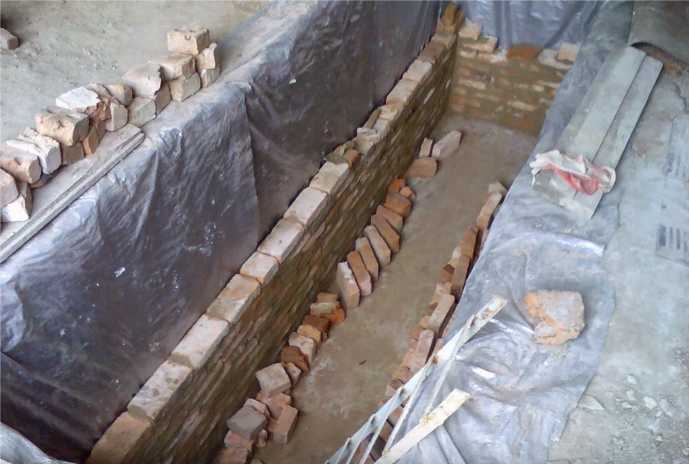
We erect the walls in plokirki
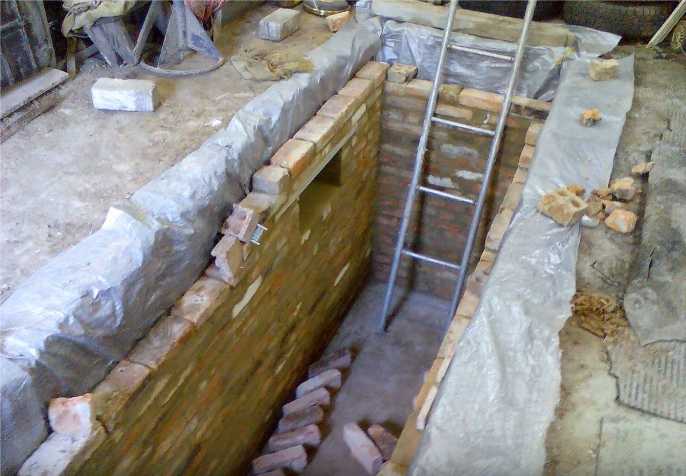
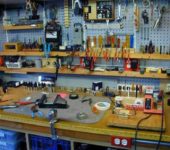
At the level of 1.2 meters from the floor, it was decided to make a niche for the instrument. Its height is 3 rows of bricks, the top is covered with a processed board.
How is a pit beggar made
In order not to have to lay out a brick niche, a metal insert is inserted. A box is welded, suitable in size.
Metal box
Further, the walls were driven out almost level with the garage floor. Part of the walls was replaced with two sections of channels. Jacks rest on the bottom if necessary. A metal corner with a shelf of 50 mm, steel thickness 5 mm is laid on the top row.
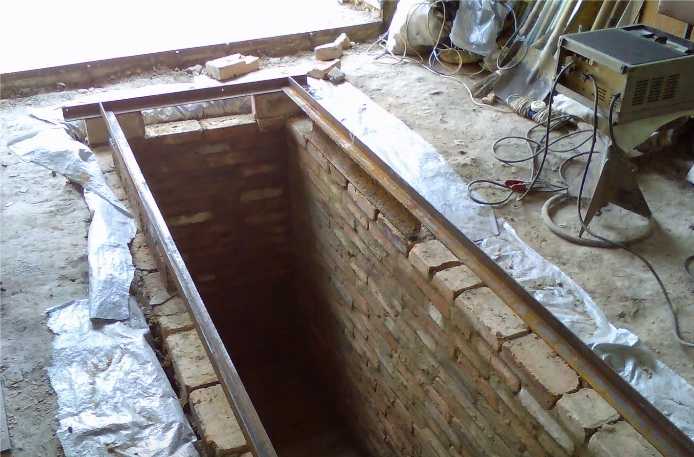
Channel on both sides of the inspection pit in the garage
The corner unfolds so that one of its shelves hangs down, the second covers part of the upper surface of the brick. To prevent the wall from collapsing under load, mortgages are welded to this corner, which are then connected to the reinforcing belt of the concrete garage floor.

Corner laid, welded embedded
Further, preparatory work was carried out on the construction of the concrete floor and it is filled with concrete.
Pouring the floor in the garage - the concrete level at the upper edge of the corner
Second side is concreted
Features of the manufacture of concrete walls
When casting concrete walls, formwork must be made. It is easier to make it from sheet material - construction moisture-resistant plywood with a thickness of 16 mm, OSB.Shields of the required size are knocked down, reinforced with bars on the outside. They are necessary so that plywood or OSB does not bend under the pressure of concrete. First, put the outer parts of the formwork. If the walls of the pit are even, problems will not arise. Just lean them back, put them straight.
Then the internal formwork panels are exposed. There should be a distance of at least 15 cm between them. So that the walls are not deformed during the pouring process, spacers are placed between them.
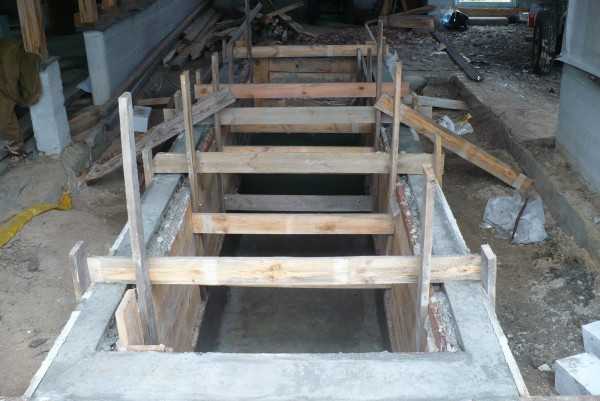
Example of formwork for a concrete inspection pit in a garage
It is advisable to fill it at a time. The filled portions must be bayonetted or processed with a submersible concrete vibrator. Remove the formwork after two to three days. After that, you can install a corner with welded embedded rods (strips) and start pouring the floor.


THX. There is no bump stop. You can run into the hole.