Do-it-yourself doghouse: two photo reports + video
When a dog appears in the house, the question of housing immediately arises: somewhere she must sleep and hide from the rain. Not everyone wants and can keep them in the house, because the kennel is required. A do-it-yourself dog booth is built, even without skills, in one day. There is nothing complicated, but there are features.
When building a booth, you need to focus on the size of the dog
The content of the article
We decide on the size and design
The right booth for a dog is not built just like that: you need to know what size it is required, where and what size to make a hole, what is better to make and how to insulate.
First of all, they are determined with the size of the dog kennel. The easiest way is to focus on the size of your dog. The height of the dog booth should be 5-6 cm higher than the pet, in width / depth is approximately equal to the length of the body, plus 10-20 cm in length for the ability to stretch out the legs. In general, dog handlers have recommendations for the size of doghouses. They recommend making booths depending on the size of the breed. The data is presented in the table (width / length / height of the doghouse are given in centimeters):
| Breed size | Width, cm | Length, cm | Height, cm |
|---|---|---|---|
| For large dogs (kennels for Alabai, shepherd dogs) | 120 | 100 | 100 |
| Medium breeds (husky, husky, labrador) | 100 | 80 | 100 |
| Small dogs | 80 | 60 | 80 |
If your pet does not exceed the average size of its breed, you should not increase the booth: it will be difficult for him to warm it up in winter. Please note that these are internal dimensions, if sheathing is planned, the dimensions are increased by the thickness of the walls.
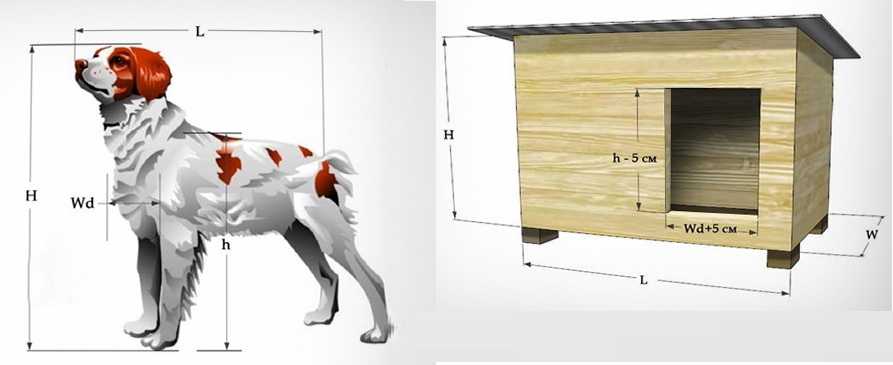
Sizing a dog kennel
How wide is the hole
There are recommendations regarding the width of the access hole. It is determined based on the width of the dog's chest. Measure, add 5 cm, you get the width of the hole. The height depends on the height of the withers: you also add 5 cm to the measured value. For the puppy, first make a small hole - a little more than required, as it grows up.
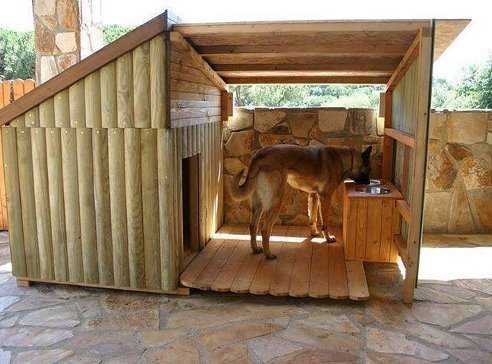
The hole in the doghouse is not located in the center, but closer to one of the walls. With this structure, the dog will be able to hide from precipitation or wind behind a solid wall, curling up in a protected part. It is often suggested to divide the booth with a partition, making a kind of "vestibule" and sleeping area. But hiding in a fenced-off compartment, the dog cannot control what is happening in the entrusted territory. Many conscientious watchmen really do not like to go there. Some, even in the most severe frosts, lie opposite the entrance, not wanting to leave the post. So, the option with a displaced access port shown in the photo is optimal.
One more point: at the entrance to the kennel there should be a nut 10-15 cm high. It protects the dog lying in front of the entrance from wind and precipitation, prevents snow and rain from clogging inside.
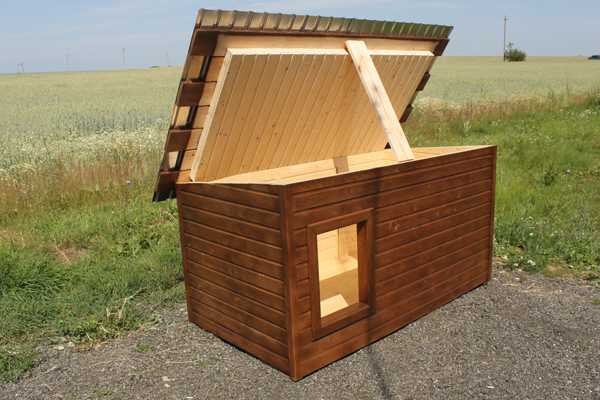
It is better to make a folding roof
Roof type
The roof in the doghouse can be pitched or gable. Shed, preferable: not very large animals like to sit / lie on it. This way they can control a large area.
Another point: since there is no heating in the booth, in winter the air in it is heated by the heat generated by the body. The larger the volume, the longer the kennel will warm up. The gable roof on the kennel just significantly increases this volume, without bringing any other benefit. If you want your dog to feel good, make a pitched roof.
If you don't like it at all in terms of aesthetics, make the ceiling, and the roof itself is already on top. Moreover, it is advisable to make it removable or folding - on the hinges.So it will be more convenient to carry out periodic cleaning and disinfection: organic residues are clogged in the cracks, in which fleas breed. It is from them that you will have to process the kennel from time to time.
A dog booth must have a raised floor. To do this, make legs at least a few centimeters high or knock down the frame, on which floor boards are laid directly.
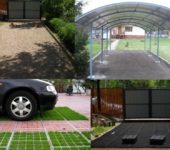
In general, if possible, dogs prefer to spend time outdoors. Therefore, it would be nice to make a canopy in front of the doghouse or on the side of it. And to be able to sit / lie under it - make a flooring.
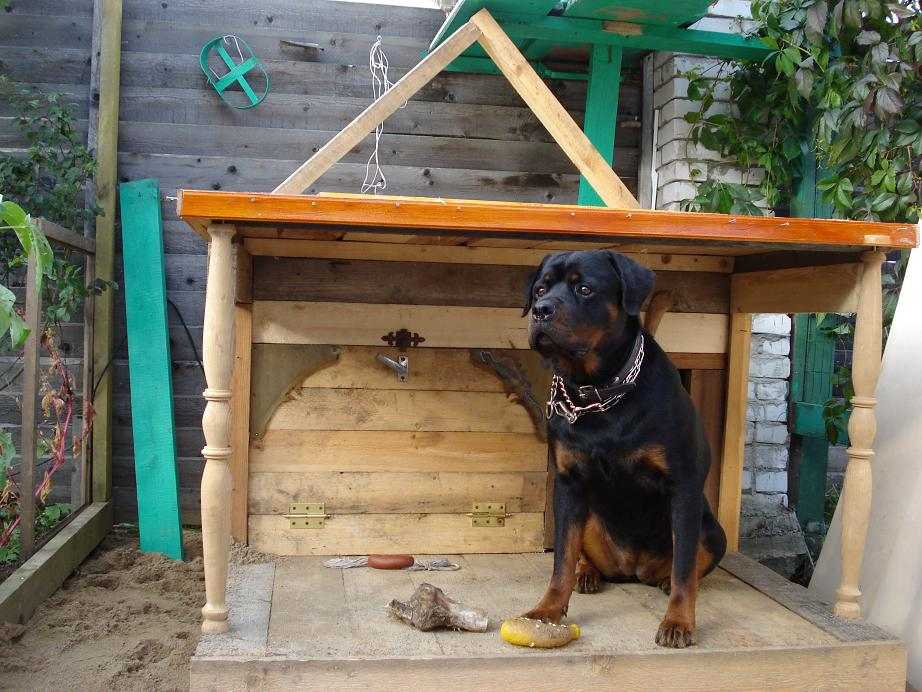
I see everything, I hear everything))
In this booth, not a folding roof, but a front wall, which is also convenient for processing.
About construction winter chicken coop can be read here.
What to build and what to insulate
Most often, a doghouse is made of wood or wood materials. Wood is preferable - it keeps it cool in summer and warm in winter. In it, the dog will quite comfortably endure the winter if the boards are fitted tightly, there are no cracks, even with a single wall the wooden booth is warm. So that, by the way, the booth for the dog turns out without gaps, they use an edged board, sometimes even grooved.
Concrete and brick booths are not the best choice: they conduct heat well, it is too hot in summer, and very cold in winter. That is why dogs often prefer to spend the night outdoors, rather than in a brick kennel.
If the wood is too expensive, use boards for the frame, and everything else can be made from OSB, fiberboard, plywood. If you use sheet wood material, you may need two layers of it: it is still much thinner than wood and, due to the presence of a binder, has better thermal conductivity (it retains heat worse). Therefore, in this case, you can think about insulating the booth for the winter.
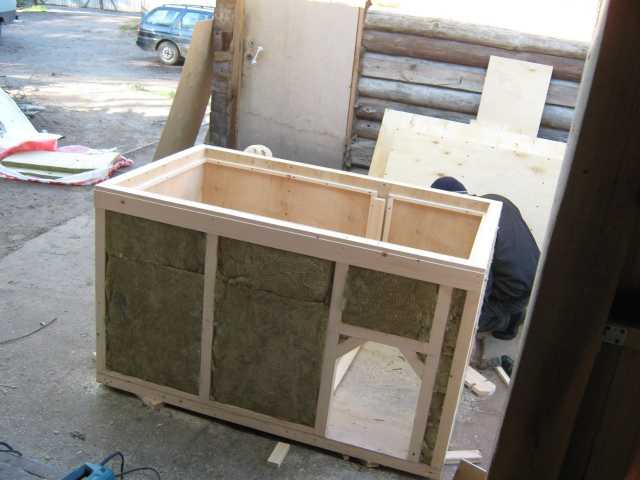
Plywood doghouse: an example of insulation
You can insulate with any suitable material. You can use the leftovers from the construction of a house, cottage, bath. It can be rock wool (like in the photo), foam or other material. When insulating with foam, do not overdo it: it does not allow air to pass through, and if you hang a curtain on the manhole, the dog will stop sitting in the booth: there will not be enough air for it. Therefore, either leave small gaps or provide for some kind of air intake channel.
If we are to insulate, then the floor and the roof too. They are also made double, laying with the same insulation. Too large a layer of insulation should not be done: the dog itself can warm up quite well, besides, it has a decent fur coat. And for her, it is worse - a frequent sharp change in temperature than constant cold. If you want the dog to be warm, fill the kennel with straw for the winter: they will trample it where necessary, and throw away the excess. You need to change such a bedding twice per winter.
For the winter, a dense fabric cut into rather thick strips is nailed over the manhole. Two strips cut into noodles are fixed with a shift of the cuts. So it turns out that the wind does not blow into the dog booth, and the entrance / exit is free. But some dogs do not immediately get used to this innovation and sometimes refuse to go inside.
The outside of the booths can be painted, but not from the inside. The canopy and the wall from the wind (preferably one deaf) are treated with antiseptics. There is no point in painting them. The main thing is to make the roof without cracks so that it does not flow inside and does not blow out.
A firewood shed or woodshed is easy to do with your own hands. How to read here.
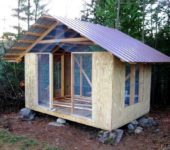
Do-it-yourself insulated dog booth
If we talk about drawings, the animal does not need any "bells and whistles" and too large sizes. For them, this is a burrow, but it cannot be large, by definition, and it is difficult to heat extra volumes in winter. The booth was made with two windproof walls and a small canopy.
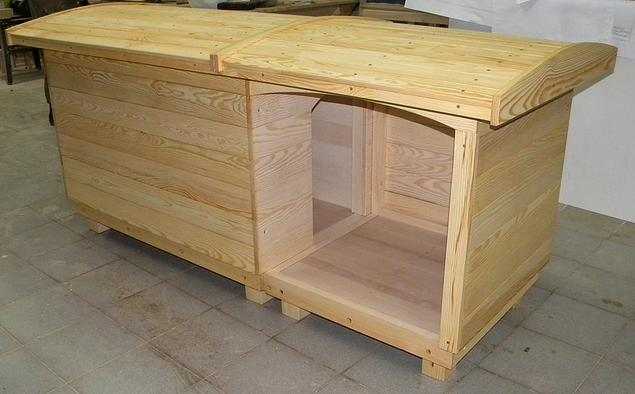
Ready kennel for a dog
First, they made two pallets in size with supports on four square beams, then they connected them together. It turned out to be a podium, on which the floor boards were fixed.Legs in the design are desirable - the floor will not get wet.
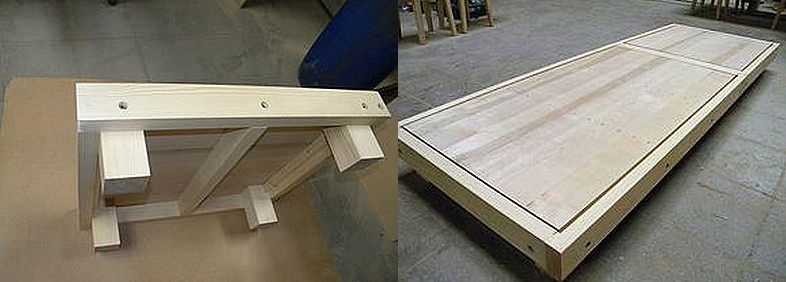
Ready floor for the booth
Bars were fixed in the corners. At the junction, there were six pieces: four for the kennel itself, two in front for the windproof walls. First, they made the inner lining, to which they fixed 7 cm of foam, then sheathed it outside. To prevent water from flowing into the walls between the boards, the gap was closed from above with a bar of a suitable width.

Walls in the booth with insulation
When the outer wall cladding, to which the windproof wall adjoins, the boards were used whole - so the structure is more rigid.
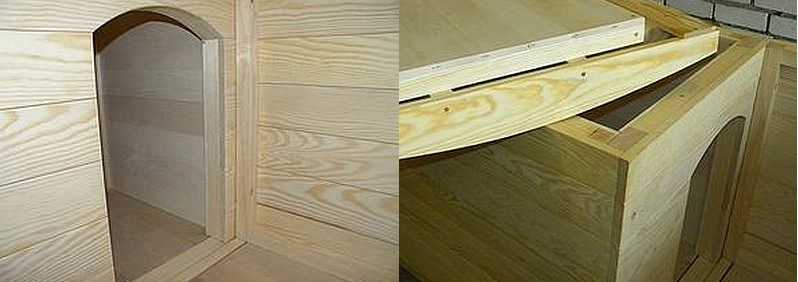
Laz and insulated removable roof
The longest time we fiddled with the roof. I didn't want to make it completely flat, so they made a strictly sized insulated shield, which was attached to a slightly rounded roof made of type-setting rails. At least it turned out without a slope, but due to the sloping shape, the water flows off without problems. Since it was still not possible to make it tightly, a film was placed under the slats.
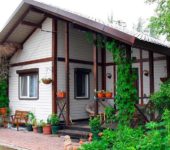
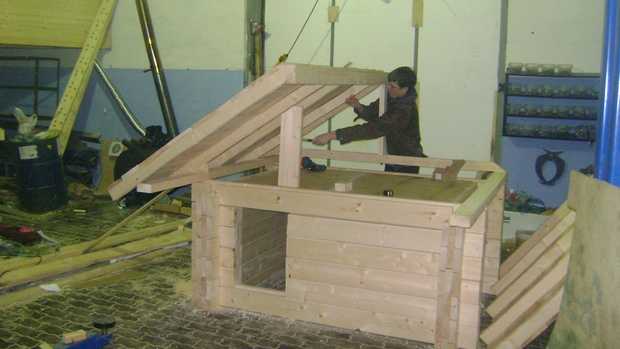
A booth from a bar for Alabai from a bar
Let's say right away that a doghouse was built from materials left after the construction of the bath. She will also be placed next to it, because in appearance it should resemble the bath itself.
The basis of this booth for a dog was a drawing with the dimensions of the booth for an alabai. But since the dog is not an Alabai, the dimensions were made more modest. Corrections were also made to the design: a window was made in the side wall for viewing, and a door for cleaning was made in the back.
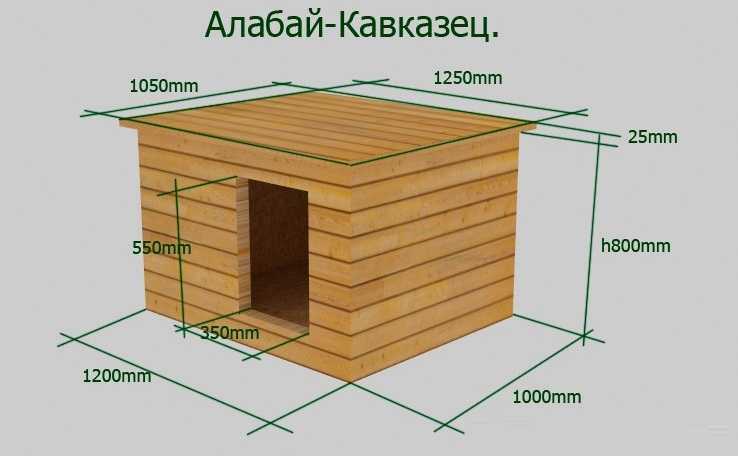
Big dog kennel from a bar
First, they built and painted a platform - from the remains of logs, which were cut and put together. Then the actual assembly of the doghouse began. First, they planed and sawed in the workshop, and the finished structure was taken out and installed in place - near the bathhouse.
The first crown was placed whole. It forms the sill and supports the entire structure. Then the timber was cut according to the scheme. Considering that the work experience had already been (the bathhouse was built), the work proceeded quickly.
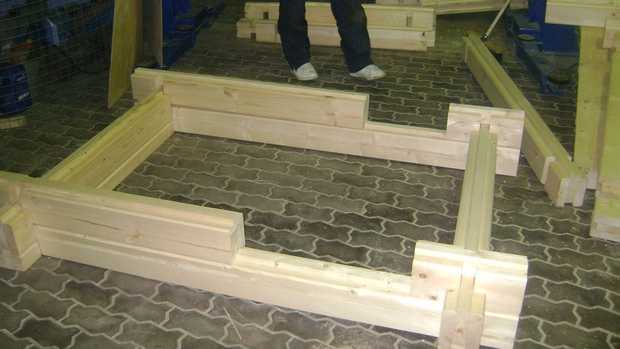
The first two crowns are folded
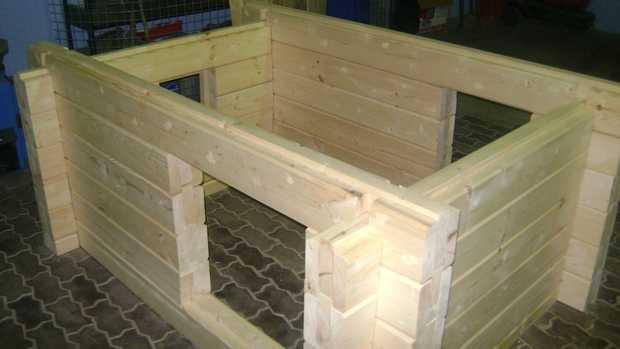
The walls are ready
Since it was supposed to make the roof a "house", as in the bathhouse next to it, to keep the dog warm, they made a ceiling. A sheet of plywood was used for it. A dowel was made in the timber, on which a sheet of thick plywood cut to size was laid. Then the roof shields were assembled and installed.
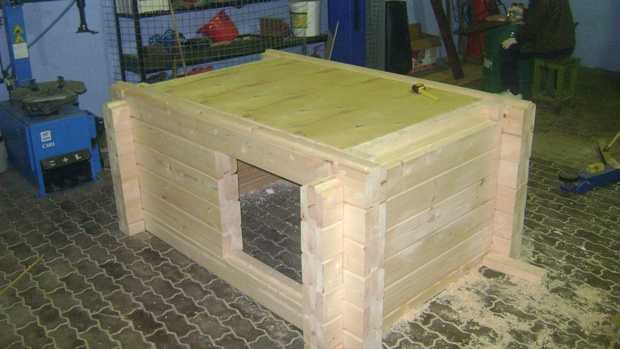
Dog kennel ceiling
They were not assembled according to the rules - the rafter system was not made. Since the roof is decorative, they assembled the shields, chipped them with the remains of soft tiles (they also remained from the construction of the baths), then they were connected and the gables were sheathed.
The roof was not done according to the rules
Then the gables were sheathed with boards. The cracks were covered with boards. The dog house is ready. Made by hand in half a day.
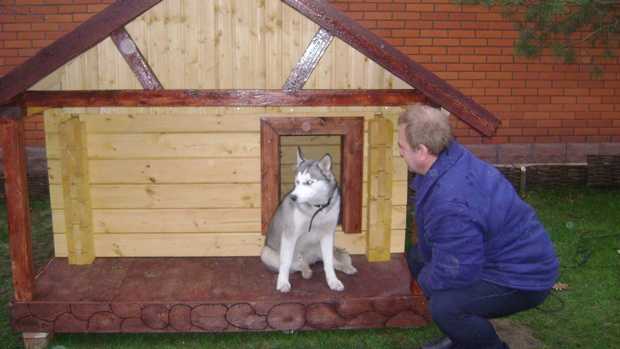
We are not quite Alabai and not Caucasian, but also not a very small dog
Such a structure for a dog of this size will still be large. This kennel is designed for larger dogs. The situation can be saved only by a partition installed inside, which reduces the width.
Another do-it-yourself dog booth is made of OSB, covered with a profiled sheet (insulation and inner lining are planned). The assembly process was filmed.