A shed for chickens for the winter: we build and insulate a chicken coop ourselves
In winter, chickens can lay no worse than in the warm season. If they are warm enough (the ideal mode is from -2 ° C to + 20 ° C), there will be enough light and good (not excessive, but balanced in composition) nutrition, the number of eggs may be the same or slightly less. In addition, knowing that your bird is warm, you do not have to worry. Therefore, we immediately build a winter chicken coop with our own hands with sufficient insulation, or we take measures to reduce heat loss if a ready-made room is being re-equipped.
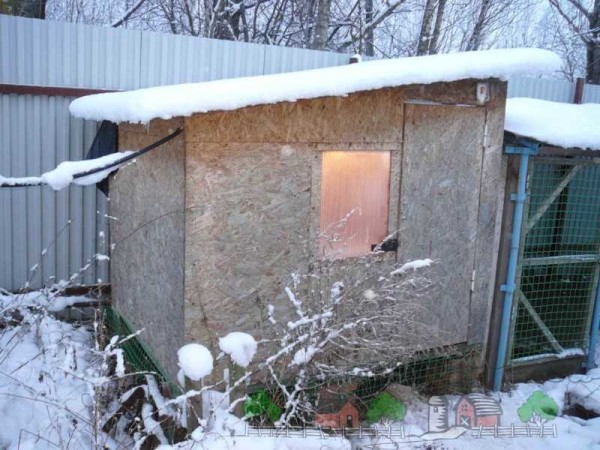
A warm barn for chickens and lighting are important for their normal well-being.
Immediately about the size of winter chicken coops. The norms for placing poultry indoors are recommended as follows: from 2 to 5 chickens per square. If the size of the area is cramped, you can "populate" the house more densely. You just need to make more nests and perches. They can be arranged in rows, one above the other. Laying hens feel great in multi-tiered small rooms. With broilers, of course, things are worse - it's hard for them to climb up, but they are rarely kept until winter.
Winter walking is also needed: down to -15 ° C, laying hens can walk outside. Only in calm weather. With height, too, everything is more or less clear. A meter and a half height is enough for chickens, but you need to do it so that it is convenient for you to serve the room.
The content of the article
What to build from
You can inexpensively build a chicken coop from cinder block, foam concrete. If there is a place nearby where there is clay, you can drive out the walls using adobe technology (hut or dry bricks).
If you need a budget warm chicken coop, you can make it like a dugout. The walls can be brought out half a meter above the level, well-insulated windows with double or triple glazing can be made in the south. It is good to insulate the piece that protrudes above the ground and the roof. For warmth, all walls, except for the southern one, can be covered with earth. If the top is still covered with snow, it will be quite warm.
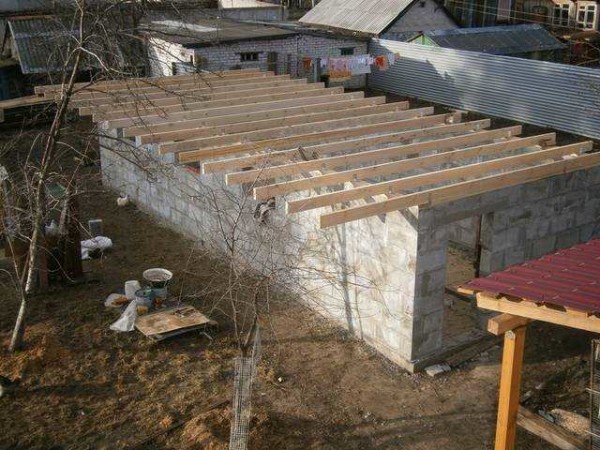
Those who are seriously going to engage in poultry breeding should think about building a chicken coop from foam concrete: it is light, warm
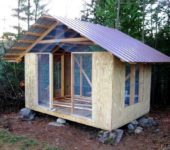
Another, perhaps, the most popular and economical option is a do-it-yourself frame chicken coop. Since the rooms are usually small, the timber for the frame needs a small section and it does not take much. You can sheathe the frame with a board, plywood, OSB and other similar material. Lay insulation between the racks and sew on the other side. To prevent mice from settling in the insulation, the people came up with the idea to beat the insulation on both sides with a metal mesh with a fine mesh. This makes the building somewhat more expensive, but fighting mice is more expensive. It turns out a warm chicken coop and the thickness of the insulation depends on the region. You can focus on recommendations for construction of frame houses.
A chicken coop from a log or from a thick bar can do without insulation in the middle lane. Only the caulking seams need to be sewn up with slats. Not so much from drafts as from chickens: so as not to pull the tow or moss.
Chicken coop foundation
There are options. They build most often on columns - they make a columnar foundation. It happens - they make a shallow pile or tape. But this is in the event that a heavy material is chosen for the walls, or that requires a rigid base: brick (ceramic, silicate, adobe), foam and slag blocks, shell rock, etc. For light structures made of wood - frame frames, beams, logs - it is enough to fold the posts or put ready-made foundation blocks (you can make them yourself).
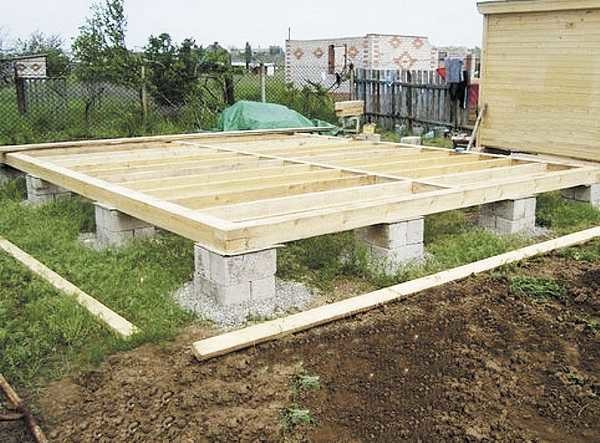
These are posts for a frame shed for chickens
In the case of a columnar and pile foundation, the supports are placed in the corners and after 2-3 meters in the interval between them. The load on the base will turn out to be small, therefore they are rarely very zealous.
Warming
Warming and heating - these two issues are very closely related: in a warm chicken coop, even in severe cold weather, you can do without heating. There are many examples. No matter how economical the heating is, as a result it flies into a good penny. Therefore, it is much more cost-effective to build a well-insulated barn right away than to pay annually for heating it later.
Any modern materials can be used as insulation. You can stuff them from the inside or outside. The main selection criterion is most often the cost. The most optimal is foam. It is inexpensive, has excellent thermal insulation: a 5 cm thick slab replaces a 60 cm brick wall. It is mounted on glue or with long nails with plastic washers, you can put pieces of some kind of plastic.
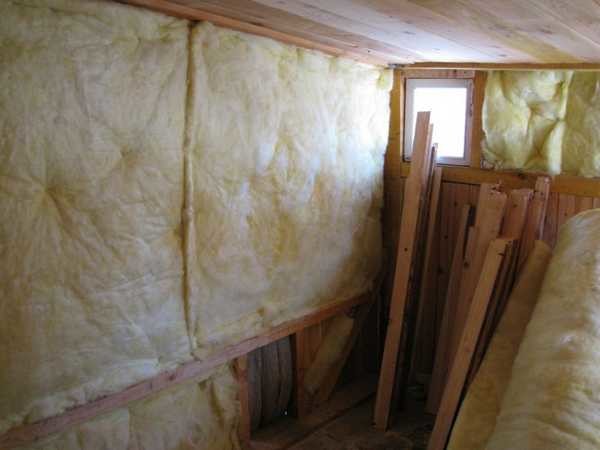
Insulation of a chicken coop with mineral wool
You can also use mineral wool and expanded polystyrene. But mineral wool requires membranes on both sides. Outside, they put a wind-hydro-protective one with one-sided vapor permeability (vapors must be removed from the insulation). Inside (indoor) steamnotpermeable.
Styrofoam is definitely good. Performance is even better than foam, even mice don't like it. But it is expensive. But, you don't even need to sheathe it: the plates are even, smooth, there are also colored ones.
You can also use natural insulation: hammer between two planes with sawdust, coat with clay mixed with sawdust, etc. In terms of heat conservation, such insulation is inferior to modern materials, but practically costs nothing. So these methods are also used. For the southern regions with mild winters, "folk" warming is more than enough, but even in the central part, and even more so in the North, they are probably not enough.
It was about the walls. It is imperative to insulate the ceiling in the chicken coop: warm air accumulates under the ceiling. If it is not insulated, it will always be cold. If you knock out the bottom with cardboard (it keeps heat well) or any board material (plywood, OSB, fiberboard, gypsum fiber board, etc.), and put sawdust on top of the attic or lay hay, it will become much warmer. And if you insulate it according to all the rules, it's generally excellent.
The insulation of the floor is done according to the same scheme as for the house: a rough floor, on it - logs, insulation between them, on top of a final floor. Make it as warm as possible: you won't regret it.
Not everyone makes a wood floor. There is also adobe - the clay is mixed with straw and allowed to dry, or concrete. The coldest is concrete, but if you add enough sawdust, it will be fine. And if, suddenly, you still make a concrete floor with insulation (at least, the bottles are bricked up), it will be generally fine.
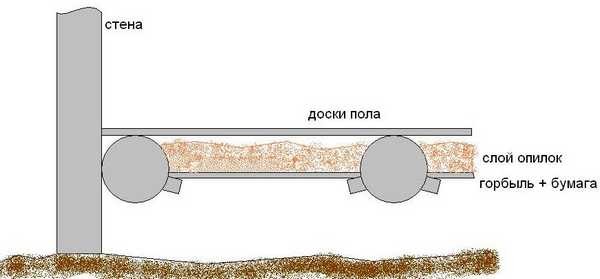
Option for floor insulation in the hen house
When you are still planning a winter chicken coop with your own hands, consider the presence of a vestibule. This small extension allows you to significantly reduce heat losses, which means - reduce heating costs.
The internal arrangement of the chicken coop is described here.
Heating
It is difficult to overestimate the importance of properly arranged heating for a winter chicken coop. All owners of poultry houses know this: at above-zero temperatures, laying hens feel great and rush well in winter.
Electricity
If electricity is supplied to the chicken coop, you can heat it with fan heaters or infrared lamps. Fan heaters cheaper to buy programmable. Not in the sense that they are cheaper, but in the fact that they will wind less electricity during the winter. There are two types of automation: temperature and time. Naturally, to heat the chicken coop, it is better to take one that reacts to temperature. As soon as it gets colder, say to 0 ° C, it turns on, as it rises to + 3 ° C, it turns off. In general, you choose the settings yourself. The method is effective and quite popular.
Chickens are often heated IR emitters... But they do not heat the air, but objects that fall into the zone of action of the rays. They are hung over the perches and several of them above the floor. If the bird is cold, they gather under them. It can be cold in the hen house, the main thing is that its inhabitants are warm. This is exactly what happens with infrared heating. One caveat: IR lamps burn out from frequent on / off switching, therefore it is advisable to cut them down very rarely. In humans, they burn for months, fortunately, they "pull" electricity a little.
It is also important to know about the features of the operation of IR heating lamps (there is for lighting, do not confuse). The surface of the lamps heats up, the design of the lamp itself is not adapted for such loads. Plastic sockets do not hold the lamp well, and finding ceramic ones is a problem. To ensure fire safety, it is best to make a wire cage for the lamp. So the chickens will not be burned and if the lamp falls out, it will not break and the litter will not flash.
Oil radiators ineffective: high consumption, little heat. Self-made devices with an open spiral are effective, but very fire hazardous, and you will have to leave them on. This is too much of a risk.
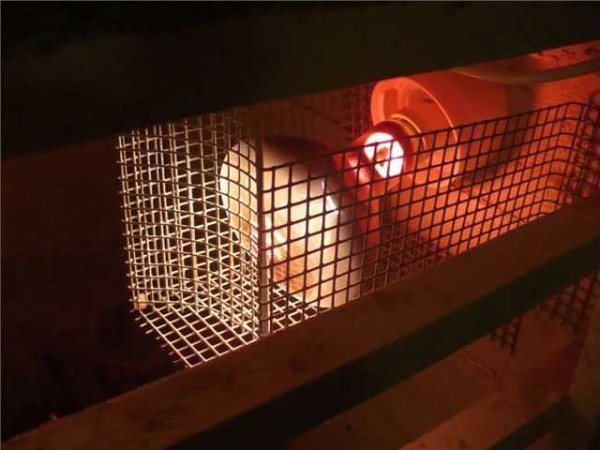
IR heater lamp in mesh casing
Boiler and potbelly stove
There is also a heating option - a boiler and batteries. But these are dreams for the majority. They also heat it with a potbelly stove, a wood-burning boiler, or put a small brick stove. And they try to lead the pipe through the hen house - so that it gives the maximum heat. If the stove is iron, it can be bricked, like an iron pipe. When heated, the brick keeps heat for a long time. With normal warming, one heater is enough for a couple of days.
Heating the chicken coop by decomposing sawdust
There is a way to maintain a positive temperature without heating - due to the heat released during the decomposition of sawdust. But it works only under the condition of normal (at least) insulation. Sawdust is poured onto the floor. The first layer is covered in autumn, before the first cold weather. The layer is about 10-15 cm. It lasts a month and a half.
Such bedding is much better than hay: chickens do not get sick, since sawdust regulates moisture well. They also love to rummage in the litter, and are constantly busy with this, so that layers do not get fat even with abundant feed and limited walking.
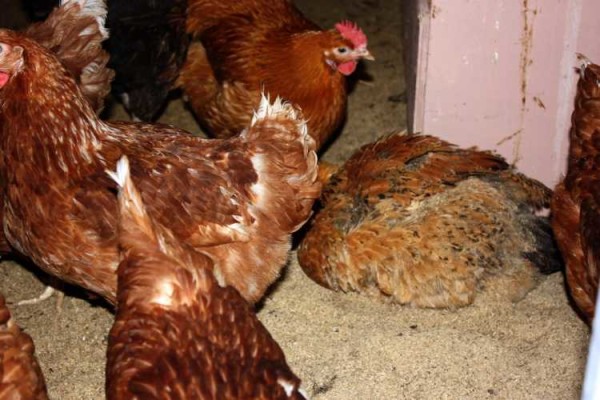
Chickens with sawdust feel great even in cold weather
After 30-50 days, add a fresh portion of sawdust (you can tell by its smell and appearance). And this time, too, about 10 cm. Then - more. By the end of winter, a layer already accumulates about 50 cm. Moreover, even in decent cold weather, the temperature inside the chicken coop keeps at least 0 ° C, which is enough for layers. If you bury yourself in such a litter, there will be about + 20 ° C. What chickens do in the cold: they dig holes and sit in them. This sawdust preyut: a decomposition reaction takes place with the release of a large amount of heat.
In the spring, the whole mixture is taken out into a compost heap, after a while there will be excellent fertilizer. But one more thing: in the fall, you have to fill a high board in front of the door: so that the litter does not spill out. It is inconvenient to walk, but the draft from under the door is eliminated.
Ventilation in a winter chicken coop
Ventilation is required to maintain a normal microclimate in the chicken coop. This is usually a plastic pipe that sits under the ceiling, goes through the roof and sticks out above it at a height of about a meter. With such a difference, natural traction may be enough. The inflow usually occurs through the cracks, but if you have completely sealed everything up, you can mount a piece of plastic pipe into the wall just above the floor level. From the side of the room, the pipe is closed with a metal mesh, and dampers are made that regulate the intensity of air movement.
Another option without an exhaust pipe on the roof is to cut a small exhaust fan directly into the wall. But such a system works forcibly and in the presence of electricity. The pipe is non-volatile))
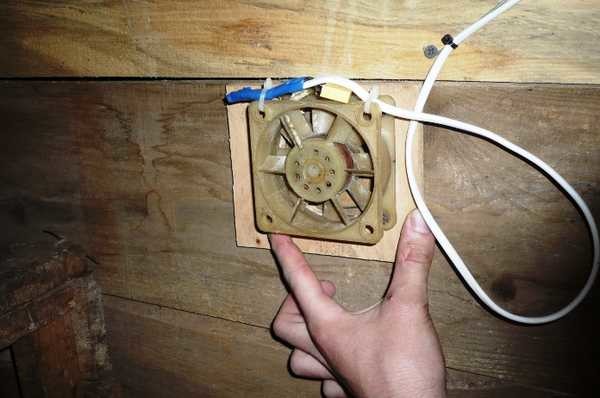
Fan in the chicken coop
The optimum humidity in the chicken coop is about 60-70%. Deviations in either direction are undesirable.It is not very difficult to increase the humidity - put in more water, but problems may arise with a decrease. The infrared lamp dries condensate very well: it dries drops on the walls and ceiling in a couple of hours. So at least one is needed to regulate humidity.
Lighting
Any chicken coop should have windows. And although heat leaves through them, you cannot do without them: to maintain a normal state, the bird needs sunlight. And to keep warm, frames are made with two or three glasses. And they must be sewn up with a net from the inside, although it does not hurt from the outside, but not for the safety of the bird, but for its safety.
In order for chickens to continue to lay in winter, they need to extend daylight hours: at least it should be 11-12 hours. Therefore, they put them on the lighting. Here it is better to immediately put a controller that will turn the light on and off automatically. Spend more money, but you will spend less time at the chicken coop.
At first, some chickens will stay overnight on the floor (those that have not climbed into perches and nests), but if the floor is warm, with sawdust, it's okay. Gradually, they will get used to it and by the time they turn off they will sit still.
There is an option - to make them get up early, and leave the evening natural. Then the light will be on in the morning, and in the evening, with the onset of dusk, they will go to bed in the sun.
Read how to build a summer chicken coop here.
How to build a small chicken coop: video
In this video, a do-it-yourself chicken coop is being built by a city dweller who fled to the village. The video sequence contains photographs of the process, so that all stages are visible.
Another video with a clear sequence of assembling a chicken coop from a bar