We make woodpiles and woodpiles with our own hands
Most of our country is heated by wood-burning stoves. If not at home, then firewood is definitely needed in the country or in the bathhouse. But firewood is bought raw and needs to be dried somewhere. To do this, they are stacked in woodpiles or special sheds are built - woodsheds or woodsheds (they say differently in different regions). The design is uncomplicated and making a woodshed with your own hands is an easy task.
The content of the article
What are
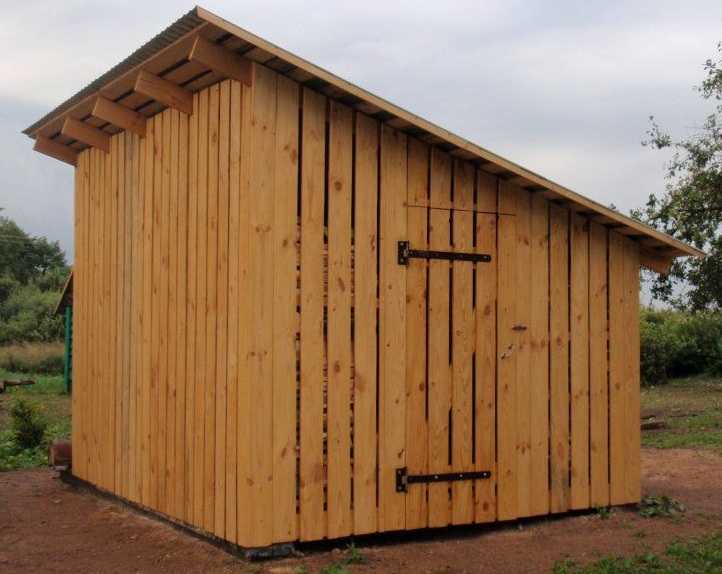
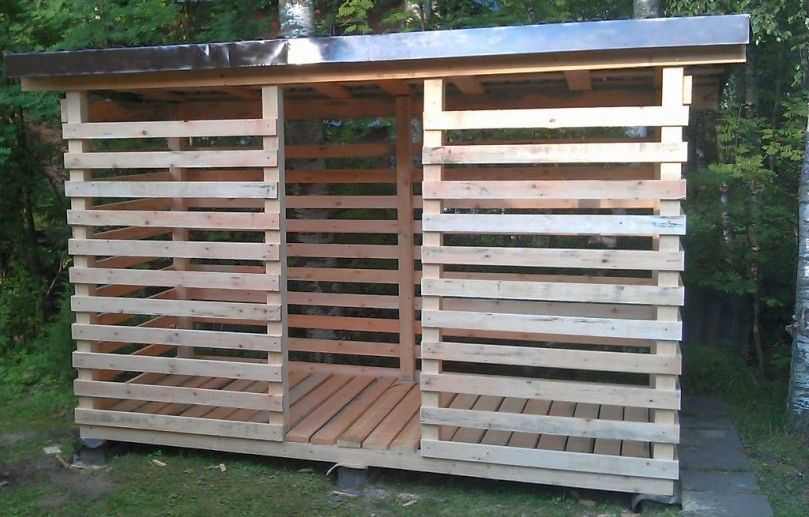
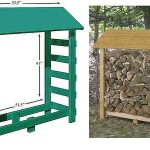
Vertically padded planks are rare. Such is the woodshed with a pitched roof
Does the drying speed depend on how the planks are installed? No comparisons have been made, so it's hard to tell for sure. But one owner claims that if you fill the boards obliquely (he has 10 cm with a gap of 2 cm), with each wall in a different direction, it dries faster and faster: in a month.
About the size of the slots: they are made from 2 cm to 10 cm. But it also depends on the width of the board. If you leave the gaps very wide, snow will be swept up heavily. If there is not much snow or you don't care about the amount of snow, you can fill the boards less often. It is also more economical.
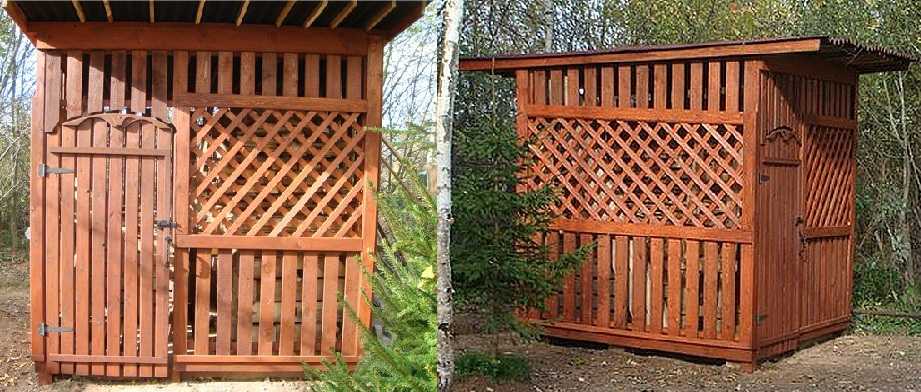
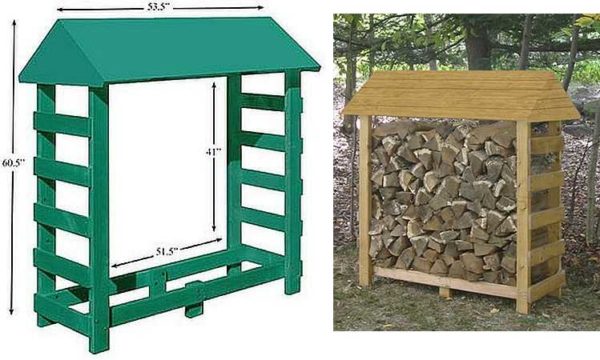
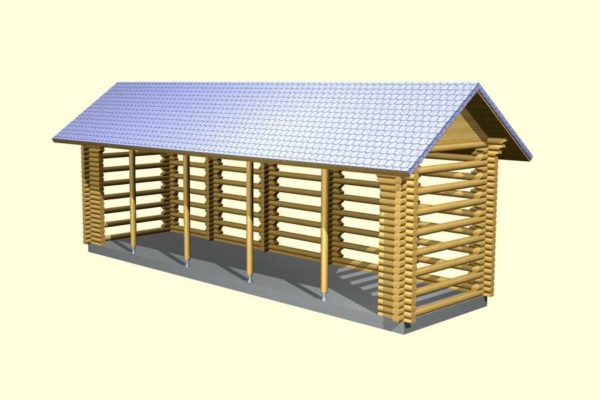
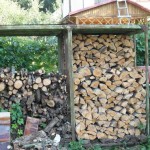
Beautiful woodshed for a summer residence
Not all woodcutters have doors (with doors they are also called "woodshed"), as in the version in the photo. Often there is not even a front wall: this way it is more actively ventilated. The front wall and doors are needed if they steal in your area, but in general you can do without them.
Log arrangement
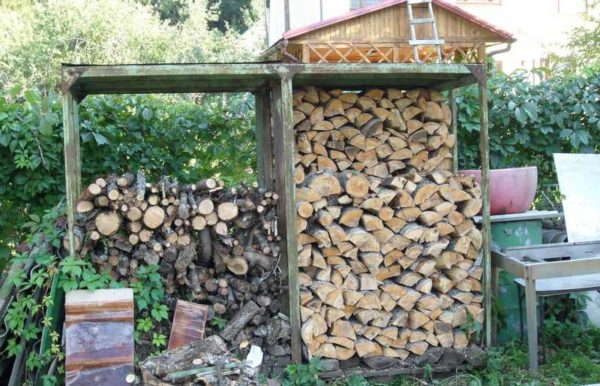
Now a little about the structure of the firewood. If it is small, and everything fits in one row, then there are no special problems - everything is available. But if large volumes are loaded, it is better to divide the area into sectors into which the consignments of firewood will be loaded. Thus, previously imported and already dried ones will not be covered with fresh ones.
It is better to divide the area into sections, so that you can go inside
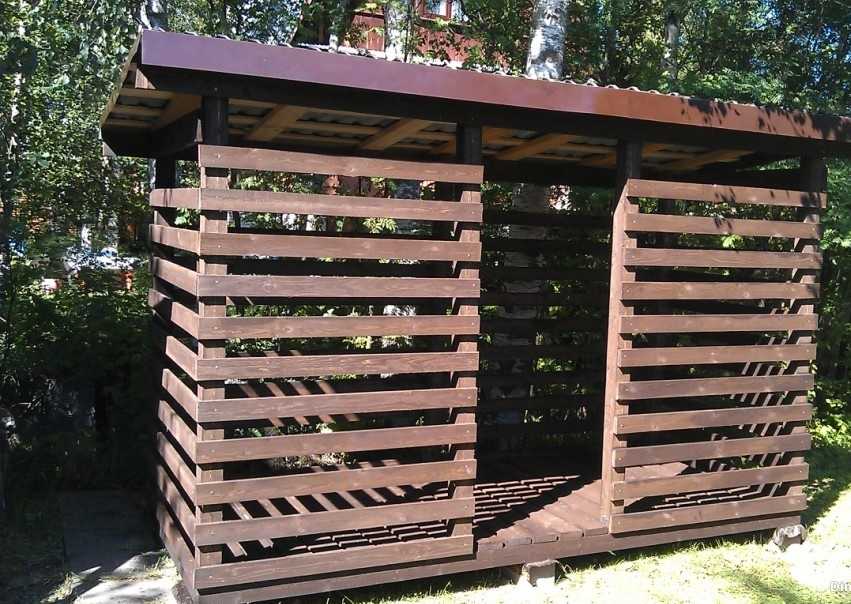
If the log box is square, arrange the sections so that you can go inside to get out the driest logs. For this, a passage is left in the middle. In depth, it should not be up to the wall, but it is advisable that you are separated from the wall by only one, maximum - two rows of logs (and in general it depends on the volume) - so they will all be accessible. It's easier with rectangular ones: they are simply divided into non-sectors by a partition. For example, as in the photo.
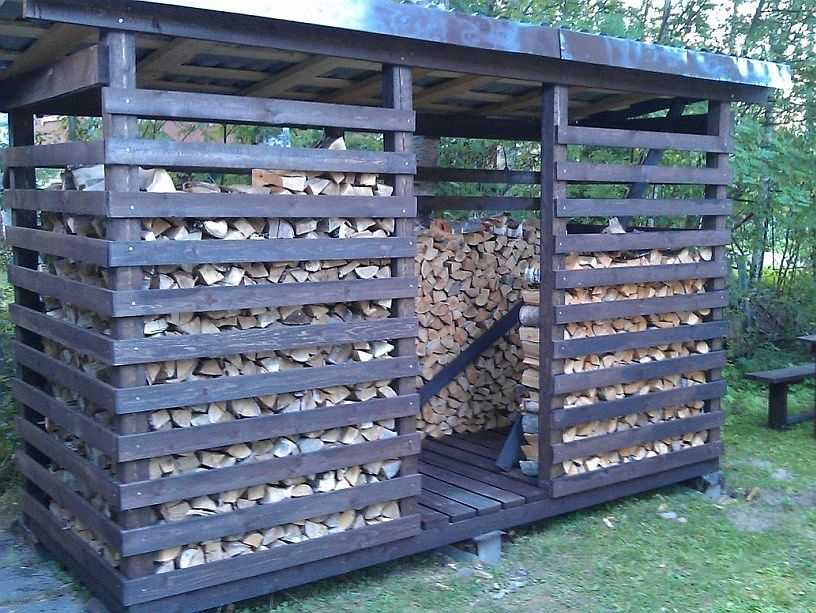
Such a large shed for firewood - one machine fits in each section - about 4 cubes. The back wall is not solid, if you look closely, there are holes.
And a little about the height. A large woodshed for a summer cottage (seasonal) is not needed. All you need is one or two cubes for the heating in autumn / spring, and even then only for the weekend. But if you have to heat a house, and even a bathhouse, you will have to build something solid. Then, regardless of the layout - long or square, the height is made about 2 meters. With an average height, you can download almost to the ceiling. but there should be a ventilation slot on top.
About toHow to make beautiful and inexpensive paths in the garden or on the site, read here. About device homemade pond can be read in this article, but how to turn it into fountain, here.
We build a woodshed with our own hands
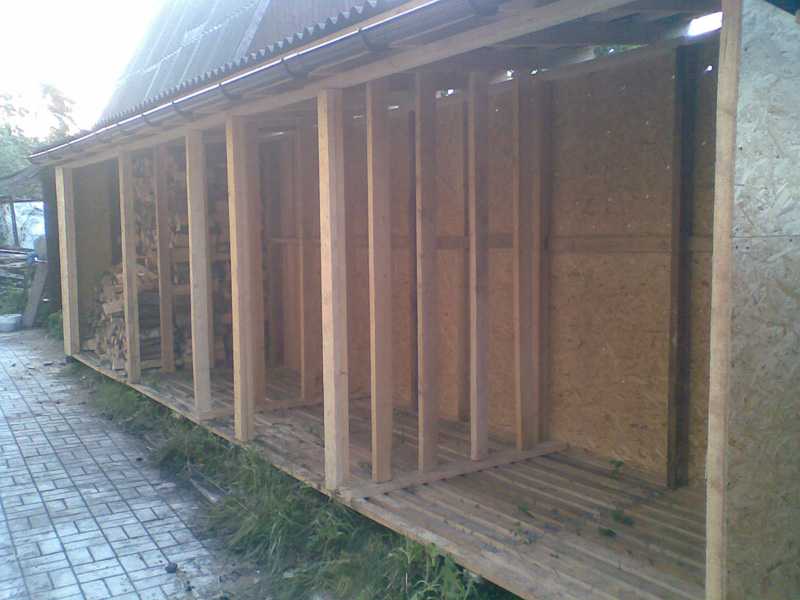
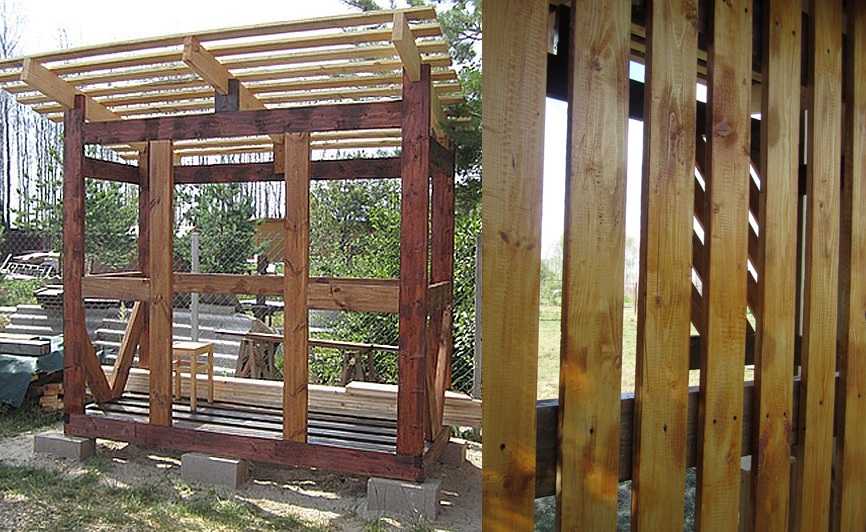
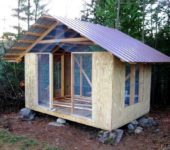
In this section, we will describe how the woodshed was built near the house. It took three days "without stress" to build with painting. Built by type frame shed.
Materials
The internal dimensions are 1.8 * 3.7 m, the height of the front struts is 2.45 m, the rear ones are 2.2 m. The total volume is 13 cubic meters, but a maximum of two cars are loaded - no more than 10 cubes. Moreover, paths are left inside - so that it is convenient to take, they do not load to the top - not everyone in the family is tall.If the load is full, it is advisable to put additional jibs: so that the wood with its weight does not squeeze the sheathing boards.
The frame is made of timber - racks, the lower and upper strapping are made of 100 * 100 mm timber. The timber is pre-impregnated with used machine oil. Everything was assembled end-to-end, with nails, reinforced with corners on screws. For the supports, standard small foundation blocks 200 * 200 * 600 mm were purchased in the amount of 6 pieces.
Construction step by step
The start of the construction of the woodshed is standard - leveling the site and aligning the blocks. If the soils are viscous (clay loam, black soil), it is better to make a sand and gravel cushion. Dig small pits 20-25 cm deep, pour and tamp crushed stone, install blocks on top.
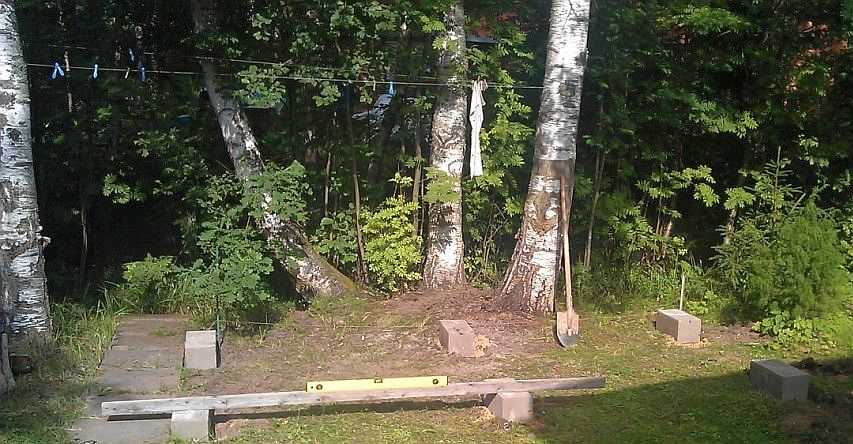
Leveling the site is the first step in building a woodshed
Roofing material was laid on the blocks in two layers, a timber was laid on top. The harness does not fit into the support in any way. If you wish, you can drill holes and hammer in the studs.
First, the bars of the lower harness were laid out, they were fastened with nails (80 * 3 mm). Then the screws were screwed into the corners. The next step is to install the racks. They are placed in the corners and above the intermediate support. The rear pillars are shorter than the front ones - so that there is a slope of the roof. They were also first set vertically (checked with a plumb line), hammered obliquely with nails - two on each side. Then they were reinforced with corners on screws - two per rack. If you are concerned, you can still screw / nail the plates to each rack from the outside.
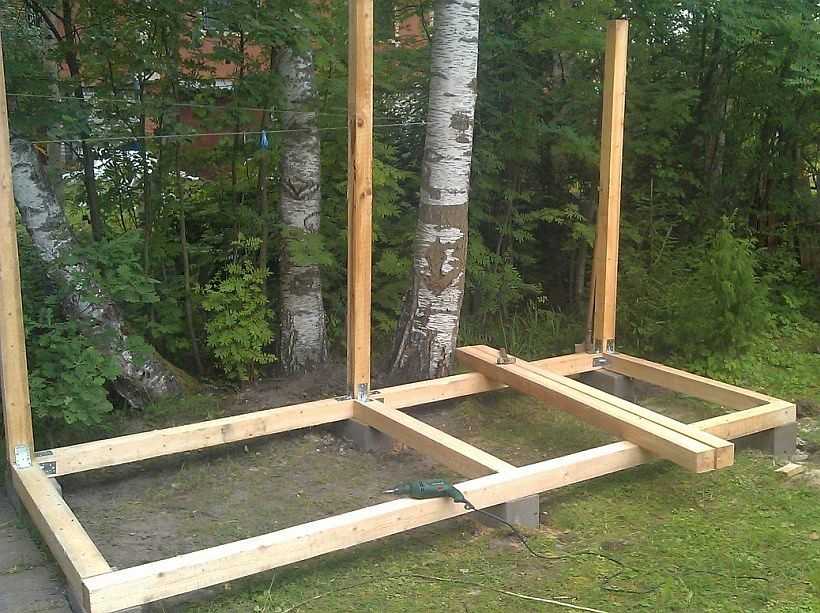
Racks are attached to the lower strapping bar
The entrance to the woodshed is in the center. Because of this, the legs are displaced and not installed above the support block. As a result, there is a slight deflection. To eliminate it, put four blocks in the first row, taking into account that the middle will be occupied by the entrance. Especially if there are doors: they load the racks decently, therefore they need support.
In front, the intermediate struts are not above the support
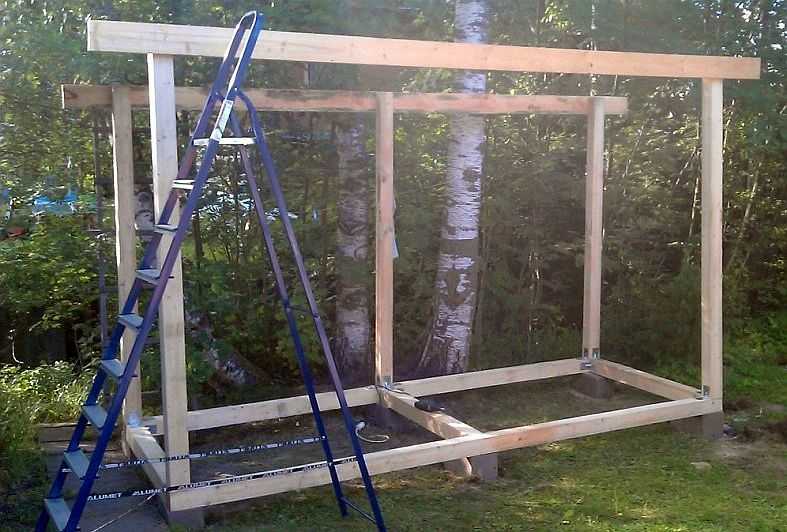
After the racks are placed, it's time to assemble the roof. First, I nailed the side boards at the top. They are installed on one, flush with the upper harness of the rear, shorter part (seen in the photo below). They and the rafters are made of a board of 50 * 100 mm, the crate is made of a board of 30 * 100 mm.
A profiled sheet was used as a roofing material, the boards were laid flat under it. Roof overhangs are about 35 cm, side protrusions are about the same. The size of the roof was chosen so that there were no scraps: exactly four sheets lay down.
Roofing material is laid under the profiled sheet - so that condensation does not drip onto the firewood: the costs are small, but there is benefit. Roofing material began to be laid from below, laid along the overhang. The next one with an approach of 10 cm. It turned out that the drop that fell at the top simply flows down without getting inside.
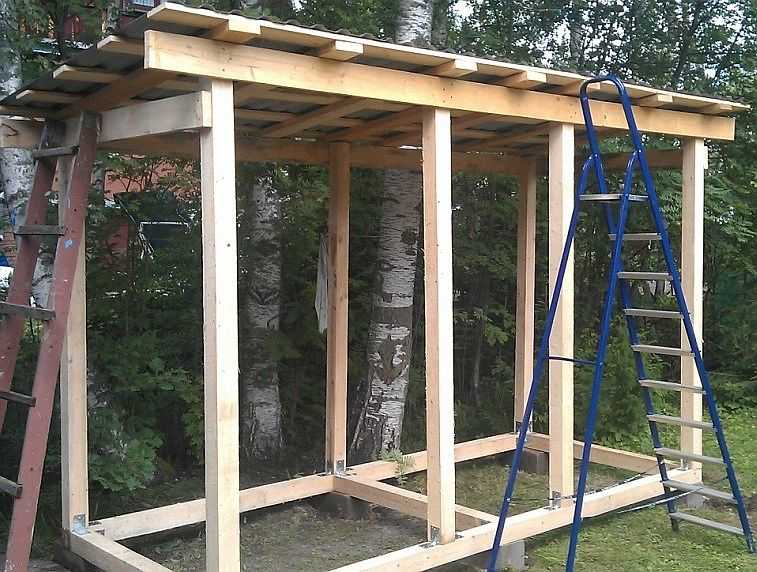
It looks like a woodworker with a finished roof
The next step is to lay the floor. It was made from a board of 100 * 40 mm. They were laid with gaps of 2-3 cm. Next, the wall cladding is nailed. It was decided to make the gap equal to the width of the board (100 mm). The boards were nailed, two on each edge. The design turned out to be well ventilated, however, with a side wind it clogs up with snow a lot.
The do-it-yourself woodsman is almost ready
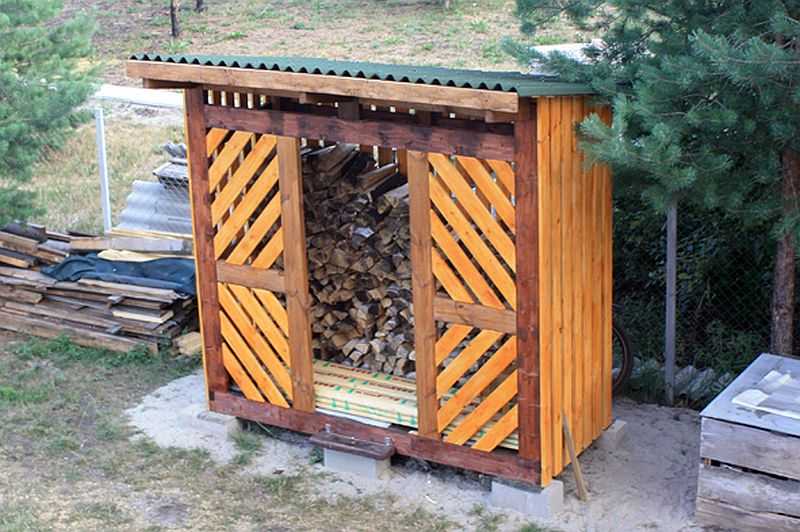
The last stage is painting. Here you take any composition for wood with bio-protective properties: so that the bugs eat less. In this variant it is painted with BioTex, rosewood color.
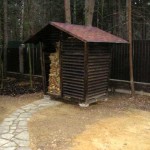
Ready for use after painting
That's it, the woodcutter is built. You can repeat this: nothing complicated. Carpentry in complexity - at the level of high school students. The most difficult parts are the roof, but it is very simple.
For another construction option, see the video.
About, how and how to decorate the site can be read in this article.
Homemade firewood: photo
There are many more similar structures. The differences are small, the principle is the same: the frame is upholstered with a board with different gaps. There are several examples that were built by the owners of summer cottages or private houses themselves.
Woodshed attached to the shed in the country
For its construction, only two pipes were needed, which were dug into the ground and concreted. Then two beams were attached to them. Similar bars were attached to the wall of the shed. Boards were stuffed between them, the roof was fixed (trimming the profiled sheet). To prevent firewood from lying on the ground, they put bricks and a sheet of old plywood on them. For the manufacture of such a canopy, you can use the remnants after construction or buy pallets and disassemble them. Just fit.
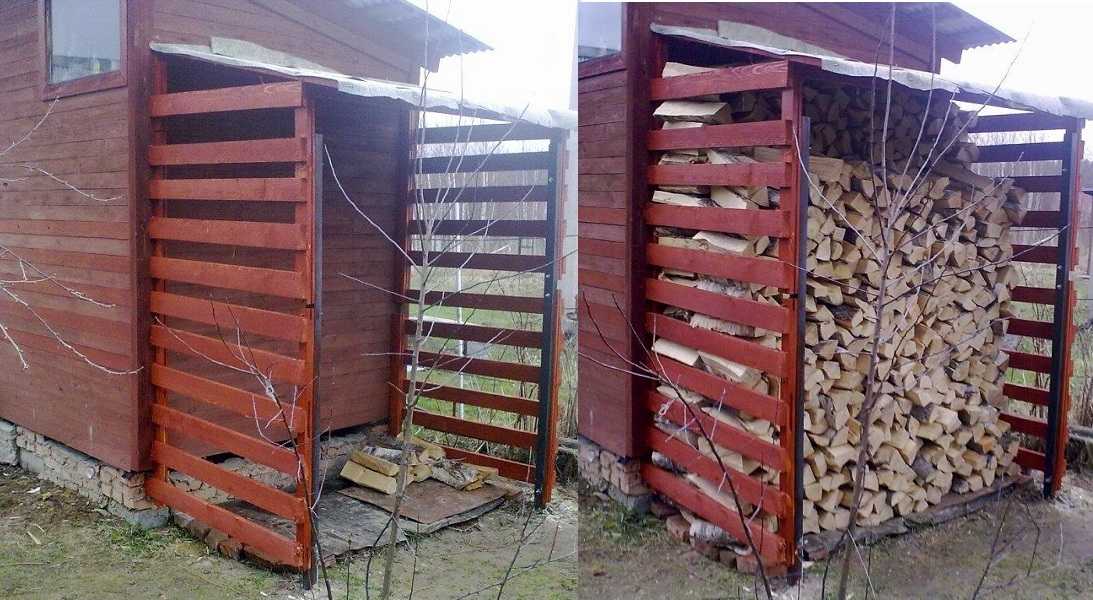
Simple woodshed for a summer residence
The second canopy was made of the same type. It is additionally divided into sectors in which there are firewood of different sizes. The foundation for this structure was also not made, the fertile layer was removed, covered with sand, and tamped. We put the paving slabs. On it there are bars that serve as a support for the crossbars on which the firewood of the lower compartment lies. It turned out neatly.
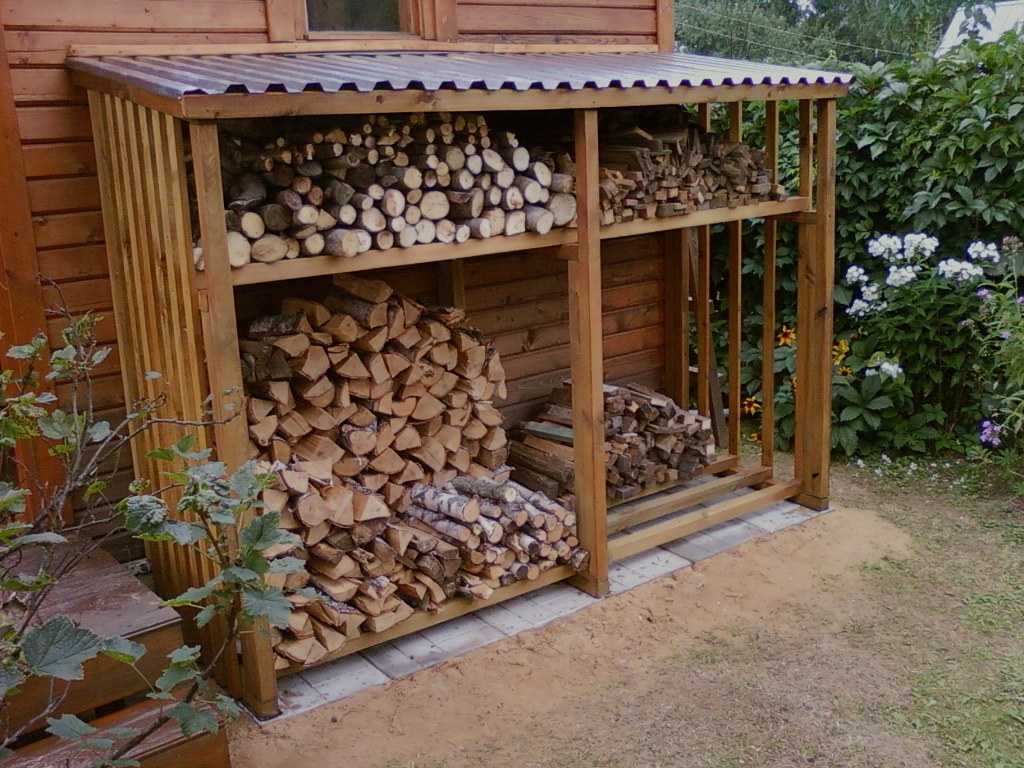
Small firebox for dacha with division into sectors
Standing separately
The slope of the roof is unusually organized here: the front pillars are made higher, there is nothing unusual in this. But grooves are cut in them, which hold the rafters of the pitched roof. That is, the roof does not rest on the top rail, as usual, but on the side posts. With a small snow load, such a structure is quite viable; with heavy snow, the roof is unlikely to withstand.
These are two about a photo explaining the construction process.
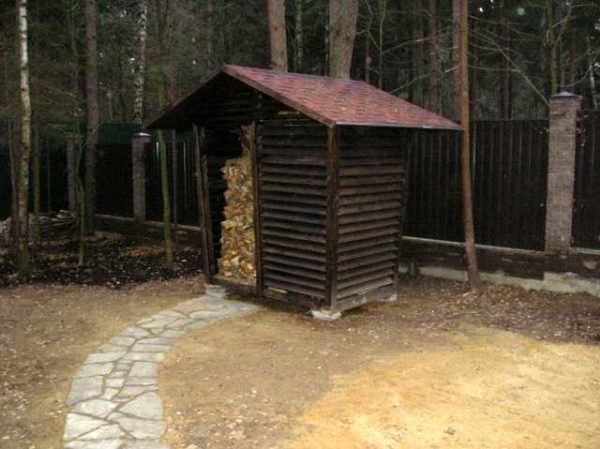
And this is what happened. The first serious building is a do-it-yourself woodshed, and already how good!
You may be interested in reading "How to make a gazebo out of wood"... It can be built in the same style as a woodshed, so everything looks like a single ensemble.
You can read about what a wooden fence can be in this article.
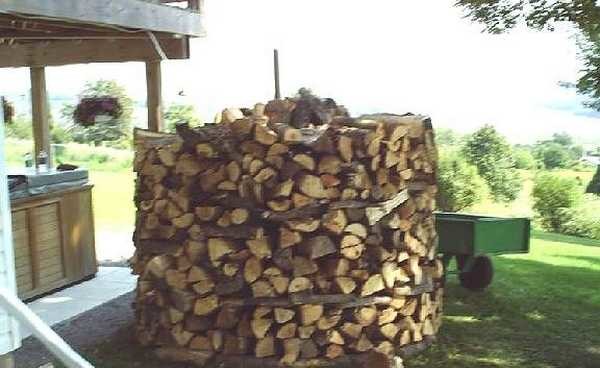
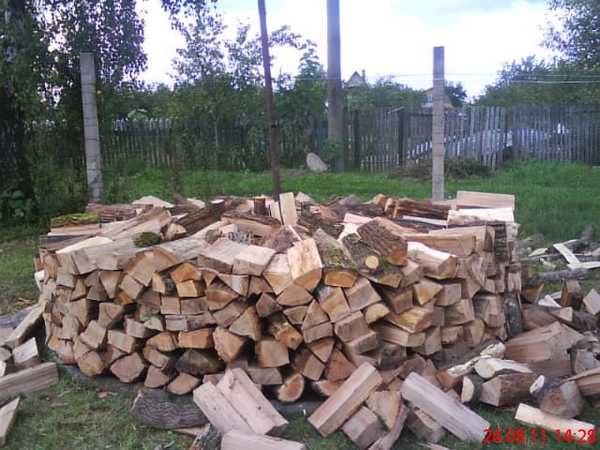
How to fold a round woodpile
Repeatedly, probably, we saw firewood piled in a cylindrical shape of a woodpile (or a photo). They look good, and, more importantly, the wood dries quickly in them.
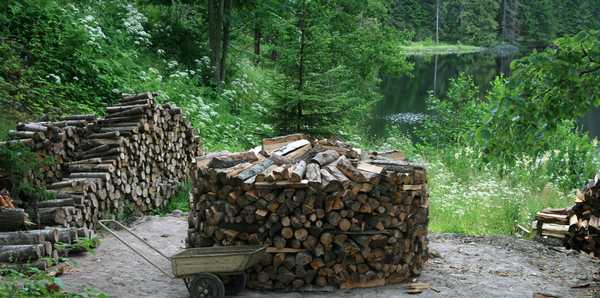
Round woodpiles for drying firewood
Everything is very simple, but without knowing the secret it is impossible to do well. Below is a photo report, which shows step by step how to fold a round raspberry from chopped firewood.
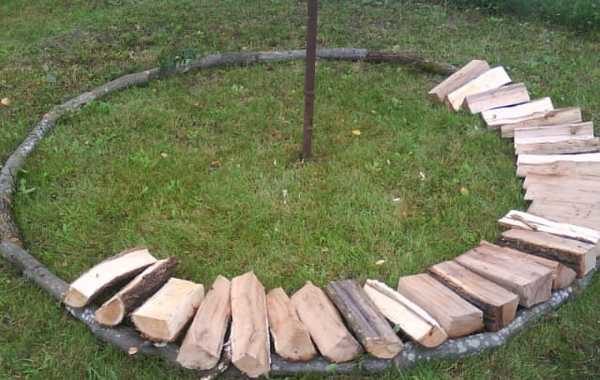
First, dig in and securely fasten the pole about 2 meters in height. Spread small-diameter chocks around. Distance to the center - twice the length of the wood (if the wood is 40 cm, to the center is about 80 cm).
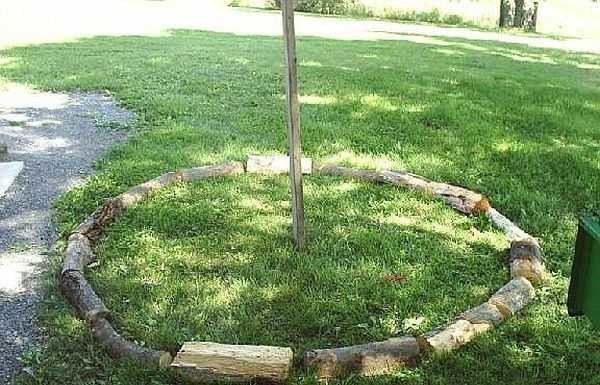
The first step in stacking the round woodpile
Next, lay out chopped firewood. At one end they rest on the lined chocks, at the other they lie on the ground. Lay so that everything lies almost end-to-end on the inner edge (with small gaps). On the outside, gaps will turn out. It's not scary - the second row will fit in them.
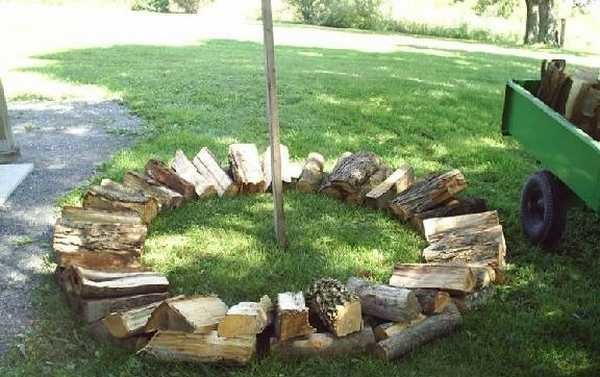
Lay out the first row
Put the second row on the first. Trying to fill the gaps whenever possible. Around the pole, we begin to fold the firewood tightly while standing.
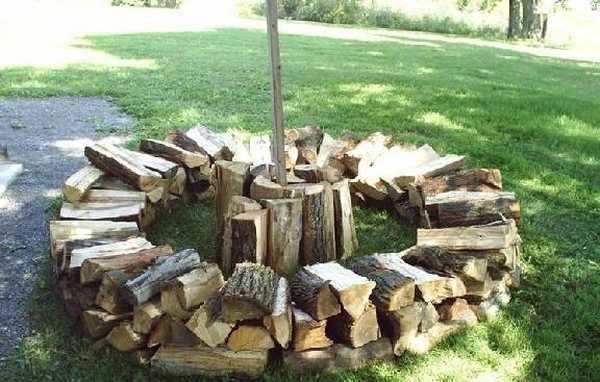
Continuation: lay out the second row, start filling in the middle
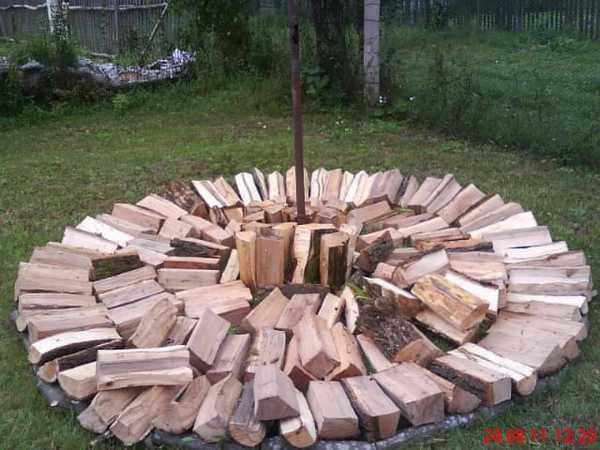
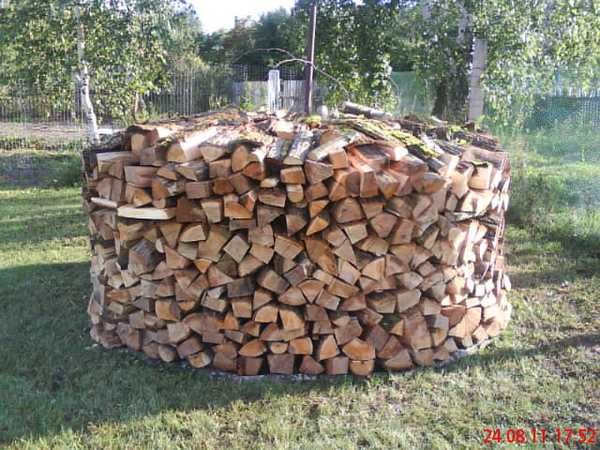
We continue to stack firewood in a circle and fill in the middle.
As soon as you noticed that the outer edge of the firewood began to slope down, lay out a row in a circle that will raise them. Then you continue to fold the wood in the same way: in a circle up to half the height of the wood (20 cm), then fill in the middle. The second row in the middle is not just put, but stuck into the slots. Try to stick the pieces of wood tightly.
Continuation of the process

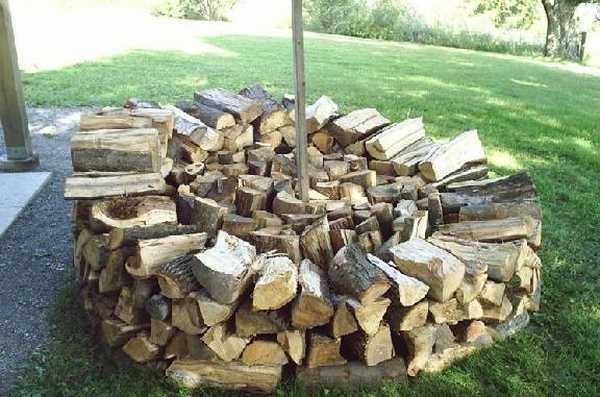
View of the woodpile from above
The stacking of the woodpile is complete
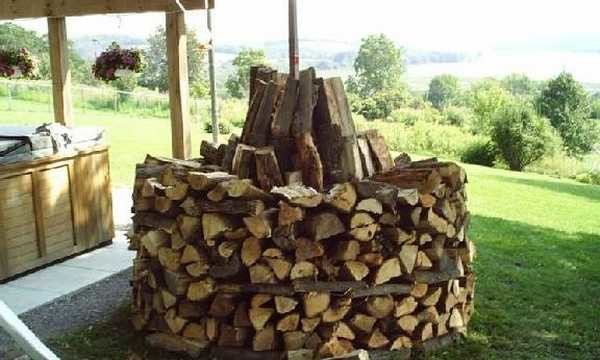
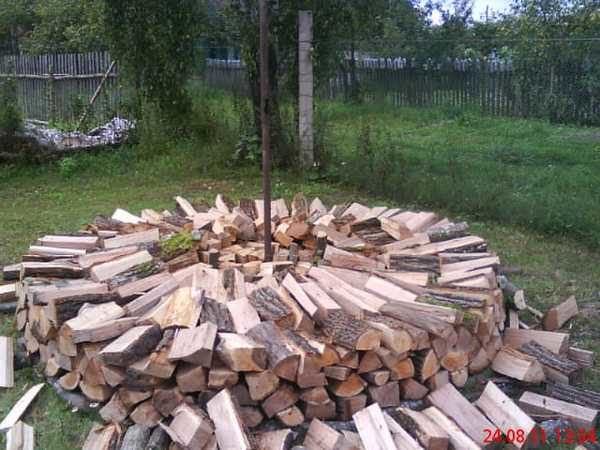
The same process can be repeated with more firewood. Lay two or even three rows in a circle. The sizes of such log boxes are huge. The photo gallery shows an example of how to stack a large raspberry.
Since you have taken up the arrangement of the site, you may need an article about how to make tracks (from the same tree, for example) or benches.
Ideas in photo format
-
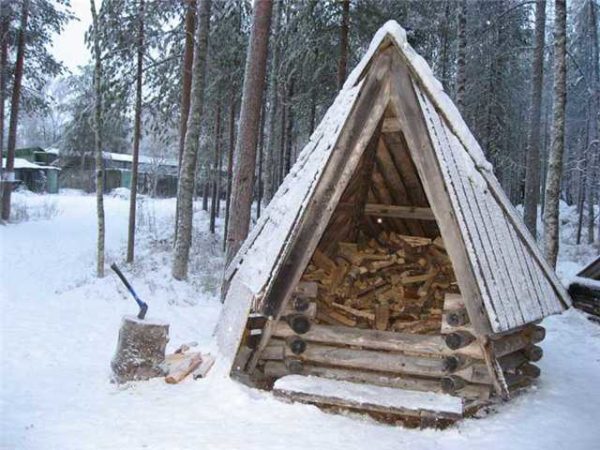
- Unusual design - Finnish firewood
-
- Drawing of a small woodshed for one glad logs
-
- This is easy to do. And you can bring into the house
-
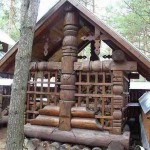
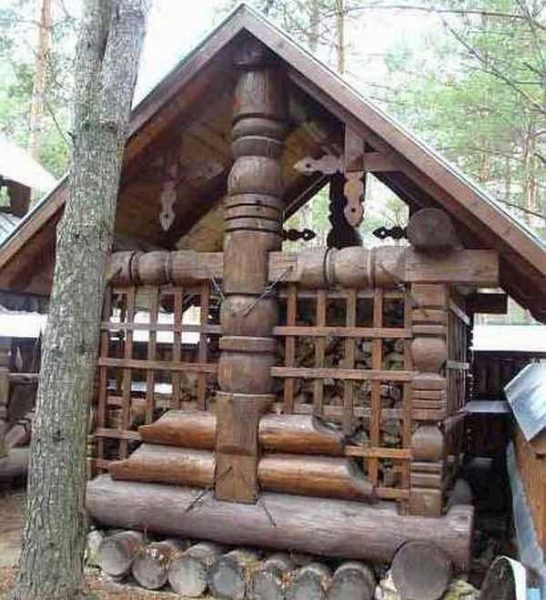
- A beautiful firebox. Directly a hut for firewood))
-
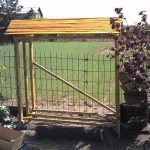
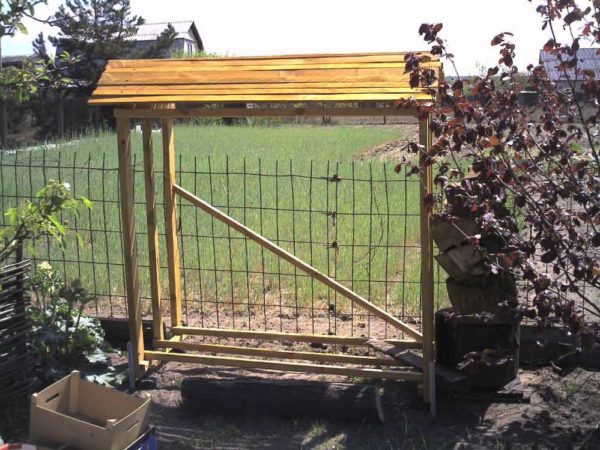
- Lightweight construction for small amounts of wood
-
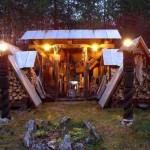
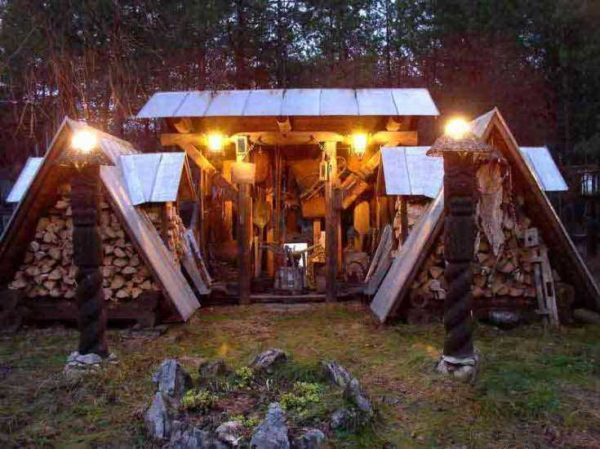
- These triangular structures are also firewoods
-
- Two concreted logs near the wall. That's the whole device
-
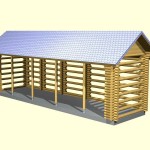
- Option of a large rectangular log log with a gable roof
-
- The large overhang of the roof protects from rain. The main thing is that the wind does not tear off the roof
-
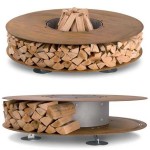
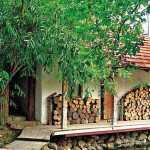
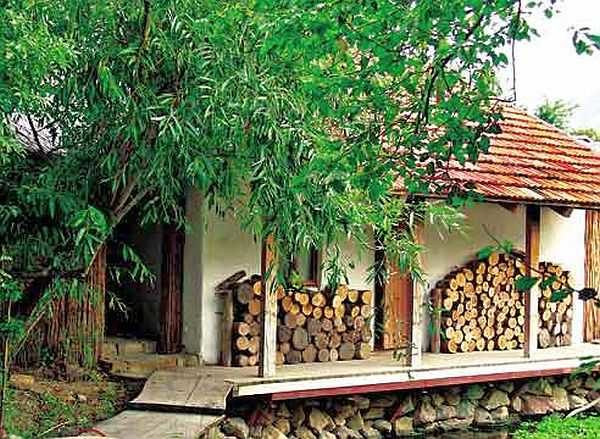
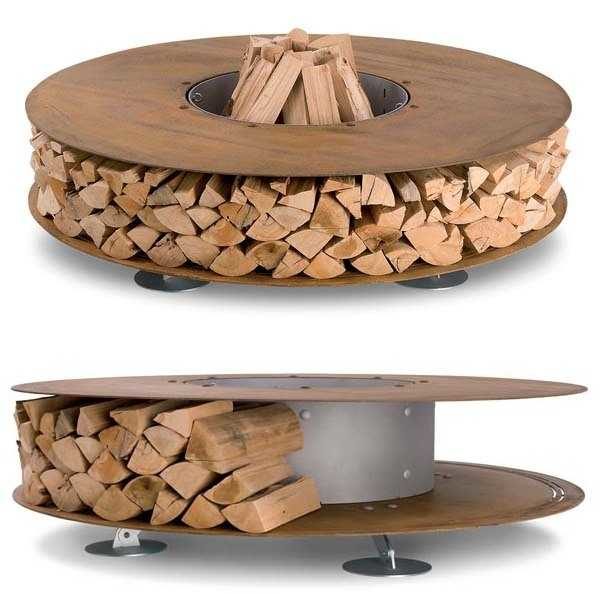
- Interesting and stylish: can be placed near the fireplace or stove
-
- A beautiful firebox is made from a log, but it costs ...
-
- Metal frame. There is not enough rigidity (mowing), because everything led
-
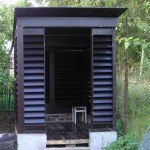
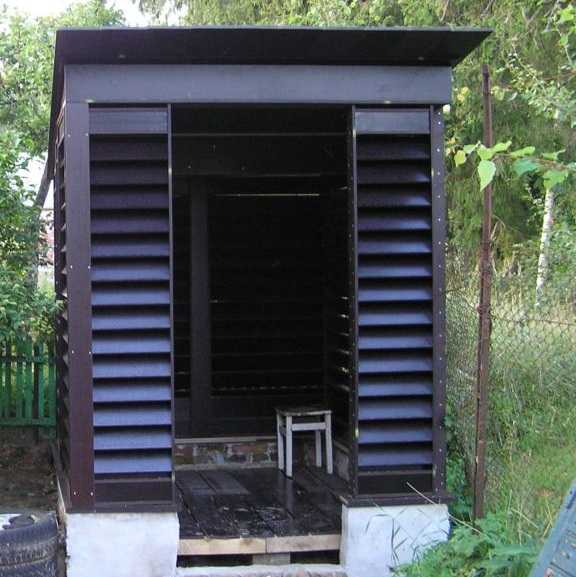
- This is an option with boards fixed like blinds
All of these models are easy to build, some are just modifications of those described above. We hope it's easier for you to build a woodshed with your own hands now.


Good day. Nowhere did I find how carefully, without destroying the shed, to change the logs, which had grown into the ground and rotted. Lags are former sleepers. Should they be taken out of the ground?
I took apart one wall. The other three are sturdy. I would like to preserve them, substituting a new basis for them. What order of work should be done in this case. Thank you.