Country shower with your own hands
In the summer, even while resting and not working, in the country you need the opportunity to wash. The easiest way to organize this is on the street, and not in the house. You can make a portable - mobile shower. This is a great option for the first time. But I want something more solid. For this, they build an outdoor shower in the country. Although it is stationary, it is lightweight.
The content of the article
Portable summer
Let's start with the simplest models, which even do not require booth devices or large capacity. There are mobile showers that work like a foot pump. The source of water is any container that you put next to you - a bucket, a basin, a tank - whatever you have. In it, lower the end of the hose connected to the foot pump, which most often looks like a rug.
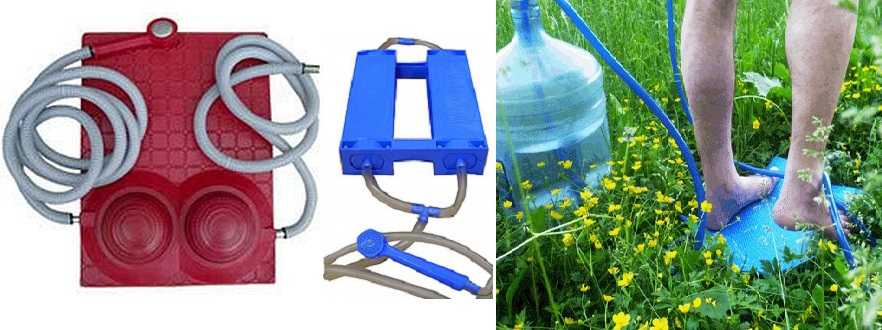
Outdoor foot shower - trample
A hose with a watering can is connected to the outlet of this "pump". To get a flow of water, stomp on the rug alternately pressing on the pump cushions. Trampled - the water went.
What is good about this option is that you can carry it with you. It's warm outside - you wash on the lawn. It got colder - went into the house, put a trough, washed there. Also, this shower can be taken on a hike - it fits into a standard package. Another plus - you regulate the temperature of the water yourself: if you pour it warmer, you wash in warm. If you want to freshen up - have collected a bucket of water cooler. A good shower option for summer use.
Summer stationary shower in the country
When installing a stationary shower, the first question arises: where to drain the water. If there is already a drain hole for toilet, you can lay a pipeline there. But this solution is not the best if you are using bacteria or drugs to recycle waste in the pit. In this case, a certain humidity is required, and with a shower it will be clearly more than normal.
For the shower, it is better to make a separate drain pit. If the soil has a normal drainage capacity, it is enough to dig a hole next to it about 60 * 60 * 60 cm, fill it with expanded clay, or with broken brick. This should be enough for an average water consumption. If your family belongs to the category of "waterfowl" or the water does not go well, make the pit bigger.
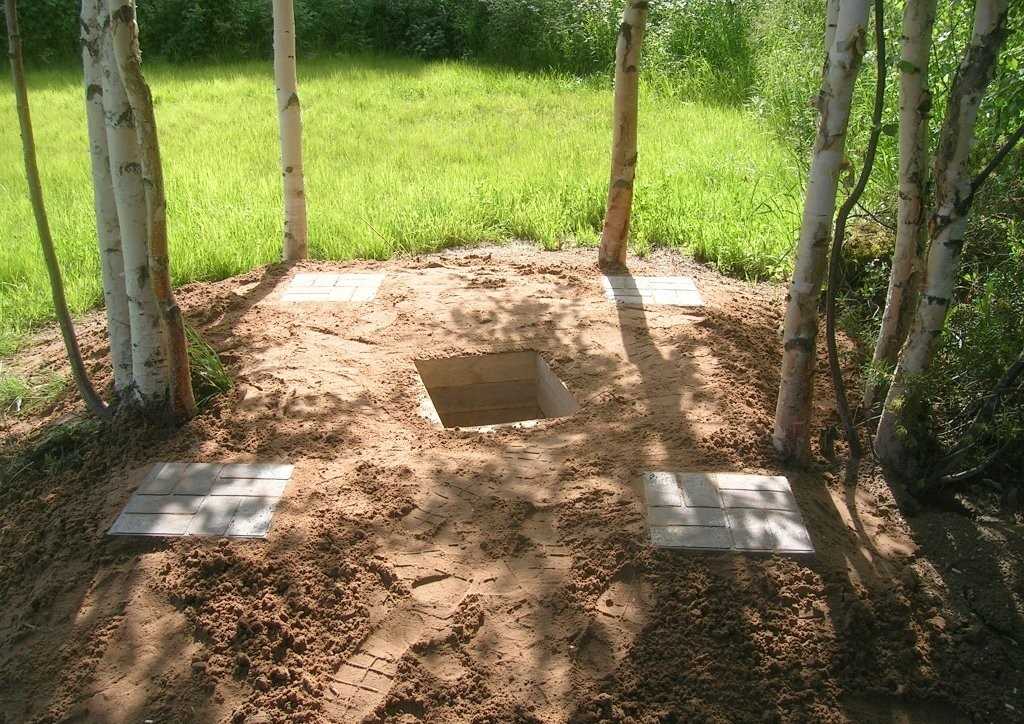
Shower drain pit
On sandy soils, you may encounter another problem: the sand may crumble. Then the walls can be reinforced with a net by driving pegs on the sides. Another option is to sheathe the walls with boards (as in the photo). But this - if the board is in the remains.
Base
Whatever the summer shower, it usually weighs a little. Therefore, the reason for it is not too serious: it makes no sense to bury the money. Most often, small foundation blocks are used, which are set in level. The shower in the country turns out to be raised above ground level by 20 cm or so. This is enough so that the treated wood (if it is used as a frame) does not rot.
The base can be building blocks or pillars cast from concrete
If you are going to cook the frame from metal, you can put it altogether on a paving slab or slab set at the level. If you wish, you can cast the posts yourself: put the formwork, lay the reinforcement and pour concrete.
Frame
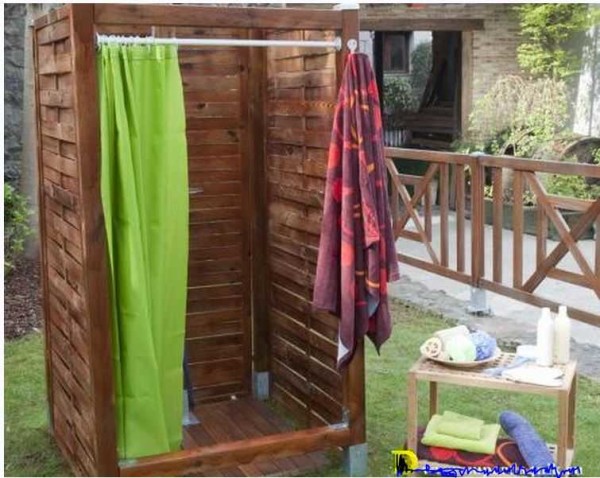
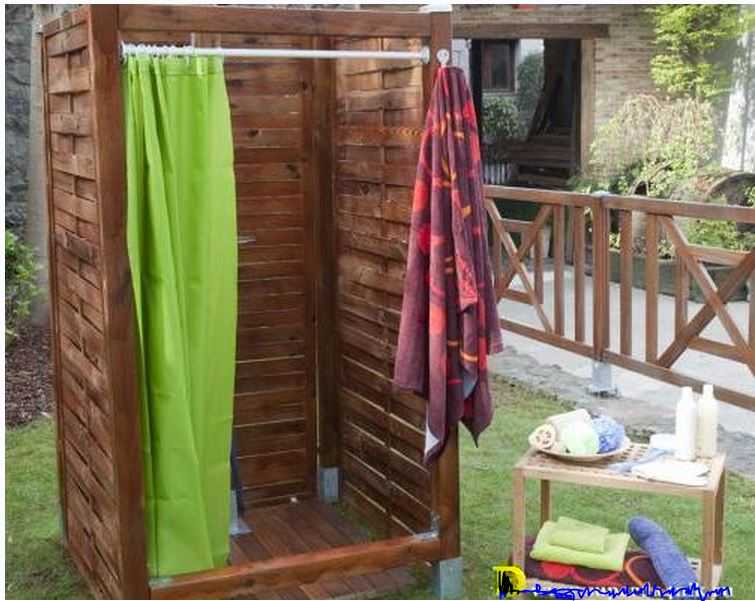
The size of the shower is chosen arbitrarily: there are no standards here. In addition, the shower stall is often only one part. In another, for example, they arrange a dressing room or a room for a water heater (electric or wood-burning - according to the conditions). Someone plans to take the other half under the pantry or store inventory. So a dacha shower is not always just a “wash” booth.
If a lightweight structure is planned, in which they will only be washed, moreover, the simplest option is with a curtain instead of a door, you can take the minimum dimensions: a square with a side length of about 90 cm (drawing below), the height of the racks excluding the tank is 2.2 m or higher (if the family is tall).
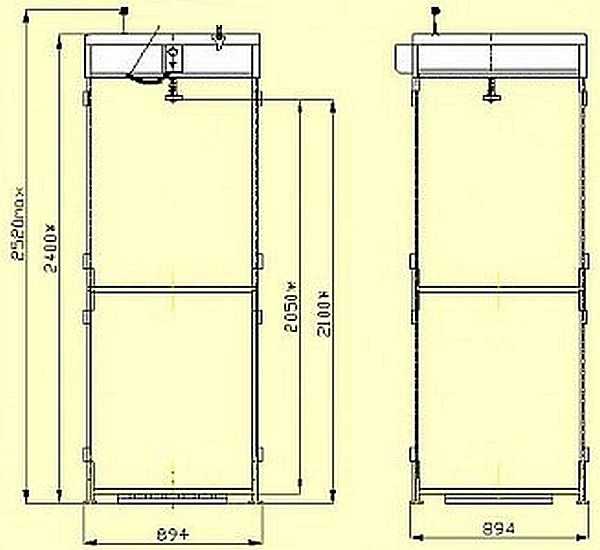
Drawing of a shower cubicle in the country (with minimum dimensions)
But this width is far from convenient: it is too cramped even for people of average build. It is more comfortable with a width of at least 100 cm, or better - 120 cm. This frame is assembled from metal or wooden bars.
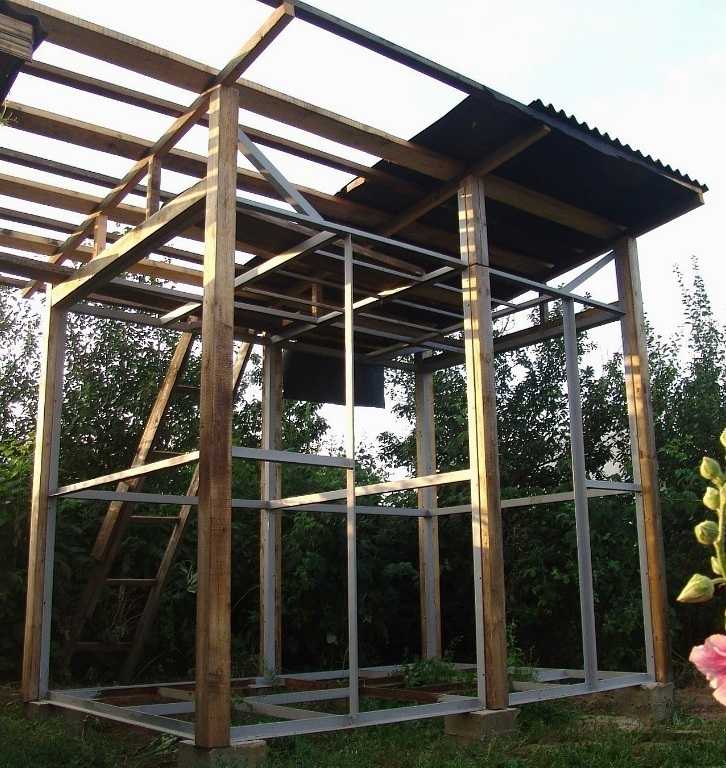
Made of metal
The metal frame for the shower is boiled from a corner with a thickness of at least 4-5 mm. The width of the shelf is chosen depending on the planned load. The frame is usually loaded with water tanks and sheathing. If you plan to put on top a plastic square container of 100 liters per 100, and cover the walls with film, impregnated cloth or something equally light, you can take the cross-section to a minimum. If you plan, for example, two 200-liter barrels, and the shower stall in the country is sheathed with clapboard on both sides, the load will be completely different. And here large sections are required.
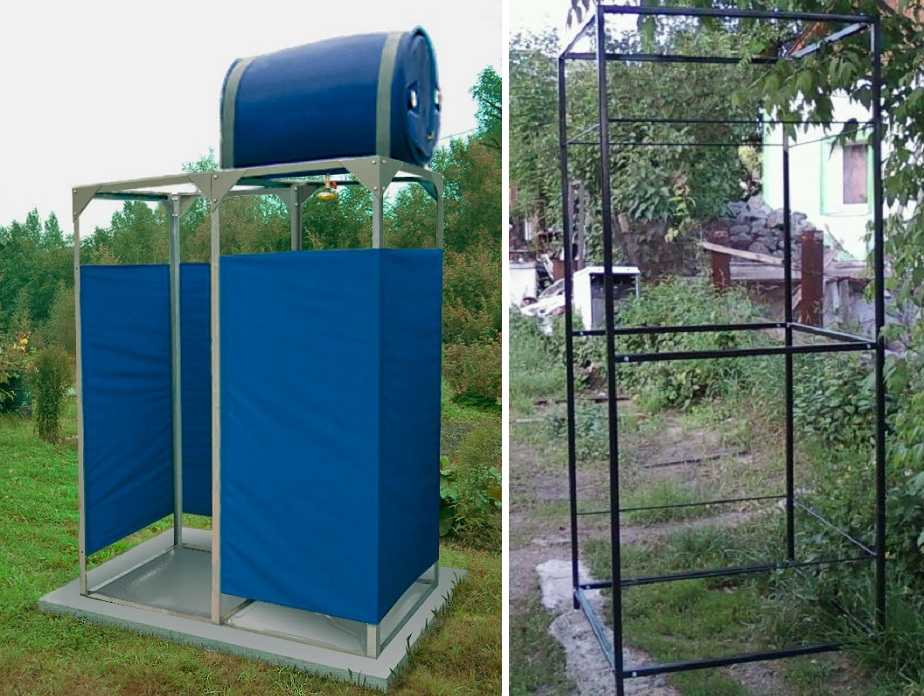
Metal frame for a shower in the country
Another metal frame for a country shower can be made from a profiled pipe. The wall thickness for racks is 3 mm, for strapping 2 mm is also suitable. It has a rectangular or square section, which makes it much easier to attach the battens and sheathing. To attach something to the corner, you often have to screw the bars to it first, and attach the rest of the harness to the bar. The strapping can be attached directly to the profiled pipe - with bolts or screws with pre-drilled holes.
The metal frame is best welded. If there is no apparatus, you can make a collapsible frame on bolted joints. Craftsmen do it like this: cut pipes of the required length, take thick mounting corners and assemble the frame with bolts.
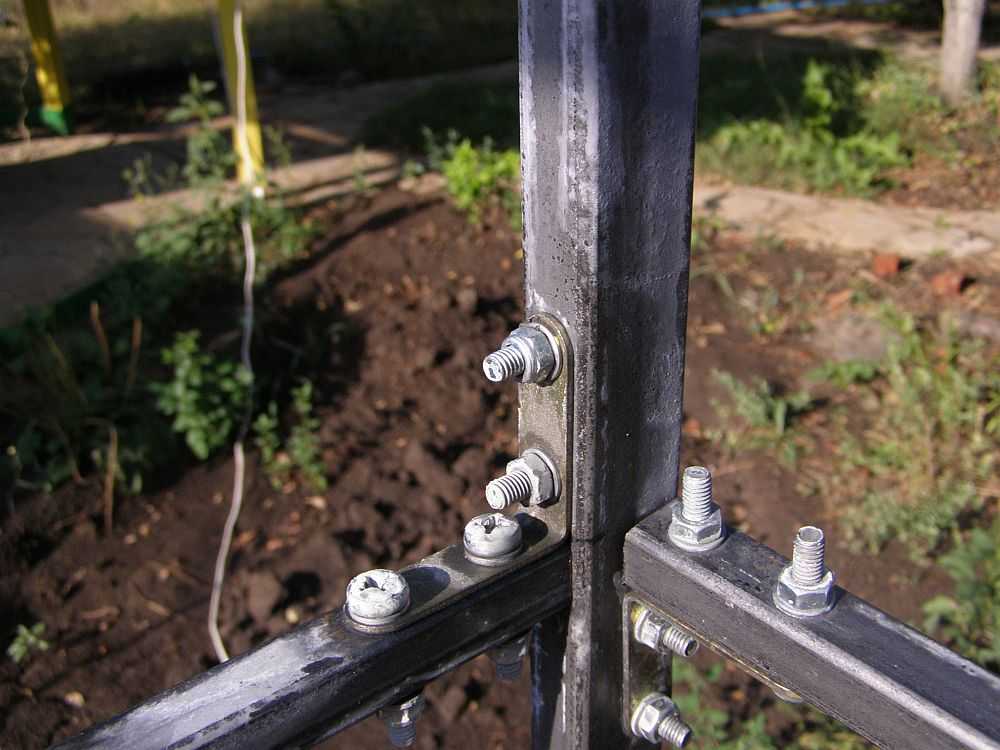
Bolt-on assembly example
In case you plan to learn how to cook metal welding technique for beginners is described here, the choice of the welding machine - here.
Made of wood
A wooden frame for an outdoor shower is assembled from a bar. For the bottom strapping, as a rule, a pine bar of 100 * 100 mm or 150 * 100 mm is used. Racks can be set with a smaller section. Again, it depends on the load. If the tank is large on the roof, make racks from a hundred. If they only keep the roof (water is heated in titanium nearby) or a very small tank, then 50 * 50 is enough.
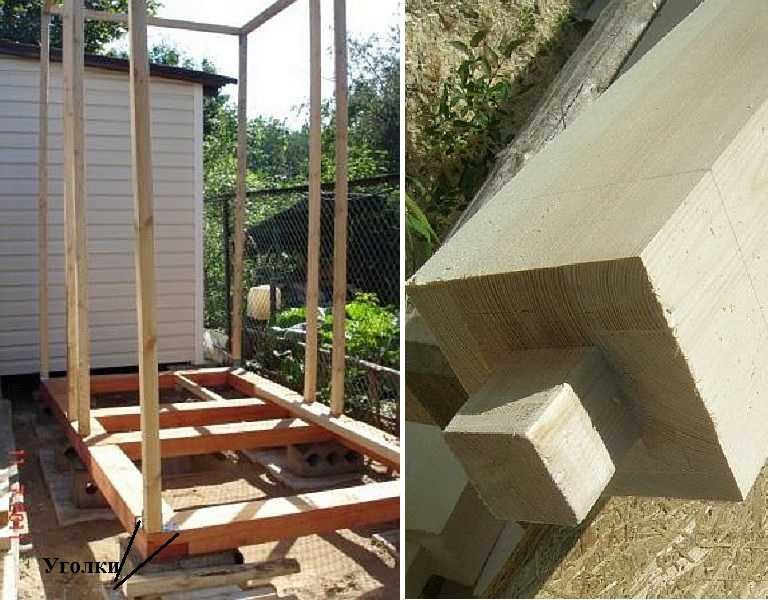
Methods for joining the shower frame bar: tongue / groove and corners
You can fix the bars in different ways. If it is correct, you need to cut out a thorn and a groove. If in a quick way, you can dock directly, reinforcing the connections with corners.
Having set the racks, they immediately make the upper harness. 50 * 50 mm or 50 * 40 mm already goes to it. They also make an intermediate strapping. There may be one, two, or even three. If you are going to sheathe the shower with clapboard, imitation of timber, it is better to fasten the crossbars more often: it will be possible to fit the not quite even lumber more tightly. The quality of wood materials sold on the market is, to put it mildly, low. We have to fix the jambs of geometry at the expense of force.
The construction of a frame from a bar is shown in the video
Sheathing
You can cover the frame with any material:
- Oilcloth or film. Short-lived, but fast and cheap. Enough for the season. You can even use an old banner (they are given almost for free by advertising agencies).
- Impregnated fabrics. The option is very easy and inexpensive. You can use the material that is taken on awnings, tents.
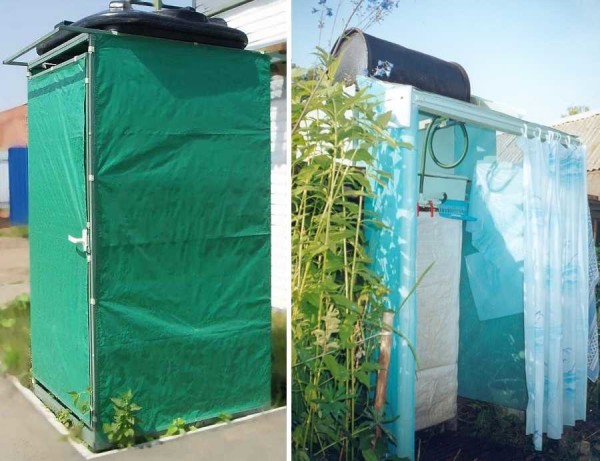
Budget shower casing - fabric and film
- Lumber. Lining, imitation timber, block house, etc. One point: do not buy raw lining or block house if you need to install it right away. After a year, it will dry out significantly, which will cause cracks. Sometimes the shrinkage is so significant that the planks pop out of the grooves. Have natural ventilation. Although, if done according to the principle wicker fence (as pictured), you can use a regular board.
The walls of this summer shower are made on the principle of a wicker fence
- Slate. They can be asbestos and polymer. Although everyone knows that asbestos is harmful, they still make siding out of it.
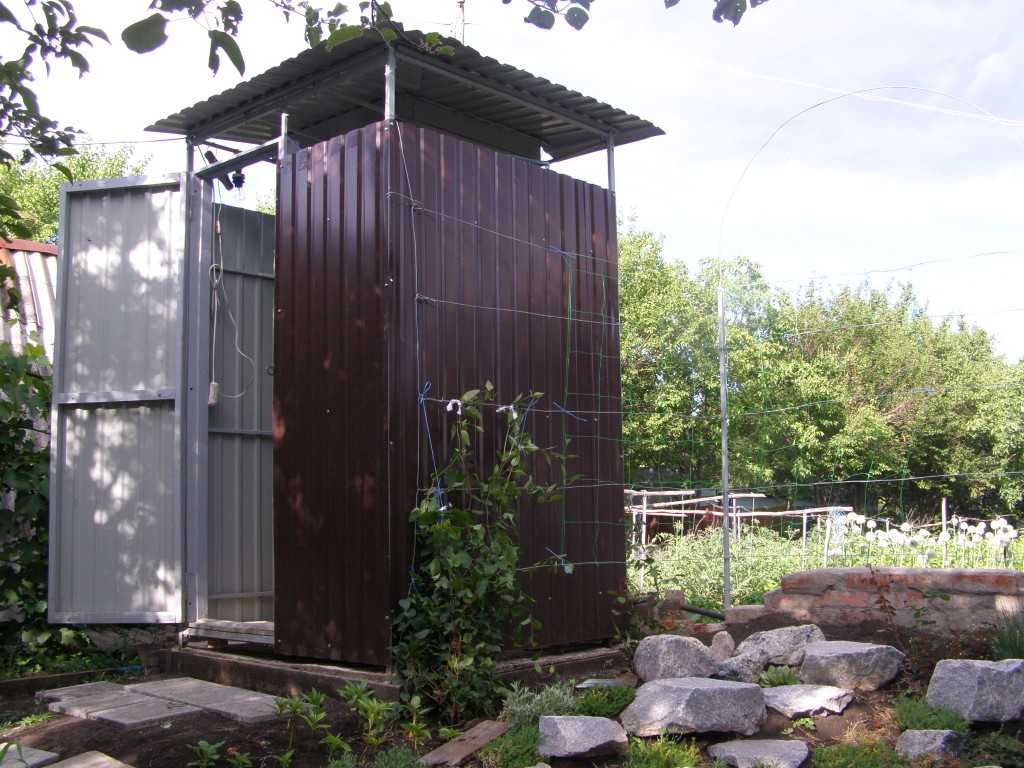
- Professional sheet. If there are scraps left after manufacturing fence made of corrugated board, you can adapt them.

Shower in the country from a profiled sheet
- Polycarbonate. If you are not confused by the translucency of this material, you can use it. Only the sections will need to be repaired, otherwise dust / moisture will enter the cells, algae will settle. Polycarbonate, of course, will cease to be transparent, but it will acquire a grayish-green tint, which you are unlikely to like.

You can also any other fence that comes to mind and will fulfill its functions. For example, in one summer cottage, the shower casing was woven. Type wattle.
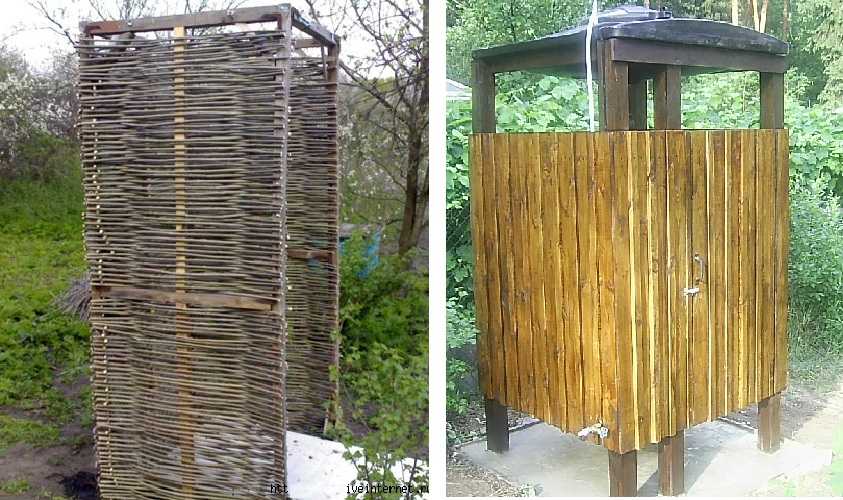
You can weave the shower trim
Shower tank
As a tank for a summer shower, use any suitable container that is on the farm. Most often it is a barrel - metal or plastic. If there is nothing suitable, you can buy a container. They are in a large assortment: plastic, metal - from ferrous metal and stainless steel.
Not everyone likes plastic ones, since water heats up worse in them. For the southern regions, this is not scary - there is already enough heat, but for the Middle Lane, it can be critical. Although in this region, most of the summer, water, even in black metal barrels, requires heating. On the other hand, plastic containers are inexpensive, light, there are square flat shapes, which means they fit well on the shower frame and there is no need to come up with a method of fastening.
In a metal barrel, water will heat up faster, especially if it is painted black. But if it is made of ordinary metal, there will be a lot of rust by the end of the season. So much that it will be noticeable on the body. This is the main disadvantage of such tanks. Much better - made of stainless steel. If finances allow, allow yourself this.
Summer shower tray
There are two options for arranging a country shower: when the septic tank (drain pit) is located directly under the shower stall. Then you can simply make a pouring floor: lay the boards with a gap of 3-5 mm. A simple option that works great on sandy and sandy loam soils. In this case, the water leaves very quickly, without stagnating anywhere, therefore such a device does not cause any inconvenience.
But this option is only suitable if you plan to use the shower exclusively in warm weather. And spring-autumn will not go - it will be cold, as it will blow from below.
If a normal drain is required or you need to divert the drains to the side (drain pit aside from the building), you need to make a pallet in the shower. The easiest case is to buy a ready-made one. Then, when building and choosing the size of the frame, you will have to focus on the size of the pallet: you need bars for it, to which it is attached. It is also connected in a standard way: they put a siphon with a flexible hose, like in a bathroom.
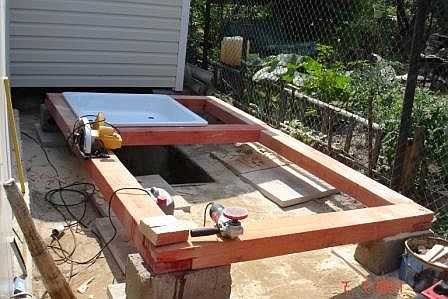
When installing the pallet, when installing the bottom strapping, the bars are placed so that it holds well
If the pallet is plastic, just the bars around the perimeter will not be enough: support is required under it, otherwise it "walks" too much. This base is usually laid out of bricks. You can tie them with a solution. Just remember to leave room for the drain hose.
In some cases, they try to make a more solid drain: without using a ready-made pallet. In this case, a concrete slab is poured. To do this, a pit of the required size is dug, about 30-40 cm deep. A layer of gravel 15-20 cm thick is laid on the bottom. Already at this stage, a mortgage is installed - a drain pipe and a drain grate. They put the formwork. It can be fixed - made of brick. Crushed stone is rammed, everything is poured with concrete (brand M 250). They wait a week (at a temperature of + 17 ° C and above) until the base gains strength. After you can continue work: put the frame and continue construction.
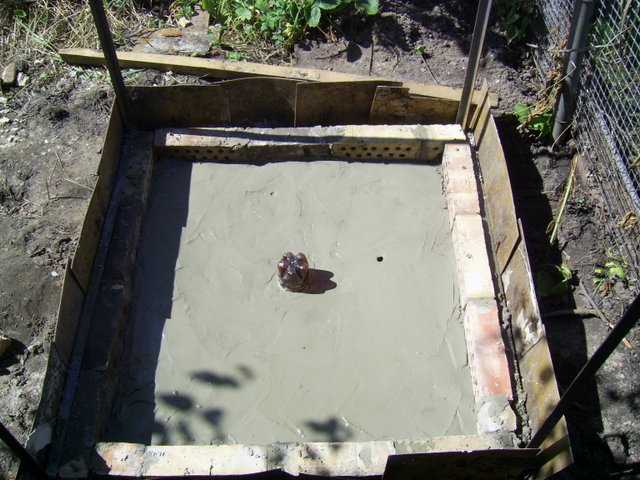
Example of a concrete pallet
Tank filling and water heating
Filling the shower tank with water is usually not a problem. Sometimes water is carried in buckets - you want to wash, you will carry it. Not very convenient, of course, but it happens ... If there is a water supply in the country, they fill it with a hose, mount a supply pipe with a valve. Water needs to be added - the tap is turned on, the tank is full - closed.
How to auto-fill the tank
The most advanced ones do automatic filling. Then the water supply is opened / closed by a float system like the one in the tank. Only in case of breakdown, it is necessary to provide for the drainage of excess water. And, preferably, when leaving the cottage, turn off the supply tap. Otherwise, you can turn your own and a neighbor's cottage into a swamp.
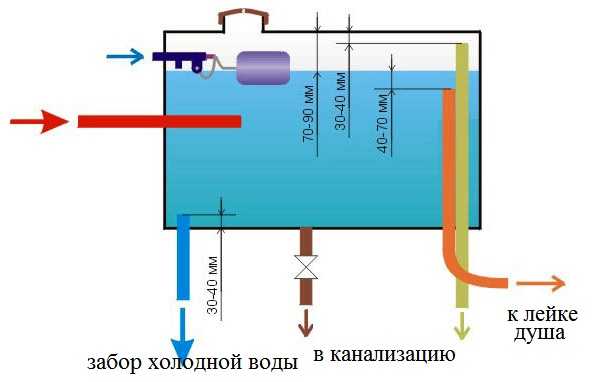
Water tank device with automatic level control
An approximate diagram of the implementation of auto-filling of the tank is shown in the figure above. Please note: the water intake into the shower takes place close to the surface: there is usually the warmest water. Only this pipe is placed at the opposite end from the cold water inlet, otherwise the water will still be cold.
Two pipes go into the sewer: one overflow (mustard-colored). With its help, the tank will not overflow in the event of a breakdown of the float mechanism. Second drain into the sewer for complete drainage (brown). It will come in handy when preserving the system - draining for the winter because a tap is installed on it.
Organization of heating
The easiest option is to use the energy of the sun. Yes, it heats the water through the tank walls. But the water column is too large to warm up quickly. Therefore, people come up with various installations for solar water heating.

Method of heating water by the sun
As mentioned above, the warmest water in the tank is at the top. And the traditional feed comes from the bottom. That is, we take the coldest water. So that the warmest water flows into the watering can, a hose is attached to it, and it is attached to a piece of foam, which I let float. So the water is taken from the top.
To speed up the heating of the water, they make a "coil" (in the photo above this is the right picture). At the bottom of the water tank and above, in one of its walls, two pipes are welded. A black rubber hose is connected to them, which are folded in rings in the sun. If there is no air from the hose, the movement of water will be quite active.
If the sun is not enough for you, but you can supply electricity to the soul, you can use heating elements (wet). We need them with a thermostat so that you can set the required temperature. They are usually used in storage water heaters, so you can find it.
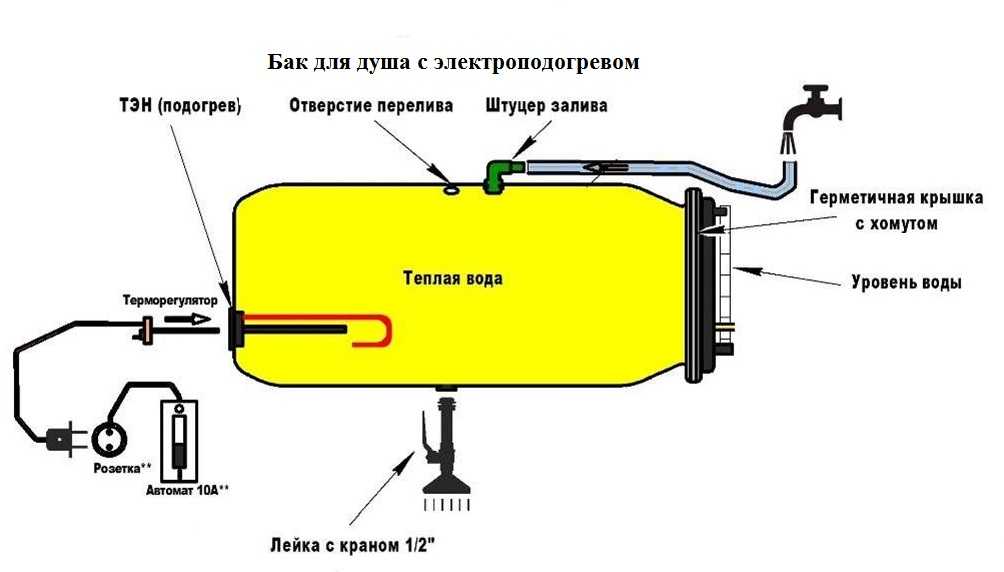
Diagram of a water heating device with a heating element in a summer shower
When you pull the power line to the shower, do not forget to put the machine with an RCD. This is the minimum that will ensure your safety.
Construction of a shower in the country: photo report
It was decided to use a fence at the far end of the site as one of the shower walls. It was decided to make a shower with a changing room - that is much more convenient.
The soils are sandy, the water leaves very quickly, so only one tire was buried for draining. Rainstorm tests have shown that more is not required. It poured much more water than mine in the barrel, and no puddles were observed.
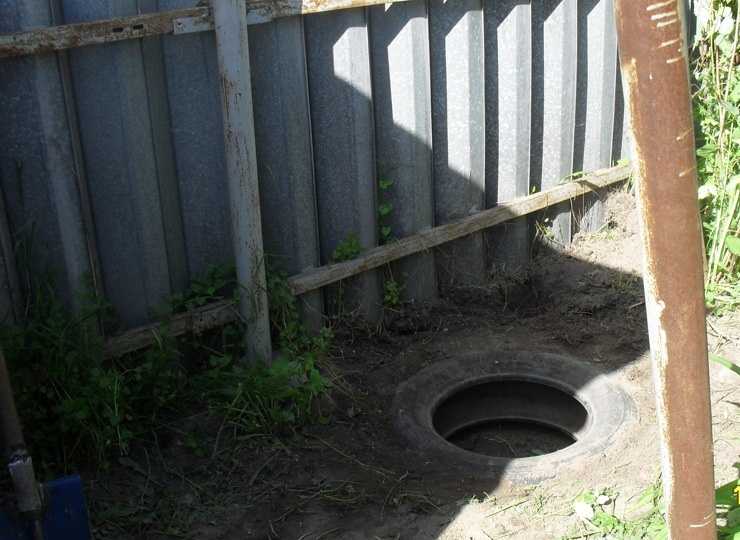
One tire was buried to drain
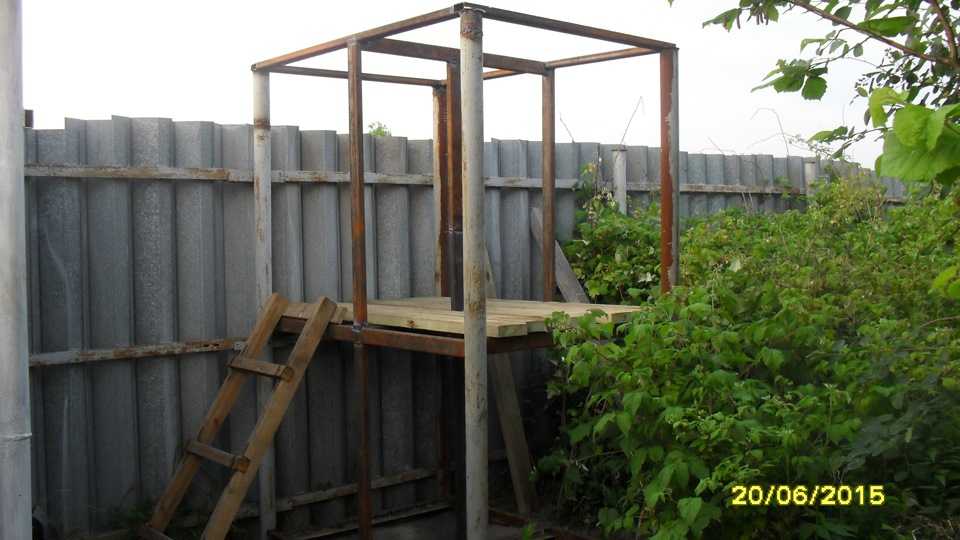
To the already existing post (from the fence), three more were added. We used a round pipe (it had been in the barn for a long time). Pits 70-80 cm deep were dug under the pillars. Pillars were installed in them, covered with rubble. The rubble was tamped down and poured with concrete.
Three pillars are buried
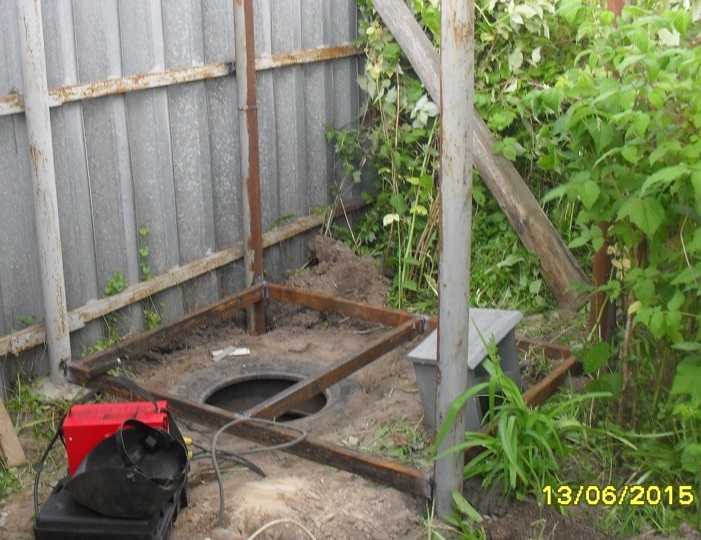
After the frame was welded. Used rectangular pipe 60 * 30 mm. For this construction, this is a bit too much, but they used what was: the remnants of the construction of the fence.

When welding, the level was maintained
Having welded the floor frame, and thus marking its level, we formed a drain. The missing height was reported with a brick (battle, remnants). All were poured with concrete, forming a drain into the tire.
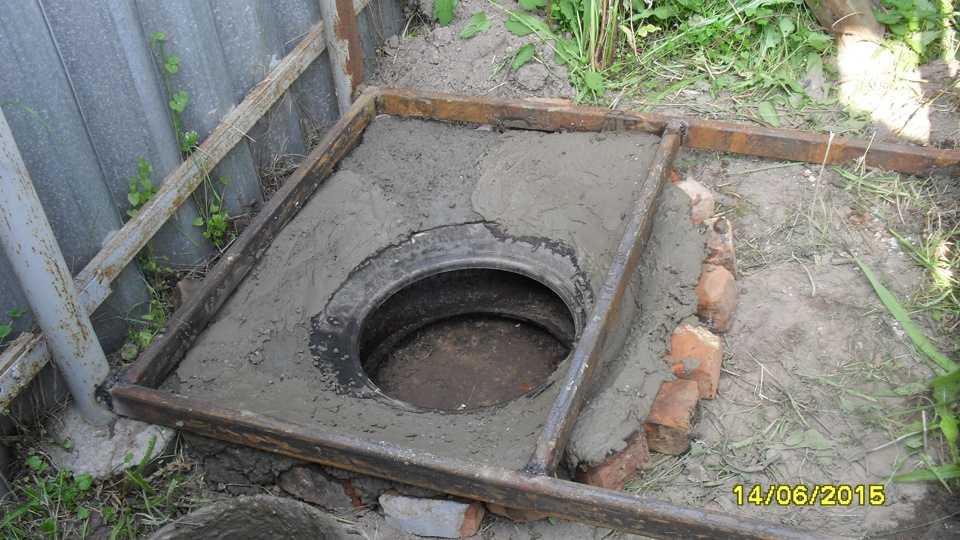
Runoff formation
We leveled the floor and in the second half, left to grasp. We started processing wood. An aspen board was bought. It was first processed with a sandpaper attached to a grinder.After impregnated with a protective compound.

Sanding boards
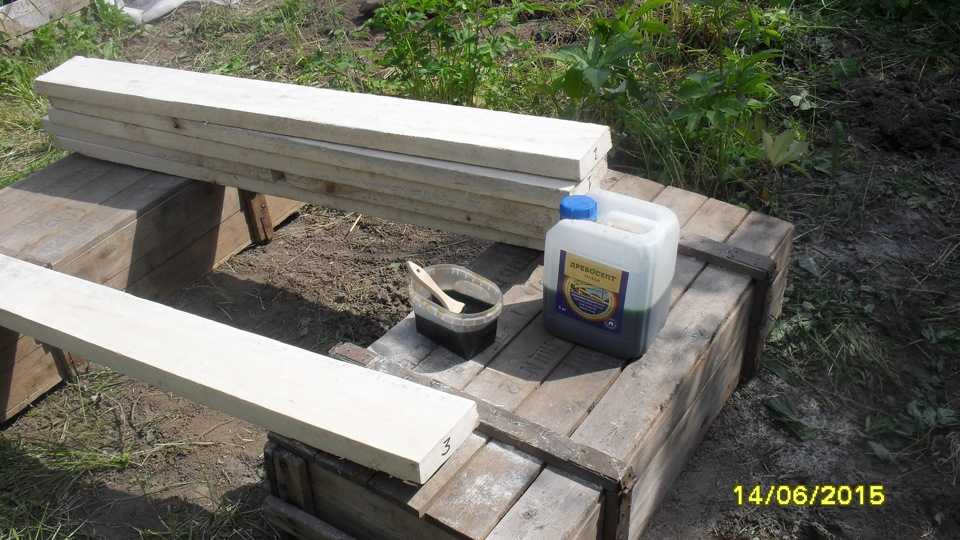
Impregnation
While the impregnation dries, we continue to cook the metal frame for the shower. The middle piping was welded from the same shaped pipes. Then it is used as a platform for working at height. Already dried planks were laid on the piping pipes. The upper harness was cooked from this pedestal.
The middle strapping was used to weld the top
The frame is almost complete. It remains to weld the frame under the barrel at the top.
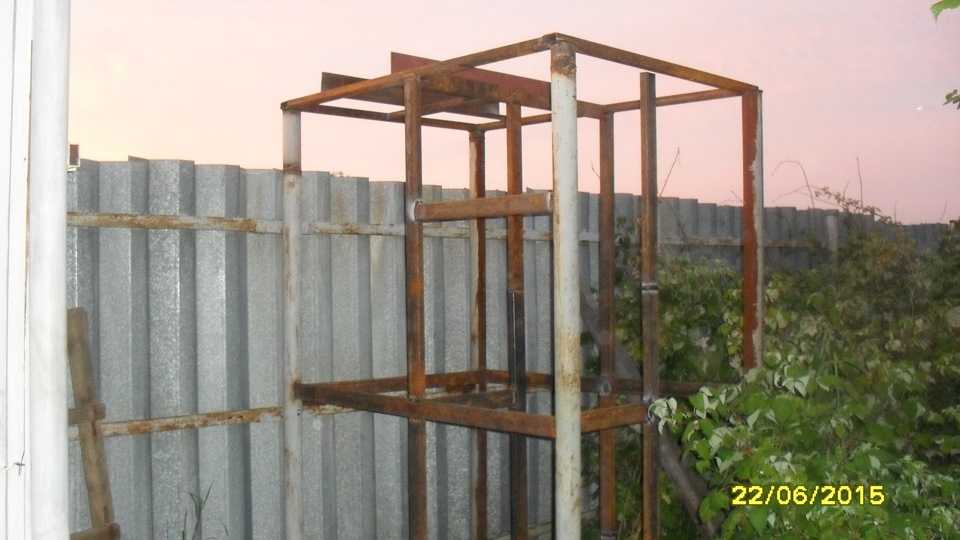
Ready-made shower frame
Above the shower area, a reinforcement of the upper strapping was added in the middle. Two corners are also welded. The thickness of the metal is about 6 mm, the width of the shelf is 8 cm. The distance between them is less than the diameter: so that the barrel rests on them sideways.
The metal used is old, so it is rusty. It was cleaned off with a grinder. Then the shower frame was painted three times with paint on rust. It was chosen in blue, as it was planned to sheathe the shower with blue polycarbonate.
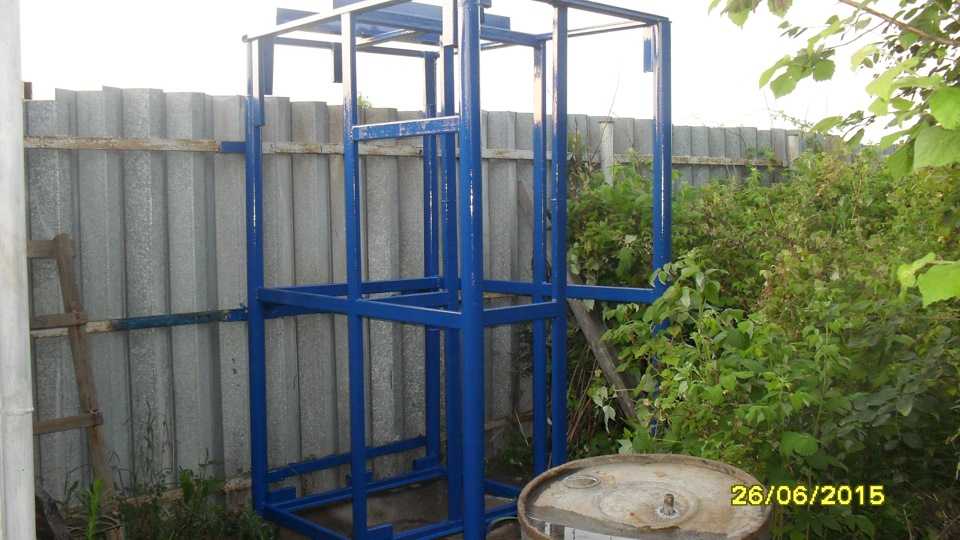
Painted with blue paint over rust
The polycarbonate was mounted on self-tapping screws. During installation, no special or ordinary washers were used. This is a breach of technology that can cause it to crack on sunny days. This material has a large thermal expansion, which increases, since in this case it is fixed to a metal frame.
how to correctly mount polycarbonate, read here.
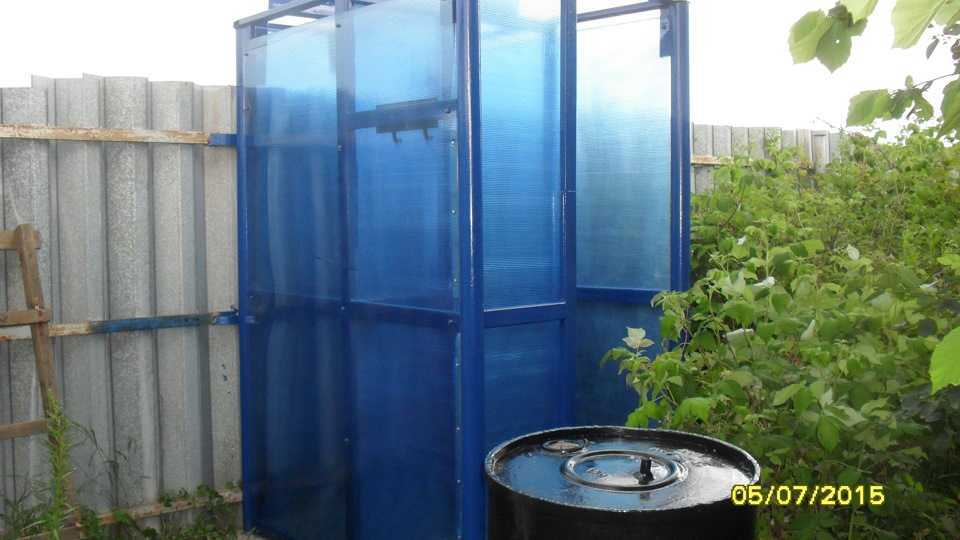
Mounted polycarbonate
The barrel in the barn has been washed. The pipes are welded to it. One is for filling water, the second is for connecting a watering can. After that the barrel is painted black.
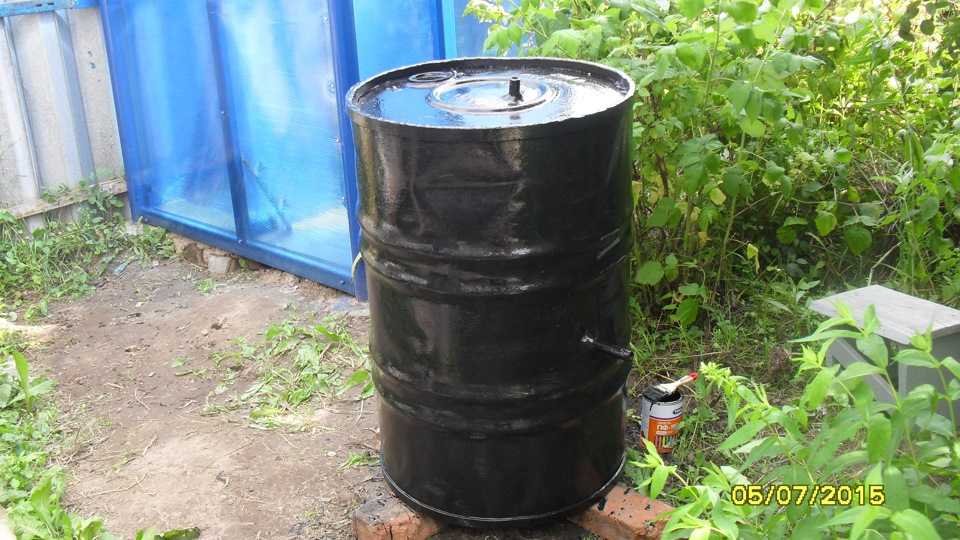
Barrel for faster heating of water is painted black


All sites write as they should and none of them write as they should. It is possible, not possible, but specifically how? How to calculate the load on a structure? The neighbor put a second barrel for cold water, wanted a contrast shower, turned on the pump and climbed into the shower, at one point the shower folded up and crippled a person, here you have wooden posts. I myself made a frame of 32 pipes, when the wind rises terribly, it staggers. So at least write formulas for calculating the loads, this is no joke!
Well, unlearn as a builder and you will know the formulas, and do not make henna out of 32 pipes =)
Better thank you for writing.
According to the article: quite informative, at the expense of water intake from different heights in the tank, it was taken into account, I did not guess myself.
ATP for the article.
The frame is powerful. With a margin! In your version, everything is thought out, there is no sewage system - soils allow ... I have more clay, so I will wrinkle my forehead. The bad thing is that they did not explain in any way - the protection of the metal from rust, I mean the part that is dug into the ground.