DIY inexpensive garden paths
Arrangement and layout of the site provides for the creation of tracks. Moreover, the requirements for them are quite serious: they must be reliable, comfortable, functional, beautiful and, very desirable, inexpensive. We will talk about how to make garden paths with your own hands at low cost in this article.
The content of the article
What to make tracks from
Track coverage can be hard or loose. The following materials are used to create a hard coating:
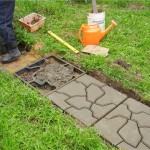
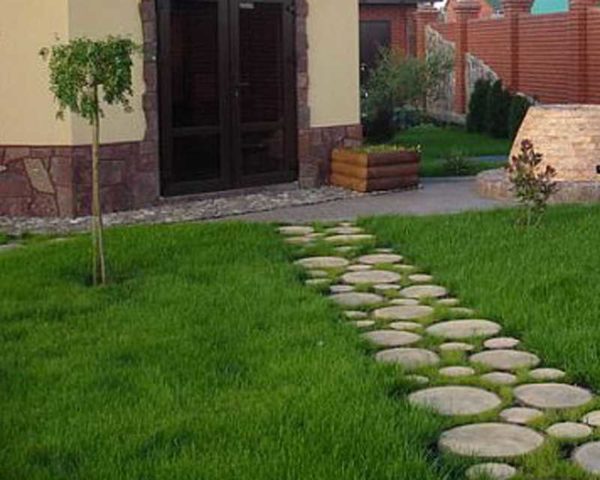
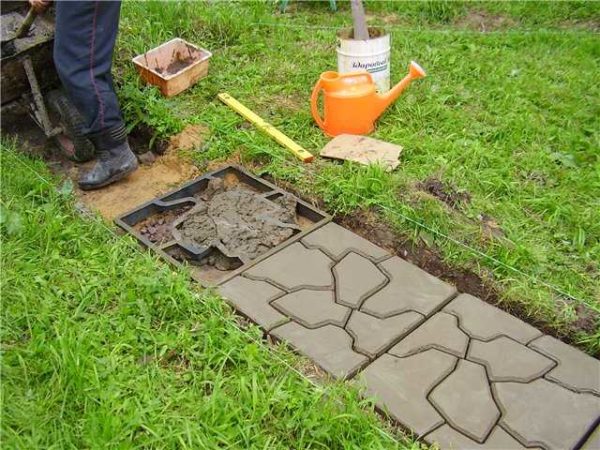
- Concrete... Concrete walkways are more than just plain gray tape. In addition to the fact that there are dyes and, if desired, you can decorate it. There are also molds for pouring in place. It turns out homemade paving slabs. Another option is to pour small concrete slabs of the required size on your own, then put them on a bedding. See the photo for examples of design.
-
- And everyone on the farm has molds for such a path - cut water bottles into cylinders, place them as needed and fill them with a solution: beautiful and cheap
-
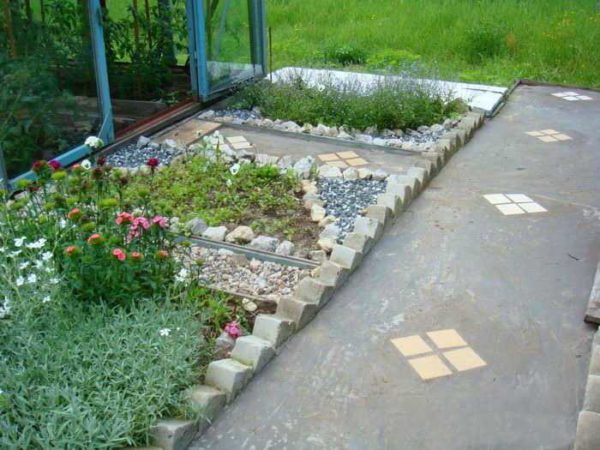
- Large pebbles as backfill and colored concrete slabs
-
- Another option for laying homemade concrete slabs in a garden path
-
- And this is a concrete track with expansion joints. If you look closely, you can see that stripes are applied across. This is to keep the wet surface non-slip
-
- Another of the ready-made forms for homemade paving slabs
-
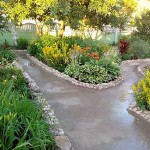
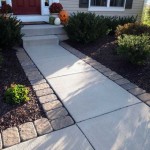
- It looks attractive due to the border and non-linear shape
-
- Simple concrete tape can be decorated to your liking
-
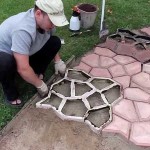
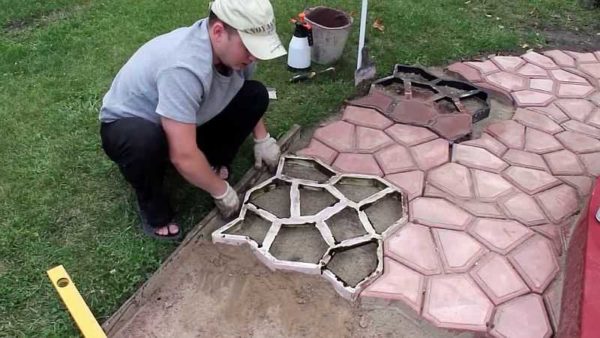
- This is how they pave the path in the country or near the house using ready-made forms into which concrete mortar is poured
-
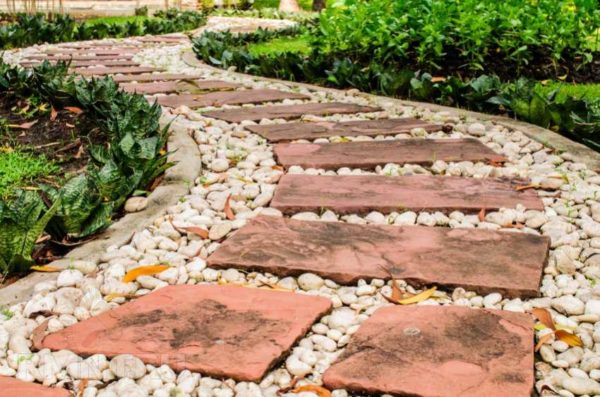
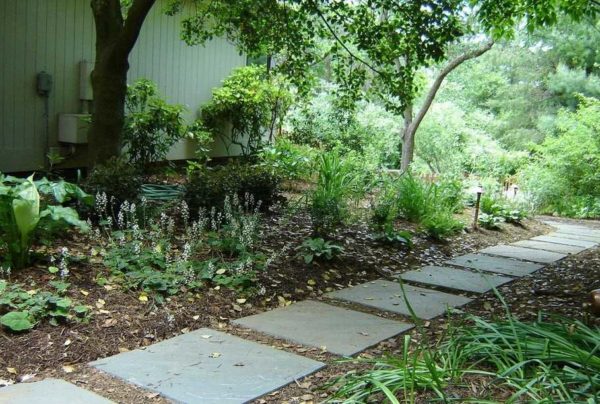
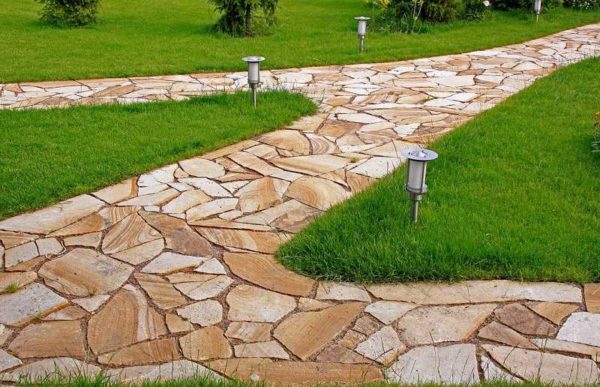
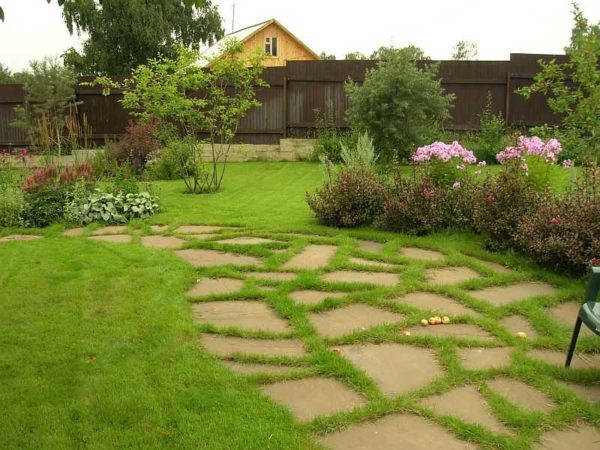
- Flagstone. This is a natural stone that has been cut into plates. It is laid on a prepared base (more on this later), the gaps are filled with backfill. It turns out beautifully, reliably, non-slip. It is not for nothing that it is stone paths made of limestone that landscape designers love so much.
-
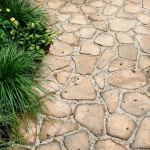
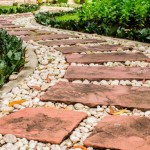
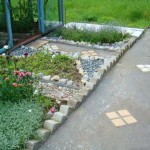
- Backfill is one of the important elements that shape the appearance
-
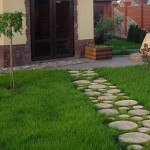
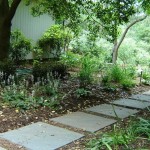
- In this form, the limestone path does not break the lawn, and it is convenient to walk
-
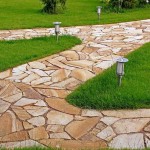
- The color of the stone can be any
-
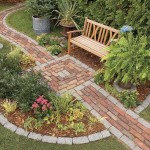
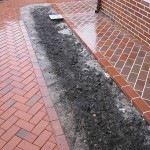
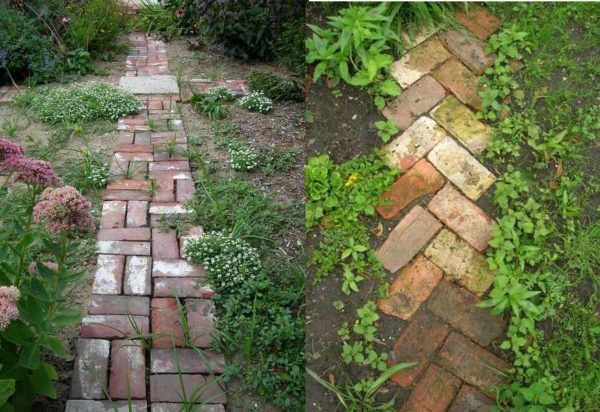
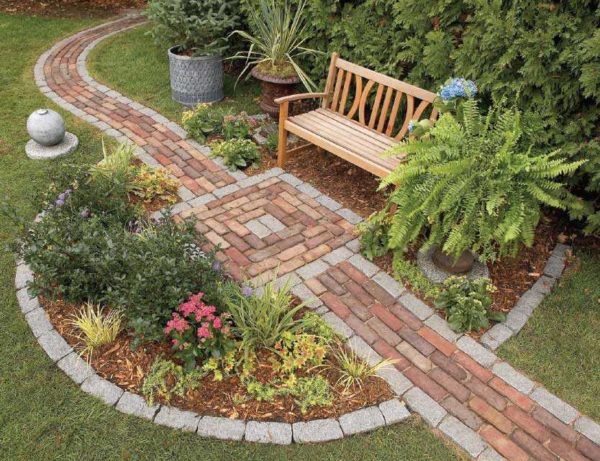
- Brick. Ordinary ceramic bricks are a beautiful material, but not for paths. It absorbs moisture, if it then freezes wet, it breaks apart. If you are going to make a path from broken bricks, then it is more or less normal to walk along it only for a couple of years. Then you have to redo it. The resulting cracks will need to be covered with coarse sand or fine gravel. Clinker bricks will serve much longer on the track, but this option cannot be called low-cost: the cost of one piece is from several tens of rubles.
-

- Quite nice paths made of old brick. And if the filling is done on the sides and in the seams, there will be beauty in general
-
- There are two types of bricks - ceramic and chipped from granite
-
- Clinker brick path - beautiful, you can't say anything ... but maybe too beautiful for a garden?
-
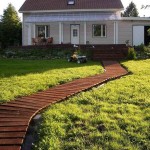
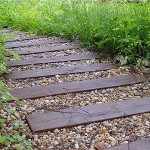
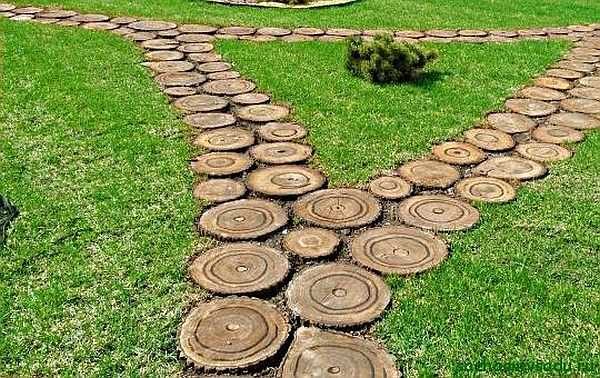
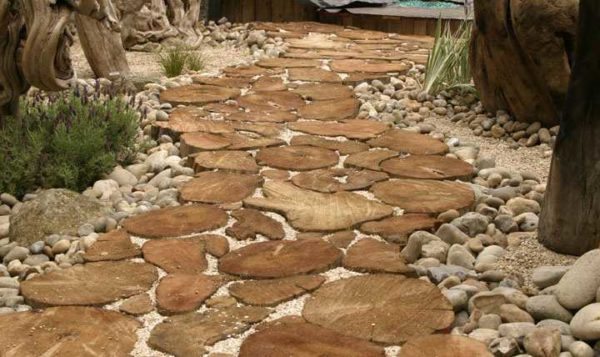
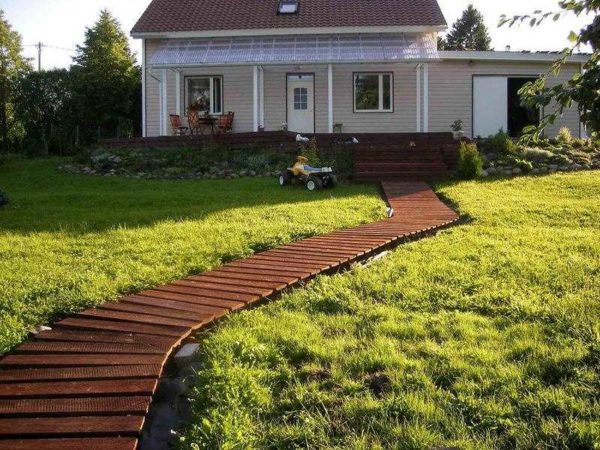
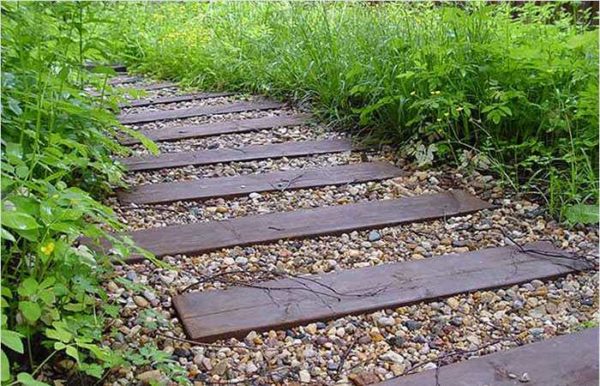
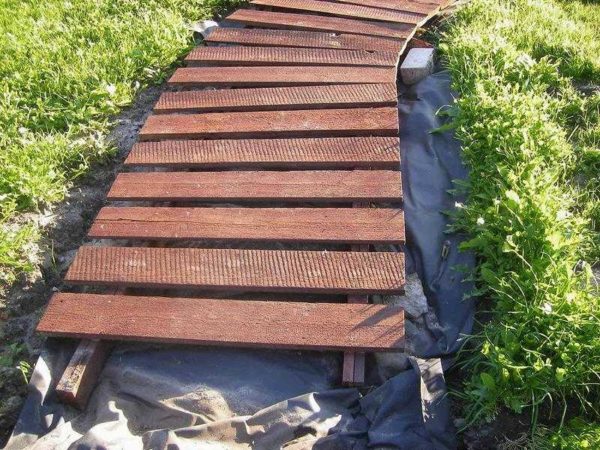
- Wood... Such a seemingly unsuitable material, but with proper processing, it can serve for a long time. Moreover, many do-it-yourself wood paths can be classified as low-cost. For example, they came up with the idea of using hemp and tree cuts as curbs or coverings. They also make the flooring from well-processed boards - better terraced, but if not, it will work from the old floor.
-

- A structured tree can be a great path
-
- This version of a wooden pavement for a summer residence
-
- A properly treated tree can last for several years.
-
- Combination with pebbles - comfortable to walk
-
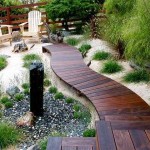
- Luxurious path for a site near the house
-
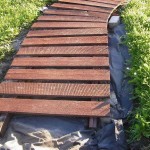
- And this is how to make a path from boards
-
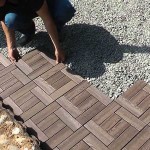
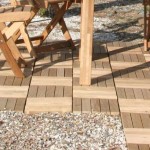
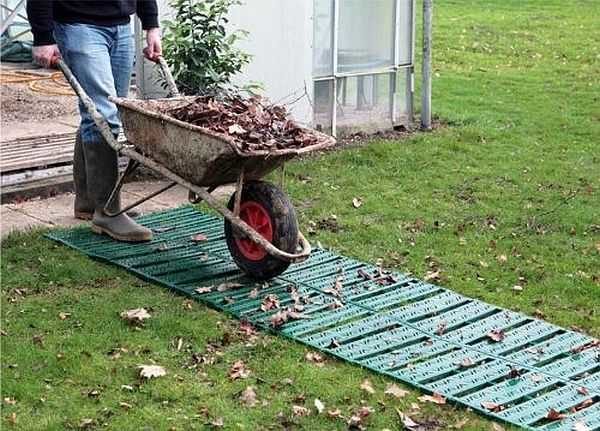
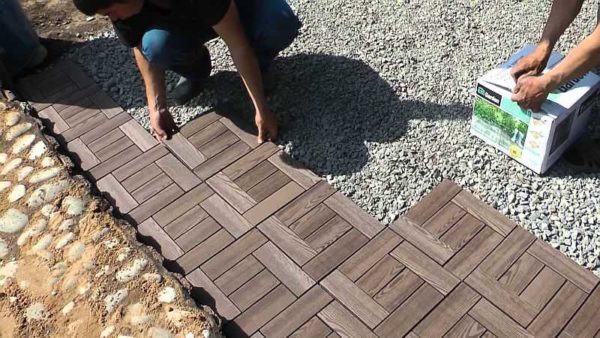
- Plastic.There are tiles for garden paths made of plastic - polyethylene or polypropylene. It has a square shape and a system of locks, which is attached to one another. It can be laid directly on top of the lawn or on previously trodden paths in the country or on a section of paths. This option is fast and cheap. It can definitely be called "Low Cost". It is better, of course, to make a dump of crushed stone and sand according to the rules, and put plastic elements on top. It's already a little longer and more expensive. There is also an immodest, but very beautiful version of plastic tiles for paths. There is also "garden parquet". These are slabs or boards made of wood-polymer composite - WPC (they are in the photo, they look exactly like parquet). This material appeared relatively recently. It looks and feels like wood, but in fact it is a mixture of wood flour and polymer. These are very beautiful coatings, but their cost is not modest. Although not fabulous.
-
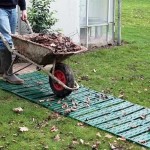
- A plastic path in the country or on a site is good because it can be done in a few minutes
-
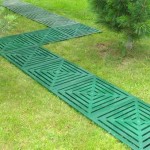
- Another type of plastic tile for paths
-
- This is garden parquet. Gorgeous, but immodest
-
- And another version of polymer tiles for garden droshky
-
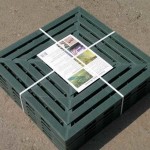
- And this is a bunch of plastic garden tiles
-
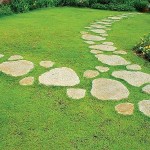
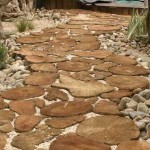
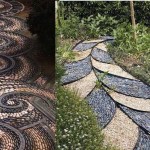
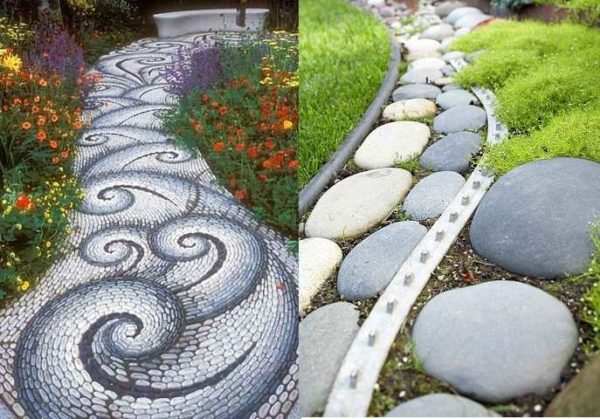
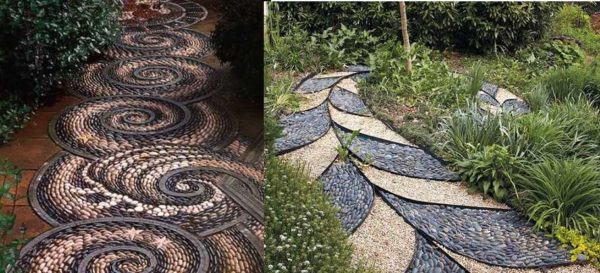
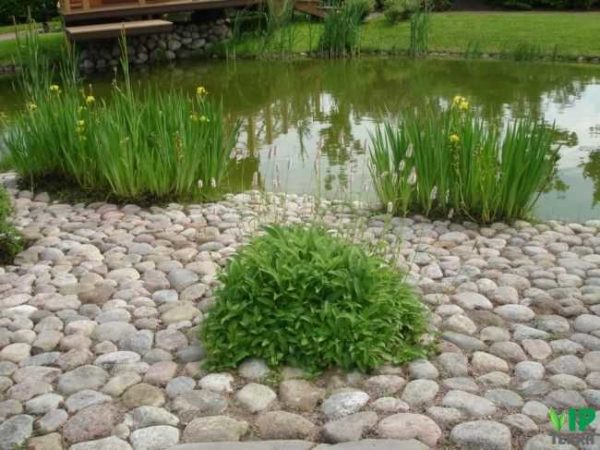
- Pebbles. These are rounded natural stones that can be found on the banks of rivers or lakes. Flatter stones are more suitable for making paths. There are different shades of gray, black, white, sometimes you can find burgundy. From these stones, laid close to one another, mosaic paths of amazing beauty are obtained. But this is an occupation for the diligent and persistent. Those who lack patience can find large flat boulders or large pebbles and place them in the sand. It is not that luxurious, but no less reliable. You can do the same with granite or other similar stones. It is important that at least one face is relatively flat. Put this flat part up, bury the rest. The work is not easy, but it will be possible not only to walk, but also to ride along the path.
-
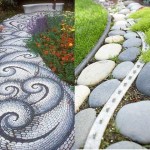
- Different types of pebble paths
-
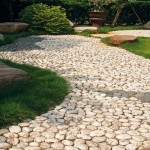
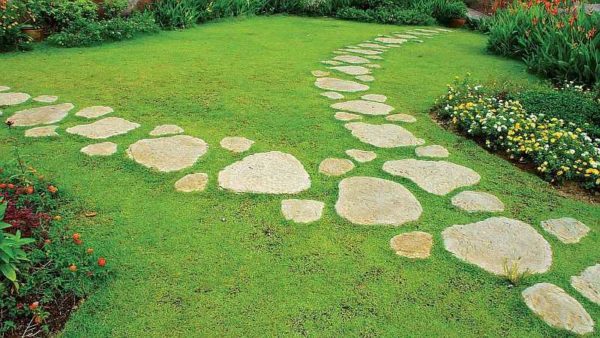
- Large pebbles do not take so long to lay
-
- Beautiful pebble paths in the garden.
-
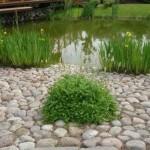
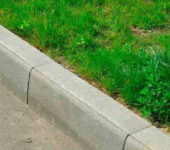
- Nice corners can be paved from large natural stone
-
- Materials at hand. Country paths are made from old tires and bottles.

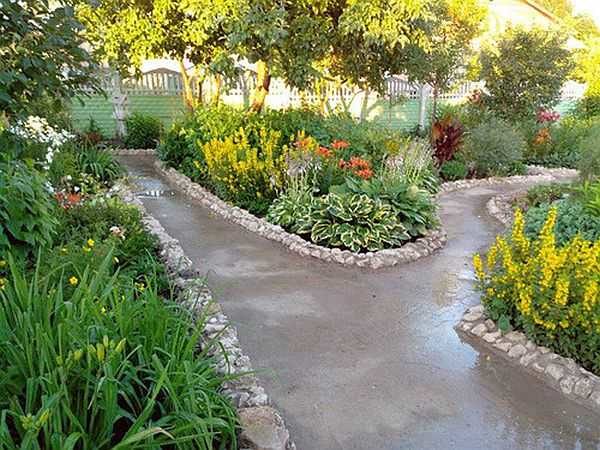


There are also tracks with a poured surface: gravel or crushed stone. Their peculiarity is that with a small layer of 2-3 cm and with sufficient compaction, it is convenient to walk on them. If the layer is slightly larger, bumps are formed when walking, and such walking is tiring. Therefore, as you have seen in many photographs, gravel and crushed stone are used as backfill, into which rigid elements from other materials are laid. If done correctly, it is convenient: gravel conducts water well and puddles do not form. Those who do not like gray can be advised to paint it: many designers do this when organizing rockeries.
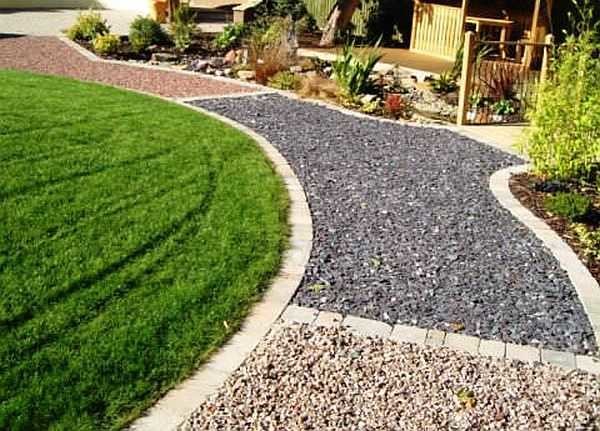
An example of a gravel track
About secrets read the layout of the site here.
How to make garden paths with your own hands
It is not enough to know what you can make garden paths with your own hands. You also need to know how to make them right so that it will serve more than one season or two. Laying different materials may differ slightly, but there are several rules and procedures that are repeated in any technology.
First rule: when laying or shaping the pavement, the track is made with a slight slope. If the material allows, a slope of several centimeters is made on both sides of the center. If, for example, a concrete path is poured, then the slope is formed in one direction - from the house, if it is nearby.The slope is made towards the lower part of the site if the track is located on a slope.
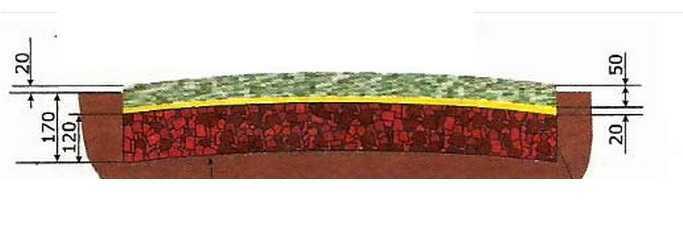
Section of a garden or country path
Second rule: any coating requires preparation of the base. If you put stones (for example) directly into clay or loam, it will be useful, of course - it will be definitely more convenient to walk, but the stones will “silt” after a while. They will simply be trampled into the clay. With a bedding device, this will take much longer. And if you also make a drainage pillow and a side, water drainage will be even more efficient, and everything will look even more beautiful.

A prepared base is required for the coating
Third rule: The pavement level should be a couple of centimeters higher than the adjacent area. Then the water will drain quickly, it will be more convenient to clean, and cleaning will be required less often: the washed out earth will not flow either during rains or during watering flower beds, which are often done along the paths.
About, how to make beautiful beds read here.
Step-by-step instruction
When making garden paths with your own hands, start with the markings. In theory, the dimensions and shape should be plotted on the site plan, and the marking should take place according to the project. But most often everything is done in place. To make the future track more clearly visible, its contours can first be covered with white sand or something similar. If the shape suits you, you can drive in the pegs and pull the twine between them, but you can also work on dumping.
Further, to make a path from stone, flagstone, brick, paving stones, pebbles and other similar materials, the actions are as follows:
- Sod is removed between the two marks. The depth of the ditch should be about 15-25 cm.
- A border is dug in along the edge, if provided.
- The bottom of the ditch is leveled, removing roots, stones, eliminating significant pits or bumps. The bottom is rammed (rammer in the photo below).
- A layer of coarse or medium-sized crushed stone is poured. To save the budget, you can fill in broken brick, other large construction waste. If you have a vibrating plate - great, if not, take something similar to the tool in the photo (you can make it from a large log, to which you can nail a handle across the saw). Use this tool to level the bottom. If you poured garbage, you need to sprinkle a little rubble on top and tamp it again.
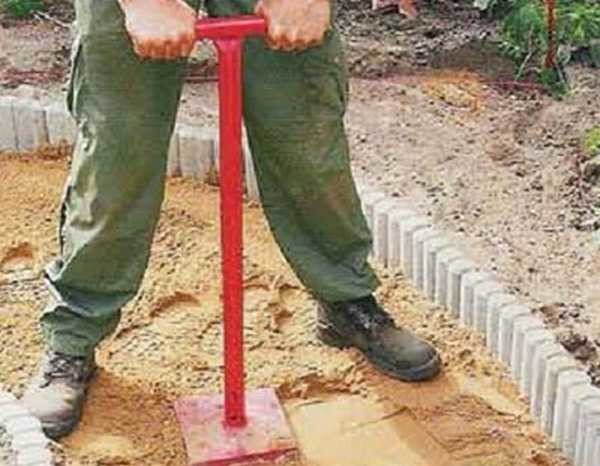
This is a rammer
- Lay a layer of geotextile on top. Its edges rise flush with the sides or even slightly higher. It is better not to skip this layer. It prevents the sand from mixing, which is usually poured on top of the crushed stone, and prevents the roots of plants from germinating, which destroy the path. A very useful thing.
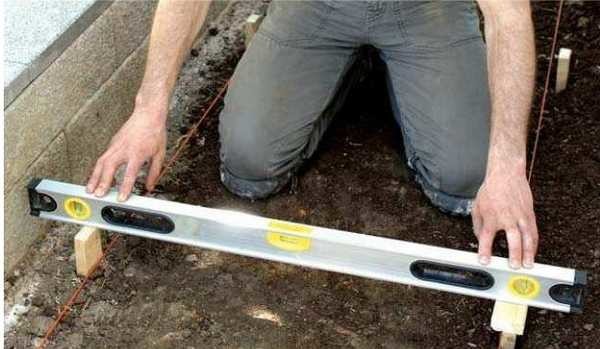
- Sand is poured onto the geotextile. Its layer should be such that the laid coating is slightly higher than the general level on the site. Sand is first scattered with a shovel, then, evenly distributing, it is leveled with a rake. Then they are rammed and leveled. To level the sand level, you can use a rule (a construction tool that is often used when pouring a concrete floor) or just take a large ruler, a building level, a flat rail. Sometimes you have to add, tamp, level several times. It is desirable to achieve a perfect surface.
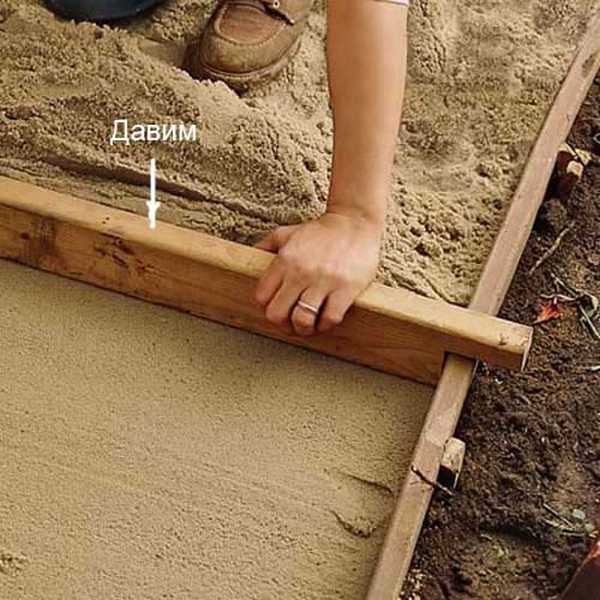
One way to level the sand under the walkway. But it is necessary to dig in the boards first and set them in level. Then they make such a blank and the sand is leveled by pulling it along the guides
- Stone, pebbles, flagstones, paving stones, bricks, etc. are placed in the sand. They are put in the right place, then knocked with a rubber mallet: they are driven deep into the sand.
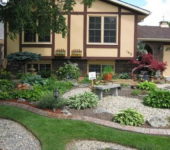
A flower garden or flower bed can be placed along a beautiful path. How to do them, read here.
Do-it-yourself beautiful pebble path
If with flagstone, paving stone, brick, everything is more or less clear - everyone has already seen and more than once how this is done, then how to lay pebbles with patterns is not clear.
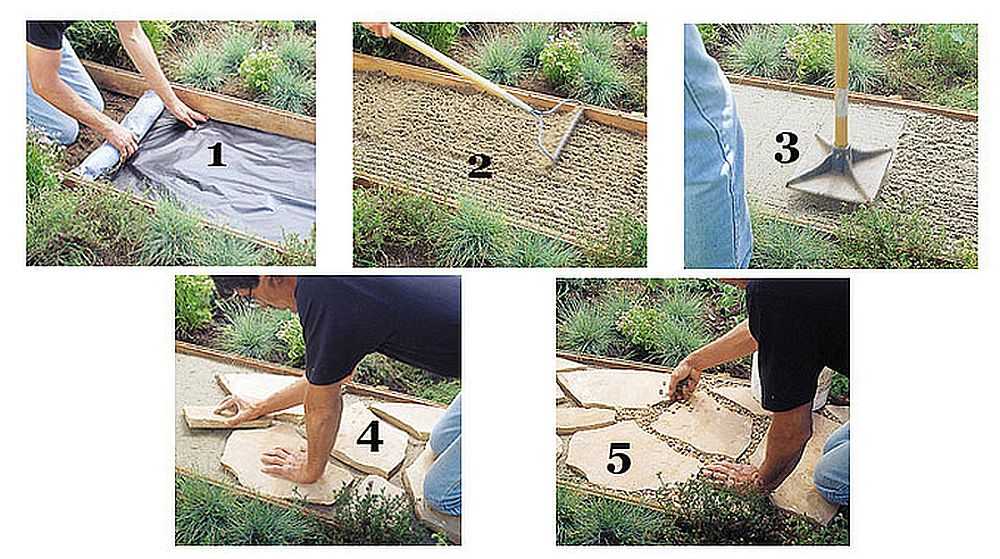
Photo instructions for making a limestone walkway
Below is a photo report on the process of making a pebble track.The main techniques are visible on it: lines are applied to the leveled sand, along which pebbles will be laid out. If these are arcs, they are made with a thread and two sticks / nails.
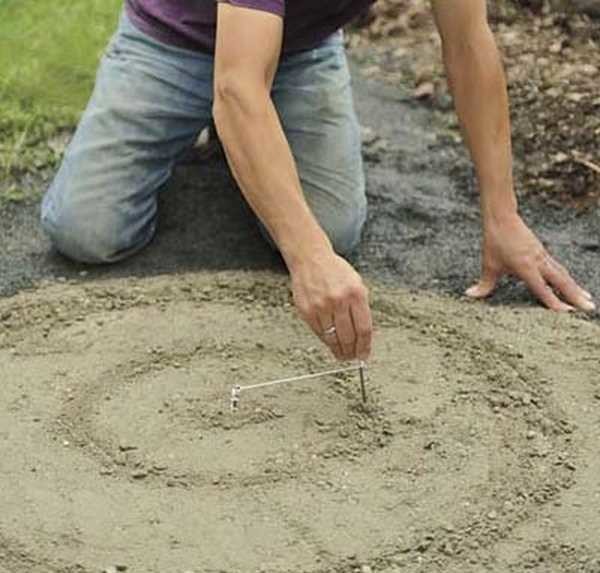
Paint on the sand
Picking up stones, they are laid out on the edge close to each other, slightly sunk into the sand.
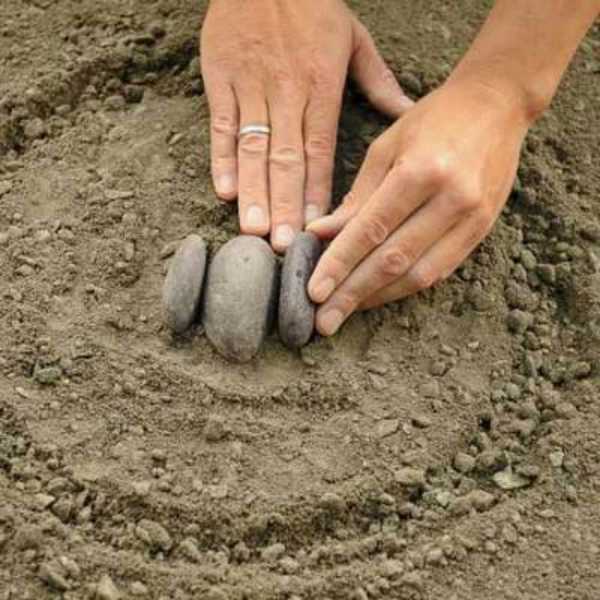
Place stones close to each other
A board is laid on the folded pattern, a rubber mallet is taken and knocked on the board, hammering pebbles into the sand. So the whole drawing is deepened, making sure that the edges of the pebbles are at the same height.
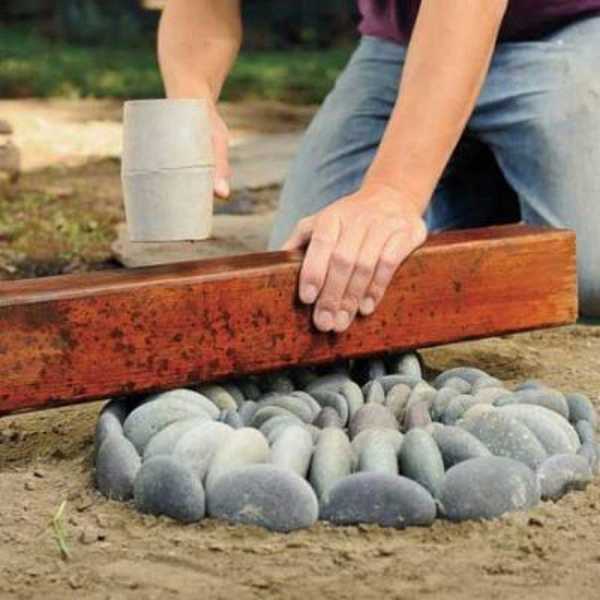
Stones "sink" into the sand
Take a mixture of sand and cement (sand 2 parts, cement 1 part) and fill in the gaps, leveling the layer with a brush.
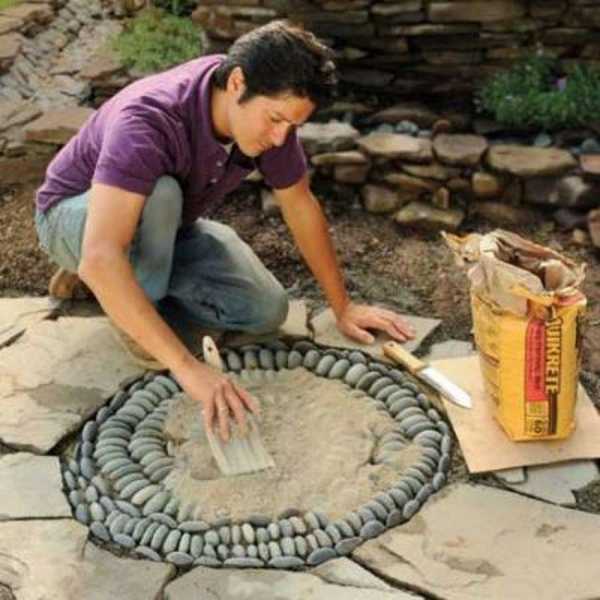
Cover the finished pattern with a mixture of sand and cement
A fragment of a pebble path is carefully watered so that the backfill does not blur. Wait several hours for the cement to set a little, then remove the excess with a soft brush.
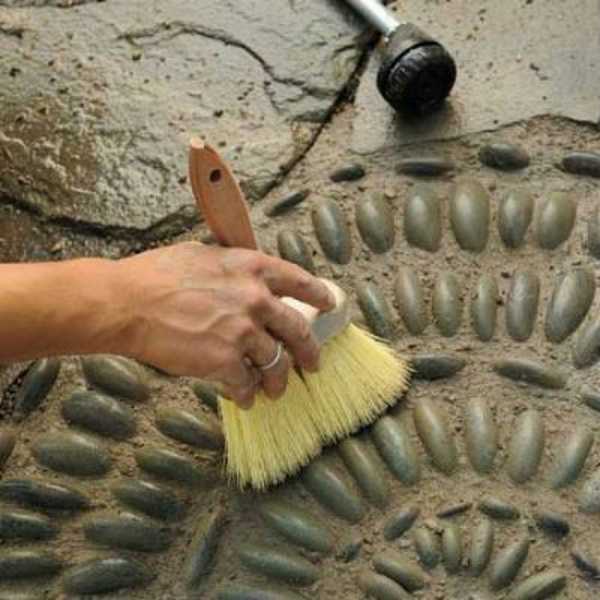
Excess concrete grout is removed with a brush
It is important not to miss the moment: the solution should not get dirty, but also become a stone. If you pick it up with your finger, it should crumble. It's time to clean off the excess.
Read about how to grow a green hedge in the article “Fence hedge: how to grow and shape»
A path of wooden hemp and gravel: video
Old logs or trees can be turned into a beautiful path. From sawn into blocks of the desired length, the face cut is ground, all the wood is first treated with a bio-protection composition (you can soak it with used oil). After drying, it is dipped in Kuzbass lacquer and dried again. Then the front parts of the hemp are covered with paint of the desired color - which will protrude outward. They dry it again and only then put it in the sand.
The process is described in detail in the video. It explains step by step how to make garden paths from hemp or logs with your own hands.
We make a concrete path ourselves
The process is generally similar to the one described at the beginning. There are some differences, which we will talk about.
After the trench has been dug and the bottom is leveled, formwork is installed along it on both sides. These are boards from 25 mm thick (thicker is possible, thinner is undesirable, you can use plywood with a thickness of 16-18 mm, Chipboard). Their height is the height of the track. If you are molding a slope, the boards should be aligned with it - one side a little higher, the other a little lower.
The formwork is set to a level - concrete will be leveled along it
To make the formwork, pegs are driven into the ground with a step of no more than 60 cm. Boards are nailed to them. It is better to smear the inner surface of the formwork with waste or other oil: so that it can be removed easily. Further, crushed stone is poured onto the bottom and rammed. But it is necessary to tamp thoroughly: if you walk along the bottom, there should be no traces.
Further, in order to prevent the path from cracking, a metal reinforcing mesh is laid on the crushed stone. Bar thickness - 4-6 mm, step 5-10 cm. It is sold in pieces, they must be tied together with steel wire.
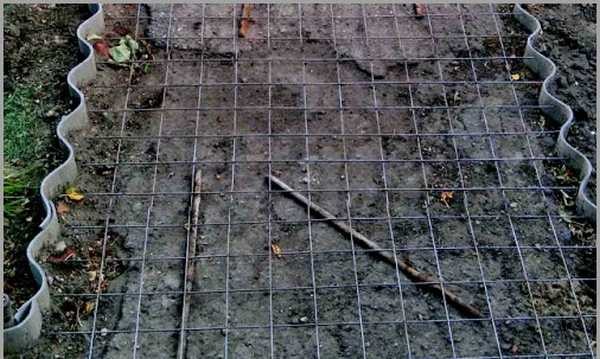
Reinforcing mesh (note that the formwork is slate, it will not be removed)
Then, to compensate for the expansion in winter, you need to put wooden planks 1.5-2 cm thick. They are placed across the path, set so that the height of the planks is level with the formwork boards. Compensation strips are set at least every 2 meters. More often you can, less often - no. Why do it more often? For beauty. Squares look better than long rectangles.
In the finished frame, a concrete solution of a grade not lower than M-250 (read about concrete brands and its preparation here). For him, take 1 part of cement, 3 parts of sand, 4 - crushed stone. Everything is mixed into a solution of medium fluidity (thick sour cream) and poured into the formwork. When pouring, make sure that no air bubbles remain. To remove them, the solution is pierced with a pin, shaking it slightly - bayonet. It is ideal if there is a surface vibrator for concrete - it quickly compacts the mortar, creating a perfectly flat surface.If it is not there, you will have to level it with the rule, using the edges of the formwork as beacons.
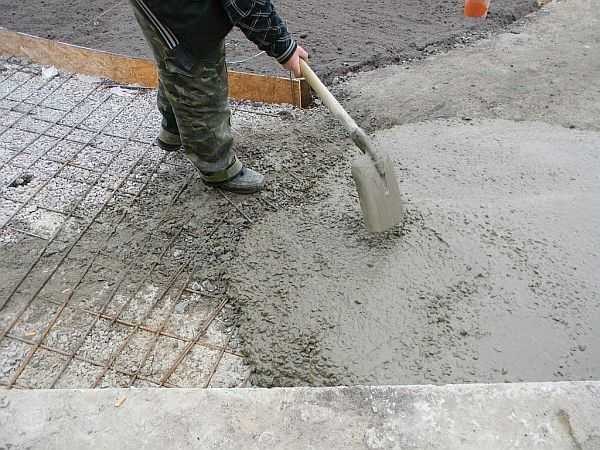
The approximate consistency of concrete
After a few hours, after the concrete has set, the surface can be processed. It can be left as it is, you can brush it over it with a stiff brush, making transverse strips, you can finally put pebbles, stones, flagstone, etc. in a not completely hardened solution. It is not very economical, but reliable. After a couple of days, the formwork can be removed, and you can already walk along the path.
About, what fences are and how to make them is written here.
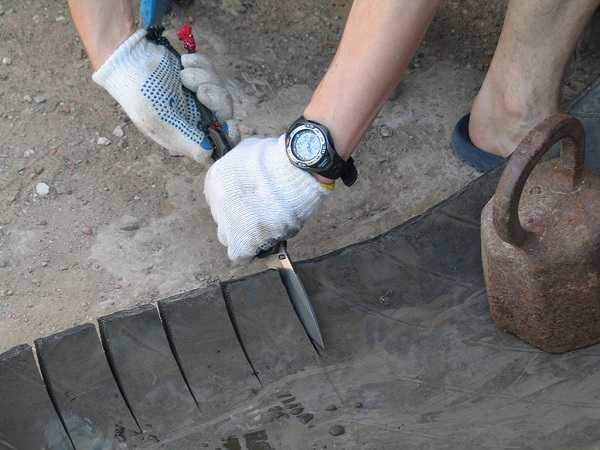
Budget tire track
What is not done from car tires: flower beds, swing, ponds and ... tracks. It's simple: you need to cut off the sidewalls of an old tire, leaving only the tread. How can you cut it off? Grinder. Someone contrives with a knife, but this is only if the cord is not metal.
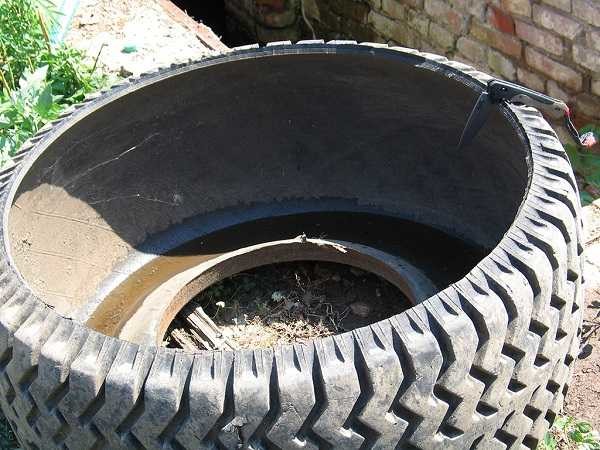
Leave only the protector
The projector is cut across to form a path. Then cuts are made on the sides of 15 centimeters - depending on the diameter of the tire. They will make it possible to unfold the rubber.
Make cuts on the folded edges - the surface is still non-linear
In this form, it can already be laid on the beds. Will serve for many years. This one is like a low-cost garden path.
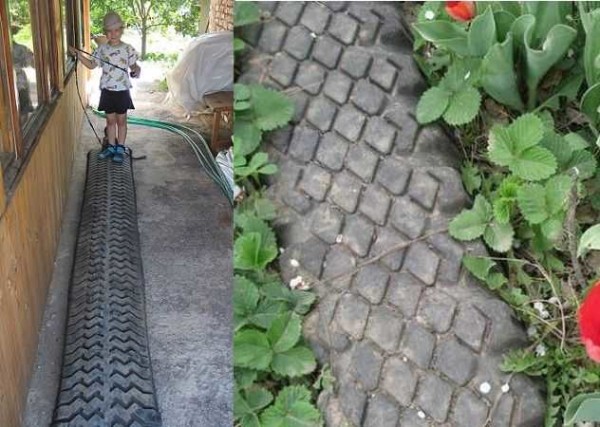
Such a coating will withstand many years of active use.
As you understand, there are a lot of options for how to make garden paths with your own hands. It is impossible to tell and describe about all of them, but we try ...
About making a playground with your own hands is written here.


I am amazed at human thought and vision of the final result. Thanks to everyone who shared their ideas online. Be healthy and happy!
Interesting ideas, I want to implement a lot.