How to polish furniture at home
Polished furniture has a very "ceremonial" look. It is quite specific, but many people like it. The difficulty lies in the fact that it is easy to spoil a shiny surface, but it is difficult to restore its attractiveness. Often the only solution is to polish the furniture.
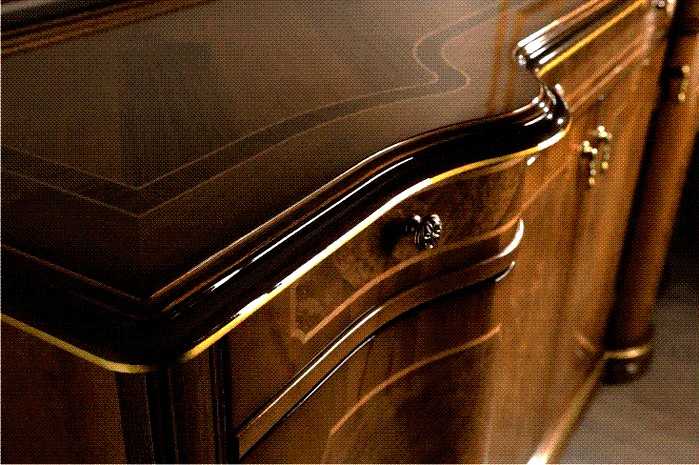
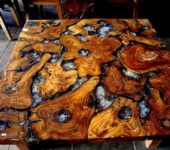
Polished furniture is good for classic interiors
The most common problem is scratches. You can still get rid of small ones with the help of polishes with special properties. Deep ones, with damage to the wood or veneer itself, can only be removed with a new polish (if it is old furniture of the Soviet era, covered with nitro lacquer). To do this, first completely remove all the old coating, then apply varnish and grind the entire part completely. That is, furniture polishing - new or old - takes place according to the same algorithm, with the only difference that the old layer of varnish has to be removed.
If the item is newer, it is most likely covered with a thick layer of varnish. If the scratch is deep, but has not reached the veneer or wood, the situation is somewhat simpler. First, the scratched layer is peeled off with an 80 and 120 sandpaper. Then it is sanded with ever finer grains. Then one or two layers of varnish are applied, after drying - polished.
Another case when furniture polishing may be required is when the varnish becomes cloudy or yellow. This happens a lot. The treatment is also difficult - complete removal of the old varnish and application of a new one with polishing. Problems with all other traces that cannot be removed by conventional means (about the restoration of polished, veneered, wooden furniture read here).
Can only be varnished on a horizontal surface
Another point: furniture polishing is done only and exclusively in a horizontal position. To do this, you often have to disassemble everything. It is difficult, but there is no other way out. You can only work on a horizontal surface.
The content of the article
Pre-grinding
Furniture polishing is a lengthy process and starts with sanding. First, all cracks and other defects are covered with a wood putty of a suitable color. After it has completely dried (the time is indicated on the label), sanding begins.
A sander is best for polishing wood or veneer. Belt or disk - a matter of taste and preference, it also depends on the complexity of the shape of the furniture. You will also need a set of coarse (80) to very fine (1200) sandpaper.
In extreme cases, an angle grinder with a special attachment (disk and Velcro) can be used. But when working with it, it is difficult to achieve a really good result - there is no required mobility of the sanding platform, so the result of such wood polishing will not be higher than average.

What you may need for varnishing furniture
We begin grinding with grain 80. We work with it carefully, removing only large irregularities. Then we repeat the processing with sandpaper at 120, then 180 and 240. During the work, it is necessary to periodically remove dust and inspect the surface for irregularities and other defects. sometimes they are better defined by touch.
Then we take water and sandpaper with a grain of 320. Wet the surface to be sanded and sandpaper. We grind everything again, but with water. At this stage, you should get a good result - everything should be smooth. If everything suits us, we move on, if not, we grind it for some time.
Primer
It is necessary to prime wooden and veneered surfaces so that the varnish lays down evenly. When sanding, we opened most of the pores, released some of the fibers. If you immediately cover them with varnish, it will be absorbed unevenly, which will cause the surface to stain. The primer will cover most of the pores so that the varnish will lay down more evenly.
Priming veneer furniture can be done in two ways. The first is fast, but accompanied by a strong smell. It is necessary to take nitro varnish or polyurethane varnish, dilute it by 10-20% (depending on the initial density), cover the surface.

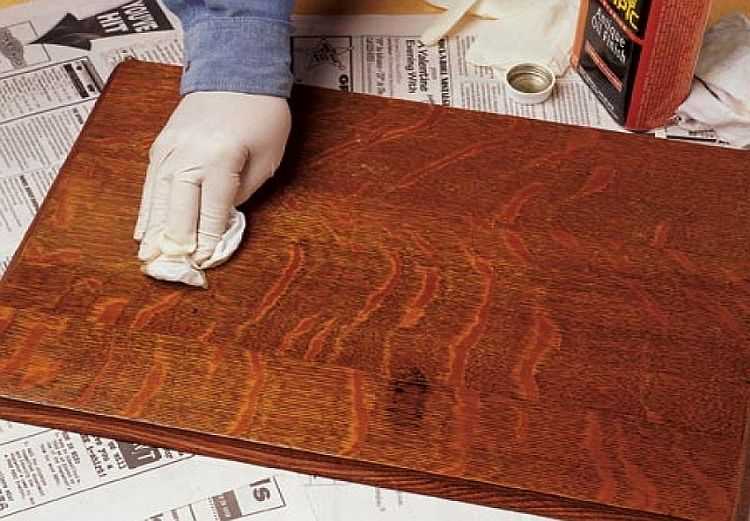
A primer is necessary to make the varnish smoother
The second priming method is long, but correct and almost odorless. We take epoxy glue, a soft cloth swab. Better - flannel, preferably white, so that it does not fade and does not change the color of the furniture. With this swab we rub the epoxy into the veneer.
While everything is drying, dust will surely adhere to the surface. It must be removed. Again, this can be done in two ways: scraping and sanding. If by scraping, we take a sharp blade (it is possible from a wallpaper knife) and use it to clean off all unnecessary. To avoid damaging the veneer, move the blade along the grain. Everything is known with grinding: sandpaper with grain 320 and water. The prepared surface is cleaned of dust, washed with water, dried. Once dry, the varnish can be applied.
Actually, further polishing of the furniture may not be necessary. Already at this stage, the product looks decent.
Varnish application
Immediately about which varnishes are better to use. The best are alkyd (Tikkurila Unika-super series), polyurethane and water-polymer (good - Swedish Bask).
Although odorless, a water-based varnish is not the best choice for a first varnishing experience. It is essentially a water-based suspension. But it is not nearly as harmless as it is commonly believed. Water-based varnishes contain very harmful solvents, albeit in small quantities. Just the usual acetone and others cannot keep such a composition in a stable state. So much cooler solvents have to be used.
This is by the way, but the reason is essentially different - processing difficulties. When applying varnish, water is absorbed into the wood fibers, they rise. As a result, after the first treatment, the surface is far from even, but very rough. This effect is especially pronounced on pine products. So after the first layer of water-based varnish has dried, take an angle grinder or a grinder, attach a 320-grain sandpaper to it and grind it to smoothness. If you are lucky, the next layer will lie flat and the pile will not rise again, if not, you will have to repeat the operation again. The situation is not fatal, of course, but unpleasant. This does not happen with other varnishes.
How to apply varnish
Now a little about the methods of applying varnish. Professionals believe the best is spray gun spraying. It may be so, but not all home craftsmen have such a device, and you need to be able to work with a spray gun. Of the manual methods of application, a popular method is applying with a piece of foam rubber (you can use a new kitchen sponge) or with a cloth swab (soft, white, lint-free fabric). To decide, you need to try what is more convenient for you, how it turns out smoother (if at all).
The next way is with a small foam roller. Suitable if the surface is varnished with a simple shape without small details (door leaf, for example).
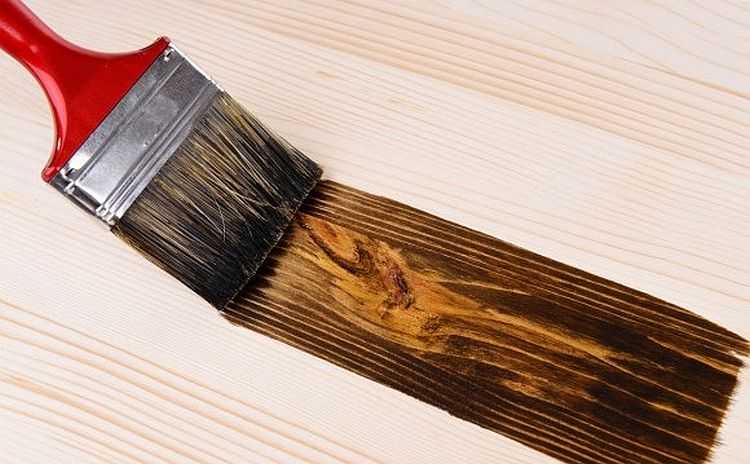
Brushing varnish is the most unpopular method
The use of a brush for varnishing furniture is, oddly enough, in the last place. The fact is that it is difficult to evenly apply a layer of varnish in this way. You need a good brush with soft, thick, natural bristles, which in no case should stick.
Technology
Regardless of the chosen method of applying varnish, its layers should be thin, of uniform thickness. On a brush / sponge / roller / swab we take a little product, rub it over the surface as carefully as possible. We dip it in the varnish the next time only after the “tool” no longer leaves traces. In this way, we cover the entire surface, leave to dry.

Many coats of varnish may be required
The applied layer of varnish does not dry completely, but the time indicated on the packaging of the varnish in the column "tack" or "applying the next layer".On average, for waterborne varnishes it is 1 hour, for alkyd varnishes - 5 hours. The next layer is applied in the same manner. The total number of layers is usually from 5 to 9, depending on the quality of the veneer and preliminary grinding. When the surface is completely flat, the varnish is dried until completely dry - 2-3 days. Then sanding starts again.
Sanding varnish
The process is the same as in the preparation, only we use the skins with a finer grain - starting from 400. Sanding is mandatory with water - moisten the surface and sandpaper. After finishing processing, we attach sandpaper with 600 grit, then with 1000 and 1200.

Grinding varnish
This stage is the last one before direct polishing. After this treatment, the surface should be absolutely flat, homogeneous, without defects.
Furniture polishing
The final stage is finishing with polishing paste. For this you need a polishing paste. You can use furniture, but more often they use automobile ones. Anyone that does not contain wax is suitable (for example, "Anticyrapin"). A good result is given by those in which there is at least a small percentage of Teflon. They also smooth out small scratches and irregularities.
Polishing furniture after varnishing takes less time than others. For this stage, you will need natural felt - they rub the paste over the surface. In order not to work by hand, a felt circle cut to size is attached to a Velcro grinder or angle grinder. A paste is applied to the polished surface, the grinder is turned on at maximum speed and the furniture is brought to the desired degree of shine. With good preparation, it is possible to get a mirror surface.


Good day. I read your article about furniture polishing with interest, pleasure, and use. The question was caused by the use of epoxy glue - after all, it is forever, then nothing can be removed, and in the case of a veneered surface, it is not known, probably, how it will behave.
But my main question is about something else. Maybe you know the composition and proportions of polish for wood (or veneered) furniture of the Soviet era. Without water (!). I know that the composition includes turpentine and wax. I would be glad if you answer.