How to install a mosquito net
With the arrival of warmth, hordes of insects are revived and one cannot live without mosquito nets. Only they are able to protect the premises from the ubiquitous insects. And then some copies manage to leak somewhere. But since the nets are for some reason very short-lived, they have to be replaced or repaired. You won't call a company representative every time and pay pretty decent money for a job that takes a couple of tens of minutes at most. That is why they try to make / fix / install a mosquito net with their own hands.
The content of the article
Types of mosquito nets
There are three types of mosquito nets:
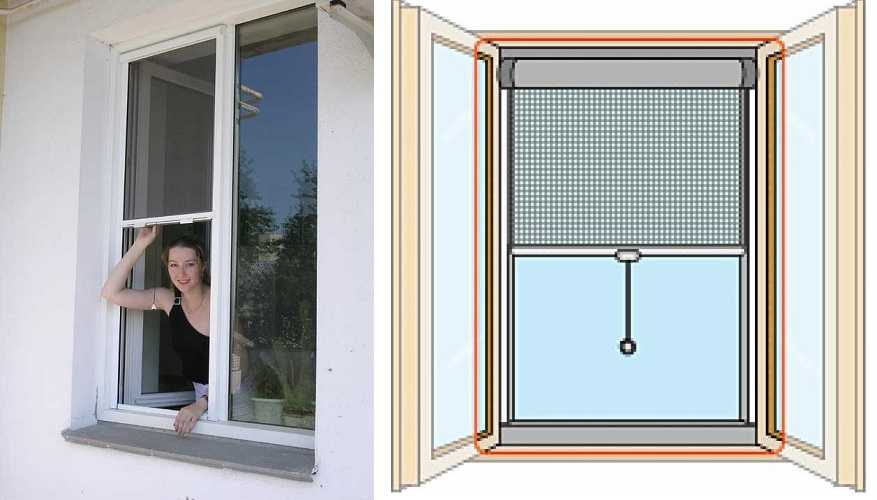
- Framework. This is a frame made of a metal-plastic profile, on which a mesh is stretched. The mesh is attached to the frame using special fasteners: Z-shaped brackets or plungers. This design is the most common, as it protects well from insects at a low price. The cost of making a mesh is from 500 rubles per square meter.
Framed mosquito net is suitable for both wooden and plastic windows
- Rolled. Arranged as roller blinds or blinds. In the upper part of the window, a roll with a net is attached. Pulling on the edge, the mesh is lowered and fixed. When released from the latch, it rises up. An excellent device, but the price is from 5.5 thousand rubles per square.

Roll nets - good, but expensive
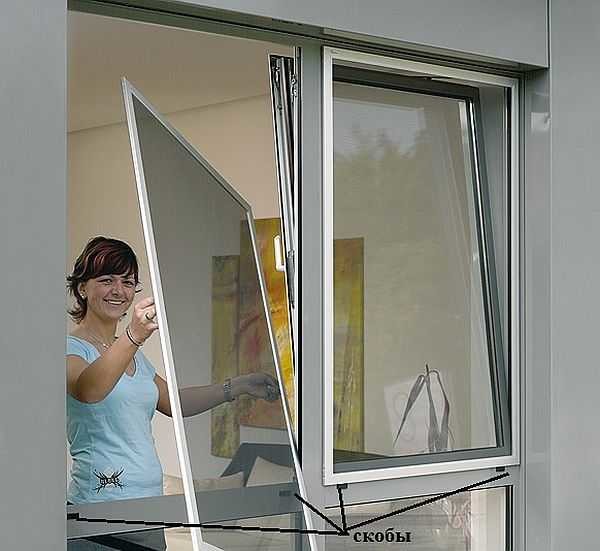
- Swing nets. The mesh is stretched over the frame, but the frame is reinforced, with a larger section than the frame mosquito net. It is installed most often on doors - balcony or entrance, can be installed on windows. It is attached to the door or window block using conventional hinges. So that it does not open under gusts of wind, magnets are built into it. The estimated cost of this type of nets is about 2 thousand rubles. per square.
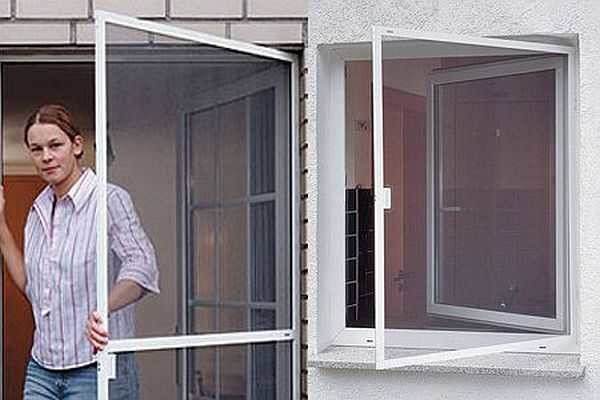
Swinging mosquito nets are convenient for doors
- Sliding. These are meshes specially for sliding window systems. They also have a frame on which the mesh is stretched. BUT this frame moves along special guides that are screwed on from the outside. Thus, it is possible to move the mesh to the place where the sash is open.
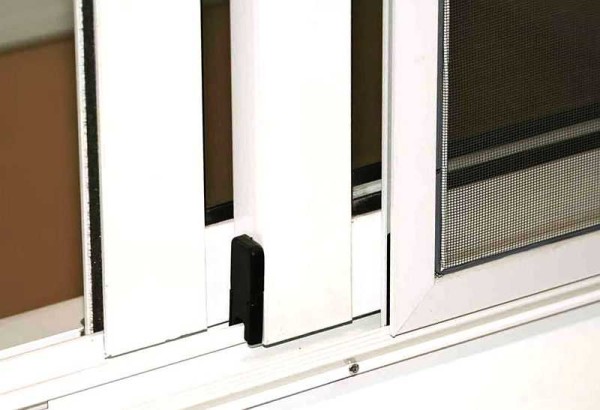
Sliding - aluminum windows on the same system
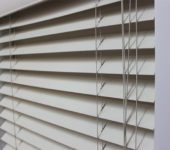
- Plisse. By the way of action, it is similar to a roll, but it is not going up, but to the side. There are two guides - from above and from below, along which the net folding into an "accordion" moves on wheels.
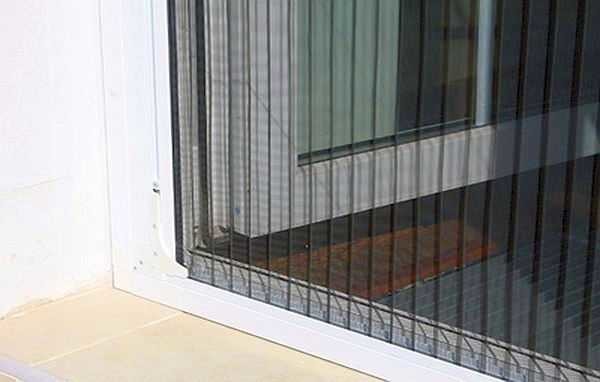
Pleated mosquito net - original and not cheap

As you can see, there are many types. Nevertheless, frame structures are used in 90% of cases. At a low price, they create a completely normal level of comfort.
Types of fixing frame grids
Most often, it is the frame mosquito nets that are installed. There are two ways to attach them: Z-brackets and stems (plungers).
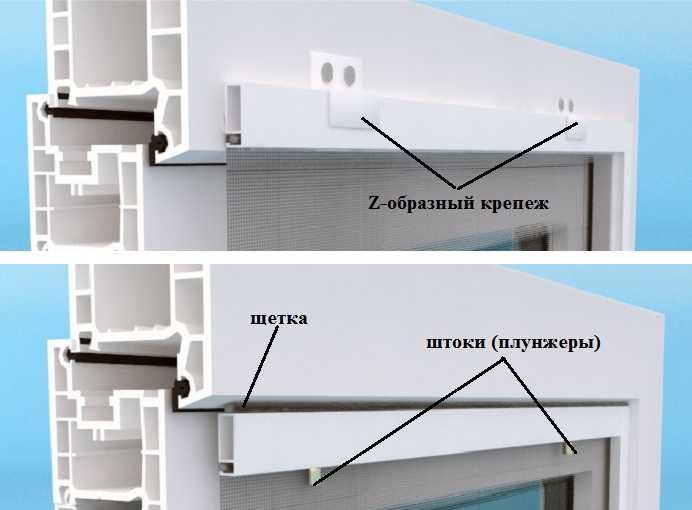
Different ways to install a mosquito stack
When fastened to brackets, they are mounted from the street side. In most cases, this is convenient and, if circumstances permit, choose this particular installation method. In this case, the mesh size must be larger than the light clearance of the window sash: the frame is inserted from the outside.
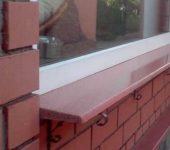
When using plungers, the mesh is also attached behind the glass, but the clips (rods) themselves are located on the side of the room. This device is convenient on the ground floors: it is impossible to remove the mesh from the outside. When installing the mosquito on the rods, its frame should be equal to the size of the skylight. It cannot be done with an accuracy of a millimeter, and to ensure that there is no gap, a brush is attached around the perimeter.It prevents insects from seeping.
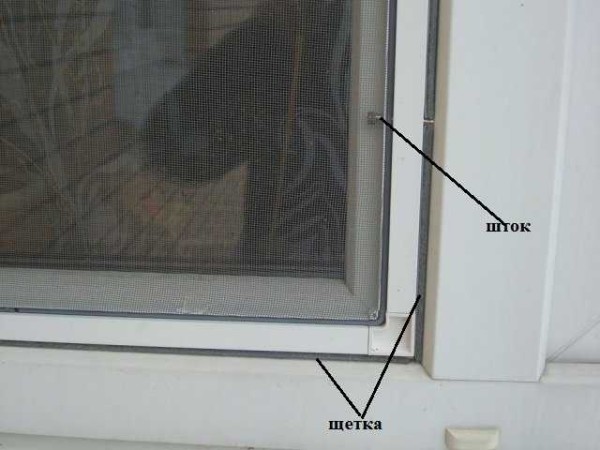
View of the installed mosquito net on the stocks from the street
How to measure the order window
Quite often, a frame with a mesh is ordered from a company, and they are installed on the windows themselves. When ordering, you will be asked to provide the dimensions of the skylight. The required measurements are taken with the sash open. You measure the distance from one gum to the next: width and height. Measure in several places, record with millimeter precision. The accuracy depends on how the grids will fit your window.
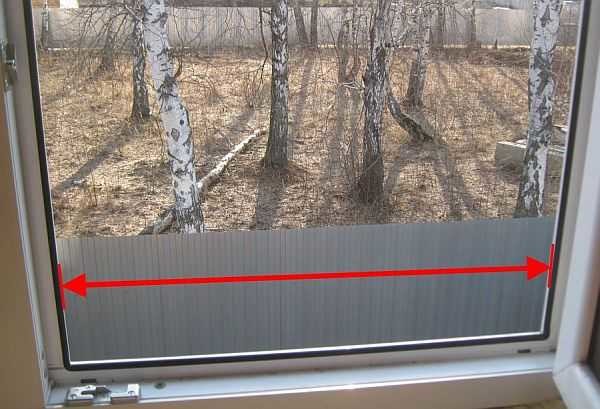
How to measure the window when ordering a mosquito net
See how to measure windows for ordering a mosquito stack in the video.
What you need to know
When ordering or buying a mesh for a window, you need to pay attention to its characteristics. Firstly, it is available with different mesh sizes: from 0.6 mm to 1.2 mm. The smaller the clearance, the less likely that the insect will "seep", and there will be less fluff. But at high density, air also does not pass well, which can be critical in the southern regions. Therefore, the best option is somewhere in the middle of 0.8-1 mm.
The mesh is also produced from different materials:
- Cotton. The cotton thread has high UV resistance. Its fleecy structure increases its "stopping" ability: insects do not crawl through such a net. But since the fiber is natural, it reacts poorly to moisture, is often affected by mold and rot, and therefore is rarely used.
- Polyester. Most common material. It is strong enough and durable, with everything it has a low price, but it does not possess any special properties.
- Nylon. A special anti-allergenic mesh is made of nylon. It is produced using a special technology with complex weaving. Thanks to this, it even retains dust and pollen. Such nets are often referred to as "anti-dust" or "anti-allergy".
- Fiberglass. It is considered optimal, as it has high transparency: when using such grids, the degree of illumination remains almost unchanged. At the same time, its strength is very high - even comparable to the strength of metal. Fiberglass is used to make a mosquito net "anti-cat", which can withstand the weight of the animal and does not break under the claws.
If no special properties are needed, choose the usual one - made of polyester. Sometimes they may ask what color the mesh is needed. The most invisible to the eyes is gray, so you can order it.
How to install a frame mesh on a plastic window
You have received a ready-made mesh. It comes with 4 small Z-brackets (brackets). Please note that they have shelves of different sizes: two by 4 cm and two by 2.5 cm. Brackets with large shelves are installed at the top of the frame, with smaller ones at the bottom.
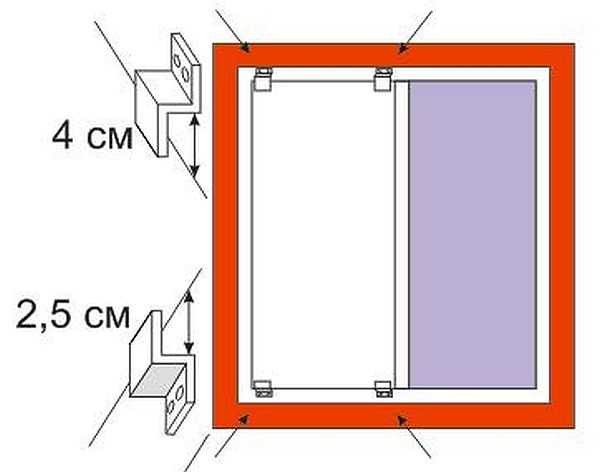
Z-shaped brackets have different shelf lengths
For attachment to the frame, for each support bracket you will need 2 self-tapping screws with a screw, which are also called "seeds". You will need a marker with a thin lead or soft pencil. You will need a drill with a 2 mm drill bit and a screwdriver or screwdriver.
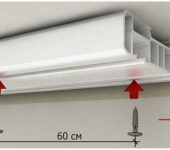
Outside the window frame, we draw a strip below the edge by 3 cm.We stand on a small step-ladder or on a chair, we take the frame with a net outside the window, we ourselves also protrude halfway. Attaching the bottom edge of the frame to the drawn line, mark its top.
You can do without manipulating the frame: you need to accurately measure its height, and set aside this value from the line drawn below. From the resulting point, put another 1.8 cm upwards and here we draw a second line. We will align the fastener shelves along it.
We take brackets with long walls. We apply so that the ledge is on the line. With respect to the light clearance from the edges, you need to retreat about 10 cm. Mark the points where you need to make holes.We carry out a similar operation with the "short" brackets from below. To check, measure the distance between the marks at the top and bottom. It should be 1.8 cm longer than your frame.If everything is correct, we drill holes in the profile (drill 2 mm), install the brackets on the "seeds". Actually everything, we can assume that the mosquito net has been installed by hand.
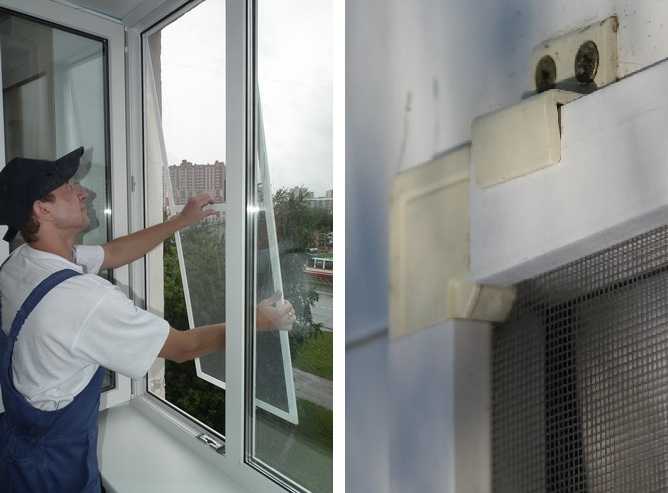
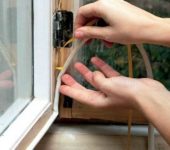
Installing a mosquito stack in a window
Now take the net by the handles, turning it a little sideways, bring it out into the street. Insert the upper edge into the upper brackets, align vertically, lift up to the stop, wind the edge behind the lower brackets and lower it. The mesh stands supported by brackets.
It is removed in the reverse order. Grab the handles, lift up to the stop, remove the lower edge from the brackets, feeding the mesh slightly away from you (a couple of centimeters, no more). Then, leading it down a little, pull it out of the upper brackets.
Corner installation
There is one more type of fasteners, similar in principle of "work" with brackets - corners. When installing this type of clamps for a mosquito net, it is also necessary to accurately measure the width. To do this, you will have to find the center of the skylight, from which to set aside half the width of the mesh. The inner part of the corner should correspond to the width of the frame with a mesh with a small gap - 2-3 mm for freedom of fixation.

Mesh corners
That is, in the presence of this type of mounts, they fix the corners and should stand in width exactly at the corners. In height, during installation, we leave the same gap of 1.5-1.8 cm. It provides the ability to install the frame in the mountings, and is held due to the fact that the upper shelves are larger.
DIY mosquito net: we assemble it ourselves
As you can imagine, you can assemble the frame and stretch the mesh yourself. All components can be bought in firms that sell spare parts for plastic windows. The following components will be needed:

This is what the frame for a mosquito net looks like in a semi-assembled state.
- profile for mesh frame MFP2;
- impost profile (transverse partition with a mesh height of more than 1 m) MFPI and two fasteners for it;
- mesh fabric;
- corners for assembly;
- sealing cord (rubber or even woven);
- handles - 2 pcs;
- countersunk screws with a drill, dimensions 3.9 * 16 mm;
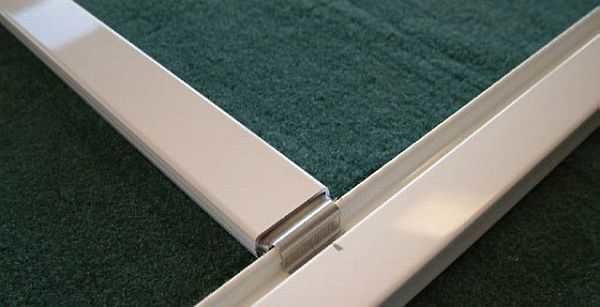
Assembling the frame
The frame consists of two long profile sections and two short ones. They are connected to each other using corners. They can be plastic (cheap, but short-lived material) and metal, painted with white or brown paint (to match the profile).
They also often put an impost - a jumper, which is installed approximately in the middle of the long side. It increases the rigidity of the structure and does not allow long profiles to "play".
The lengths of the profiles must be cut taking into account that they are going to the corners. Therefore, 20 mm is subtracted from the width and length of the light opening (how to measure it is described above) - it is this length that is replaced by the corners.
Saw off from the profiles in two pieces of the required length. It is better to cut with a hand saw for metal - it turns out a smoother cut with almost no burrs. It is brought to smoothness with a file or sandpaper. Then on a flat surface - it is more convenient on the table, laying the profile with the grooves up, fold the rectangle, insert the corner holders - the grooves are also up. In the photo, the grooves are directed downward, but this is inconvenient - then the frame has to be turned over.
We collect the frame from the sections of the profile and corners
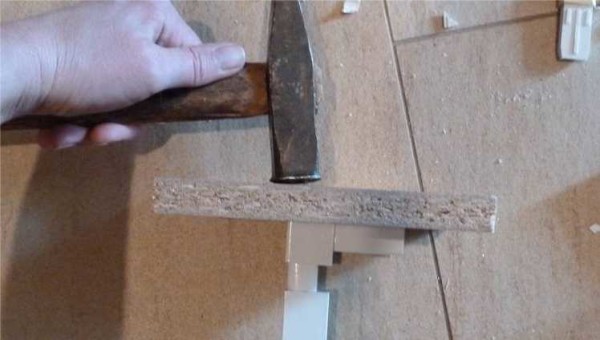
With the normal coincidence of the corners and profiles, they should be inserted tightly. Very tight. Put your hands in place, it will not work. You will have to knock, and in order not to damage the plastic, use a lining - a wooden block or a piece of chipboard, as in the photo.
How to assemble a frame for a mosquito net on windows
When assembling, check the corners as well. They must be strictly 90 °, or the frame will be oblique, and there will be cracks in which mosquito flies will crawl through. After the rectangle is assembled, we install the impost. We saw it off by 2-3 mm shorter than the resulting width of the frame, insert the holders on both sides, fix it on the frame in the groove.
Impost and holder
Stretching the mesh
Spread the mesh onto the assembled frame.It should be 3-5 cm larger than the frame on each side: it will be more convenient to pull it this way. We take the cord, press it through the mesh into the groove. You can start from one of the corners, or you can start from the middle of the short side, alternately moving to the right and then to the left.
The cord comes in quite hard, in workshops it is rolled up with a roller; in its absence, you can use any object with a rounded surface. A knife handle is suitable - office or kitchen knife, screwdriver holder, scissors handle, etc. Straightening the mesh, insert the cord.
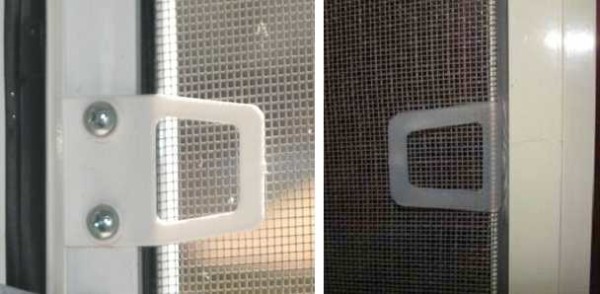
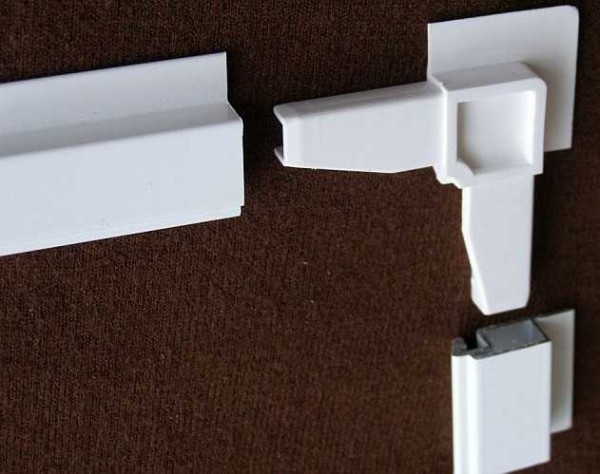
Kinds of handles: plastic and with a metal base
Installing handles
Having reached the place of installation of the impost, we put the handles. Usually they are thin, plastic, inserted into a groove under the mesh, then pressed with a cord. There is a second type of handles - they are denser, sometimes with a metal base, screwed onto the self-tapping screws to the profile, but after the mesh is stretched. If you have a choice - take metal or at least plastic, but thick ones. Plastic ones are very flimsy, often tear.
If in the process the mesh is crooked, the cord can be pulled out by prying it with a screwdriver or something similar, straightened, and rolled up again. Having finished stretching, check the width and height of the frame at several points. If there are deviations somewhere, then in this place the net is stretched too much It is loosened by pressing a little with the palm of the hand near the frame. If this does not work to equalize the width, the cord is pryed off and pulled out at some gap. Having aligned the width, holding the mesh, refill again.
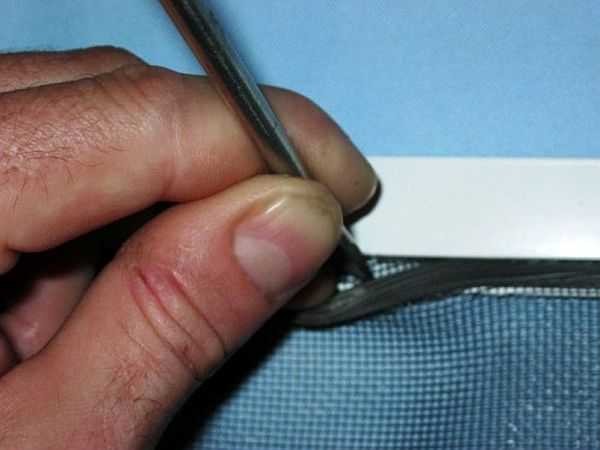
You can pry off the sealing cord with a screwdriver
If all the sizes match, you can cut the cord, tuck in the tail, then walk along the profile again, checking the evenness of the “entry of the seal. Now you can cut off the protruding edges. This is usually done with a clerical knife. That's it, the mosquito net is assembled with your own hands, you can start installing it on the window.
An example of an assembly can be seen in the next video. This is a promotional video: the company sells ready-made kits for self-assembly. The process is not detailed enough, but you can consider in general terms.
Homemade mosquito nets: saving the full
If we calculate the cost of all spare parts, take into account the time lost for their purchase and assembly, then the profit is dubious. Components are still sold to you at a higher price than to firms. It can be useful only in the sense that after self-assembly, you can easily repair it yourself.
However, there are some very inexpensive options for homemade mosquito nets. They are made on a frameless principle, they are mounted directly on the window. There are two ways to do this:
- Velcro - a knitted tape, which consists of two parts - a tape with hooks and a counter with a rough surface. The mesh is cut out a little more than the light opening, the mating part is sewn to the mesh, and the part with hooks on the sticky layer is attached to the frame along the perimeter of the window.
- On the sealing cord. It is inserted into the place of the standard seal. To do this, remove it (pry it off and pull it out), pull the mesh over the opening, press the cord into the groove. The principle is the same as for setting the mesh into a frame.
See the video for the second way to make a budget mosquito net yourself. The idea is great, the costs are minimal.
Related Videos
Pleated mesh
Hinged mosquito net
How to reduce dust through the mesh
Replacing the handles on the mosquito net


My wife is a terrible allergic person, and this mainly concerns insects (Therefore, I consider a mosquito net an integral part of the house. Made on a sealing cord, it holds very well.
Insects are very annoying, that's a fact. the windows were installed, the nets were handed over. I'm happy so far.
I dug information on this topic. I share what I understand. Usually firms producing mosquito nets use the cheapest material that quickly changes its properties under the influence of ultraviolet radiation from the sun, which makes the handles on the nets fragile, and the mesh itself begins to interact with dust, pollen and stink terribly, causing allergies. This happens already in the first summer of the grid operation. Use an expensive fiberglass repair mesh that is more UV resistant and lasts three to four times longer than regular cheap Chinese mesh and is also more durable. The whole problem is to find it on sale by meter.