What and when to use drywall profiles (gypsum plasterboard)
When installing any structure made of plasterboard, a base is needed - a frame on which the gypsum board sheets are attached. This frame is assembled using technology from special products - profiles. About what a profile for drywall can be, its types and sizes, scope - in this article.
The content of the article
Materials: what are the profiles for gypsum boards made of?
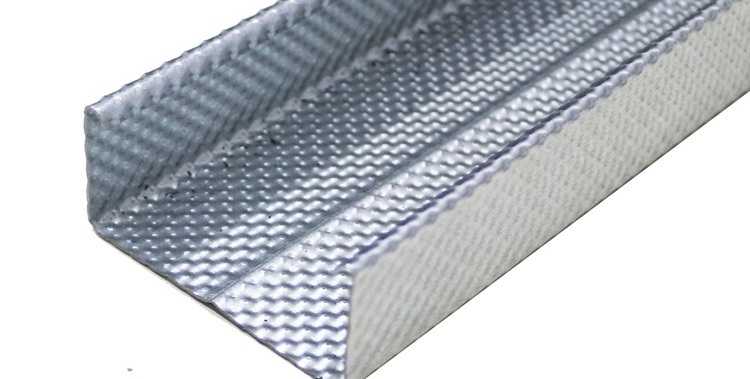
Any kind of drywall profile is made of steel and aluminum. Steel (ordinary or galvanized) are more common, since aluminum, although they have excellent characteristics, are very expensive.
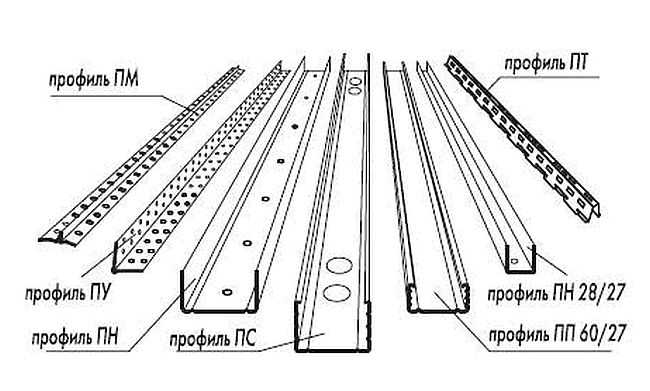
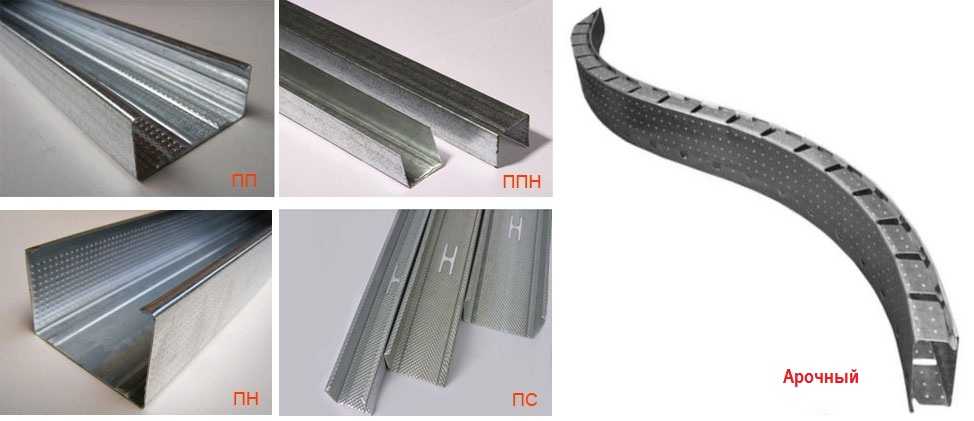
These are the main types of profiles for gypsum board
Steel can be ordinary or with a protective layer - galvanized. Conventional - made of black steel - have a lower cost, suitable for rooms with normal operating conditions. They are used to make a suspended ceiling, walls and partitions, arches in living rooms, corridors. In rooms with high humidity - bathrooms, kitchens, etc. - it is better to use galvanized steel or aluminum.
Types and sizes of profiles for drywall
In any place that sells materials for gypsum board, there are profiles of different types and sizes. To choose and not be mistaken, you need to know how they differ.
Profile for drywall: you need to know, sizes, types, purpose
To create wireframes
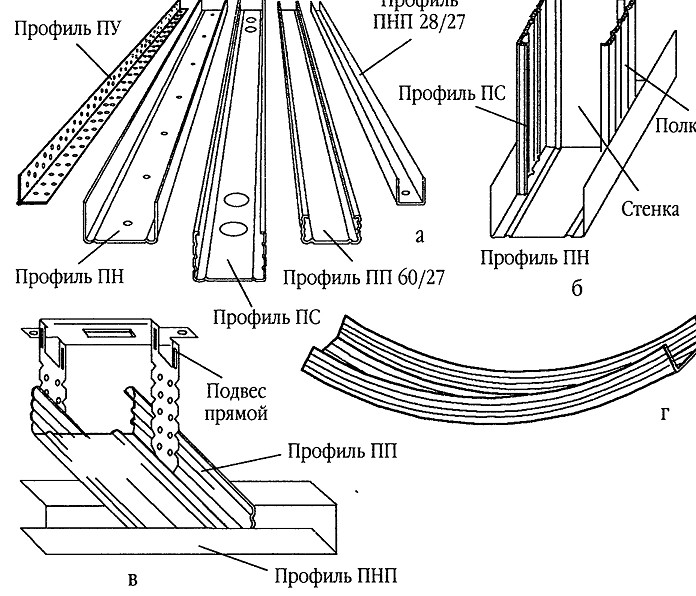
There is a profile for drywall of the following types:
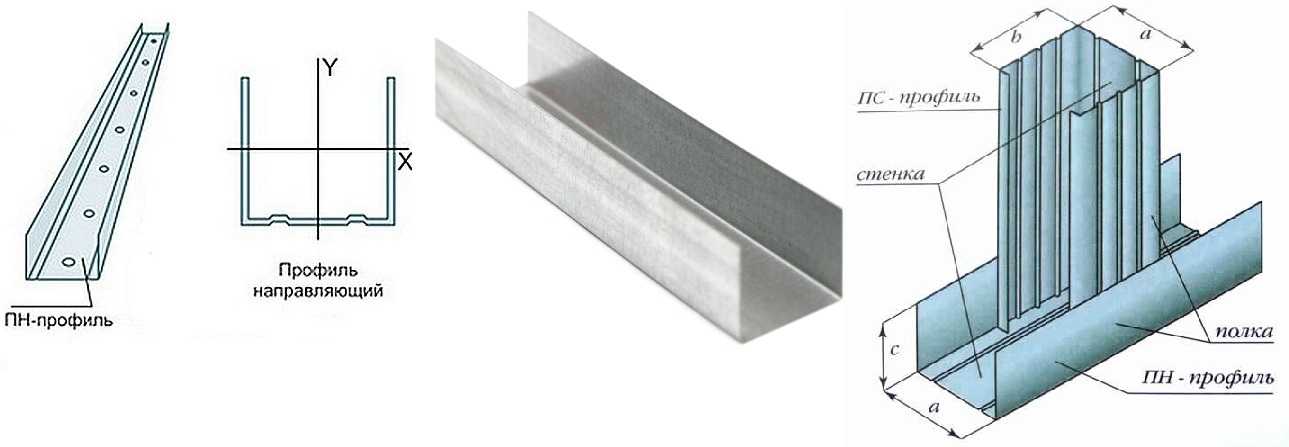
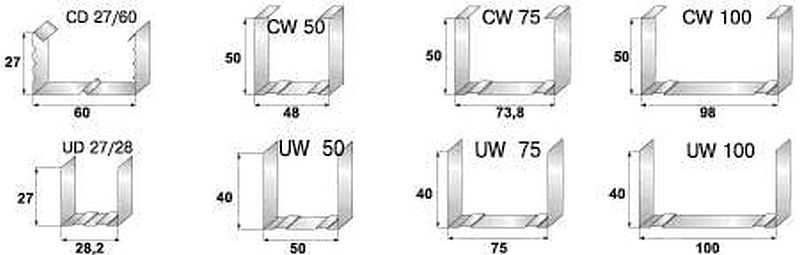
- Guide. It is designated as PN (UD) (interpretation - guide profile). U-shaped in cross-section, with smooth side walls. It is used as a base-support for racks and lintels. It is fastened along the perimeter of the structure, then all other elements of the system are installed in it. Dimensions:
- 28 * 27 mm;
- 50 * 40 mm;
- 65 * 40 mm;
- 75 * 40 mm;
- 100 * 40 mm.

The plasterboard guide profile can be distinguished by its smooth shelves
- Rack. It is designated PS (CD) - rack-mount profile. It is inserted into the guides, and the gypsum board is attached to it. Accordingly, it bears the main load and must have high rigidity. It has a U-shaped structure with additional shelves and stiffening ribs, which give it greater rigidity. Dimensions:
- 50 * 50 mm;
- 65 * 50 mm;
- 75 * 50 mm;
- 100 * 50 mm.
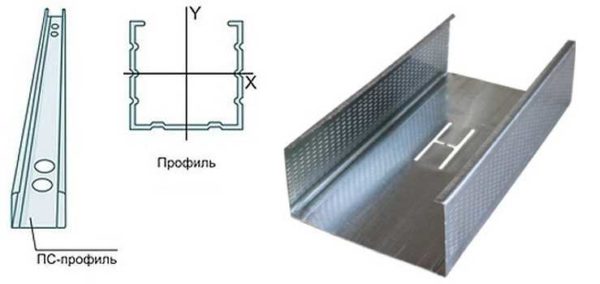
The rack profile for plasterboard has additional stiffeners and shelves
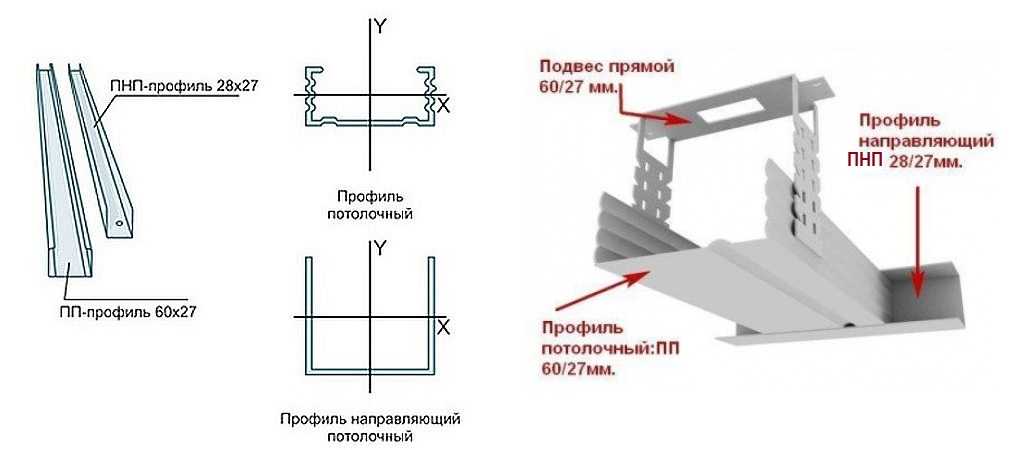
- Ceiling. It is designated PP and PPN. Accordingly - the guide and the supporting ceiling profile. The ceiling guide has a section in the shape of the letter "P", has a smaller cross section than the wall one. Ceiling bearing profile - has shelves and stiffeners, but differs in shelves of lower height. A lower height, in order to "take away" less heights from the room and that the ceiling plasterboard is thinner, creates less stress on the frame.
- 60 * 27 mm - PP;
- 28 * 27 mm - PPN.
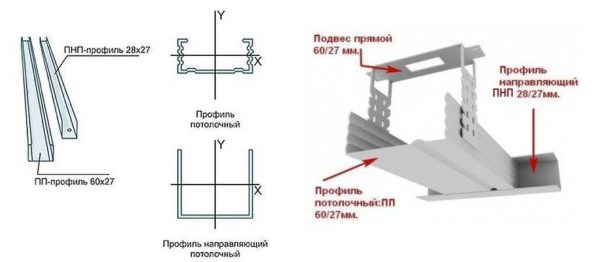
The ceiling profile can also be guide and load-bearing. They are smaller (compared to wall)
- Arched. It has a complex structure - with cuts on the side edges for increased flexibility. Required to create curved surfaces.

These are all types of gypsum board profiles that are used for the construction of the frame. The "frame" is assembled from the PN guides, the stands from the PS are inserted into them, which are then connected by jumpers (usually from the PN) - for greater structural rigidity.
Additional profiles and accessories
There are several types of additional profiles that are used in finishing works, when creating a suspended frame for the ceiling, for attaching rack profiles to walls, etc.
- Angular. In section - a right angle with a slightly protruding central part. It is used to decorate the corners of plasterboard structures. There are several types:
- Both shelves are perforated with large holes - so that the corner becomes part of the plaster, due to which they are held.
- Corner profile for gypsum board with mesh. A strip of mesh can be glued to the edges of the perforated corner - for better adhesion followed by finishing.
- On a paper basis - two metallized stripes are glued to thick paper. They are used in unloaded places - they decorate window openings, the edges of niches, shelves and other similar products.
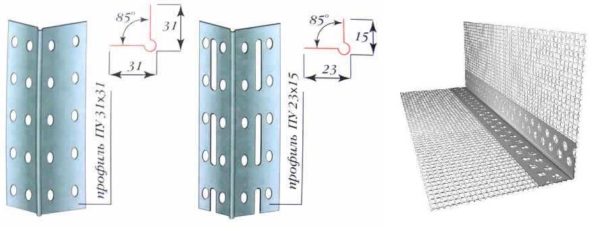
Corner profile - for forming and protecting the corners of plasterboard structures
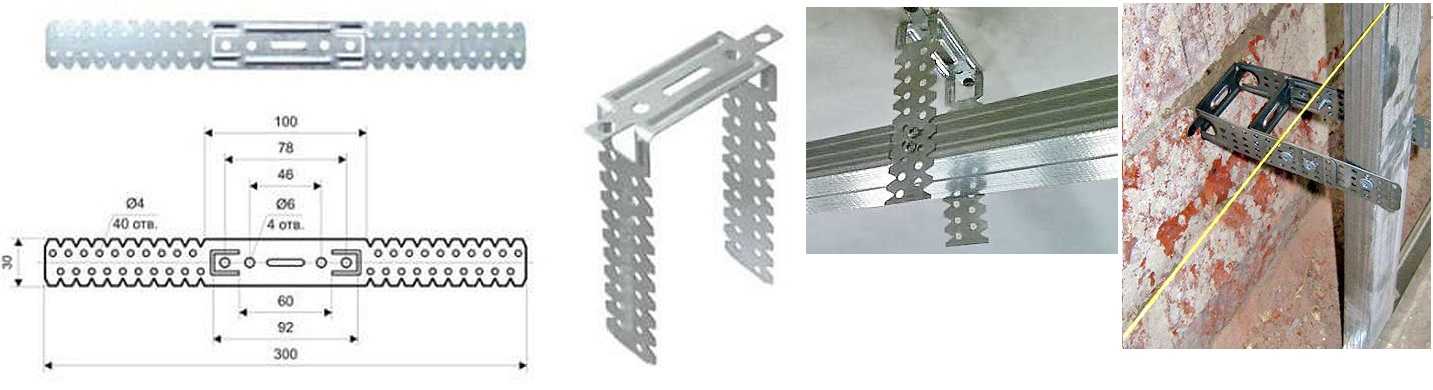
- Perforated hangers. It is a 125 * 60 mm tape fastener. It is divided into three parts: the middle one is used to fix the suspension to the ceiling / wall, the outer ones are perforated, bent at 90 °, the profiles are attached to them.

Perforated hangers and how to use them
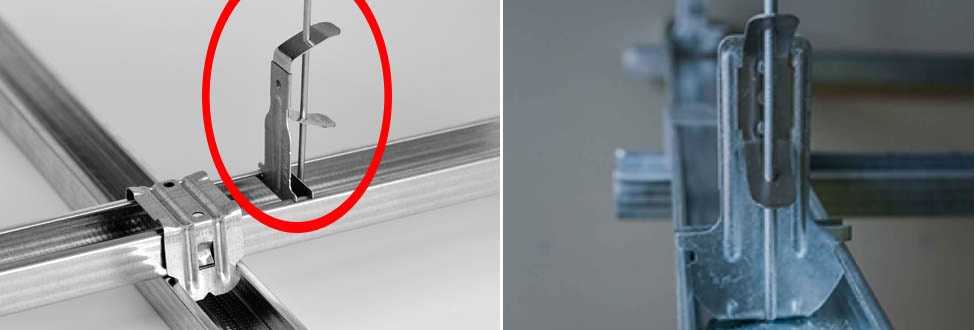
- Anchor hangers for PP (ceiling profiles). There are several types. Used when installing false ceilings. A distinctive feature is that it is easy to adjust the height, which is necessary when setting the plane of the ceiling.

Anchor suspension - for easy adjustment of the false ceiling height
- One-level and two-level connector for PP (crab). Plate with fixing elements for fastening crossing profiles. Used when constructing frames for suspended ceilings.
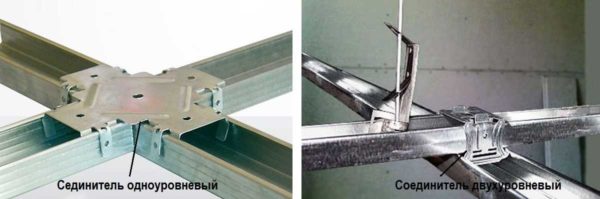
Connectors - sibling and duplex
- Extension of profiles. Small staple (110 * 58 mm) for splicing two pieces of the same type and size.


Most of these devices can be dispensed with. For example, two profiles are spliced using a piece of a guide profile of a suitable size. It is inserted inside, squeezed with pliers on the shelves, screwed with self-tapping screws. The connection is more rigid than with special devices.
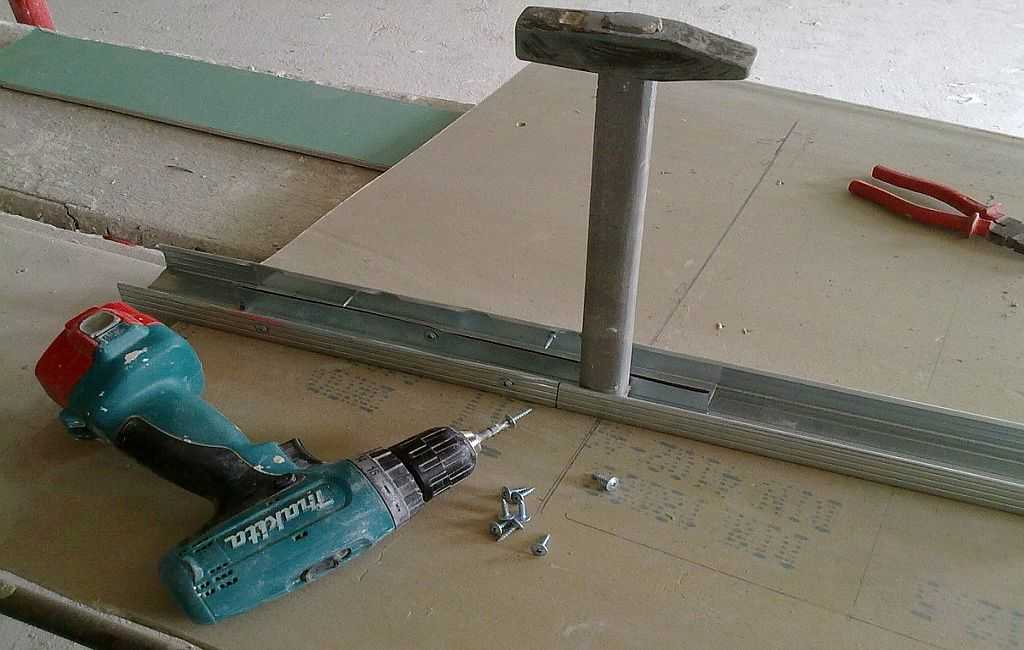
How to connect / build up a drywall profile
When creating a frame located along the wall, it is not fastened with perforated suspensions, but with boots - sections of profiles bent in the shape of the letter "L" (called "boots" - for their characteristic shape).
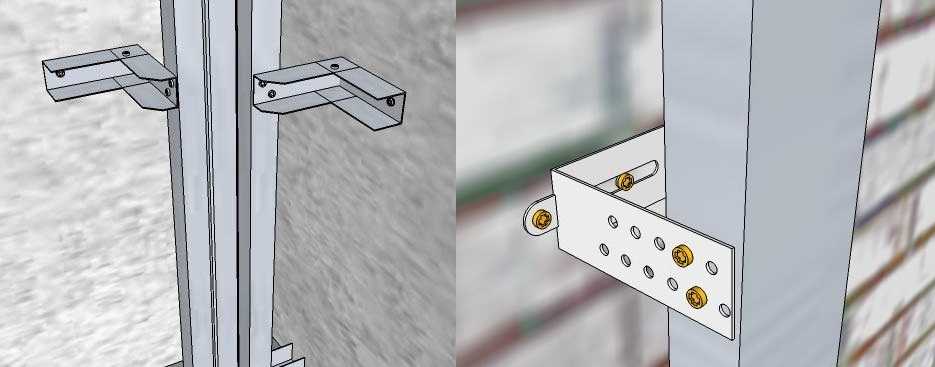
Two ways of fixing the rack profiles to the wall - using a perforated suspension and a piece of profile
This is not so much a way to save money, but an opportunity to get a more rigid fastening, since perforated suspensions were originally developed for suspended ceilings and the load from wall drywall, and even laid in two rows, is difficult to withstand.
Profile length
Each type of drywall profile may differ in length. Standard lengths are 2.4 and 2.8 meters. but there are up to 4 m.
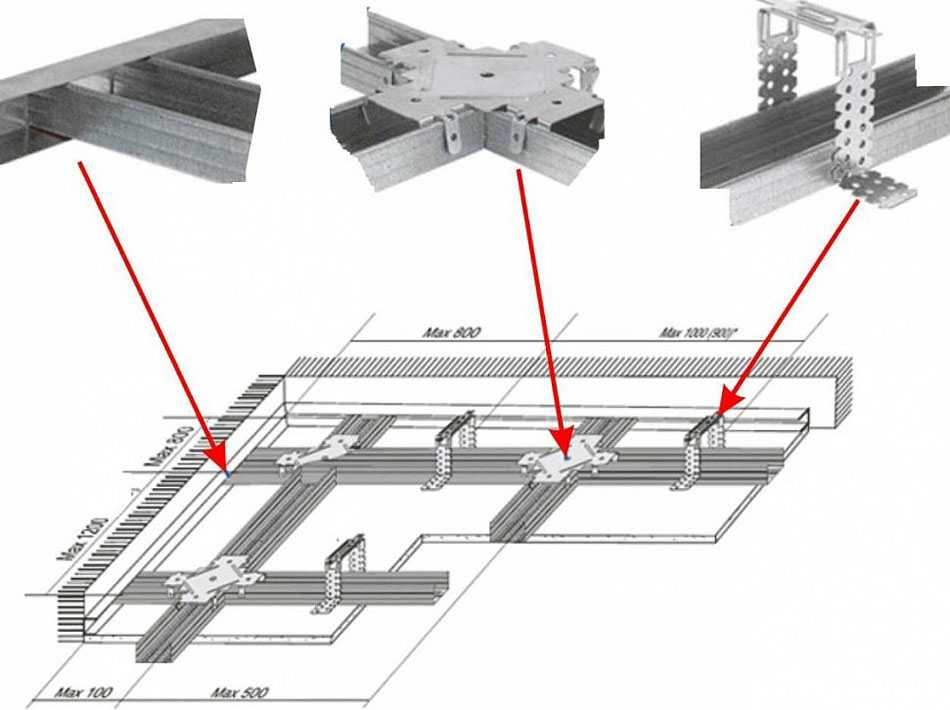
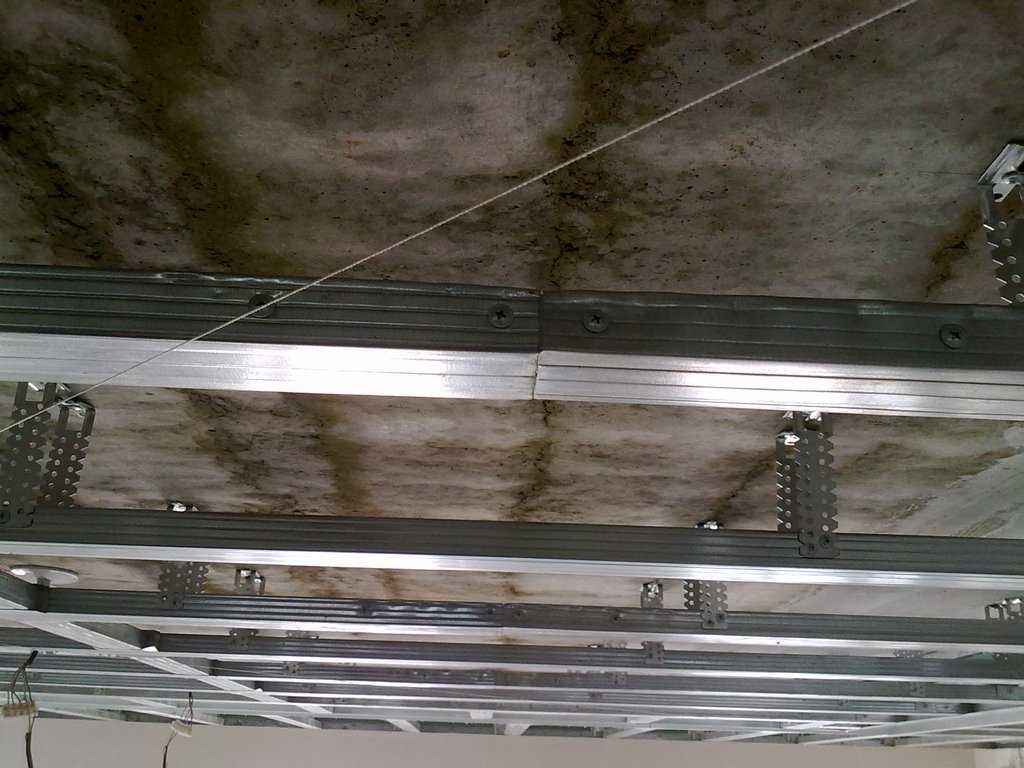
An example of assembling a frame for a gypsum plasterboard false ceiling
Should you look for long profiles? It doesn't make much sense. Unless the assembly of the frame will speed up a little. Profiles under the gypsum board are perfectly spliced, the strength of the structure does not suffer. Only when assembling the frame should it be done so that the joints on adjacent racks are not at the same level. Usually, the joints are made alternately at the top, then at the bottom.
How to choose a profile for gypsum board
In a more or less large hardware store or even on the market, there are profiles for drywall of the same type and length, but with a significant difference in price. The cost can differ twice, and sometimes more. Moreover, the most expensive are usually Knauf, the cheapest are unnamed China, the middle range is domestic manufacturers.
In addition to the type and size of the profile for drywall, you must also choose the thickness of the metal and the manufacturer
Metal thickness
The difference will become clear as soon as you pick up the profile. Some are strong, rigid, made of steel with a thickness of 0.5 mm, 0.55 mm, 0.6 mm and more.Others are made of such thin metal that they change their geometry even if the profile is lifted by one edge.
With this parameter, everything is more or less simple and understandable. The thicker the metal, the stronger and tougher the profile, but the price is also higher. It is optimal for creating partitions with a standard wall height to take profiles with a metal thickness of 0.5 or 0.55 mm. If possible, you can take 0.6 mm.
The dimensions are standard, but the weight of the same profile may be different - due to the different thickness of the metal from which it was made
It makes sense to take a large metal thickness only if the height of the partition is large - the load will be more significant and additional strength will not interfere. But in this case, you need to look at what will be cheaper - a profile for drywall made of thicker metal or more often installed racks and crossbars. Just keep in mind that racks are usually installed with a pitch of 60 cm - so that the joint of the gypsum board sheets falls in the middle of one of the rack profiles. When decreasing the step, it is required to achieve the same - the joint of drywall sheets should not hang in the air. So it will be possible to put them only after 40 cm. So the seam will also fall on the profile. But this is too many racks and is unlikely to be cheaper. In general, you will count.
Manufacturer's choice
Choosing a manufacturer of drywall guides is both simple and difficult at the same time. All experts unanimously affirm that the best are Knauf (Knauf). They always correspond to the declared parameters, have an ideal geometry: the racks fit perfectly into the guides, do not dangle or burst them. In general, working with Knauf drywall profiles is easy, simple, the work progresses quickly. But, these are just the most expensive of the entire range. Despite this, the advice is this: if you have no experience with drywall - better buy Knauf.
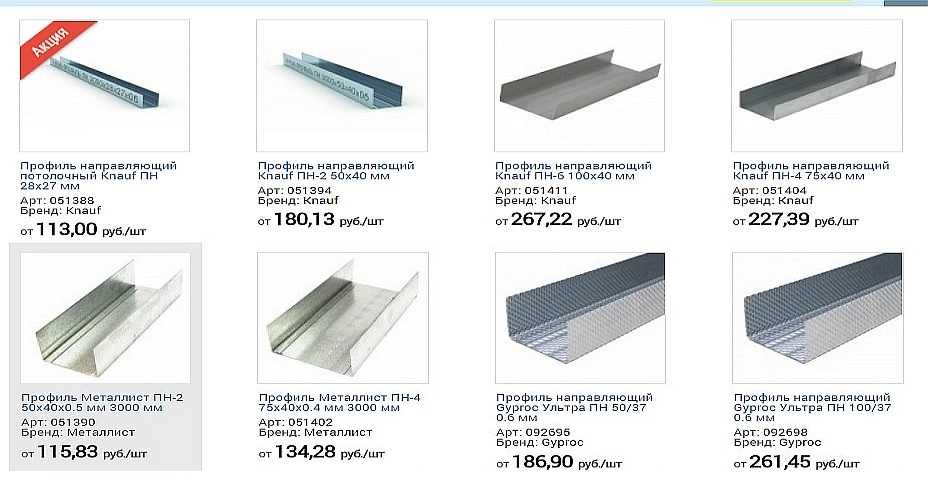
This is a screenshot of the prices for drywall profiles from one of the online stores
There are several Russian firms in the middle price range. These are Giprok (Giprok) and Metalist. There are also little-known regional campaigns. How lucky you are. Trust your feelings and feedback. It is not always possible to be guided by the words of sellers. Domestic manufacturers have good batches, there are unsuccessful ones. In most cases, there is such a problem as a mismatch in the dimensions of the rack-mountable substation and the guiding PN profiles. The posts must fit exactly inside the rail. For this, with the declared width, for example, 50 mm, the actual one should be 1.5 mm less. Problems arise with the accuracy of observing this difference. In addition, the declared metal thickness must be checked (with a micrometer). In general, it will be possible to save money, but you will spend your nerves and time in a significant amount.
GIPROK has this option
Giprok has a profile with a corrugated surface. All sides of the profiles - both the backrest and the shelves - have extruded "pimples". They increase the rigidity of the profile. This is indeed the case - the design is more rigid. But the connection of racks and guides turns out to be more awkward - because of the mismatch of the "pimples", they do not attract closely like smooth metal walls. There is a second point - structures made of such profiles squeak more. With all this, such profiles cost a little less than Knauf, but it is more difficult to work with them. In general, it's up to you.
How to count the number of profiles
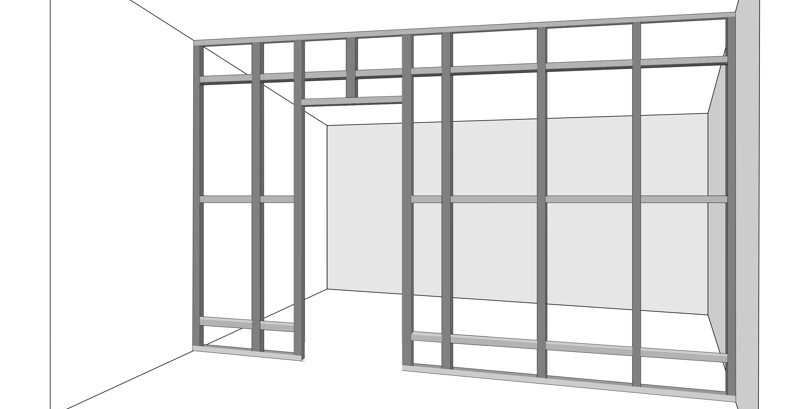
Knowing what type and type are profiles for drywall, their size is not enough. It is necessary to calculate the amount of each species. It will be easier to count if you draw a plan of the frame on a piece of paper, sign the names of the profiles, put down the dimensions. It will not take much time, but it will help to more accurately determine the quantity.
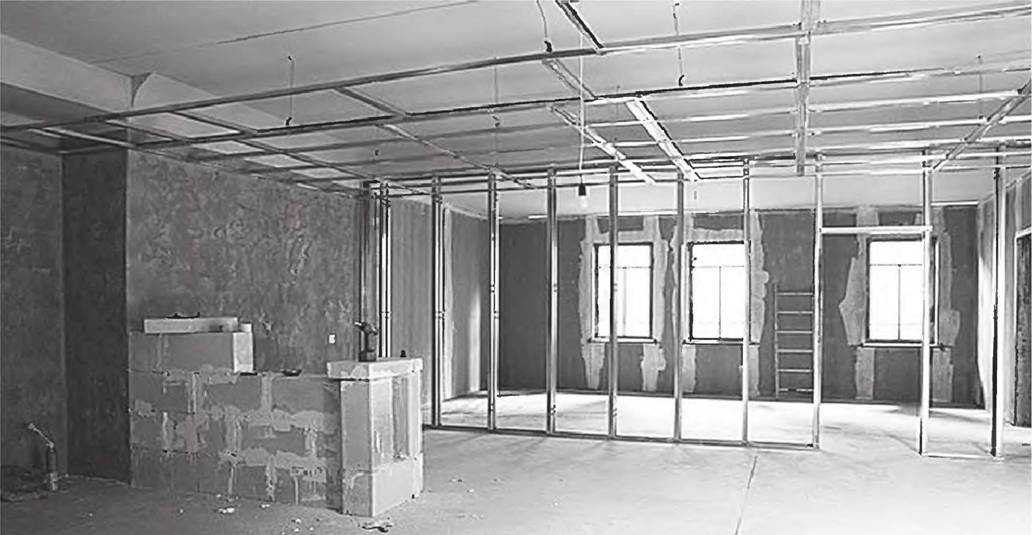
You need to clearly imagine how the frame will look like
Calculating the number of guides for one wall
If the walls are very uneven, they can be leveled with drywall. A parallel wall is being built, but set strictly in level.In this case, the calculation of the number of profiles for drywall will be as follows:
- Guides - PN. They are mounted around the perimeter. To find the footage of the guide profiles for wall cladding, measure its length and height, add and multiply by 2. If there are windows / doors on the wall, the guide profile is mounted along the perimeter of these openings. To the resulting figure, add the doubled height of the opening and its width.

Something like this looks like a frame for a partition
- Rack profiles for gypsum board - SP. As already mentioned, they are placed in increments of 60 cm. Moreover, the extreme opening cannot be more than 60 cm. Even if 10 cm remains, an additional stand is placed. First, we count the number of racks: divide the length of the room by 60 cm, add another one - the corner one. For example, the length of the room is 4.75 meters. 475 cm / 60 cm = 7.91 pcs - this will be 8 racks + 1 corner, in total - 9 pcs. Next, we look for the footage - we multiply the found figure by the height of the room. We get the required length for the racks: 9 m * 3.2 m = 28.8 m.
- Jumpers. Rack profiles are used. They are placed in increments of 60-80 cm, but at the same time, the vertical joints of drywall sheets should also fall on such a partition. Here you will have to count depending on the chosen step, and then add the found figure to the one that was calculated in the previous paragraph.
If all the walls in the room are sheathed with plasterboard, a similar calculation is carried out for each wall, then the results are summed up.
Number of plasterboard profiles for false ceilings - PP and PNP
The calculation here is a little simpler: the frame is assembled "in a cage", so it is easier to calculate it. Otherwise, the approach is the same as described above. So we consider:
- The footage of PP profiles for a false ceiling is equal to the perimeter of the ceiling. We measure the length and width of the room, add and multiply by 2. This will be the desired number. For example: there will be a false ceiling in a room measuring 3 * 4 meters. Calculation of the footage of PP profiles: 3m + 4m = 7m, 7m * 2 = 14m. For this room you will need 14 meters of PP profile.
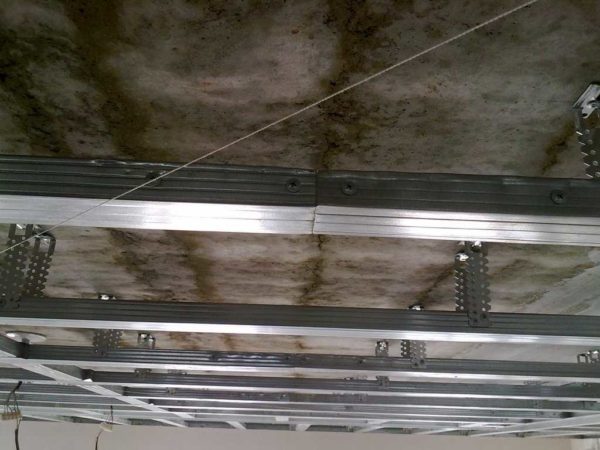
First, the guide ceiling profiles are mounted
- The footage of the PNP profile. It is better to place the bearing profiles along a short wall. In this case, we divide the size of the longer wall by 60 cm: 400 cm / 60 cm = 6.66 pieces, round up - 7 pieces. There is no need to add a corner post, since a guide profile will be filled around the perimeter and the posts are tucked into it. Bearings from the PNP profile are located along the short side (in this example, it is 3 meters), that is, the required length of this type of profile is 7 pcs * 3 m = 21 meters.
- Further, we count the number of PP profile on the partitions - segments 60 cm long, which are installed between two adjacent bearing profiles. In this case, the partitions will be located along the long wall. Therefore, we consider this: 300 cm / 60 cm = 5 pieces, and the total length will be 5 pieces * 4 m = 20 m.
In total, for a suspended ceiling in a room measuring 3 * 4 meters, you will need 14 m + 20 m = 34 m of the PP profile, 21 meters of the PNP profile.
-
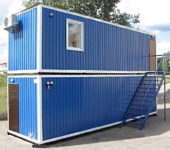 Modular houses from block containers: types, manufacturing features and layout options
-
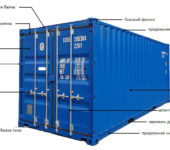 Houses from shipping containers: construction options, layout
-
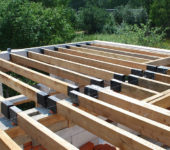 Types of wooden beams for floors, length calculation, installation
-
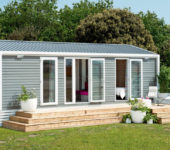 Mobile homes for year-round use
-
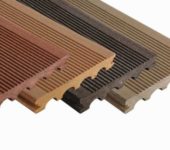 Polymer / composite decking (WPC decking): types, sizes, installation


Great article! Thank you!
So-so.