How to attach a veranda to a country house and glaze
Most often, summer cottages are required for recreation: to relax after working in the garden or in the garden. Verandas are best suited for this - open or glazed. They can be large or small, wooden, stone, polycarbonate. The best part is that a small veranda in the country house is built by one person in a few weeks with his own hands. True, of a modest size.
The content of the article
Projects of country houses with a veranda
If the dacha is going to be built from wood - timber or logs - it doesn't matter, the most popular project is 6x6 meters. This is due to the fact that the standard length of lumber is exactly 6 meters. With this size of the house, waste is minimal. Considering the projects, we notice that it is necessary to look at six meters - this is only the residential part or together with the veranda.
For example, in a project from a bar, the photo of which is located below, the entire building area is 6 * 6 meters, 2 * 6 is a veranda, the inhabited part is only 4 * 6 meters. The internal area will be even less - it is necessary to take into account the thickness of the walls and finishing materials.
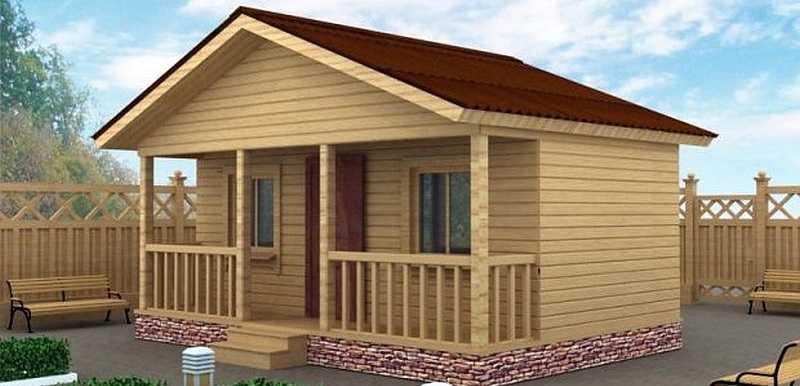
The project of a small cottage from a bar with an open veranda
In another project, 6 * 6 meters is only a building, and a veranda is attached to it. The total building area is larger (see photo).
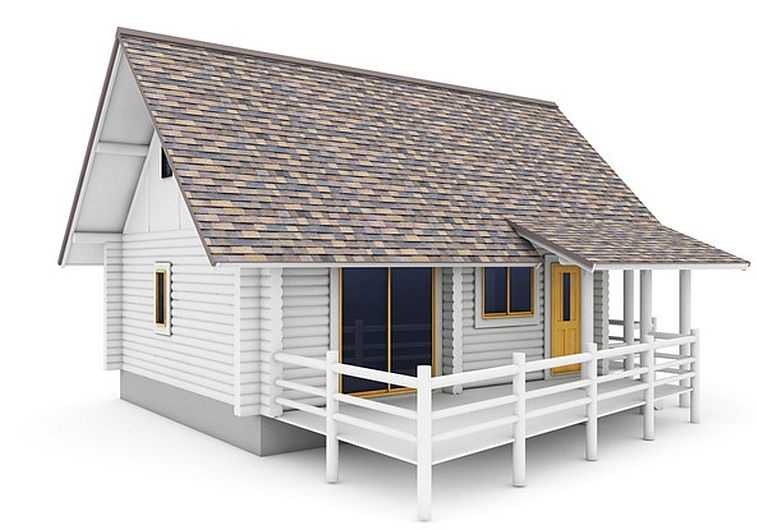
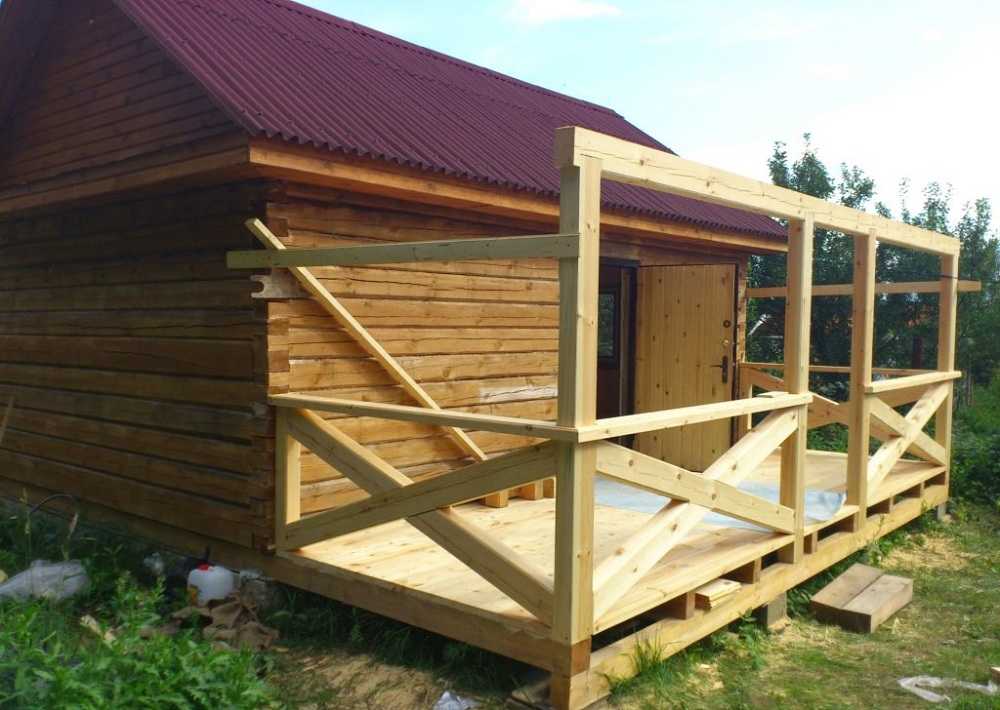
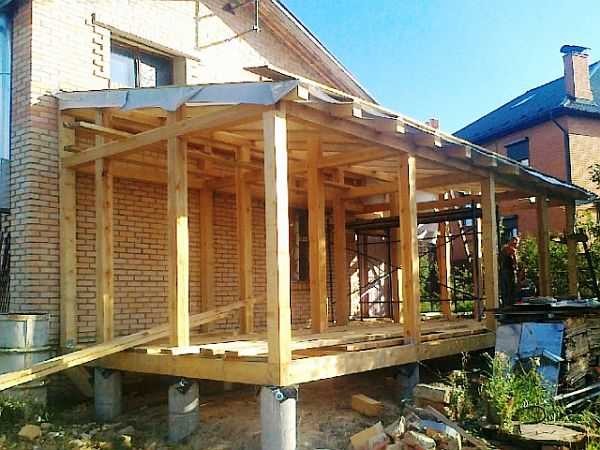
In this project, the house stands on a strip foundation, a veranda for cost reduction on a pile
Country houses with an attic and a veranda are popular (as in the photo above). With such a layout, having occupied a small area under the house, use it to the maximum. Another of these summer cottages is in the picture below.
Cottage with veranda and attic
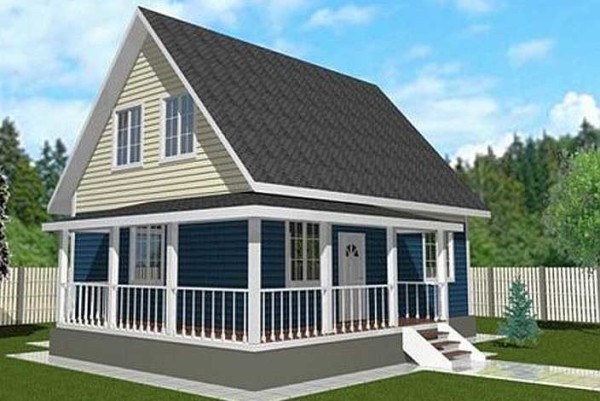
In this project attic floor occupies an area larger than the premises on the ground floor, overhanging a spacious corner veranda that spans two sides of the house. Since the load from the attic is transferred to the veranda racks, a general strip foundation.
Small country house with an attic floor and a veranda along the facade
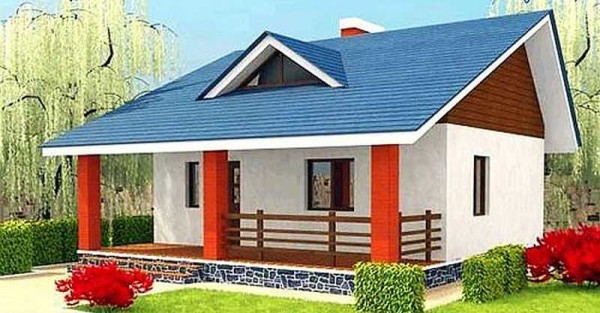
The next project was created for a country house made of foam concrete. The asymmetric roof gives it an oriental flavor, echoed by the veranda style.
How to attach
Do-it-yourself veranda at the dacha is not only built from scratch. More often she is attached to the finished house. In most cases, the foundation for the veranda is made columnar (on poles) or piled. For a light veranda made of wood or built on a frame principle, such a base is more than enough. But you need to take into account the geology of the site, otherwise the extension in winter will "walk" in height. Then in the spring you will have to correct the distortions.
The foundation for a veranda in the country
We will tell you how to build an open veranda in the country. On sandy or sandy loam, gravelly soils that are not prone to heaving, it is quite possible to get by with shallow columns. They are buried 20-30 cm below the fertile soil level. At the bottom of the excavated pit, rubble is poured, it is well rammed. For reliability, it can be spilled with liquid concrete. Solbits made of bricks or rubble are folded on this pillow (rubble, with proper laying, are more durable). To further simplify the work, you can put concrete cushion blocks down, and on them, if necessary, add columns to the desired height.
On sandy soils, the foundation can be made columnar. Country houses with a veranda in this case are inexpensive.
If the soils are prone to heaving - clay, loam, you can't put up posts: they will be pushed out every year. In this case, it is better to make a pile foundation, digging below the freezing depth for your region.You can make wells for them with a hand drill. On not very viscous clay, you can handle it alone, in extreme cases - together. For greater stability, it is better to do piles with an extension at the bottom - TISE piles.
A little about how many piles or posts you need. They are placed at a distance of 1-2 meters. The distance depends on the cross-section of the pile or post and on the materials from which the veranda is built. The open wooden country verandas adjacent to the house do not weigh much. Therefore, under them you can put supports with a distance of 1.5-2 meters. If glazing is supposed to be on the veranda, the step should be less - at least 1.5 meters. In general, it would be nice to calculate the load and determine the required pile section.
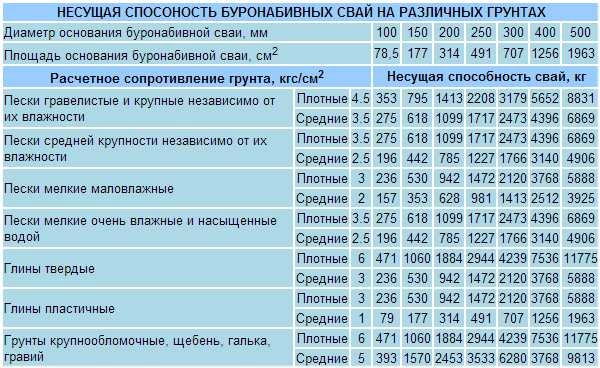
Table of the bearing capacity of piles depending on the soil
Consider the mass of all materials that will put pressure on the piles: strapping beams, logs, floor boards, insulation, racks, rafter systems, roofing, alleged heavy furniture. In general, consider everything. Add 20-30% percent for snow loads (if winters are very snowy, then more) and a margin of safety. Divide the resulting number by the estimated number of piles. You get a mass that will press on one support. From the table, find the line that indicates the type of soil on your site. Moving along it, find the nearest higher value of the bearing capacity of the piles. In the upper part above the found column, the diameter is indicated, which is required for this load.
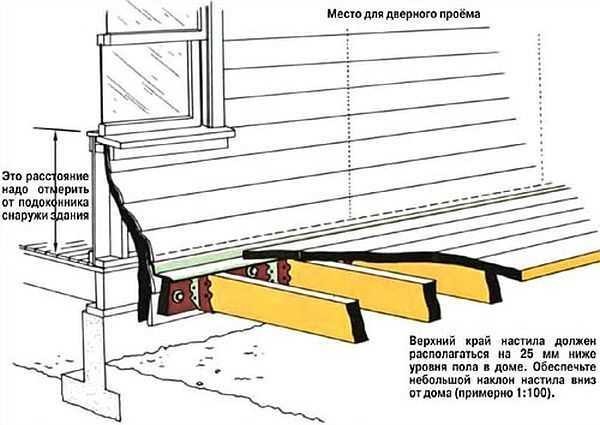
Now about how high the pillars should be. The floor in the annex should be slightly lower than the floor in the country house. This will prevent rainwater from pouring into the house. The difference in height is required small - about 25-50 mm. And the height of the pillars or piles should be such that after assembling the entire structure (strapping, beams, floorboards), the flooring is at the required height. On the wall of the house, this height is beaten off with the help of a bar, on which the ends of the floor log will rest (its upper edge is set below the required flooring level by the thickness of the board).
At the required level, a timber is fixed, along its lower edge, the upper level of the posts or piles is marked
Do not forget to remove the fertile layer from the site, which will be under the veranda, before starting construction. Otherwise, the smell from there will be unpleasant. After pouring the piles on heaving soils, the formed pit is covered with the same soil and rammed well, on well-drained ones you can fill it with crushed stone. If on clay, for example, you fill a hole with rubble, then water will collect in the pit, which sooner or later will be under the foundation, or it will bloom and smell accordingly. Therefore, spare no effort, tamp the soil well.
How to make the foundation for a veranda in the country, we think, in general terms, is clear. Having chosen its type, you will need to thoroughly understand the little things, and this is unrealistic within the framework of one article.
Construction of a veranda in the country
After the foundation is ready, the construction of the veranda itself begins. Let's divide the process into stages.
- It all starts with tying posts or piles. They are first covered with waterproofing, then racks are attached to them. After installing all the racks, the bars of the lower harness are placed between them. There is a second option: first, the harness is attached, the racks are attached to them. This option is worse: if you need to change the strapping bars (they are closest to the ground and are most often affected by fungi, although they are treated with antiseptics), you will have to disassemble the entire structure of the veranda, including the roof.
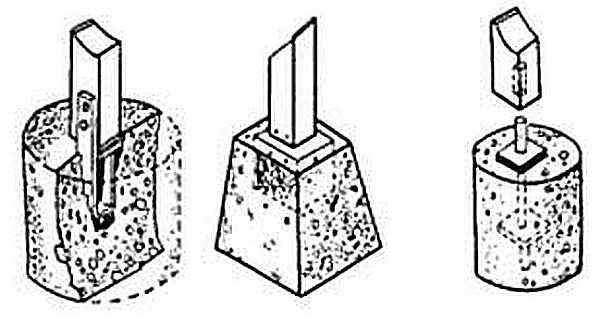
How to attach veranda racks to the foundation
- After the lower strapping, the floor beams are mounted. When building country verandas adjacent to the house, pillars or piles are rarely placed at a distance closer than one meter to the main foundation. With this arrangement, the second end of the beams is attached to the support bar. At one end they rest on the harness, the other on the timber attached to the wall of the house. With a sufficiently large width, there are also intermediate supports. Lags are also attached to them with nails hammered obliquely.
How to fix logs and floor boards on the veranda
- Now the upper harness is installed, which connects all the posts. The next step is to lay the ceiling beams. They are installed in increments of at least 1 meter. These beams can be open, but then the rafter system must be assembled carefully, or they can be hemmed from below with clapboard, edged board, drywall, etc.
Assembled top rail and ceiling beams
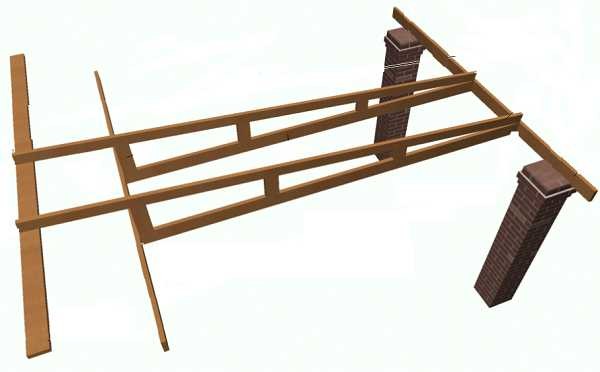
- The roof on the veranda should have a slope. Therefore, a rafter system is also required: they make the roof of the veranda adjoin the wall or to the roof of the house. Since the veranda is adjacent to the wall, a timber is nailed to it at the required height. The difference between the height of this beam and the strapping determines the angle of the roof slope. Its minimum value depends on the type of roofing material.
The rafter system of the veranda attached to the house
- Next, the veranda rafter system is mounted. One edge of the rafter legs rests on the upper support bar, the second on the outer bar of the upper harness. You can attach it to the harness by making a recess in the timber (the depth of the notch is not more than 50% of the timber thickness). The second option - a recess is cut out in the rafter legs, nailed from above through and through with nails. The third - just lay the lag, fix it to the bar with corners.
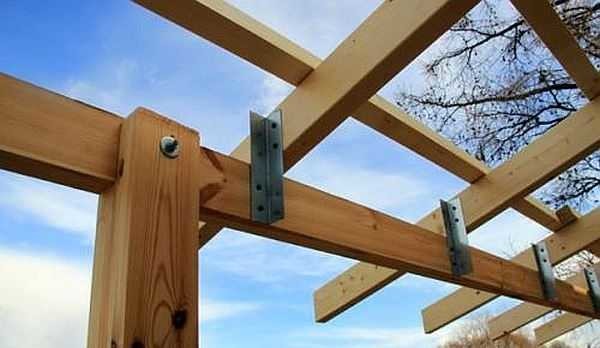
One of the ways to attach the veranda rafter legs to the upper harness: on metal corners
- If the rafter system is long, the beams can sag. Spacers should be installed between the ceiling beams and the rafter legs to minimize deflection. The number of spacers depends on the depth of the veranda. On average, they need to be installed every meter.
In order to prevent the roof from sagging over the veranda, spacers are installed between the ceiling beams and rafters.
- Next, the floor is laid. If the veranda is open, it is better to take a decking board: it has an uneven surface (wavy) and does not slip when wet. If you want a floor with a smooth surface, use an edged board. One important point: on open verandas, the floor should be done with a slight slope away from the house. This will allow water to drain off quickly. A floor board with a spike and a groove is needed only if the veranda is covered and the floor needs to be insulated. Then, first, they make a rough floor from an edged board, on it there are logs, between them there is a heater, and on top of it is already a finishing floor.

One of the stages of building a veranda: flooring
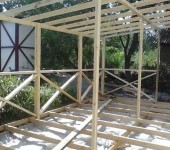
- After the floor has been laid, the side rails can be installed. They will give the building even more rigidity.
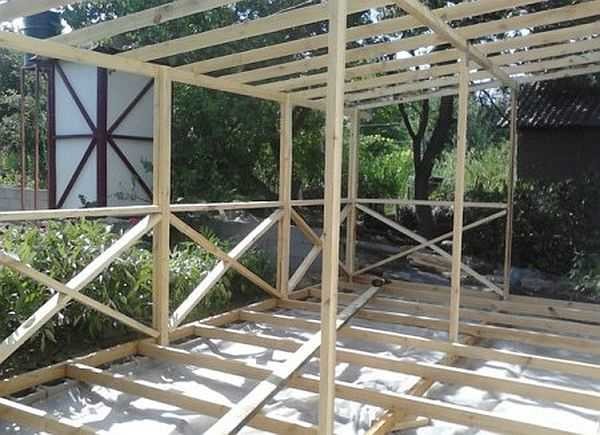
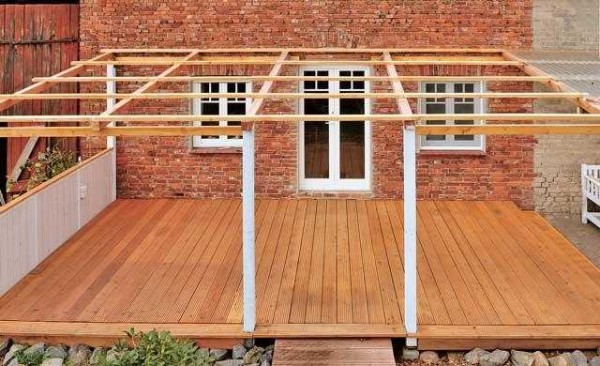
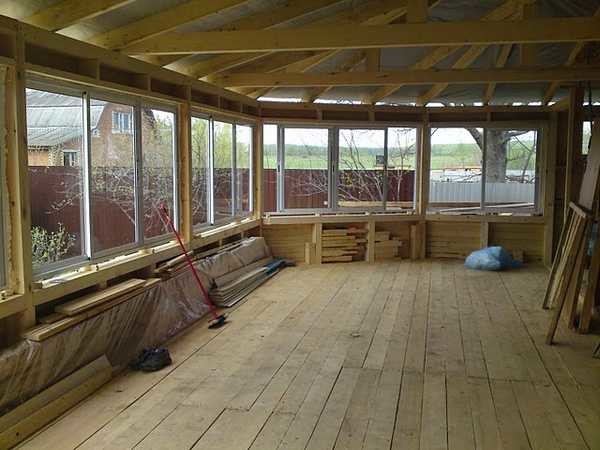
It looks like the assembled frame of the veranda attached to the house
- The last to be laid is the roof covering. There are no peculiarities: they make a crate, the step of which depends on the weight of the material and, according to the manufacturer's recommendations, mount the roofing material. After that, it is important to correctly make the abutment to the wall: so that there are no leaks in this place. The most versatile option for summer cottages made of bricks or building blocks: make a strobe above the level of the roofing material, put a beam into it, at which one of the edges is cut (see photo below). Another beam is nailed below, a slightly larger section and also with a cut edge. From above, this whole structure is closed with an apron made of roofing iron.
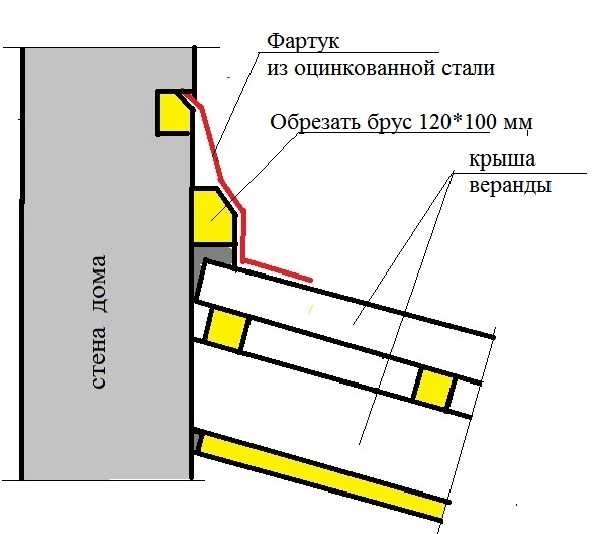
The second option for joining the roof of the veranda to the wall of the house
On this we can assume that the veranda in the country was built with our own hands. There are still questions of wood finishing and protection. This is a very difficult question and very important.
how read here to arrange a veranda.
How to cover the floor on the veranda in the country
First of all, let's make a reservation that by the word "paint" the floor in the country we mean to change the color of the wood, to increase its security, but not to paint over its texture. That is, we will talk about the stains themselves, but with protective properties. Rather, we will tell you how to cover the floor on the veranda in the country. Opaque paints that create an opaque film on the surface, even the best ones, will definitely bulge and crack on the floor. Especially if it is an open summer veranda.In this case, it is better to use stains.
Impregnations for protection
We draw your attention to the fact that all wood must be treated with antiseptics before construction. This is especially true for an open veranda. Here and the side rails, all the racks and the floor - all these elements - require careful protection. For impregnation, you can use the composition SENEZH IMPRA. It is even suitable for working wood in direct contact with the ground. What is important, it does not change its color, does not wash out, and does not create a vapor-proof film. That is, after processing, the wood continues to dry.
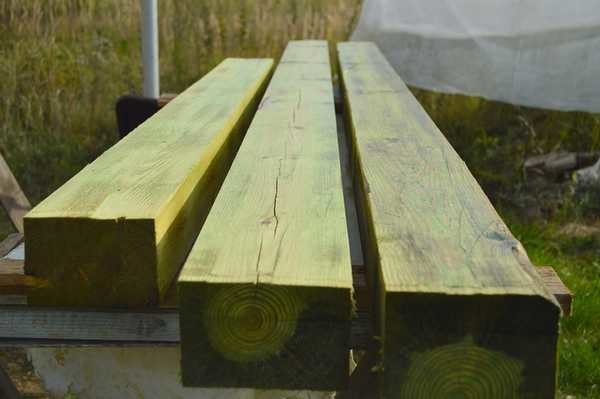
Protective antibacterial impregnation Senezh has excellent characteristics, but stains the wood greenish
The same campaign has another Senezh impregnation with similar characteristics. But it gives the wood an olive hue. If you then give a dark color, it almost does not affect the final result, and it is visible under the light ones.
Pinotex Tinova Professional is a primer for dry wood. Protects against blue stains, darkening, mildew and rot. Penetrates deep into fibers. It is applied to clean, dry wood (moisture content not higher than 18%). this is its drawback: verandas are rarely built from dry lumber.
Color-changing
There are the following options for coloring compositions:
- Tikkurila Valtti Puuoljy (Tikkurila Valtti Puyoli). This composition is intended for surfaces that are constantly exposed to atmospheric factors. Its base is oil. Therefore, it is necessary to use it on dried wood: the maximum moisture content is 20%. Apply by brush to a clean surface, one layer is usually sufficient.
- Pinotex Terrace Oil (Pinotex Terrace Oil) - oil for Pinotex terraces. This composition is applied to the base and also: it must be tinted by adding the desired pigment. Designed for wood processing on terraces, verandas, stairs, etc.
Both of these formulations are oil based. They need to be updated once a year or two - see the status. But at the same time, apply to the old coating, simply by cleaning it first. Easy to apply, leaves no streaks. It is usually absorbed quickly: if after 15-20 minutes there is an unabsorbed compound somewhere, it must be blotted with a dry cloth. Moreover, even after a year, the surface looks attractive, no cracks, coating chips and other troubles.
If your wood is not dry enough, the solution is this: soak it with antibacterial impregnations that do not create a vapor-proof film on the surface. After a while, it will dry out enough (in a year - for sure). During this time, of course, it will darken. Remove the top layer with a grinder and then cover the floor on the veranda in the country with oil.
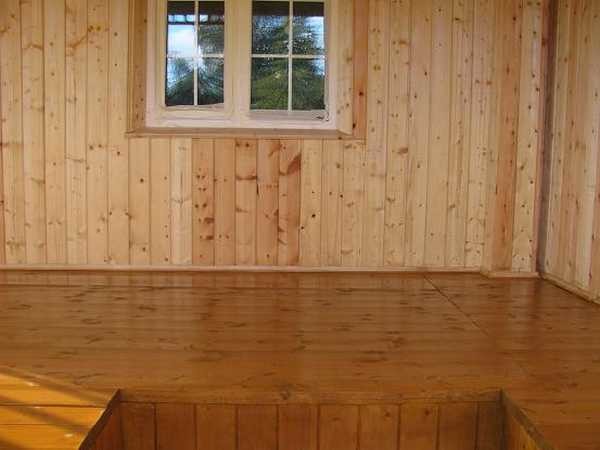
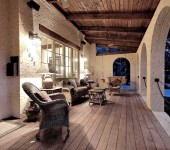
This is how the floor looks like, only covered with an oil composition. A little later it will become a little darker, the gloss will be less
If you look at prices, then Pinotex is cheaper, but under it it is necessary to apply its own "Base" - the base impregnation. Tikkurilu can be placed directly on the boards (but dry). If water gets on the surfaces treated with these compounds, it stands in separate puddles, not absorbing until it is wiped off, or it dries.
Sometimes the verandas are covered with yacht varnish. If we take expensive, high-quality ones, the coating lasts for several years. Yacht varnish is cheaper in a year cracks, sometimes rises. Before applying a new layer, the old one must be removed, the surface must be sanded. For varnishing, try Eurotex alkyd varnish or Eteral urethane varnish. They have good reviews. But keep in mind: it is slippery on varnished surfaces in winter. So if you want shiny surfaces, paint the walls, pillars and side rails. On the floor, after all, it is better than oil.
Glazing: how and how
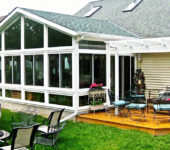
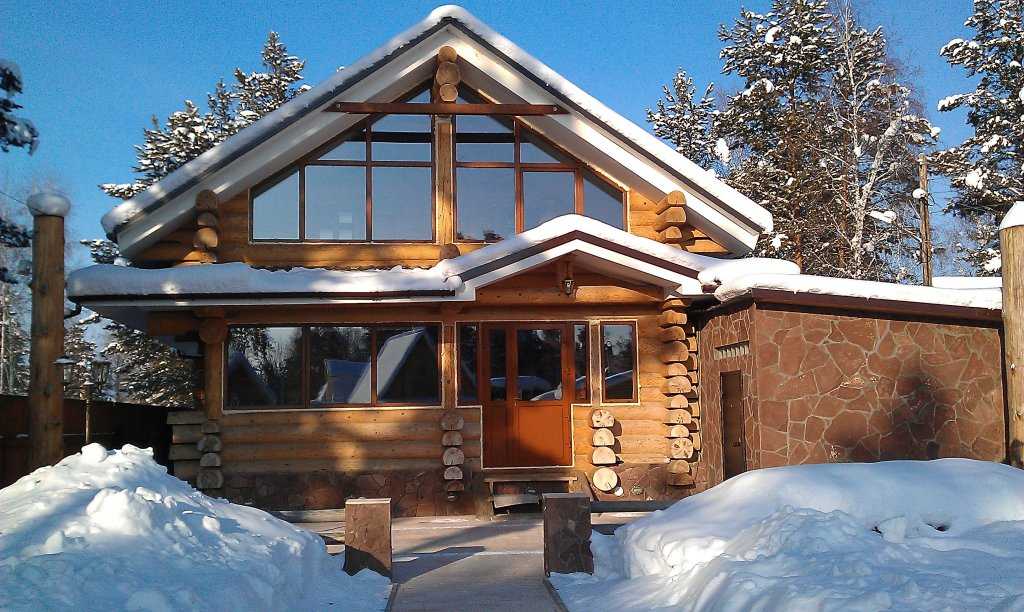
Even a large open veranda can be glazed if desired. The easiest way is to call a measurer from a company that sells metal profile windows and listen to their suggestions. The windows they can offer are opening or not.The choice is yours. Such glazing of the veranda looks like in the photo below. For giving seasonal residence, such an option may be unsafe: if the territory is not guarded, they can break.
Glazing of a large veranda
Even with such a decision, questions arise:
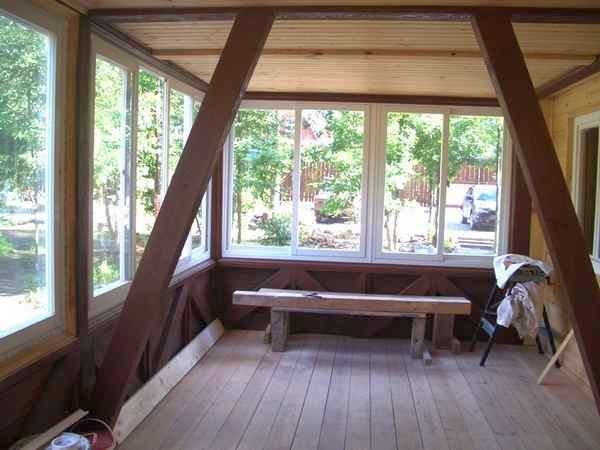
- Install single or double frames. If you have finances, you better bet double. They keep warm much better. Even if in winter you come to the dacha just to check how you are doing, it will be much warmer in spring or autumn. Up to the point that if the veranda is on the south side, while the house is heated, you will bask on the veranda: the sun heats the air, and the frames keep the heat. It will be especially warm if you make an insulated floor. But even with a single deck, the temperature in the glazed extension will be much higher than in the house.
- Windows must be burglar-proof or not. If there is no security nearby, then even the best ones can hack. Even toughened reinforced glass won't last long against brick. And in order not to provoke thieves, the entrance to the house should be behind a reliable metal door, while the entrance to the veranda can be equipped with simple doors.
Read how to install plastic windows here.
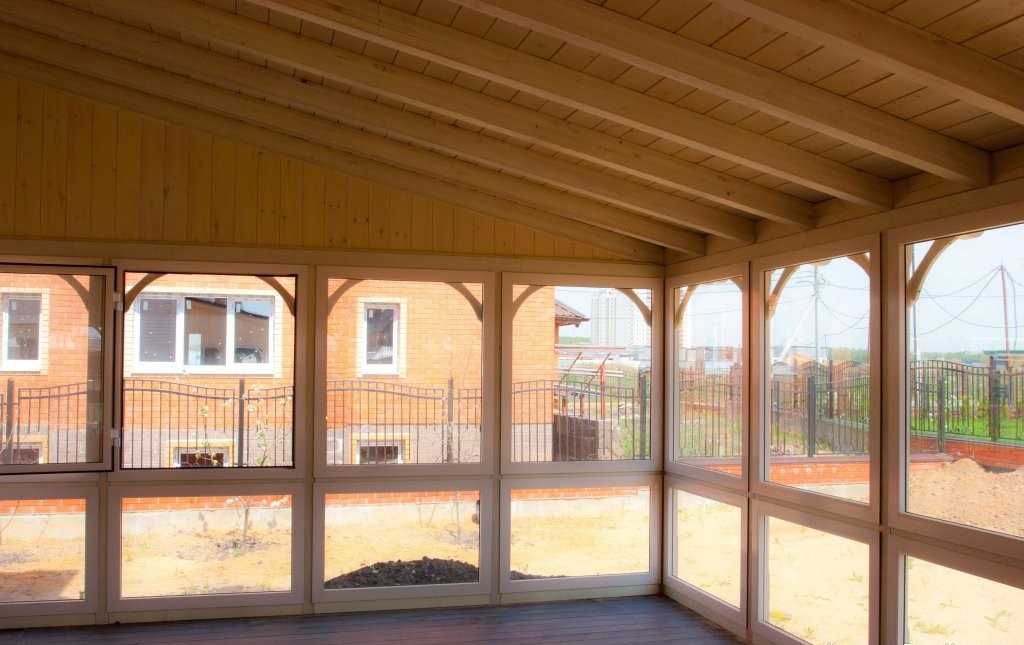
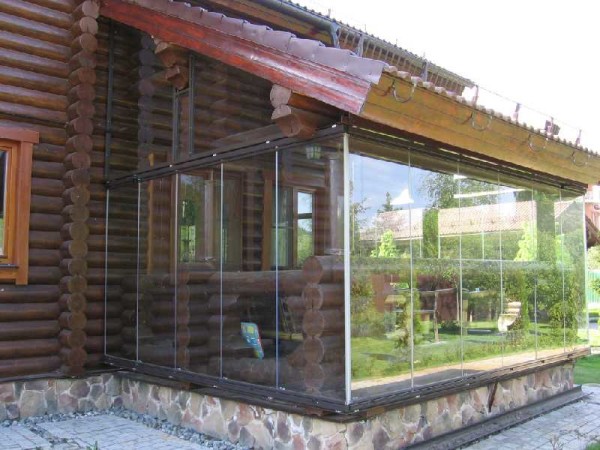
In the photo below, the veranda at the dacha was glazed with double windows. With a slit floor in the spring, it is much warmer in the extension than in a log house.
When deciding how to glaze the veranda in the country, keep in mind that double races retain heat better even in an unheated annex
Large glazing area - large sash. If you order double frames made of wood, they will open inward (just like in fiberglass). With a small veranda area, they can interfere. There are several options. The first is to order those in which both frames will open outward (there are some). The second is to put sliding ones. One point: sliding ones are made only of aluminum profiles. If they can make them out of wood for you, they will cost immeasurably (this type of window is not cheap even from aluminum). We see the glazing of the country veranda with sliding metal-plastic windows in the photo.
Sliding windows made of aluminum profile on the summer cottage: comfortable and warm
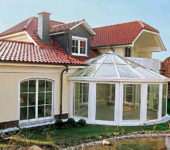
If the veranda in the house is made of logs, and it was cut down together with the house and was originally planned as open, the white windows in it will look "not very good" to say the least. Not everyone will pull windows in wooden bindings on a large area, metal-plastic is still cheaper. The solution is simple: there is laminated aluminum. A film is glued on it, imitating the surface of a tree. Choose the desired color and everything looks good (an example of such glazing of a veranda on two floors in the photo below).
Glazing of the veranda at the dacha from a log (polyurethane foam is visible, it will then be closed with strips)
After the veranda has been glazed, I want to build an open gazebo. How? Read here.
Another option is frameless glazing. In this case, a strong strapping is made at the top and bottom, special glasses are inserted between them, the gaps between which are laid with rubber seals or covered over.
Frameless glazing of the veranda in combination with a log house is not the best solution
Wood is better combined with polycarbonate. Its plus is that you can install it yourself: make frames with a quarter removed, install polycarbonate sheets on the sealant in them. They are attached to the frame with self-tapping screws with special thermal washers that compensate for different temperature expansion. The seams between the sheets are filled with a transparent sealant, but there are special mounting profiles for joining the sheets.

Glazing of the veranda with polycarbonate: you can do it yourself
You can glaze the veranda in this way yourself. Polycarbonate weighs relatively little, is not so picky about the conditions of transportation, it is easier to work with it than with glass. Due to the cellular structure, it keeps heat even better than glass: it is used in greenhouses and greenhouses.So a veranda in the country with your own hands can be not only built, but also glazed.
With a glazed veranda, you want an open area. How to build a polycarbonate gazebo read hereand oh pergolas and their construction is written here.