Sports corner for children in an apartment, house
Having barely learned to walk, children constantly strive to climb higher - up the stairs to the second floor, on the closet, bookshelves, in extreme cases - on a chair or table. They can climb in, but getting off without assistance is a problem. In order not to put them at risk, it is better to buy or build a children's sports corner right in the apartment or in the house. You need a little space for it - a couple of squares, who have quite a tight area with an area, accommodate shells simply in the doorway or on the walls.
The content of the article
Equipment
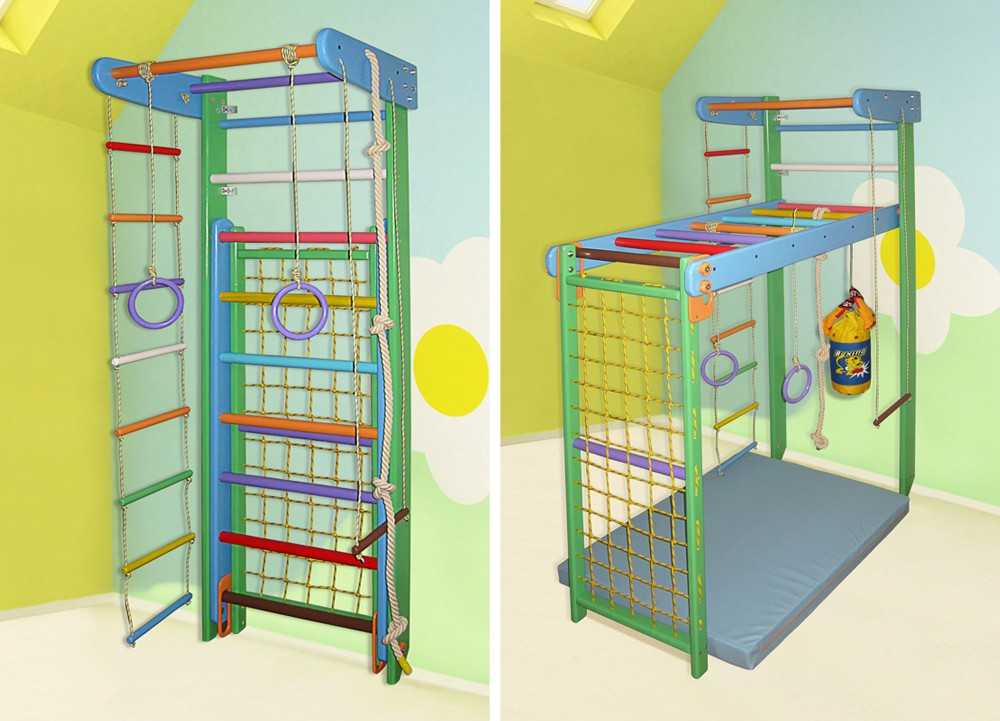
The children's sports complex most often consists of a wall bar, a horizontal bar, a climbing rope and rings. This is the minimum of shells that can be placed on an area of 1 sq. M.
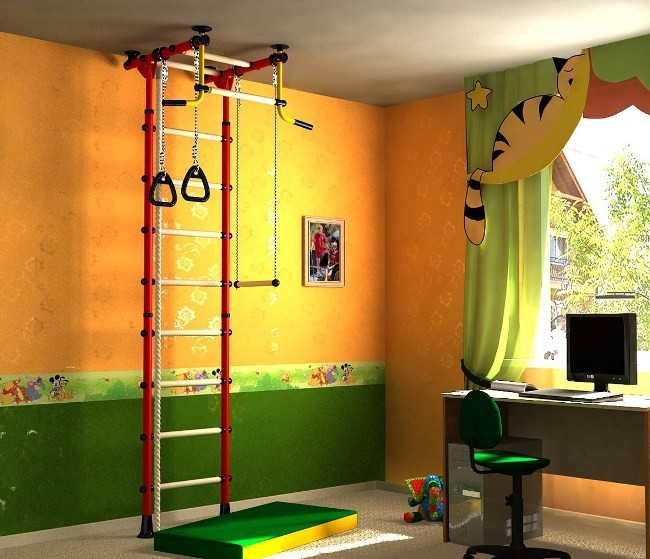
The minimum set takes up very little space, and the benefits are the sea
If the area allows and requires the development of a "sports base", add a few more shells:
- rope-ladder;
- arm;
- climbing wall
- rope wall.

It takes up more space, but the functionality is much higher
There can also be a separate board with hooks - for the press. It's also a useful thing, but more for parents.
The models for toddlers may also have a slide and a swing. To save space, the slide can be attached - it can be hooked on and off. This is convenient in the space saving pan, but since in such options there is usually no platform in front of the slide, it is difficult to ride on it. In any case, the kids. If you wish, you can find a children's sports corner with a slide and a playground, and the slide can also be removable.
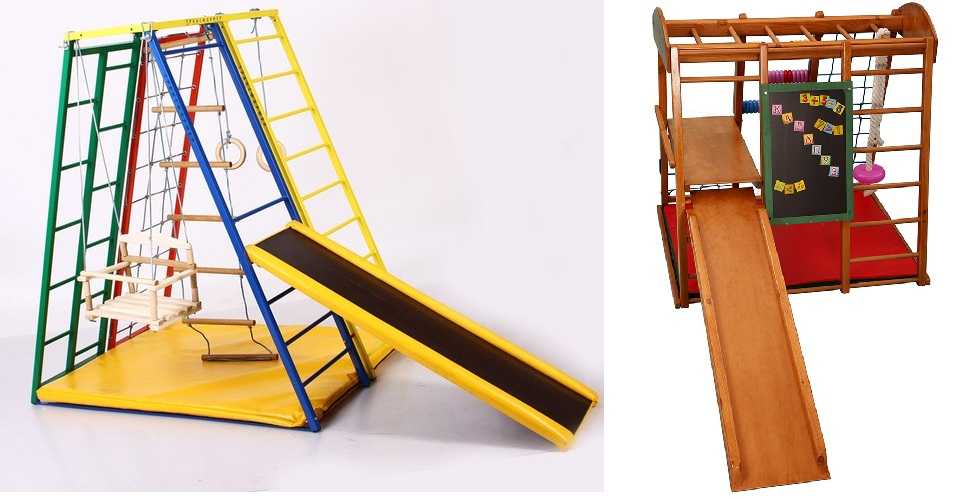
Sports corner for small children with removable slide
There may also be children's abacus and a slate board. These are kits with educational elements. There may also be an increased interest in them, and abacus, in addition to its direct purpose, is also used as a ladder with a massage effect.
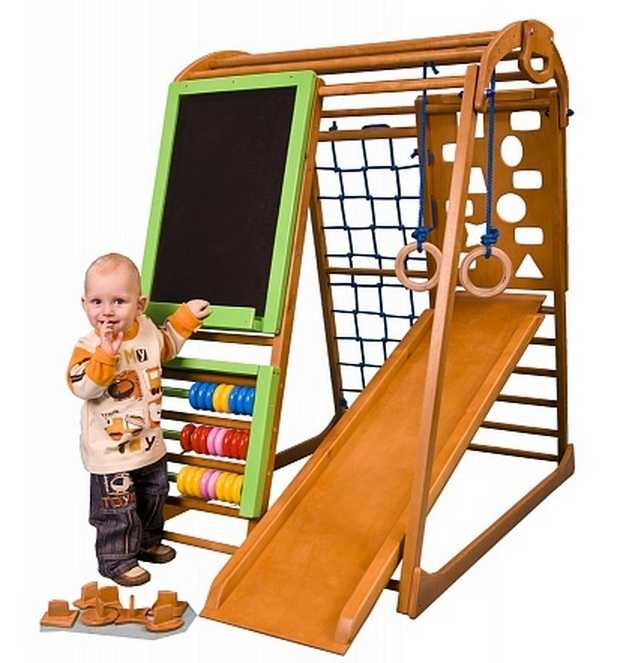
With developing elements
All these elements are combined in different combinations and variations, the lineup is very wide, so if you want you can find whatever you want.
Design
There are two options for children's sports corners - free-standing (with or without a platform) and those that are attached to the wall. Usually, free-standing ones are sports complexes for kids - they have a small height, hollow walls, ladders. This makes it easier for young children to learn sports equipment.
For kids - from 1 year old there are small slides with gentle walls - they usually stand separately
For older children, the shells are made to the very ceiling: they already have enough strength to climb there. In this case, it is important to provide a high-quality fastening.

Such a structure must be well fixed.
Folding models are available for small rooms. With a slight movement of the hand, they move apart. When choosing such a sports corner, pay attention to the reliability of fixing movable or prefabricated units. Loads are considerable and the margin of safety must be appropriate.
Folding sports corner for children
Another option is stationary, but space-saving - the main sports equipment - a Swedish ladder and a rope wall or a mini-climbing wall, are located on the adjacent corner walls. At the top, they are connected by a small handle, which can also be used as a horizontal bar at the same time.
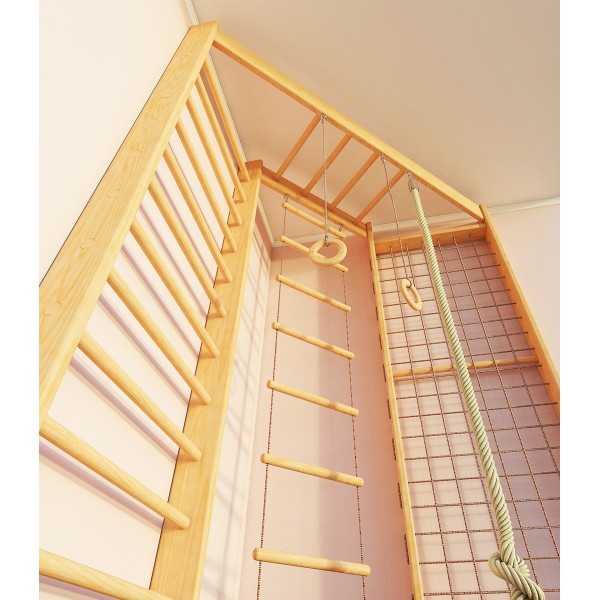
Sports corner option for a small room area
Such a design is convenient - it takes up the most difficult area for decoration - a corner. Moreover, you can highlight the corner behind the door, where you definitely won't put anything.
Read how to make a playhouse for children in an apartment block here.
From what age
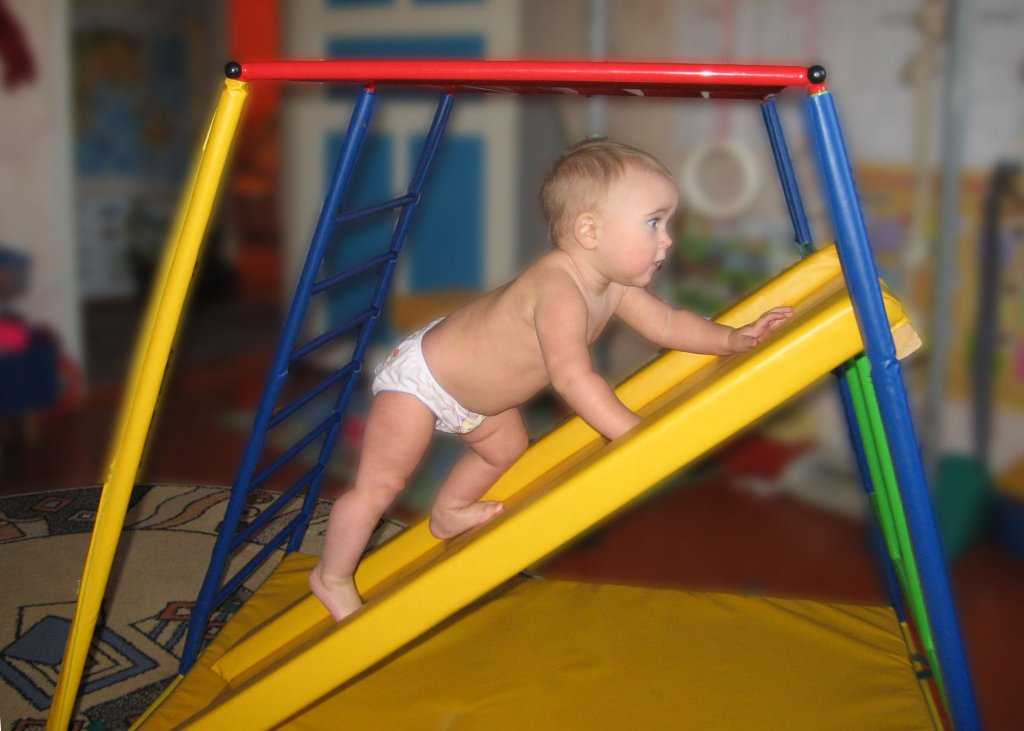
Pediatricians advise purchasing a sports corner for children by the end of the second year of life.But those families in which shells were bought for the elders often note that the younger ones learn to climb stairs earlier than to walk. So it's a matter of preference.
An example is in the video. The sports corner was installed when the girl was only 1.2 years old. The shooting was made a month later. Mom notes that the child has become more coordinated and agile. During the month, not a single serious fall was observed (several times they were successfully caught, but this does not count). There are many approaches during the day - every time after sleep, and in intervals when it becomes boring. Conclusion - a sports corner for children in an apartment is not necessary, but desirable.
If you are really worried that the child will hit hard when falling, you can put a sports mat under the sportswear and next to it or soft floor for nursery large thickness (at least 10 mm). A soft floor is preferable - it is designed specifically for children and, with a relatively small thickness, has good shock-absorbing ability.
DIY children's sports corner
Anyone who has held a saw, hammer and drill in their hands at least a couple of times can independently make a sportswear in an apartment. The work is very simple and does not require filigree precision. What you need to pay attention to is the reliability of the fastening. In this regard, it is better to play it safe and do it with a large margin of safety.
If you plan to make a sports corner out of wood, use dry wood (with a moisture content of no more than 16%). Also pay attention to the grade: there should be no through knots on the racks and supports. With the loads that may arise, they are dangerous. These are, perhaps, all the basic requirements.
On the basis of the Swedish wall
If desired, a children's sports corner can be made by hand. No special tools are needed. You definitely need a saw or jigsaw, a drill with attachments of the "crown" type, it is very nice to have a hand mill and sander. If they are not there, you will have to do a lot manually. You also need a level, it is more convenient - a laser, but you can do with a building one, preferably in tandem with a plumb line - check the verticality of the racks.
In addition to boards 150 * 45 mm, you will need cuttings for brooms (they are thinner than for shovels, and more convenient for children). You will also need ropes, a piece of rope, self-tapping screws, bolts, pins, corners, in general, everything that is needed to fasten the structure to the wall and ceiling.
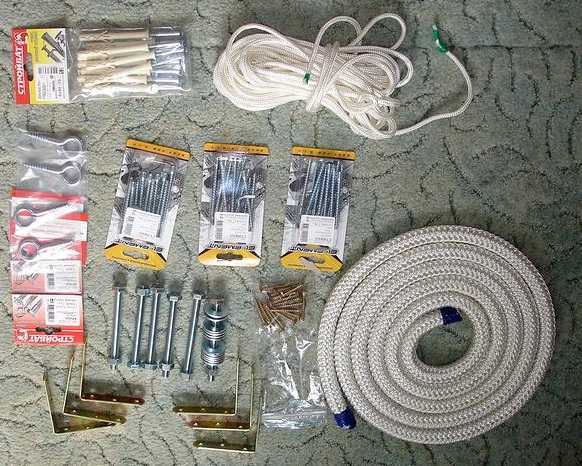
What you need to make a children's sports corner
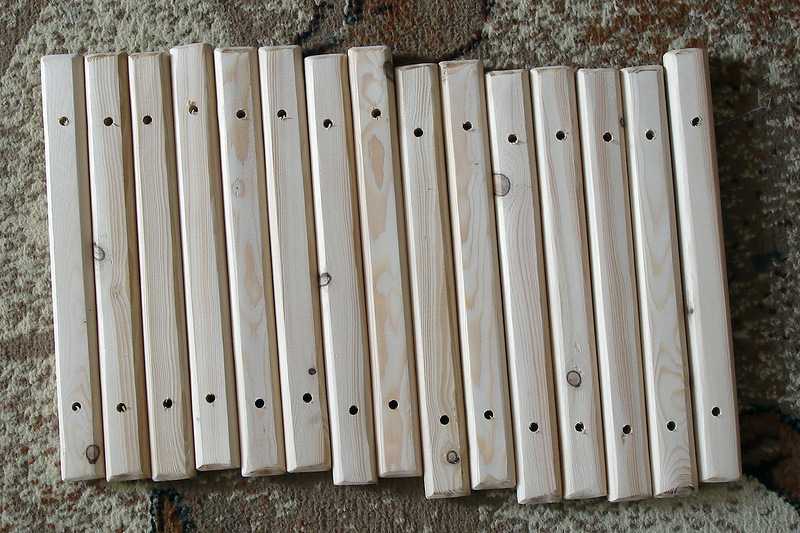
The board was cut to size (taking the distance from floor to ceiling, subtracted 10 cm), sanded. We fasten the two received racks with clamps, put marks under the steps. In these places, we drill holes of the required depth with a crown (half the thickness of the board). To be able to control the depth of the hole, a strip of electrical tape or colored tape is glued to the crown. They are oriented along the lower edge of the strip.

Start of production of the Swedish stairs for the sports corner
The two short parts with holes in the photo are a mini-handle for several slats, at the same time it can be used as a horizontal bar. In long racks on the side facing the wall, in the lower part we saw off a piece for the baseboard.
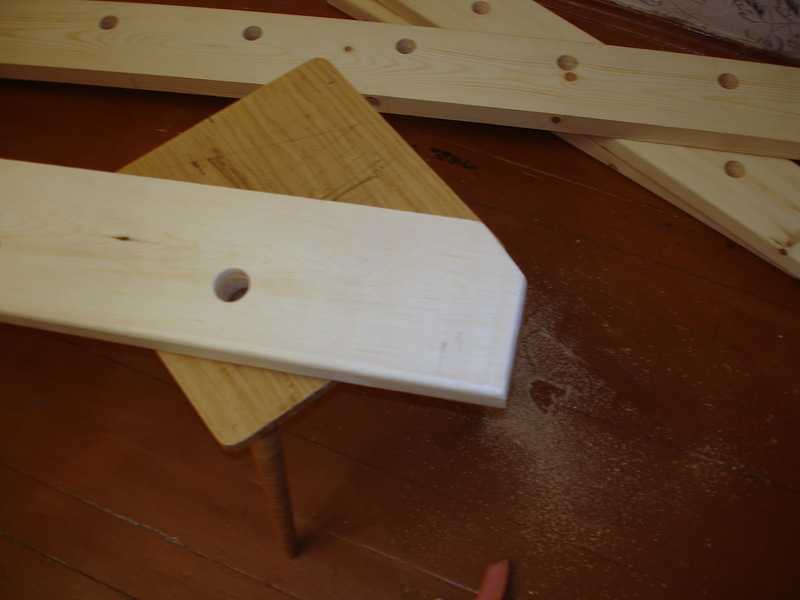
Cut off a piece at the bottom of the racks - there is a plinth
Now we connect the racks and the top. Whether the children's sports corner will be strong depends on the quality of this connection. We use powerful studs, we put wide washers under the caps of the screws and nuts, instead of a heap of washers, you can make metal plates. We pre-drill a hole for the studs, it must be strictly perpendicular to the plane - so that the mount does not break.
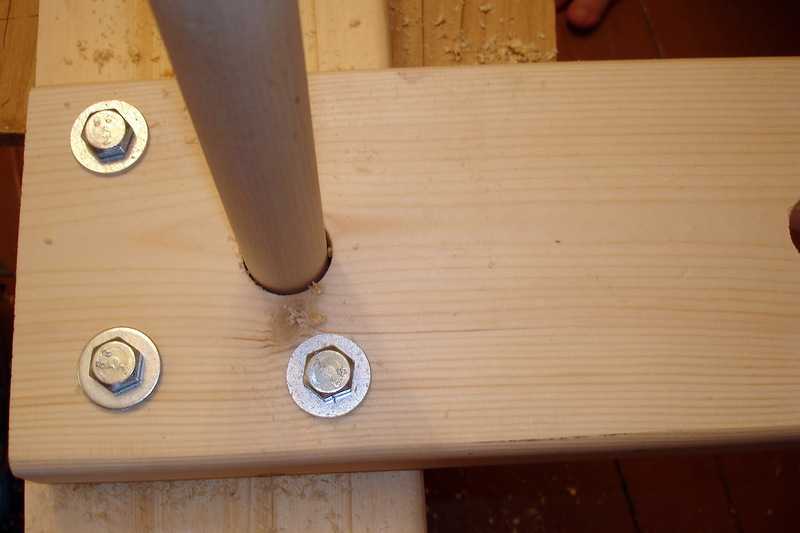
You can also have four pins))
We install rungs-steps in the finished sidewalls with glue. For reliability, we fasten them with confirmations (furniture ties). We drill in the end of the hole, install the confirmat, drowning the head into the wood. The holes can then be closed either with wood putty or with furniture plugs in the color of the wood.
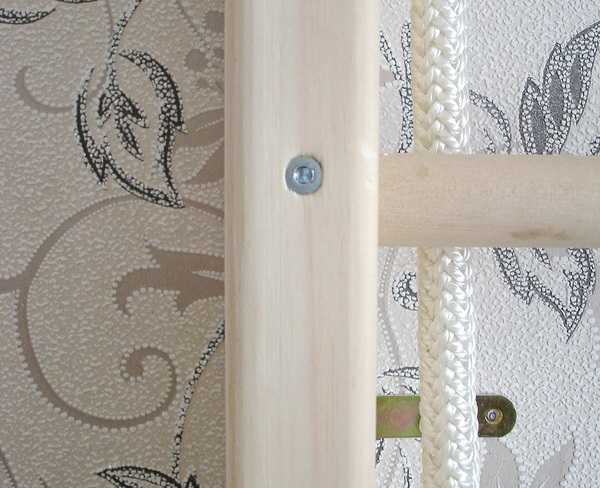
Confirmations are installed (one of the corners that fix the stairs to the wall is visible)
Putting it to the wall, mark the places where you need to install the fasteners, drill holes there and install the dowels.
Attached to the wall the base of a home sports jersey for children (and not only)
As tests have shown, such an attachment is not enough for reliable fixation: if you hang on the extreme crossbar and pull yourself up, over time, the attachments will be pulled out of the wall from vibration. Therefore, it was decided to make additional fasteners to the ceiling. Collets (anchors) were installed into it, into which long metal rods with rings at the end were screwed.
The construction of a playground in the country or near the house is described here.
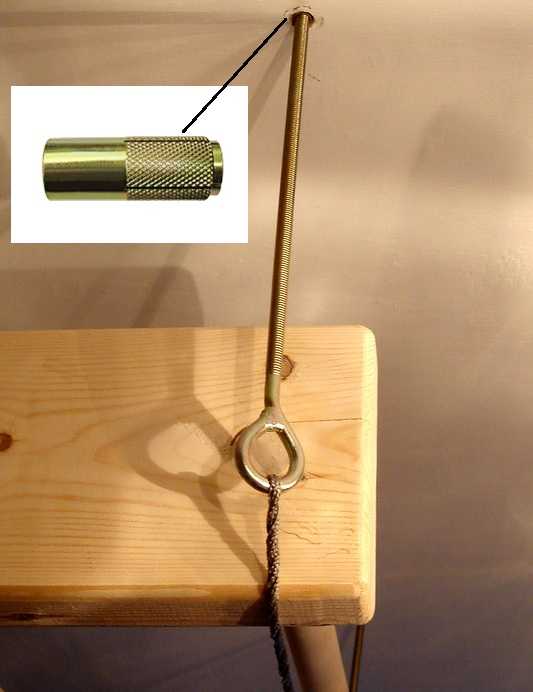
Ceiling mount
As a temporary option, a rope is threaded into the installed fastener, then the fastener will be modernized. To avoid difficulties, it is necessary to install the anchor in the ceiling so that the rings are close to the boards. Then they can be fixed with bolts and washers. You will get a rigid mount. In this case, the load will be distributed between the fasteners in the wall and in the ceiling, which significantly increases the reliability of the entire structure.
The base of the children's sports corner is ready. Let's start assembling additional shells. Let's start with a rope ladder. Crossbeams 300 mm in length are cut from a bar of 35 * 25 mm. The edges are cut with a router to a round shape (do not leave sharp corners) and are well sanded. Holes were drilled in them at a distance of 50 mm from the edge, the diameter of which is slightly larger than the cord. The holes must be drilled at the same distance: the more precisely, the easier it is to assemble the ladder.
We drill holes in the slats
We take the cord and make markings on it every 30 cm. This will be the distance between the steps. We mark the two cords identically - with the coincidence of millimeter to millimeter. We put on the first step, tie a knot at the bottom. In the place of the markup we tie the second one, thread the next step and so on.

Cord marking and knot
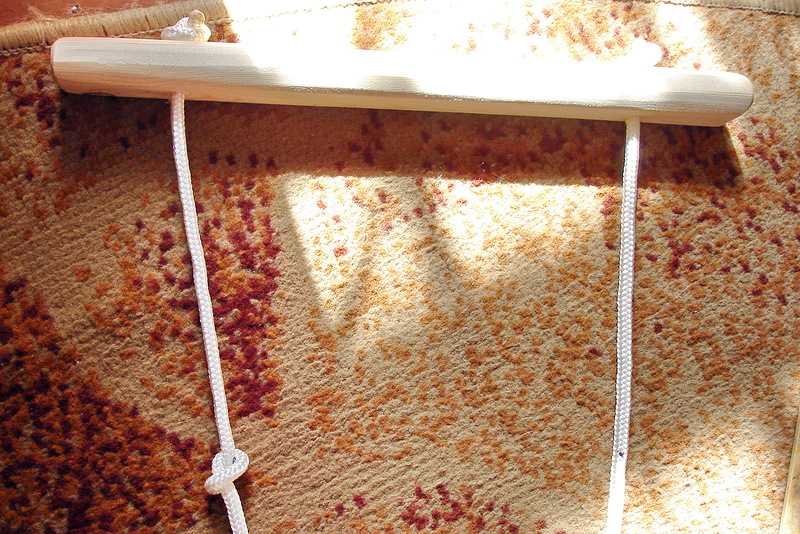
It looks like the beginning of a rope ladder
We hang additional shells on screwed hooks by making loops from the same rope, or by fixing carabiners at the ends, and clinging carabiners to hooks or straps - it seems more convenient and reliable to someone.
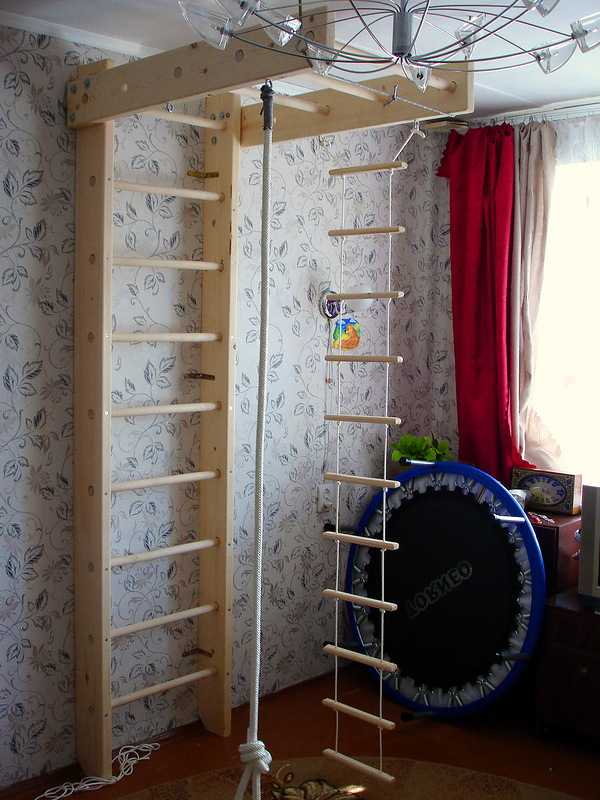
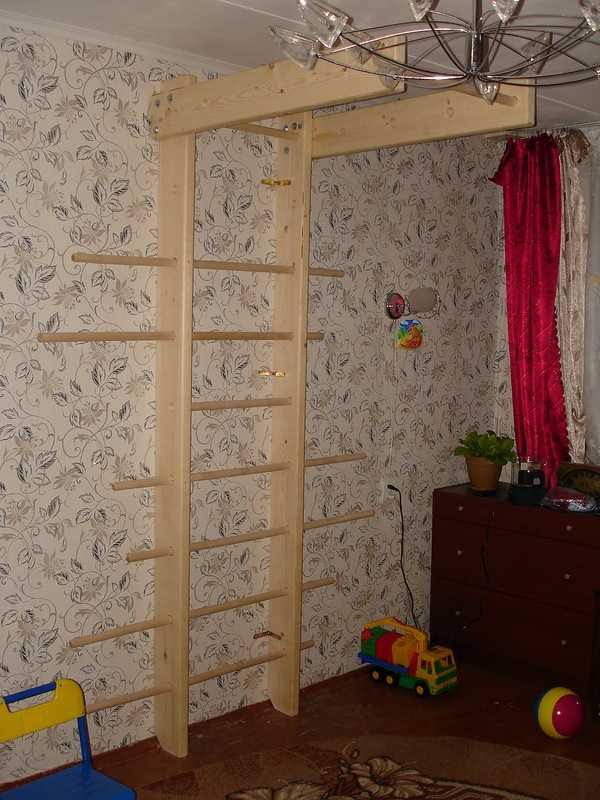
DIY children's sports corner
This is what a homemade corner for children's sports looks like. It takes up very little space in the apartment.
How to make a loft bed with your own hands is described hereand in this article you can read about the choice of ready-made options.
Sports complex for home
In this construction, everything is so simple that there is nothing to explain. The main difficulty is in the manufacture of the Swedish staircase, and it is described in the first photo report. It was decided to make a large children's sports corner in the corridor - the area there allows. So that you can turn it and the ship into a house. The result is such a design.
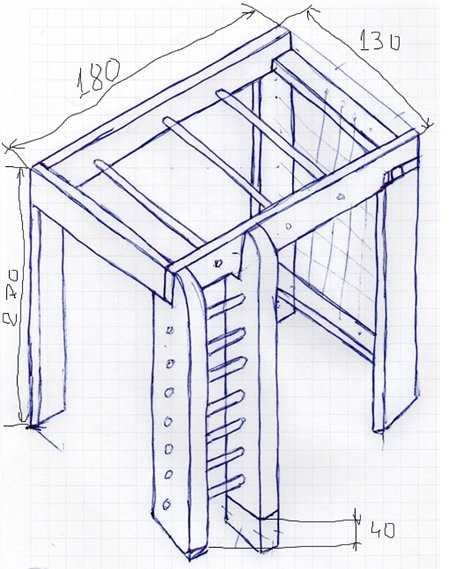
Drawing of a sports corner for children
We started with making a climbing wall. The board was bought in advance, it was dry, and after the winter spent in the apartment it became even less damp. Board thickness - 50 mm, width - 100-150 mm. We collect the frame from it. We make joints strictly at 90 ° (we use clamps). Before installing long screws, we drill holes for them (the diameter of the drill is 1-2 mm less than the diameter of the screw). Drill holes in the assembled frame in 10-15 cm increments. We pull the cord.
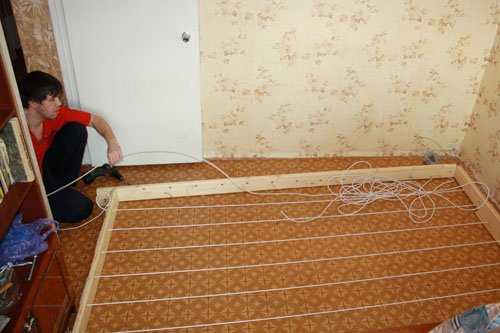
Preparing the wall for climbing
I must say right away that they made mistakes when installing the ropes:
- began to pull from top to bottom;
- did not make knots at the intersection.
As a result, climbing is very inconvenient - the rope slips. We'll have to redo it. We must do the opposite. First of all, pull the rope across, and then - top-down (or bottom-up), tying a knot at each intersection. Then the rope wall will be movable, but it will be possible to climb it.
We attach the corners to the assembled frame, install them to the wall, mark the holes for the fasteners and, after installing the dowels, finally fix them.
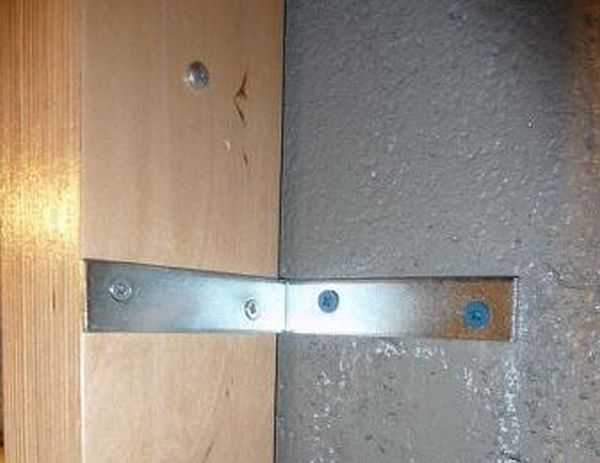
How to fix the frame to the wall
Then everything is also simple. We take two boards of the same length. We drill holes in them for the installation of crossbars (from cuttings), to which the shells will be attached * we are also planning a swing and a rope ladder.
How to make a play house for an apartment read here, and in ethat article a step-by-step description of building a house in the country or near the house.
Next, we collect the rest of the frame. We attach one prepared board to the wall adjacent to the already installed rope structure. On the one hand, it rests on the frame, and on the other, we attach another support, so that the board is strictly horizontal (we check with the building level).
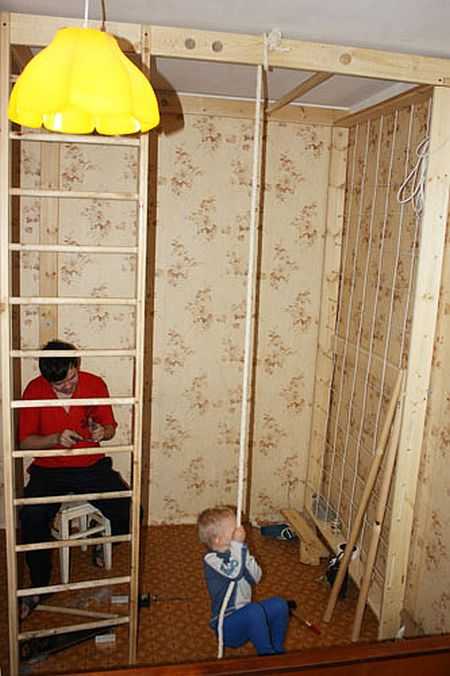
We collect the rest of the structure
We build a staircase, set it up in the same plane with two already installed racks. We fix everything. For reliability, you can also attach to the floor with corners and dowels.
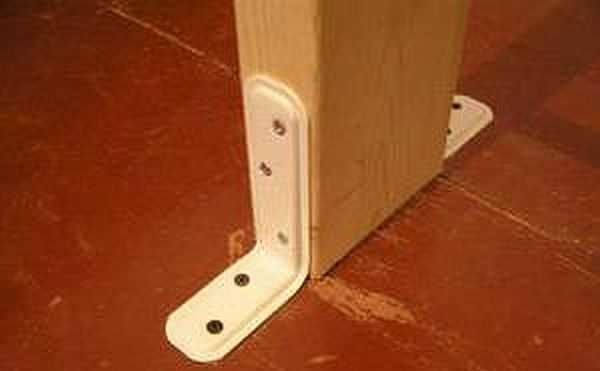
One of the mounting options (not the most beautiful, but reliable)
Having checked everything for strength, we hang the shells and put them into operation.
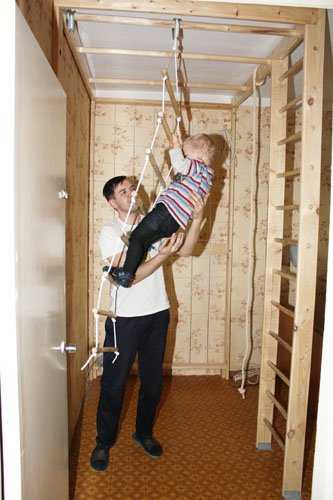
Test of strength))
Watch another version of a homemade sports jersey for children in video format